Throughout the latter half of the 19th Century, artillery technology advanced at an astonishing rate. The throw weight, accuracy, range and killing power of artillery became such that it completely revolutionized warfare. While we think of the machine gun as the implacable destroyer of the Great War, more soldiers were killed and wounded by artillery during that conflict than by any other means. Breech-loaded field guns could churn out withering rates of fire, and large siege cannons were able to destroy virtually any fixed position, break through any fortification.
One of the most notable of the heavy guns of World War One was the Model 1911 30.5cm siege howitzer (as we will see, it went on to play a role in the Second World War, too). Developed and built by the koda Works in Pilsen in what is now the Czech Republic (but which was part of the Austro-Hungarian Empire then), the gun was the size of a 12" ship's cannon, and could lob a nearly 1,000 pound armor-piercing shell almost four miles. While it took six minutes to load, aim and fire the weapon, the Austrians had conceived of these "mortars" in 1906 for attacking Italian forts along the Alps below the Tyrol in what was the era's biggest arms race (forts vs. guns).
Yet when war broke out, the koda 30.5cm found nearly immediate success when it reduced the Belgian forts around Liege, Namur and Antwerp (in conjunction with the Krupp 42cm howitzer "Big Bertha"). Later in 1916 the barrel was lengthened and the M1916 designation adopted.
The importance of this gun in an age before the advent of heavy bombers can't be overestimated. Airplanes were still mostly curiosities, and by 1916, the largest bomb the UK had was about 112 pounds. The koda 30.5cm could land shells almost ten times larger equipped with delayed action fuses on the top of forts made of steel and reinforced concrete that had seemed impregnable before the war.
Even after the end of hostilities in 1918, the koda guns soldiered on, parceled out by the Allies to various countries, including the newly-created Yugoslavia and Czechoslovakia, as well as Romania, Italy and Hungary. They helped train the next generation of artillerists, and when World War Two came along, Nazi Germany seized 17 of the guns from the Czechs, along with one used for artillery instruction in Austria. They refurbished them and then wreaked havoc in Poland, France and against the Soviet Union. Their enormous throw weight was especially useful against the Crimean fortress of Sevastopol in 1942 when the Germans used 16 30.5s. These guns provided a reliable way to deliver crippling explosives, given that Germany's largest bomber was the Heinkel HE-111 with a maximum bomb load of 2,000 kg (4,400 lbs), usually made up of 250 pound SC-250s.
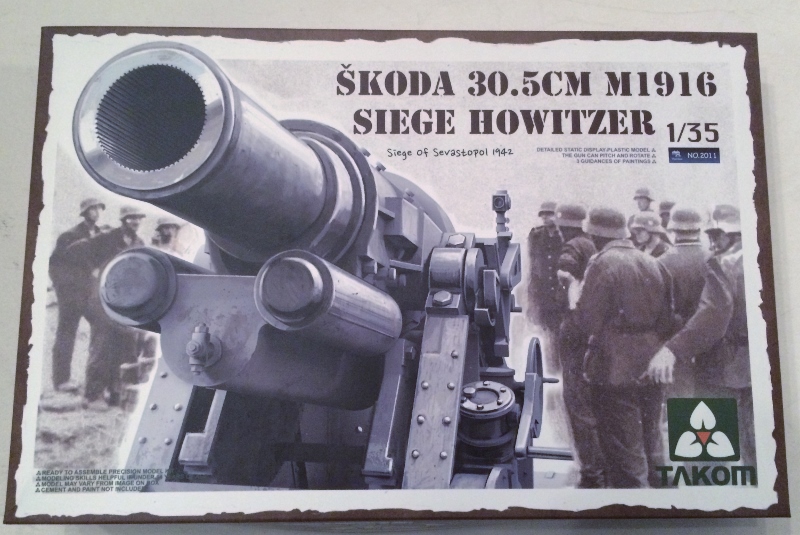
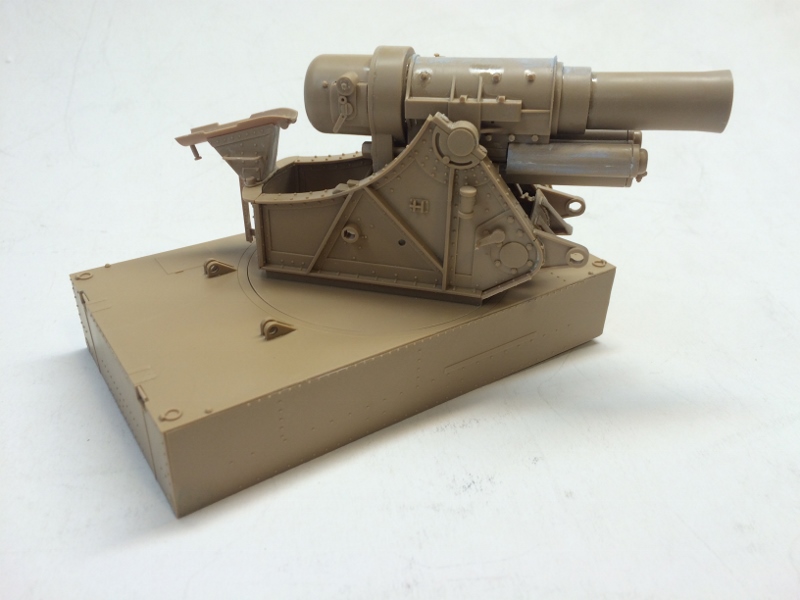
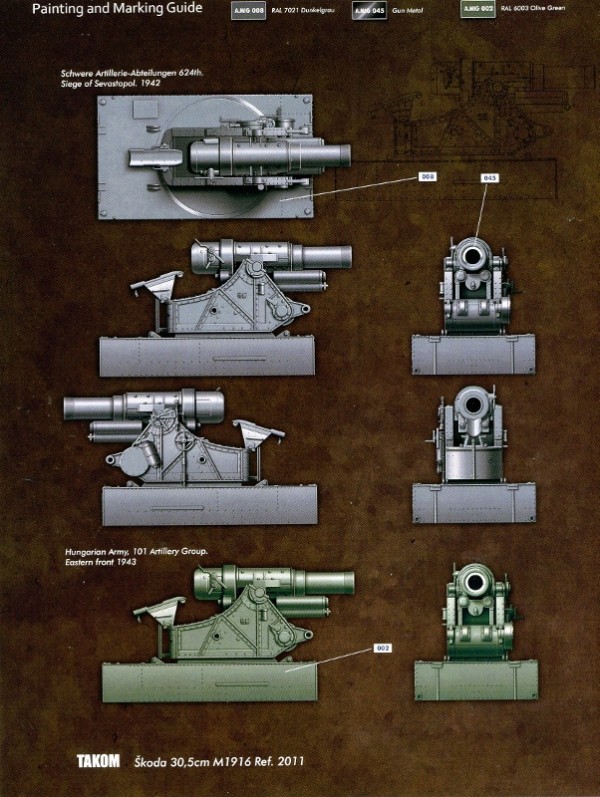
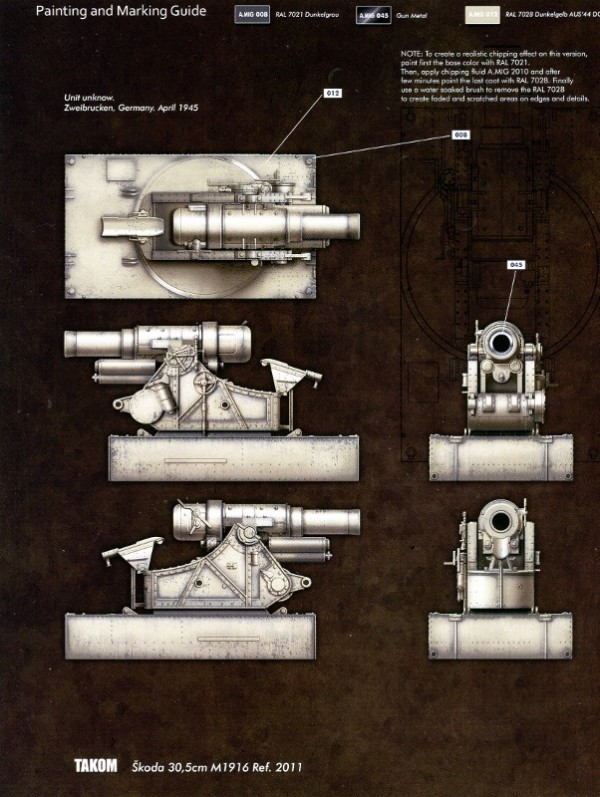
New plastic manufacturer Takom has introduced a WW2 version of the koda gun in 1/35th scale. It is difficult to tell from the kit or surviving materials what differences there are between the WW1 and WW2 models, other than the kit's gun is mounted on a metal platform, while the earlier howitzers were mounted on wheels for mobility.
what you get
Inside a smallish cardboard box with a photograph of the gun in Wehrmacht service are:
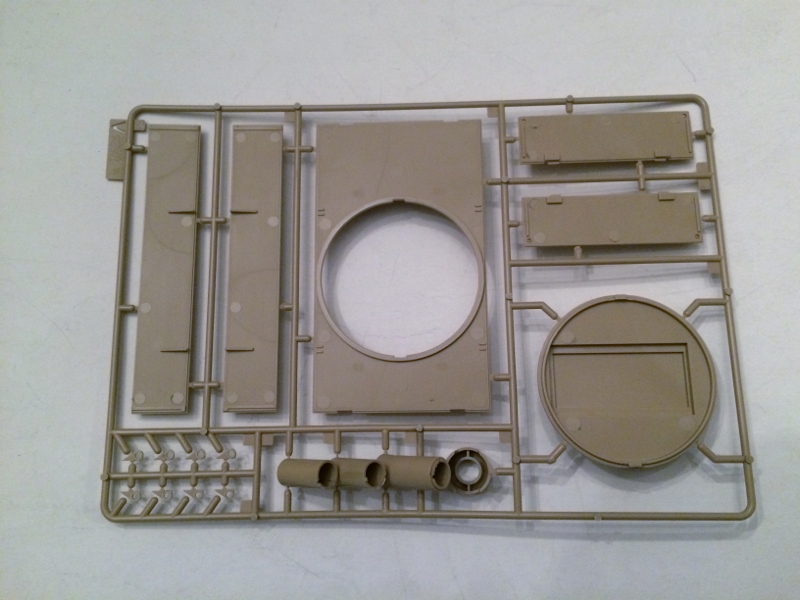
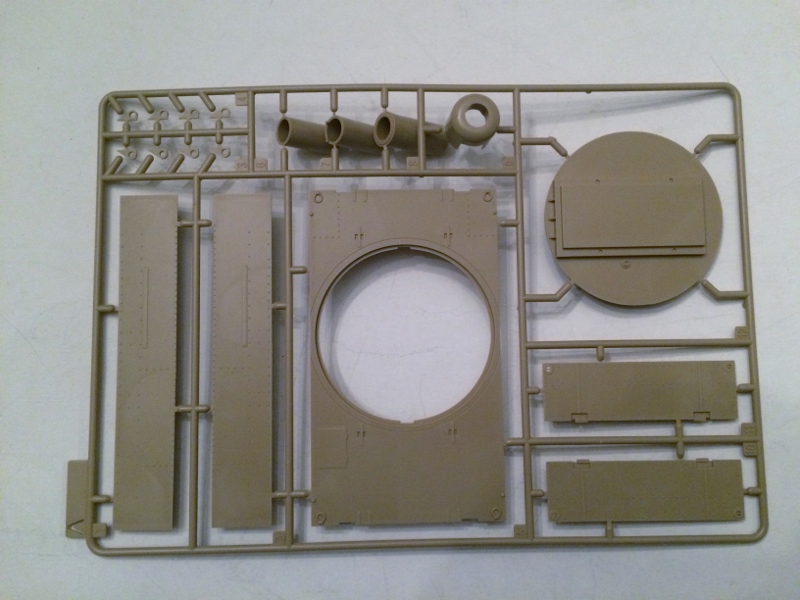
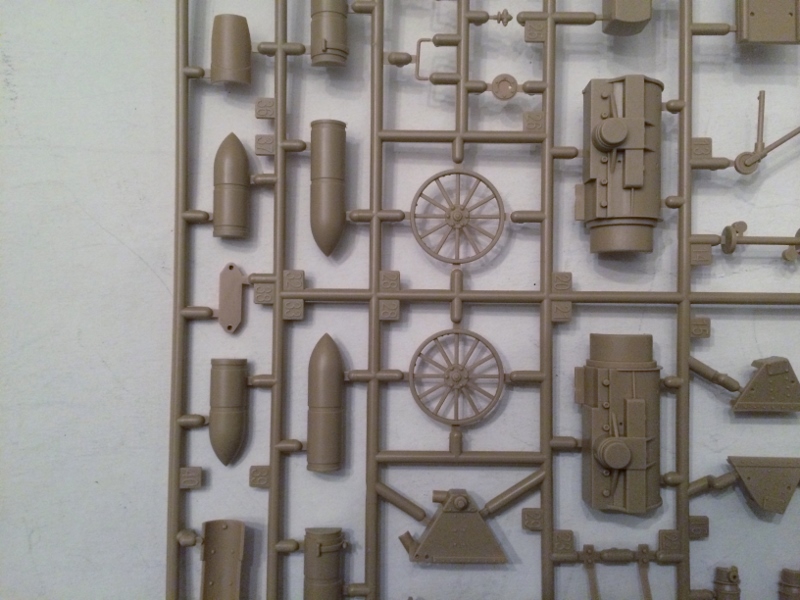
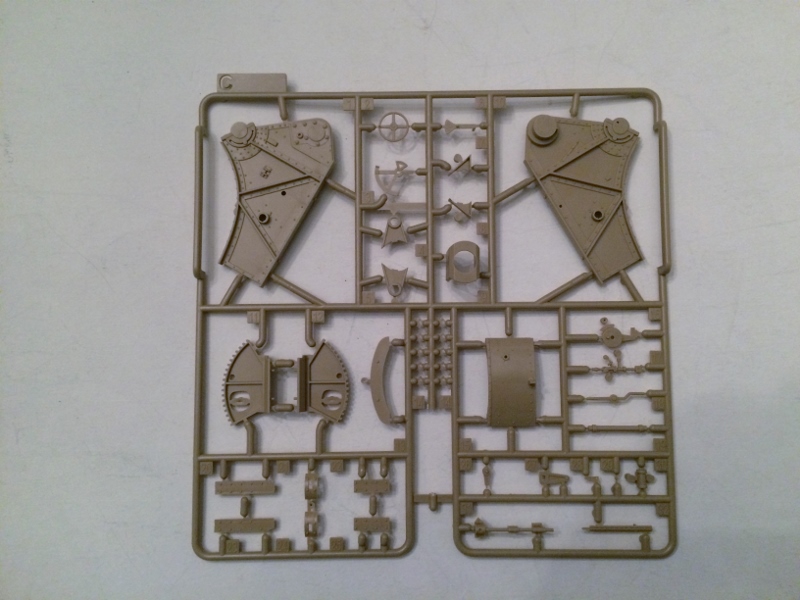
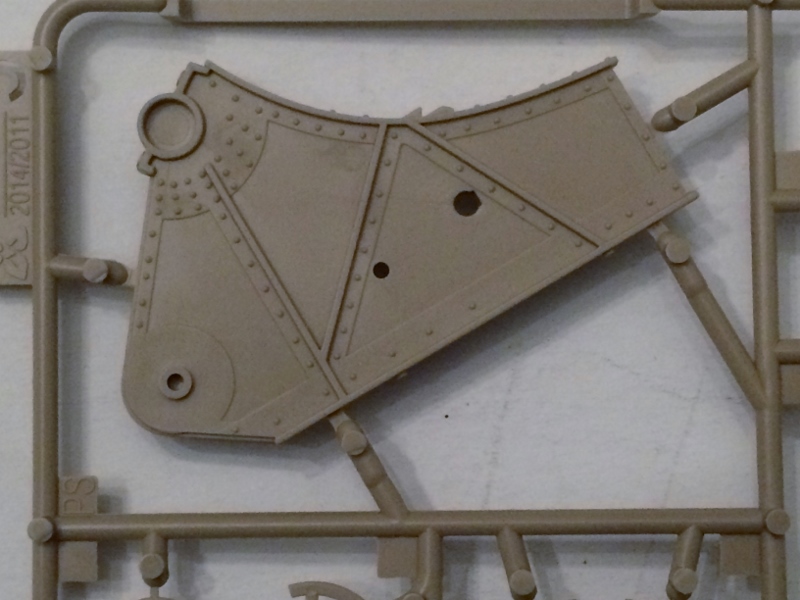
3 sprues of tan plastic
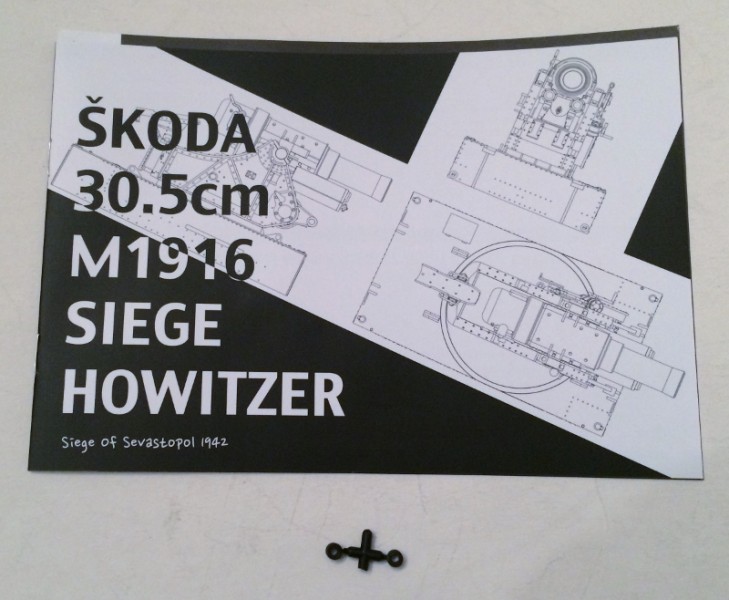
an instruction booklet
a painting guide
two vinyl poly caps
the review
It's exciting to see styrene manufacturers introducing more unusual kits like this one. After all, heavy artillery was a major factor in some battles, but these guns aren't as "sexy" or have the camouflage variants of tanks or field guns. Still, the very presence of this kit on the market is a joy for some of us.
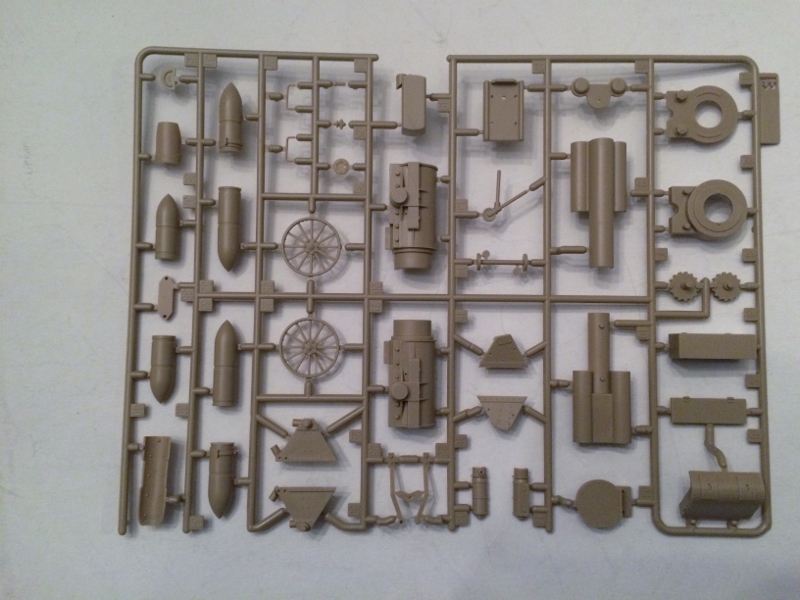
The molding is crisp, there is little or no flash, and seams are either manageable or out-of-sight. There are only three sprues, so this isn't a complicated build. One shortcoming I have detected already is that the rifling in the barrel only extends a short way, thus eliminating the option of "breech open."
the build
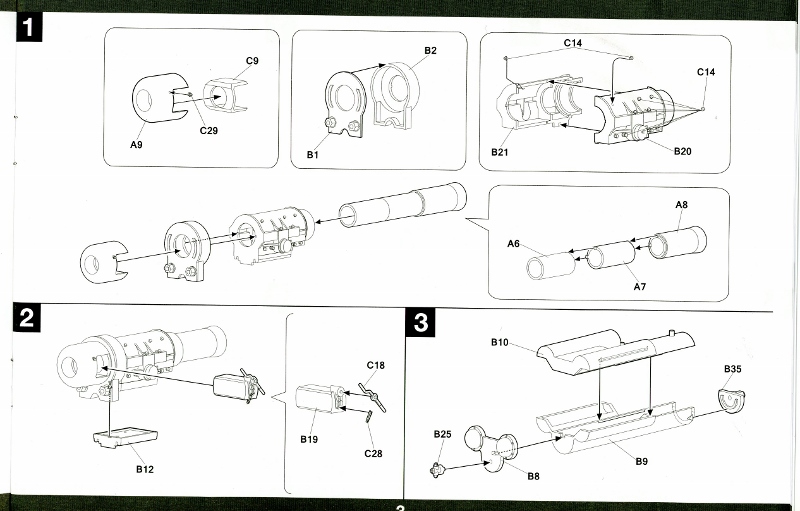
As I suspected, the build went quickly and without MAJOR incident. But I should point out a few things before starting:
The instructions are far from perfect.
Test fit pieces before gluing.
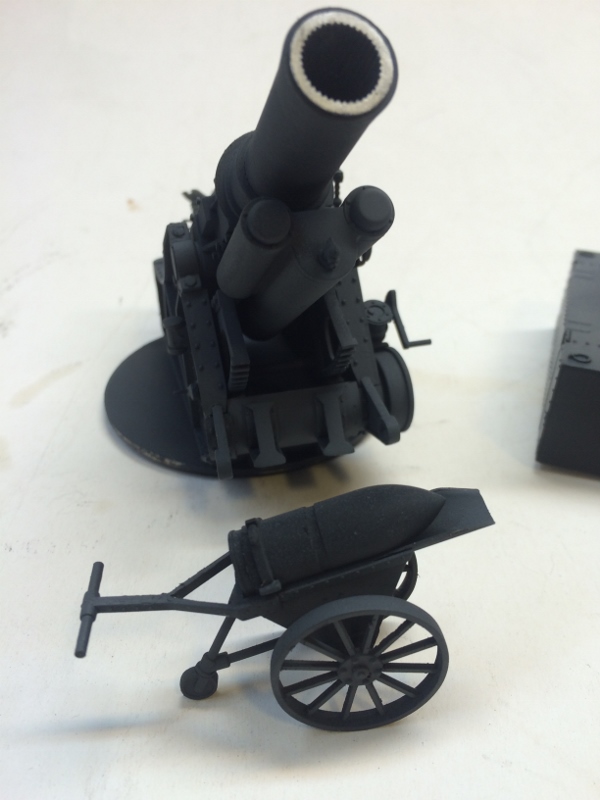
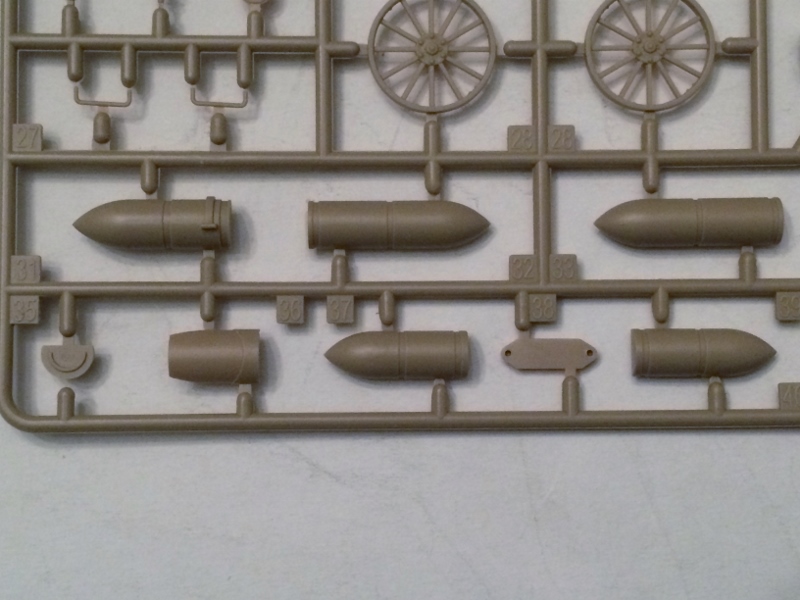
Check any references, as there are things like the color of the ammunition that are not revealed to mere mortals.
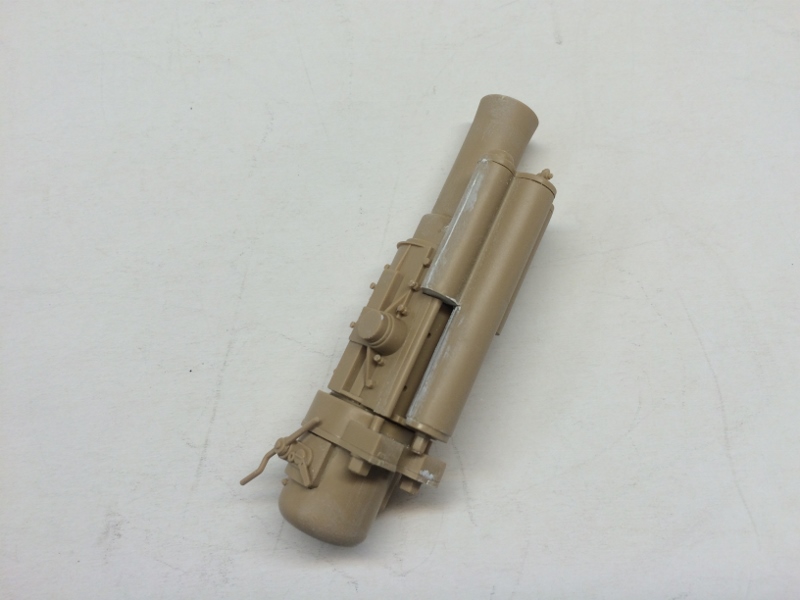
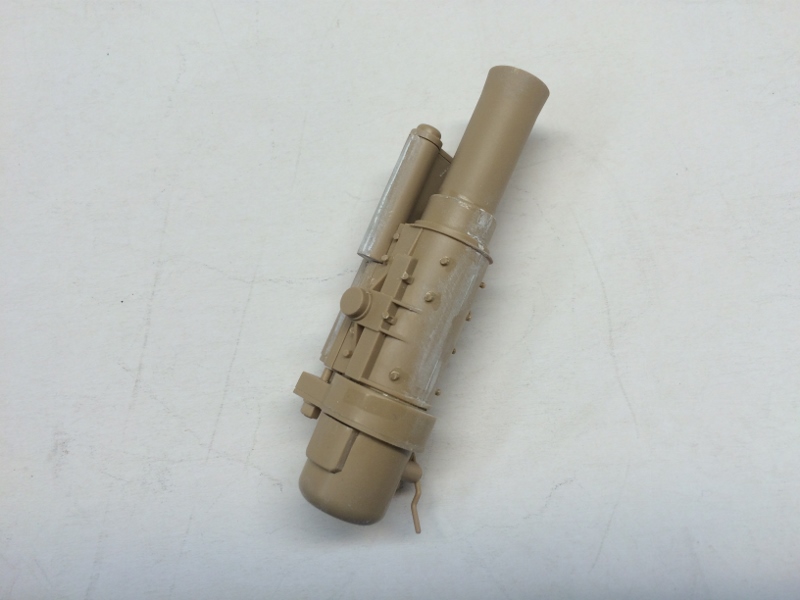
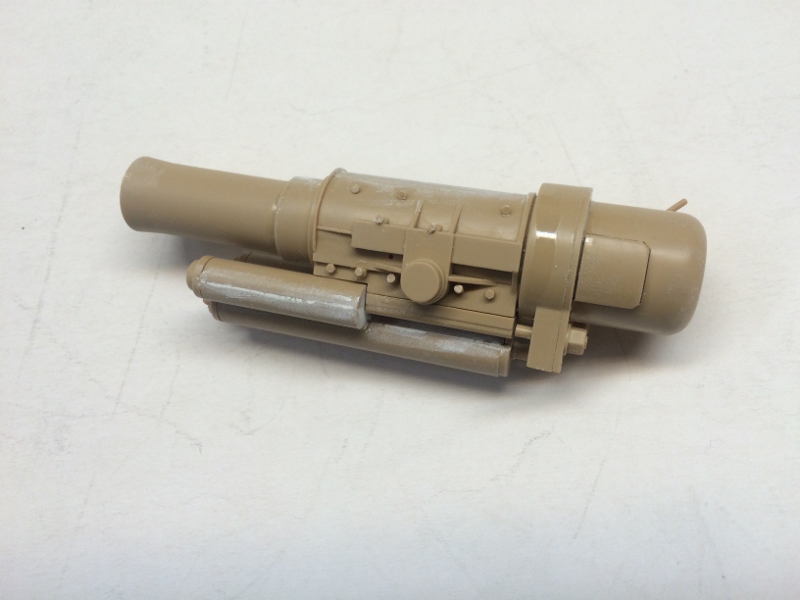
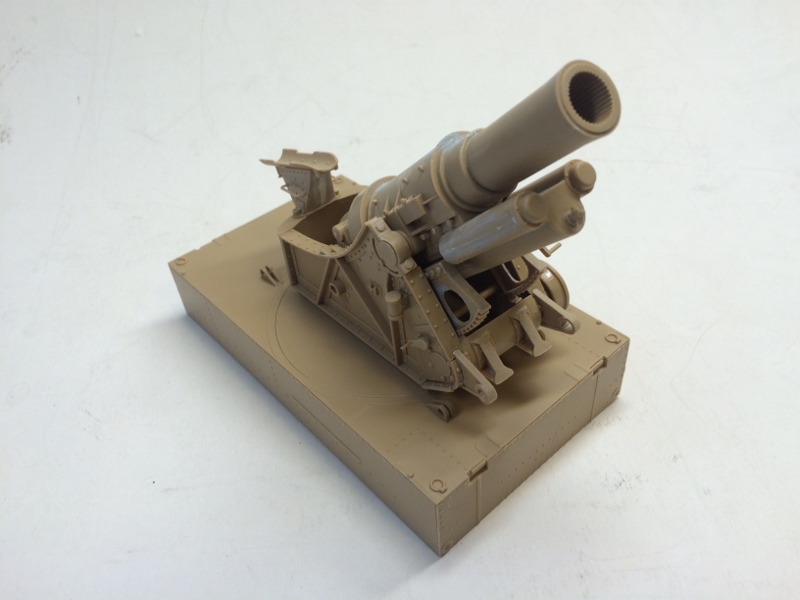
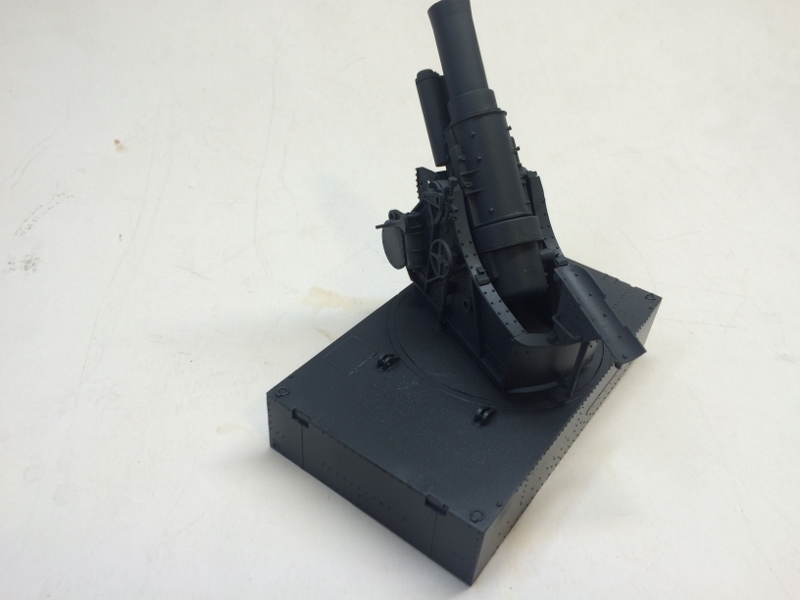
The first part of the build is assembling the gun tube and recuperators. As was pointed out in the review portion above, the rifling is extremely disappointing: it only goes about 1/2" down the barrel, and has no "twist." There is no ready remedy for this problem, short of someone bringing out an after-market barrel.
There are several things to be careful of when completing the tube, including the 14 adjuster bolts along each side. They're tricky to remove from sprue C (four attachment points that require nimble work with a hobby knife), and they will be easy to knock loose when handling the barrel.
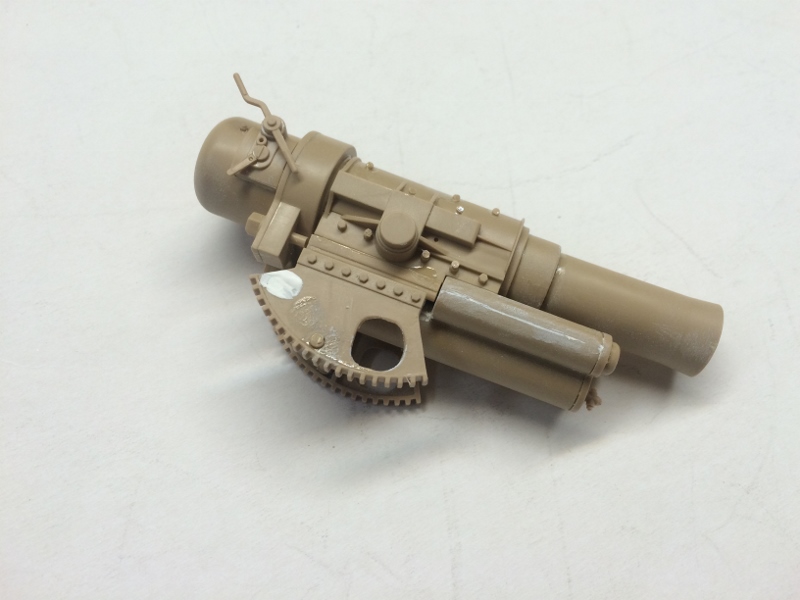
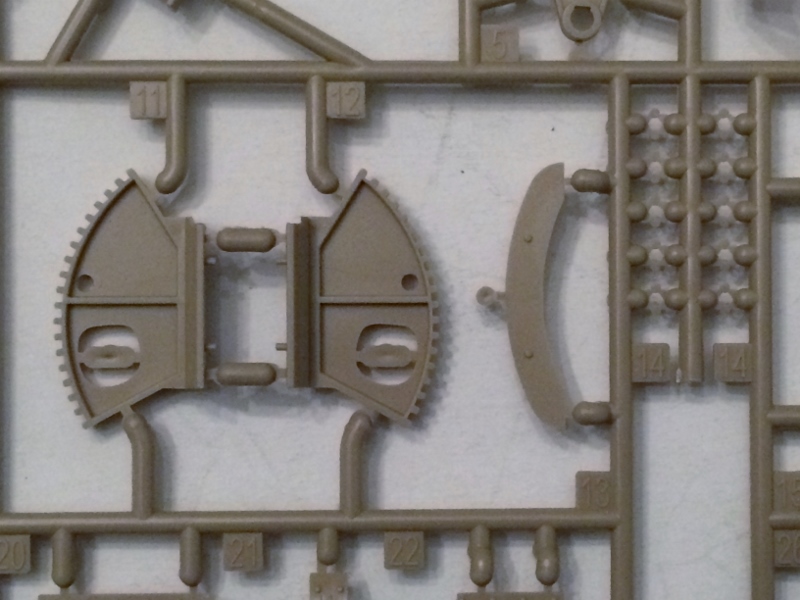
The next stage in the assembly is the cradle. There are some knock-out holes on the inner cradle with the gear teeth that engage the cogs on the mechanism for raising and lowering the gun (see photos below). Overall, though, the kit has limited flash or knock-out holes. A number of pieces do have knock-out "tails" (where the styrene leaves extra sticking out of the filler holes in the mold). These will need to be removed.
Additionally many of the attachment points are clunky and will have to be filed down after severing with a sprue cutter. I recommend getting a quality one with a good, sharp tip.
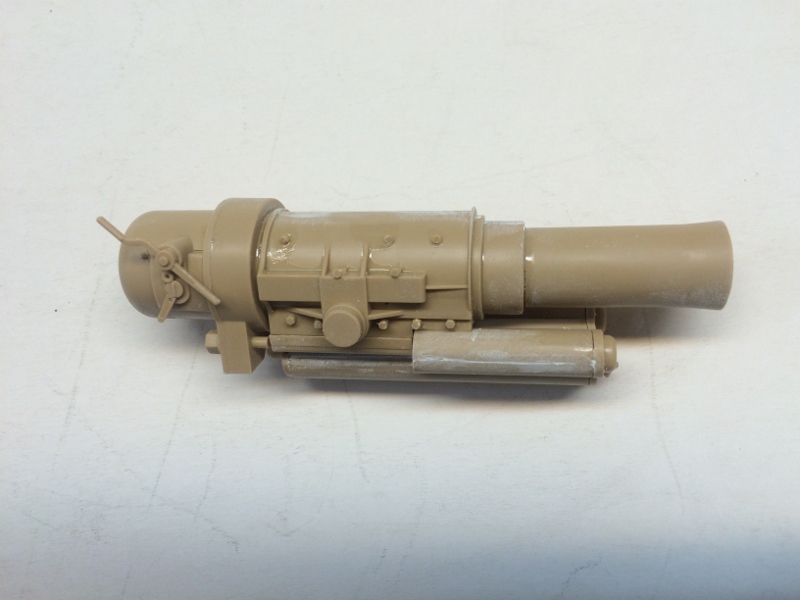
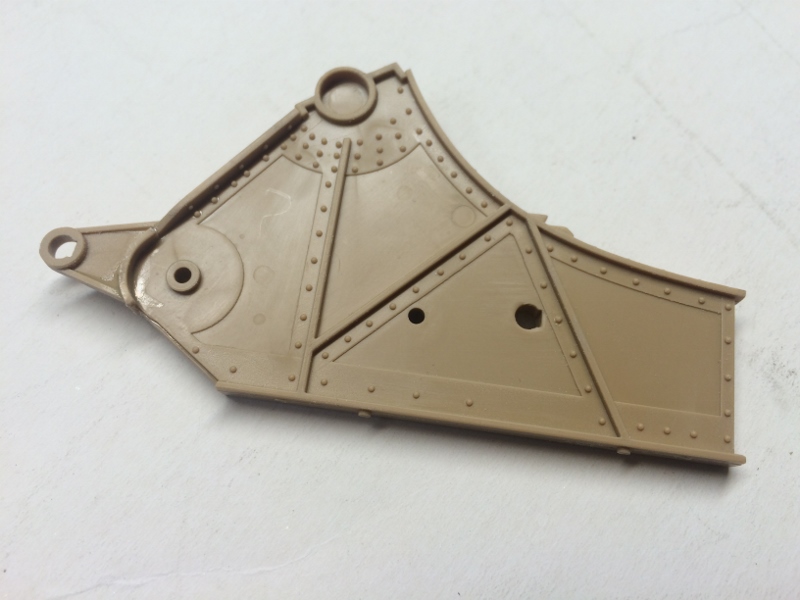
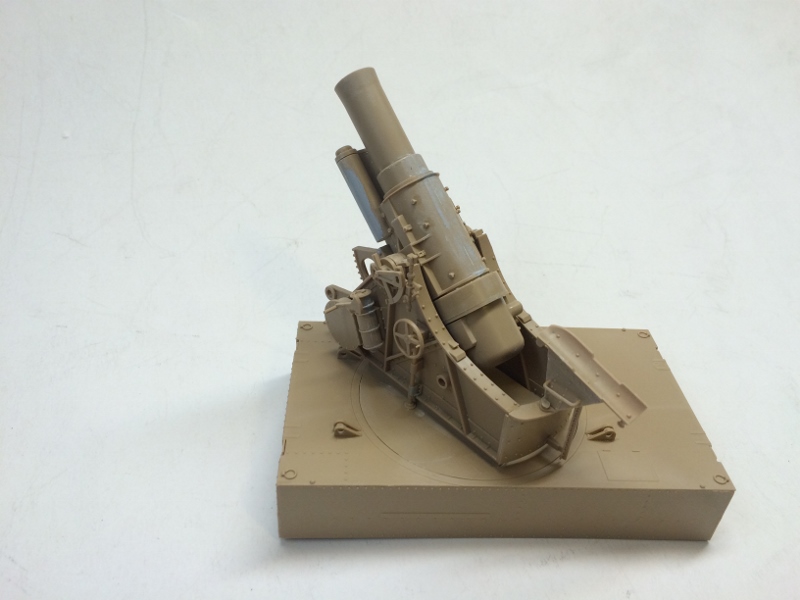
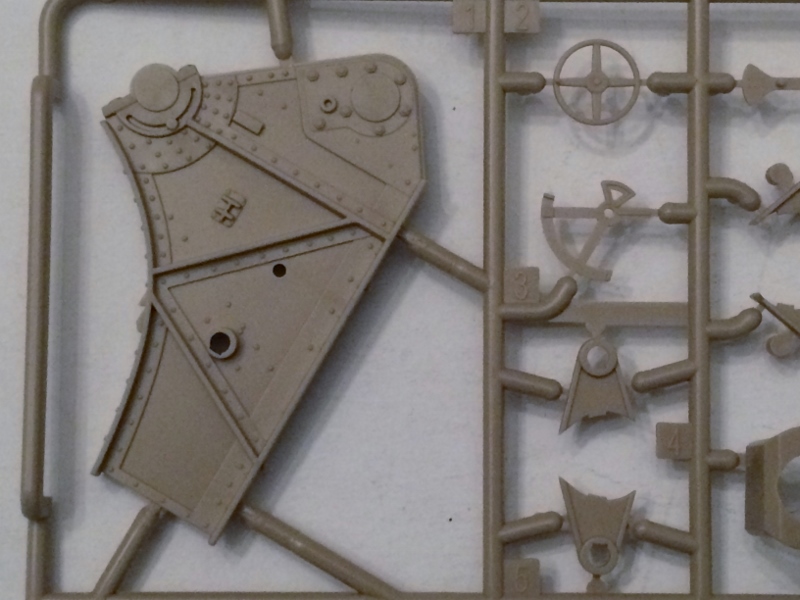
The instructions for the kit are mostly clear and straightforward, but the placement of pieces C-21 & C-24 are murky and will have an impact later on. As best I could determine, they are meant to line up with the outward edge of pieces C-20 and C-23, but the result was like wrestling an alligator when time came to add the front "shield" assembly B-6. Reversing the placement suggested by the instructions will make the later assembly easier, but perhaps incorrect and definitely strange-looking.
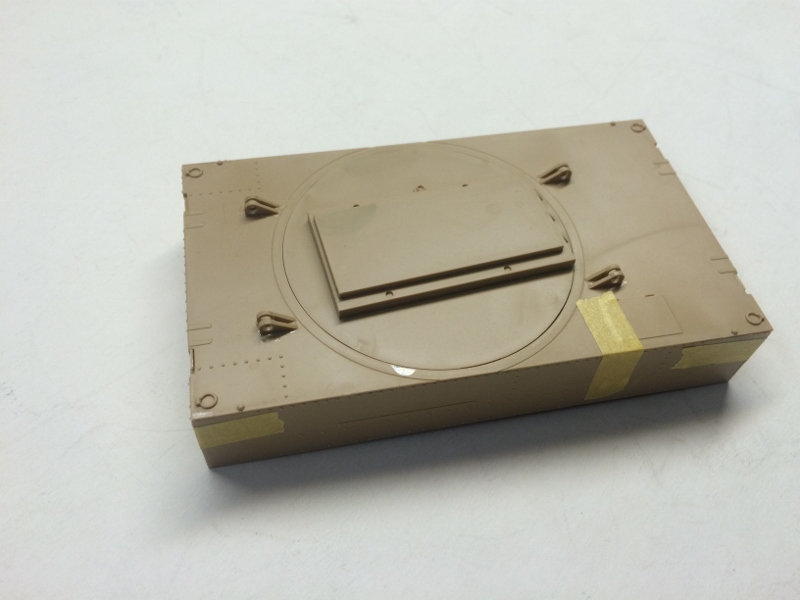
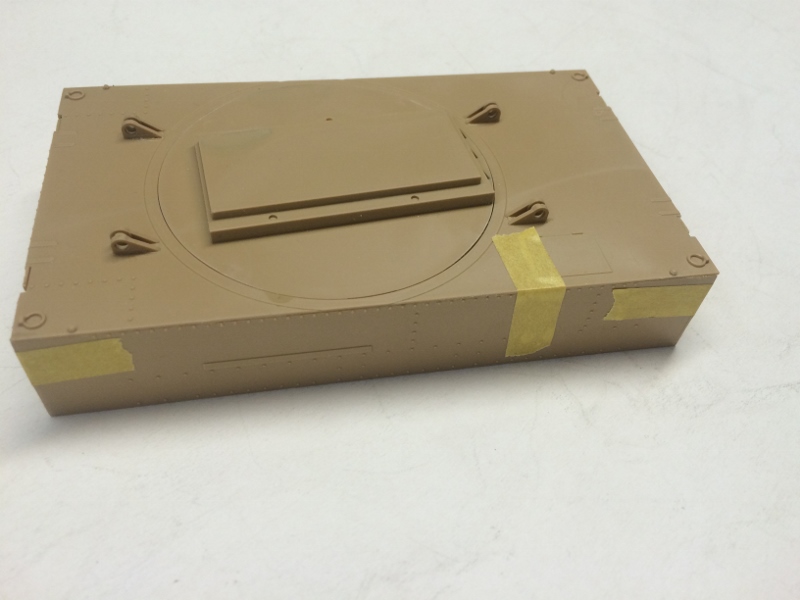
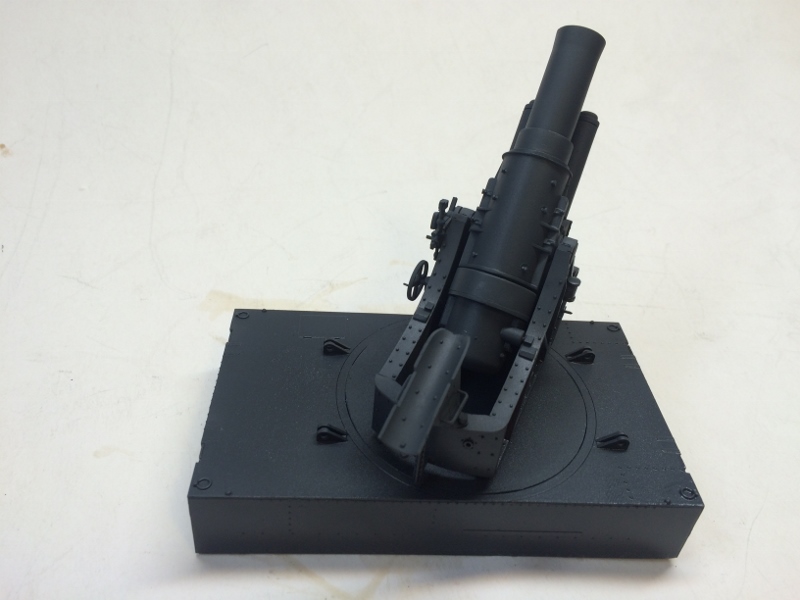
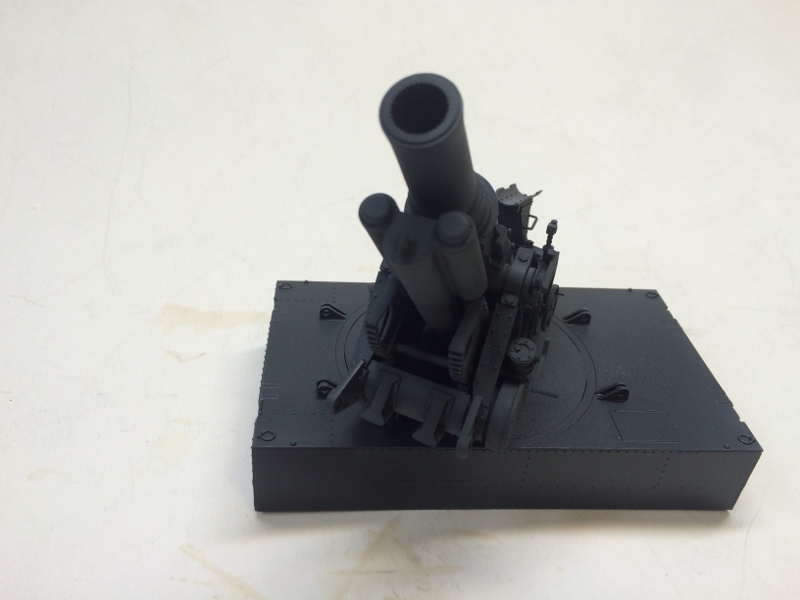
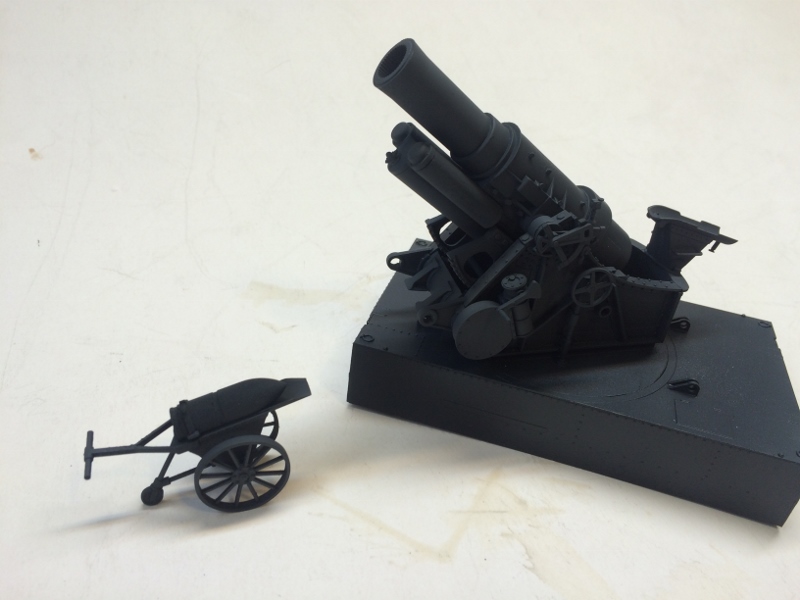
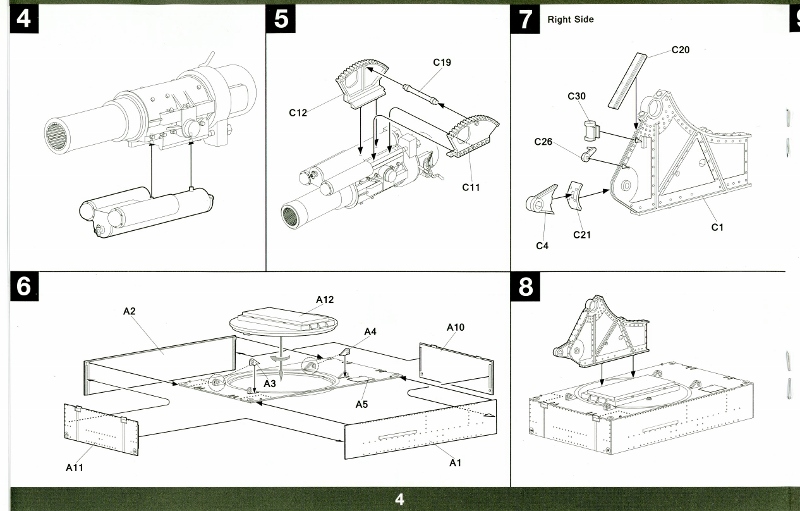
The next step is to prepare the mounting platform. Unlike the WW1 version which was on wheels for transport, the WW2 variation was set onto a metal platform with a rotating turntable that is mounted in the kit version with retaining nibs, much like a tank turret. After that, the levers and wheels that control the gun's movements are added to the cradle sub-assemblies.
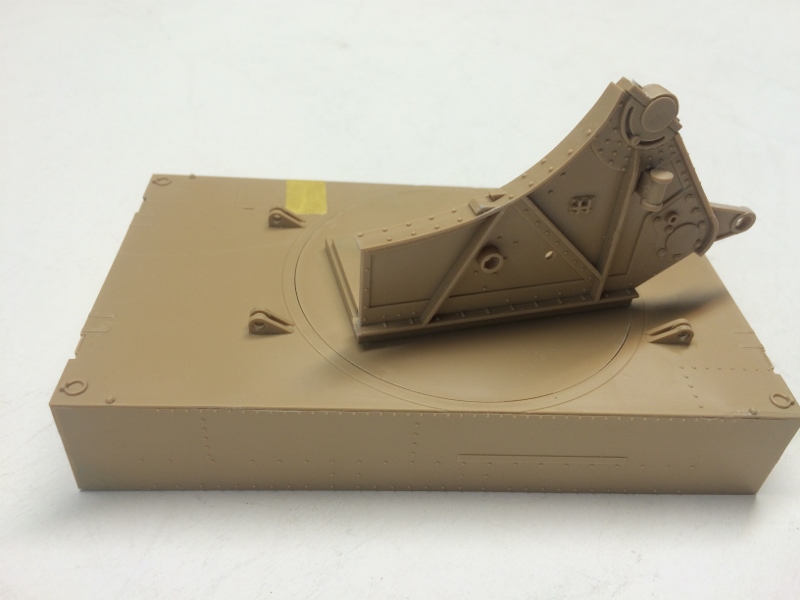
One major problem with the platform & turntable: there is a small ring on the left-hand side of the turntable where the brake wheel assembly C-2 & C-31 enters (looking and acting much like the handbrake on a railroad car). The ring and mounting hole need to be CAREFULLY removed because it is about 1" out of alignment. Either use a sharp hobby knife with caution, or consider a razor saw.
Once the gun cradle is finished, it is mounted in a 3-step process: the right side of the cradle is glued to the turntable, then the gun is mounted to the pivot point at the top. Finally the elevator gear is meshed with the gun cradle's gear teeth and the left cradle assembly is glued to the turntable.
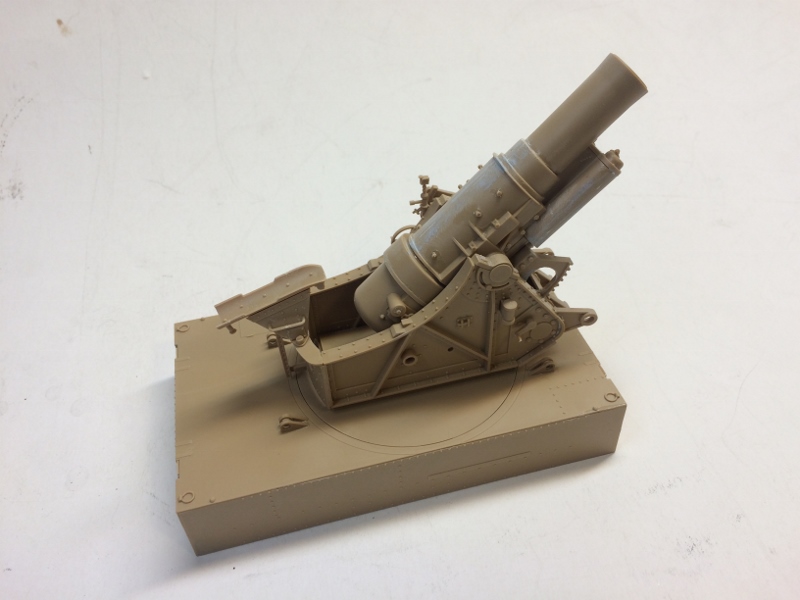
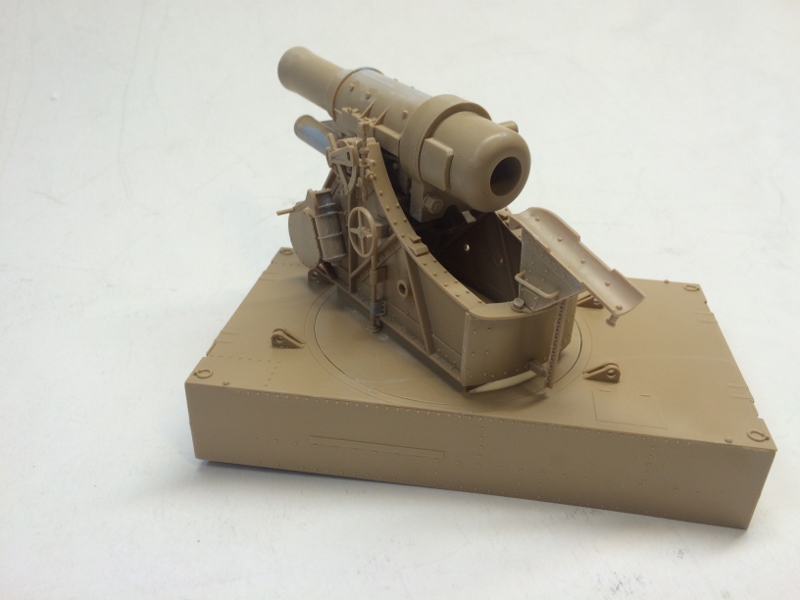
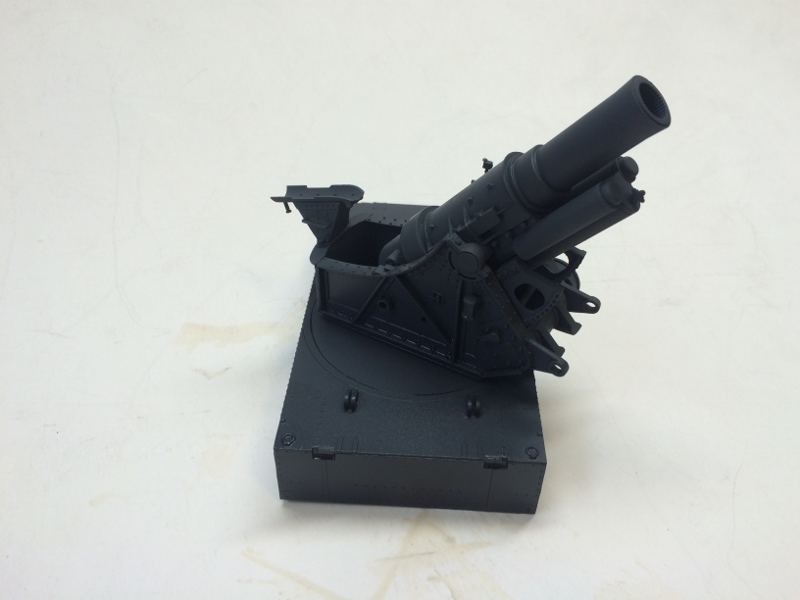
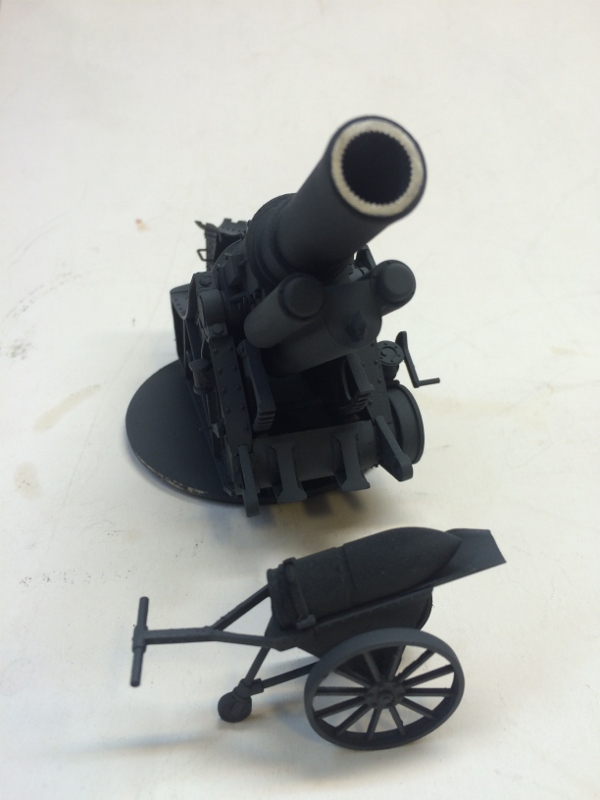
Because the instructions, unfortunately, were murky about the placement of the front components of the cradle, the struggle to align the various sub-assemblies may result in a poor fit. The photos below show a very good rendition of the 30.5cm mortar, but I don't think I would enter the kit in any competition where its shortcomings would be glaring.
conclusion
For anyone interested in heavy artillery, this kit looks to be a winner. It has nice detailing, and doesn't cry out for any AM improvements (other than more ammo).
Thanks to Takom for this review sample. Be sure to mention you saw this kit reviewed on Armorama when ordering.
SUMMARY
Highs: Crisp molding, a small number of parts, a straightforward set of instructions.Lows: No option for WW1 build. Rifling extends only a short distance down the barrel. Murky spots in the instructions can lead to poor fit.Verdict: Recommended to anyone who is interested in heavy guns.
Our Thanks to Takom! This item was provided by them for the purpose of having it reviewed on this KitMaker Network site. If you would like your kit, book, or product reviewed, please contact us.
Thanks for the concise review, Bill. When my copy arrived I was VERY disappointed with the barrel muzzle. The rifling only goes in 1/2 inch, allowing the viewer to see the end of it, and there is no twist to the rifling! That's not going on my model. I expected better from Takom. A rifled aluminum insert would be exceptional.
Donald, this is the only post I found, and there are no photos of real guns. Perhaps you can post a link to those various versions?
Tom, I, too was very disappointed to see the limited (and incorrect) rifling. Seems this kit cries out for an aluminum insert/barrel. This might be the short-term answer:
I'm not to good with linking, The best that I can say is that at the top of your web page that is open here type in Skoda 30.5 and hit the search or go to button. You should get a lot of different web sites with the info. that you are looking for.
UPDATE:
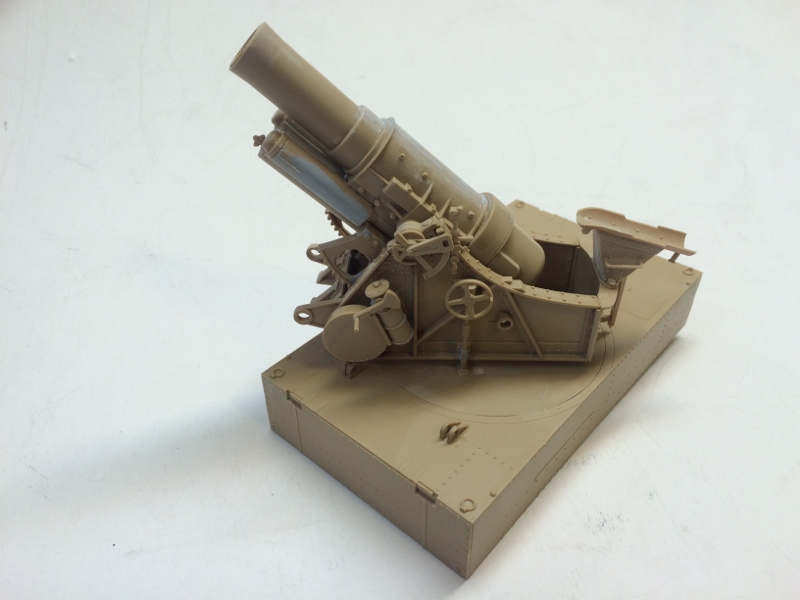
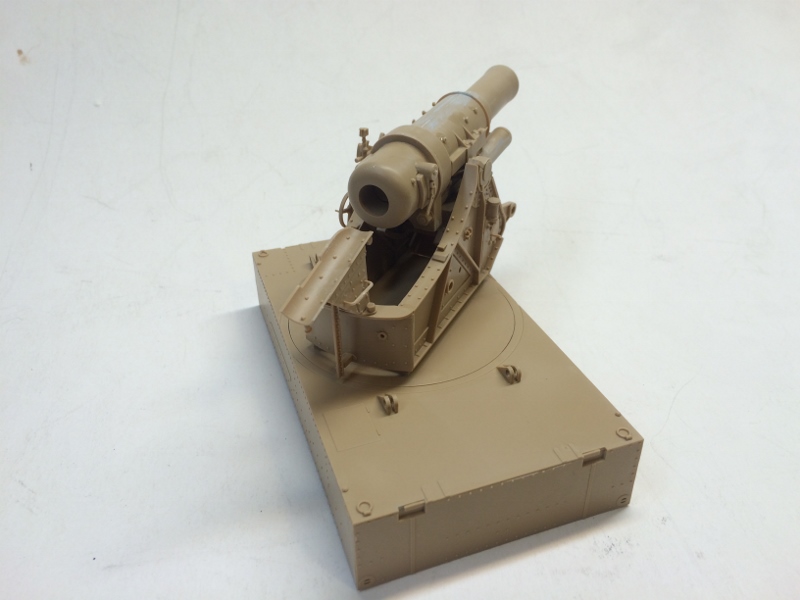
I have finished the kit and it is now a "built" review. Please have a look again, especially the new section added ("the build"), as well as numerous photos of the steps along the way and the completed, painted gun.
Thanks for the review, Bill, and great job on that BEAST. It's got such a cool surly "Steampunk" look to it. I'd like to get one, even though I'd prefer a WWI version of it.
It looks like it might be a good kit for me to build "on the road".
Chris
Chris, it will appeal to some of your "WW1 addiction" while being an easy build when traveling. I'll bring it along to the next meeting so you can see it "in the flesh."
@bill_c Bill,
Well written build review, I especially liked the intro very informative and well researched. Again great job on the build - very inspirational.
~ Eddy


Comments