Introduction
In the 1970s missiles were expected to be the answer to everything. Anti-tank missiles could be guided onto their targets in-flight, ensuring higher hit rates, while they could also pack a punch at long distances. The US Army decided to develop a new system on its tried and tested M60 hull that could fire the new Shillelagh anti-tank guided missile, while also retaining conventional cannon capabilities. The M162 Gun/Launcher system was the result of this odd marriage.
The gun used rifling in the tube for normal rounds, but added a straight key-way slot down the middle that engaged tabs on the missile to keep it from spinning when fired. The turret was radically altered to make it as narrow as possible, and the whole thing was stuffed full of high-tech systems that earned it the Starship nickname.
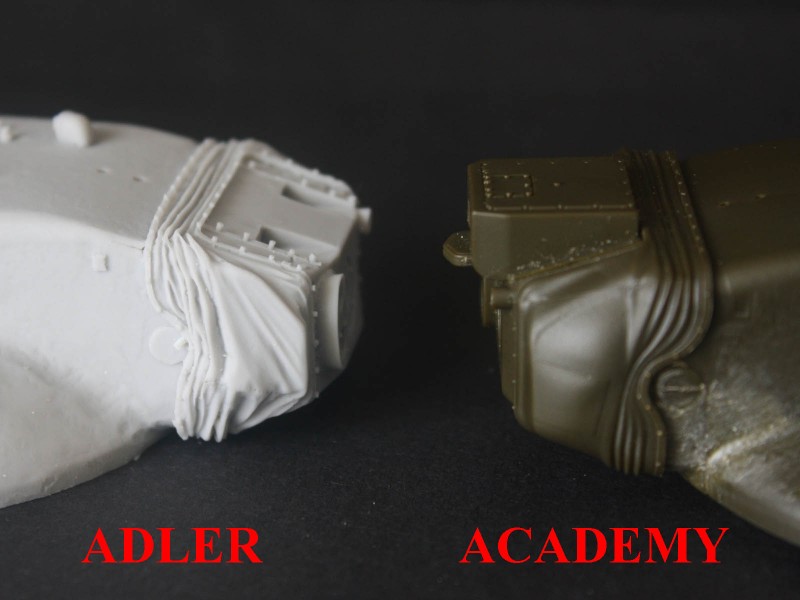
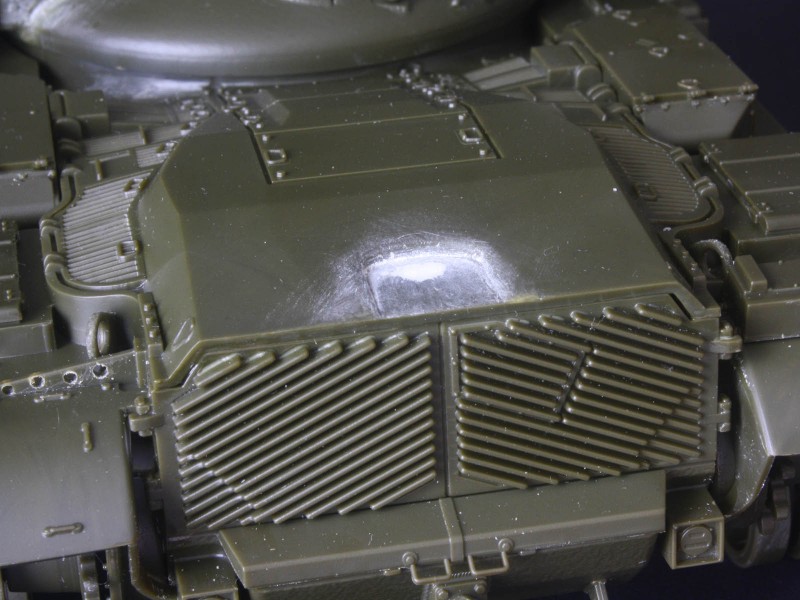
Early in the manufacturing run it was discovered that the conventional bore evacuator simply didnt have enough oomph to push the burning gases and debris out of the main gun after firing, resulting in these gases entering the turret when the breach was opened to load the next round. Worse still, the burning embers could prematurely ignite the next round, since they used combustible shell cases. So a new system was added that used compressed air to do the job the Closed Breech Scavenger System, or CBSS. This required a compressor and air tanks that were housed in a special bulge under the rear doors on the hull. Early vehicles had to have this added before finally being issued to troops in 1975, while those still under construction had it cast into the hull from the start. Since it no longer needed the bore evacuator, later guns lacked this feature. But early guns often retained the evacuator even after the vent-holes in the barrel were plugged. So, it is possible to find early development M60A1E1 and M60A1E2 tanks with the evacuator and no CBSS bulge, or later in-service tanks (with or without bore evacuators) that all have the CBSS bulge.
The missile proved prone to misfires, with duds landing in front of the tank and lying there until the rocket motor kicked in, at which point they flew off in whatever direction they happened to be facing! This and other issues led to the M60A2 being withdrawn only a few years after it entered service. The hulls were recycled into specialist vehicles such as bridge-layers, while the turrets were scrapped.
Decades ago, Tamiya came out with a Starship in their motorised line. It had some detail issues, but was the only game in town. A few years ago a company named Adler released a nice resin turret and CBSS bulge for those wishing to make a better M60A2. This new Academy kit is the first of three new plastic Starships announced that has actually hit the shelves we still await the promised kits from AFV Club and Dragon.
Contents
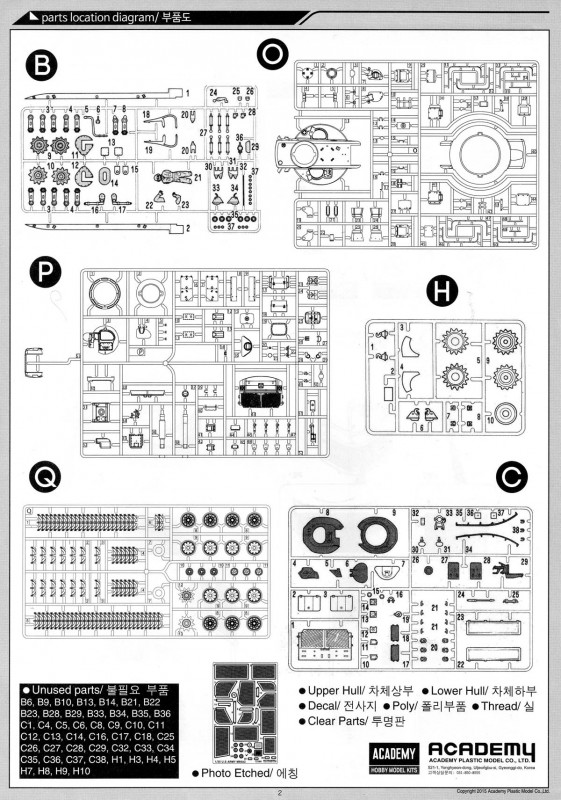
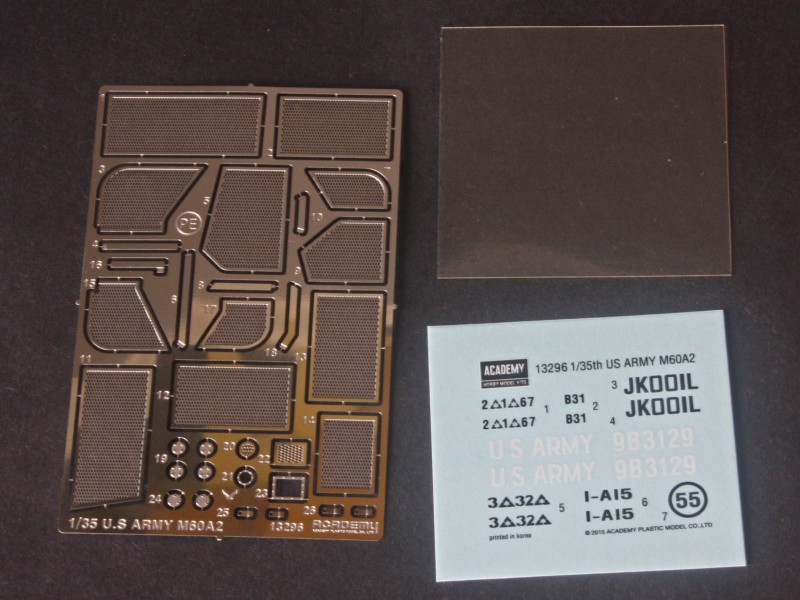
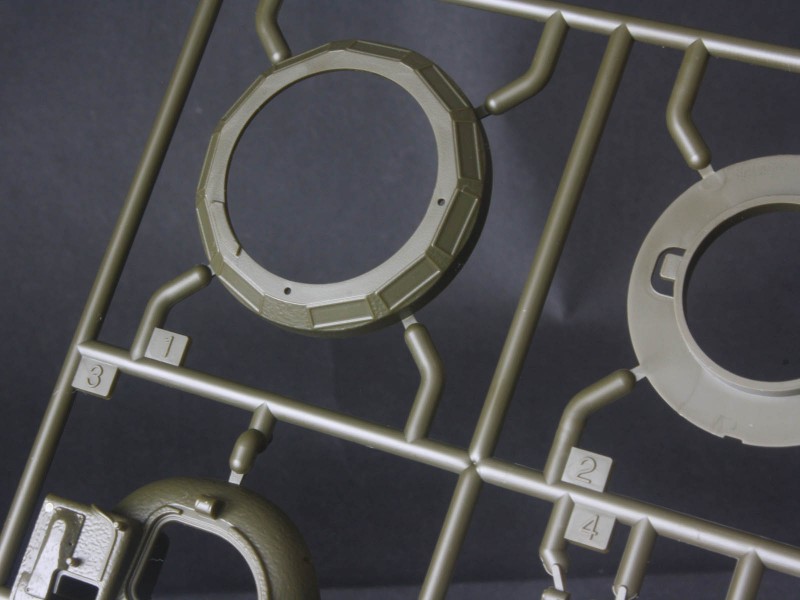
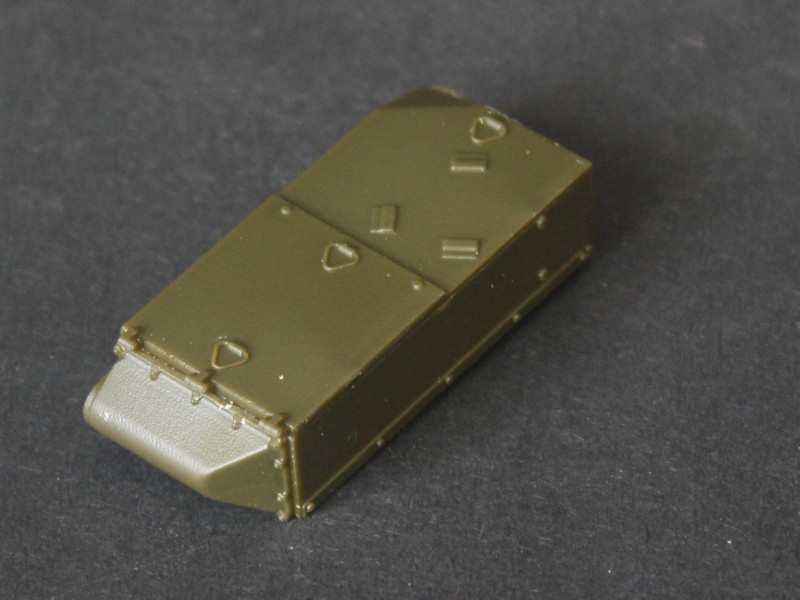
Inside a large box there are seven dark green sprues holding 344 parts, plus separate upper and lower hull, and a mantlet cover. Also included is a photo-etch fret, eighteen poly caps, decals, a string for the tow cables, and instructions. Moulding is crisp and free from flash or sink-marks in my example.
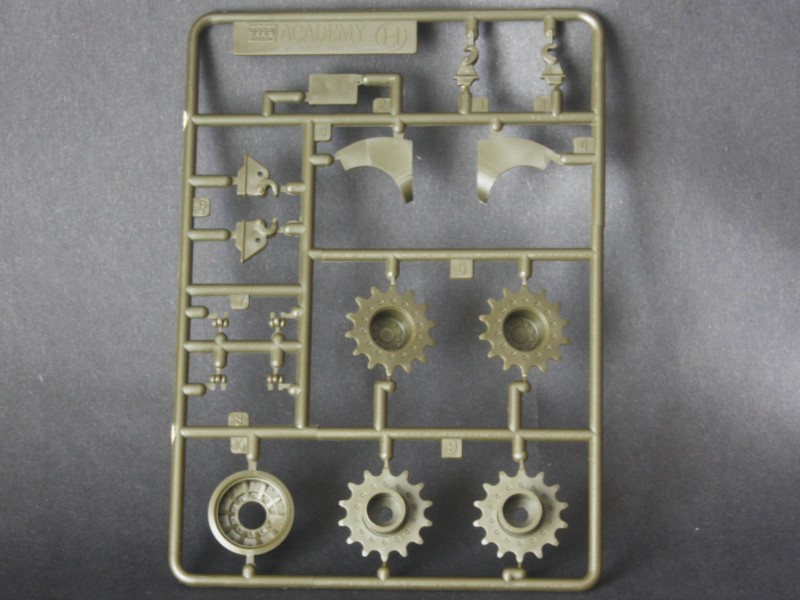
The sprues for the turret, wheels, and track are new, but there are two sprues from Academys earlier M60 kits and this is also the origin of the large hull parts. Much of the old stuff goes in the spares box, including the M19 cupola and square AN/VSS-3A searchlight from their M60A1 & M48A5 kits.
review
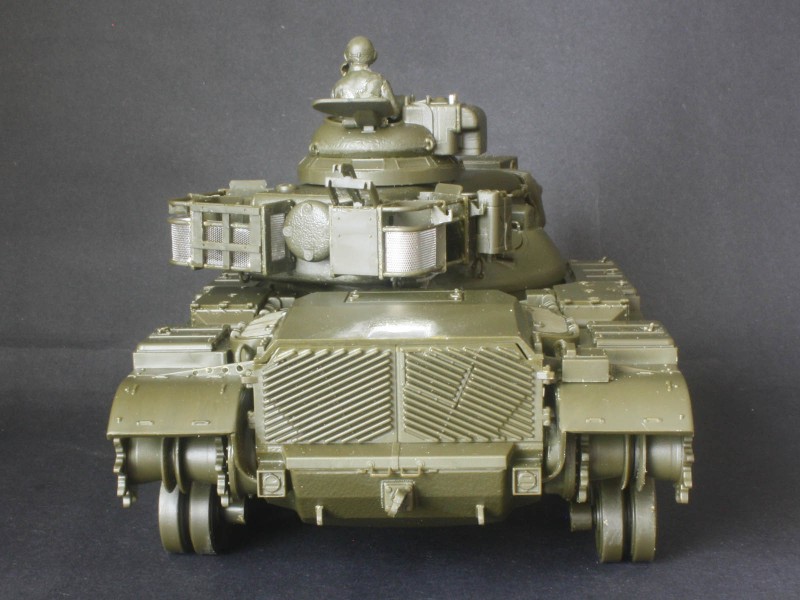
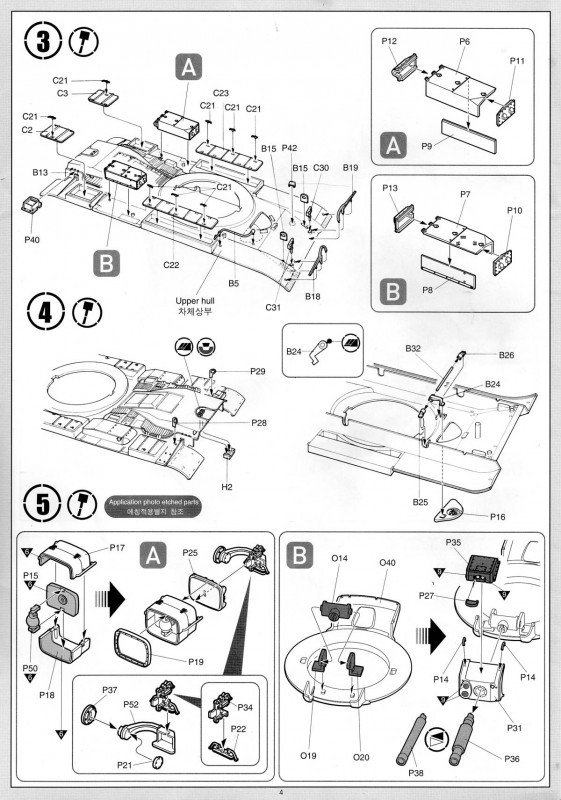
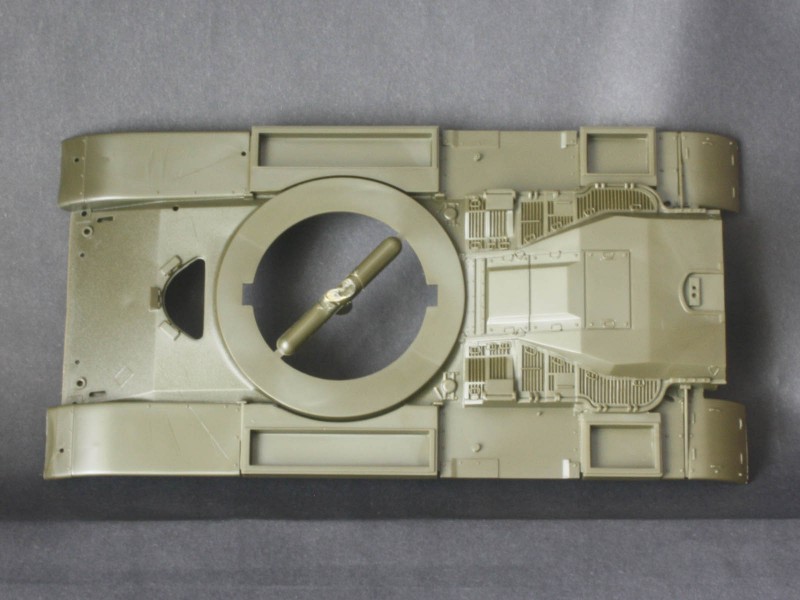
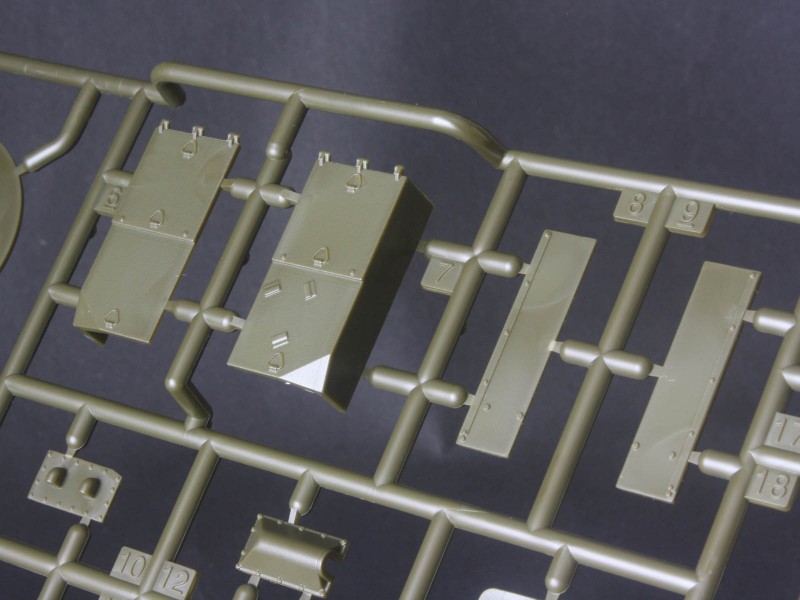
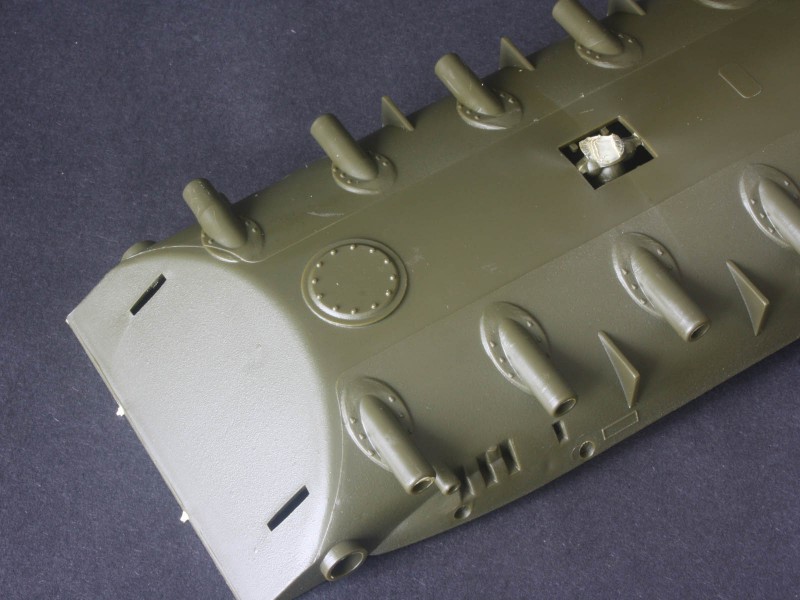
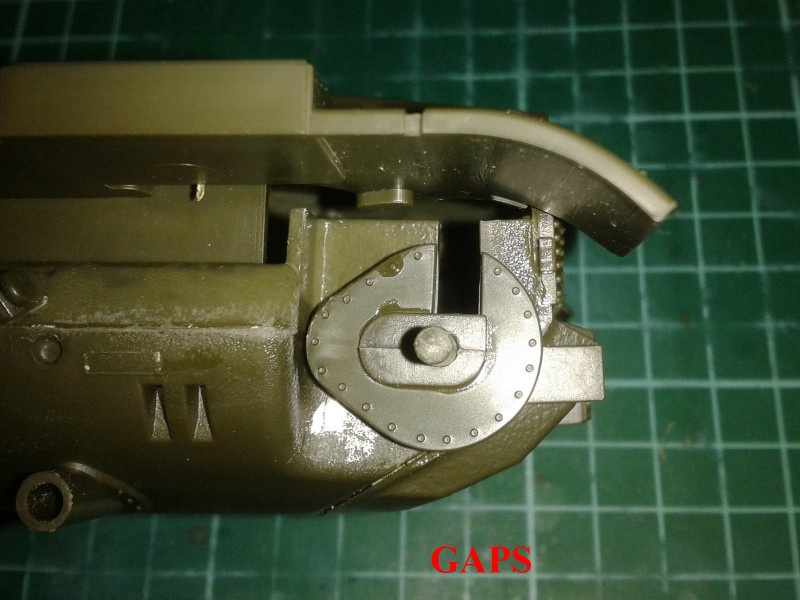
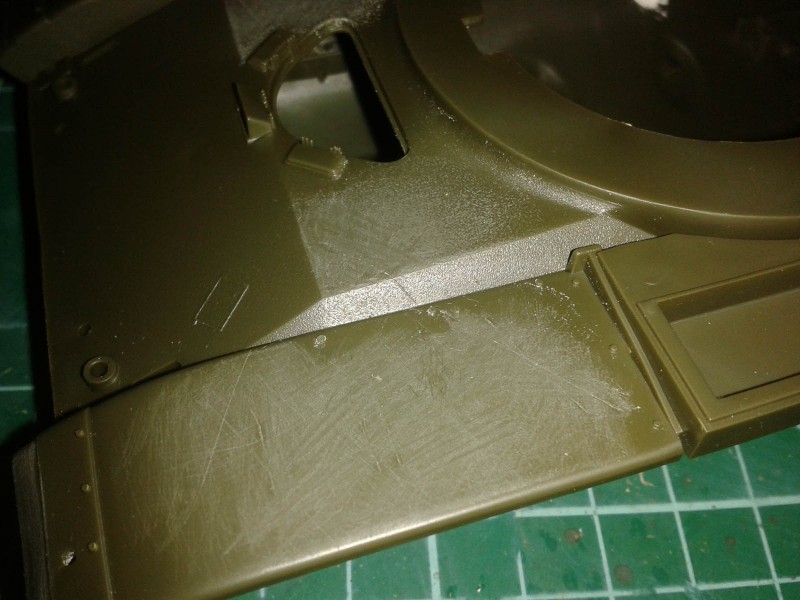
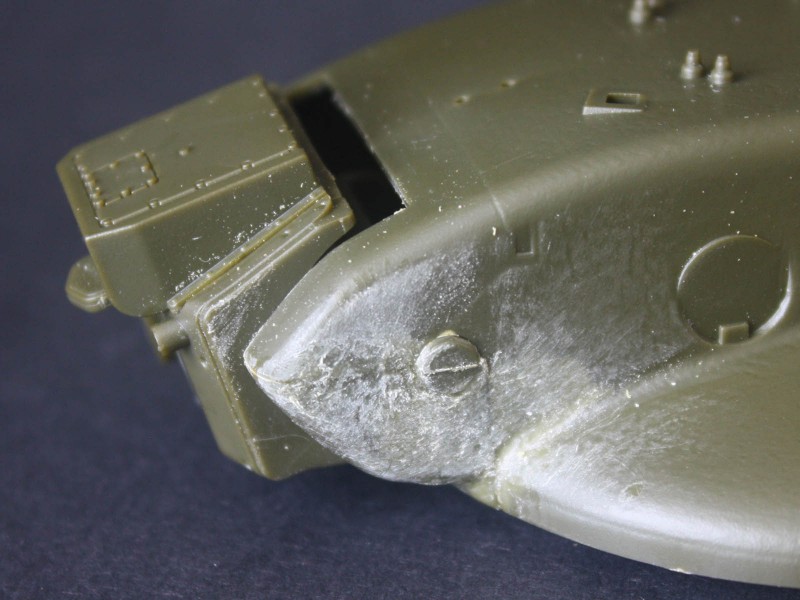
Starting with the hull, the aging Tamiya clone lets the side down. There is a square hole to plug in the bottom, two odd screw-holes to fill, and the axle slots at the rear are only partly hidden by the crude final drive covers. The round escape hatch with bolts does not resemble the oval hatch on real M60s, and the suspension mounts are a poor representation of the real thing. The tops of both lower-hull sides are separate strips, which lack texturing even though the main castings do have a subtle grainy texture. There are no foundry marks despite these being prominent on the real thing. The rear end is a new part, with a decent rendering of the CBSS bulge, but for some reason the tail lights and their boxy surrounds are moulded on. This makes them rather chunky and shallow-looking. There are two prominent bolt heads missing from the CBSS door extensions that should sit either side of the fine handles these bolt secured the doors closed. There are two types of tie-down (or griping) loops for the hull sides, but all the photos I have seen show only the horizontal type represented by part P48 (parts C20 go in the spares box and the holes get filled), and most tanks show four per side. As the kit only offers two per side the rest will need to be scratch-built.
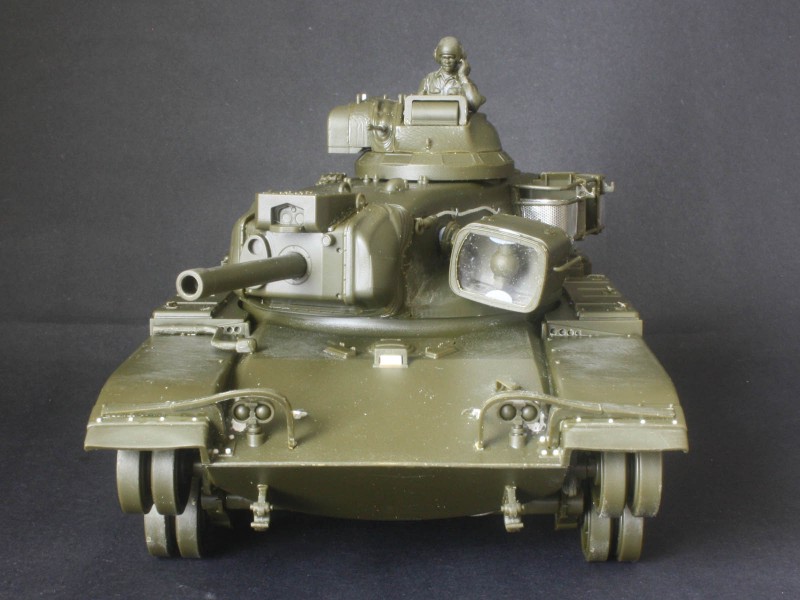
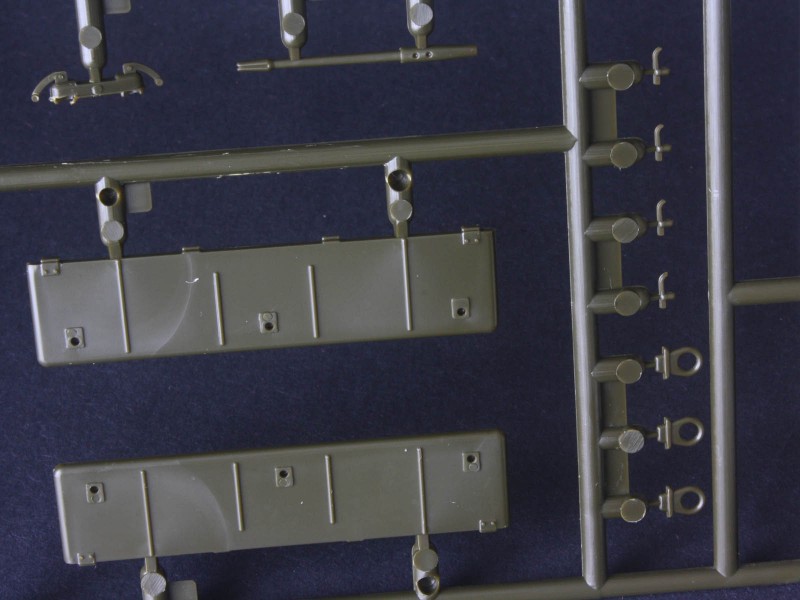
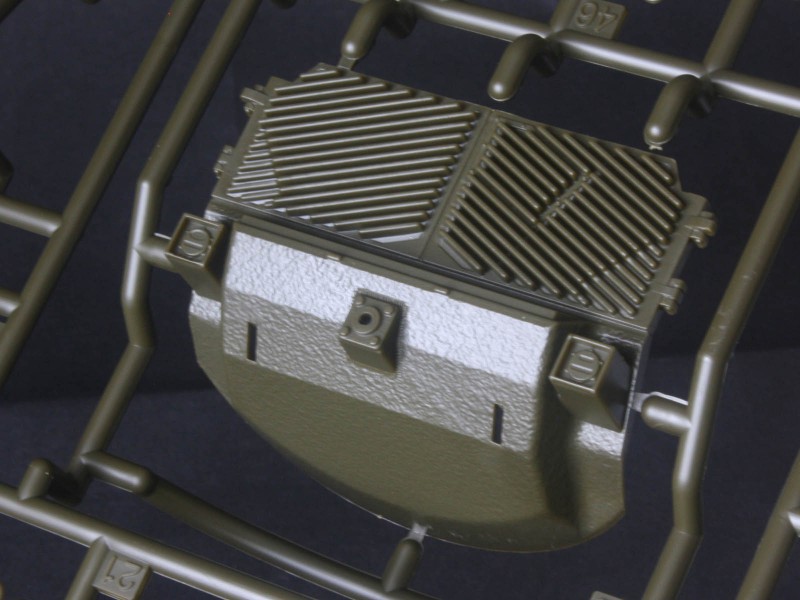
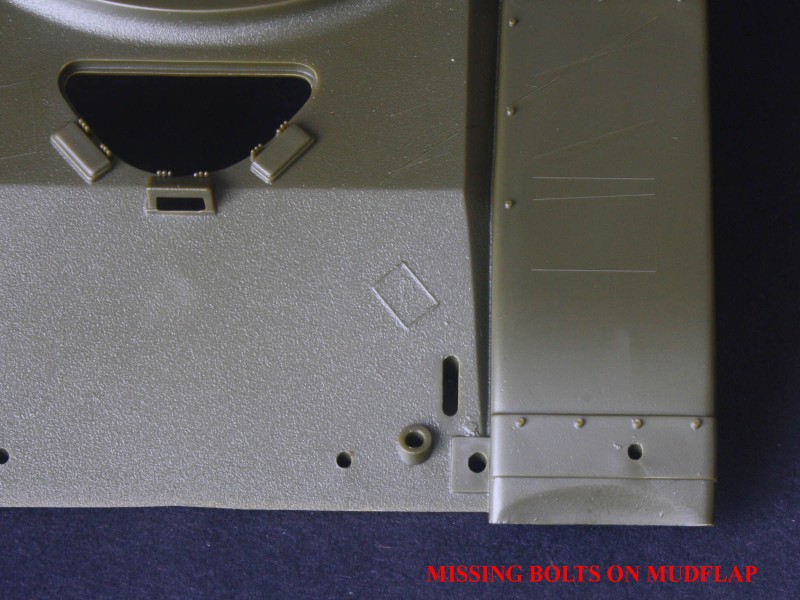
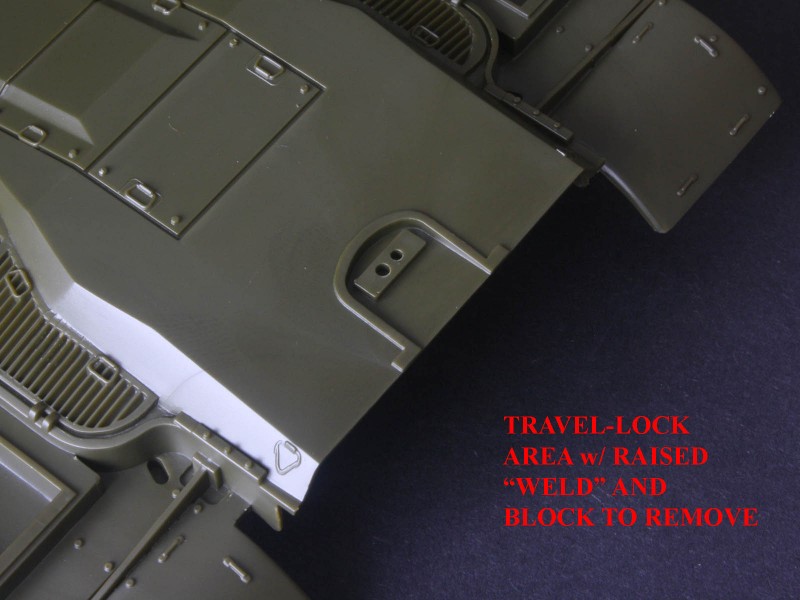
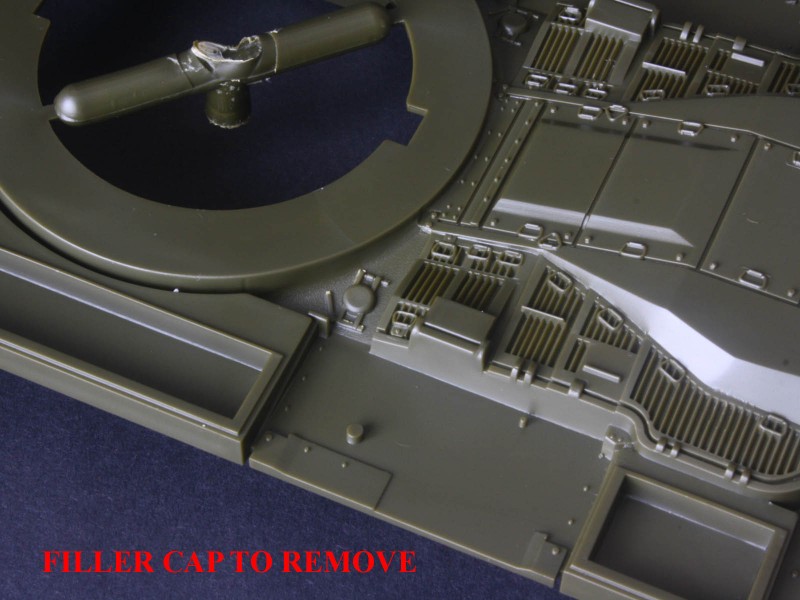
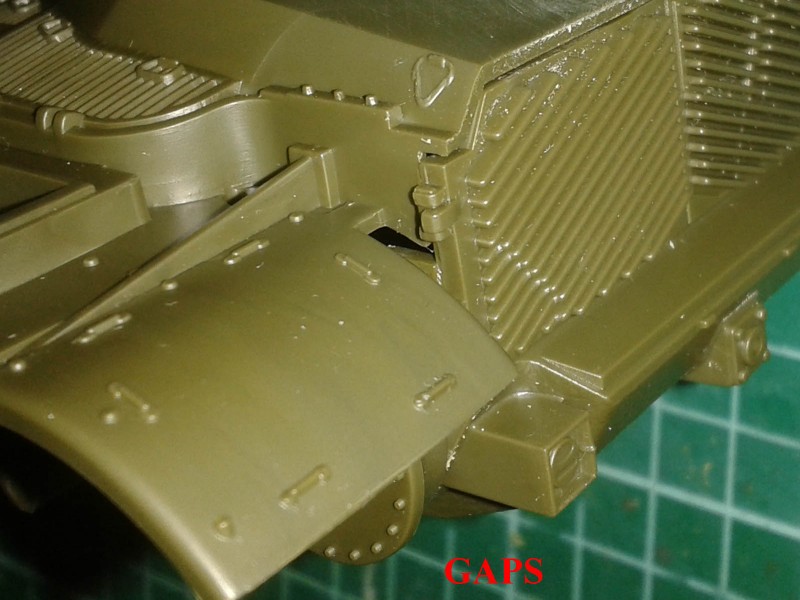
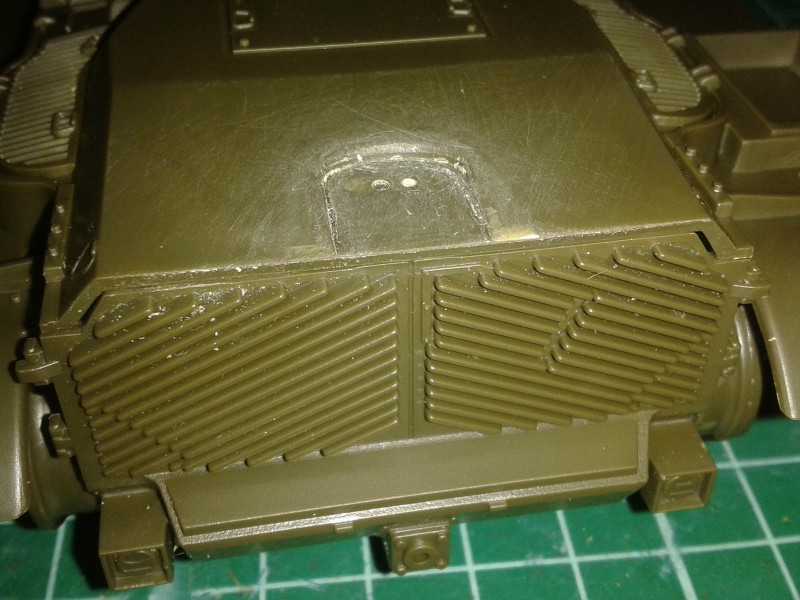
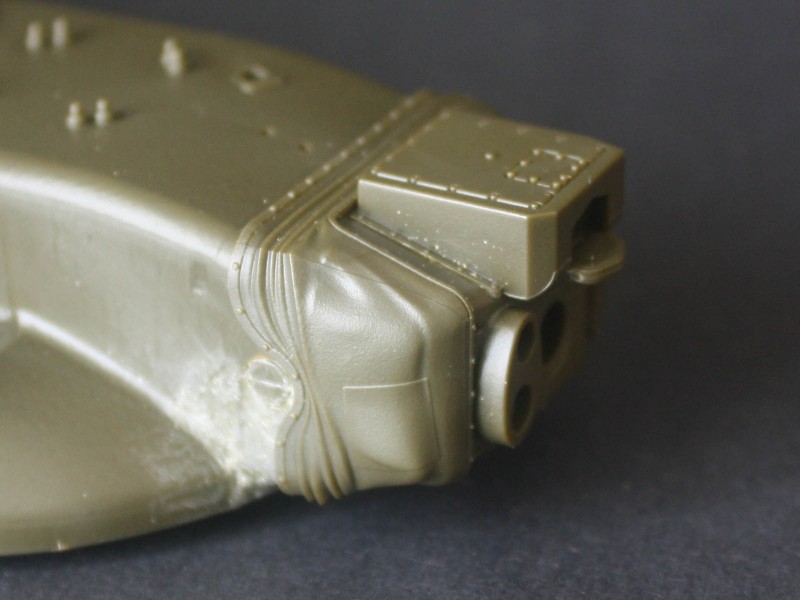
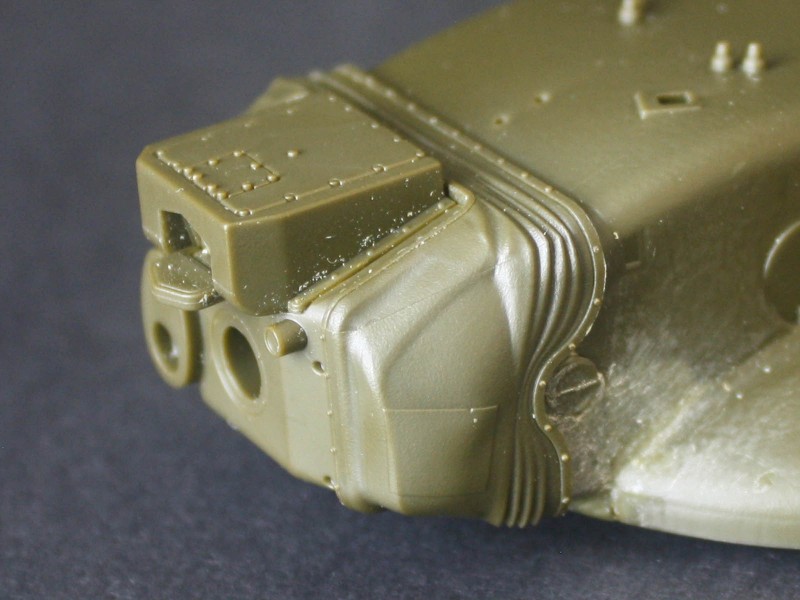
The upper hull is still an adequate item, but the fender support brackets are moulded on as vague lumps these really need to be cut off and replaced with styrene ones complete with holes. Then there are the odd fuel filler caps, which feature undersized lids and stringy hinges all moulded on in prehistoric style. Unlike the M60A1, the A2 has no turret overhang to hide these. Besides, there should be only one on the right-hand side! Up front my sample has a series of faint raised lines that I think are alignment points for the ERA blocks on the earlier M60A1 RISE and Blazer kits they need to be sanded off. A row of bolts is missing from the front edge of the forward fender brace mounting pads, which double as headlight brush guards I used 0.020 Plastruct hex rod in carefully drilled holes. The brush guards themselves are chunky, whereas the real ones were bent from angle-iron, and lack the diagonal support brace. At least the toolbox handles are all separate parts! We get new aluminium top-loader air cleaners for the fenders this is the first time they have been done in plastic to my knowledge. (Puts paid to sales of my 3D resin-printed versions over on Shapeways.com, but then the kit parts lack the recessed bolts on the rear casting or the well-defined intake elbows at the front, so maybe mine still have value?) The new sprues also include a slide-moulded fire extinguisher handle cover for the front glacis, which has nice representations of the T-handles under the hood definitely a welcome touch. At the back, the depression for the gun travel lock has a strange raised lip that probably represents a weld seam, but this needs shaved off or toned down, while the instructions say to scrape off the mounting block for the old kits travel lock. Not mentioned in the instructions, but definitely necessary for the build, are parts H3 & H4 the curved mud guards that are added to the inner rear corners of the fenders. Also omitted is the tow pintle, part C19.
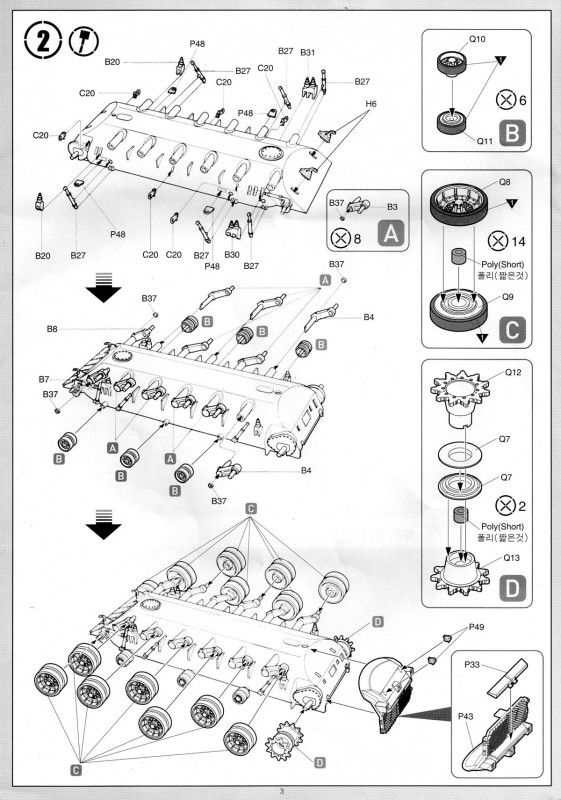
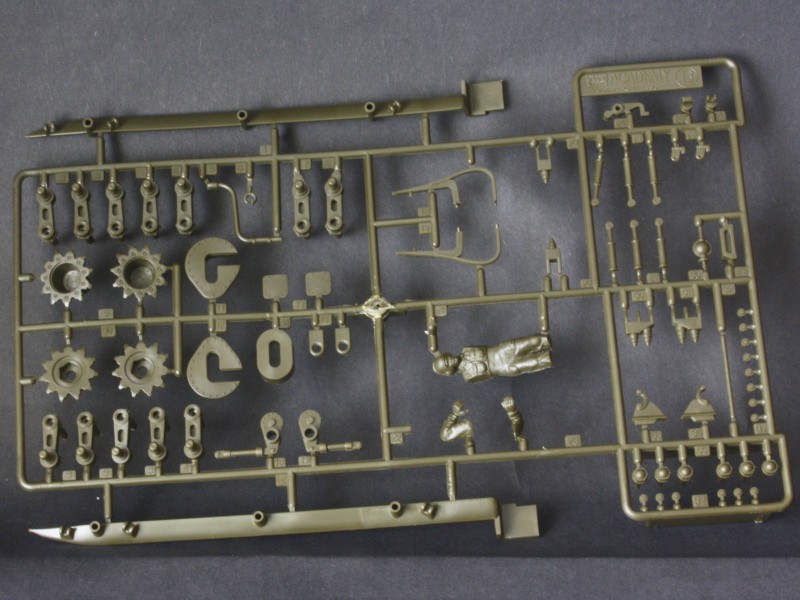
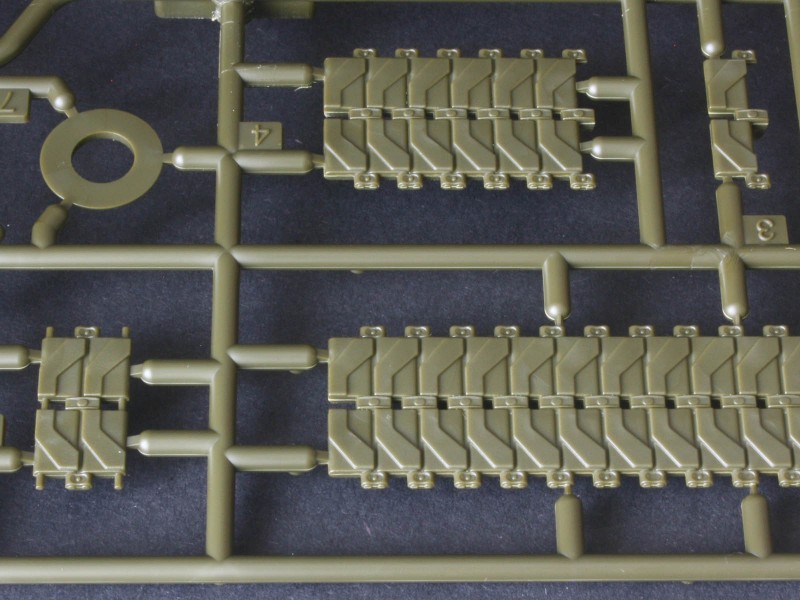
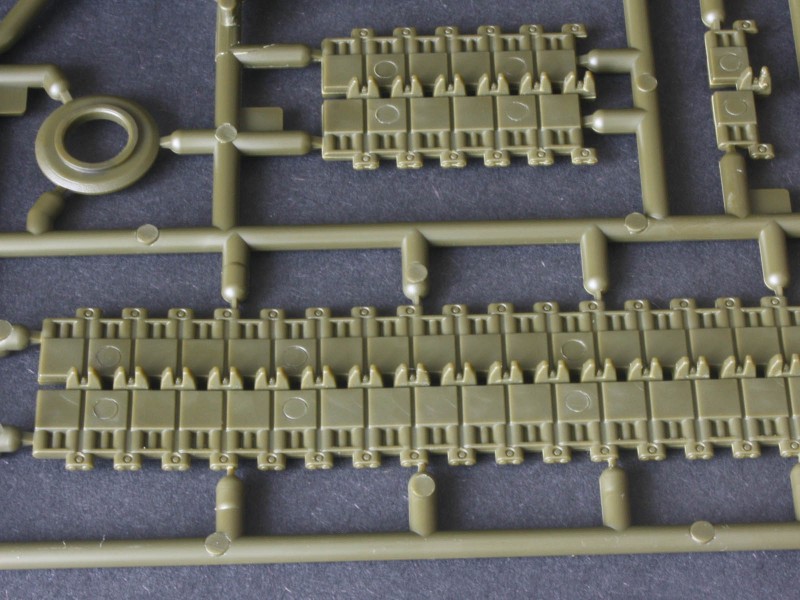
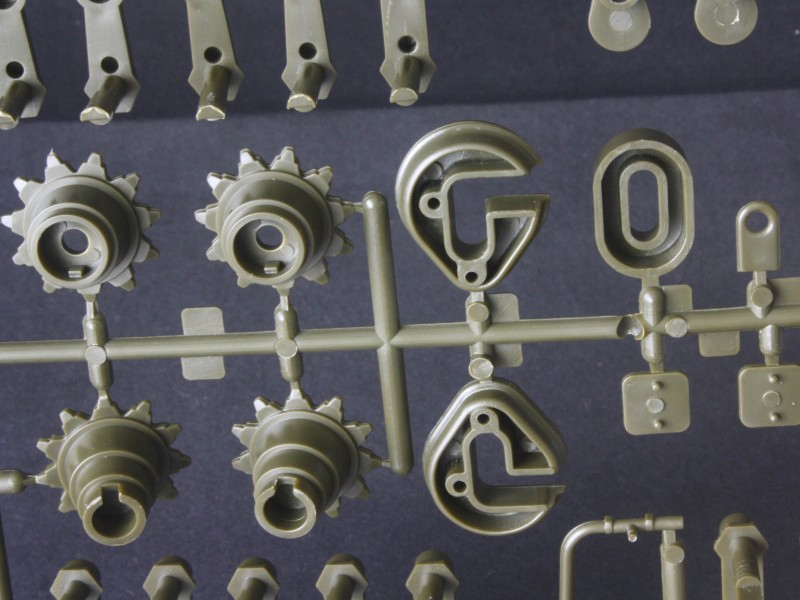
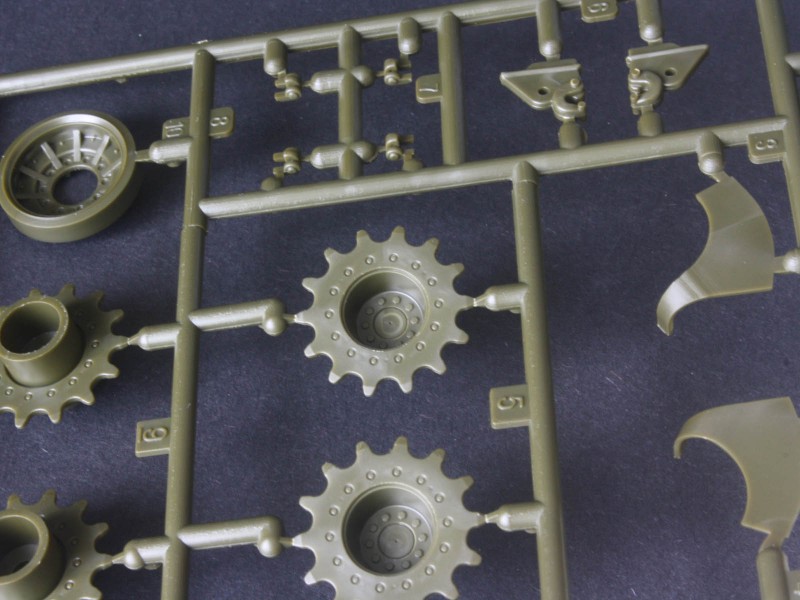
The suspension still suffers from floating hydraulic shock absorbers (they ought to attach to the swing arms) and rather clunky details, but at least we get new cast-aluminium roadwheels that feature moulded-in hubs. The use of old sprues means we get no less than three sets of drive sprockets, but none of them have the three oval mud-holes, so these must still be cut by hand. The track is plastic link&length, representing the early T97 rubber-chevron type, but most in-service photos show Starships on the T142 tracks with octagonal rubber pads. The kit tracks have almost no definition to the chevrons, which is ok if they are meant to be heavily worn and ready for replacement.
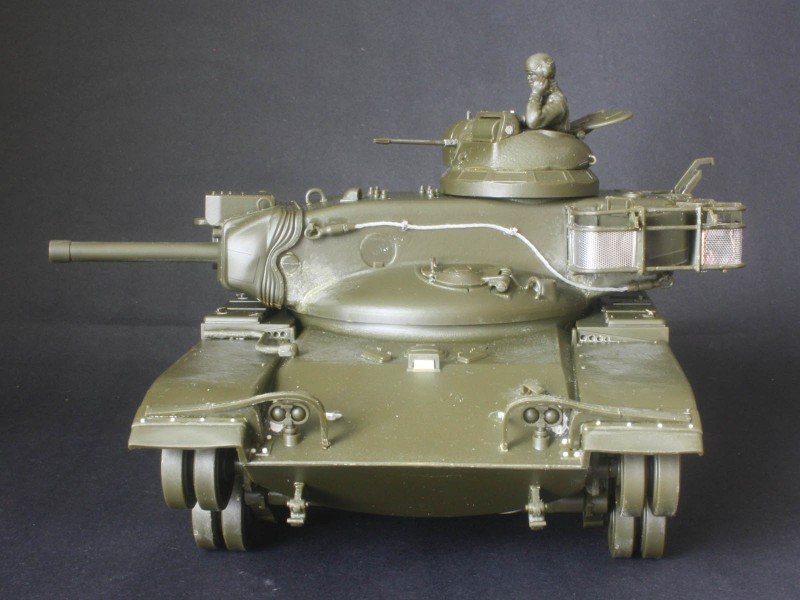
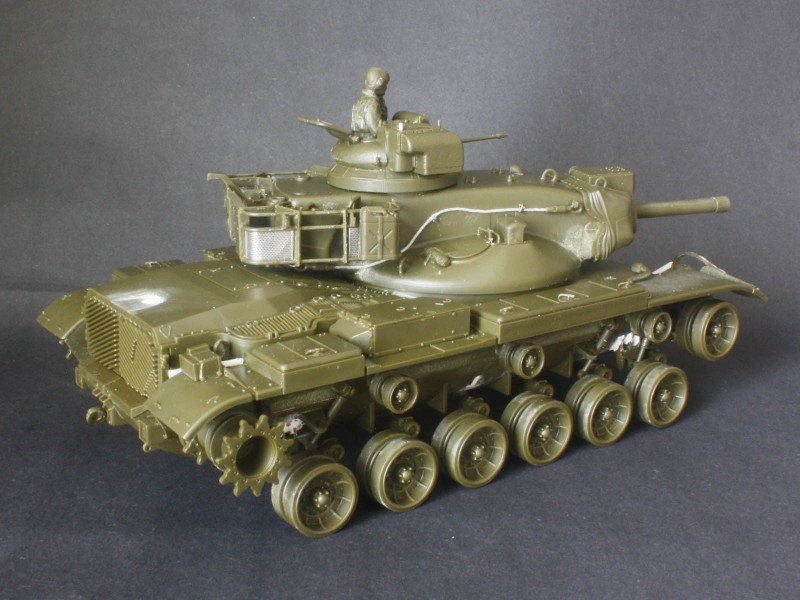
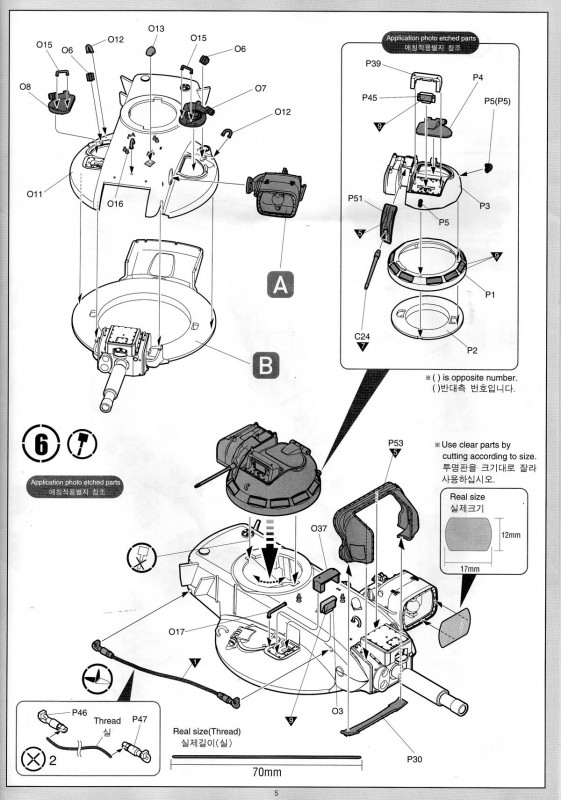
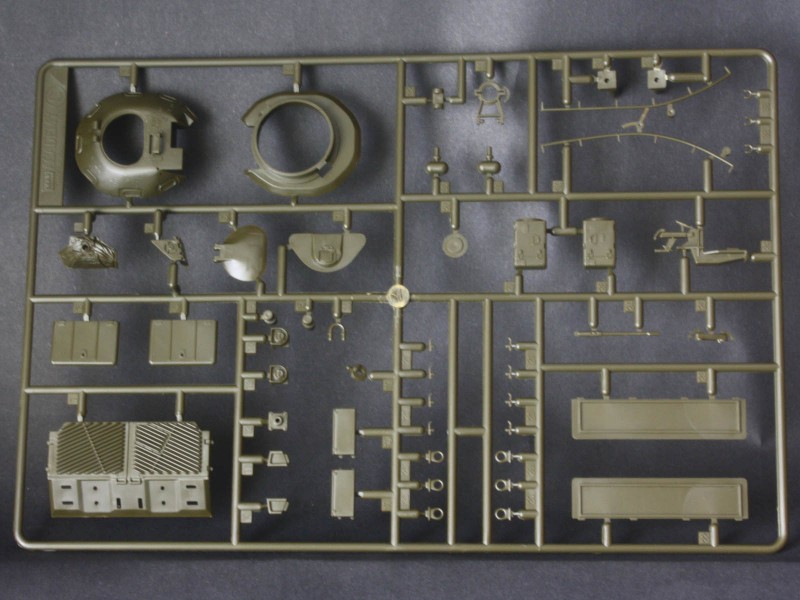
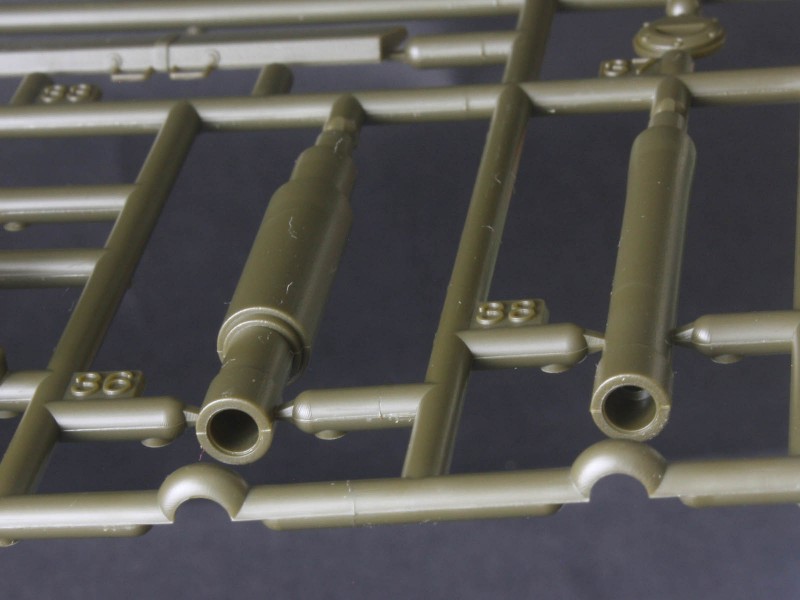
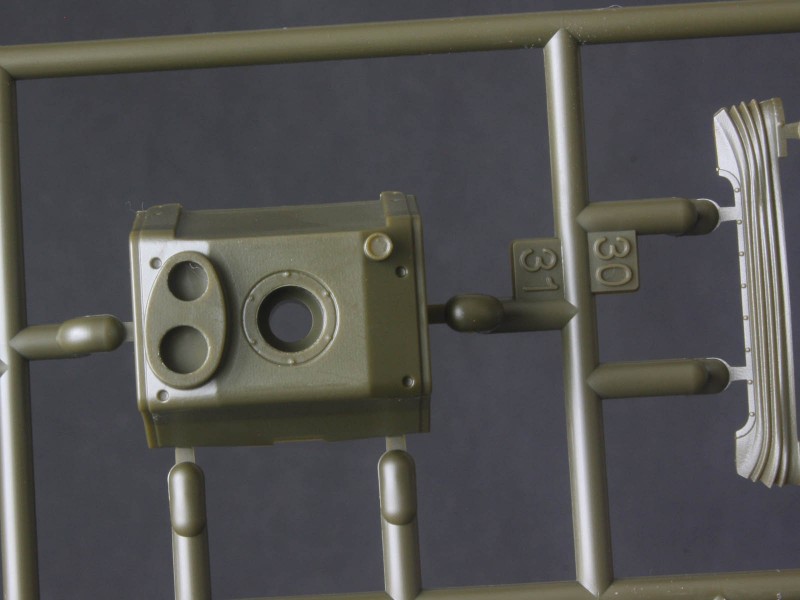
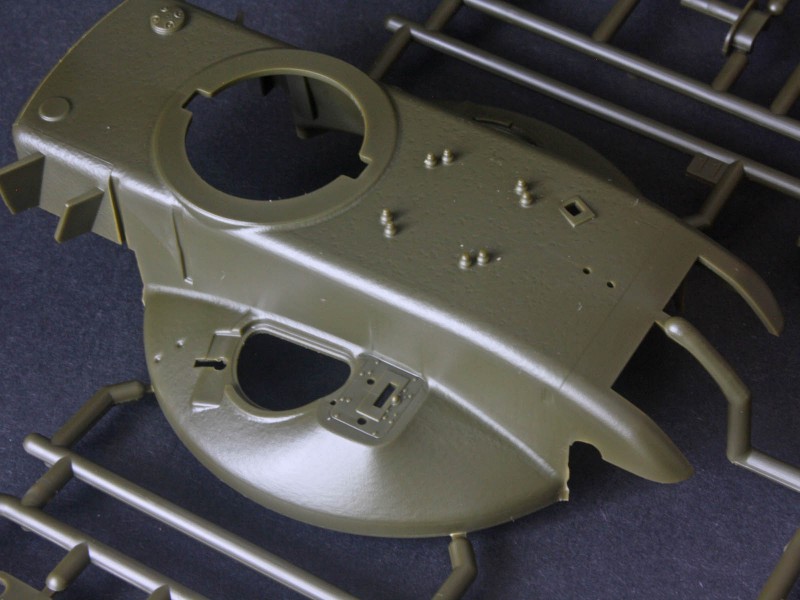
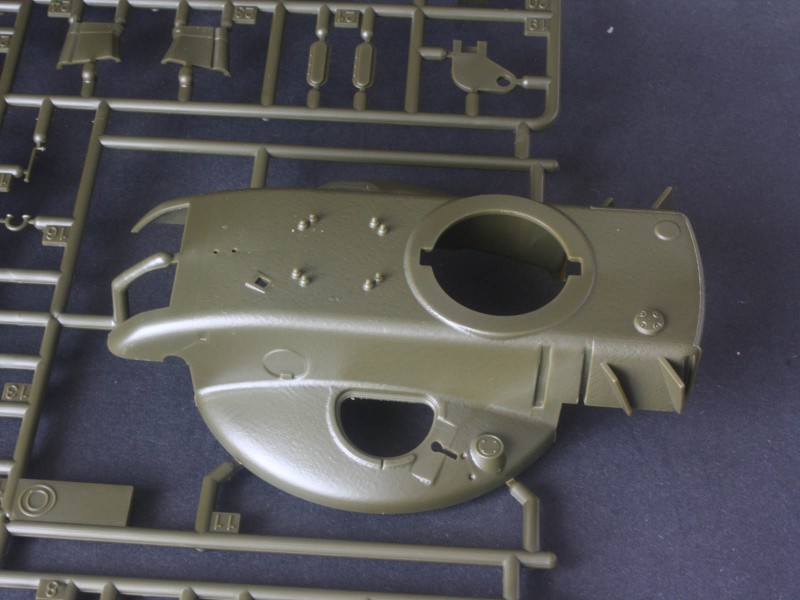
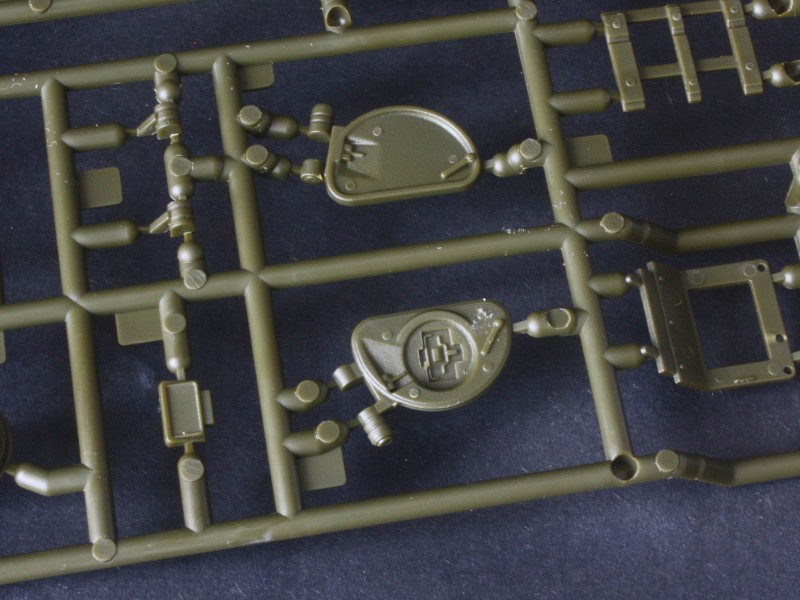
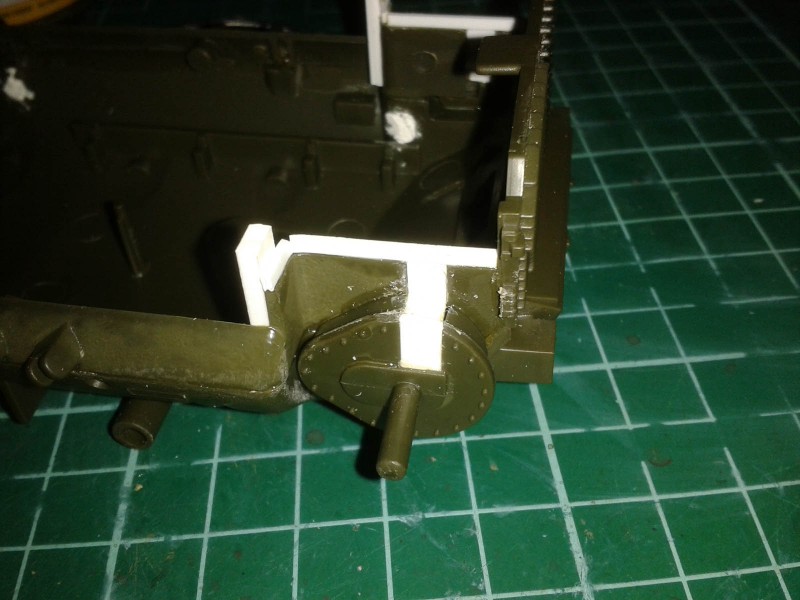
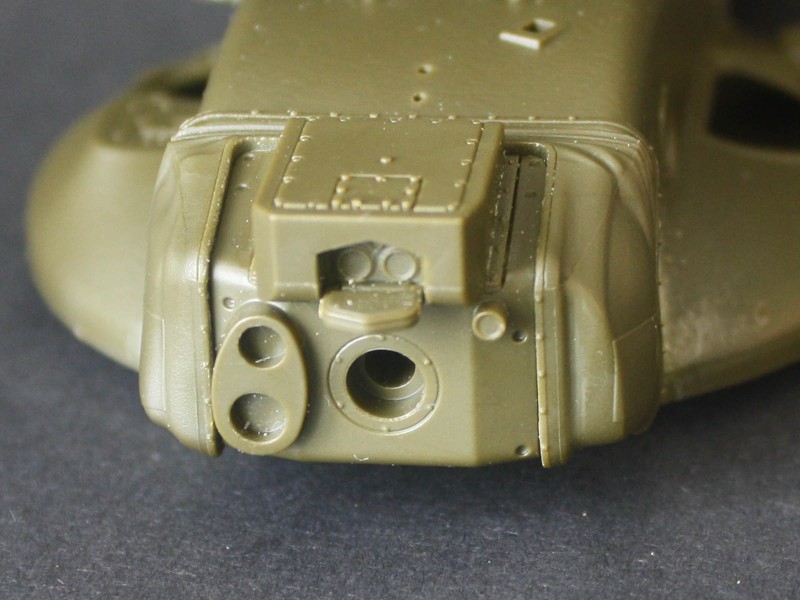
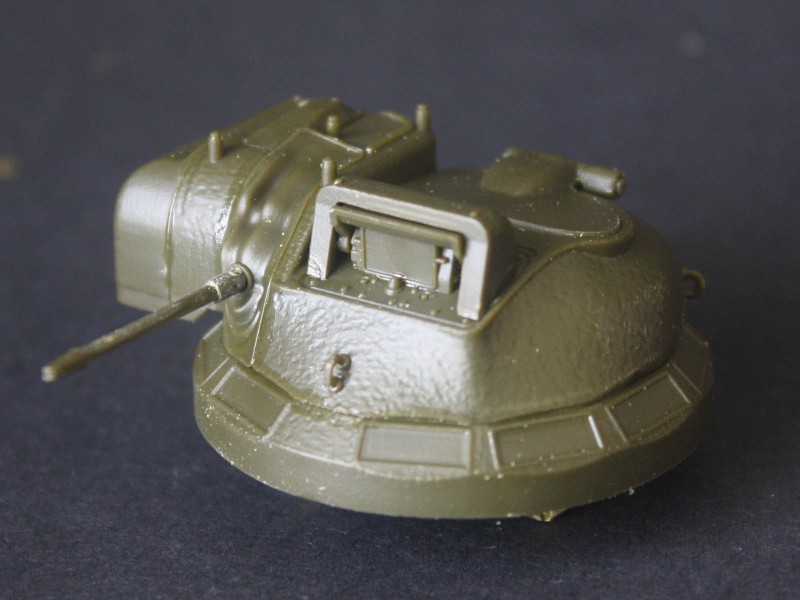
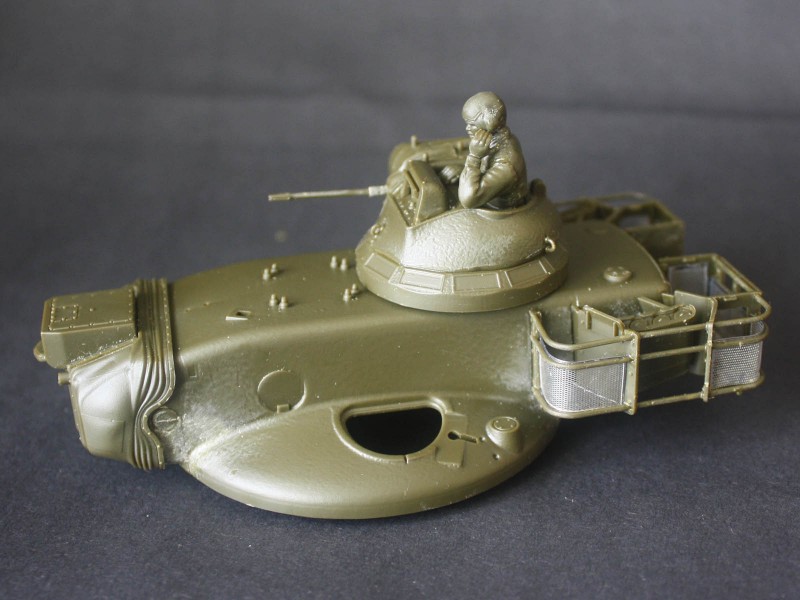
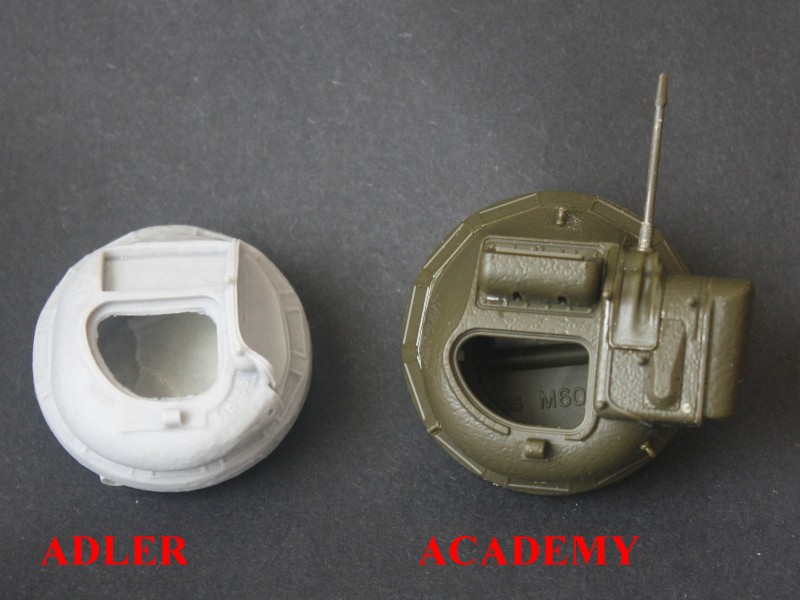
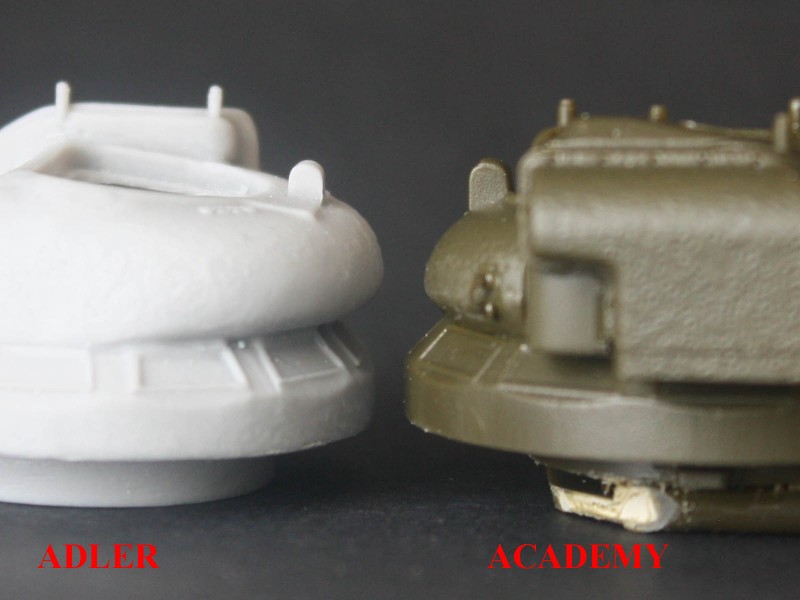
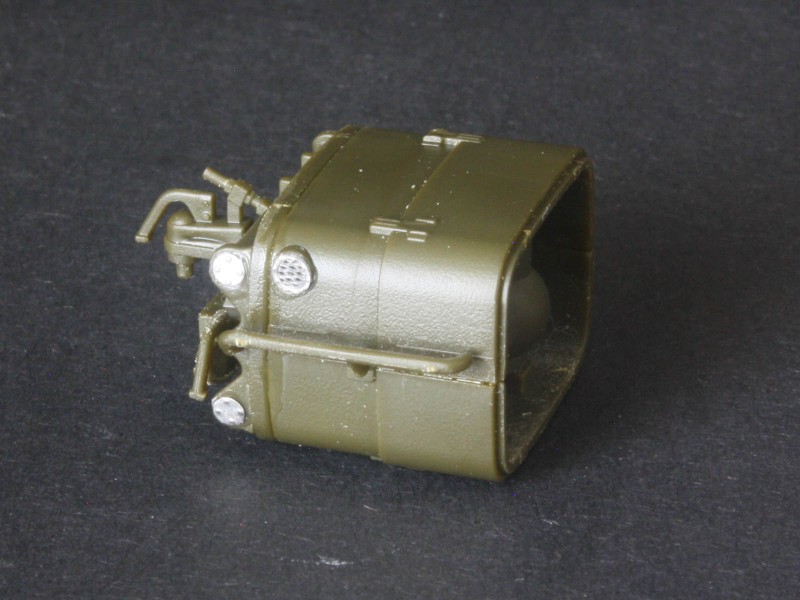
The turret is where all the new effort has been invested, and it is a definite improvement on the old Tamiya kit. Casting texture is subtle and realistic, and the details look sharp. However there are no foundry marks on any of the cast parts, which is a shame. The mantlet has a separate dust cover (another improvement on Tamiya!) with nice fold details around the back end, but the front cheeks are puffy and smoother than images of the real thing. Of course, using it fixes the gun elevation at horizontal. Slide moulding is used to make hollow one-piece barrels for both types of gun, and is also used on other details like the smoke launchers. Based on measurements of a real gun kindly provided by Kurt Laughlin the kit tubes look to be the right length. The mantlet captures the complex shape of the real one, and the box with missile guidance on top benefits from slide moulding.
At this point a comparison with the Adler offering is inevitable. Aside from the missing foundry marks (which Adler included on almost every part) and the less organic-looking dust covers, the Academy turret actually looks more like the real thing than the resin one! Of particular note is the way the sides roll into the roof the Adler one has a sharper curve and seems a tiny bit flat as a result. Also, the Adler TC cupola seems a bit undersize, probably because it is based on the poor Tamiya cupola.
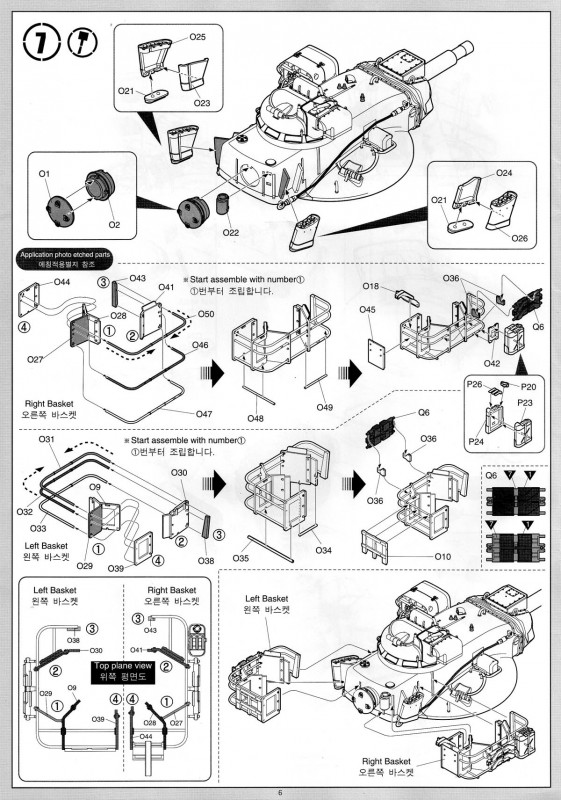
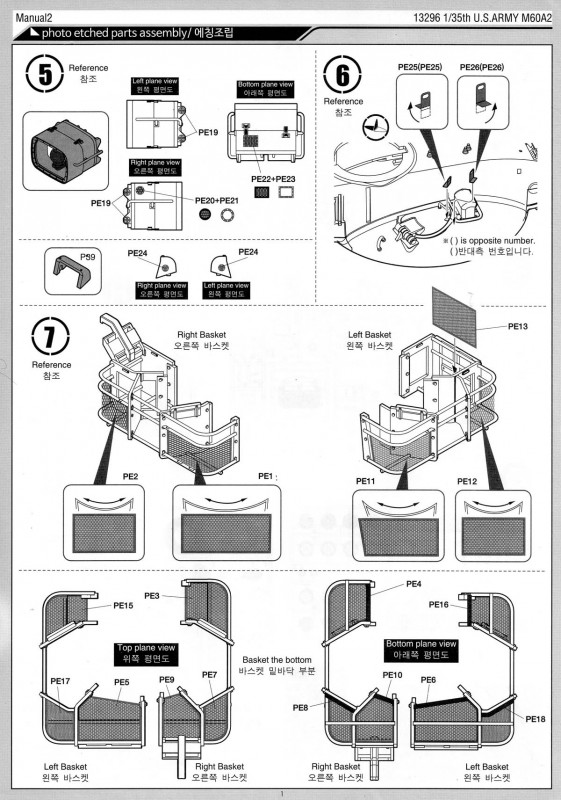
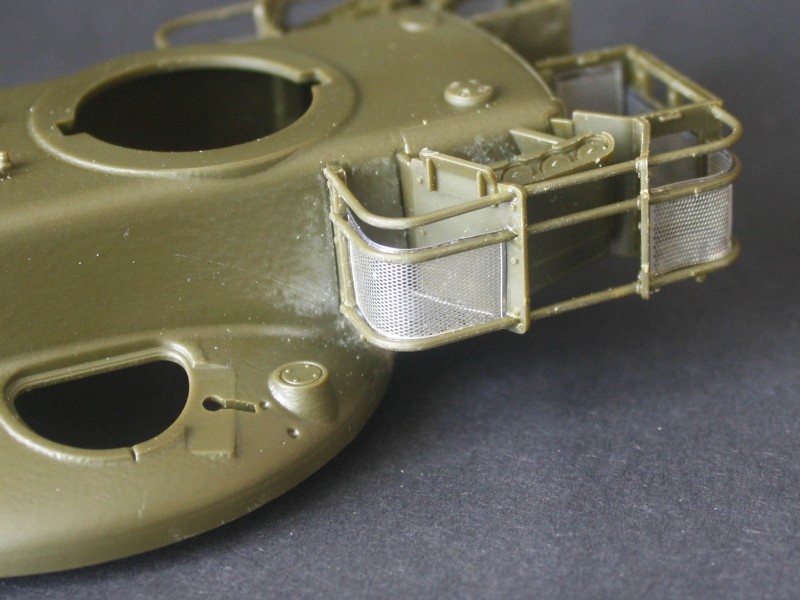
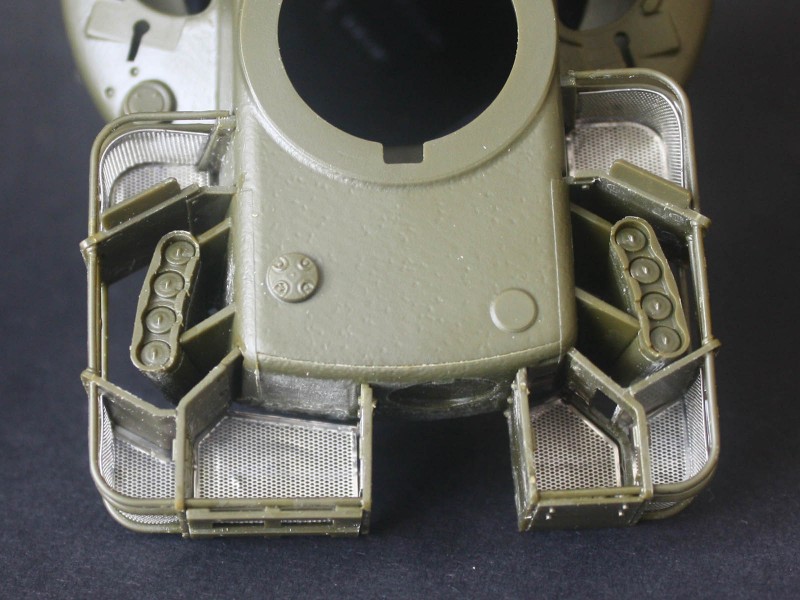
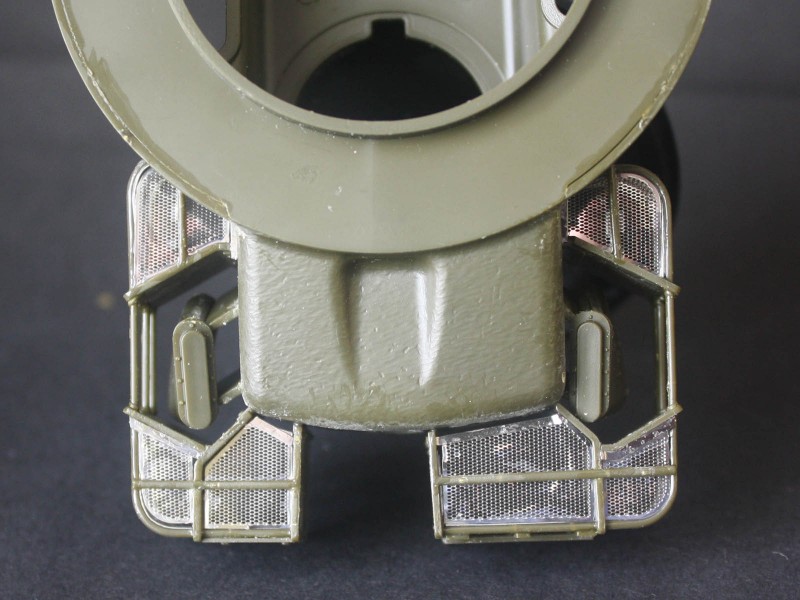
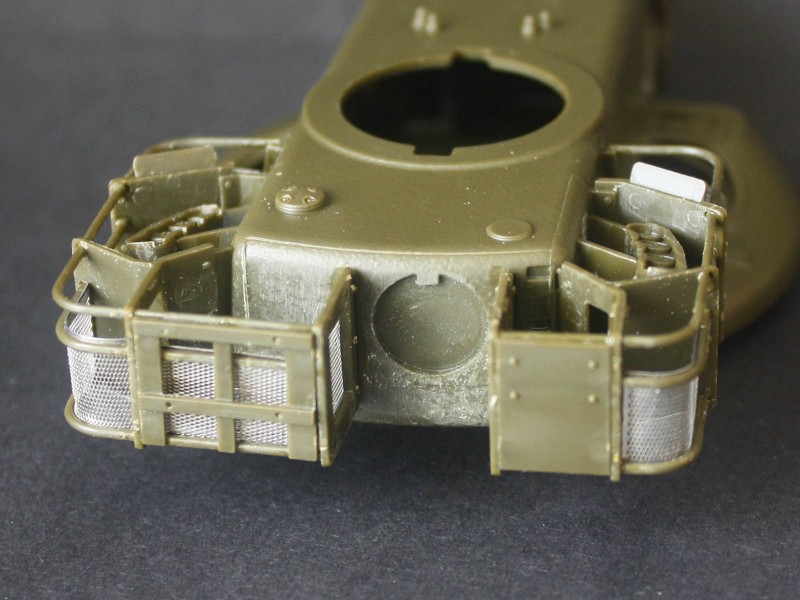
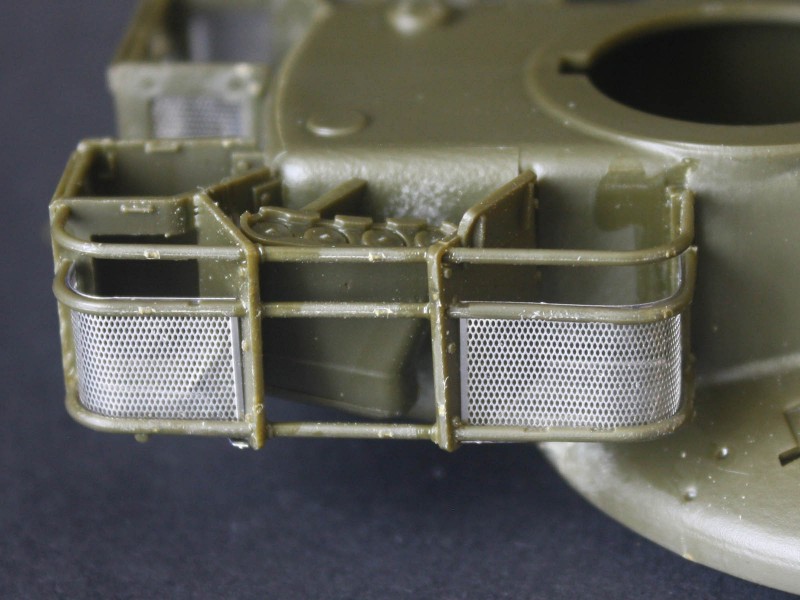
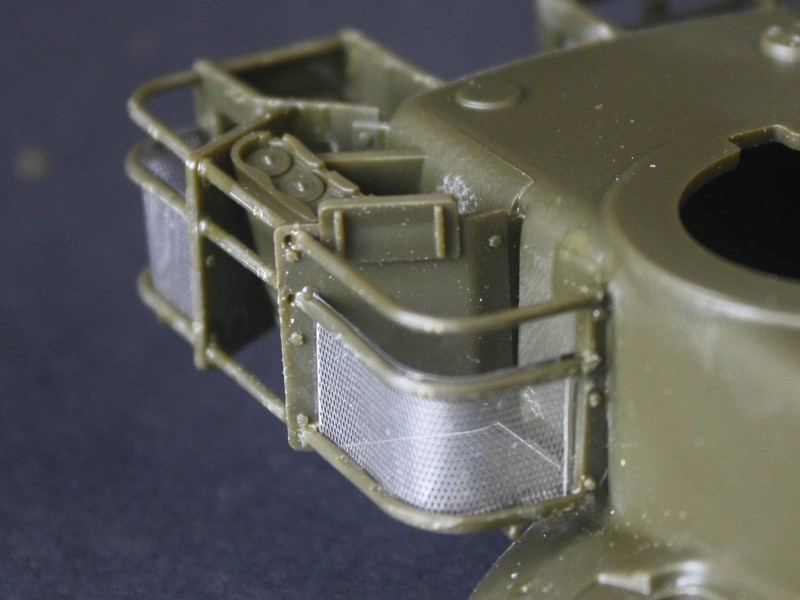
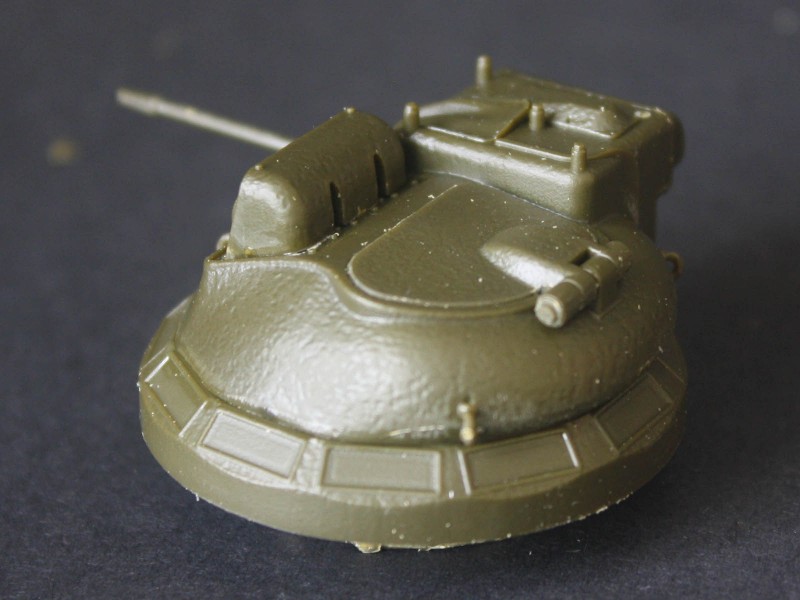
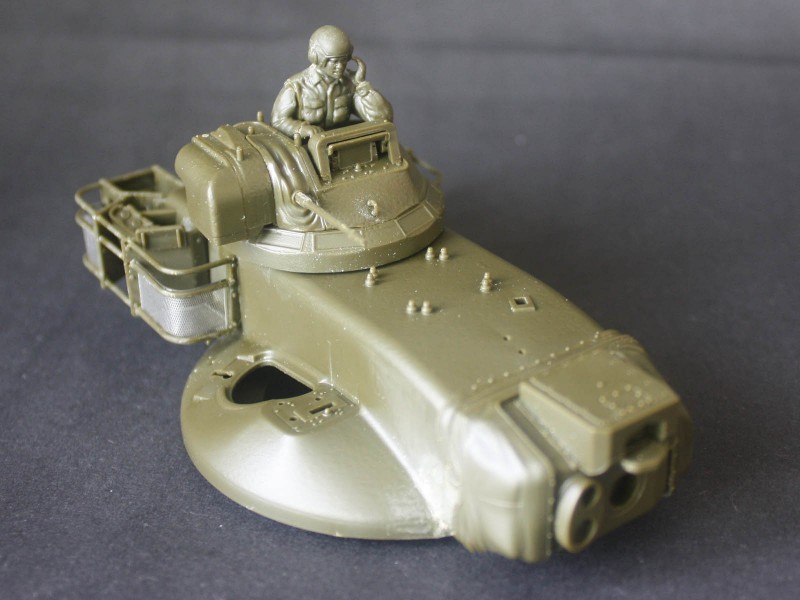
At the back the turret baskets are complicated multi-part assemblies. The instructions say to build them completely before fitting to the turret, but I prefer to get the main parts assembled and then tack them to the turret to let them dry - details like PE mesh and stowage brackets can be added afterwards. The baskets really look the part, but cry out for a ton of soft stowage! (There was very little room inside, and the basket is interrupted by the ventilator and smoke units, so what little space remained was usually piled high in period photos.) Since it would be a lot easier to deal with these baskets before adding any breakable details to the turret, I ditched the instructions and started my turret assembly by adding the gun mount parts and closing the turret halves before using the old stippled glue method to hide the joins under new cast texturing, and then did the baskets the rest of the turret assembly would follow after. However, the smoke launchers need to go on before the baskets, as they are effectively trapped. These launchers lack detail around the lids, where the real ones have hinges on the inboard side. I discovered that the PE screens are a very tight fit in the baskets, which is a problem since the dividers can be misaligned by half a millimetre and the screens then wont fit. The floors dont seem to be supported by much, and all of the PE is very bendy, so it takes the patience of a saint to assemble the stuff, but it really looks the business when it is done!
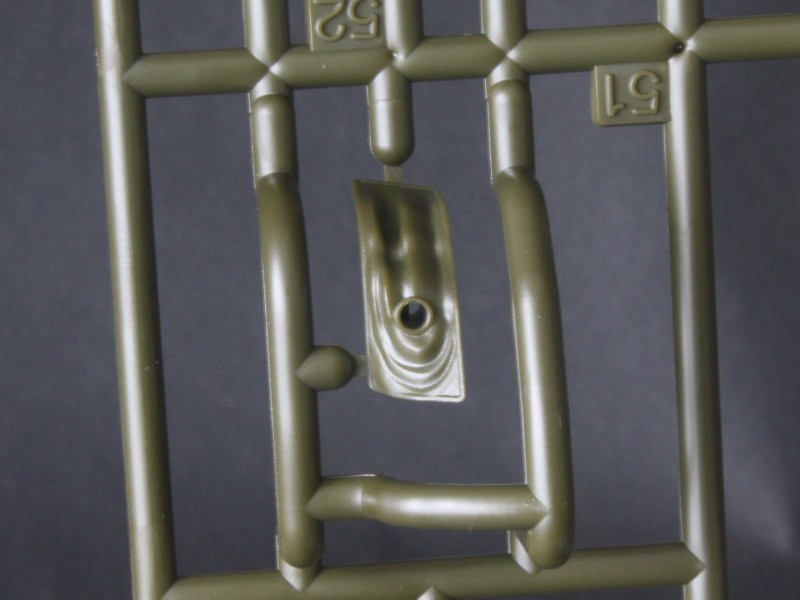
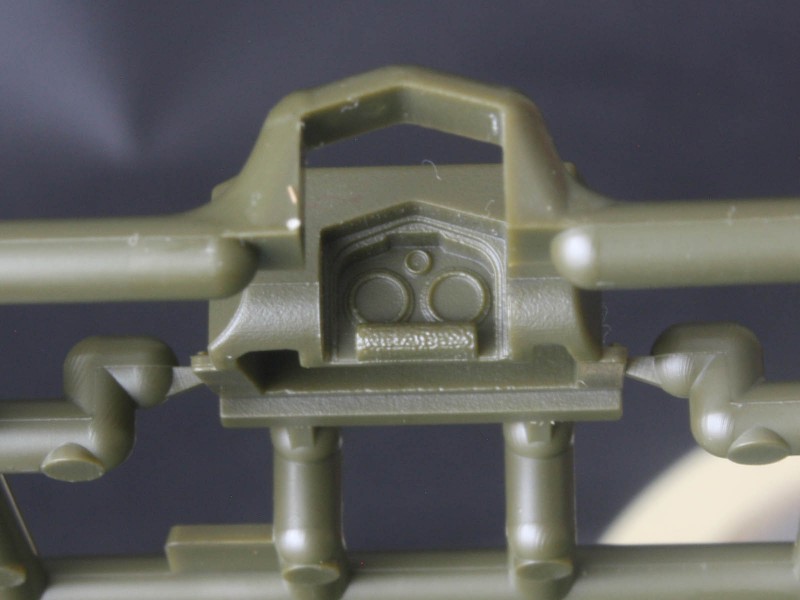
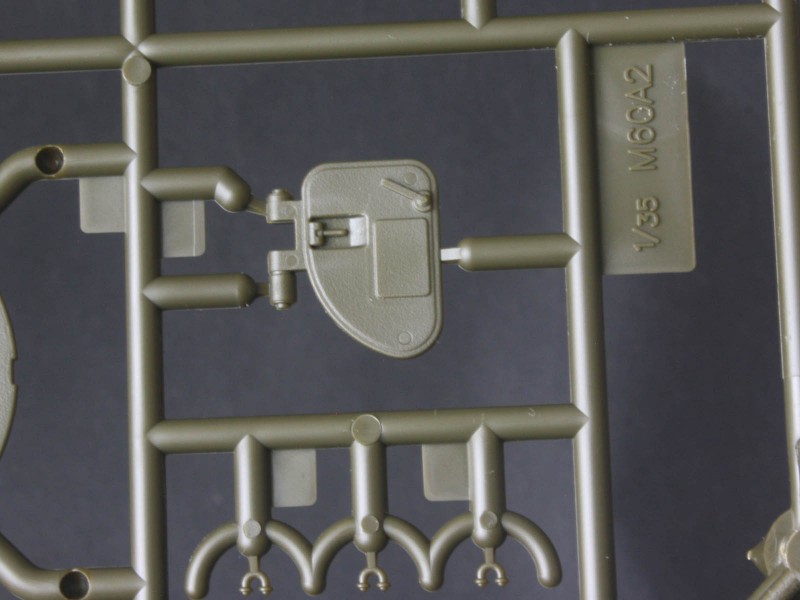
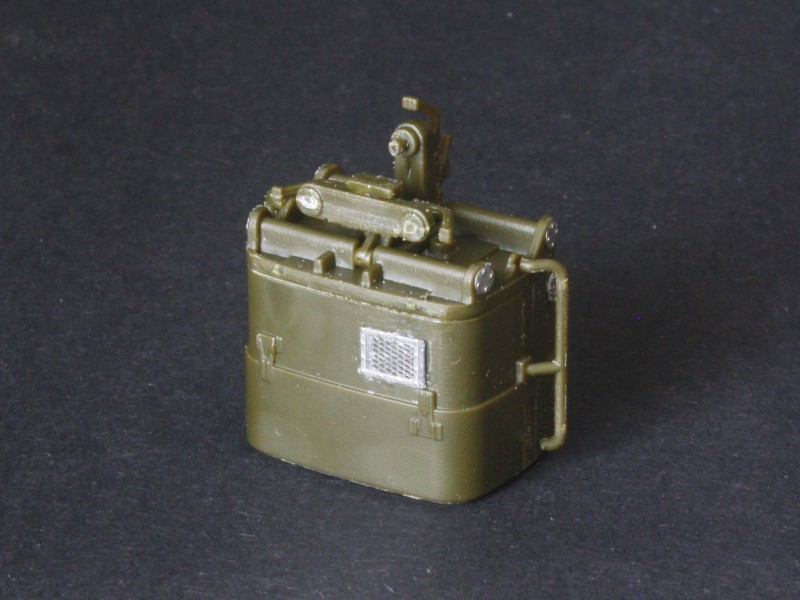
There is a decent rendition of the AN/VSS-1 searchlight that mounts on the turret left side, but it lacks the power cable. Worse still, the instructions do not say which way up the back plate goes. The kit has no clear sprue, but they give a sheet of clear material and a template in the instructions for the modeller to cut their own front glass this is a poor substitute in my opinion since the glass needs curved sides and has to fit exactly in a very snug space. Purists will point out the moulded-on horizontal support bars on the back of the searchlight, but these are compensated in part by PE end caps. In fact nearly all the PE left after the baskets are done goes on this searchlight.
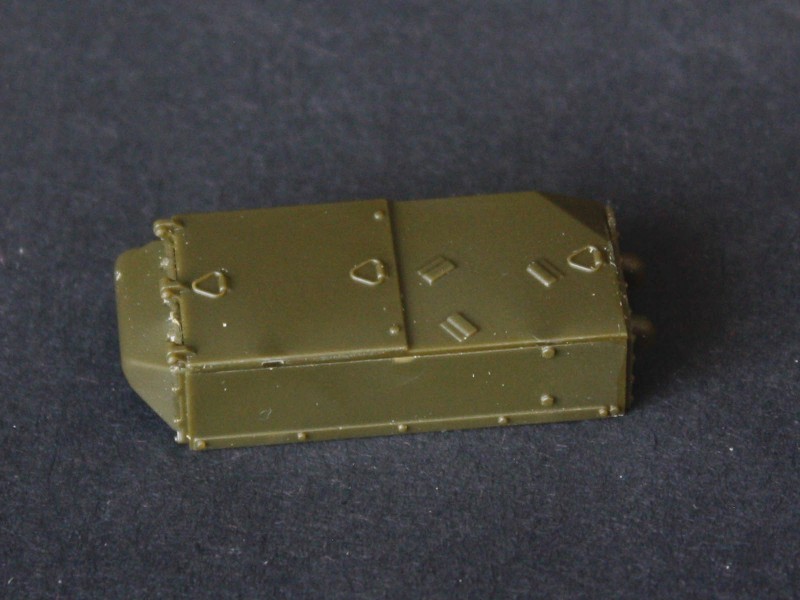
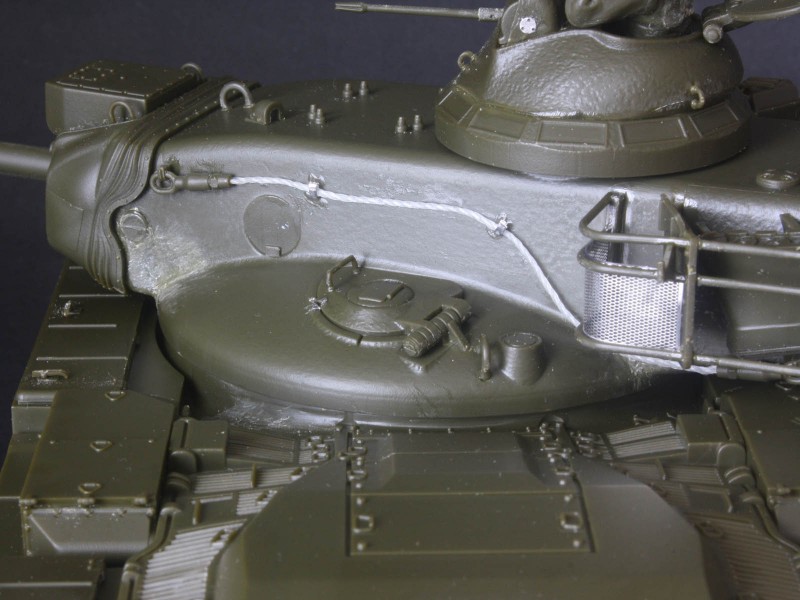
The Loader and Gunner hatches are nicely textured and have detail on the inside, but again lack foundry marks. At least they have separate handles. The periscope flap on the Loaders hatch is moulded shut, so adding a periscope would require surgery. The Gunners periscope lives in an armoured hood that had a curved front cover to protect it when not in use, but the kit part is offered in the open position only. The tow cable ends have the clamps moulded on, with the cable itself to be cut from the supplied string, which I coated with Gator's Grip glue to stiffen it and reduce the risk of "frizz". There should be intermediate cable support brackets on the turret, but these are absent I bent some from off-cuts of the PE fret. Also missing is the drip-bead under the rear of the turret, just where it curves under at the bustle a bit of 0.020 rod will do the job here. If you want to model a command tank (Platoon Leader or Sergeant) the one thing that does pose a problem is the lack of MX-6707 antenna base on the turret rear we get the cast antenna support pot in the right-hand stowage basket, but nothing to sit on top. Fortunately Adlers Nest makes exactly the right item in their 35037 set, Arms Corps Models offers a set of four as ACM-35871, and Live Resin offers it in LRE-35158. (Info on this was posted by Jim Kilian in a
recent thread.
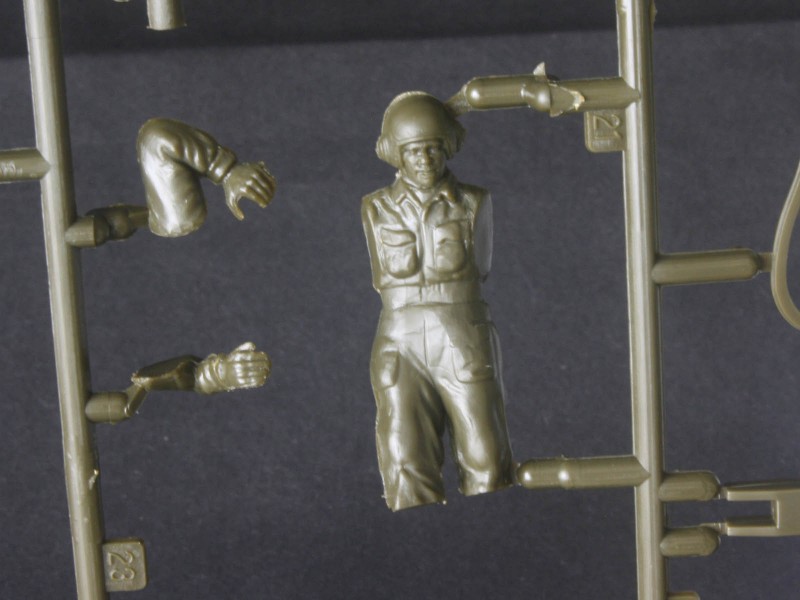
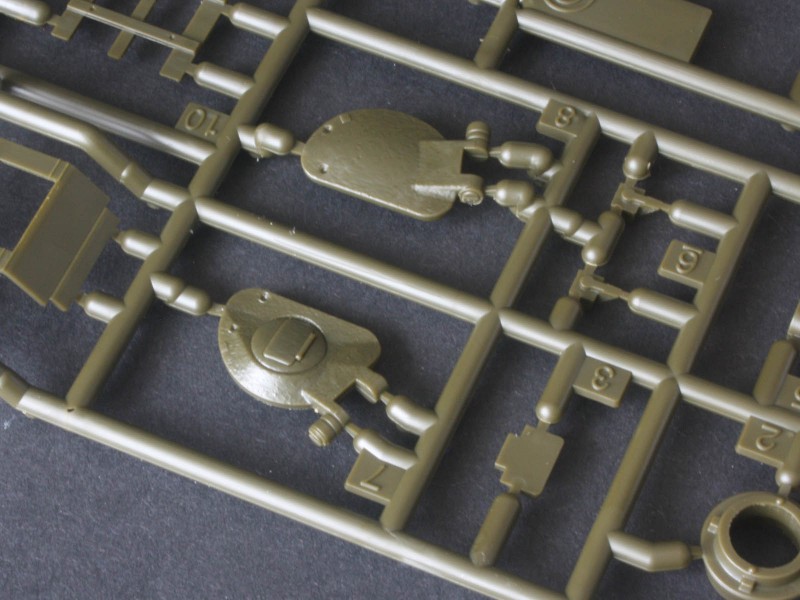
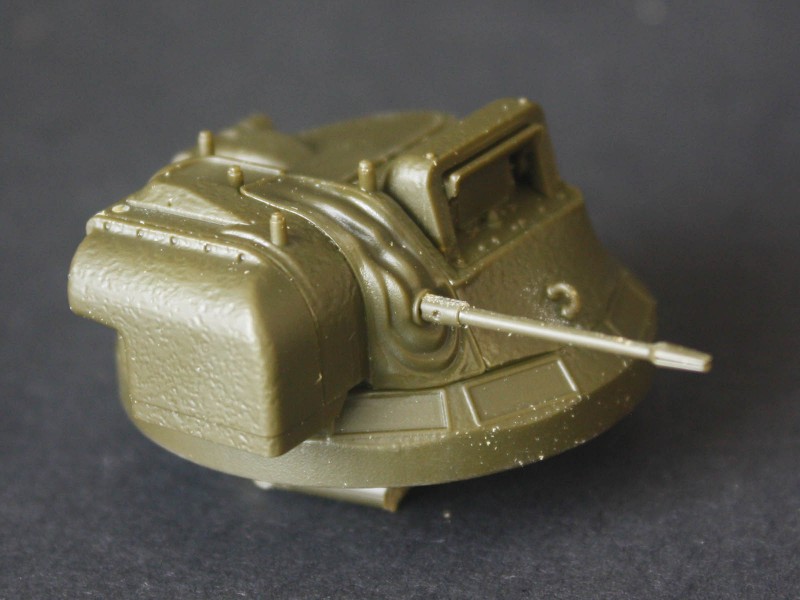
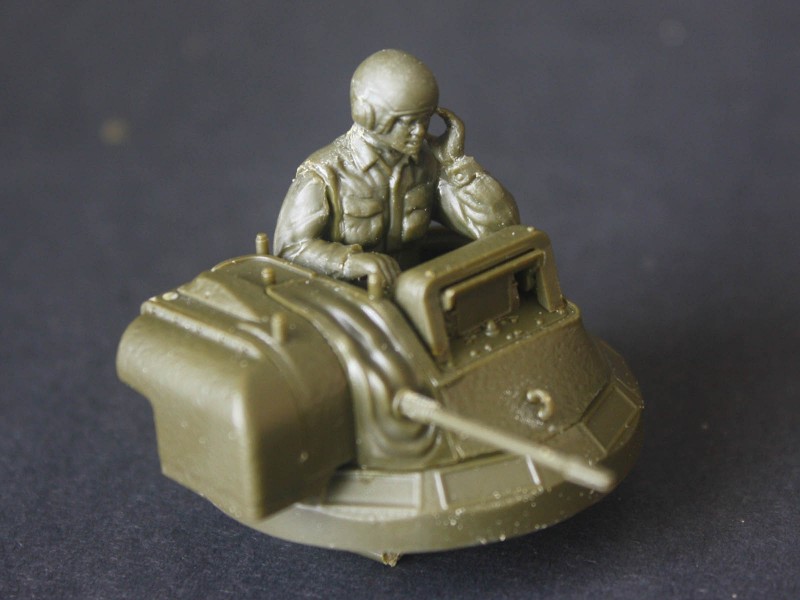
Up top, Academy has done a good job on the TCs cupola. The only quibbles are the dust cover that fixes the machine gun in place (it is a bit smooth, and many photos show these guns pointing upwards at rest), and the use of the mediocre barrel from the older M60A1 sprue instead of a new one with better vent-hole definition on the sleeve. There are plenty of better aftermarket 0.50cal barrels out there that can be substituted. The hatch has details moulded to the inside, but as the cupola has no interior to show off you might want to stick a figure in the hatch to block the view. Fortunately there is a ¾-figure commander on the M60A1 sprues that can be used, even if it is a bit clunky and old school. The instructions again seem to have been rushed, as they fail to mention that the TCs periscope hood has the curved front cover as a movable part (P44), and the side of the gun blister (P32) is likewise not called for despite being obvious.
instructions
These take the form of a fold-out A4 size booklet which is fairly clear, but the assembly sequence might put details at risk. I prefer to rearrange things to get all the big stuff sorted before adding delicate parts, and it is easy enough to skip around these steps. A separate sheet has the painting guide on one side, and the sprues drawn on the other.
paint and markings
There is only one paint scheme offered MERDC and two decal choices for tanks in 2AD or 3AD. This corresponds with the limited use of the vehicle in Europe before it was withdrawn in 1982, but it would be nice to have more than one vehicle number within each of these units. Of course in real life the vehicle could also be painted basic OD, and there were various versions of MERDC to suit Desert, Woodland, and Winter environments to choose from depending on season and location. It seems the 3AD markings might be incorrect see the thread linked above.
UPDATE
Looking at pics of the vehicle at Portola (The late Jacques Littlefield's now-defunct MVTF collection) it was marked with "3A32A I-A15" as per one decal option. It had no serial number on the side, but did have "ACES HIGH" and a fan of playing cards on the right side of the turret. It rode on the T97 tracks as supplied in the kit, and used the barrel without bore evacuator. Clearly Academy referenced this vehicle during research! Of course there is no indication that the markings or camo represent a genuine in-service tank - they could be a museum flight of fancy for all I know.
The other marking scheme, "2-1-67 B31", appears in Tankograd's book on the M60A2 & A3. This is a front-on shot of three tanks training in Grey Desert camo. It uses the tube with bore evacuator and rides on T142 tracks. Since the sides cannot be seen there is no way to know if either of the supplied serial number decals apply. I have seen a side pic of the vehicle marked "JK001L" on a training range somewhere - it has the tube without bore evacuator, but the tracks are too muddy to make out the type, and the unit markings cannot be seen in the photo.
conclusion
Academys new Starship fills a definite gap. The new turret is good, but the use of the old hull is a real let-down. And the lack of foundry marks is a missed opportunity that Academys rivals will no doubt capitalise on. For the truly fussy the turret could be mated to the old but decent ESCI/Italeri/Revell M60 hull to get a better model. Still, this first new kit of this iconic failure is a welcome improvement over the ancient Tamiya kit. I found mine for only £20 at that price the minor flaws still make it a worthwhile purchase.
For reference, there are some useful walkarounds on the web:
SVSM
PrimePortal
Military Today
US Army Germany website
Toadman's Tanks
Twinsv website
MERDC camo website


Comments