The M1 Abrams Main Battle Tank (MBT) is the namesake of the late General Creighton W. Abrams, former Army Chief of Staff and commander of the 37th Armoured Battalion. It is the backbone of the armoured forces of the United States military, and several of US allies as well. The purpose of this vehicle is to provide mobile firepower for armoured formations of sufficient capability to successfully close with and destroy any opposing armoured fighting vehicle in the world while providing protection for its crew in any conceivable combat environment. It is capable of engaging the enemy in any weather, day or night on the multi-dimensional, non-linear battlefield using its firepower, manoeuvre, and shock effect. The Abrams Tank System synchronizes its high tempo, distributed manoeuvre via its digitized situational awareness and the fusion of onboard and remote battlefield sensors.
Production of M1A1 tanks for the US Army is complete. Over 8,800 M1 and M1A1 tanks have been produced for the US Army and Marine Corps, and the armies of Egypt, Saudi Arabia and Kuwait. Production of new M1A1 and M1A2 Abrams tanks is in its final phase for Foreign Military Sales. Three versions of the Abrams tank are currently in service the original M1 model, dating from the early 1980s, and two newer versions designated M1A1 and M1A2. The M1A1 series, produced from 1985 through 1993, replaced the M1s 105mm main gun with a 120mm gun and incorporated numerous other enhancements, including an improved suspension, a new turret, increased armour protection, and a nuclear-chemical-biological protection system. The newer M1A2 series includes all of the M1A1 features plus a commander's independent thermal viewer, an independent commanders weapon station, position navigation equipment, and a digital data bus and radio interface unit providing a common picture among M1A2s on the battlefield.
Contents
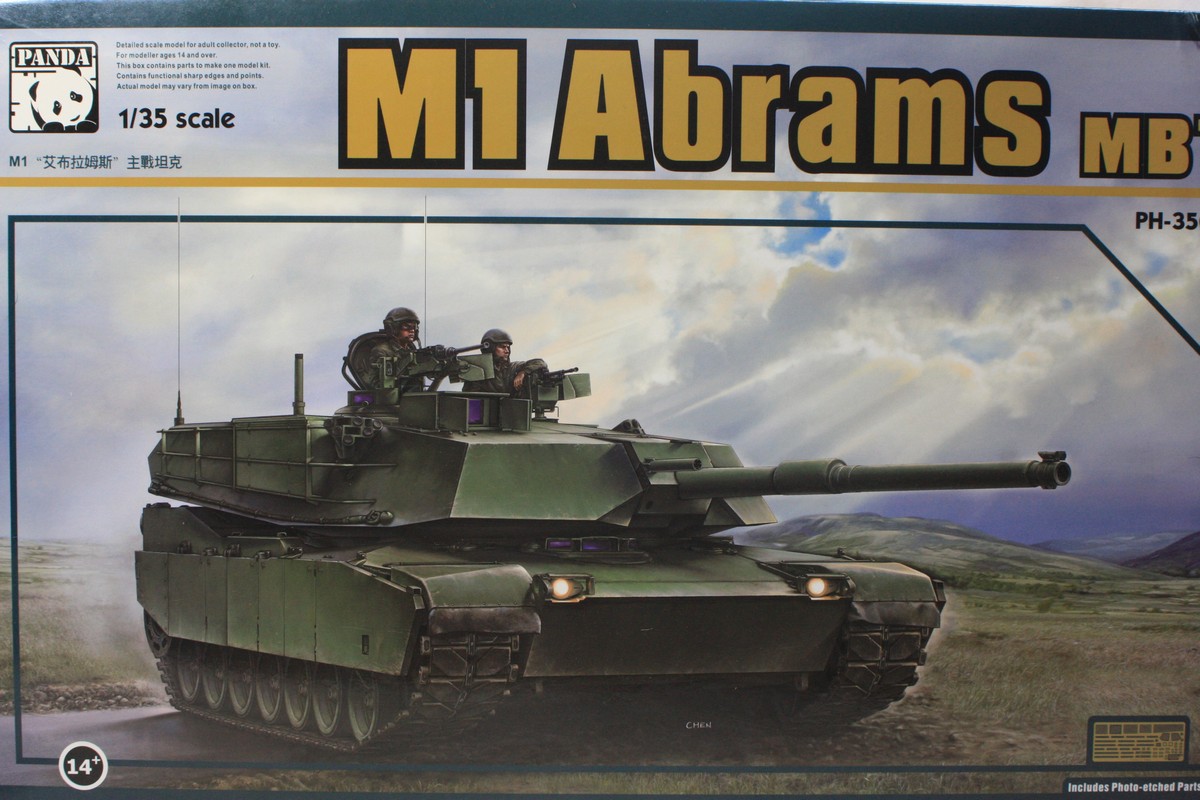
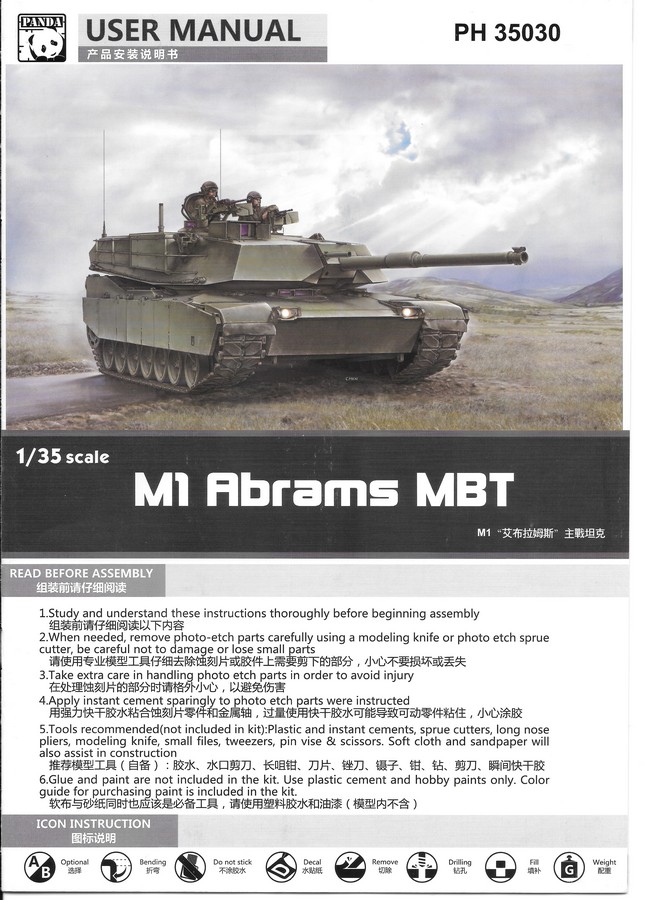
Pandas M1 Abram MBT comes in a solid cardboard box with a lift of top. The artwork on the top of the box is very eye catching with the main tank in what looks like it is on the Aberdeen proving and training ground in Maryland with sun rays just breaking the clouds.
The main part of tank
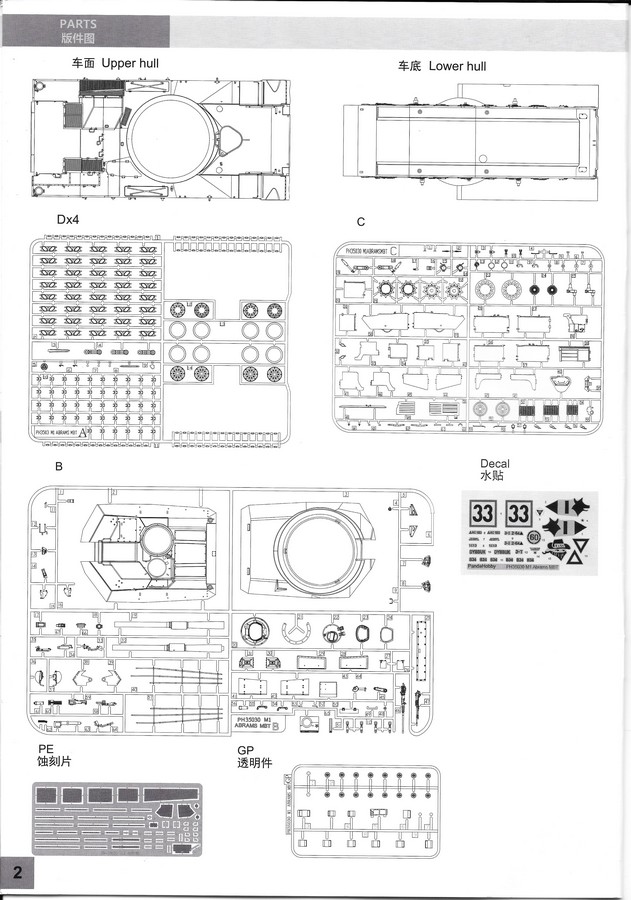
1. Six sand coloured sprues.
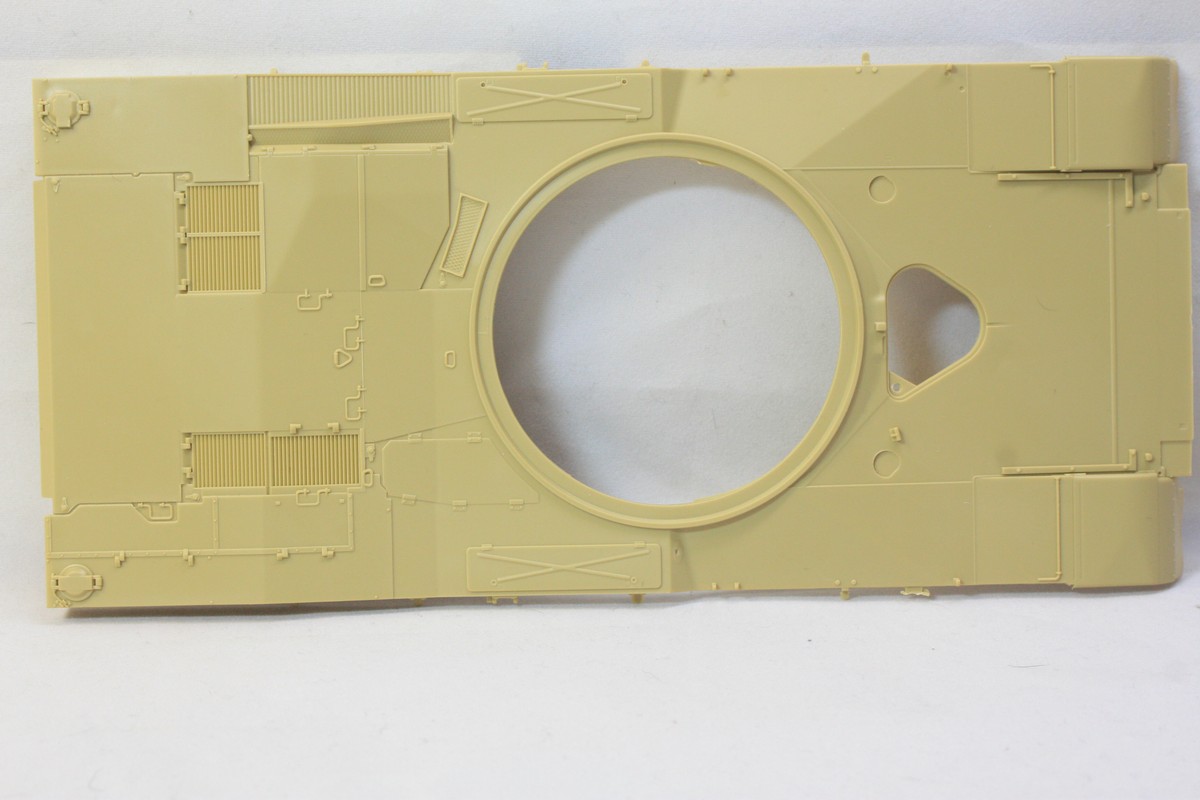
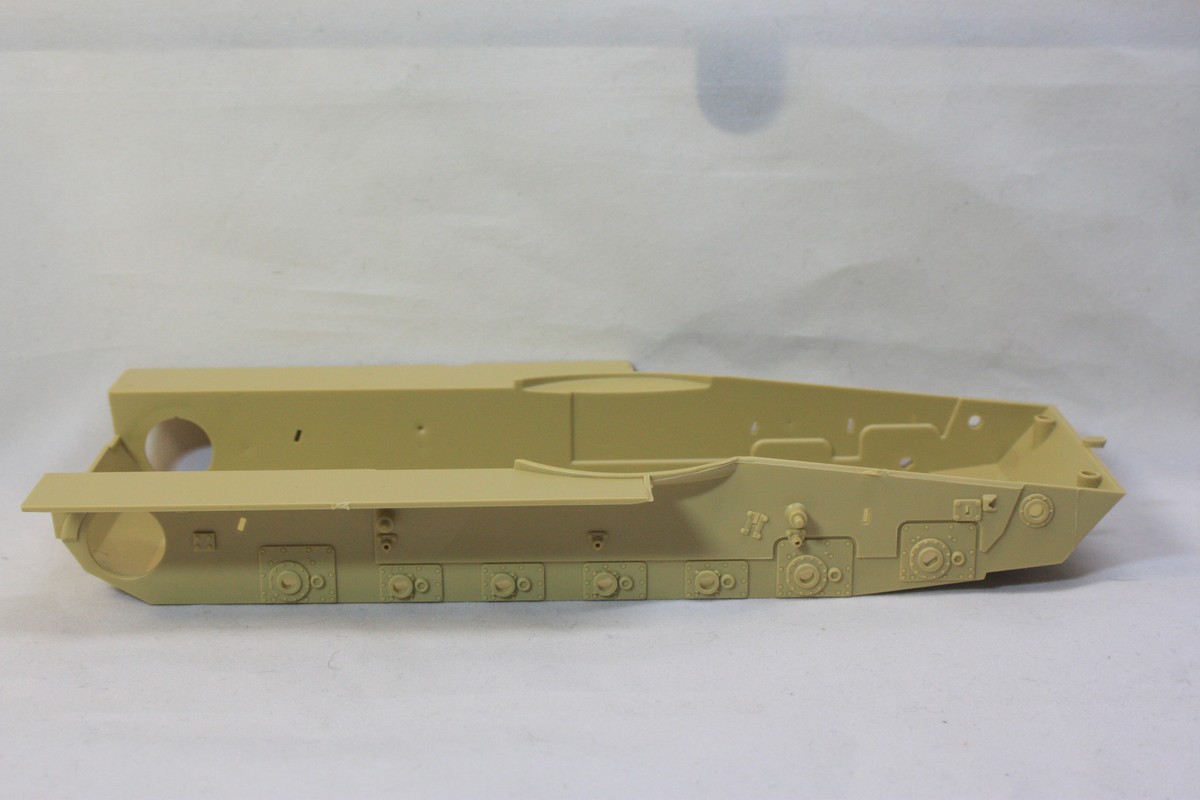
2. 2 sand coloured parts that make up the bottom of the hull and top of the hull
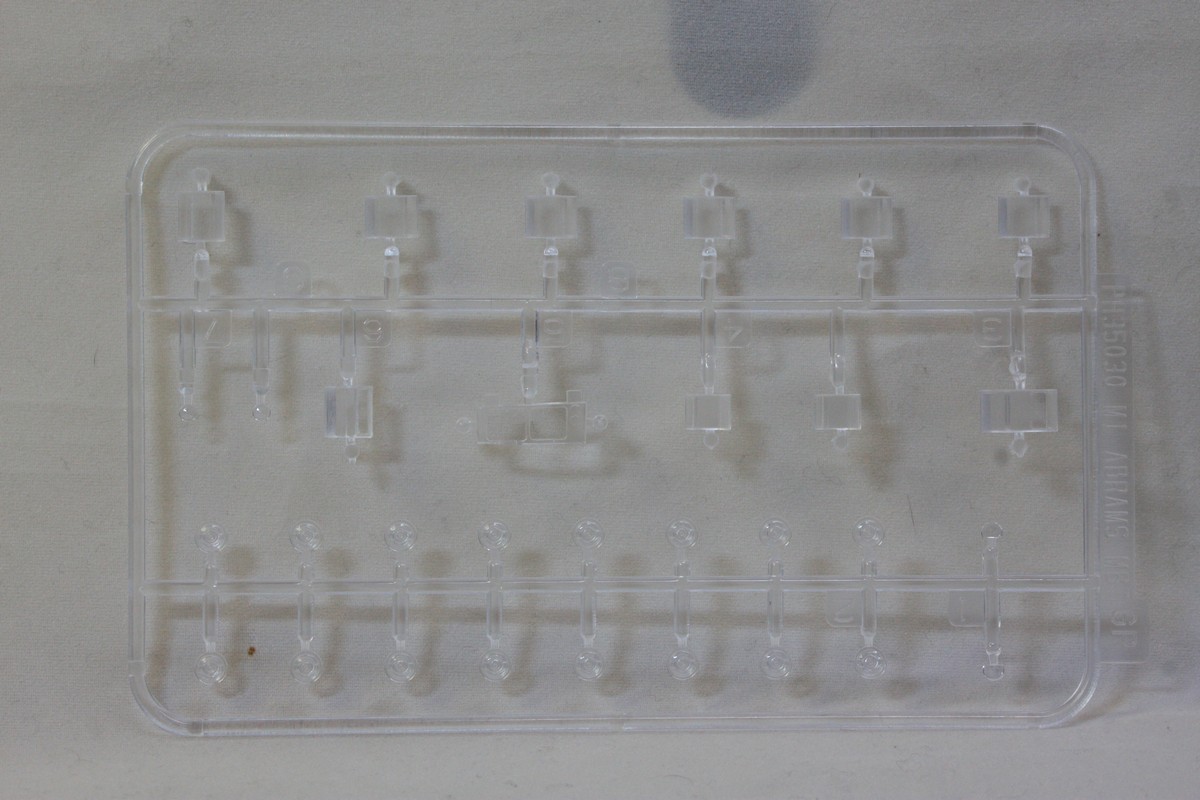
3. 1. Clear sprue for the lens and periscope
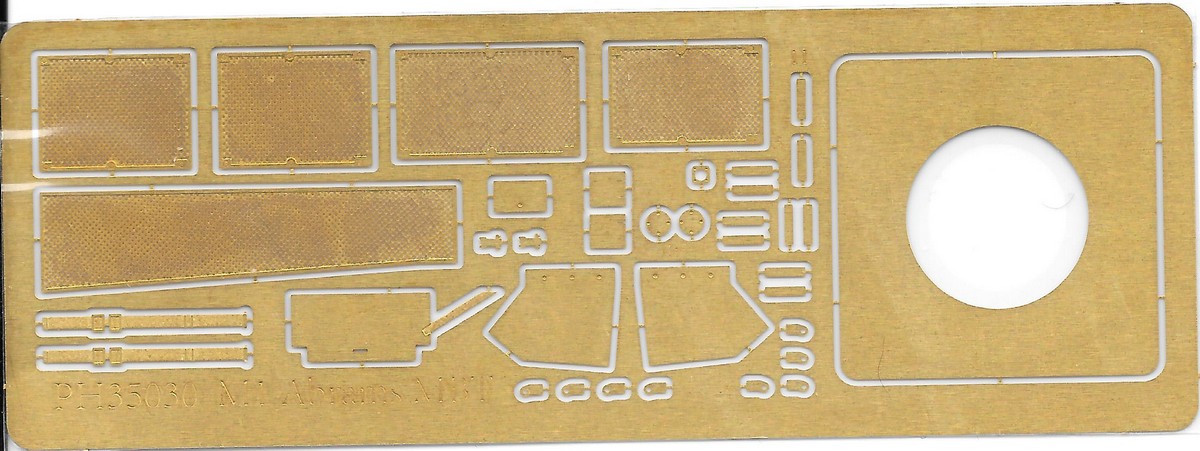
4. 1. Medium Photo-etch sheet
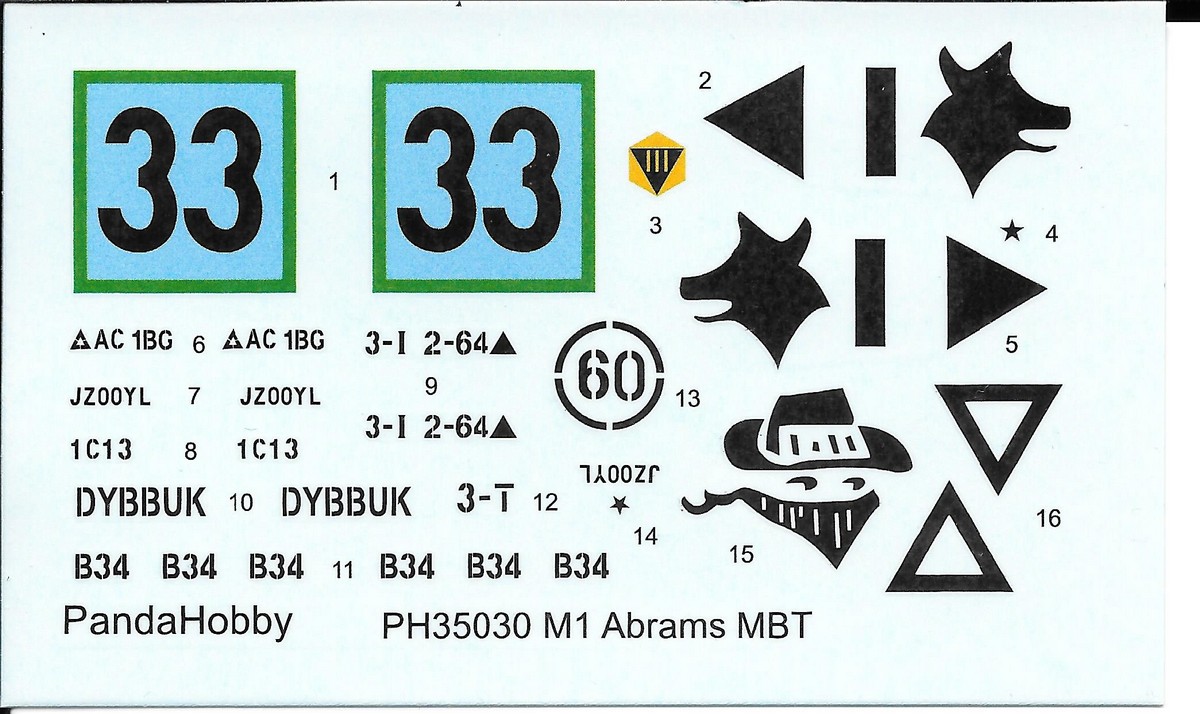
5. 1. Small decal sheet for two options
6. 1. wire
7. 1. Colour profile (double sided)
8. 1. Instruction booklet.
Review
I am a modeller that really likes the first impression when opening the box on a new model kit, with all the Abrams tanks on the market, I was a little surprised when I learned that Panda hobby had decided to release one too.
At first, I looked at the number of sprues and thought surely something is missing here? Having seen some of the other alternatives out there with boxes crammed full of plastic sprues where you end up with another box full of parts not used.
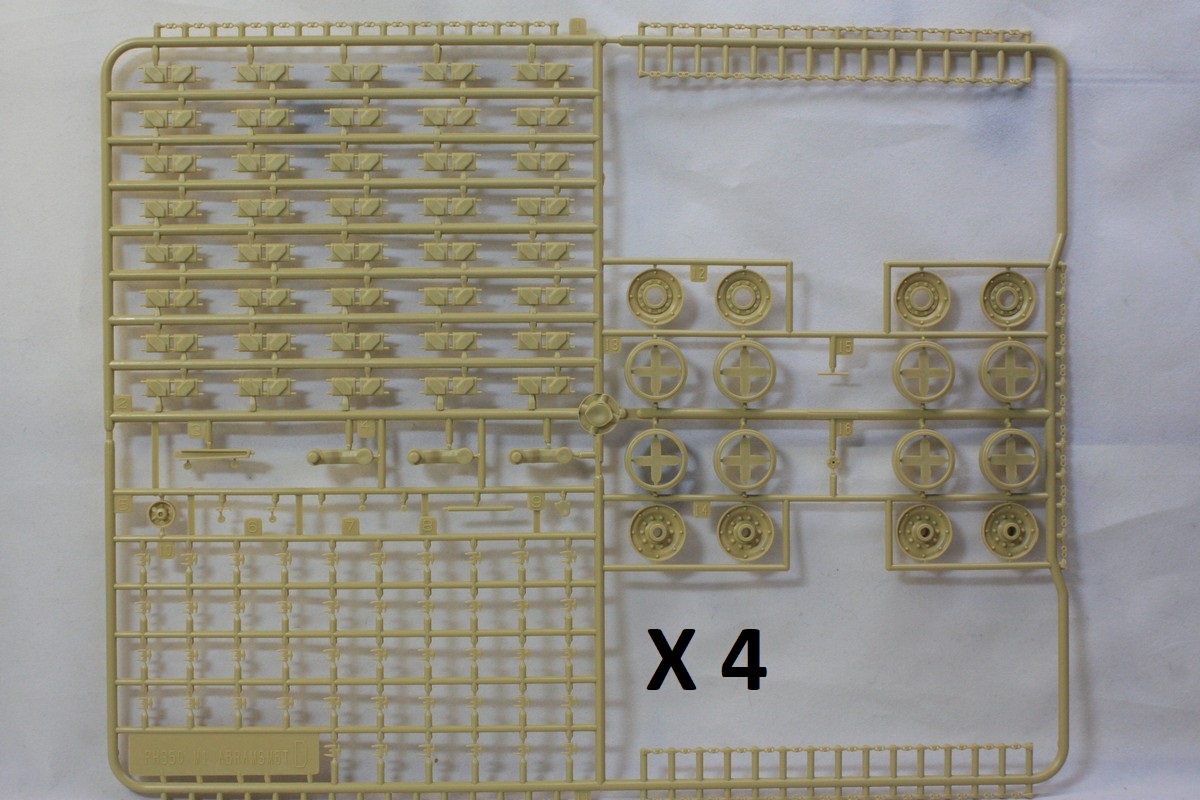
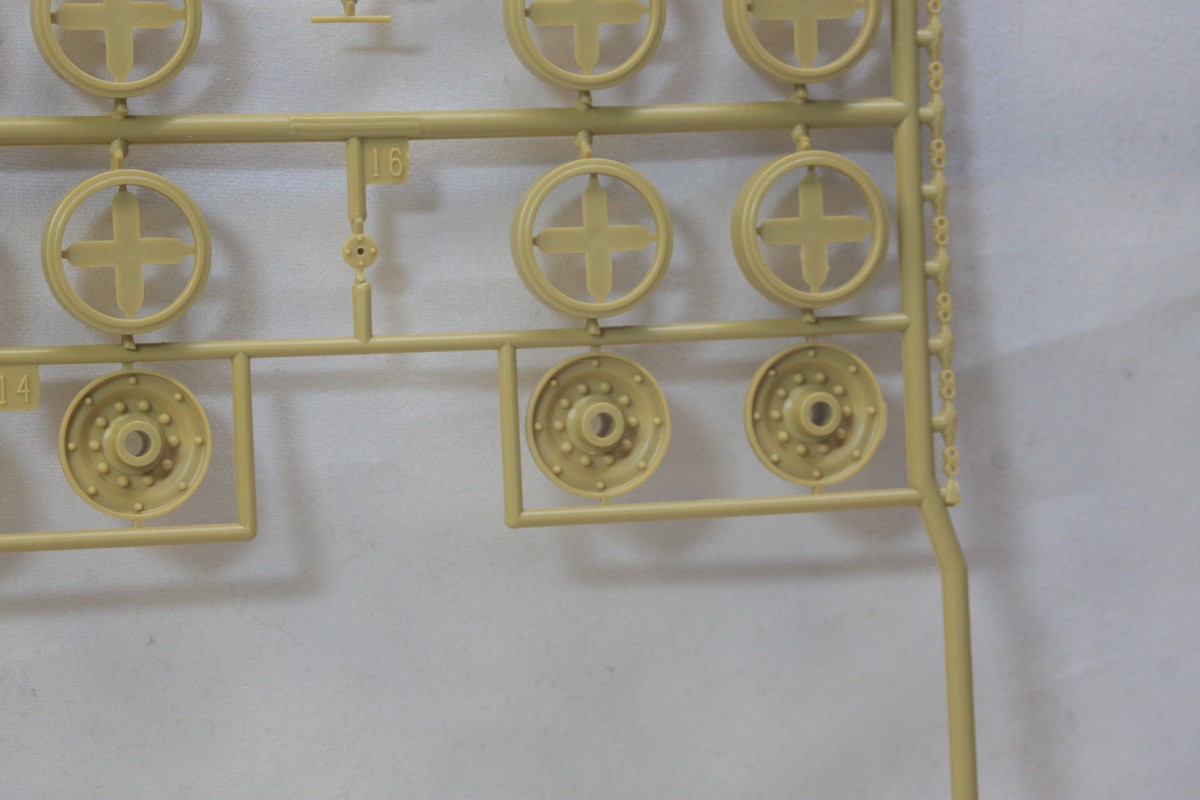
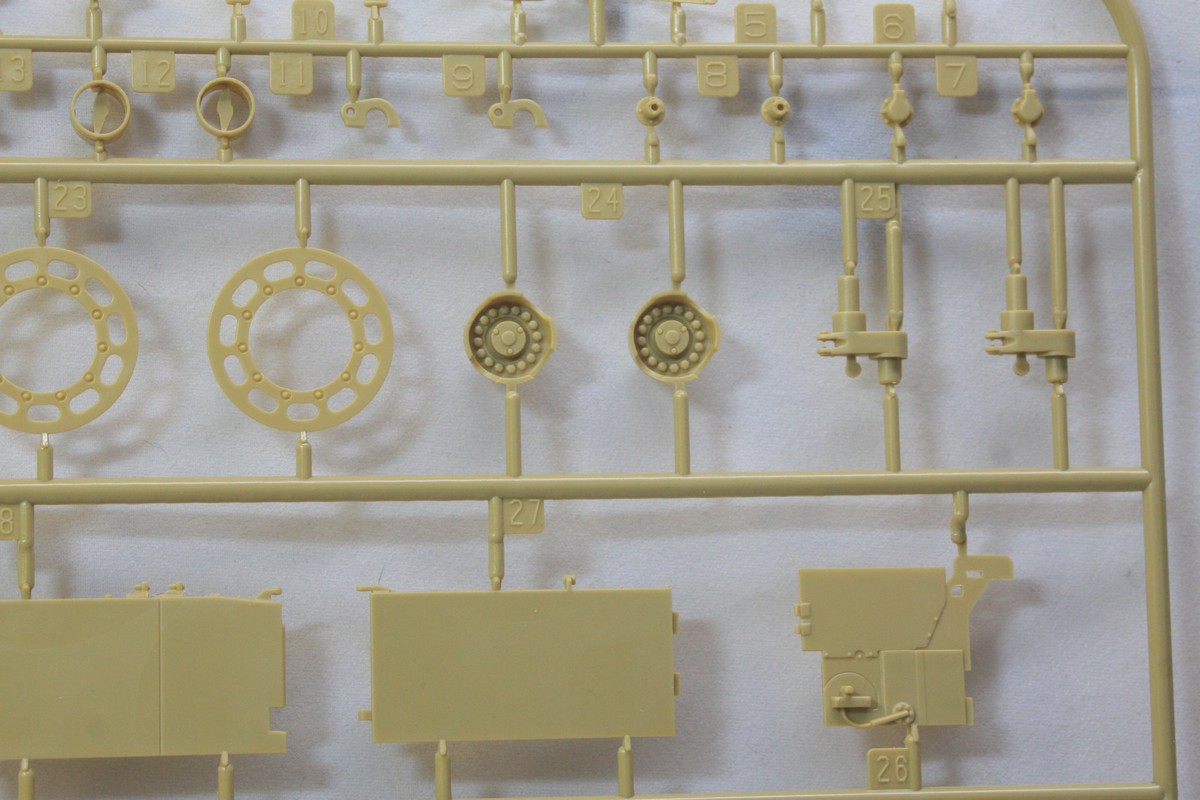
So onto the review, the first sprue that I picked up were the wheels, tracks and torsion bars. The wheels, now I like what Panda Hobby have done here with the normal front and rear side of the wheel both have good detail on them they come with a clear hub! again the detail is good under magnification. Then you have two road tyres that sit over the front and back wheel.
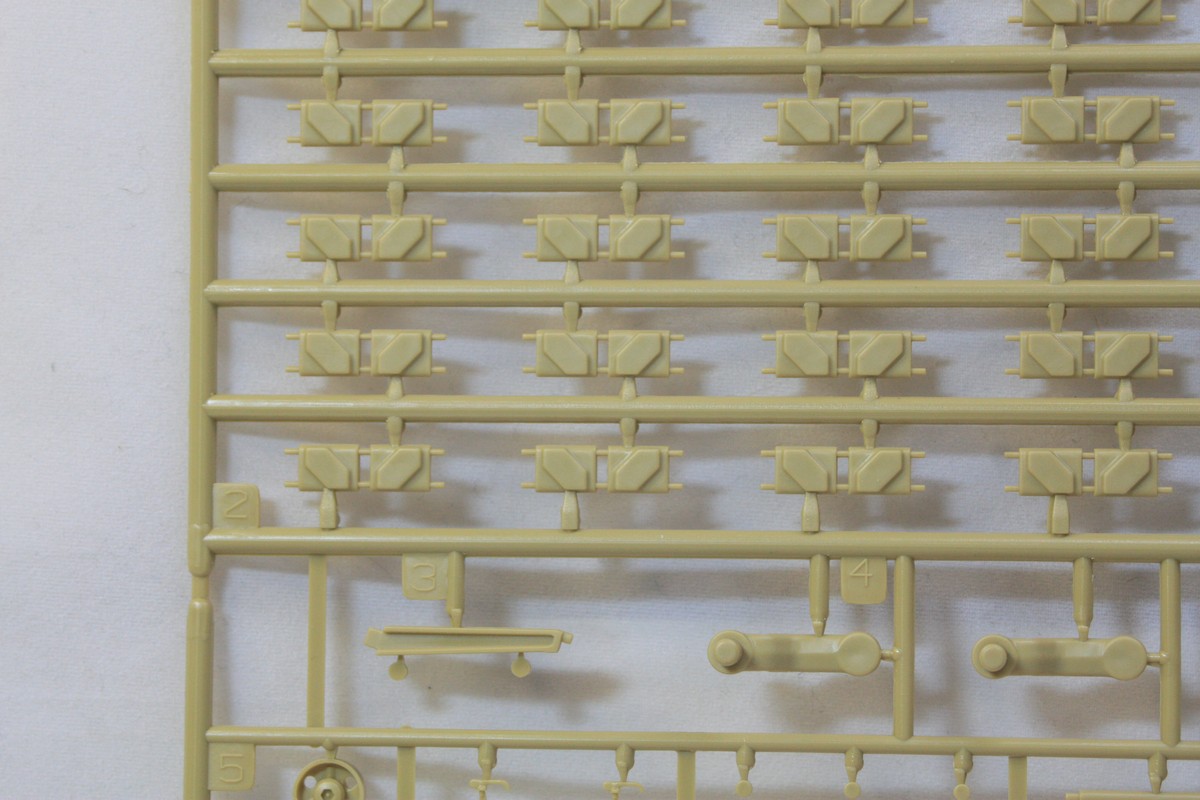
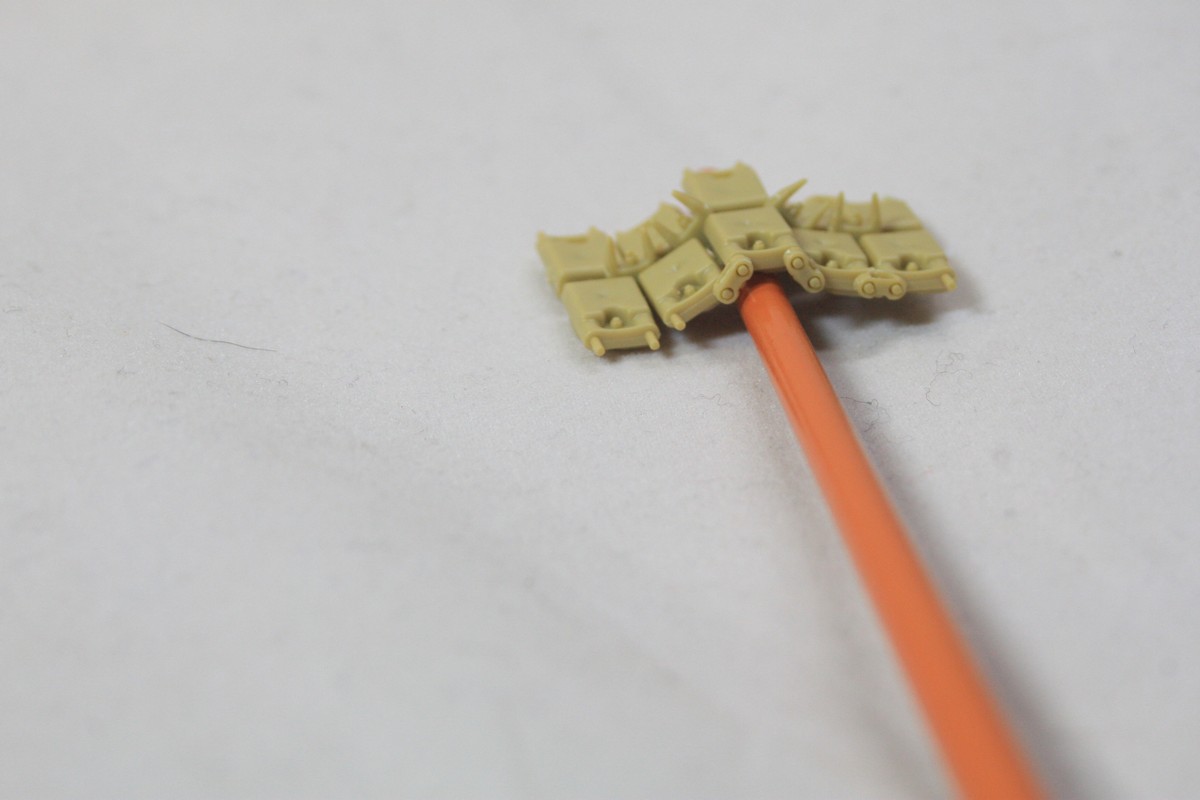
On the same sprue is the parts for the tracks my first thought was are you kidding me, being an XL modeller and having those chubby little fingers I was dreading making these!
So in for a penny, in for a pound, I decided I would have a dry fit of the tracks just to see how easy or difficult they were going to be. It was not as difficult as I thought it would be, however they are fiddly, to say the least.
What you get is the main part of the track with rubber road pads on, you have separate guide horns that click into place in between the middle of two individual tracks this holds them together. Then smallest little eyes (in twos) that sit over the ends of each individual tracks to stop them splaying when you go over uneven ground. (please check out the pictures to see this process)
Once together they work really well and certainly will give you slack over the return wheels and look good if on an uneven surface (Yay real working tracks)
Please note that cutting these very small parts of the sprue is, in itself fiddly and you will need to be careful. I am lucky enough to be testing some new sprue cutters that I collected from Brevco Modelling at Telford for the internationals these are not cheap but they really are the best cutters I have ever used.
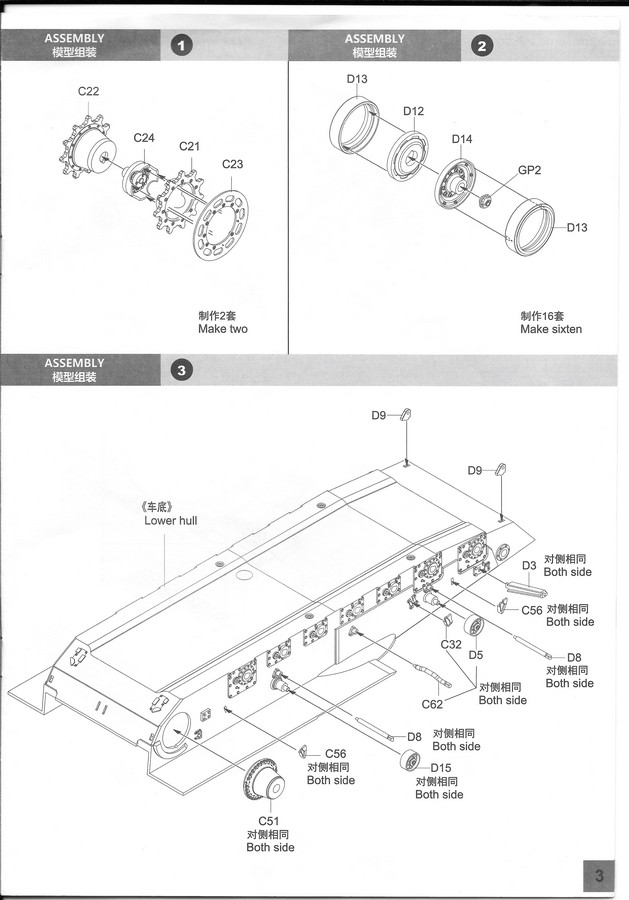
Another hit with me was the torsion bars and the fitting of them to the sides of the lower hull, now usually they say that they are moveable when actually the fit is so bad that you have to glue them in place so no movement! But the fit for these was good and I actually got movement so far so good.
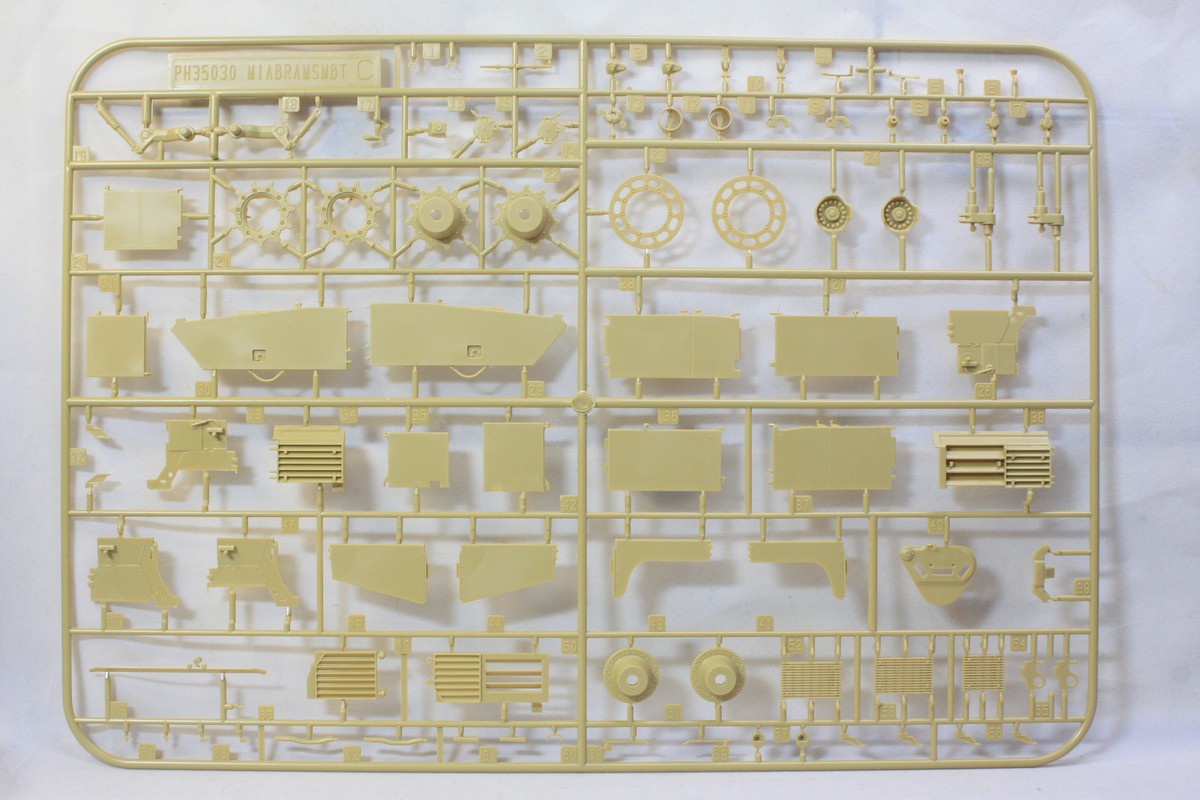
The detail on the lower hull is good, it is made up of panels for where the torsion bars will fit and connect to the tank, which gives it that feel of realism. There are a couple of attaching arms that need to be cut off and filed down on the lower and upper hull, where the lower and upper hull was attached during the manufacturing process.
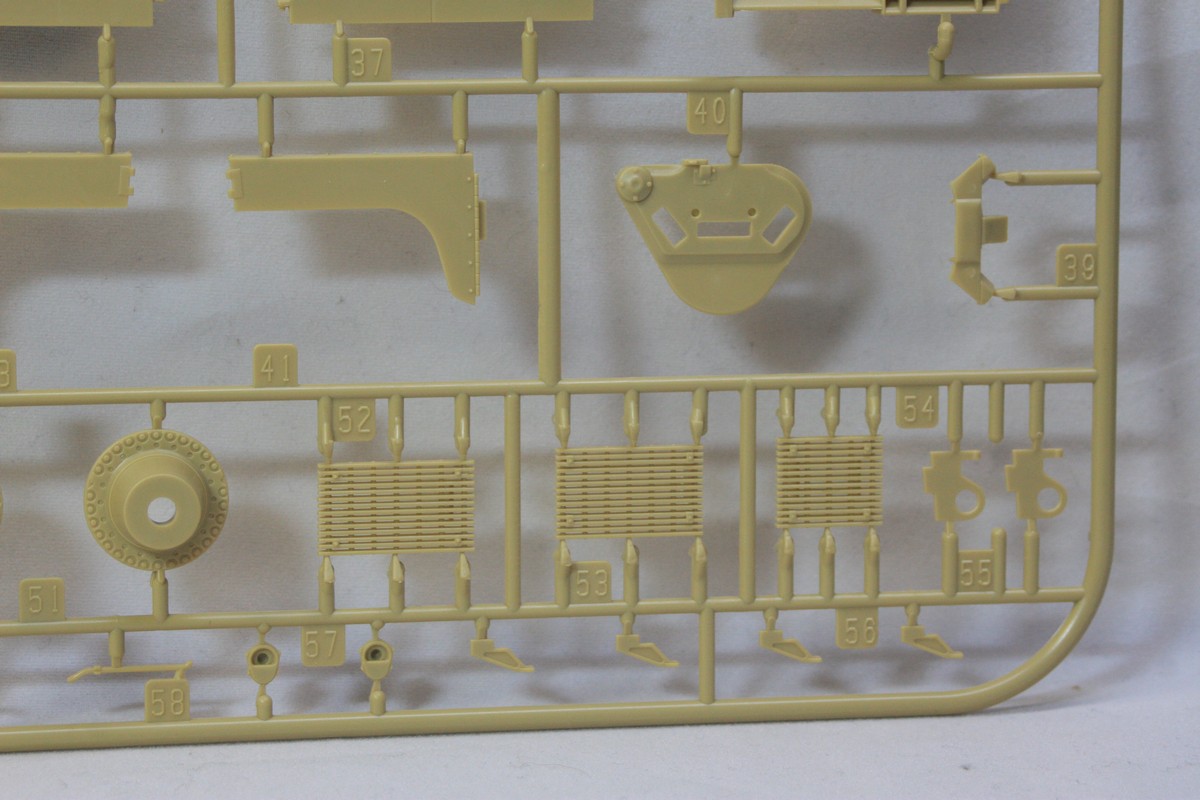
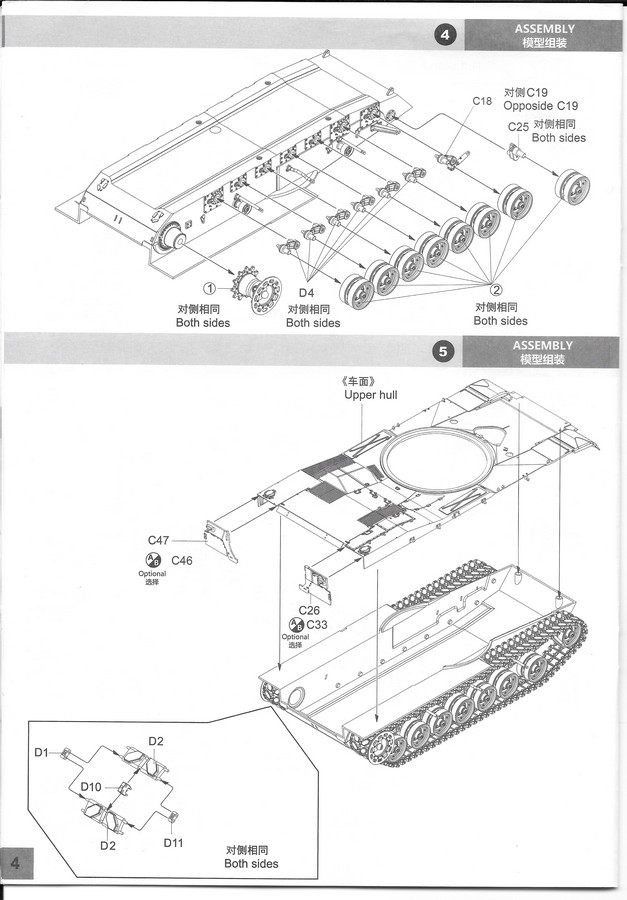
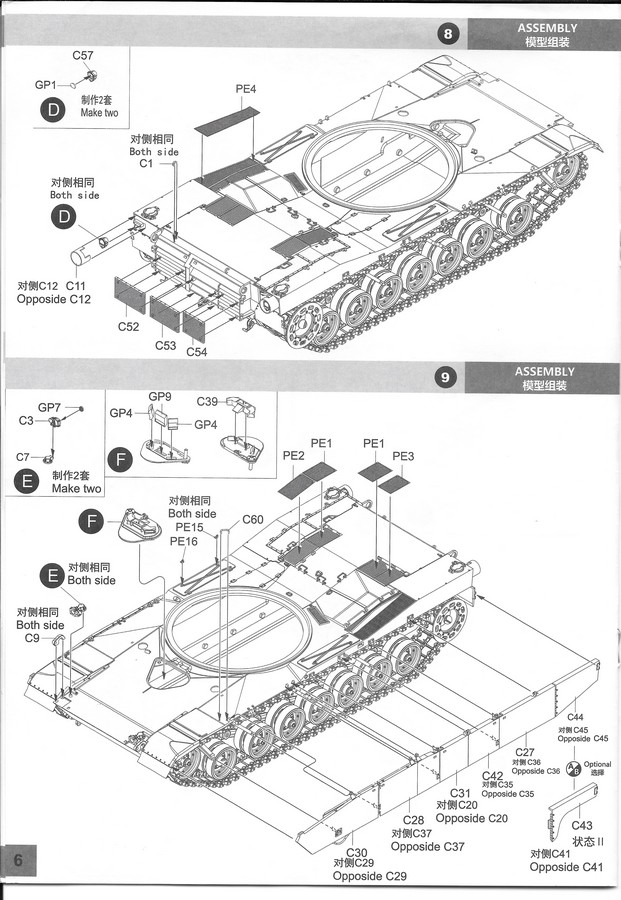
The out riggers for the stabilising of the armoured side panels designed to protect the tracks and wheels are good, as is the fact that each panel is individual rather than just one long moulded piece. Another really nice and authentic touch is the ability to have one or more of the panels attached in the open position, should you wish to display the tracks or thinking of a diorama scene.
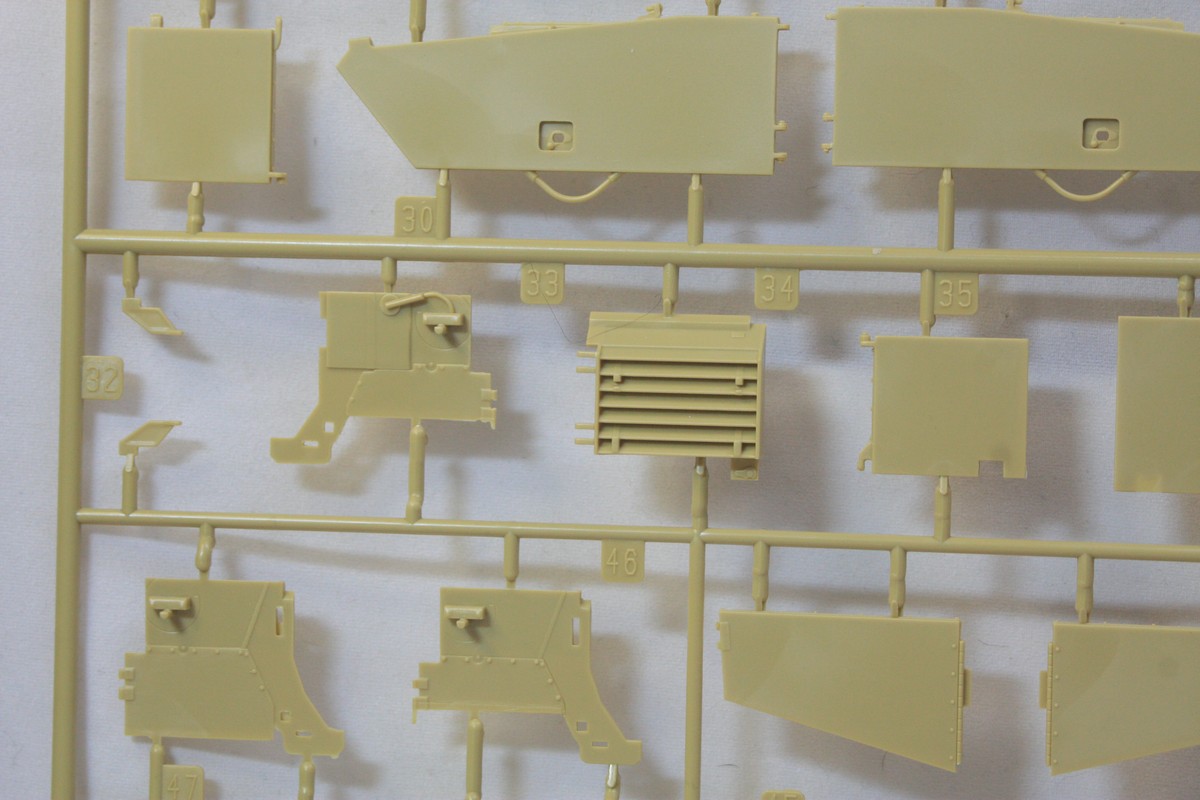
The upper hull has one or two really nice touches about it one is the inclusion in the mould of the kit, rubber front mud guards that look worn and bent, Panda Hobby have included some photo-etch in the form of covers for the air in takes and engine filters.
The surface detail on the upper hull is good with all panels and moulding that look to be in the right place and at the right angles. The rear of the upper hull has some nice detail in the louvers and filters around the engine compartment. The driver's hatch comes with an array of periscopes and can be left open or closed.
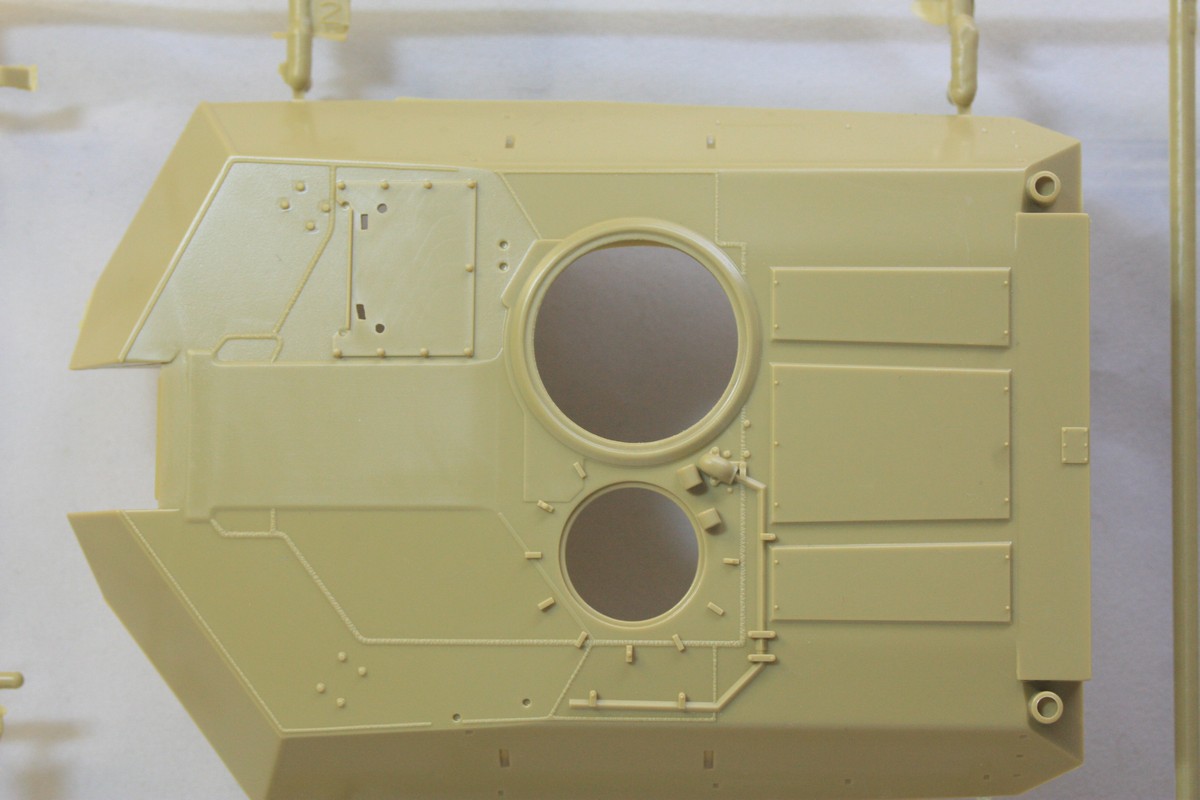
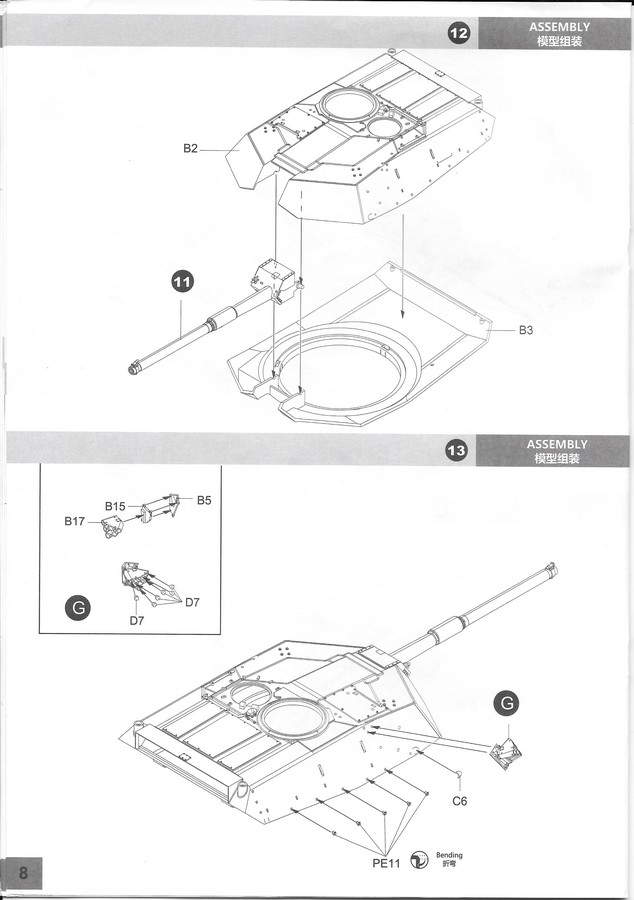
The turret at first looks a little simplistic until you start looking at the build process it becomes very clear that Panda Hobby have done a really good job of adding some really nice realistic parts to this kit, like the grenade launchers which in most kits comes as a whole molded part, this one actually has six small heads that fit into the grenade launcher for the.
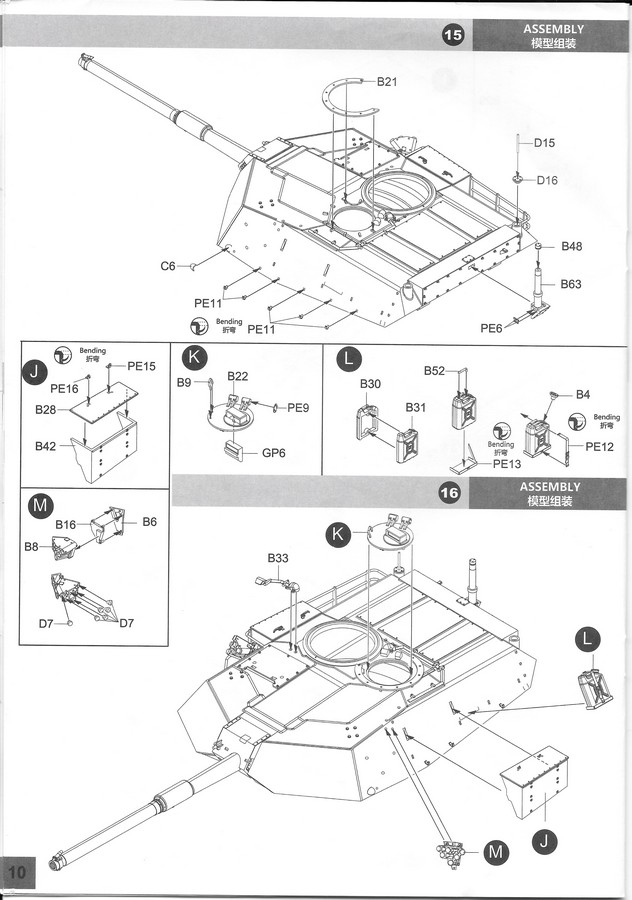
Some photo-etch hooks albeit small and potentially fiddly to bend, are there for holding the tow cable.
The turret carries some nice detail with raised panels, wire conduit and raised mound around the commanders hatch.
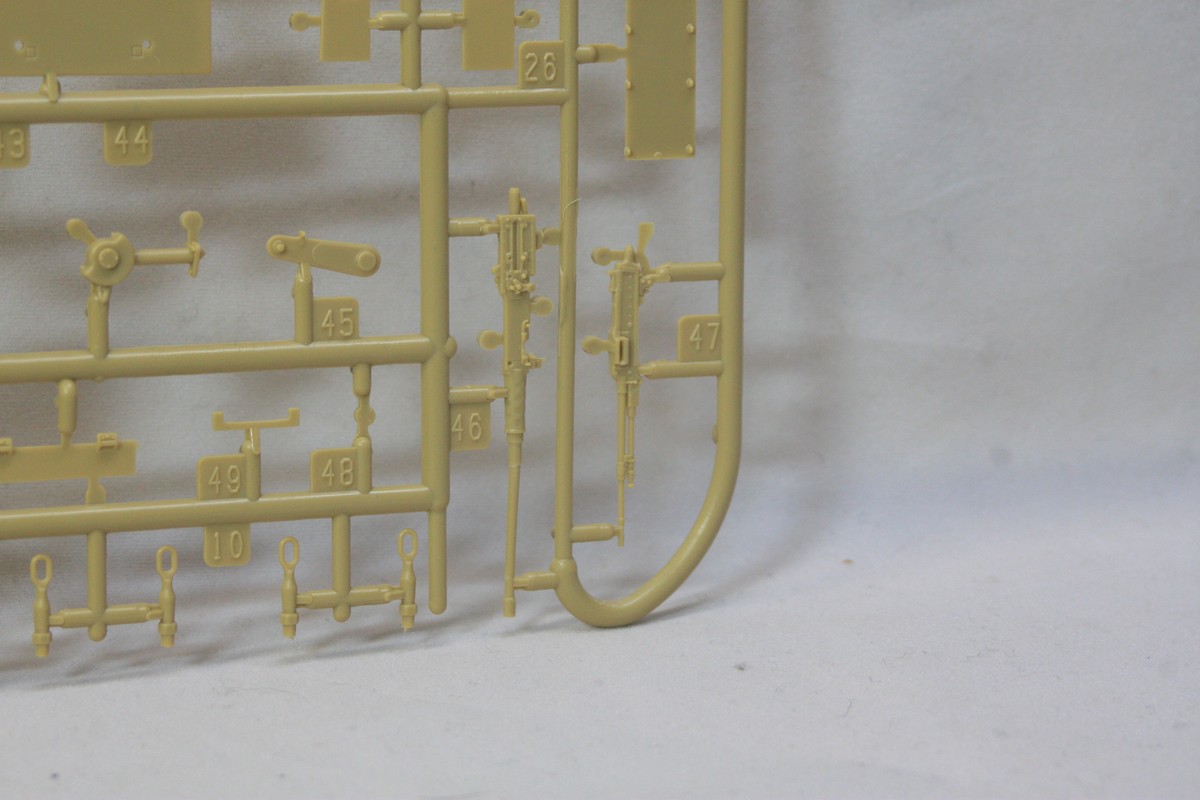
The commanders copula has various periscopes and a mount for the very detailed 50 calibre machinegun that attaches to the commander's weapons station.
The other secondary weapon is again well detailed 7.62 calibre machinegun which is mounted on the loaders skate mount.
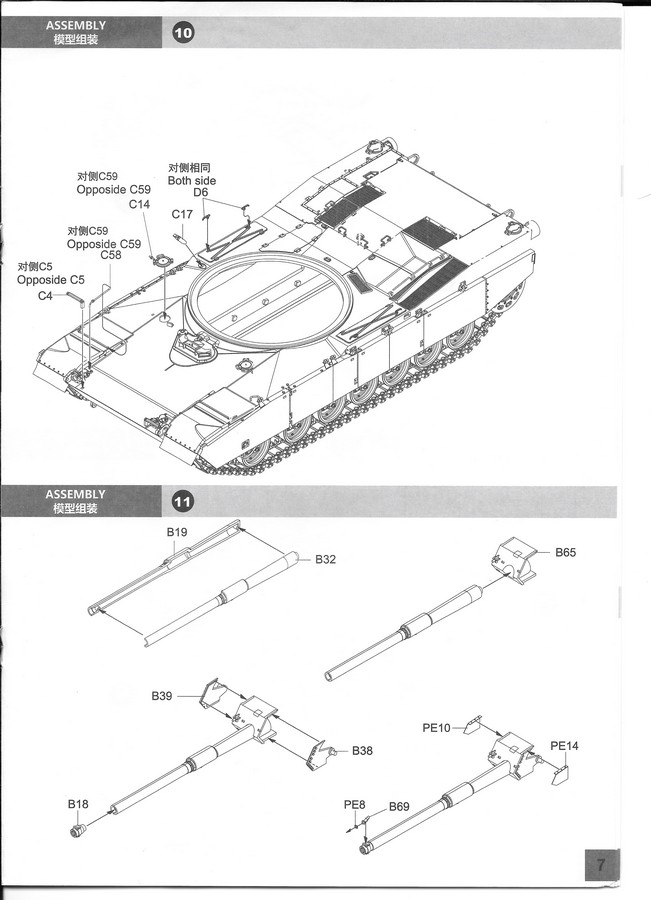
The main gun is the 105mm smoothbore gun is moulded in two halves with the aim aperture as a separate part
When finished I am sure that the turret will look very good and well detailed with antennas up along with the storage basket, fuel cans and storage boxes.
There are some blemishes on the hull a couple of marks that look like some kind of seepage during the manufacturing process though none of this looks likely to cause any real problems. Also, there are some injector pin marks that will need to be dealt with especially those underneath the top of the hull where the tracks run and are possibly impeded if not cleaned.
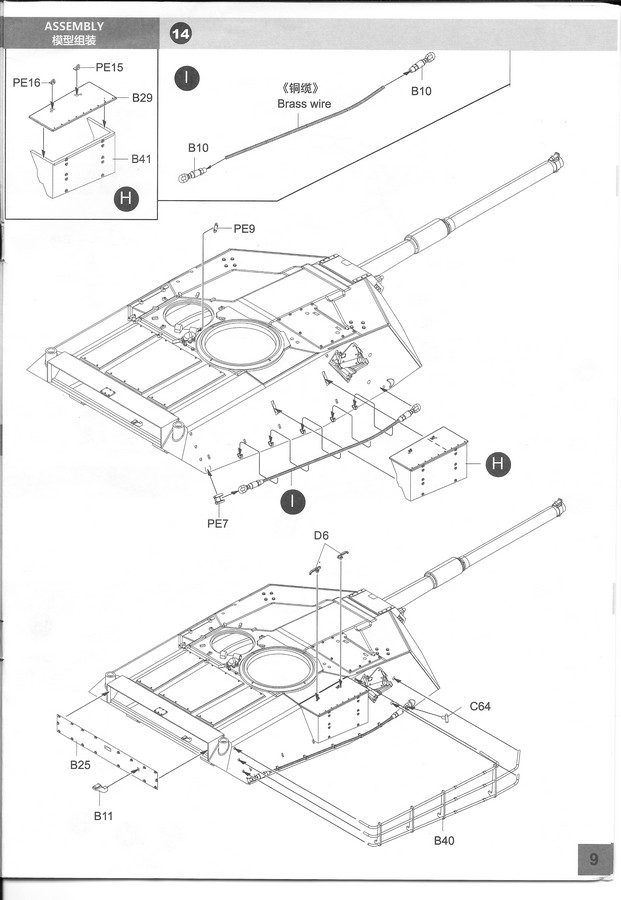
The instruction book looks straightforward and is twelve pages, the build process runs from page three to page twelve and breaks down to twenty build parts, painting is for four options which are not provided the detail for the units, I do however believe them to be as follows
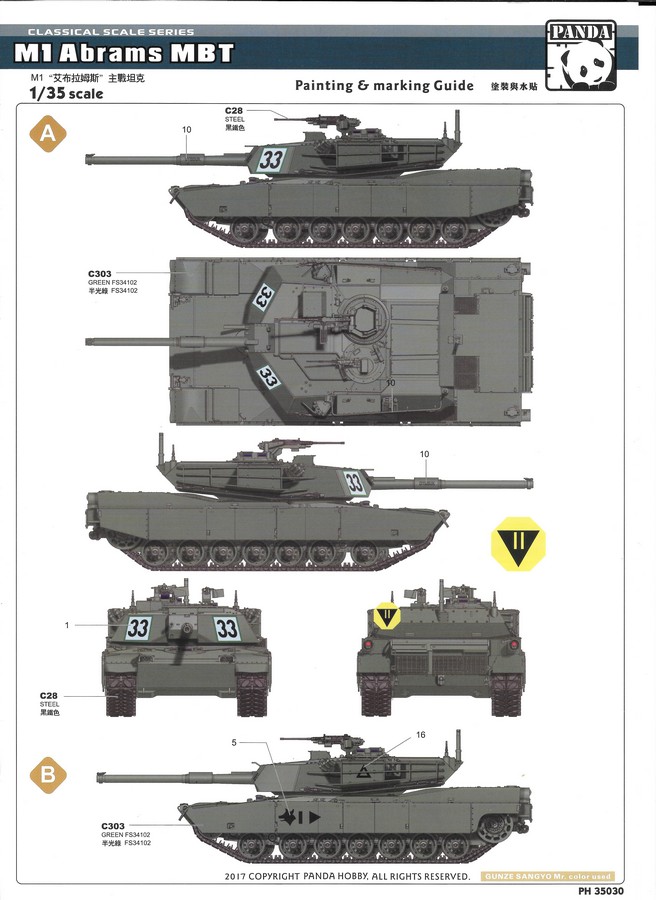
1. (A) M1 is the 11th Armoured Cavalry (was part of the Blue Army during NATO exercises) this tank is painted overall Green FS34102
2. (B) M1 of the 3rd Battalion 67th Armour 2nd Armoured Division of Fort Hood and carries the Wolfs head on the side of the armour side skirts
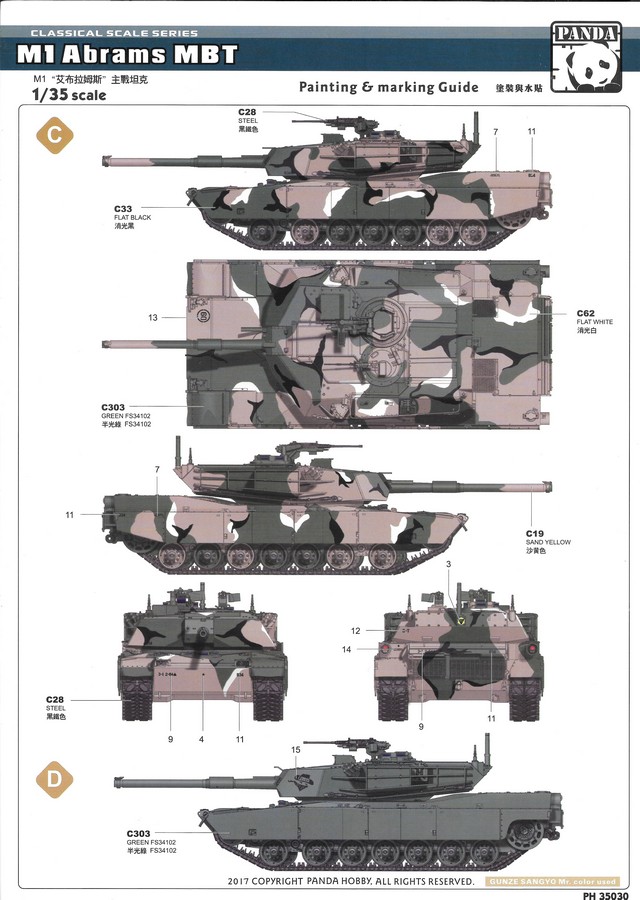
3. (C) is a M1 possibly the 11th Armoured Cavalry with a MERDC four-color camouflage
4. (D) M1 of the 1/64 Cavalry the Bandits of the 3rd Infantry Mechanised Division and carries the Bandits emblem on the front of the turret
Please note this is only my guess as to the units.
Conclusion
I am very much looking forward to building this new tooled version of the M1 Abram from Panda Hobby although at first, I was sceptical of yet another M1 being produced, I have to say that I have been very wrong in this instant of scepticism.
For sure there is not the part count that you would find with some other manufacturers kits, there are one or two annoying errors in the instructions and a little bit of work that needs to be addressed, such as injector pin marks and what does look like some seepage in the manufacturing process.
On the other hand, you wont be getting lots of plastic parts that you would not be using the kit itself is at the same level if not better than some of the other M1 kits that are available.
The simplicity of the build as it looks in the instructions, I am sure will make this one a winner.
(I will let you know about that later when I have built it and done a build feature)
There are a few downsides the build for the tracks is in the very bottom left corner of page 4 and is a very small instruction of how to build them, at first I thought they had missed out the how to build the tracks part.
SUMMARY
Highs: New tooling is crisp very good looking and seems simplistic to build? Lows: The track build instruction could have been bigger and the tank options not having any battalion names? Verdict: For all of the little niggles overall it looks very nice it looks like a straightforward build, I would recommend this kit for all Abrams fans and those interested in tanks
Our Thanks to Panda Hobby ! This item was provided by them for the purpose of having it reviewed on this KitMaker Network site. If you would like your kit, book, or product reviewed, please contact us.
About Adie Roberts (In_War_and_Peace) FROM: ENGLAND - SOUTH WEST, UNITED KINGDOM
I am disabled after a terrorist bomb I have in the past made models for TV and film and work with local museums making new models for display. I also take on commission builds for people
The first thing I noticed after I opened my instruction book was that the tracks are illustrated on the tank backwards. That may lead more than a few people to actually add them onto the model backwards.
In the 80's there was a nonslip coating available in the field. It was a "brownish" OD enamel paint that came in gal cans. Basically it was paint with about 2 inches of sand in the bottom of the can. In the 90's a forest green color epoxy based coating was available.(it was called flight deck coating) It is very thick and had to be spread on with a trowel about a 1/4 inch thick.
Review and comments by all are extremely helpful. After reading the comments I would like to address a couple of observations. First is the anti-slip issue. The armor battalion that I served with fielded M1 MBTs in January 1983. The were the first batch that were produced after General Dynamics bought the Chrysler Tank Plant. The 56 Abrams tanks had an anti-slip finish that was applied to the Forest Green paint that the tanks were received in. It was as a previous comment of paint with sand. The finish was not applied to the entire top portions of the tank, only the on the top hull plate from the center to the left side, the top of the turret from the front to just behind the commander and loader's hatches and the engine deck. The back of the turret where the blow-out panels were located were not treated with anti-slip. Again, our tanks came forest green with the sand already in the paint. It was not the same as with the M1A1 which is thicker and it was like sand grains within the paint not like it was stippled. The second comment is on the fuel filler covers for the two front fuel cells. To refuel the front cells on the Abrams, you had to traverse the turret to where the main gun was over the filler cap and elevate the gun to max elevation. This gave you sufficient room to put a fuel nozzle and take on fuel. One not for modelers that like to weather their tanks with fuel spills. The fuel system on the Abrams pumps fuel from the front tanks to the rear tanks as only the rear tanks supply fuel to the engine. Occasionally, the transfer valve will stick and if the tank is parked with the rear higher than the front, fuel would run to the front tanks and overflow (even with the cap on). It was a practice for us to ensure the front cells were not full when parking our tanks in the motor pool. I have had the opportunity to crew the M1, M1IP, M1A1 (HA) prior to retiring and as they said in "Fury" "Best job I ever had."
Let me make an additional comment pertaining to the three eye bolt lifting rings on the commander's cupola. Our M1s had them. Actually I have never seen an M1 or M1A1 that didn't. When Tamiya released their first M1 model back in the '80 I took the eye bolts from a T34/76 kit to add to the cupola of the model I built. Maybe the Chrysler M1s did have the eye bolts but the General Dynamic ones we had did.


Comments