Continuing the line of Centurion variants from AFV Club is the new Mk. 5 with bull-dozer attachment.
Construction of the Centurion Mk.5/1 RAAC , the Australian version used in the Vietnam war (item AF35100), has been reviewed previously. Anyone who has read the reviews on AFV Club's previous Centurions will already be familiar with the construction of these excellent kits. Aside from the dozer attachment, there are few differences between this and the previous Cents from AFV Club. The Korean War version depicted on the box mounted a 20pdr. "Type A" gun without a fume extractor -this same gun was also seen on RAAC Australian Mk. 3 and early Mk. 5 Centurions in Vietnam. This superb kit contains all the parts needed to alternatively build the Vietnam-era Australian (RAAC) version. In today's economy, AFV Club's strategy will be to give hobbyists real value for their money.
contents
With well over 400 parts, the box contains an aluminum barrel (complete with rifling)for the early 20 pdr. gun, a sprue of clear parts, and many brass photo-etched parts, as well as all the parts needed to build the RAAC Australian version. The aluminum barrel for the later-style Mk.5 Australian 20 pdr. gun (with 3-finned fume extractor) is not included in this kit.
construction
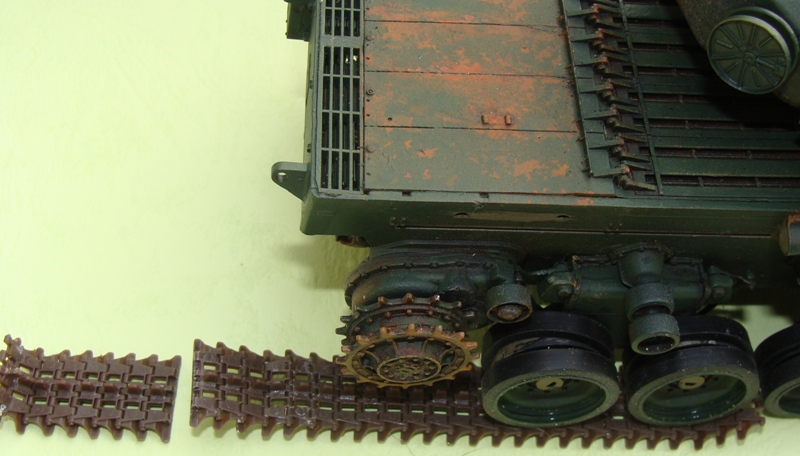
Suspension
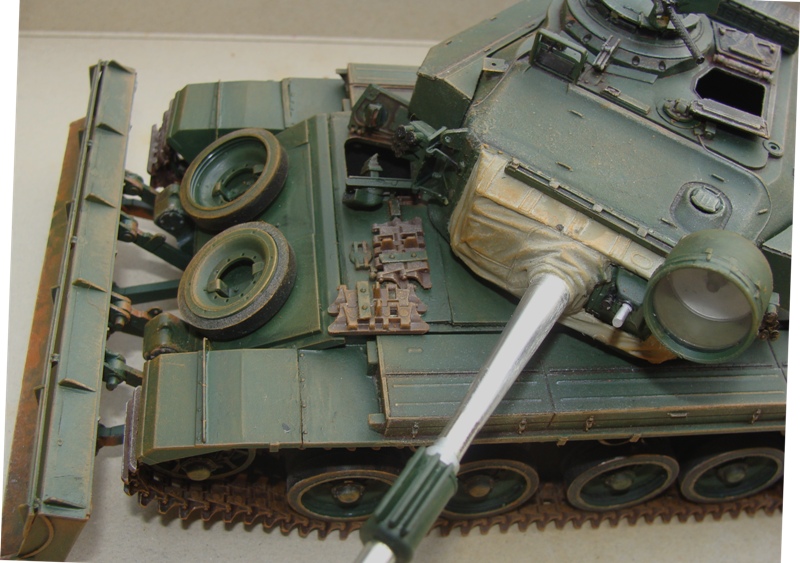
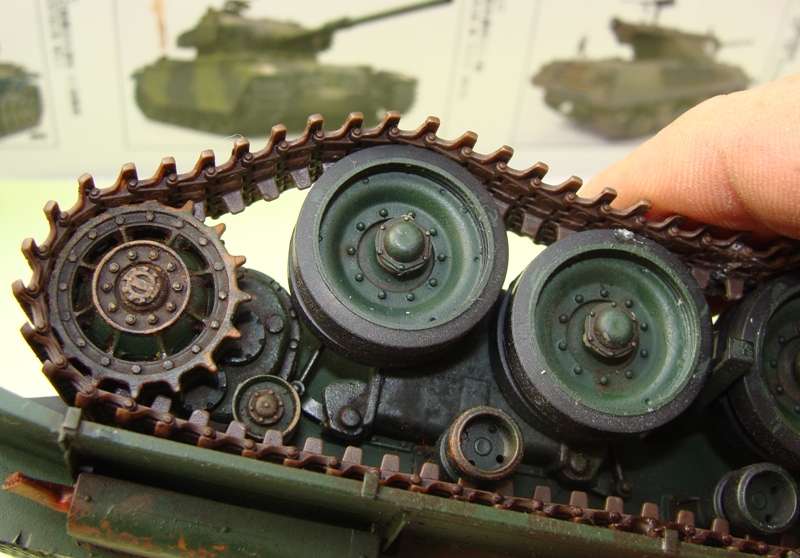
To get the best out of an AFV Club Centurion and really enhance its realistic suspension, the indy track links for Centurion kits (item AF35102) is a must. They easily snap together on a hard surface, but connecting the ends together on the tank is tricky. I cheated by shaving the "snap" pins off the last two links and simply cementing those together. The kit tracks are vinyl which must be cemented with CA cement ("super glue").
The road wheel tires are made of vinyl. These are not just the rubber tires, but also include the outer rims of the wheels. The poly caps trapped inside the road wheels are very difficult to fit over the axle stubs -I shaved the axle stubs slightly.
The six bogie units have movable main axle mountings with a large spring trapped between the two. The connecting rods and top arms (parts E8/E9, E20) are designed to be movable by melting the attachment pins. The lower connecting rod attachment point is glued into place -when the suspension in compressed, the connecting rod just bends. The front idler axle can be positioned at different angles. Dry-fitting the vinyl tracks around the completed suspension assembly will be necessary before cementing the axles (B23), to avoid putting too much tension on the completed suspension.
Hull
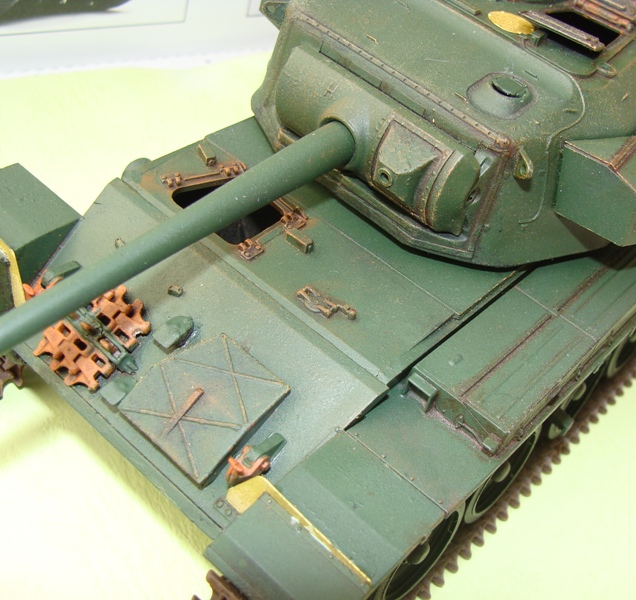
The upper hull is not a single part, but consists of seven parts. Included are photo- etched parts for the front fender supports. I added a little rough casting texture to the hull using Tamiya putty and an old brush.
Turret
The distinctive Centurion turret bins are constructed from multiple parts, but the storage straps are not included. Replacing the large RAAC turret storage basket not used on the Mk. 5 version is a jerry can with a PE seam and mounting brackets.
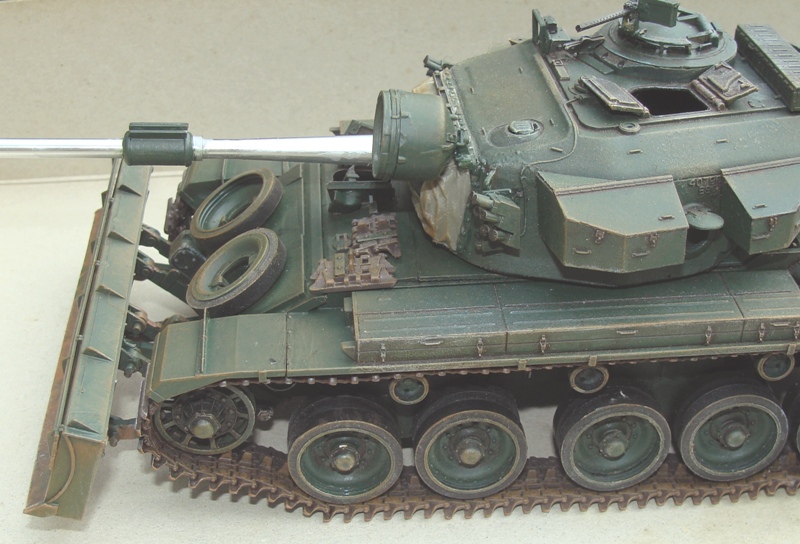
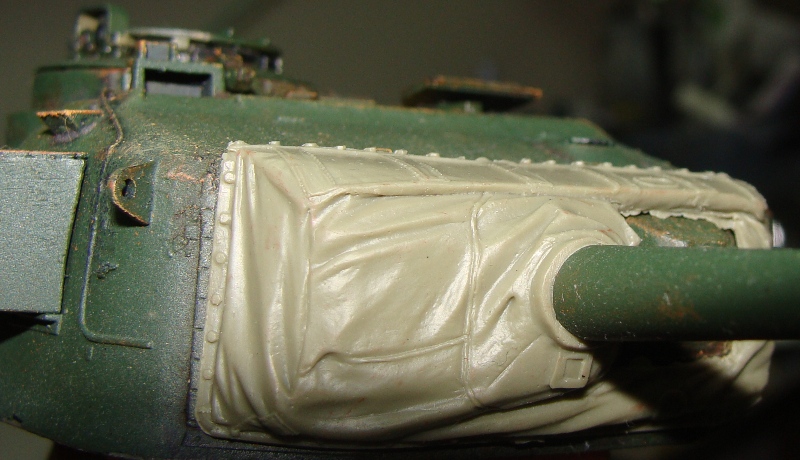
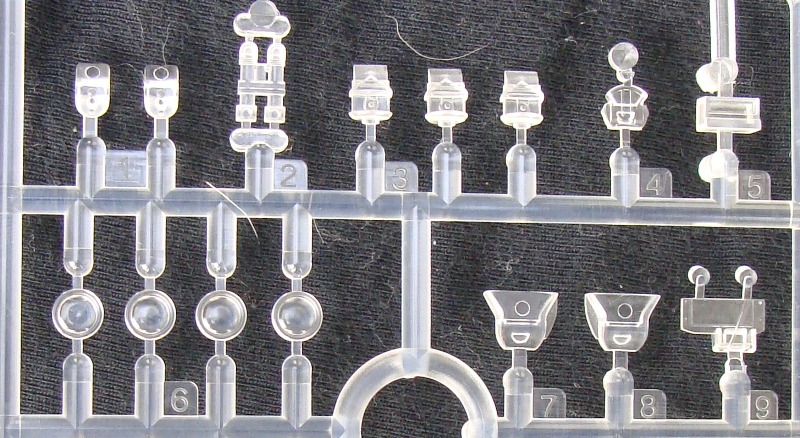
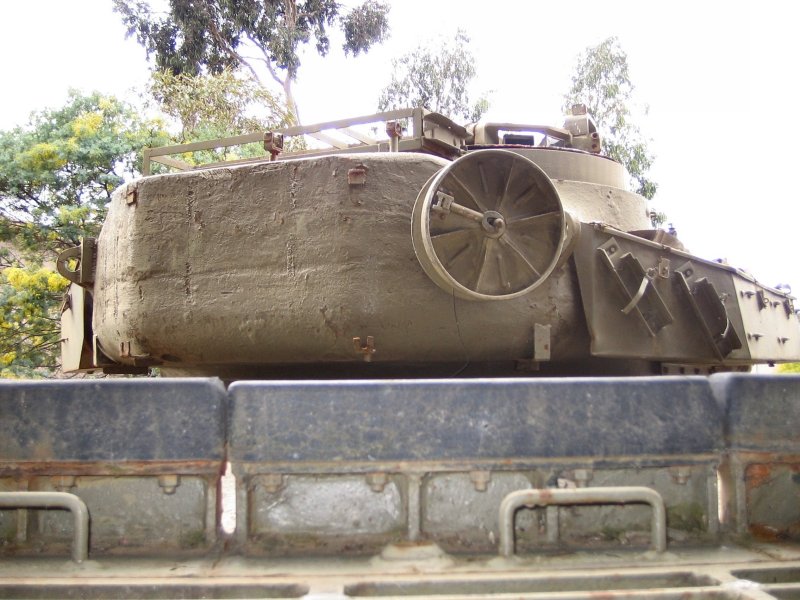
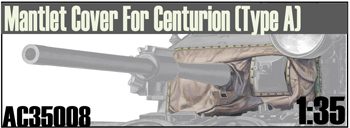
The clear parts provided for the periscopes are moulded in a softer plastic than the usual brittle stuff. A slight join seam along the turret side will have to be smoothed, as there is no seam on the actual turret -careful not to eliminate the cast texture or turrret serial number! You may at first be worried about the rather large seam you are left with on the rear of the turret. Looking at photos of the real RAAC Centurion, this seam is prominent and rough. The .30 cal. machine gun mounted on the cupola has a PE mounting bracket. I had trouble with mine, as the hole in this bracket is too small. Also, there is no way to securely attach the ammo box to the side of the gun -I just drilled a hole in each and used a short length of rod to join the two together. The weight of the metal barrel means you won't get the barrel to sit level. It will be better to glue the mantlet/barrel assembly in place at the desired elevation, unless you install the separately-available canvas mantlet cover (item AC35008). I was glad I bought the mantlet cover; it's easy to install and really transforms the look of the whole model.
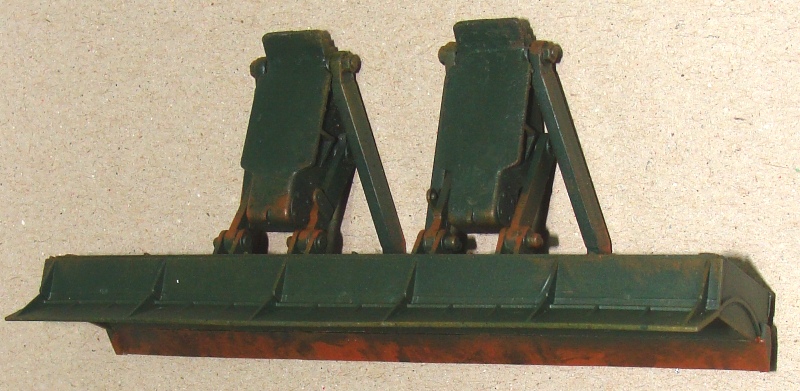
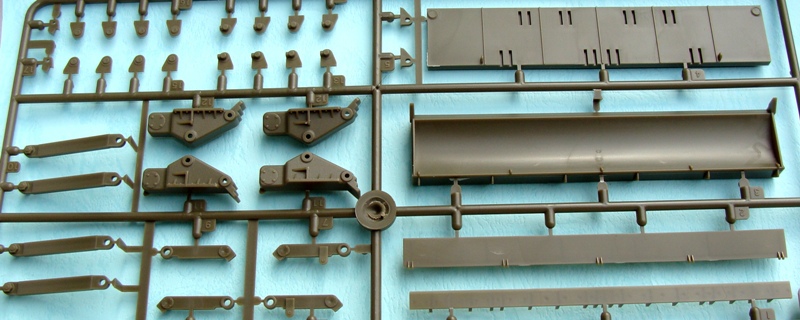
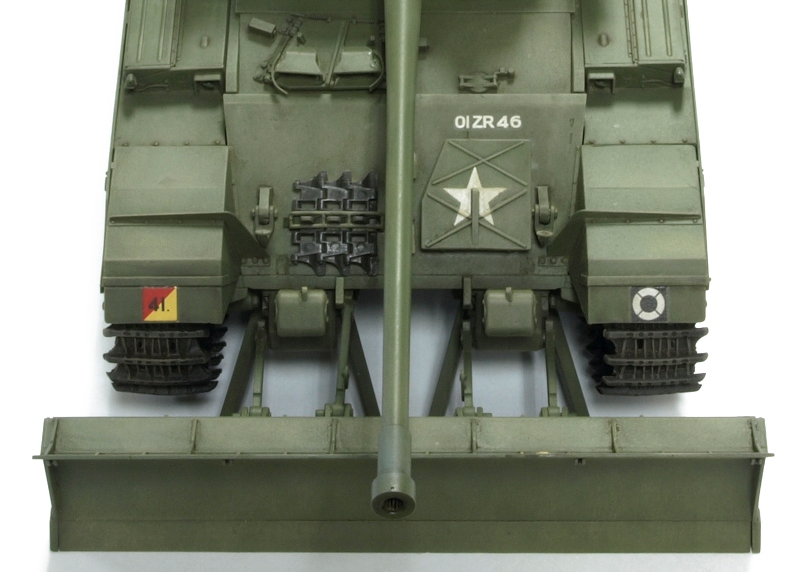
Dozer Attachment
The only noticeable knock-out marks to remove are seen on the back face of the dozer plow (part J2). Pay attention to the box photos when mounting the dozer blade to the tank: the "flat" parts of the dozer mount to the lower hull glacis, with the small "pips" on the dozer pointing up.
Decals
Crisp decals are provided to represent 4 different Centurions: Two of the British Army, the Royal Danish Army, and the New Zealand Army.
Notes on building an RAAC (Australian) Centurion:
To fit the extra glacis armour on the front of the RAAC version, you have to first remove the
moulded-on details on the front plate (part C24).
The RAAC version uses shorter photo-etched parts (parts G1) for the front fender supports.
The rear fender sections for the RAAC version are the cut-down style.
Side skirts were mounted on the Mk.5, but not on RAAC or New Zealand Army versions.
Rear-mounted infantry telephone box: note this box is attached to the rear hull plate on the
Mk.5, and to the rear fuel tank on the RAAC version.
The later Mk.5 RAAC gun barrel (not included in this kit) had the distinctive 3-finned fume extractor.
Part F17 is mounted on the turret in place of the PE part G5 (blanking plate).
Rails I54 and I55 are used on the rear engine deck instead of C35 and C36.
conclusion
As the Centurion was used during its long career as ARV/AVRE vehicles, bridge layers, dozer tanks, BARVs as well as the many specialized vehicles in the IDF, AFV Club will be very busy releasing the versions we Allied armor fans have been dreaming of for years. Though not for beginners, this kit offers real value for bucks. The kit can be built as a Korean or Vietnam war version. The dozer attachment will shortly be available separately for those wanting to mount it on any Centurion (item AF 35108).
SUMMARY
Highs: A welcome addition to the growing line of Centurion kits from AFV Club. Box is brimming, including additional parts for building the Australian (Vietnam) version.Lows: Collecting all the Centurion variants could become addictive. Instructions could be clearer -I don't follow directions well.
Verdict: Though not for beginners, this kit offers real value for bucks. The kit can be built as a Korean or Vietnam war version. The dozer attachment also fits any other Centurion variant. I've gotta have two of these!
Our Thanks to AFV Club! This item was provided by them for the purpose of having it reviewed on this KitMaker Network site. If you would like your kit, book, or product reviewed, please contact us.
About Ted Hayward (ted_hayward) FROM: TAIPEI, TAIWAN / 台灣
From B.C., Canada. Living in Taiwan for past several years. I've been building kits for as long as memory serves -armor, aircraft, cars. Big fan of 1/16th scale armor kits. Currently serving as poster boy for working with CA adhesives in a well-ventilated area. My first kit was the positively awful ...