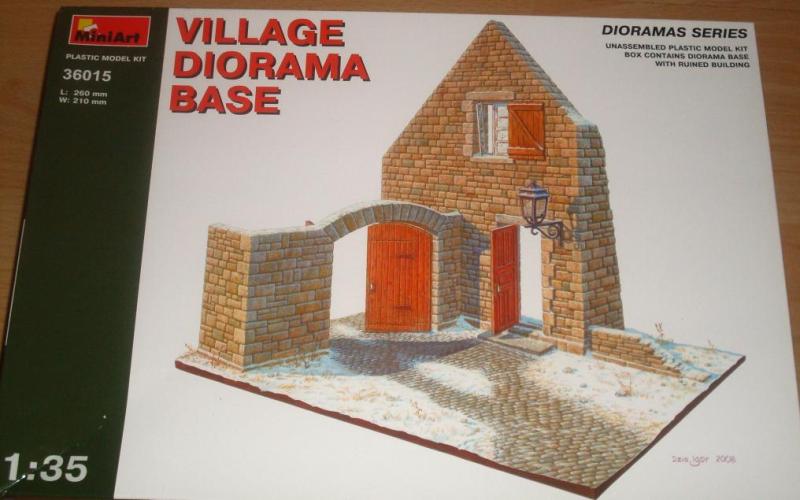
Over the past couple of years, the Ukrainian company MiniArt has built up an excellent reputation as a major new player in the hobby by bringing us a range of excellent AFV kits, figure sets and diorama buildings in 1/35 scale.
Towards the tail end of 2008, the company added another string to its bow by launching a brand new line of diorama sets containing not just building sections but a base as well, and these are sure to prove popular with many modellers. This review examines the "Village Diorama Base" (kit no. 36015) from this new 1/35 "Dioramas Series" range.
contents
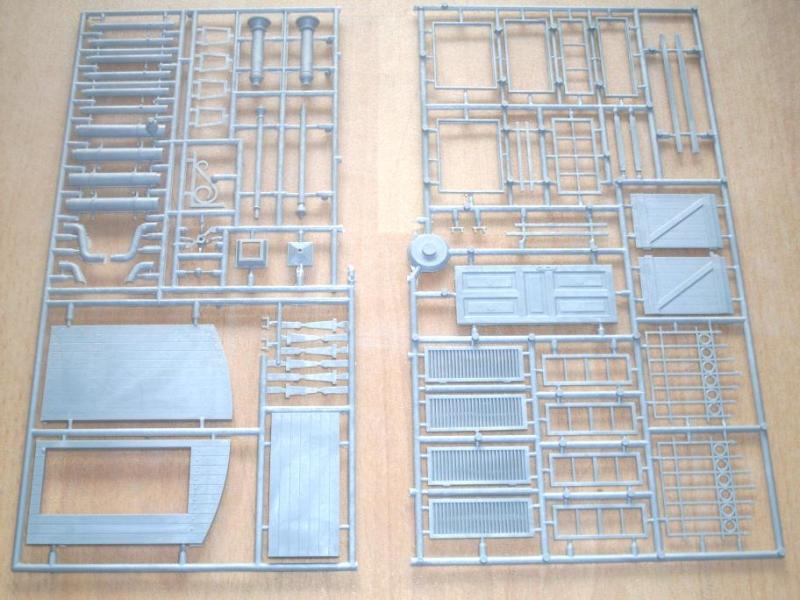
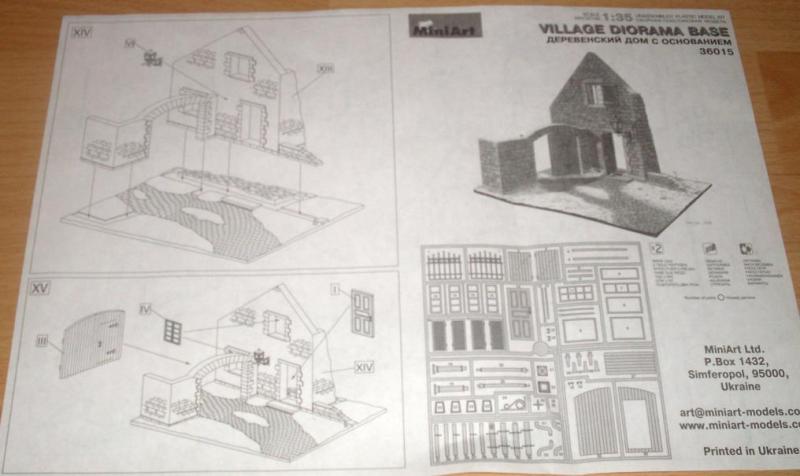
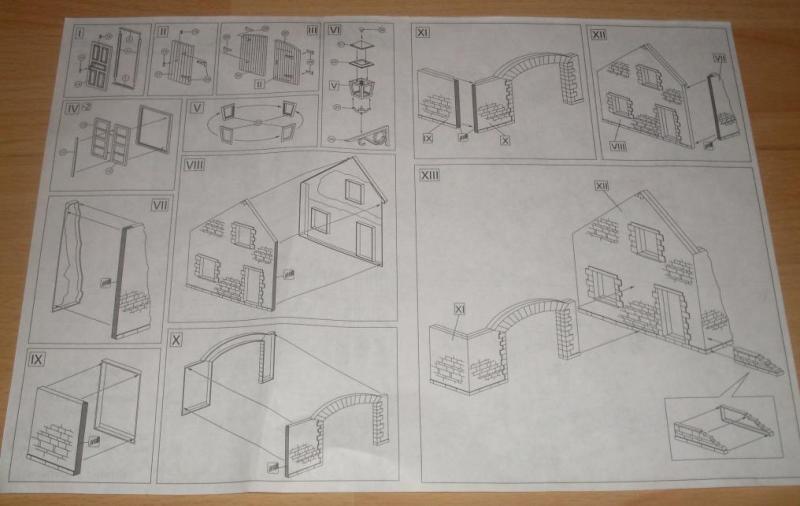
Open the box, and inside you find four vac-formed panels containing the base and the main building elements, plus two injection-moulded sprues holding the accessory parts (house door, window frames, gate, wall-lamp and fixtures) and a double-sided A4 instruction sheet. The total parts count is 77.
Size and Layout:
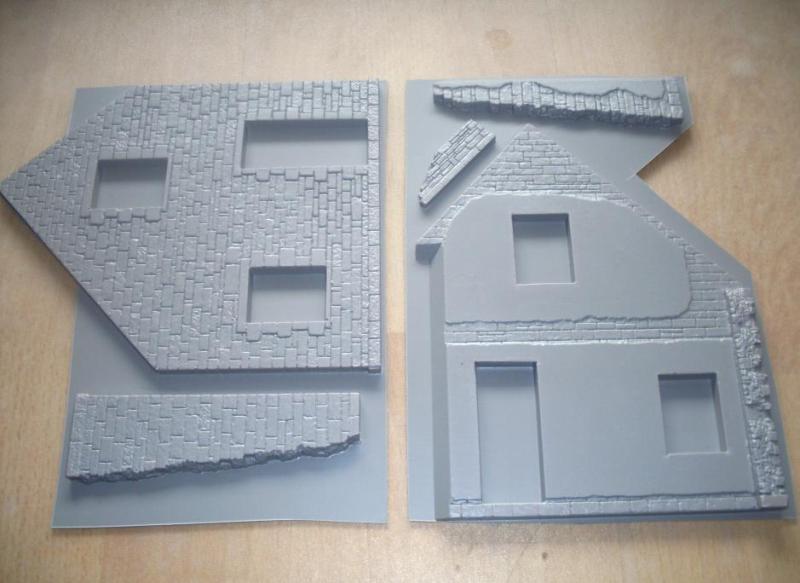
The building structures featured in this kit are the side section of a house (complete with a door and two windows), plus an adjacent gated wall section extending at a 90 degree angle away from the house. The base has recessed locating grooves for the house and wall sections, which should make that part of the assembly process a breeze.
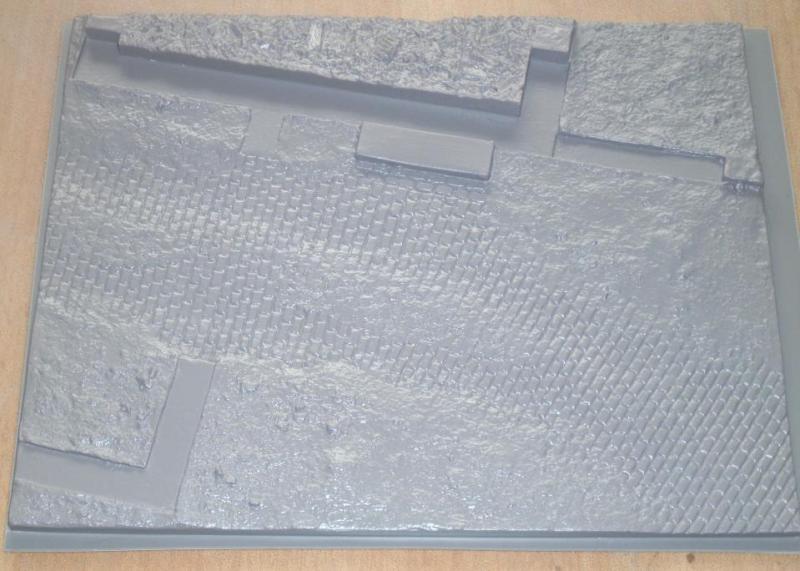
Overall, the base measures 27.5 cm x 21.5 cm, and there's an open space in front of the building that my test placements showed will comfortably accommodate an AFV up to the size of a Panzer IV or a Sherman. If the modeller doesn't mind a bit of "barrel overhang" beyond the edge of the base, even a Tiger I would fit and still leave space for a figure (two at a push) next to it.
So options are there. And given that the main house section stands an imposing 22.5 cm high at the apex of its roof, there's no danger of it being completely obscured by a vehicle standing in front of it.
The style of the building makes it suitable for a diorama set anywhere in France, Belgium or Germany.
review
As is the norm with MiniArt, the main wall sections are moulded as front and back halves with detail on both sides. The advantage here is that although (being vac-formed) these parts will require very careful cutting out from their carrier sheets and equally careful alignment to get the fit and the joins perfect, this system eliminates the problem common to cast ceramic diorama buildings, which usually have only one side detailed.
The texture and detail of the brickwork is very nice, as is the cobblestone on the base. And if the photos of the finished article on the side of the box are anything to go by, I expect it to look very effective and impressive once painted and weathered. The cobblestone also extends up to and through the gate, with10 or 12 square cm of ground space beyond the gate for adding some extra touches to the diorama that the viewer will only see by looking more closely - so some scope for additional interest there.
The windows, shutters, gates and doors are nicely reproduced with detail on both sides. Each of these injection-moulded elements is comprised of several parts, and things such as the gate brackets and the door handles are moulded individually to give sharper, better detail on the finished article. The trade-off of course is that it makes assembly that bit more fiddly, but it doesn't look like anything that should trouble modellers used to handling the myriad smaller pieces that come with some of today's AFV kits. Some of the injection-moulded parts do however carry some flash, so these will need cleaning up.
On the instruction sheet, the assembly process is broken down into 15 steps with accompanying clear diagrams. These look like being reasonably easy to follow, and no obvious clarity problems leap out.
conclusion
A very impressive-looking kit with definite 'eye-catcher potential'. This is my first MiniArt building kit, and I'm very much looking forward to taking it on.
SUMMARY
Highs: Nice detail on all sides, plenty of space for an AFV plus a figure or two.Lows: Vac-form might not be for everyone, and isn't ideal for novices. Some minor flash clean-up needed on the injection-moulded parts.Verdict: A reasonably priced diorama kit with very nice all-round detail. Ideal for showing off a medium-sized AFV in a Western European WWII setting.
About Steve Riley (Kuno-Von-Dodenburg) FROM: ENGLAND - NORTH, UNITED KINGDOM
I've been building models since childhood - but with several l-o-n-g breaks (I built maybe 3 kits and a handful of 1/35 figures during all of the 1980s).
A visit to EuroMil '98 rekindled my interest in a big way and I got back into figures. Armour (Great War to Vietnam) followed a few years ago, ...
Good review Steve i haven't tried my skills on any of the Mini-Art dio accessories yet (my preference being resin/ceramic buildings) but after reading your review i might give them a try it might save me a few pennies what with the economy being what it is at the moment thanks again to James for the link
Nice review. I really like the Miniart buildings and think they turn out great.
I do prefer to build my own 'base' and attach the buildings to it rather than using the kit supplied base piece
C.
On a lot of levels i´d agree with you Charles, but these bases are excellent ... details wise and ease of use. They can easily be cut to size if you´d prefer to have them smaller, and Im sure with rubble or other details, can be made larger. As I use enamels and thinners, the plastic is a good medium for working in, plus the advantages of the light weight.
Some images of the finished model from Swedish modeller, Lars Henåker
Unpainted diorama baseDiorama baseBase with cromwell and figures
Frank,
I'm not saying the kit bases are bad or unusable, on the contrary most I've seen are well thought out as to building placement and streets etc.
The detail in the base portion equal that of the buildings.
I normally work on round diorama bases and I think it's easier to adapt the Miniart buildings to my base than adapt their bases to that format. Just a personal preference.
Thanks for the link, his work is very nice
Cheers,
Charles
Nice Review they are nice to do.
Takes a little learning curve but not much.
Only thing I do not like and not a big deal is the Road will bow under weight.
But an easy fix is pour Plaster on the backside to keep up or glue some sprue on.
As said no problem at all.
I have one just about one done and looking at another one.
Thanks again Frank
Hi Charles. Oh ... the written word ...
I understood as much ... but I was just saying (and you´ve also mentioned) that the bases are still very usable ... and are easy to adapt to whatever you want ... bigger, smaller .... or in your case round.
Hi Jeff. Normally I fix the given base onto a sheet of cork. Gives it all the strength it needs. When I have a high base ... its usually packed with polystyrene, cut to measure as well, so the weight involved, is not an issue.
This might just the building I'm looking for, for an Am Rev dio I have planned as soon as I can find the figures I need; the fact that it is injection molded scares me a bit, though a club member did a demo and they seem easy enough to assemble.


Comments