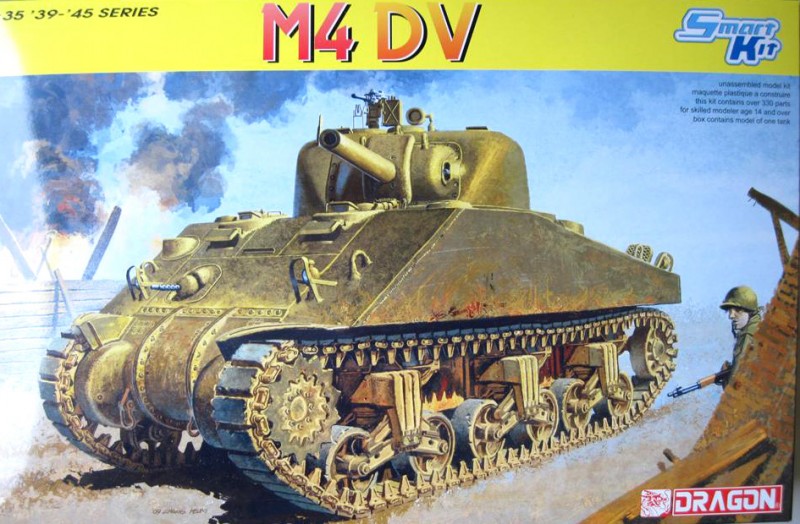
introduction
There were five main variants of the M4 medium tank produced during WWII, with each one divided by engine or hull type. The M4A1 was actually the first to be manufactured and sent into action, with the M4 following shortly after. The M4 used a hull that was welded on the corners, and the vehicle was powered by a Wright (later Continental) 9-cylinder R975 radial engine producing 400 hp at 2500 rpm. It had a manual transmission with five forward and one reverse speeds. It was built at six main production plants, with a total of 6,748 units produced. Baldwin Locomotive Works manufactured 1,233 units, or about 1/6th of the total M4 variant, from January 1943 to January 1944. This Dragon kit represents one of the Baldwin-built tanks, with their distinctive direct vision (DV) ports located on the hull front just below the driver's and co-driver's hatches.
the kit
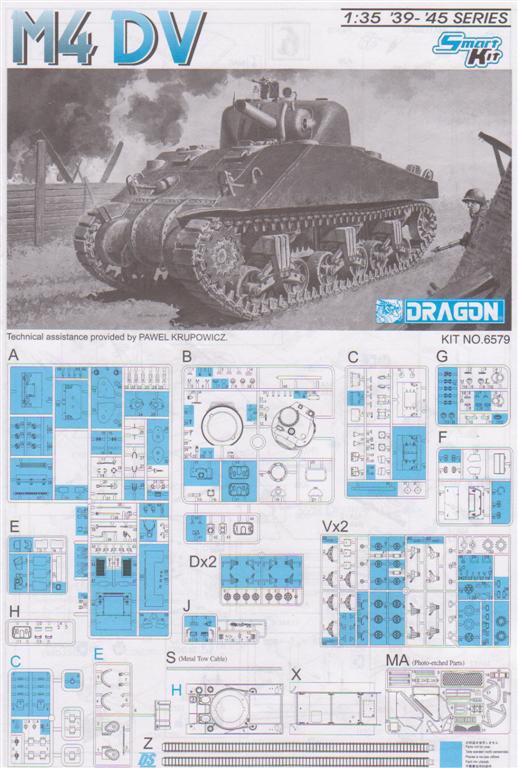
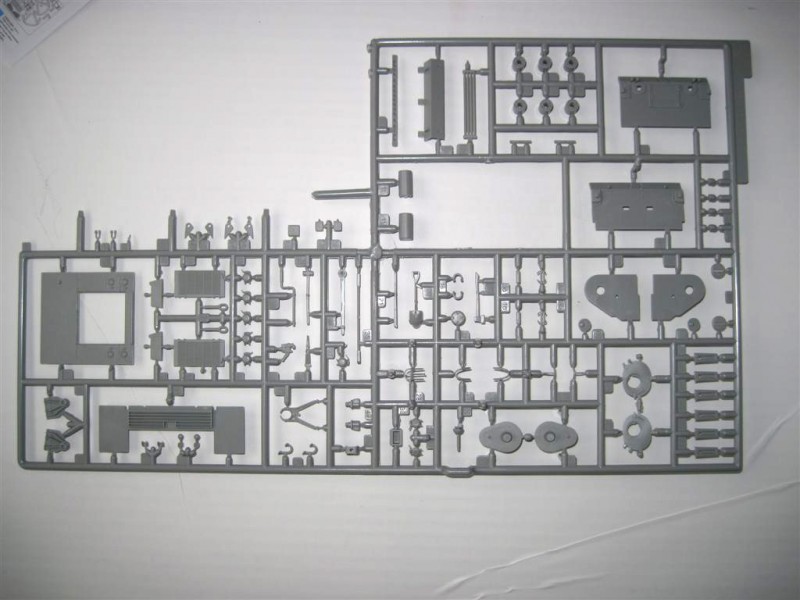
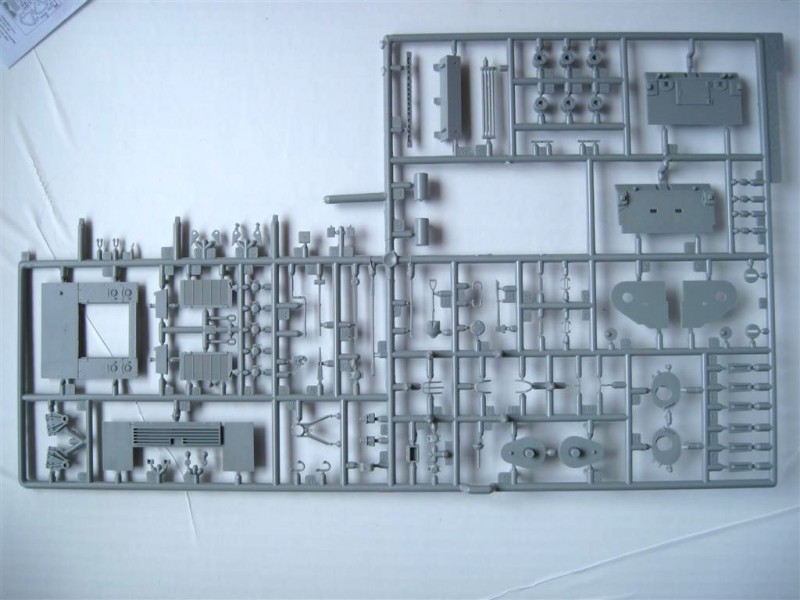
The box, with artwork by Chang Heum, contains 507 parts in gray styrene on 12 sprues, about half of which are marked not for use. There are also 22 clear parts on one sprue, 42 photo etch parts, one braided wire for the tow cable, and two lengths of DS plastic track. Two small decal sheets are included. The sprues were all packaged carefully, and the clear parts, photo etch, cable and decal sheets are taped to a piece of cardstock to protect them. My sample arrived in good shape, with no damaged parts. The styrene appears well-molded with no visible flash. Dragon have been modifying the Sherman sprues lately, improving some parts and adding or removing sprue sections by changing mold gates. Each new change is apparently added to older kits as well, so the entire production gets the upgrade.
the review
Looking at the kit spue-by-sprue
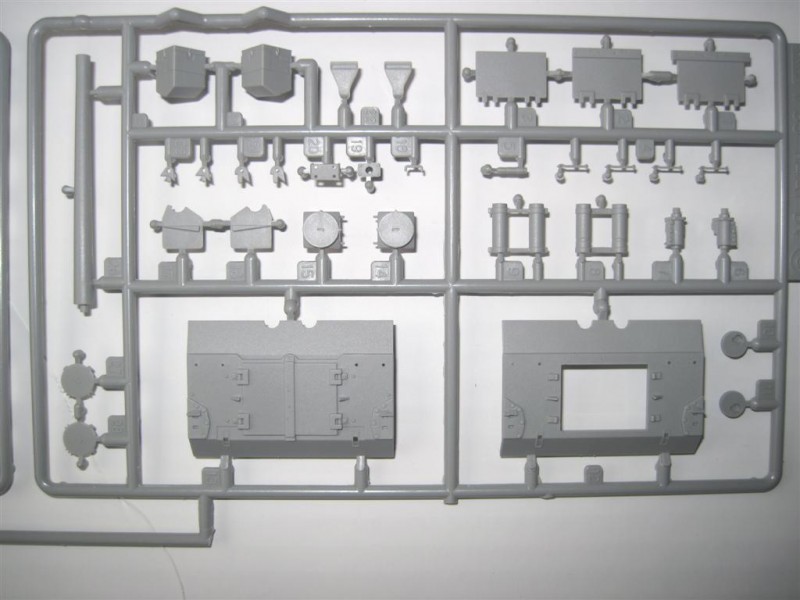
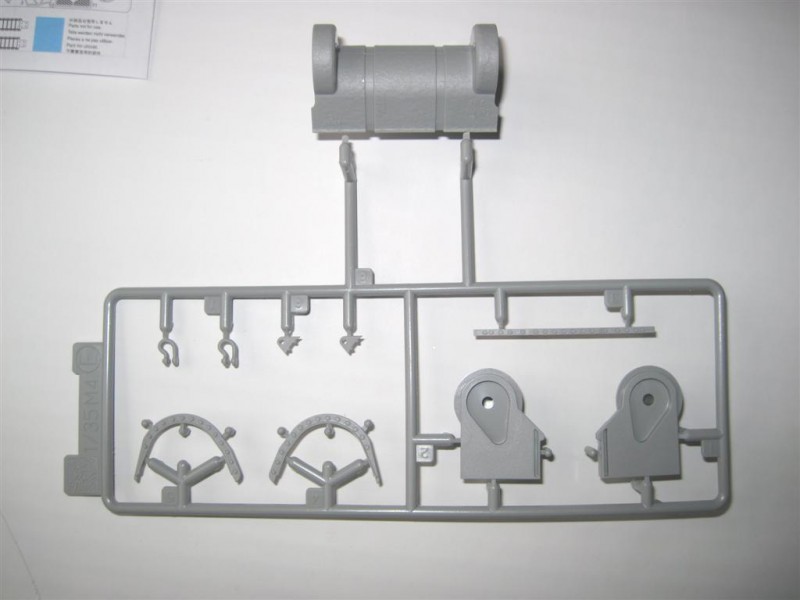
Sprue A: Marked M4A2/A3. This to be the most-common array with Dragon Shermans I have built. Most of it is marked not for use. Those parts that will be used are the suspension bases, brush guards for the lights, lifting hooks, bow MG, fuel caps and pioneer tools. The barrel on the MG is hollowed out.
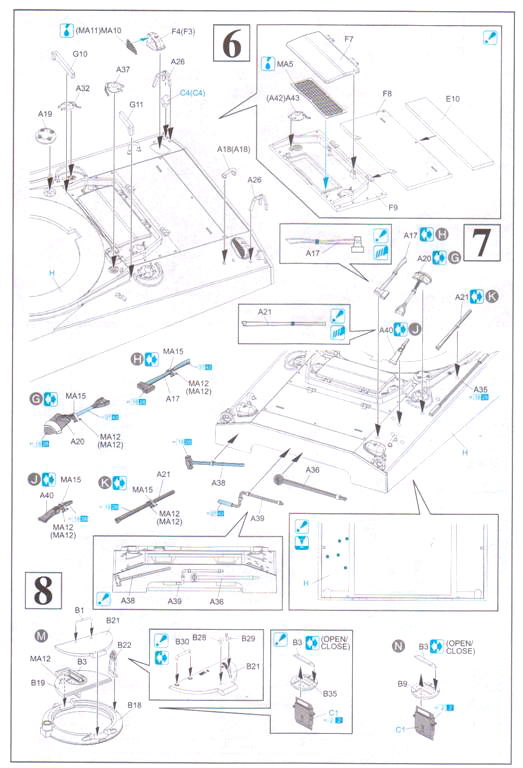
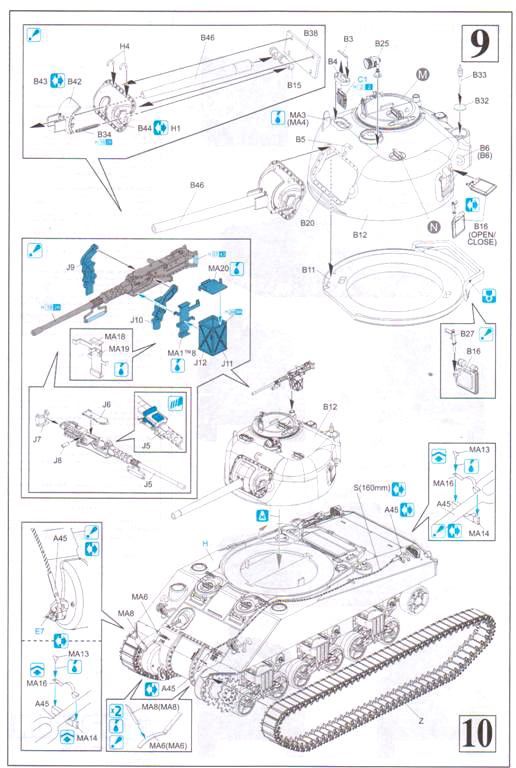
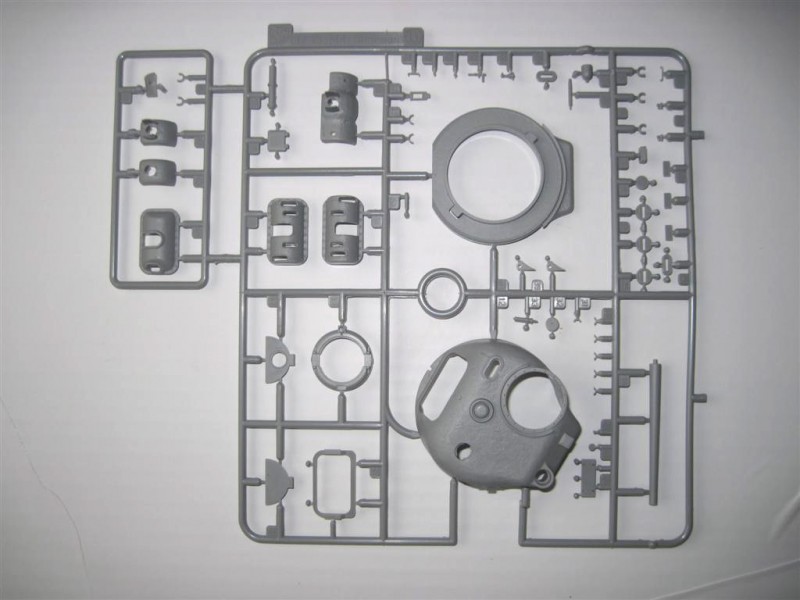
Sprue "B": This holds the low bustle turret and components. The turret has nice casting texture, but no foundry marks. There are fine mold lines where the loaders hatch has been blanked over, and also around the pistol port. The lower turret piece has mold lines on the sides of the bustle, and is missing some of the texturing. You get two versions of the M34 gun rotor shield: one with side flanges, and one without. Both shields and the M34 gun mount have good texturing but no foundry marks are present. The screw heads are very nicely-represented. You also get a small shield for the co-axial MG, which was added on some models. There are two M34A1 gun mounts, and the M34A1 rotor shield is included in case your particular tank was upgraded in the field. The M3 75mm gun is slide molded and hollowed out at the end of the barrel, with only very minor mold seams to clean up. The split hatch is nicely detailed as well. The only thing really missing is the gun breech, which is available on Dragon's German tanks. With all the details on the hatch interiors, it's a shame they have nothing else to show off on the inside of the tank.
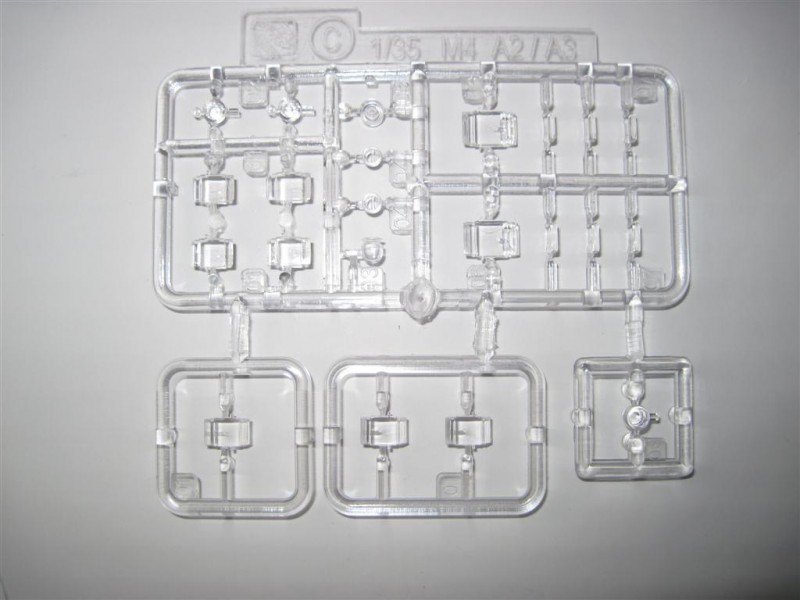
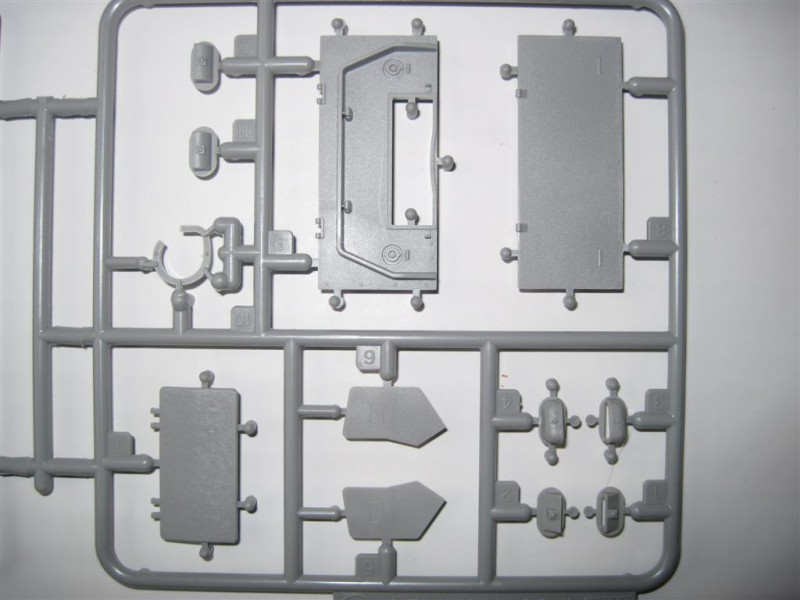
Sprue "C": There are two the first, marked M4A1 DV, is in gray styrene and holds the rear hull plate, engine access doors, exhaust and air cleaners (square type). There is also another 75mm gun tube, with flared muzzle (marked not for use, but it could be used as an option depending on references).
The second "C" sprue is clear parts, consisting of the periscopes, head lights and tail lights.
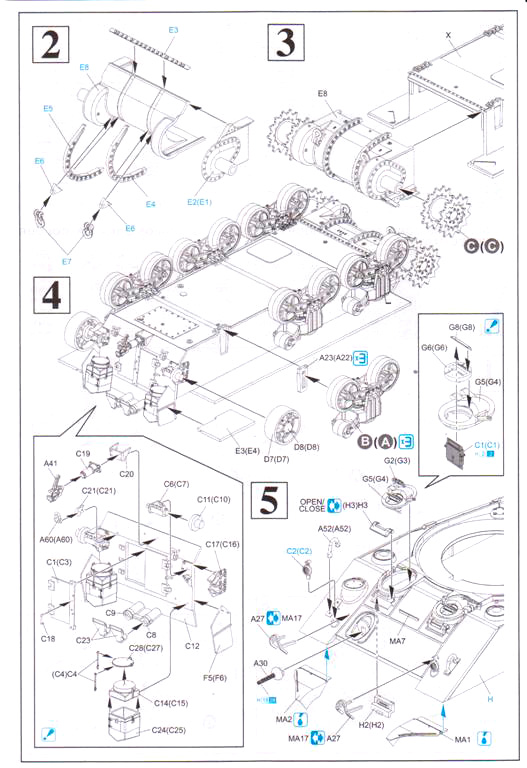
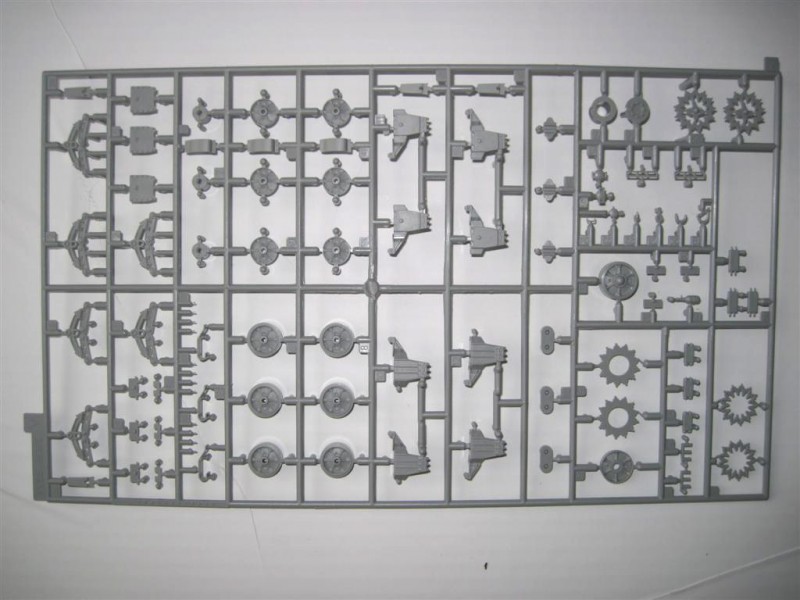
Sprue "D": Marked 1/35 M4, and again, there are two. This holds the open spoke wheels and cast suspension unit with raised return roller arm. To me, this sprue appears to have been cleaned-up some. The suspension units are marked not for use on this kit, so you will have some nice-looking spares for another project. The idler wheel has a separate hub cap for improved detail.
Sprue "E": Marked 1/35 M4. This holds the 3 piece transmission cover and final drive housings. The transmission cover is a single molding divided into three parts, with casting numbers on each one. It is nicely-textured, but does have three fine mold seams running horizontally across the surface. At the bottom there are bolts and drain plugs. The two bolted flanges are separate parts with good details on both sides. To represent the two halves on each flange section, the modeler will need to scribe a fine line along the center of each. The final drive housing is the correct size.
Second "E" sprue: Marked M4 75mm Normandy. This has appliqué armor and another M34A1 rotor shield, all marked not for use. Only three parts are used here, all for the rear hull.
Sprue "F": Marked M4A1 DV, this is the rear engine deck. Details are very nice, with caps on the fuel tanks and good casting texture on the engine access cover and air intakes.
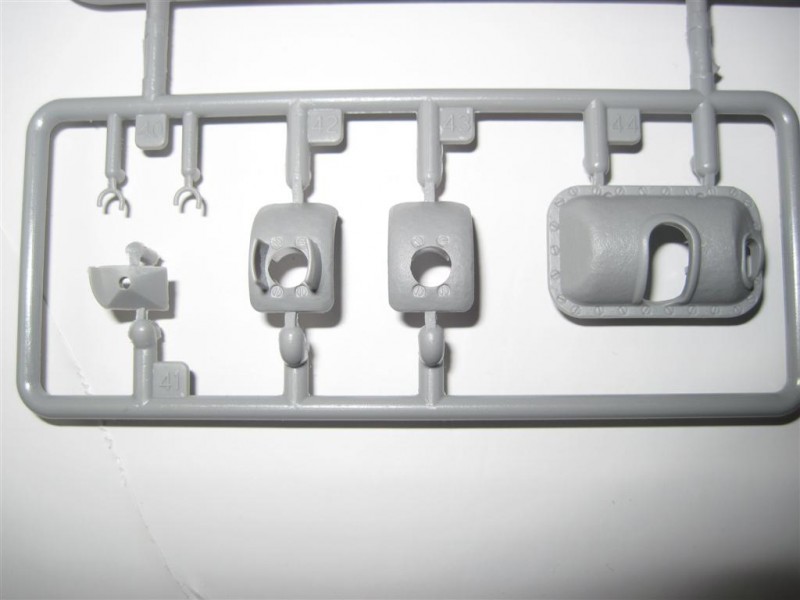
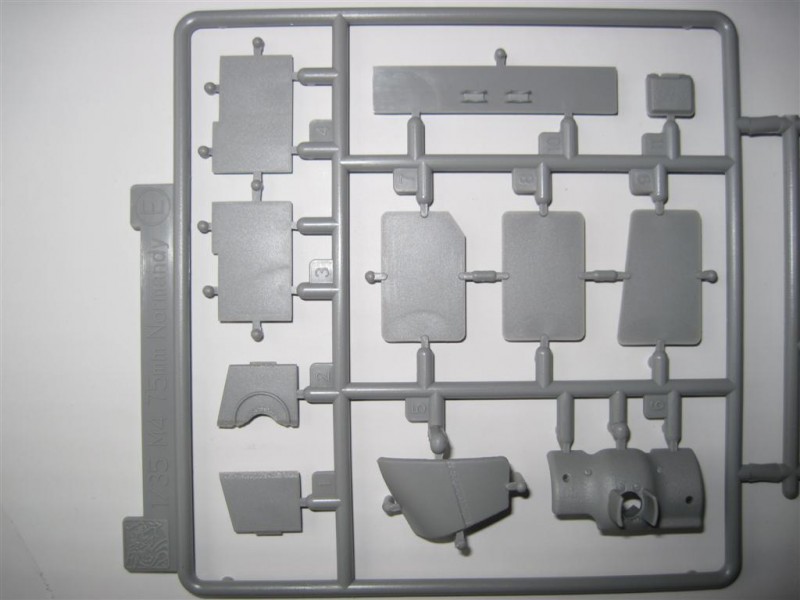
Sprue "G": Marked M4 Normandy. A small sprue holding the front hull hatches and springs, and periscopes. Again, there is nice texturing on the cast hatches, and the springs are very finely-rendered. There are very nice and fine periscope guards on this sprue, but they were not installed on the early versions, and can go to the spares box as well.
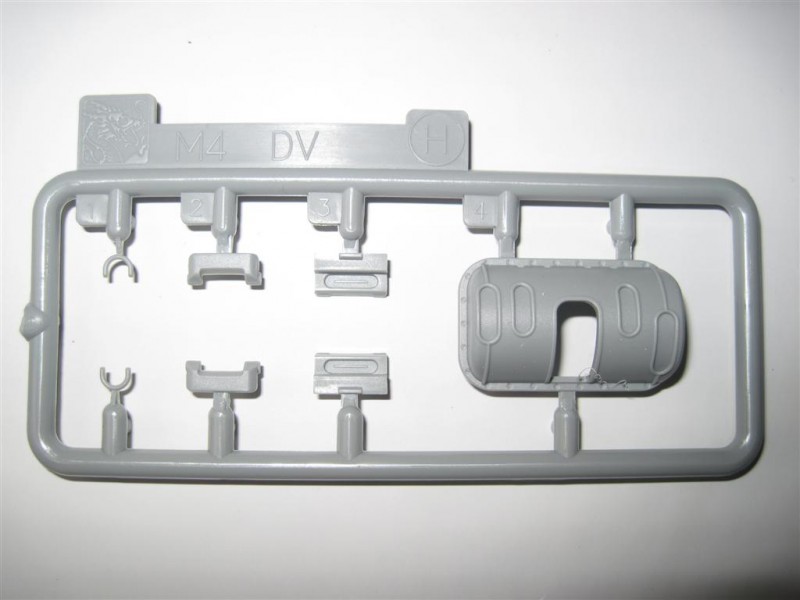
Sprue "H": Marked M4 DV. This has the direct vision hoods, two lifting rings and another M34A1 gun mount, with all the openings blocked off.
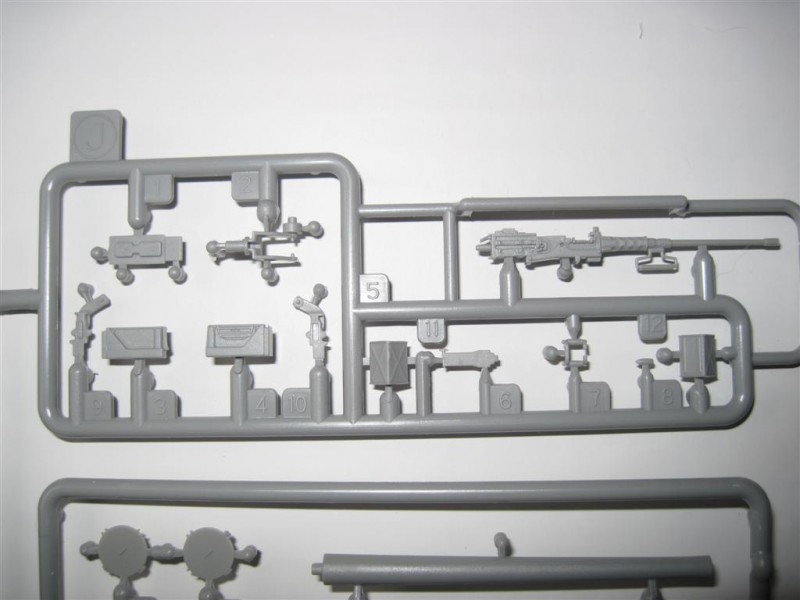
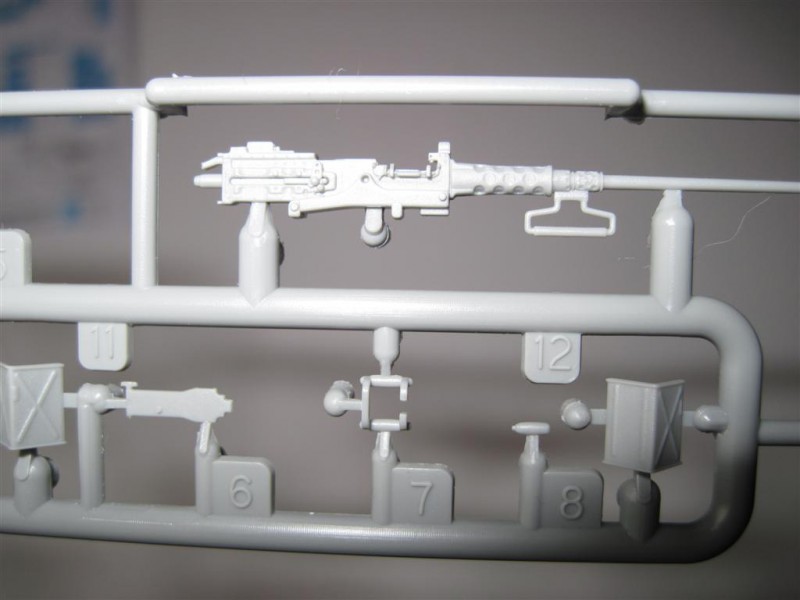
Sprue "J": This sprue has a newly-tooled M2 .50 cal MG. The top cover is removed and breech details are excellent. It includes an early ammo box, late ammo box and two different mounts. The charging handle is the correct size, and it looks like Dragon took their 1/6 scale kit and scaled it down. Mold seams are almost invisible. Overall this is excellent.
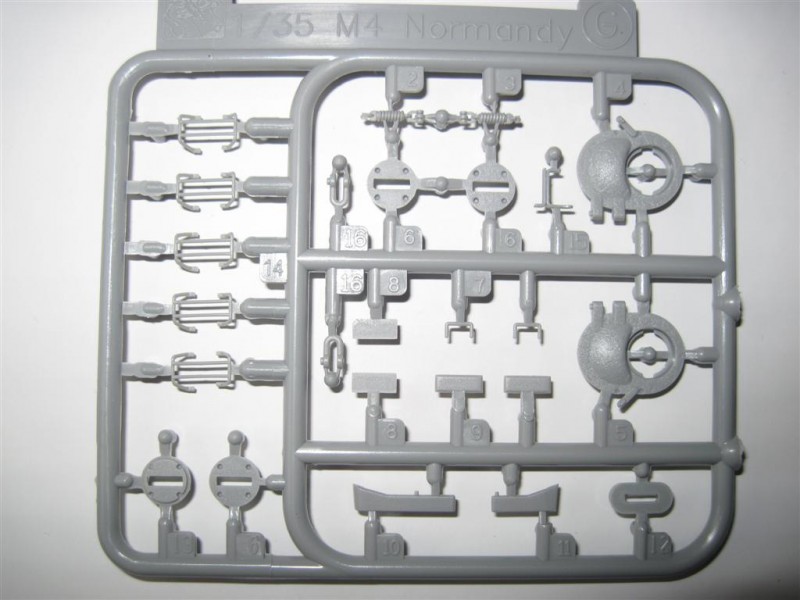
Sprue "V": Marked VVSS bogie, it has the straight return roller arm suspension units with casting numbers on them, lower suspension halves, two types of return skids, springs, six spoke solid road wheels, and idler, as well as three types of drive sprocket. If the modeler desires, the four bolt holes on the empty face of the upper suspension unit can be drilled out, and the four bolts securing the return roller arm can be placed. There are extra bolts molded onto the sprue on one side. The early track skids have the four mounting bolts molded on already, and are the correct type for this version. Spare track links are included, too, but they are for the rubber and steel chevron-type, and would have to be modified if used.
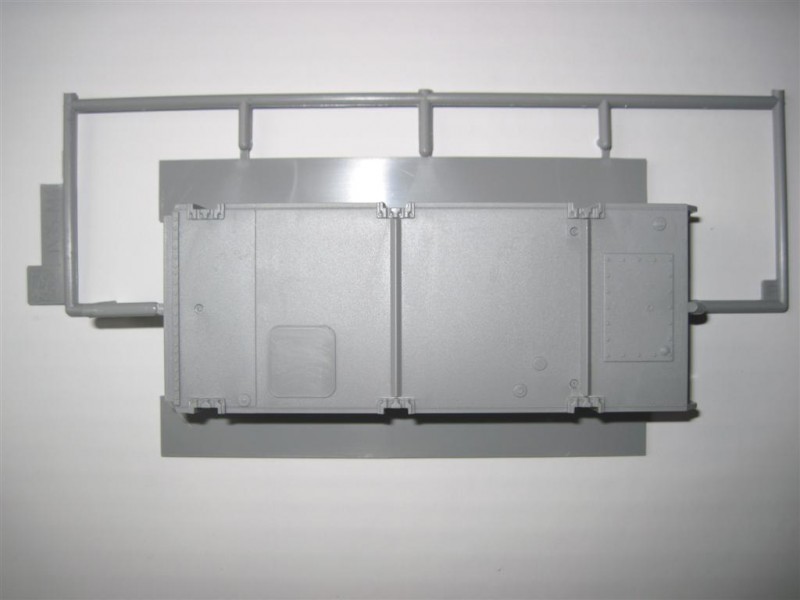
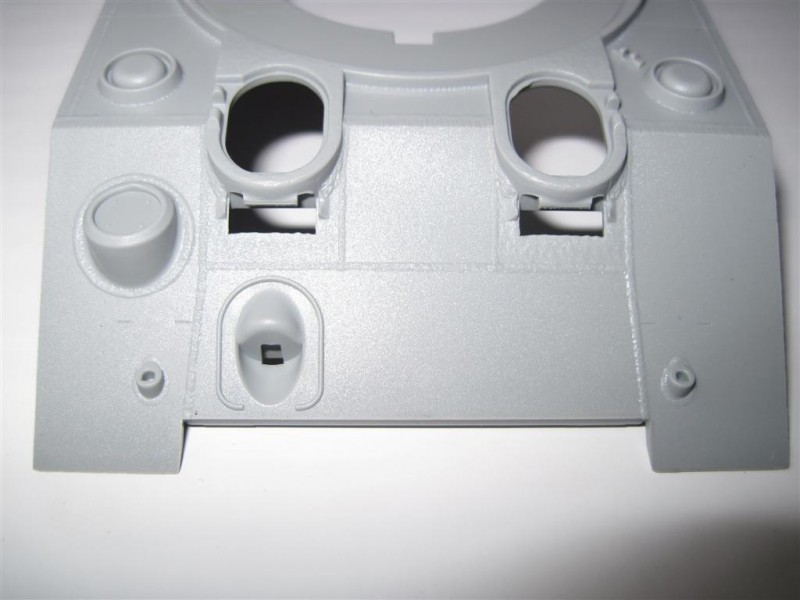
The upper hull is listed as Sprue "H" as well. It is a new tooling with a 90 degree rear plate and the new DV hull front. The front hull is made up of six sections, with the hatch sections cast. Weld seams are nicely-represented, and while raised, are subdued. There is a mold seam running along the hull just behind the front hatches that will need to be removed. Slight indentations for the placement of the brush guards for the head lights, and marking holes on the underside of the hull top for the placement of the pioneer tools are also provided.
The lower hull is a separate part, and is welded with a bolt strip along the front for the transmission cover, a section for the engine at the rear, and some drain plugs.
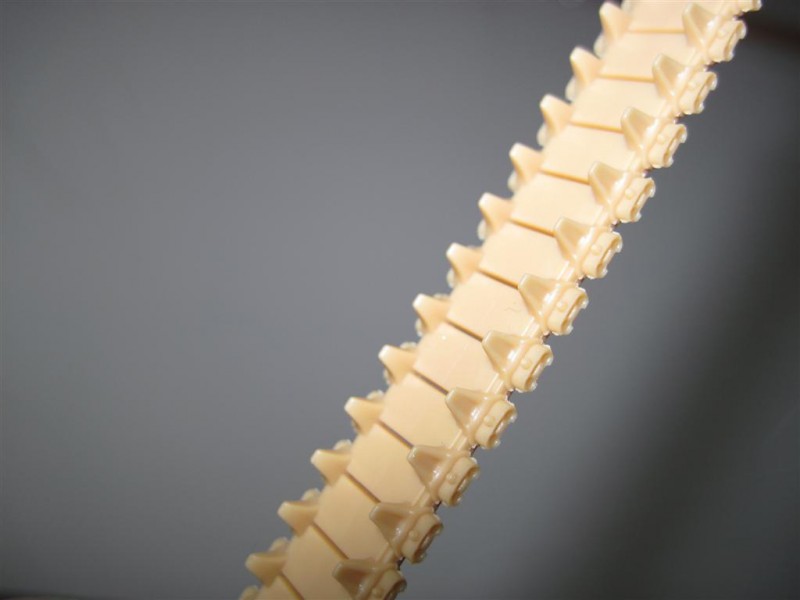
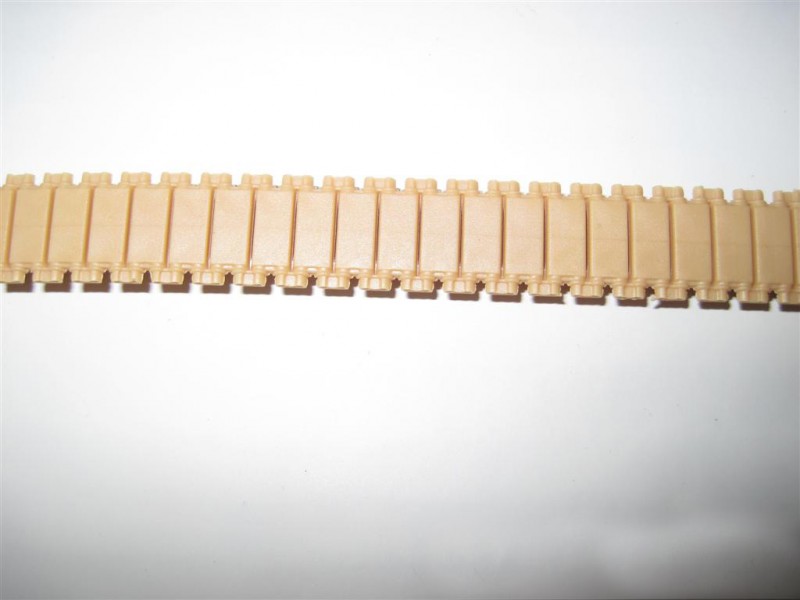
The DS plastic tracks represent the early T-41 rubber track, and are soft and flexible, cleanly-molded, with daylight visible between the links. There are small squares on a few of the inner pad surfaces from the ejector, but these can be easily-hidden, or removed with care. The teeth on my sample are all straight.
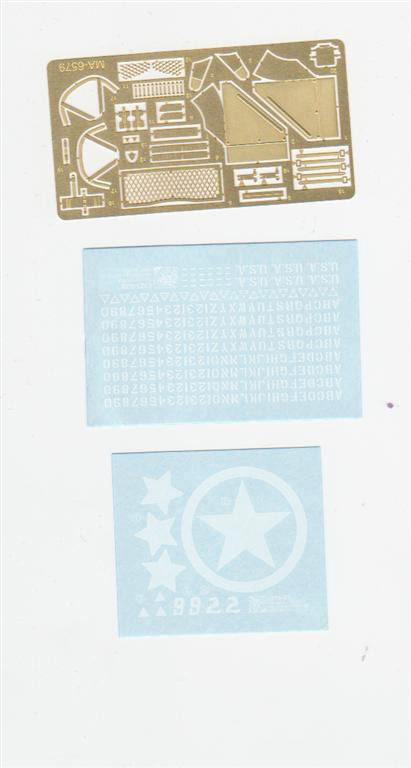
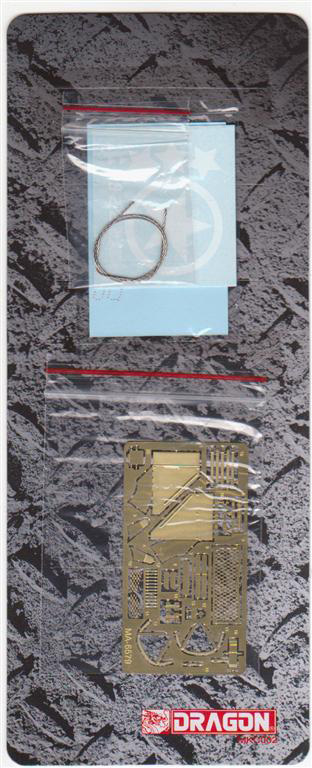
The photo etch fret has the intake screens, straps for the tool tie-downs, a bracket for the small ammo box on the M2 .50 cal., brush guards for the headlights, and front fenders (none are provided in plastic). There is a length of twisted wire for the tow cable.
decals & painting
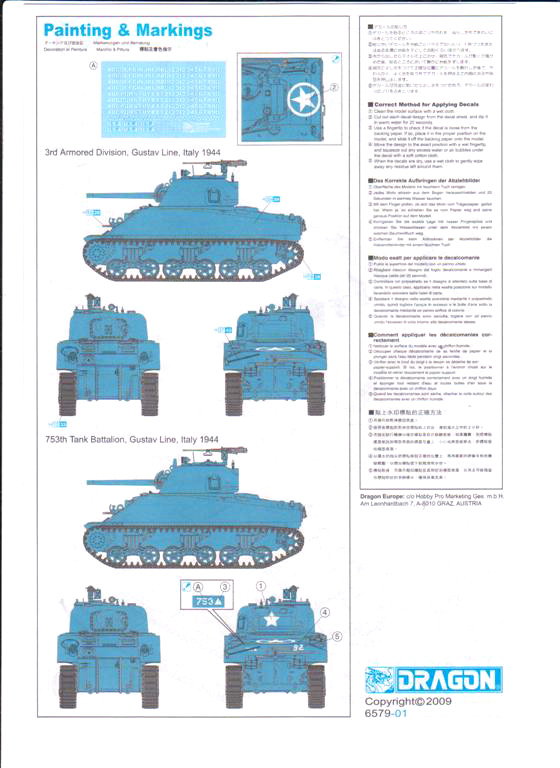
Two decal sheets are provided: one with stars and markings for vehicle 92 of the 753rd Tank Battalion, and the other a generic sheet with letters and numbers, dashes and triangles, and U.S.A. decals to create the vehicle you wish. The instructions don't indicate this clearly, but to make the decals for the 753rd, you will use numbers from this generic sheet, too. The other vehicle indicated ("3rd Armored Division, Gustav Line, Italy, 1944") is incorrect, as the 3rd Armored Division did not enter combat until it went into France on June 28th. Use of references for the appropriate vehicle will be required. I have searched on-line with little success, so book references will probably be the best resource.
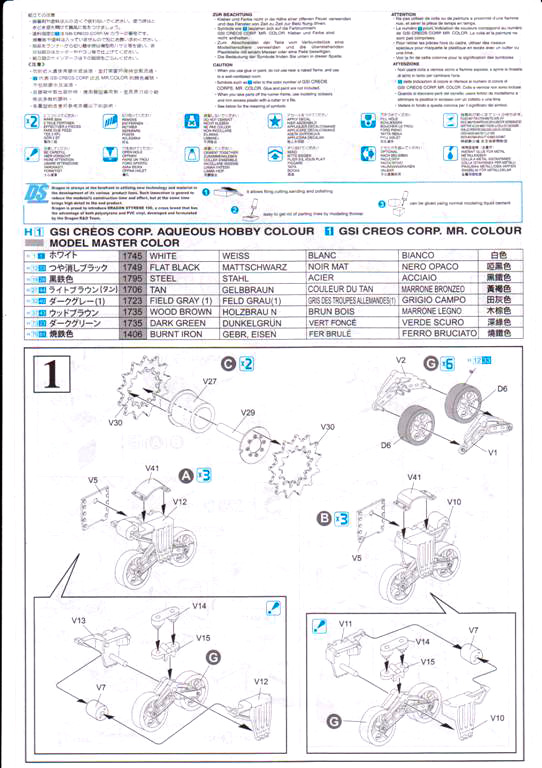
Instructions are in 10 parts, with sub assemblies shown in drop boxes. They appear clear and for Dragon instructions, are quite nice. The paint guide is provided with colors listed for GSI hobby color and Mr. Color, and Testors Model Master enamel paints. As always, study the instructions carefully before construction.
conclusion
All of the parts in this kit look well-defined and carefully molded. There are a few seam lines to clean up, but no pin marks on any part faces that I could find. It seems that each version of the M4 that Dragon produces is better than the last. Aside from some minor interior details (gun breech and a radio for starters), there isn't much more I could ask for with this kit. I'm hoping to start a build log soon to show how well it goes together. I think this is an excellent kit and well worth getting. My local hobby store has it in-stock for $41.00. I have seen it around on-line as high as $60.00 (shipping included.)
My thanks to the staff at Armorama for sending me this kit to review.
A
Build Log has been started on the forums to evaluate the kit construction.


Comments