_GOTOBOTTOM
Armor/AFV: Modern - USA
Modern Armor, AFVs, and Support vehicles.
Hosted by Darren Baker
M1A2 TUSK
razorblade1975
Visit this Community
Gyeonggi-do, Korea / 대한민국
Joined: March 21, 2007
KitMaker: 32 posts
Armorama: 31 posts
Posted: Sunday, November 16, 2008 - 03:03 AM UTC
My second works for 2008 (Totally 3rd works in my modeling life).
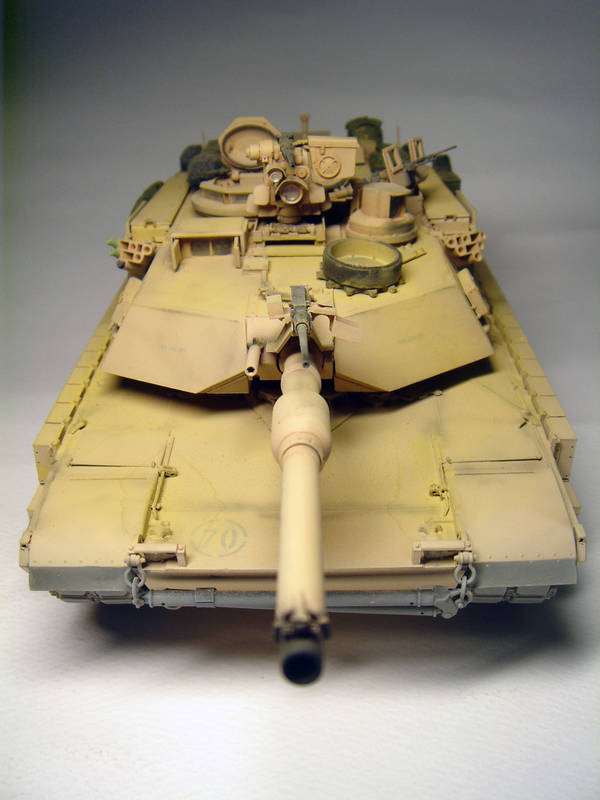
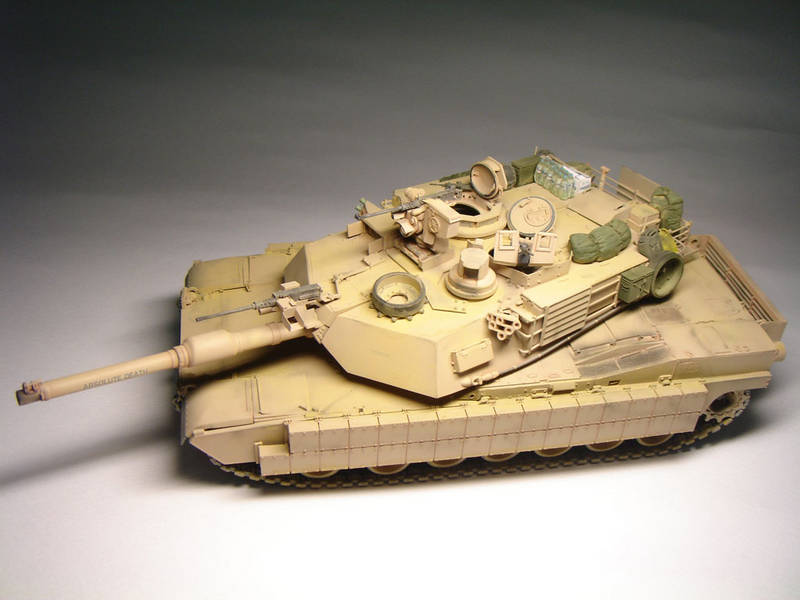
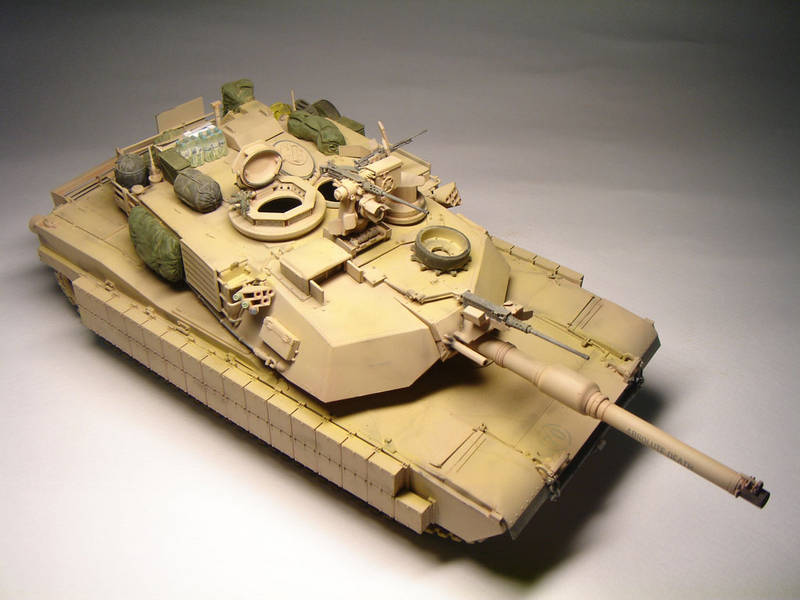
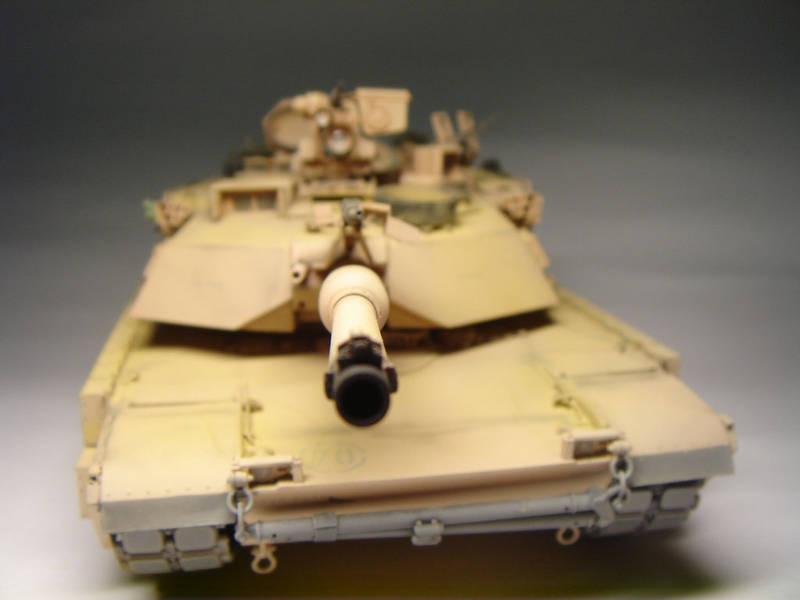
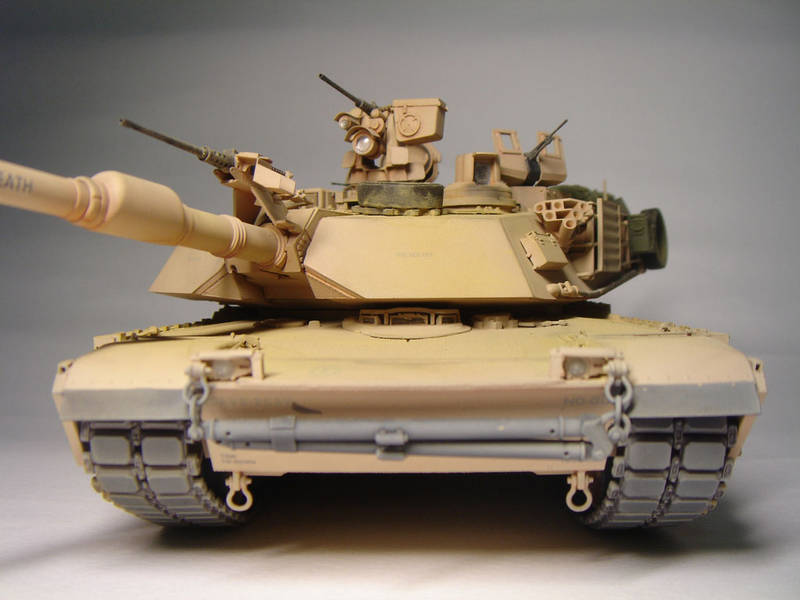
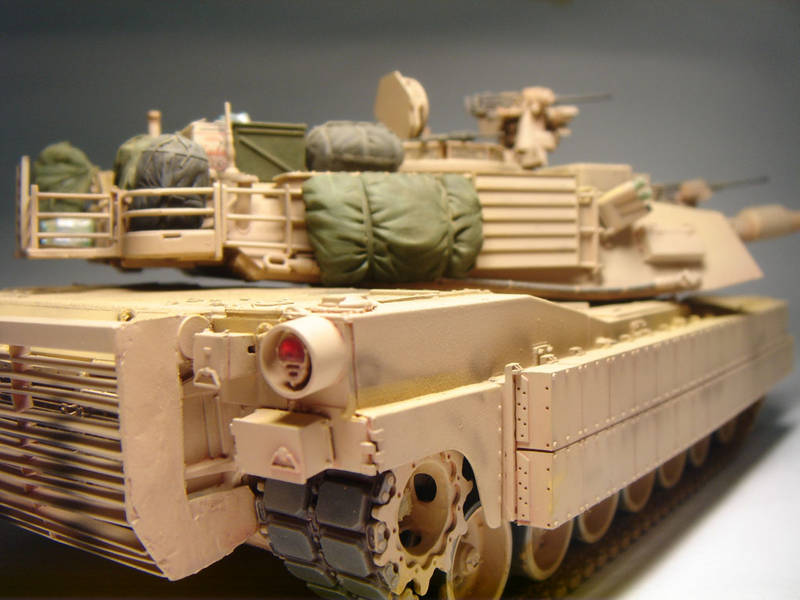
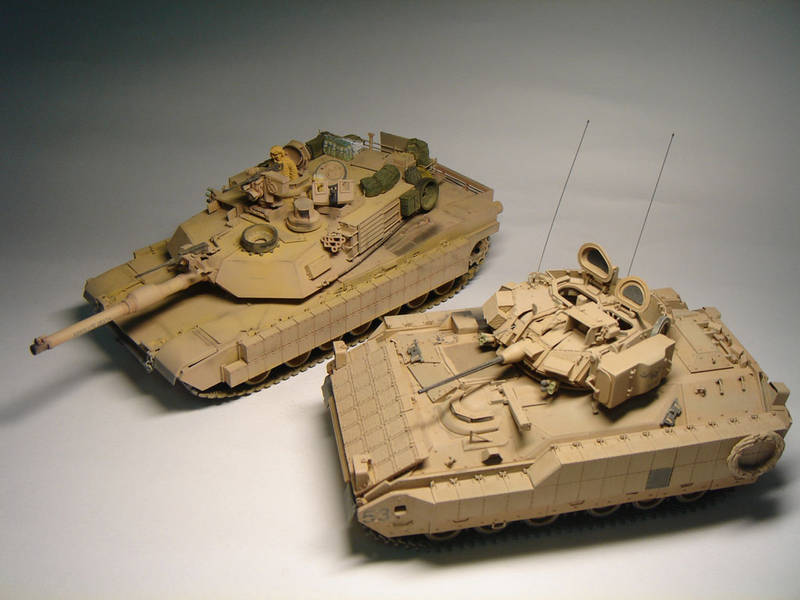
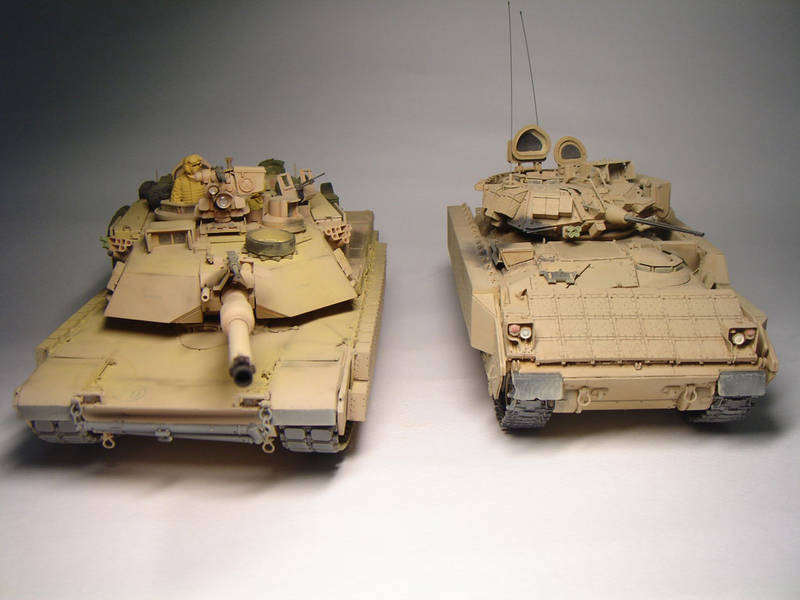
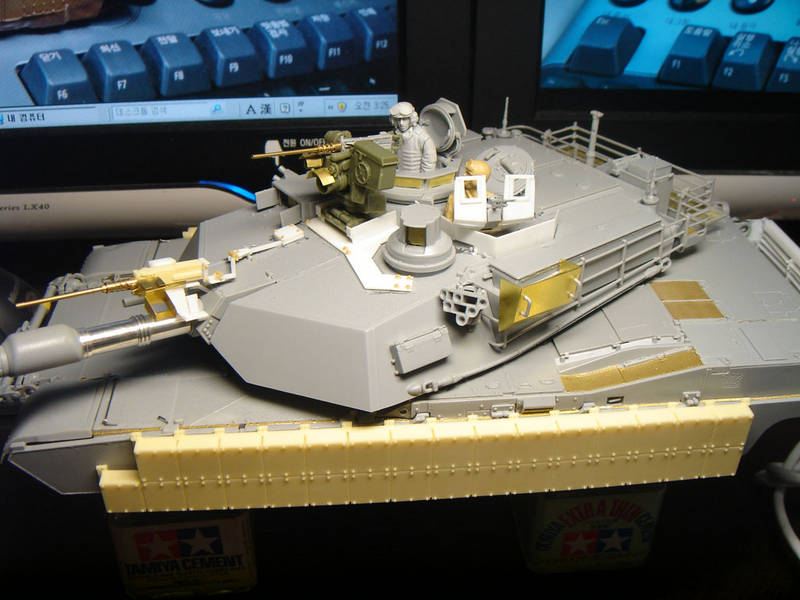
I made M1A2 TUSK and It had to be made for TUSK spec :
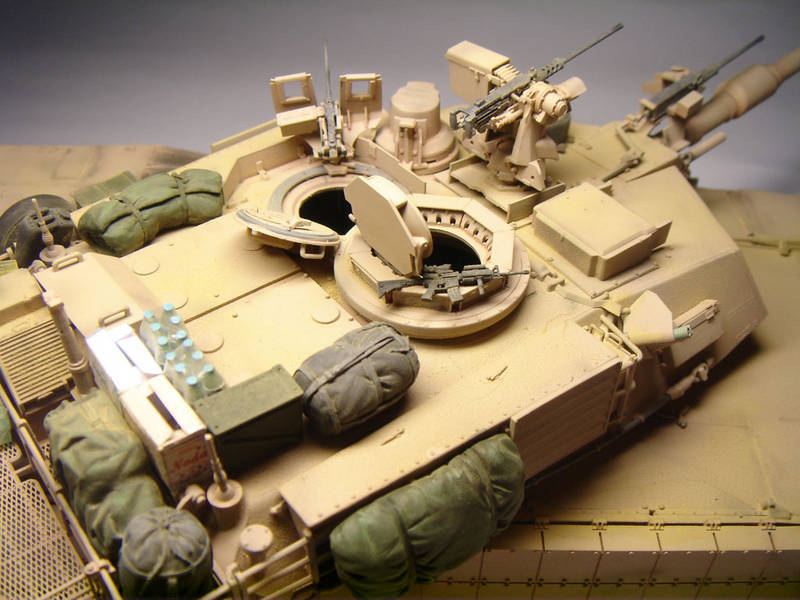
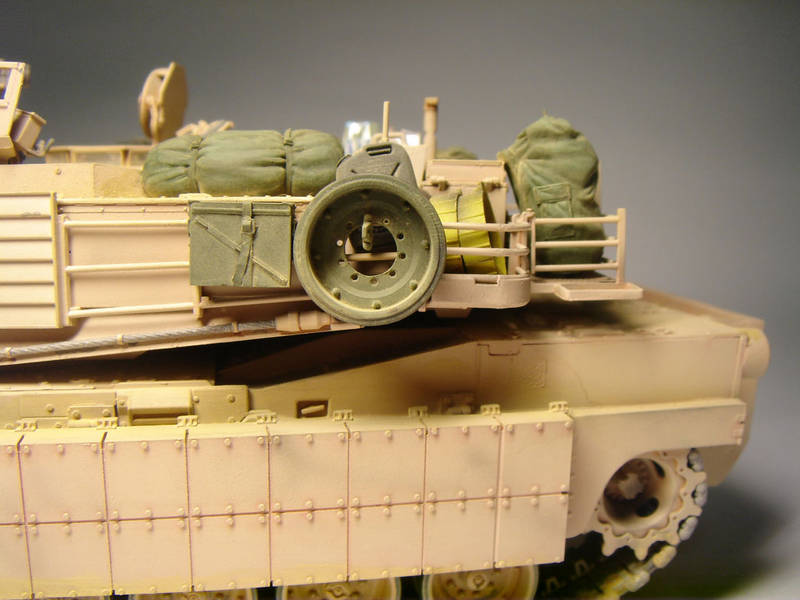
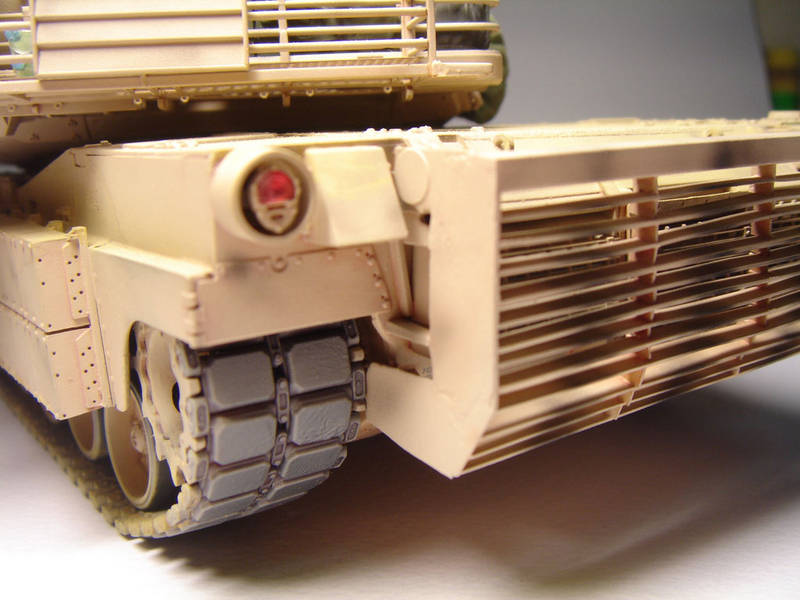
1) ERA to Side Skirt
2) Exhaust Cover to Rear panel
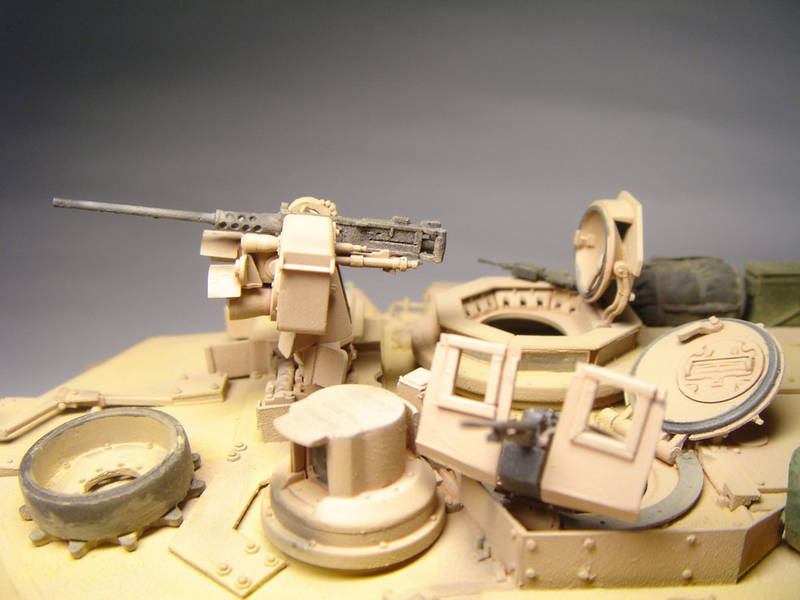
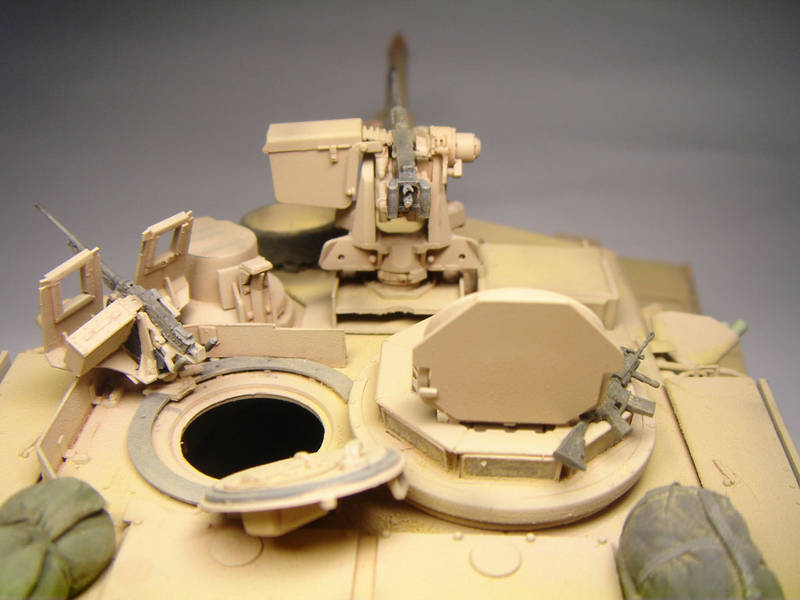
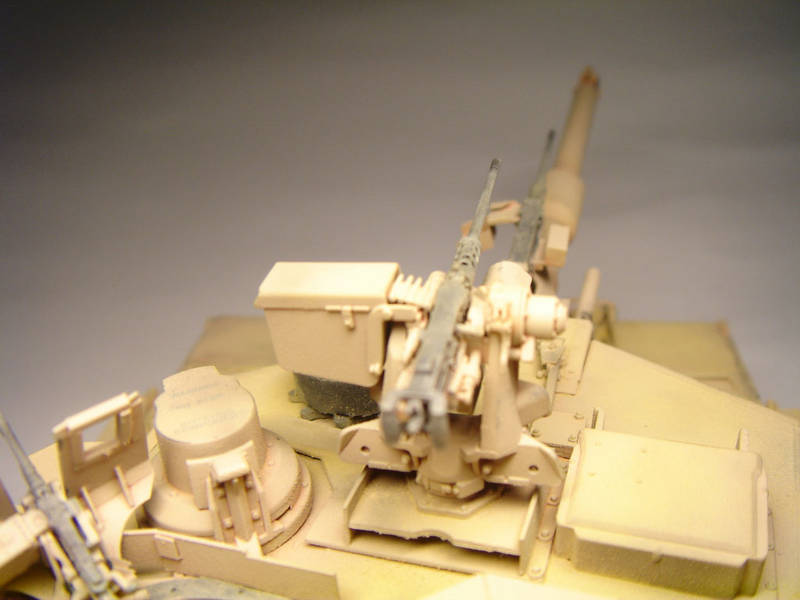
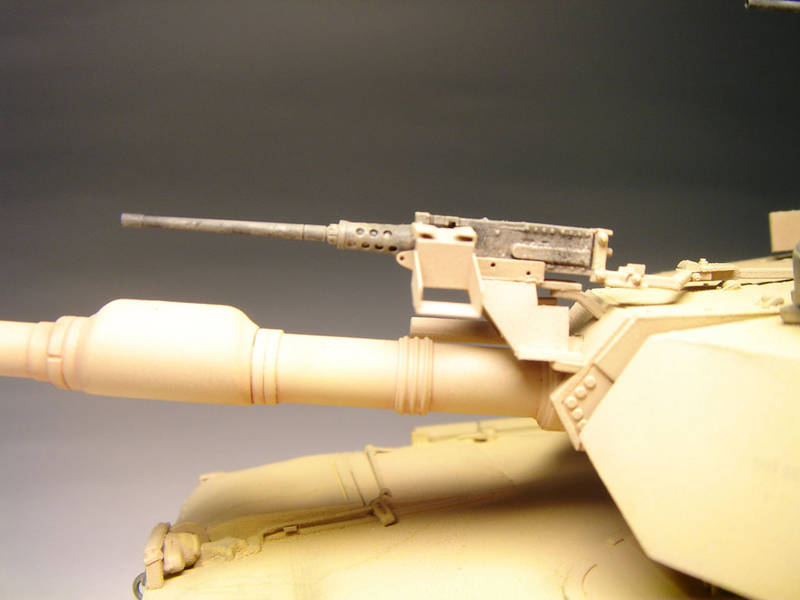
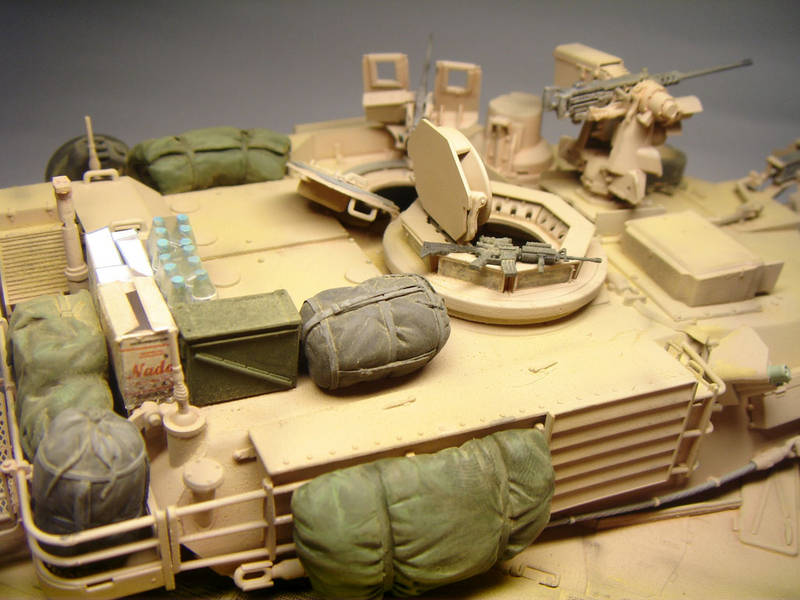
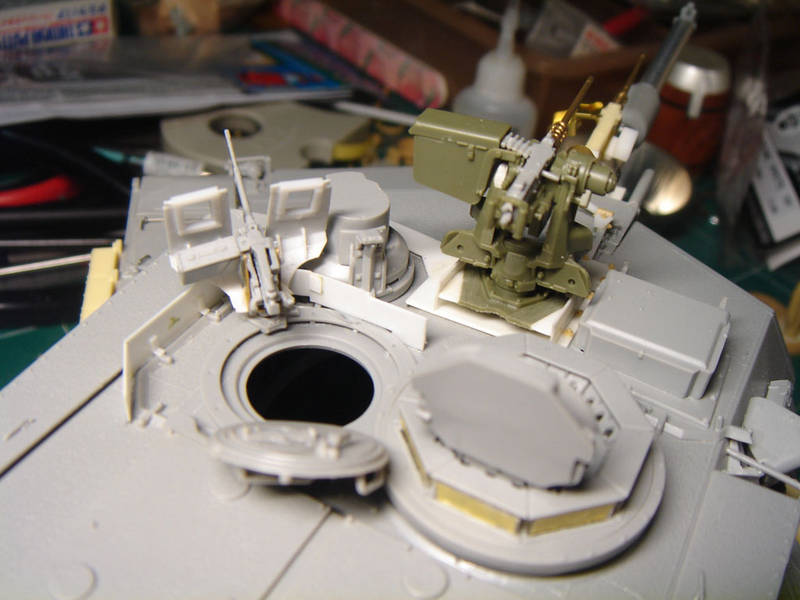
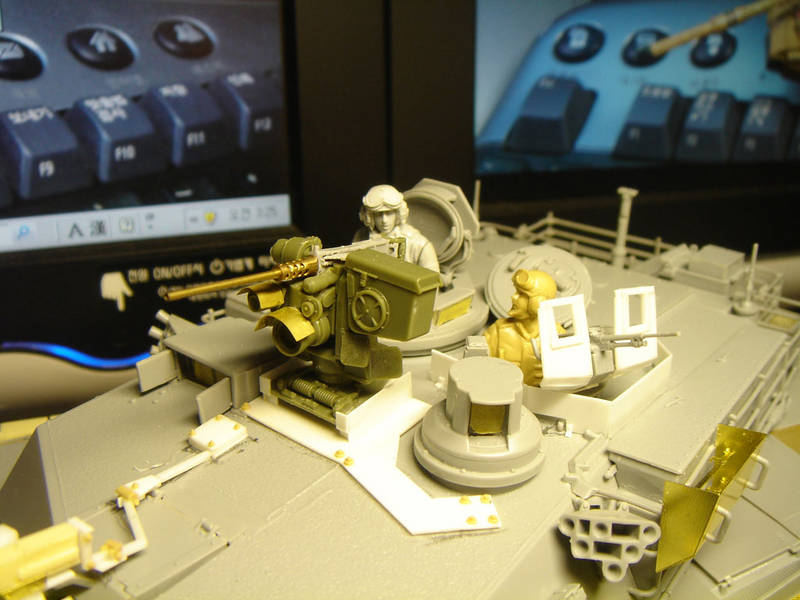
3) RWS to turret
4) CSAMM on the 120mm Barrel
5) Armor Gun Shield to Gunner hatch

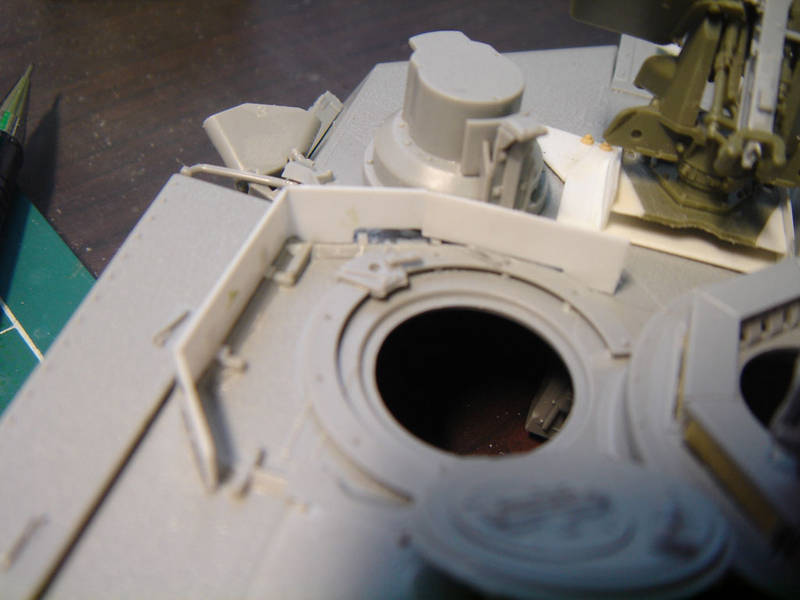
I used DML M1A2 SEP as basic kit and some aftermarket parts for this conversion :
1) Voyger M1A2 ERA
2) AFV Club RWS
3) Voyger Cal.50 (for CSAMM)
4) LionMarc Cal. 40 (for RWS)

I scratchbuilt Exhaust Cover by 0.3mm plate because Two of eduard exhaust covers that I purchased are wrong details. So I had to make it by my hand. After that, I found Voyger released accurate Exhaust Cover. Also scratchbuilt Armor Gun Shield because there's no aftermarket products.

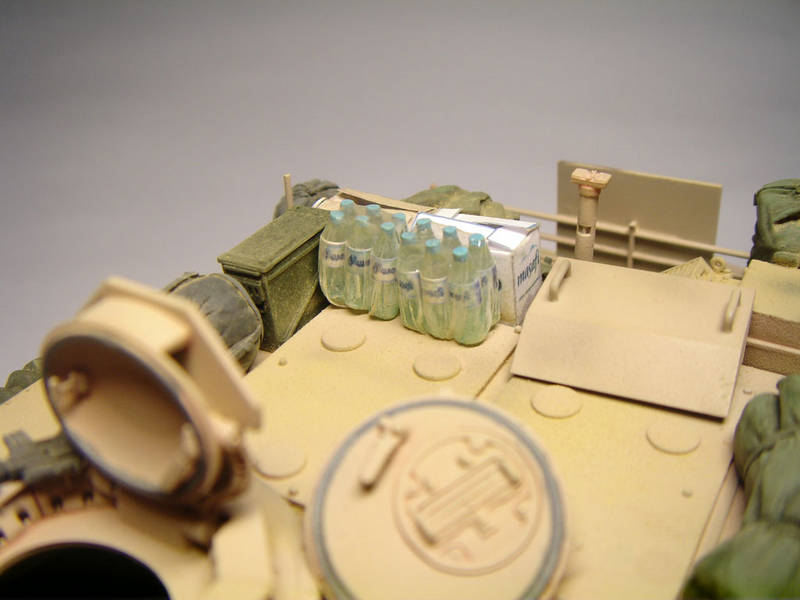
Because of my technics, I couldn't made all this conversion more accurately. This is the third works after 21c. In fact, These photos are more better than real one. I took about 200 shots and selected 30 pictures of best shot. On 2009, I would try more exciting Iraq War items.

Thank you for watching these pictures.


HeavyArty
Visit this Community
Florida, United States
Joined: May 16, 2002
KitMaker: 17,694 posts
Armorama: 13,742 posts
Posted: Sunday, November 16, 2008 - 03:35 AM UTC
Looks pretty good. Nice job on the TUSK upgrades. A few pointers though. First off, it looks way to yellow and brown to me, it could just be the lighting, but I would dust it with a more sandy color or repaint to get it more uniform. All your optics and vision blocks should have a red anti-laser coating added. They are not clear. The tail lights look like you have painted the slits on them red too. They are blackout marker and stop lights and should be black slits. Same with the small slits on the front lights as well. The .50 cal CSAMM mounted above the barrel should be in line with it. Right now it is shooting off to the left and a little higher than the main gun. The road wheel hubs should be black. They are actually clear with oil inside, but appear black or a very dark (almost black) brown. The T handle on the left side rear of the hull is a HALON fire extinguisher pull handle and should be red. The loader's gunshield is missing its ballistic glass too. The exhaust deflector that you have thrown on top of the turret isn't used w/the rear slat armor, also it should be bare metal and scorched. It heats up to almost 1200 degrees from the hot exhaust and will burn any paint off it. Lastly, the first side skirt is replaced with a non-ballistic sheet metal skirt on the TUSK to reduce weight. It should be replicated with 0.020 sheet styrene in the same shape to be correct.

Pretty good job. A few tweaks and it can be great.

Some of the same issues with the Bradley as well. Paint looks too yellow. It needs its optics painted with a red anti-laser finish too.
trahe
Visit this Community
Virginia, United States
Joined: April 03, 2006
KitMaker: 1,158 posts
Armorama: 950 posts
Posted: Sunday, November 16, 2008 - 12:34 PM UTC
Are the resin ERA panels for sale anywhere?
LeoCmdr
Visit this Community
Alberta, Canada
Joined: January 19, 2005
KitMaker: 4,085 posts
Armorama: 3,917 posts
Posted: Sunday, November 16, 2008 - 03:14 PM UTC

Quoted Text

Are the resin ERA panels for sale anywhere?


Voyager Model makes them.
tomapaul
Visit this Community
Bucuresti, Romania
Joined: September 17, 2007
KitMaker: 425 posts
Armorama: 304 posts
Posted: Sunday, November 16, 2008 - 11:59 PM UTC

Quoted Text


Quoted Text

Are the resin ERA panels for sale anywhere?


Voyager Model makes them.


But the kit is inaccurate compared to TUSK I upgrade kit, and only the prototype had slat armour.Word is out that Voyager is making the Tusk II upgrade kit...but I don't really know.
ivanhoe6
Visit this Community
Wisconsin, United States
Joined: April 05, 2007
KitMaker: 2,023 posts
Armorama: 1,234 posts
Posted: Monday, November 17, 2008 - 12:23 AM UTC
I like your build alot ! MAYBE THE LIGHT IS WHAT MAKES IT TOO YELLOW but a great build never the less I hope my build of the Dragon M1A1 AIM I have on the work bench looks as nice. I also liked your personal on board gear a lot too. Keep up the good work .
razorblade1975
Visit this Community
Gyeonggi-do, Korea / 대한민국
Joined: March 21, 2007
KitMaker: 32 posts
Armorama: 31 posts
Posted: Friday, November 21, 2008 - 03:26 AM UTC
Thanks Gino.
razorblade1975
Visit this Community
Gyeonggi-do, Korea / 대한민국
Joined: March 21, 2007
KitMaker: 32 posts
Armorama: 31 posts
Posted: Friday, November 21, 2008 - 03:27 AM UTC
I purchased this ERA (from Voyger) in Korean online shop.
You can find it anywhere that Voyger sells.
razorblade1975
Visit this Community
Gyeonggi-do, Korea / 대한민국
Joined: March 21, 2007
KitMaker: 32 posts
Armorama: 31 posts
Posted: Friday, November 21, 2008 - 03:29 AM UTC
I heard Legend also making TUSK conversion Kits too.
That's really good news to me. I love conversion kits than scratchbuilding.
razorblade1975
Visit this Community
Gyeonggi-do, Korea / 대한민국
Joined: March 21, 2007
KitMaker: 32 posts
Armorama: 31 posts
Posted: Friday, November 21, 2008 - 03:32 AM UTC
I used MIG's Gulf Sand pigment to this TUSK. So it looking so yellow.
I use [Xtracrylix Armor Sand] for base color to my US Armors in Iraq.
tomapaul
Visit this Community
Bucuresti, Romania
Joined: September 17, 2007
KitMaker: 425 posts
Armorama: 304 posts
Posted: Friday, November 21, 2008 - 04:19 AM UTC
The tow bars should be nato green or tan.Most of them are green.
CombatKrieg
Visit this Community
Singapore / 新加坡
Joined: January 19, 2008
KitMaker: 517 posts
Armorama: 382 posts
Posted: Friday, November 21, 2008 - 04:53 AM UTC
That's a nice Bradley there... Together with the Abrams, nice detailing on the exhaust stains too.
Ric_Cody
Visit this Community
Georgia, United States
Joined: May 22, 2005
KitMaker: 299 posts
Armorama: 294 posts
Posted: Friday, November 21, 2008 - 09:54 AM UTC
1st off, very good looking model. The only thing I have noticed is that one the Right Rear of the tank, you have a box in the wrong spot. The larger box you have on the lower part needs to be moved up. It does not mount that far down because if it would be mounted down there it would get tore up easily due to the fact that the lower part is just a thin Aluminum fender that gets tore up easily.

Ric
 _GOTOTOP