_GOTOBOTTOM
Armor/AFV: Braille Scale
1/72 and 1/76 Scale Armor and AFVs.
Hosted by Darren Baker
Trumpeter's Dicker Max - again
firstcircle
Visit this Community
England - South East, United Kingdom
Joined: November 19, 2008
KitMaker: 2,249 posts
Armorama: 2,007 posts
Posted: Monday, July 28, 2014 - 11:05 AM UTC
I say again, as a braille build log of this same kit was already started by Kenneth T. Overby

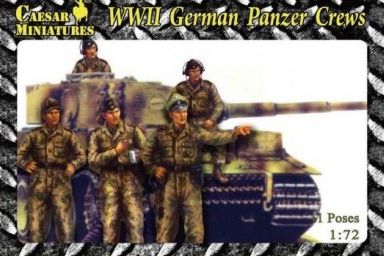
This kit was discounted by a model shop on eBay as it had a crushed box, but inside it was all OK, and I started building it around Christmas. Lots of things interrupted it, some model related, some not, and I hadn't really bothered photographing it properly either.

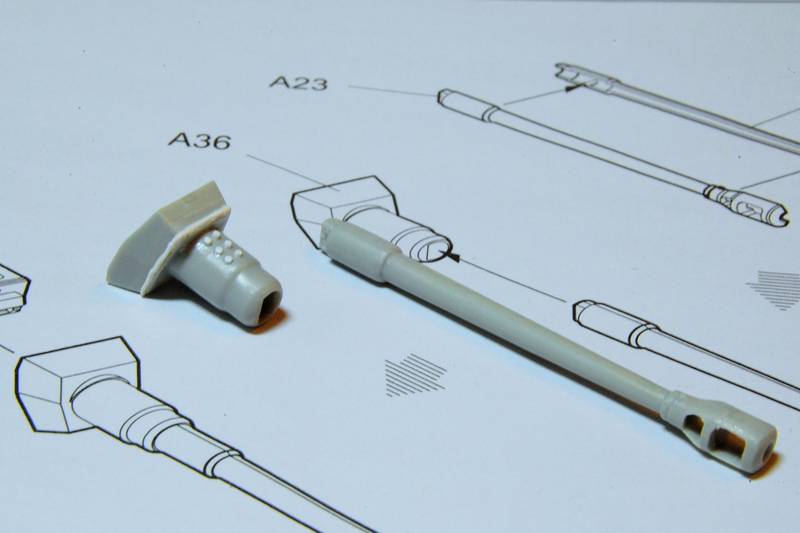
The blog that Ken Overby did made a good job of starting off with all the detail sprue shots, and he got as far as building the right hand dummy driver box, but there it ends, which is a shame, hopefully he will return to finish it.

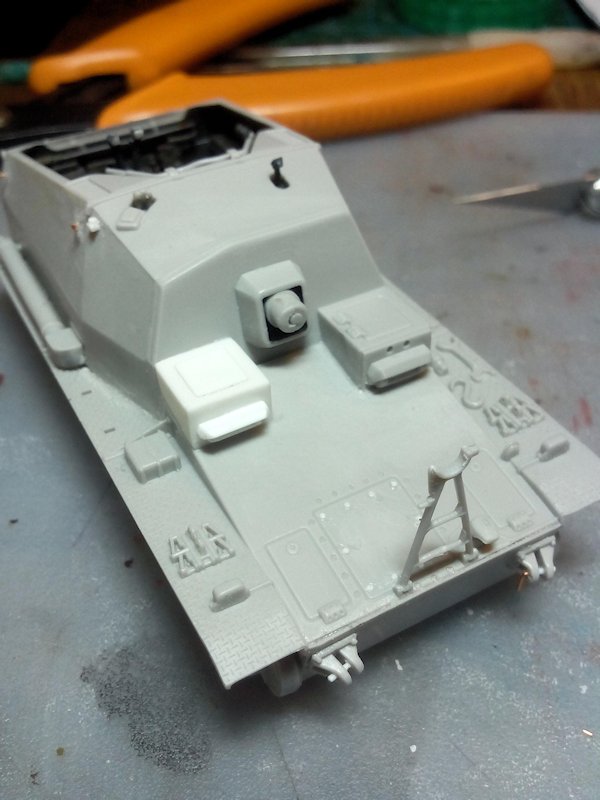
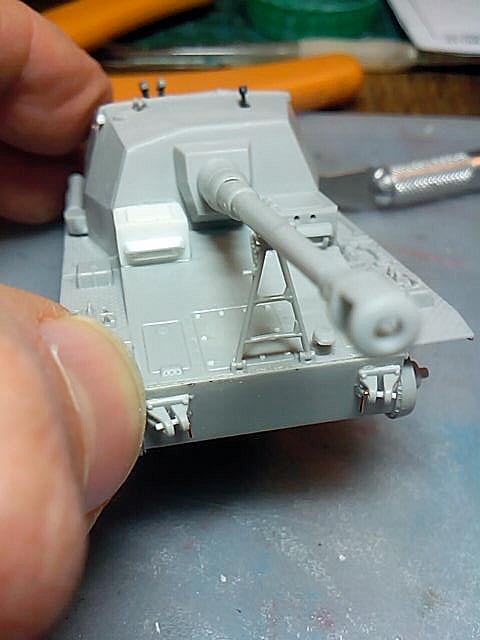
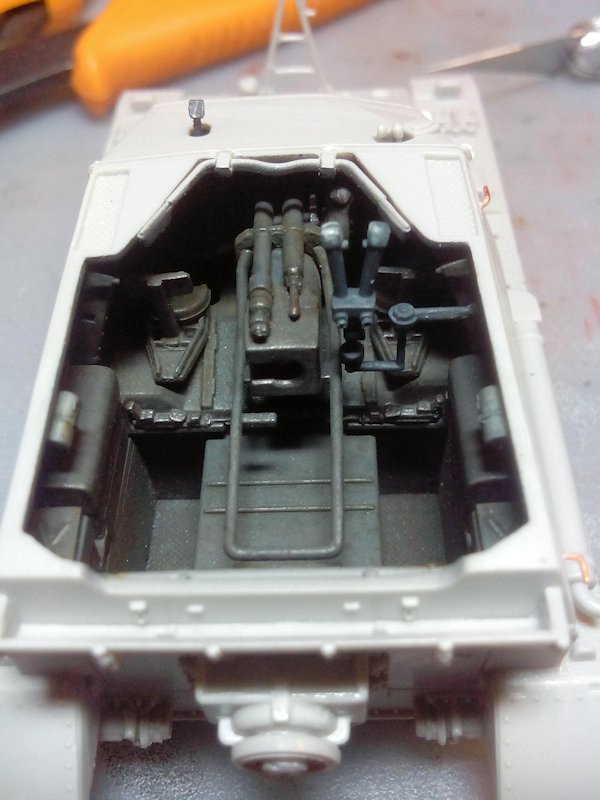
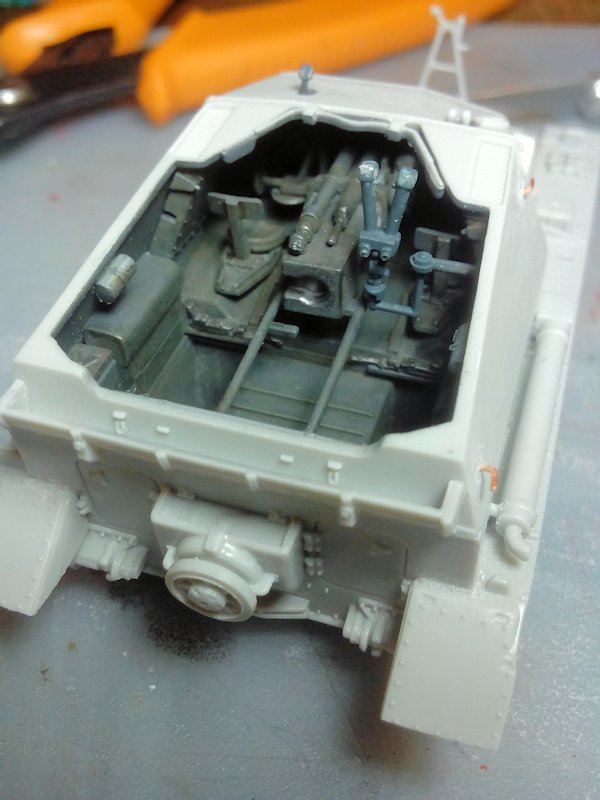
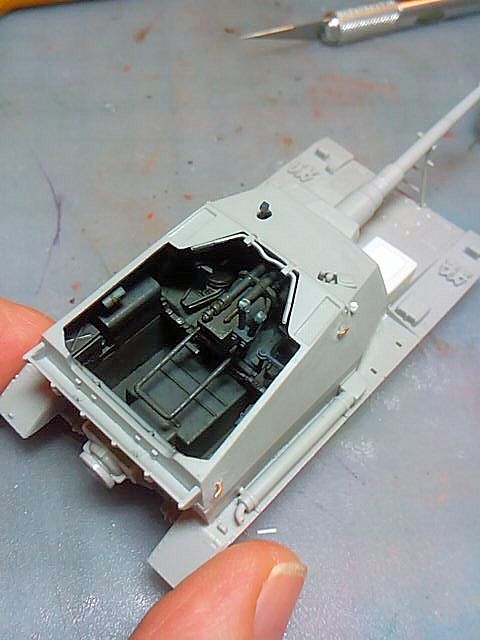
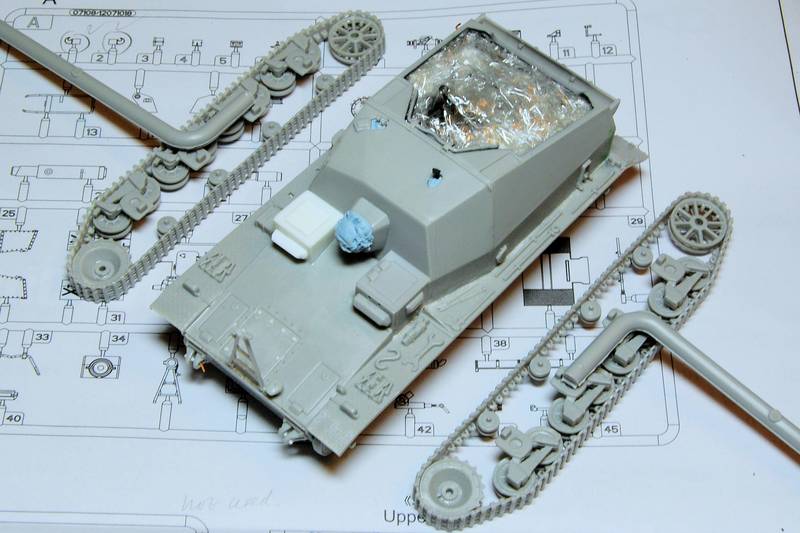
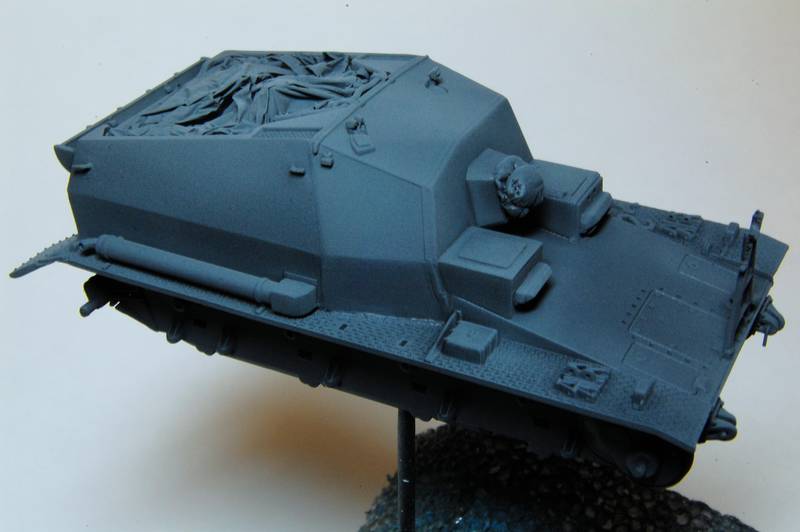
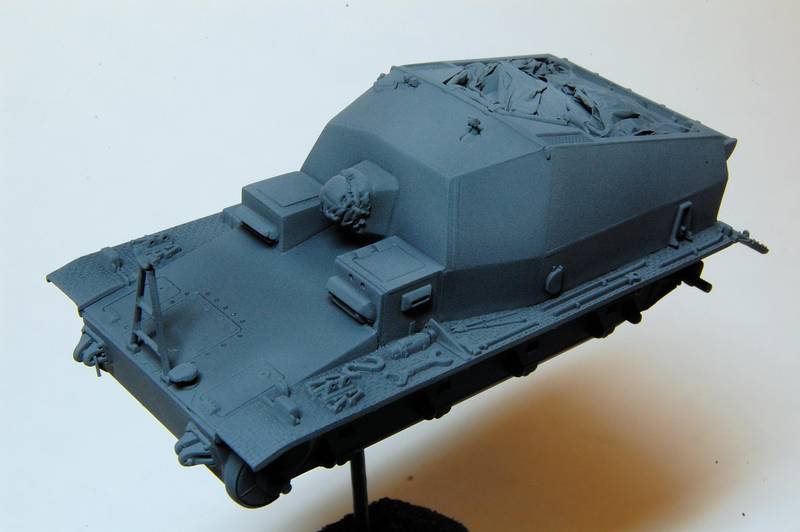
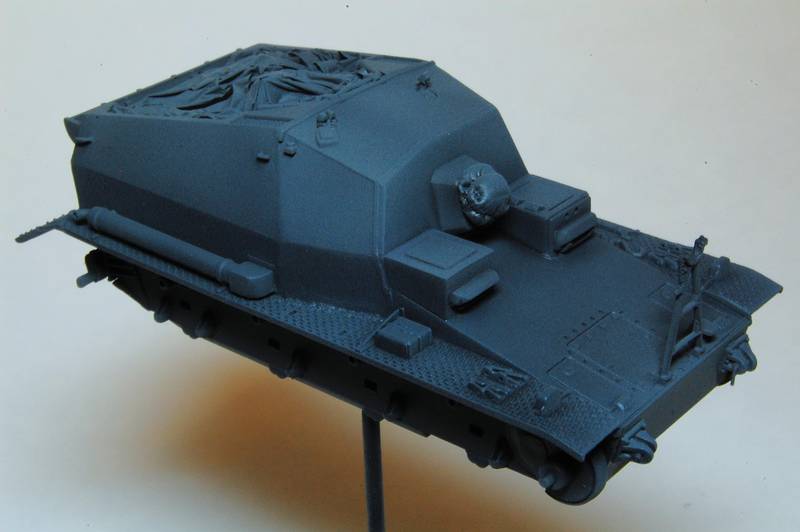
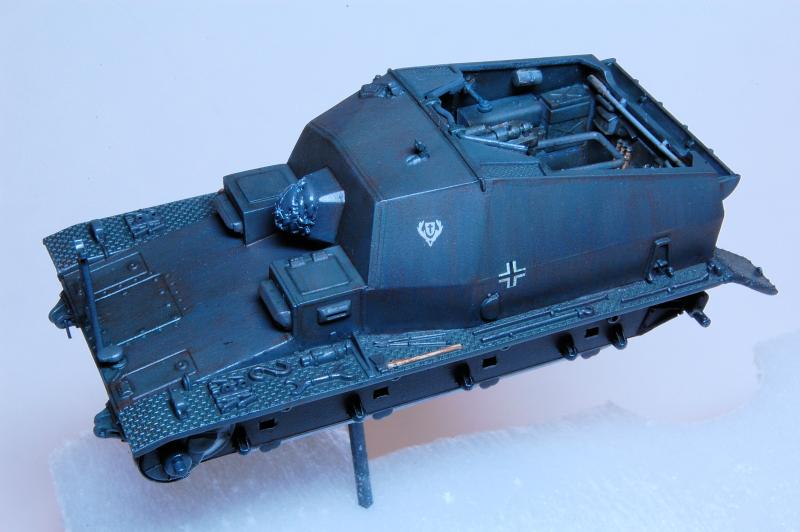
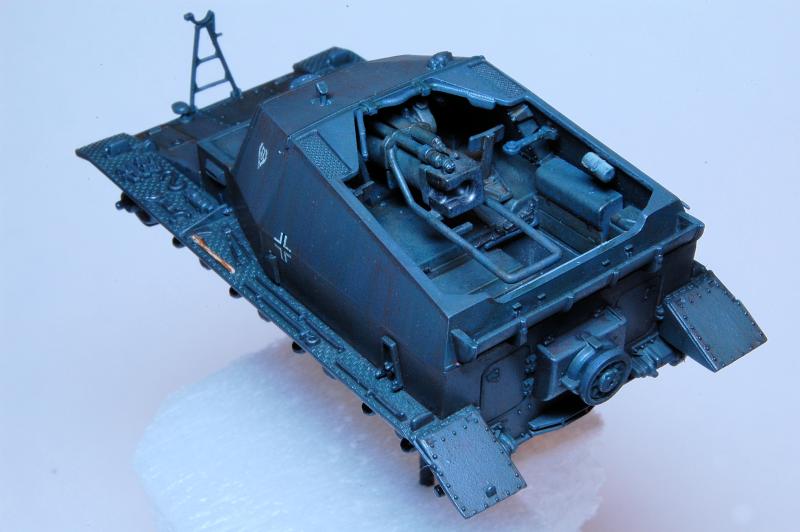
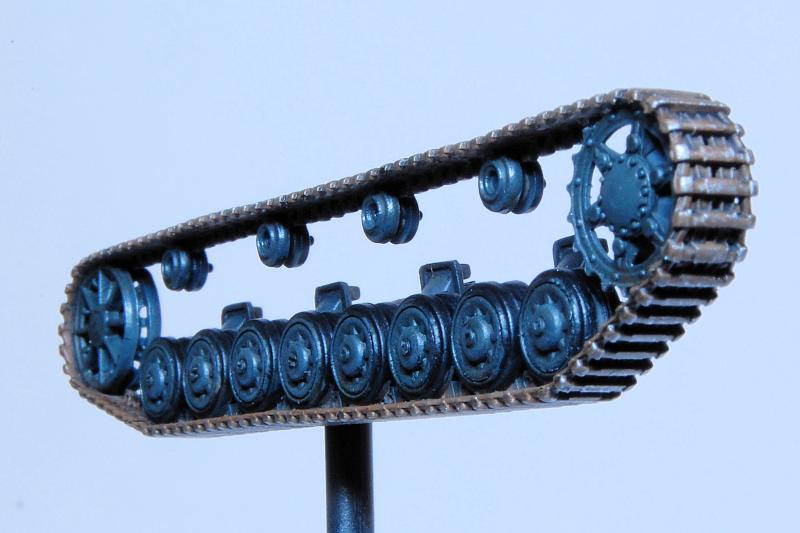
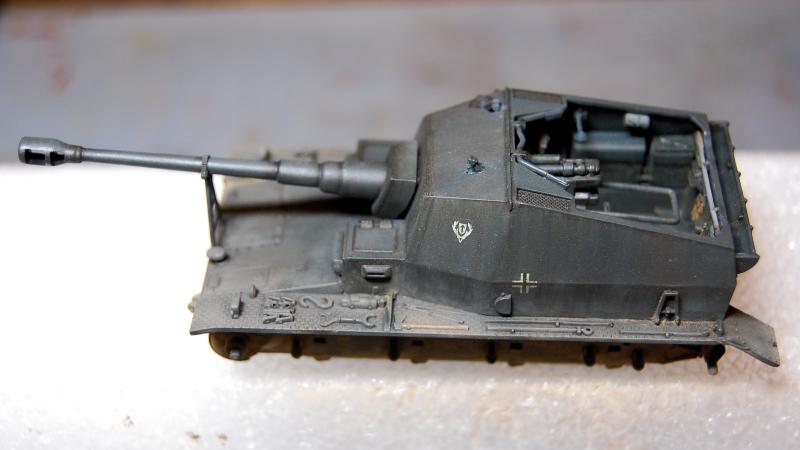
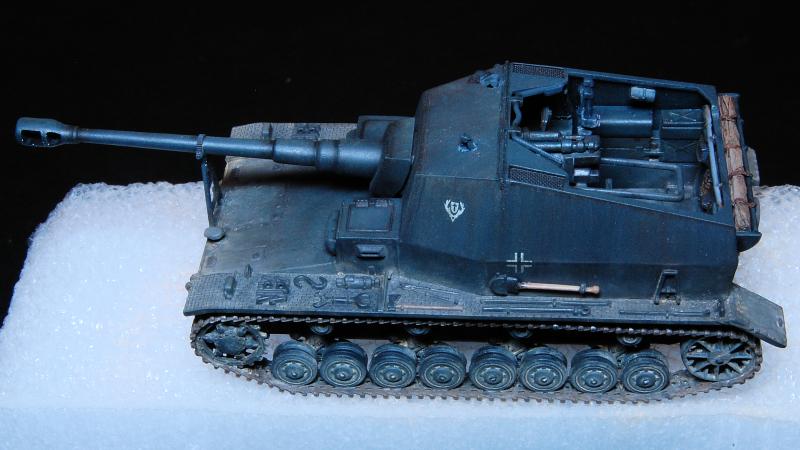
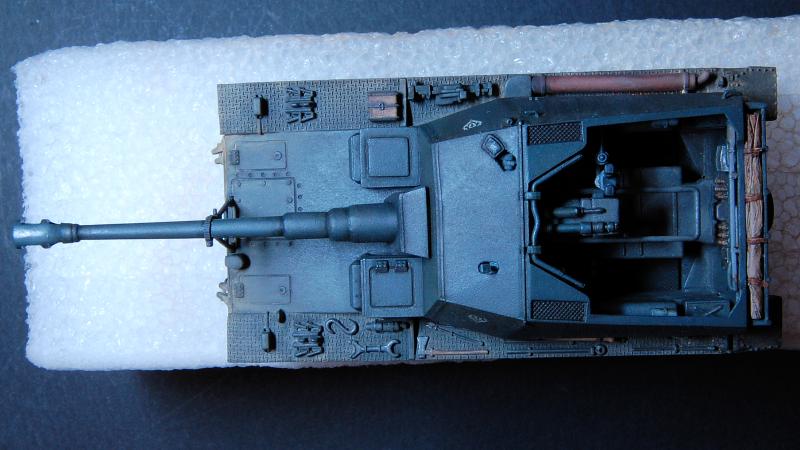
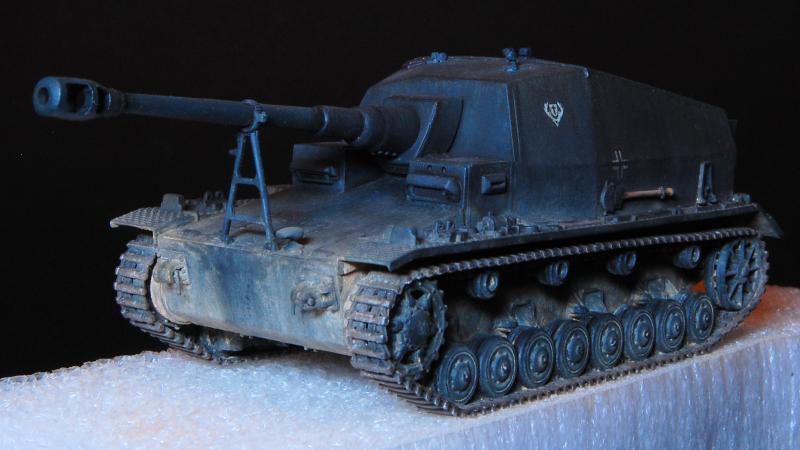
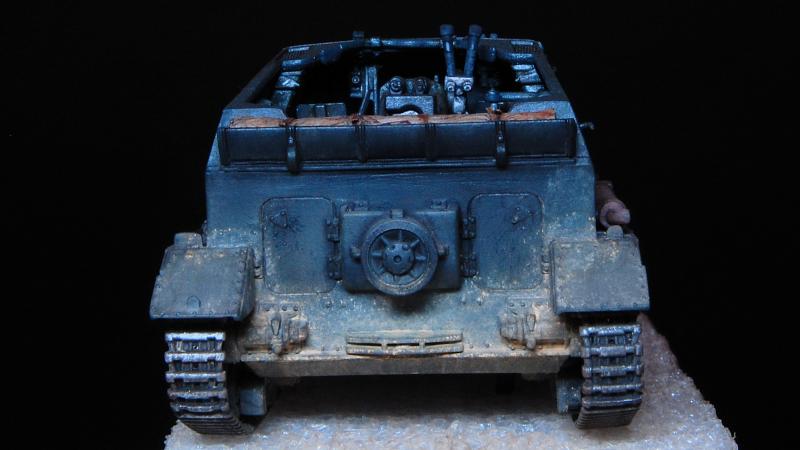
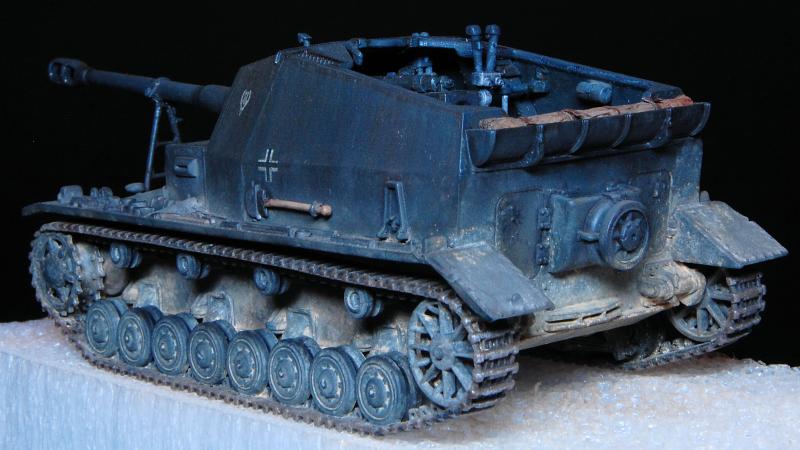
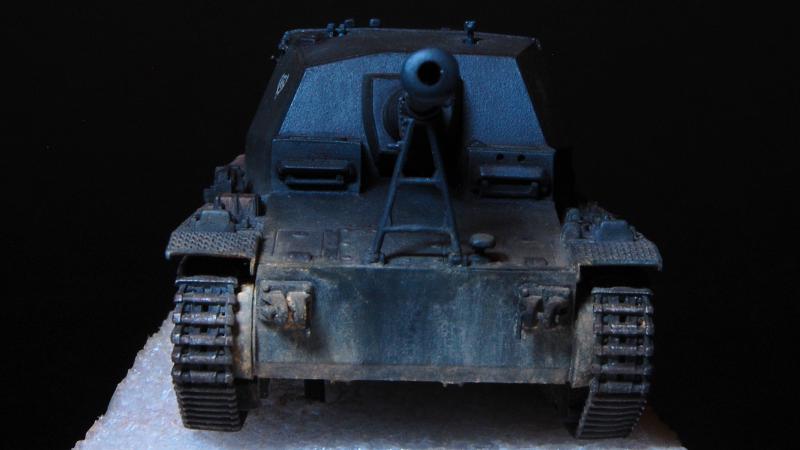
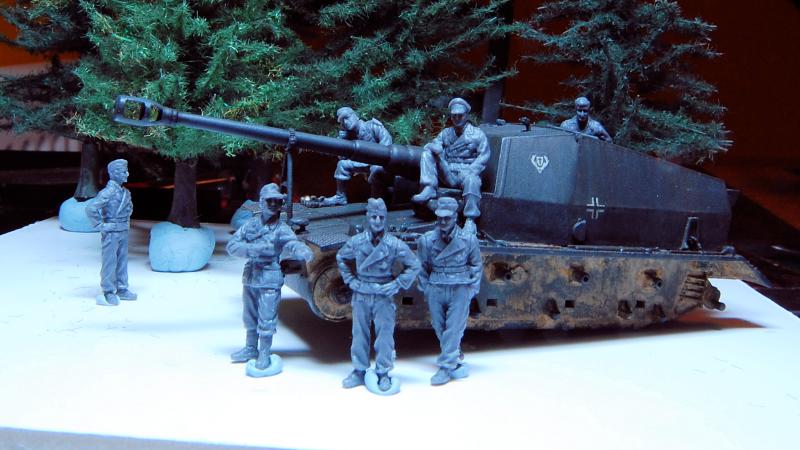
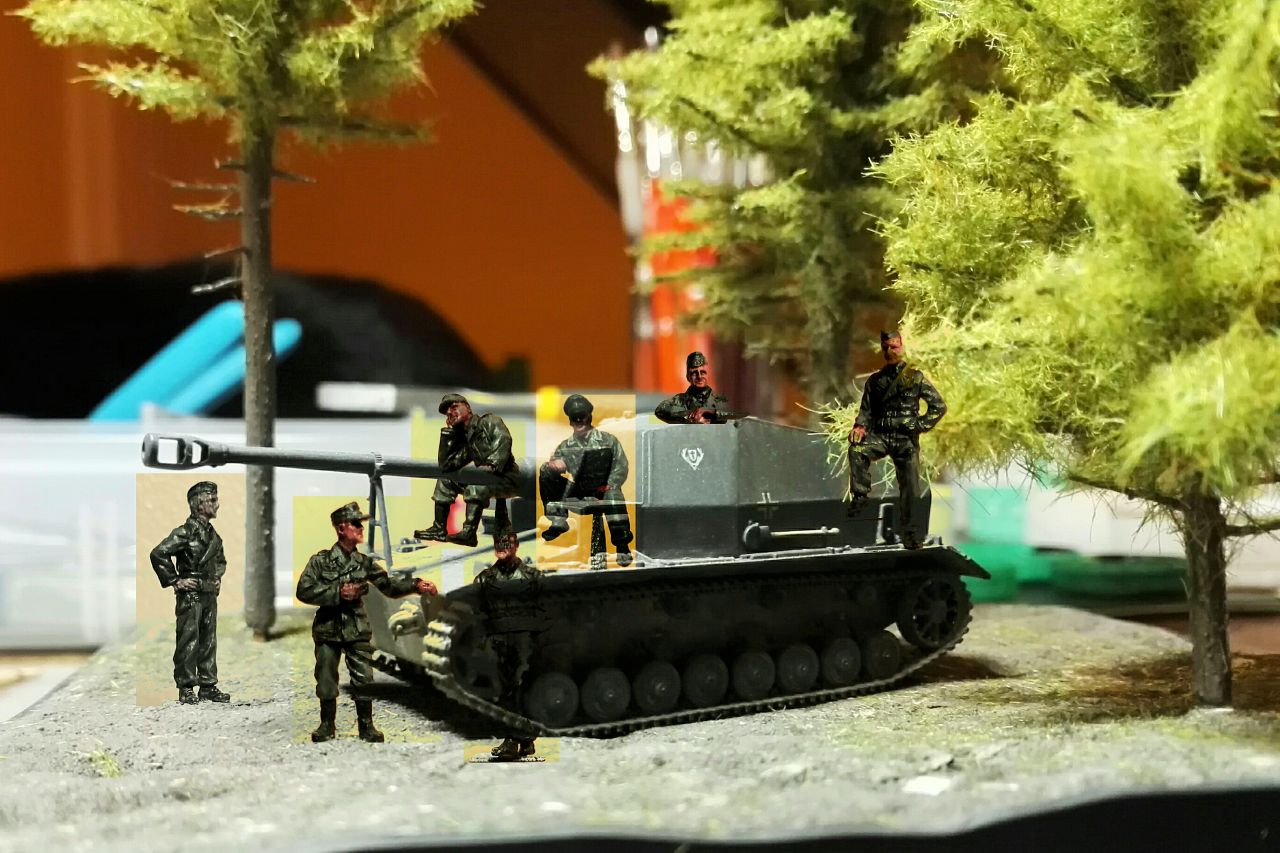
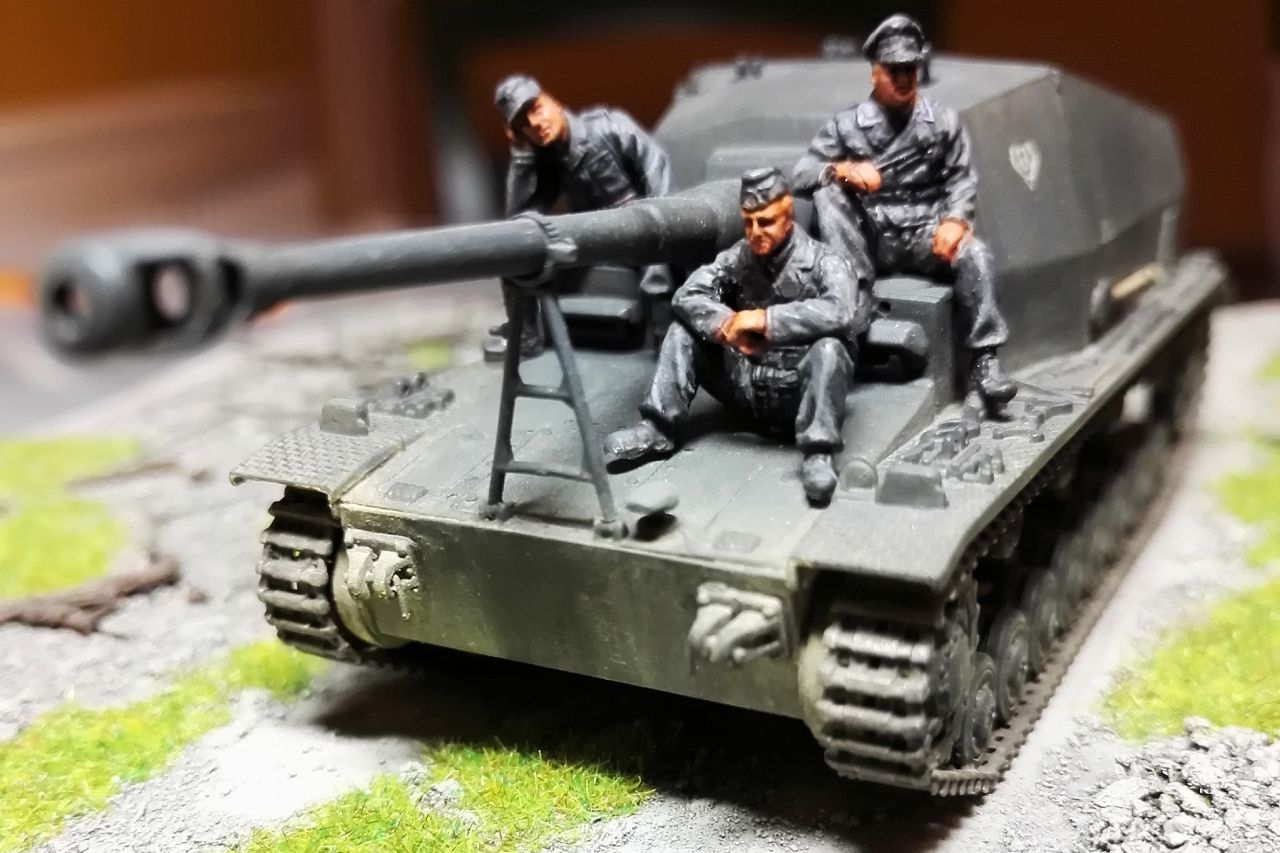
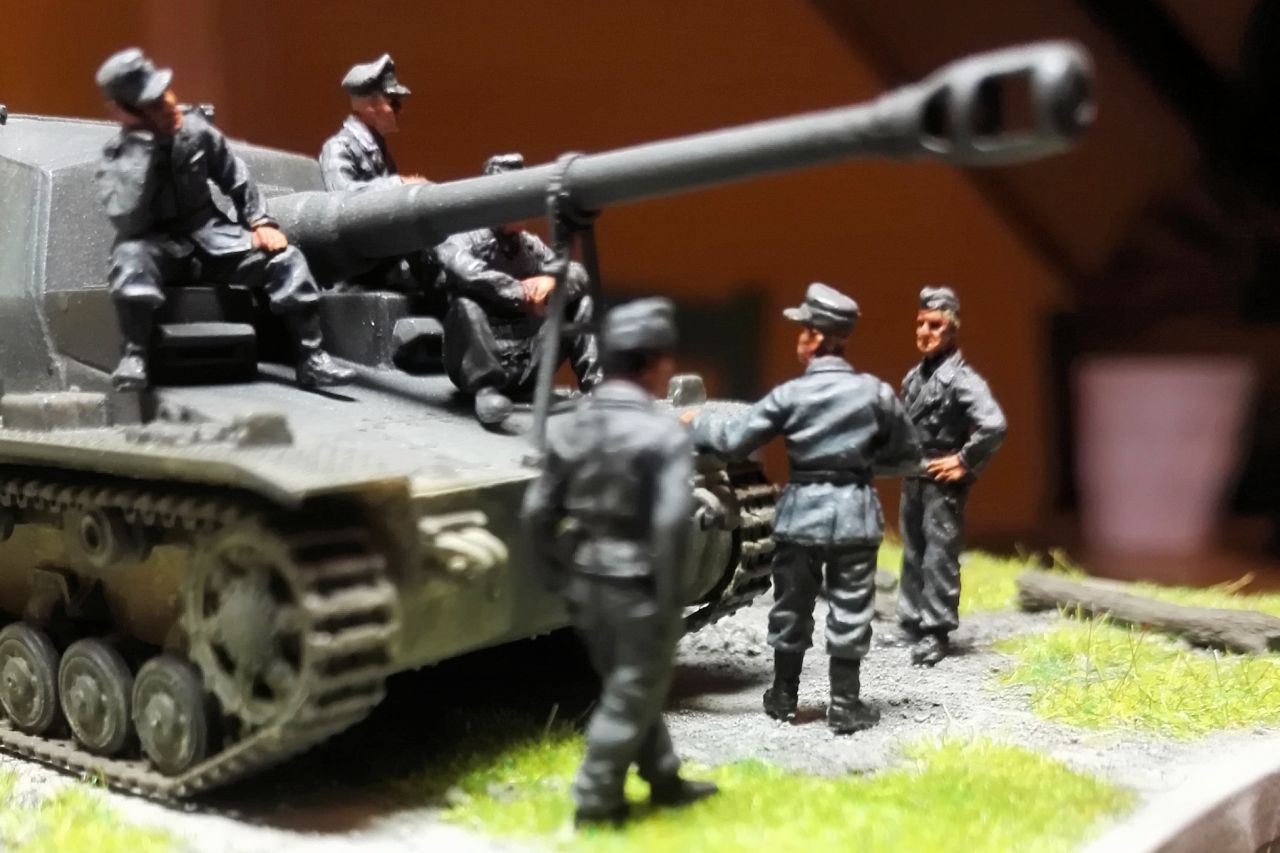
Below are some shots I took on my not very good camera phone. I built the bottom and top halves, then painted the interiors of both and then cemented it together. The two periscopes are part painted and poking out of the upper plate of the fighting compartment. In these shots the gun and the track units are just clipped in place.

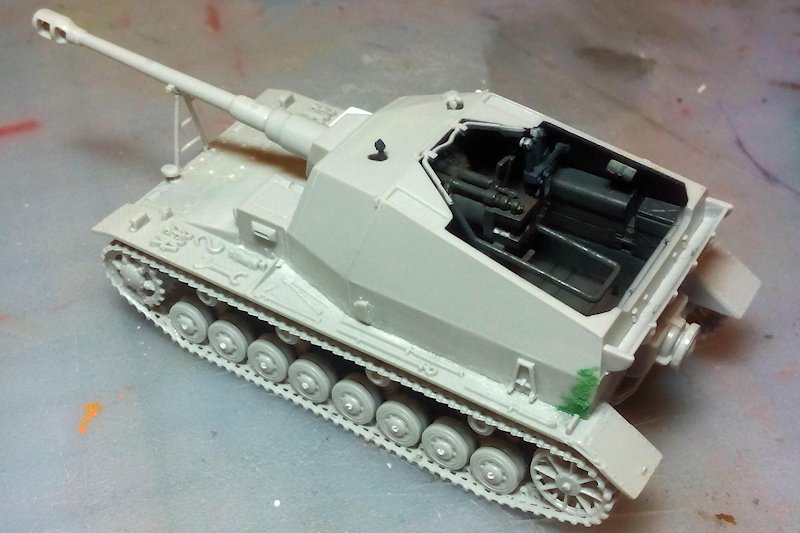
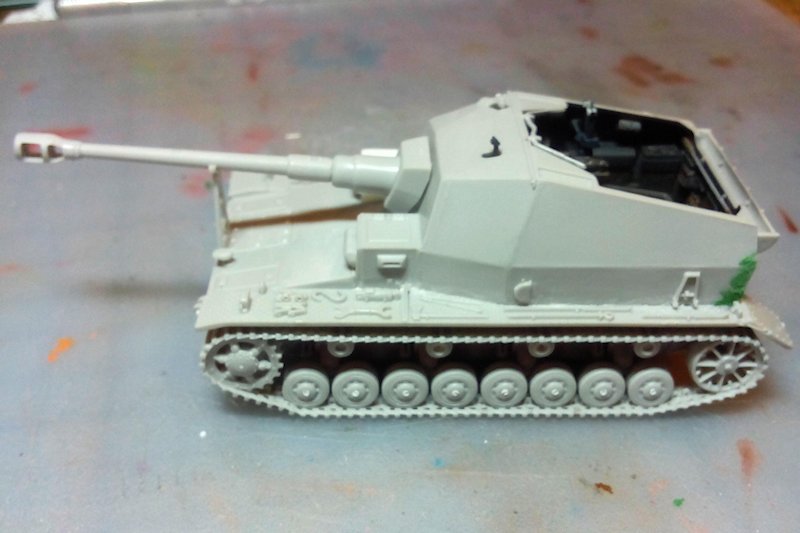
You can see the dummy driver compartment in white; quite how Trump missed this detail is beyond belief! Not that difficult to create oneself, including the dummy hatch plate on top and the vision slit, made out of triangular section Plastruct strip. Another error however, that I didn't notice at the time I did this, is that the front plates of these two boxes should be slightly inclined, not dead vertical. Oh well.

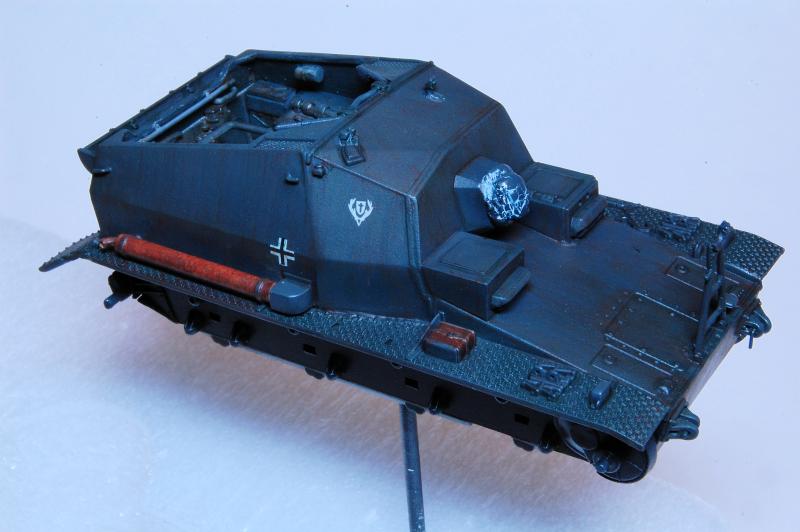
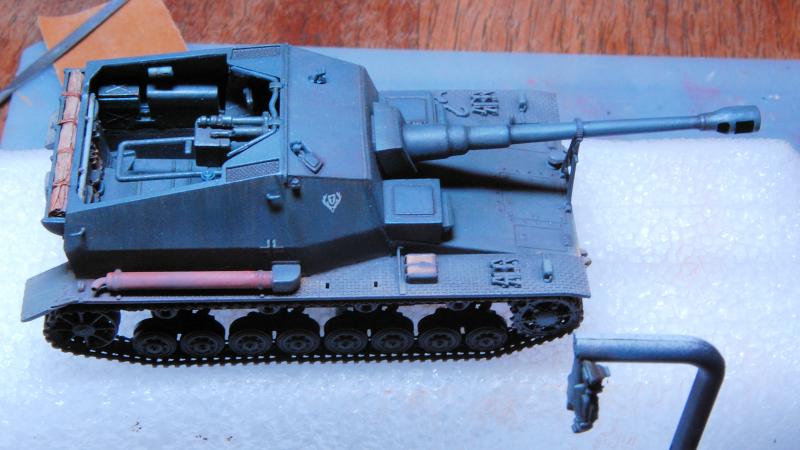
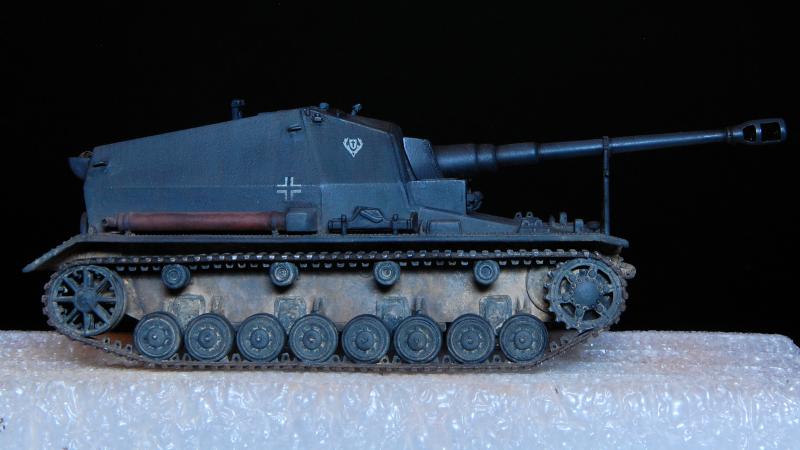
I drilled the towing wotsits at the front and added pin, and also removed the moulded on tow rope from the side armour, and replaced the hooks that it mounts on. Just in front of the forward hook is an added aerial mount.

You can see there was a bit of filler required at the exterior joins between upper and lower halves, though the interior joins are perfect.

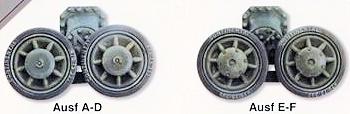
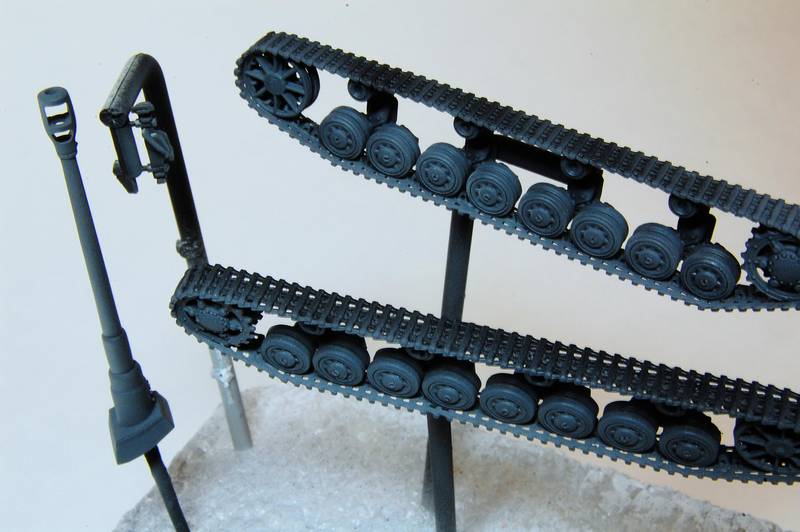
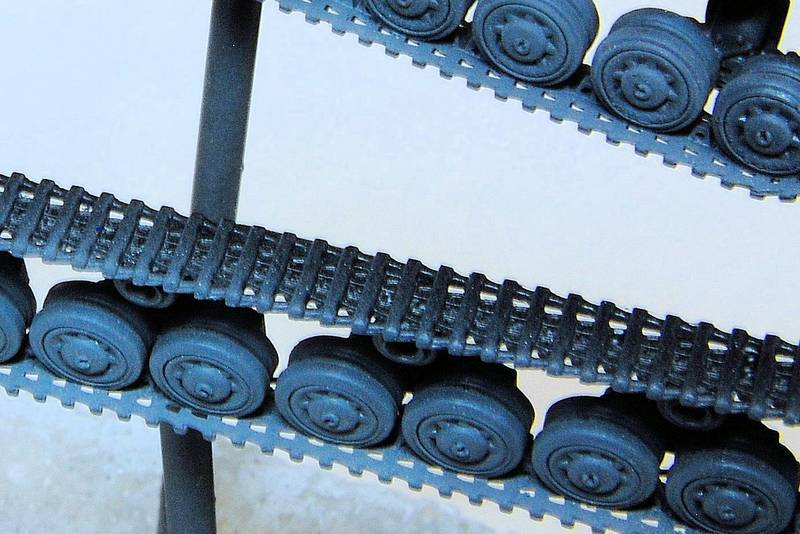
The wheels: I will talk about those another time, suffice to say, a fair amount of fiddly work went into improving them.

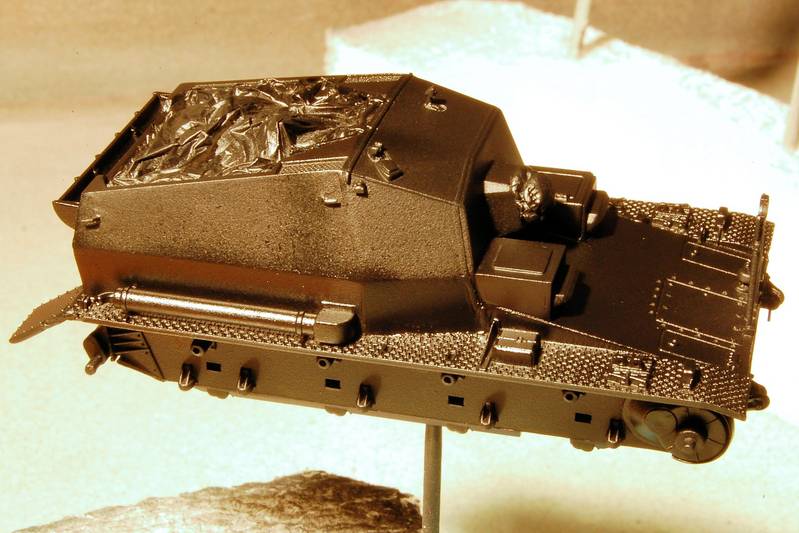
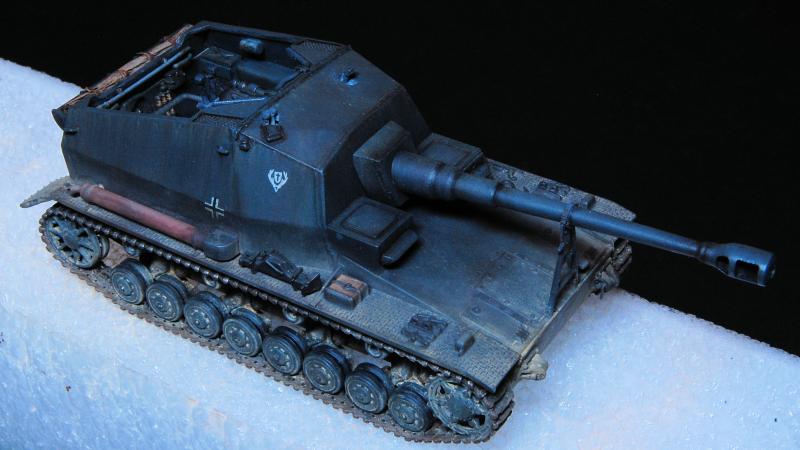
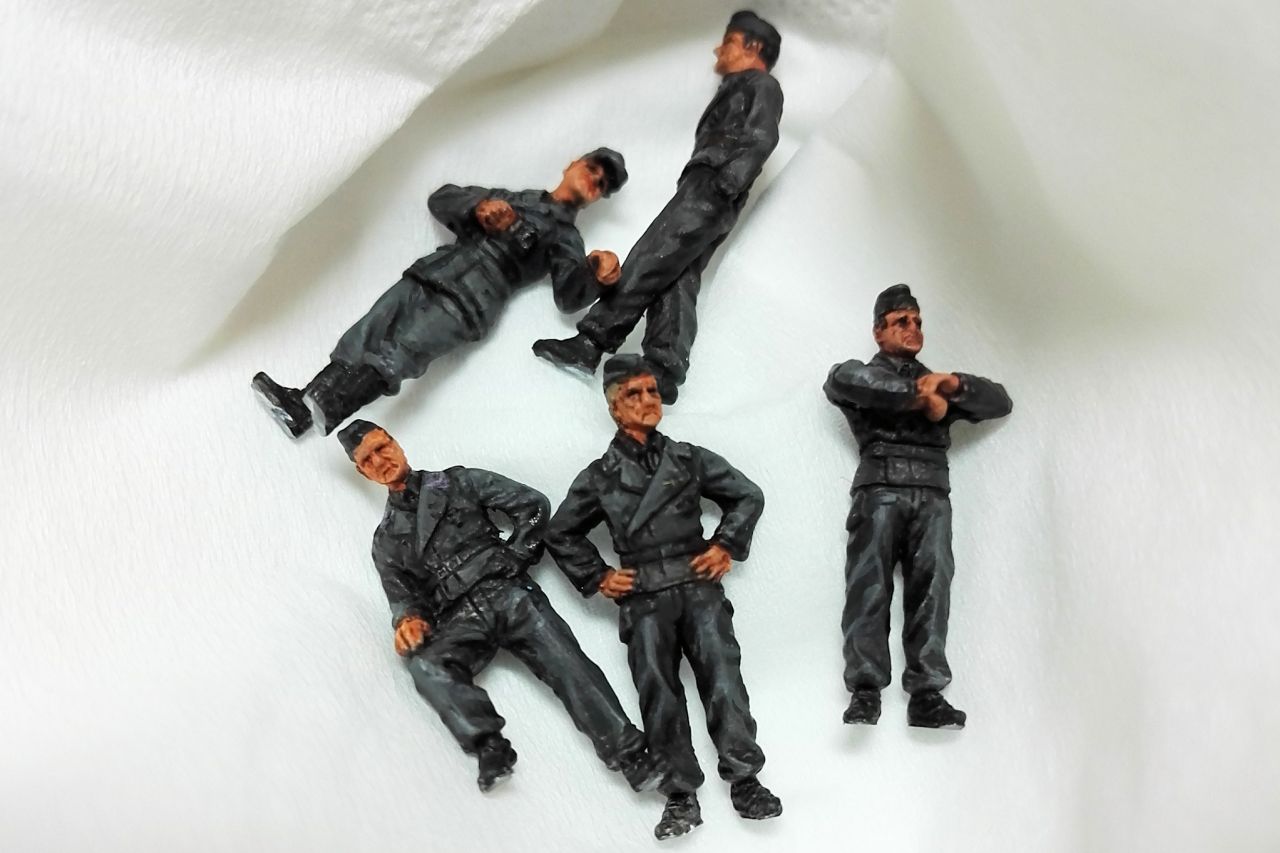
Apologies for the photo quality


firstcircle
Visit this Community
England - South East, United Kingdom
Joined: November 19, 2008
KitMaker: 2,249 posts
Armorama: 2,007 posts
Posted: Saturday, August 02, 2014 - 08:11 AM UTC
A bit more on those wheels...Kenneth Overby in his blog posted this picture, which I hope he won't mind me using:


So those injection points being on the centres of some of the wheels and on return rollers: on the rollers I just filed out the centre smooth until it looked more or less the same as the others. On the road wheels it's harder to deal with because of those "letter C"s that he refers to. The thing is that they should be there, but on the wheels where the injection point is they are very damaged. Despite it being stated in some places that the suspension of the Pz.Kpfw.IV Ausf.E was used, the factory photos of the vehicle clearly show earlier type wheels, with those little C shapes (in fact they are more like four sides of a hexagon with a sunken bolt in the centre). The best reference picture I could find is from the box art for Tristar's "Pz.IV running gear Set 1":

A further problem is that Trumpeter have made them all face the same way when obviously they will point in random directions. The only way to fix these two road wheel issues, to me, was to remove all of the "C"s and then add them back on, made out of tiny bits of bent rod. Picture of them in a minute.

Made two small additions to the gun: on the mantlet I added some weld seams to try to suggest the thickness of the front armour plate. Underneath there appeared to be six bolts of some type which were also added.


Prepared for priming, with the already painted interior masked with cling film:


Primed in black:


First session with Tamiya German Grey:


Second session with same paint slightly lightened:


It's hard photographing grey paint...

And here you can just about see the modification to the road wheels, little "C"s all pointing in different directions:

I don't mind admitting that it was a pain getting them all to look sufficiently alike. I guess an easier way out would be to locate another kit with the correct wheels... but my way was cheaper.
tread_geek
Visit this Community
Ontario, Canada
Joined: March 23, 2008
KitMaker: 2,847 posts
Armorama: 2,667 posts
Posted: Saturday, August 09, 2014 - 07:47 AM UTC
Well, it appears that I totally missed this one! Granted, I've been quite distracted this summer. Your doing an effective job on jazzing this build up. The dummy driver's compartment really looks the part, especially the visor. Enhancing the towing pintles in the front are one of those "little things" that add quite a bit to a build.

I thought that I had one of these in the stash but when I checked, it seems that it's a "Sturer Emil." I like the effect of the German grey but was wondering what colour you use to lighten it?

Cheers,
Jan
sabredog
Visit this Community
Western Australia, Australia
Joined: July 22, 2007
KitMaker: 607 posts
Armorama: 599 posts
Posted: Sunday, August 17, 2014 - 03:46 PM UTC
Jan

Mix a bit of flesh or yellow ochre with the Panzer grey.

Works a treat and keeps the "tone" of the Panzer grey consistent than if you used a "older" white.

My build of "Stubborn Emil" below


Finally, another example of panel lightening using the above method;


Hope that helps

firstcircle
Visit this Community
England - South East, United Kingdom
Joined: November 19, 2008
KitMaker: 2,249 posts
Armorama: 2,007 posts
Posted: Sunday, August 17, 2014 - 08:45 PM UTC
Hi Jan, my memory for these things being so poor, I'd pop out to the "paint shop" (garage) to check the bottle, but as I'm on hols, I can only say I'm pretty sure it was a little Tamiya Buff I added to the German Grey. Thanks for the praise on the visor, it did come out quite well, not quite sure I could repeat it exactly the same if asked to do it again!

Michael, I'm sure you meant to say "cold" white, not "old" white those pesky self correcting keyboards. Your two models look super as usual ( and on another of your marvellous "coaster" bases).

sabredog
Visit this Community
Western Australia, Australia
Joined: July 22, 2007
KitMaker: 607 posts
Armorama: 599 posts
Posted: Sunday, August 17, 2014 - 09:49 PM UTC
Oops!

Yes, I meant "colder". My typing skills are atrocious!
firstcircle
Visit this Community
England - South East, United Kingdom
Joined: November 19, 2008
KitMaker: 2,249 posts
Armorama: 2,007 posts
Posted: Saturday, October 25, 2014 - 09:14 AM UTC
Other stuff out of the way (for the moment at least) some attention back on Fat Max. With the interior mostly done, last time I was up to external base colour with some shading / highlight modulation type stuff, now some details have started to be painted, and some weathering.

A first pass of shading was done with black Vallejo Game Wash, hardly noticeable in the photo, followed by some AK Wash for Panzer Grey, and some AK Streaking Grime for Panzer Grey. (Yes, I've gone product mad... these things just fall out of Amazon resellers.) Some preliminary rust colours, a bit lurid right now, painted on the exhaust.

Tracks have been base painted and given some washes and some worn steel highlights, tyres also filled in with one of those Lifecolor black paints.


Panzer grey is an interesting painting subject... studying wartime colour photos seems to confirm that it is so very dark as to appear almost black, hence shading and other effects present a different challenge to lighter paint schemes. I noticed how few of the "professional" guides I have show many examples of this scheme. Alex Hill's Osprey Miniature AFVs - only whitewashed greys; Rinaldi's Tank Art Vol 1, has a light grey on dark grey camo; FAQ 1 and 2 again whitewash greys or camo over greys... Tony Greenland has a few examples in Panzer Modelling, which is kind of interesting as he is (was) a big proponent of dry brushing, which does seem to make more sense with such a dark colour.

Anyway, further pin washes and effects have and will be applied, and some figures are being warmed up, then I'm going to need some conifers.
berndm
Visit this Community
Niedersachsen, Germany
Joined: March 26, 2014
KitMaker: 844 posts
Armorama: 40 posts
Posted: Saturday, October 25, 2014 - 09:36 AM UTC
Hi Matthew, another fine example for bringing a mediocre kit
to "shine" good work on the not to easy dark camo. The idea to complete the running gear alone is interesting.
Got a Trumpy Char BI and the driver compartment looks also rather strange.

All the Best

Bernd
firstcircle
Visit this Community
England - South East, United Kingdom
Joined: November 19, 2008
KitMaker: 2,249 posts
Armorama: 2,007 posts
Posted: Friday, January 02, 2015 - 01:17 AM UTC
It's now a year since I started this Xmas present to self (2013) and it is nearing completion, of not quite there yet.

The gun was attached, and a bit of work was done on creating the chain that holds the gun on the cradle; I think the kit provided a clamp which I must have lost. The "chain" is just lengths of rod. Then the first round of dust was applied:

The tracks finally made it on a couple of weeks ago, and a tarpaulin was made out of cling film and stashed in that carrier on the back.

I've done repetitive rounds of dusting with the airbrush, dusting with pigments, re-visiting the pin washes plus a bit of dry brushing on the track guards and wheels.

Not quite finished yet, but I'm getting that feeling again about being not sure when it's done. Trying to get the balance between dusty but still defined with pin wash. Also the balance of contrast between dusty lower and dark upper, which I'm trying to keep very dark. The dusting has been done by reference to photos, and the summer dust does show up a lot on the dark grey - hence they started painting them something to match the dust colour...

Also not sure about the tools - have been just highlighting with graphite. Feedback would be welcome, the more critical the better...


sabredog
Visit this Community
Western Australia, Australia
Joined: July 22, 2007
KitMaker: 607 posts
Armorama: 599 posts
Posted: Friday, January 02, 2015 - 03:46 AM UTC
Very nice

Are you going to put it on a base?
firstcircle
Visit this Community
England - South East, United Kingdom
Joined: November 19, 2008
KitMaker: 2,249 posts
Armorama: 2,007 posts
Posted: Friday, January 02, 2015 - 04:22 AM UTC
Michael, thanks...

I'm hoping for a base something like this:


PantherF
Visit this Community
Indiana, United States
Joined: June 10, 2005
KitMaker: 6,188 posts
Armorama: 5,960 posts
Posted: Friday, January 02, 2015 - 04:28 AM UTC
This is quite interesting and all in 1/72 too. I like what I see and will make me pull out my kit soon.


Jeff
tread_geek
Visit this Community
Ontario, Canada
Joined: March 23, 2008
KitMaker: 2,847 posts
Armorama: 2,667 posts
Posted: Friday, January 02, 2015 - 10:05 PM UTC
Matthew,

Very interesting, novel and I must say, rather appealing approach to your finishing of this one. It reminds me (and I don’t know why) and even my SWMBO of a sort of Zhostovo approach to finishing. Basically, starting with dark hues and applying lighter ones to it which is the opposite of my standard. ;-) The figures for the base look very good. Who is the manufacturer and what might they be made of??

Cheers,
Jan
firstcircle
Visit this Community
England - South East, United Kingdom
Joined: November 19, 2008
KitMaker: 2,249 posts
Armorama: 2,007 posts
Posted: Sunday, March 12, 2017 - 02:41 AM UTC
Jan, apologies for taking over two years to answer your question regarding the figues; they are by Caesar Miniatures, and are made of, I think, some form of hard polythene, so not polystyrene as far as I know. They seemed to paint normally and easily, and I was able to bend one of the arms to a degree, after finishing, without any ill effect.

This is the box:

These are photos of them that I took on the phone, then edited and superimposed on the Max with it sitting on the half finished base, just to try to get a feel of what it might look like. I was hoping to get one of them into the vehicle, which I couldn't quite manage in the end.


Some of them, lying in tissue having been removed from their cocktail sticks, and now matt varnished, with Winsor and Newton Artists Matt Varnish after my first attempt with Dulcote seemed to achieve nothing at all.


The first three in place. I mounted 0.5mm rod in a very intimate place on each and then drilled holes in the Max. This allowed them to be seated in a fixed position while providing a little movement to get the feet in the right places.


Three more added. The guy in grey resting his hand on the track guard was the one whose arm had to be bent considerably to make the correct contact, and the single rod in his foot was strong enough to keep him and his hand in place. This was all done in the same week as the On Track competition... so sweat and anxiety...


I regret that I didn't take any photos of the trees at earlier stages. (These are not the same trees as in the photos in earlier posts above, which were Noch items and tended to all look the same, apart frome the height.) The trunks are thin dowel, tapered and roughened with sandpaper. The branches are twisted 0.5mm craft wire attached into small holes drilled in the dowels, anchored with CA glue. They were painted first with sand textured acrylic paste (Daler Rowney) to cover over the joins and wire twists, provide a bit of thickness and variety to the branches and some texture to branches and trunks. They were then painted with Tamiya brown shades before the foliage was applied, which was static grass, applied with a static applicator on to hairspray. This is the stage at which these photos were taken, so before the foliage was painted and before further painting on the trunks etc.


tread_geek
Visit this Community
Ontario, Canada
Joined: March 23, 2008
KitMaker: 2,847 posts
Armorama: 2,667 posts
Posted: Sunday, March 12, 2017 - 08:02 PM UTC
Matthew,

As is often said, "...better late than never!" As I have mentioned in a previous correspondence your trees were/are a good start and more importantly convey a proper suggestion of a fir tree's nature. I wonder how many people have actually taken the time to study a real fir tree in detail? Models are by their very nature "illusions" or "representations" of reality or objects in the real full scale world. I have found that at model shows the merit of an entry depends more on its overall presentation and the effect it creates/causes with the observer than anything else. I have seen and indeed practiced the manipulation of some of these "techniques" to "create" impressions of what one believes they are seeing.

As for the figures, I truly wish that some of these figures that I see people employ were more readily available in my area. I have not been a regular participant in acquiring merchandise by mail-order so that is not an option that I will easily embrace! So basically, I'll continue to inquire and gather information and hope that in the future I might be fortunate enough to find a circumstance where these or suitable figures may present themselves for reasonable acquisition.

Cheers,
Jan
celt15
Visit this Community
Wales, United Kingdom
Joined: September 16, 2016
KitMaker: 95 posts
Armorama: 91 posts
Posted: Monday, March 20, 2017 - 03:56 AM UTC
Not familiar with this vehicle,being new to Armour after doing aircraft sinec forever,but it looks really cool.
firstcircle
Visit this Community
England - South East, United Kingdom
Joined: November 19, 2008
KitMaker: 2,249 posts
Armorama: 2,007 posts
Posted: Monday, March 20, 2017 - 04:31 AM UTC
Jan, thanks for the nice comments on the trees; they are still relatively unfinished here, but you are right in that I wanted it to create quite a big impression on the viewer - the tallest tree makes the diorama 9 inches tall and when I came to pack it I realised I needed a bigger box!

Kenneth, thanks; basically it's a Panzer IV with a gun that's too big for it. Quite an awkward kit with a couple of quite big errors.

A few pics of the base being made. This base started out with the Noch Fir Trees review in 2014, but those trees were removed and the entire surface was scraped off with a curved chisel then resurfaced with clay. One annoyance was that it wasn't quite soft enough to get a really good track impression as I couldn't bring myself to press down too hard on the model. Then painted with white glue and pulverised soil added:

The entire thing was then sprayed with black MrSurfacer, then airbrushed with progressively lighter brown shades of Tamiya acrylic. Then the new toy was brought into operation, the static grass applicator:

Some twiggy bits added; a couple of trunks out of the Woodland Scenics starter set but also lots of boughs from a plant that I found on a lunchtime walk from work that had nice thin straight branched stems.

Someone got a bit bored while I was doing all this...
celt15
Visit this Community
Wales, United Kingdom
Joined: September 16, 2016
KitMaker: 95 posts
Armorama: 91 posts
Posted: Wednesday, March 22, 2017 - 04:52 AM UTC
I enjoyed your build and learned all about a vehicle that I knew nothing about,thanks for sharing.
firstcircle
Visit this Community
England - South East, United Kingdom
Joined: November 19, 2008
KitMaker: 2,249 posts
Armorama: 2,007 posts
Posted: Monday, March 27, 2017 - 02:52 AM UTC
Thanks Kenneth

After saying "I regret that I didn't take any photos of the trees at earlier stages" I was browsing my online storage and noticed that I had these that my phone had automatically uploaded.

Originally primed with white, then coated with sand texture...

 _GOTOTOP