Dioramas: Buildings & Ruins
Ruined buildings and city scenes.
Hosted by Darren Baker
Big Punch, Big Push
justsendit
Visit this Community
Colorado, United States
Joined: February 24, 2014
KitMaker: 3,033 posts
Armorama: 2,492 posts
Posted: Monday, February 16, 2015 - 05:33 AM UTC
Wow Nick! I love the hazy background — reminds me of a dust storm — very convincing. That's a real breakaway from the bright & sunny California shots.

—mike
jrutman
Visit this Community
Pennsylvania, United States
Joined: April 10, 2011
KitMaker: 7,941 posts
Armorama: 7,934 posts
Posted: Monday, February 16, 2015 - 05:58 AM UTC
Holy crap dude.
J
Stickframe
#362
Visit this Community
California, United States
Joined: December 01, 2013
KitMaker: 1,661 posts
Armorama: 1,202 posts
Posted: Monday, February 16, 2015 - 05:59 AM UTC
hi guys --

Well, shoot!! Gino - thanks very much for the heads up on the guy's unlikely uniform - I should have cut the hood etc off to begin with(he received quite a few mods already), and I'm guessing the bag on his left hip gets to go too....Strike: One!

Next, the guy in the middle - of the three....I wonder about his, uh, posture and giraffe neck....I know it "takes all kinds" but, he does not look all that terrific...Strike: Two!!

Beyond those two - I think I'm doing alright.

Romain and Mike, thanks! just remember, this has a way to go still! As you both know, I do like to take these pics in a variety of lighting - that (and posting here!) is a real test - does it look ok, or not??.....

As for follow up - well, per Gino's note, the pointing guy is going into surgery tonight - and he's going to lose some weight! into the resin OR he goes....

The other guy....will find a home somewhere in the shadows, and another will be built to replace him....as he's not a "great" figure to begin with, I don't think it's worth the time to straighten him out, shorten his neck and so on.

When these guys are done, it's on to another M1114 and, more guys - then, the Linebacker!

Thanks for having a look and your comments.

Nick
Stickframe
#362
Visit this Community
California, United States
Joined: December 01, 2013
KitMaker: 1,661 posts
Armorama: 1,202 posts
Posted: Monday, February 16, 2015 - 06:01 AM UTC
Perfect Jerry! thanks

Nick
justsendit
Visit this Community
Colorado, United States
Joined: February 24, 2014
KitMaker: 3,033 posts
Armorama: 2,492 posts
Posted: Monday, February 16, 2015 - 06:09 AM UTC

Quoted Text

... does it look ok, or not??.....


“Yeees … I like it!!!”
Stickframe
#362
Visit this Community
California, United States
Joined: December 01, 2013
KitMaker: 1,661 posts
Armorama: 1,202 posts
Posted: Monday, February 16, 2015 - 10:23 AM UTC
Hi guys -

Sorry no pictures right now, but, the two figures are repaired. Gino, out came the small wire cutters and xacto, and the "pointing" guy now has a different uniform. I cut off the hood, and re shaped the back of the vest and added more thin lead foil straps (the great Jerry R has more than once noted the value of the lead foil on a wine bottle for model building - he's right!) so it looks more like what it should. Next, off went the left hip pouch. Repaint, reinstall.

Regarding the middle guy, the one I refer to as a certain "European" model builder, aka, Romain, noted to me the guy looked like he had a load in his pants...not a good look. So, while I was going at it with the Xacto, I recarved his backside. Worked out fine. Also, shortened his neck - he looks less weird now, almost good. I didn't try to straighten him out, as the other repairs went a long way to make him stand out less in bad ways.

Also, Romain, I almost didn't include the last picture, I'm glad I did!

Next, on to M1114 number two and its crew -

Cheers
Nick
Stickframe
#362
Visit this Community
California, United States
Joined: December 01, 2013
KitMaker: 1,661 posts
Armorama: 1,202 posts
Posted: Monday, February 23, 2015 - 04:32 AM UTC
Hi guys -

I'm sorry - today I bring mediocre photos presented with brevity! The bottom line, this M1114 is close to being done. Rather than the straight desert tan version, I went for the up armor over camo. Even with the more complicated painting, this version went together considerably more smoothly than the last - the biggest obvious factor being nothing on this one was warped!! I'm working on a couple of figs for this truck, and once they're done, on goes the gunner's turret and the doors. Please take a look:


Ok - once again, sorry about the pics! this actually looks very good in real life! Once it's closed in I'll take a few more pics - maybe on the dio base!!...then a few more of the crew.....

Next, on to the Bradley M6!!

Ok, no more Armorama fun and games for me - back the real job!!

Cheers
Nick
HeavyArty
Visit this Community
Florida, United States
Joined: May 16, 2002
KitMaker: 17,694 posts
Armorama: 13,742 posts
Posted: Monday, February 23, 2015 - 06:06 AM UTC
Looks good. I like the interesting paint scheme. I can't wait to see the M6 Linebacker.
jrutman
Visit this Community
Pennsylvania, United States
Joined: April 10, 2011
KitMaker: 7,941 posts
Armorama: 7,934 posts
Posted: Monday, February 23, 2015 - 06:07 AM UTC
Cool looking vehicle. Looks a lot like one of mine in Desert Storm,
J
Stickframe
#362
Visit this Community
California, United States
Joined: December 01, 2013
KitMaker: 1,661 posts
Armorama: 1,202 posts
Posted: Monday, February 23, 2015 - 10:47 AM UTC
Hey guys - thanks for checking in. I'm glad this has more or less passed your critical view test. The idea of the combination of the two trucks, with different paint schemes comes from a pic of events in the time and place. I like the mix of the two because it's authentic, more of a challenge to build, and otherwise, the dio would have a lot of desert sand (D9, M6 and M1114). I'm trying to finish this up tonight, and next, maybe two or three more figs.

Then, the Linebacker, which I'm really looking forward to. I've never built a Bradley, and I like scratch building. While this won't require too much scratch work, the work done will be pretty obvious. I'm also adding various etch parts, and the correct tracks - ought to be fun.

Thanks again for checking in

Cheers
Nick

DaGreatQueeg
Visit this Community
Napier, New Zealand
Joined: August 01, 2005
KitMaker: 1,049 posts
Armorama: 841 posts
Posted: Monday, February 23, 2015 - 11:03 AM UTC
I don't know enough to comment on any technical aspects but the dusty muted finish and the mix n match paint work spells realism to me ..... great stuff.

Brent
avenue
Visit this Community
Philippines
Joined: May 25, 2013
KitMaker: 544 posts
Armorama: 542 posts
Posted: Monday, February 23, 2015 - 11:16 AM UTC
well done!
1stjaeger
Visit this Community
Wien, Austria
Joined: May 20, 2011
KitMaker: 1,744 posts
Armorama: 1,727 posts
Posted: Monday, February 23, 2015 - 03:23 PM UTC


I'm with Brent!!!!

This looks sooo realistic!! And the mix of camo schemes is not only authentic, but it adds automatically to the interest of the scene!!

Well done Sir!! Brilliant show!!

Cheers

Romain

Stickframe
#362
Visit this Community
California, United States
Joined: December 01, 2013
KitMaker: 1,661 posts
Armorama: 1,202 posts
Posted: Tuesday, February 24, 2015 - 01:55 AM UTC
HI Brent, Avenue, and Romain - glad you guys like it! This truck was a lot of fun to do, with the mix of paints, details etc - - in any case, I'm calling it done! I added a couple of guys, and for fun, took a look at it on the dio -

Please check it out!


if you look to the background of these pics, you can see both M1114s - and the base for what will eventually be another building - the Vallejo bottle is pretty good for scale ref too -


Above, you can see both. They are the same Bronco M1114, just a bit of variety with color and arms -


There you have it - thanks for having a look! - I've got to get back to work - real job that is -

cheers
Nick
justsendit
Visit this Community
Colorado, United States
Joined: February 24, 2014
KitMaker: 3,033 posts
Armorama: 2,492 posts
Posted: Tuesday, February 24, 2015 - 02:20 AM UTC
Nick, This is looking great, as always!

I have one reservation though, regarding the traffic cones tossed onto the roof of the new M1114 (image #4). I really liked them there until the turret was installed, now they seem to be inhibiting its rotation. What do you think?

—mike

PS:
jrutman
Visit this Community
Pennsylvania, United States
Joined: April 10, 2011
KitMaker: 7,941 posts
Armorama: 7,934 posts
Posted: Tuesday, February 24, 2015 - 04:17 AM UTC
What the......didn't you just start this truck this morning??
J
white4doc
#429
Visit this Community
Massachusetts, United States
Joined: October 14, 2003
KitMaker: 1,086 posts
Armorama: 964 posts
Posted: Tuesday, February 24, 2015 - 04:50 AM UTC
Looking great, Nick. Your surgery on the figures looks like it was a success, too. The mix of the sand and NATO pattern gives it a good variety, I think I have a pic of an 1114 with sand armor, NATO-flage body with a plain green hood.
ahandykindaguy
Visit this Community
Alberta, Canada
Joined: August 20, 2008
KitMaker: 1,295 posts
Armorama: 1,191 posts
Posted: Tuesday, February 24, 2015 - 08:34 AM UTC
Hey Nick! Looking good sir. While modern stuff is definitely not my wheelhouse, your skill is evident all the time. I particularly like the tease you give us all with the pink stuff in the corner of some of these shots!!! Very nice....

Looking forward to your next full scale Monday style update!

Later slugger.

Stickframe
#362
Visit this Community
California, United States
Joined: December 01, 2013
KitMaker: 1,661 posts
Armorama: 1,202 posts
Posted: Tuesday, February 24, 2015 - 10:10 AM UTC
Hi guys, thanks for checking it out -

Mike, well, you raise a good point. The idea is, the cones were traveling loose on the lid, secure behind the rear fold panel (I'm adding a "stay back" sign), but, as the lid is raised, the cone would slide down, or forward to the roof, near the cupola. I'm guessing that if the cupola rotated it would either knock the cones out, or the pressure would force the lid back down - I don't know? Maybe they would jamb the cupola - I hope not! Good eye in any event! Thanks!

Hi Jerry - I think one could easily spend a lot of time on those M1114s - there are so many variants and potential combinations of details etc. I really wanted to move on this one tho and get onto to Bradley - and dio - and figs!!! There's so much to do still - that truck is just about done.

Hi John, as I've been following your build, and read of your experience, I really appreciate your fact check!! I don't want to repaint that truck!! For this, it also received the completely green interior. It was interesting to see how some of the colors that work well with the sand color don't work with the green, particularly on the interior. My trusted grey paint looks really light against the green, so I mixed it with black to darken it up. Of course, as the cabin is fairly dark when closed in, you can't see it anyway!!! Oh well, I know it's right! As for the figures, they're always a work in progress for me - I view even modest reworking as a victory!! Several of the guys are modified, and I'm glad to say for the most part, you can really see my "modifications". Thanks for the comments.

Hi Dave, glad to see you could find some time on the forum!! I'm sure your secretly reworking parts of your dio (interior mods to the church) in your secret model building lab!! As to a "big" Monday post, maybe after the Bradley is done? I still need to make several more figs....and, yes, the taller building. While pretty effective, the pink foam structures are a lot of work (for me anyway) to pull together....I'm debating adding a civilian car or two, but I don't want to tread into adding too much and making the whole scene look forced and cluttered.

Ok guys, thanks for checking it out and your comments -
Cheers
Nick
justsendit
Visit this Community
Colorado, United States
Joined: February 24, 2014
KitMaker: 3,033 posts
Armorama: 2,492 posts
Posted: Tuesday, February 24, 2015 - 11:52 AM UTC

Quoted Text

... as the lid is raised, the cone would slide down, or forward to the roof, near the cupola. I'm guessing that if the cupola rotated it would either knock the cones out, or the pressure would force the lid back down ...


Copy that.
Stickframe
#362
Visit this Community
California, United States
Joined: December 01, 2013
KitMaker: 1,661 posts
Armorama: 1,202 posts
Posted: Tuesday, March 03, 2015 - 01:09 AM UTC
Hi guys - only time for a really quick post today! racing during lunch break -

You'll see a few more figures - essentially built a couple of guys each night last week, then production line painting all day Saturday!! I thought I'd go blind!!! anyway, have a look:


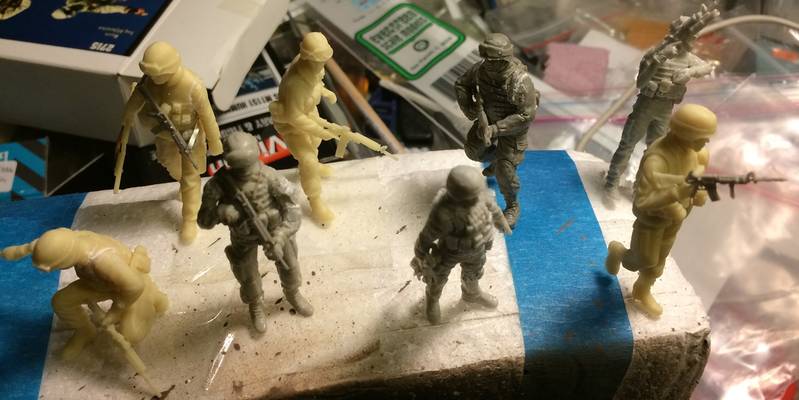
Above are most of them. In total I added 8 new figures:


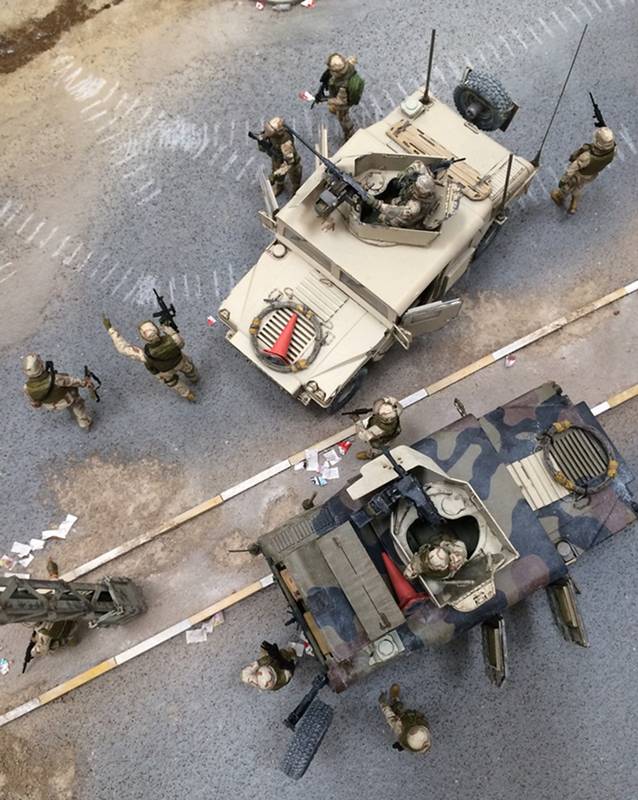
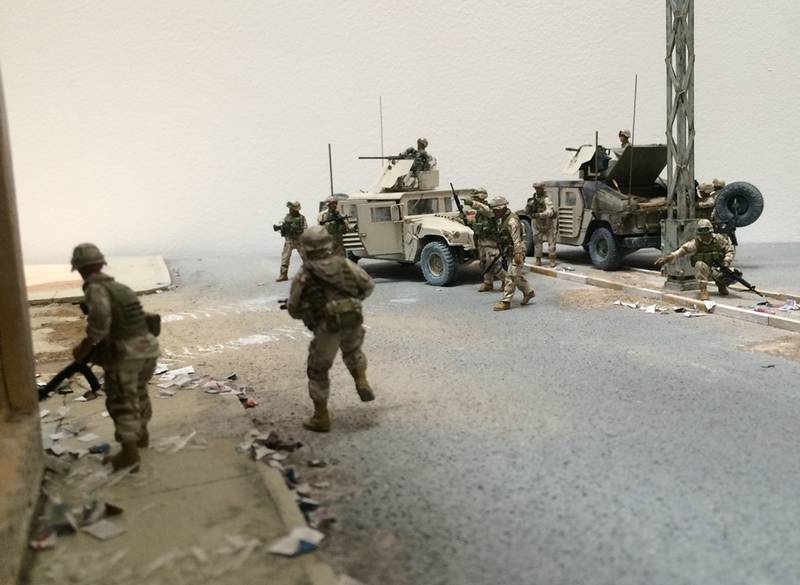
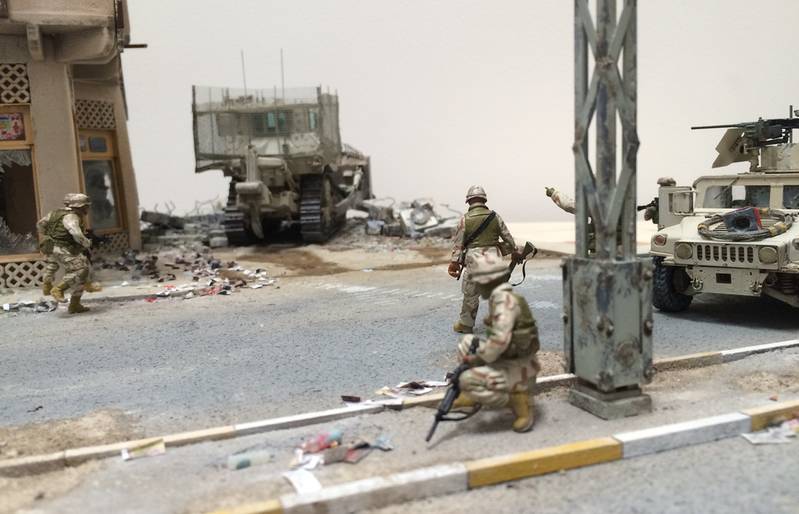
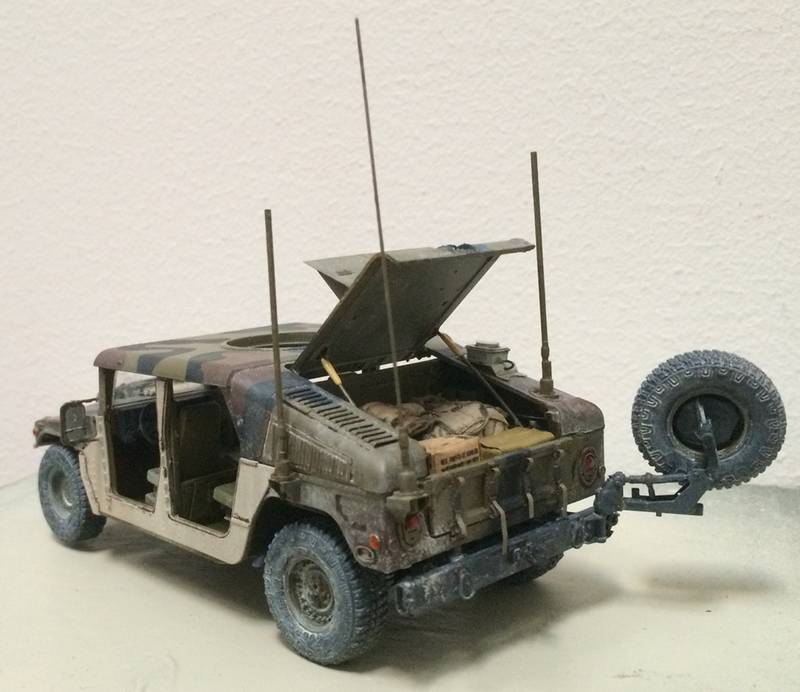
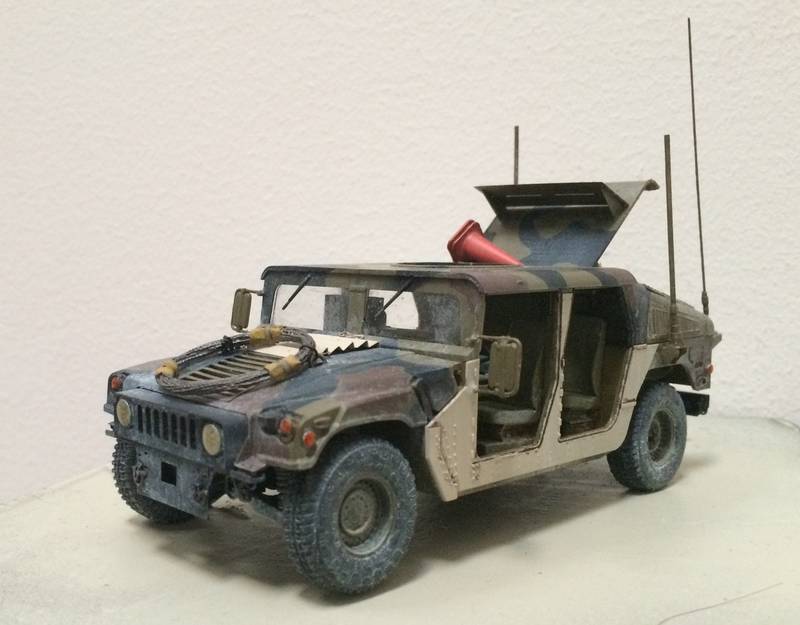
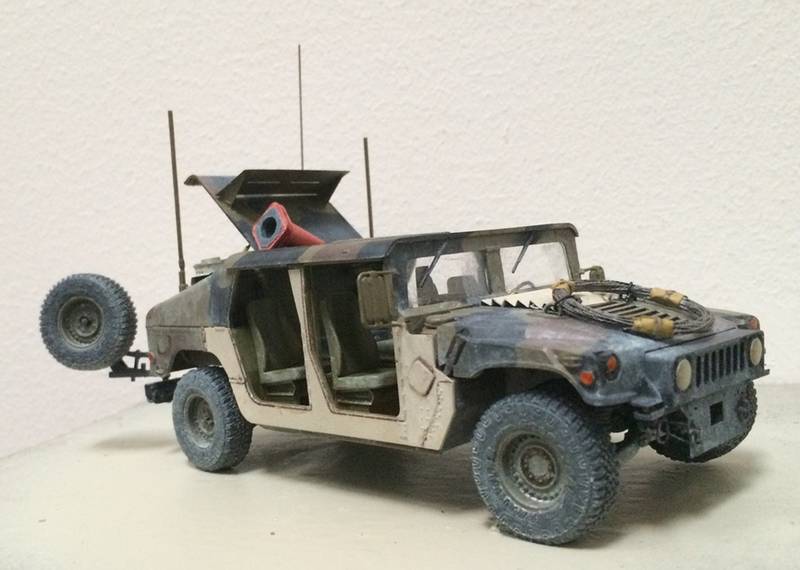
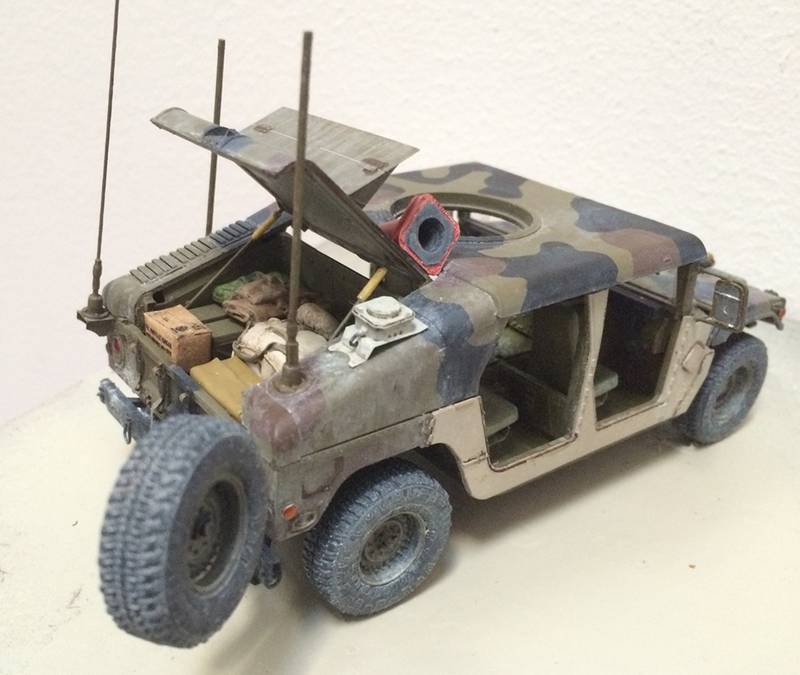
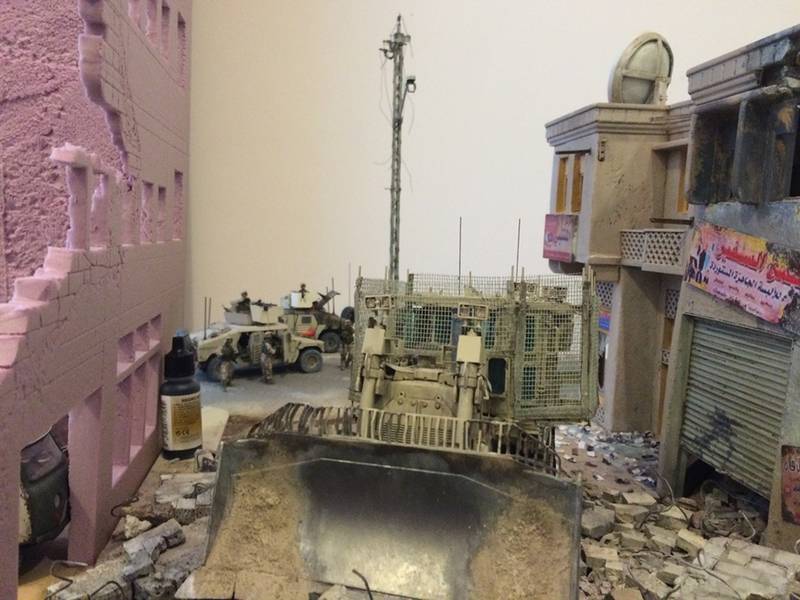
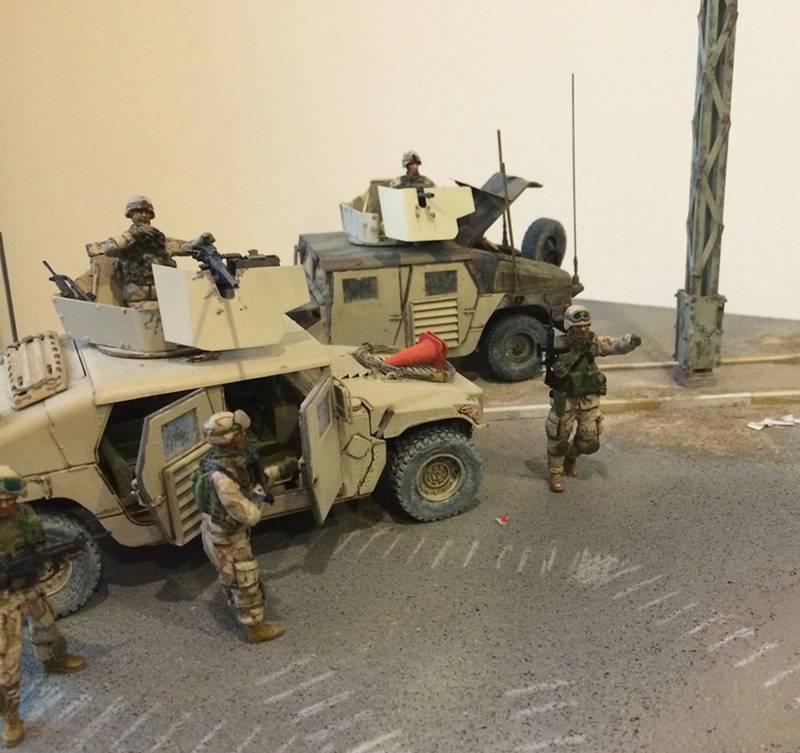
The pics tell the story! the one obvious point: I used a few mfgrs here - and when you do that - you get: different size guys. Different: EVERYTHING! weapons, gear, you name it, almost everything is at least slightly...if I were just doing a detailed study of the soldiers, they would each be redone! as I'm not, they are staying as is. Some of the differences have more to do with being close, but not exactly the same - I'm hoping that as they are scattered about and in fairly dynamic poses, it really won't be all that obvious.

And now:


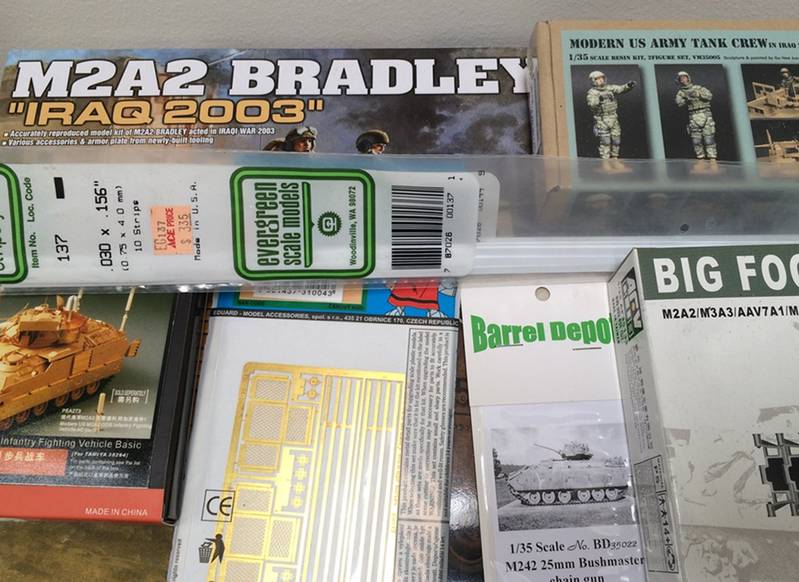
This type of pic seems to be fairly popular - the whole package image! Anyway, this will eventually get built into a Bradley M6 Linebacker. This version had four stingers mounted on board, instead of the TOW system. This will require some scratch work, but not really all that much.

The bigger challenge is turning out to be that the Academy base kit is fairly simple; it doesn't have too many parts, and those it does have are a bit chunky and the assemblies are fine. All of this ok - as it represents the correct vintage Bradley for around 2004.

Where it's getting interesting so far comes from the Voyager "basic" upgrade kit - Man! that's got some heavy duty etch work headache inducing "moments"!! so far several hinges, latches, "curves" you name it and I'm nowhere near done! hopefully will result in a cool build!!

Ok, that's all for now! back to the real job!

Cheers

Nick
HeavyArty
Visit this Community
Florida, United States
Joined: May 16, 2002
KitMaker: 17,694 posts
Armorama: 13,742 posts
Posted: Tuesday, March 03, 2015 - 01:17 AM UTC
Looking great. I like the layout w/the two HMMWVs. One question on the figures, are they USMC or US Army? If USMC, the vests should be either coyote brown (field drab) or woodland camo. If Army, they should be woodland camo as the Army doesn't use the coyote brown vests. Issued IBA vests do not come OD Green.

US Marines wearing woodland (3) and coyote brown (second from left) IBAs.


US Army Soldiers wearing woodland IBA.


Hope that helps.

Can't wait to see the progress on the M6 as well.
justsendit
Visit this Community
Colorado, United States
Joined: February 24, 2014
KitMaker: 3,033 posts
Armorama: 2,492 posts
Posted: Tuesday, March 03, 2015 - 01:30 AM UTC
Nick, That looks great! Nice interaction and distribution of the troops. I don’t really see any drastic issues with the figure sizes/scales — works for me!

—mike
Stickframe
#362
Visit this Community
California, United States
Joined: December 01, 2013
KitMaker: 1,661 posts
Armorama: 1,202 posts
Posted: Tuesday, March 03, 2015 - 01:47 AM UTC
HI Gino.

thanks! yes, these fellows are Army - the earlier posts, with the previous soldiers show the woodland pattern.

These guys, well, need it! and they will get it! I appreciate your fact checking - these projects are too much work to be wrong! especially on something as obvious as that!

Hi Mike - glad to hear it - I guessed as the guys are dispersed, they'd be OK - except for the camo as noted above - the opti-visor is going back on tonight - more camo....


thanks for having a look and your comments

Nick

jrutman
Visit this Community
Pennsylvania, United States
Joined: April 10, 2011
KitMaker: 7,941 posts
Armorama: 7,934 posts
Posted: Tuesday, March 03, 2015 - 08:25 PM UTC
Finally!!!! Somebody posting some actual progress on this forum. Not much of that lately and I wonder why that is?
Anyway,brilliant as usual buddy. This may seem trivial to you but even though your figgies are dispersed,they are still equi-distant from each other. Look at the overhead view and you will see what I mean. This happens to all of us as we do it without thinking. The problem is...real life is not equi-distant!! LOL
Randomness is hard to model.
J