M198 PREDATOR A Btry 3-162 FA Yauco

#192
Kentucky, United States
Joined: November 25, 2009
KitMaker: 1,383 posts
Armorama: 1,281 posts
Posted: Sunday, February 07, 2016 - 07:49 AM UTC
Thank you guys for the good words and looking in!
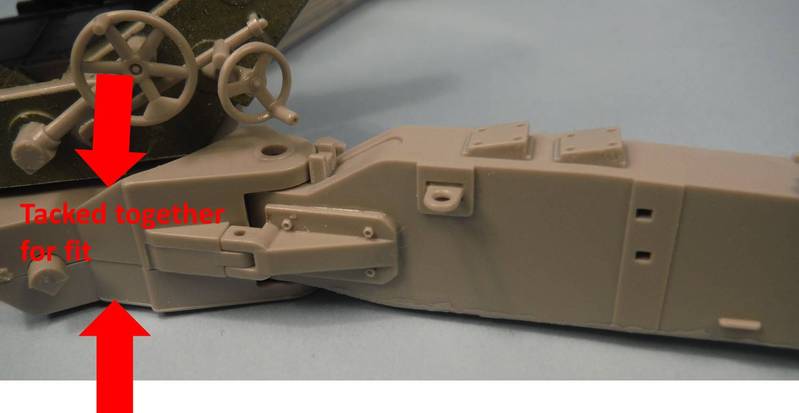
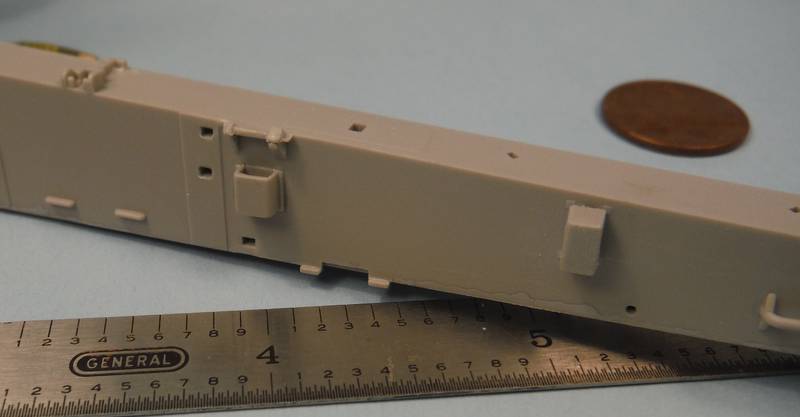
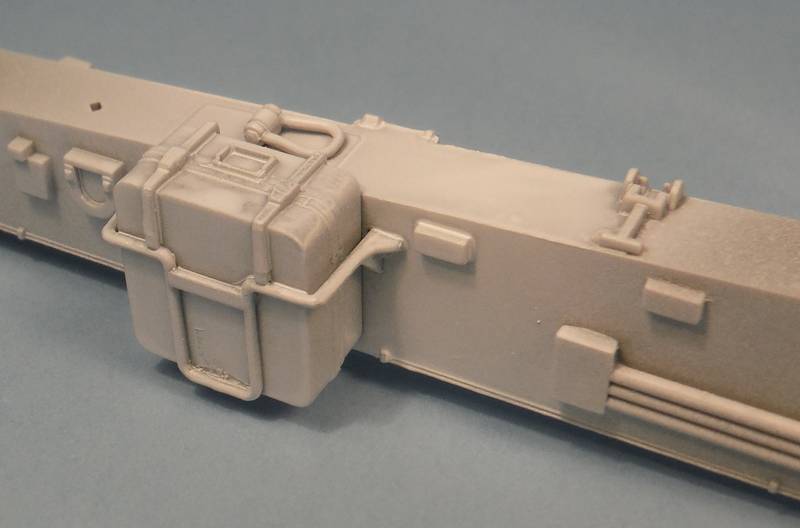
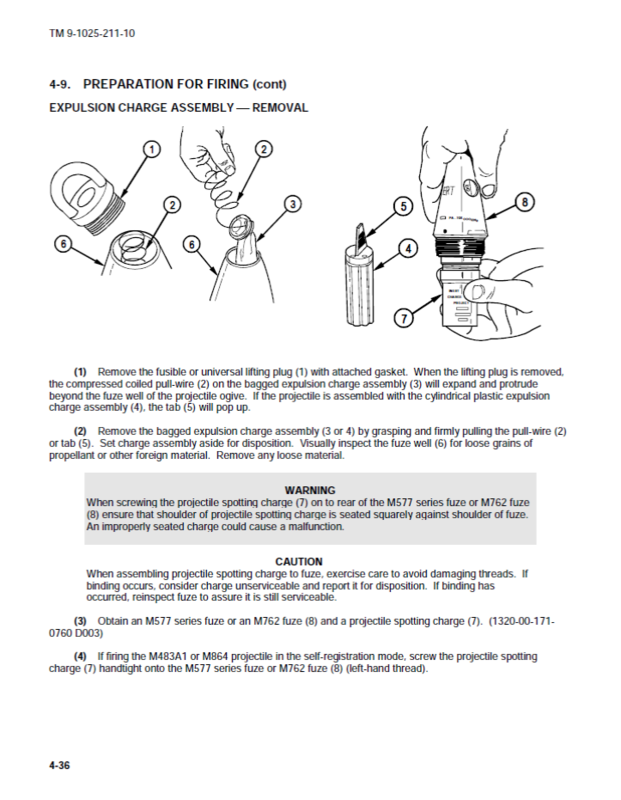
Work and travel in cutting into the bench time. Working on the other trail some here. Photos are a great way to catch the areas needing more attention! I tried to assure the fit of the trail stops (two parts C15) into the base with a tacked together trial fit of the trail joint per photo.
#424
Queensland, Australia
Joined: April 23, 2015
KitMaker: 4,648 posts
Armorama: 2,248 posts
Posted: Sunday, February 07, 2016 - 11:23 AM UTC
Wow,
You're stirring up the memories. Does the fire direction computer system come with the kit? I see the two angled plates used to hold the displays in place at the forward end of the left trail.
Like the lubricant spray, I can't remember what the computer system was called.
Good to see your quick progress!
Gary
"Artillery adds dignity, to what would otherwise be an ugly brawl."
Frederick The Great
#192
Kentucky, United States
Joined: November 25, 2009
KitMaker: 1,383 posts
Armorama: 1,281 posts
Posted: Monday, February 15, 2016 - 05:21 AM UTC
Quoted Text
Wow,
You're stirring up the memories. Does the fire direction computer system come with the kit? I see the two angled plates used to hold the displays in place at the forward end of the left trail.
Like the lubricant spray, I can't remember what the computer system was called.
Good to see your quick progress!
Gary
Thank you for looking in Gary. Appreciate the good words. There is no firing computer with the kit. As far as I can tell it should be a Gunners monitor display and an Assistant Gunners monitor on the other trail, but have not found a good photo of the displays yet. I think this photos shows them. I do not know what was used in 2003.

#192
Kentucky, United States
Joined: November 25, 2009
KitMaker: 1,383 posts
Armorama: 1,281 posts
Posted: Monday, February 15, 2016 - 05:25 AM UTC
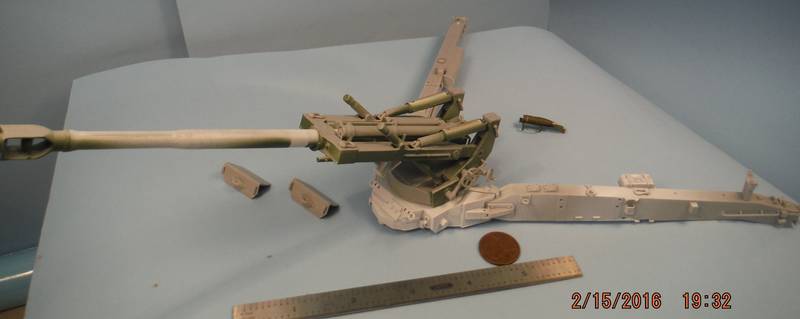
Slowly slowly forward. The trails are on and this thing is big.

#192
Kentucky, United States
Joined: November 25, 2009
KitMaker: 1,383 posts
Armorama: 1,281 posts
Posted: Monday, February 15, 2016 - 05:31 AM UTC
This is a great kit, but little items I think need work include using solder for the hydraulic lines near where the pump handles go in the base. Still need to work around the sight case.
Thank you for looking.
All the best- Stuart
#424
Queensland, Australia
Joined: April 23, 2015
KitMaker: 4,648 posts
Armorama: 2,248 posts
Posted: Monday, February 15, 2016 - 12:09 PM UTC
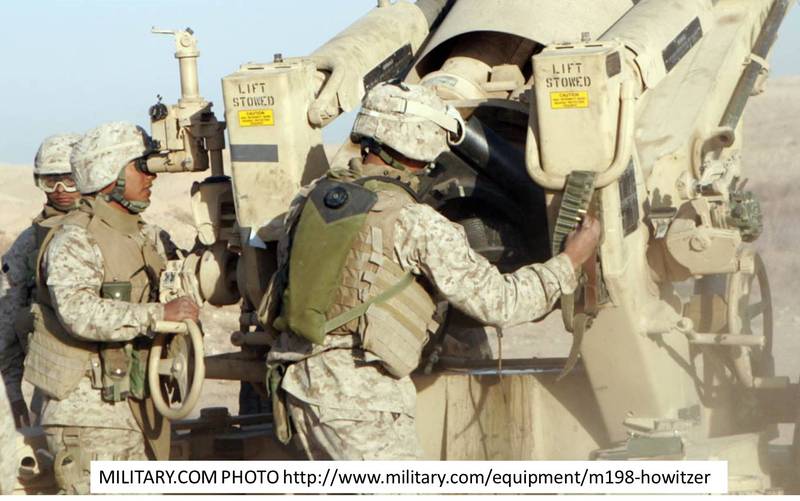
See where the guy is pulling the lanyard? That is the correct place to stand. If you stand in the middle, directly behind the breech firing a combat charge, that thing will come back and kill you. I think in that picture they'd be firing a small green bag charge. In combat I've seen that barrel recoil about 7-feet.
I think the most amazing thing about the M198 was that four guys could lift those trails high enough to hook it onto the pintle of a 5-ton.
Looking good!
Gary
"Artillery adds dignity, to what would otherwise be an ugly brawl."
Frederick The Great
#192
Kentucky, United States
Joined: November 25, 2009
KitMaker: 1,383 posts
Armorama: 1,281 posts
Posted: Wednesday, February 17, 2016 - 08:52 AM UTC
Thanks Gary. Wow! With 7 foot of recoil, I understand why so much of that barrel is lubed in front.
Found a better photo of the hanging primer belt on Military.com that I wanted to share.
#192
Kentucky, United States
Joined: November 25, 2009
KitMaker: 1,383 posts
Armorama: 1,281 posts
Posted: Wednesday, February 17, 2016 - 08:54 AM UTC
and as far as references please see Mike Redleg 12 DelVecchio's excellent M198 article in Fine Scale Modeler of this kit "Trumpeter 1/35 M198 155mm Howitzer, Finished, 8/09/09"
http://cs.finescale.com/fsm/modeling_subjects/f/3/t/114226.aspx (the weld beads shown in his write up are a nice touch at this stage of build)

Arizona, United States
Joined: October 20, 2015
KitMaker: 304 posts
Armorama: 293 posts
Posted: Wednesday, February 17, 2016 - 04:08 PM UTC
The build is coming along very nicely. I can't wait to see it finished.
Rob
#192
Kentucky, United States
Joined: November 25, 2009
KitMaker: 1,383 posts
Armorama: 1,281 posts
Posted: Sunday, February 21, 2016 - 05:02 AM UTC
Thank you Rob. I have come to love the journey as much as the destination as I am learning a lot as I go.
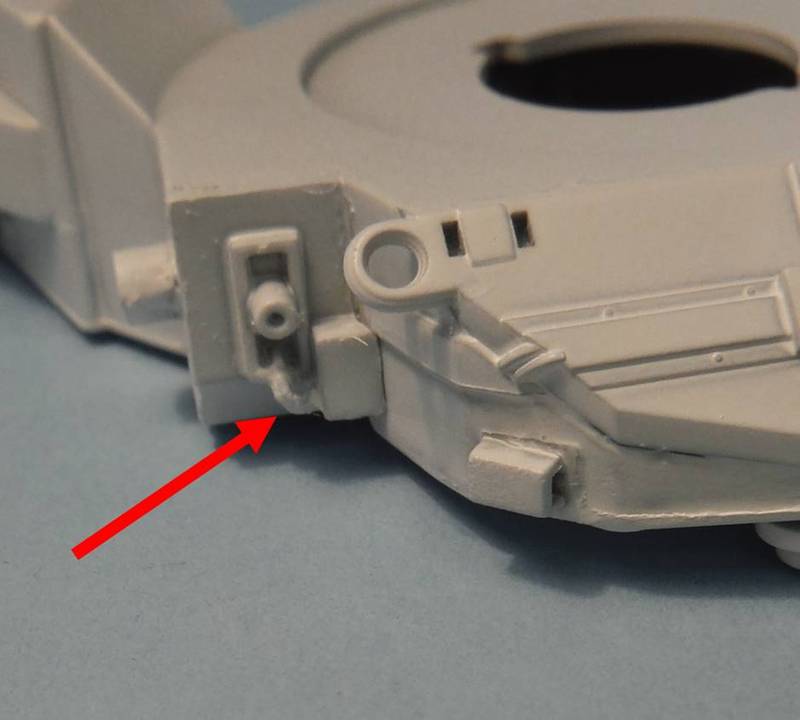
For example, my friend recalled from his M198 days that small changes were needed to meet the 6 minute set up time for the gun. The Gunner carried his sight in his lap in the back of the truck and the case was not strapped down. Based on his memory and the Prime Portal website M198 photos, I updated the trail as shown.

#192
Kentucky, United States
Joined: November 25, 2009
KitMaker: 1,383 posts
Armorama: 1,281 posts
Posted: Sunday, February 21, 2016 - 05:10 AM UTC
Also tried to bump up the brake drums. Again please see the first M198 listing of photos on Prime Portal website.
Sorry for the slow pace, but work schedule requires a lot of travel lately.
#192
Kentucky, United States
Joined: November 25, 2009
KitMaker: 1,383 posts
Armorama: 1,281 posts
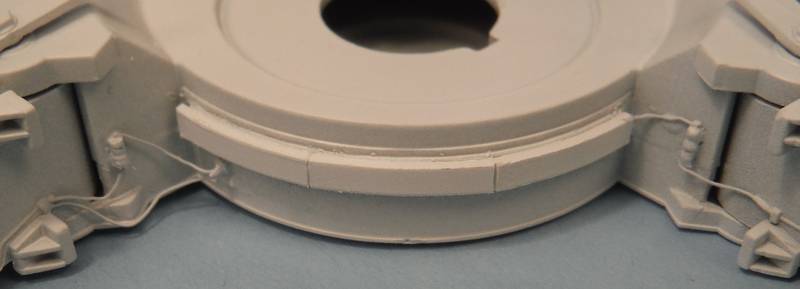
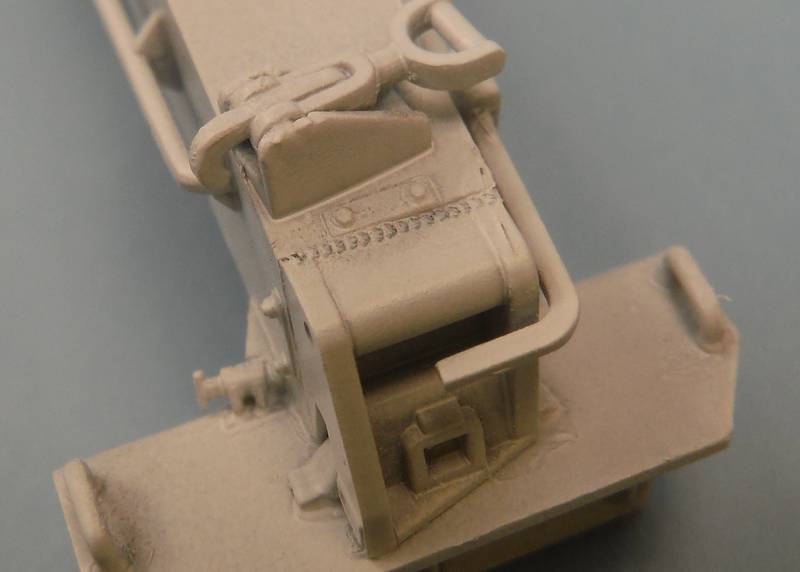
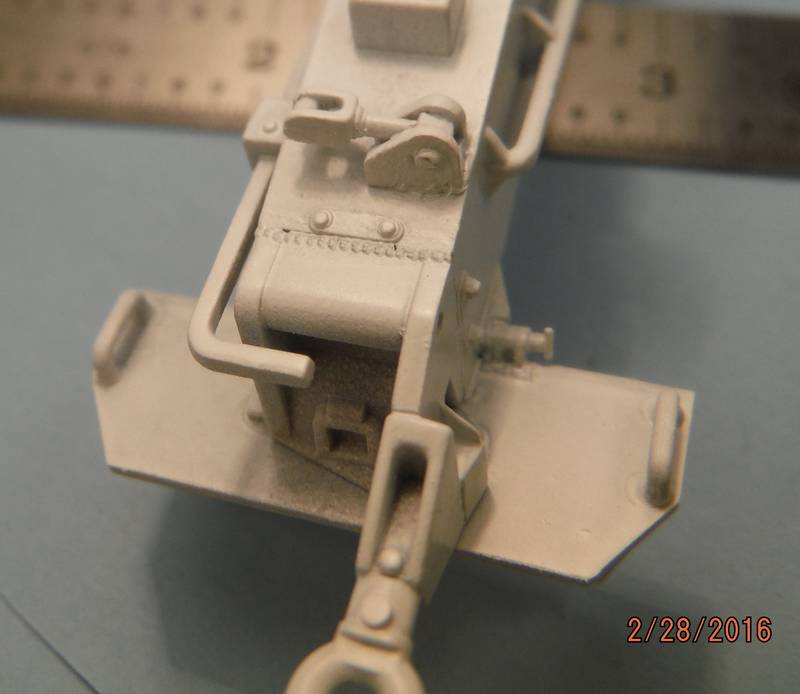
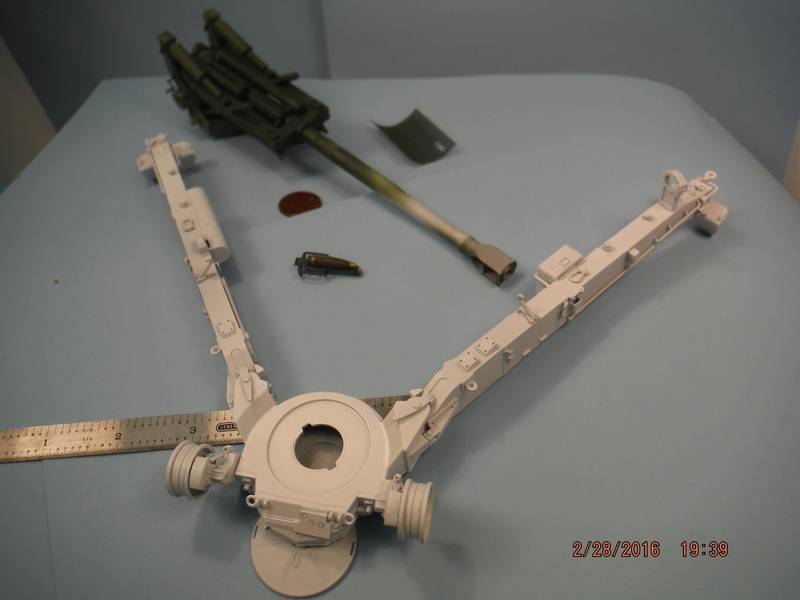
Posted: Sunday, February 28, 2016 - 06:11 AM UTC
#192
Kentucky, United States
Joined: November 25, 2009
KitMaker: 1,383 posts
Armorama: 1,281 posts
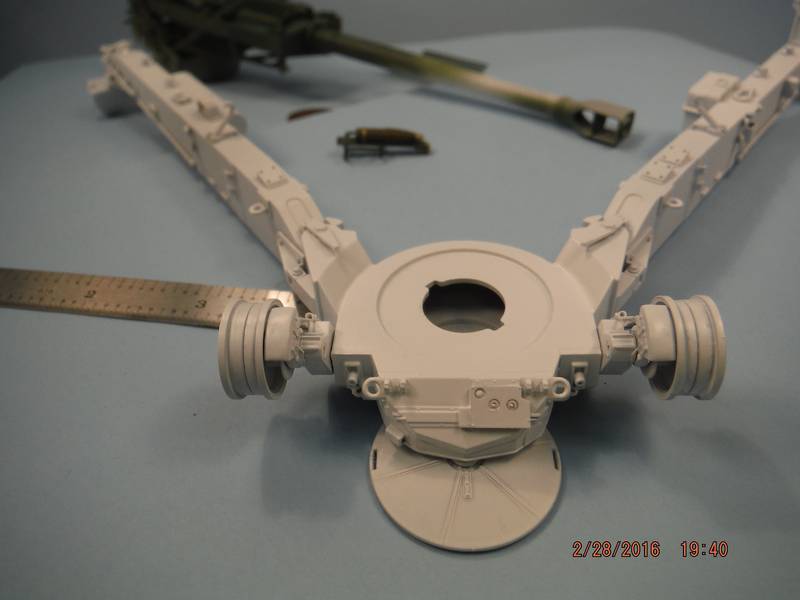
Posted: Sunday, February 28, 2016 - 06:19 AM UTC
#192
Kentucky, United States
Joined: November 25, 2009
KitMaker: 1,383 posts
Armorama: 1,281 posts
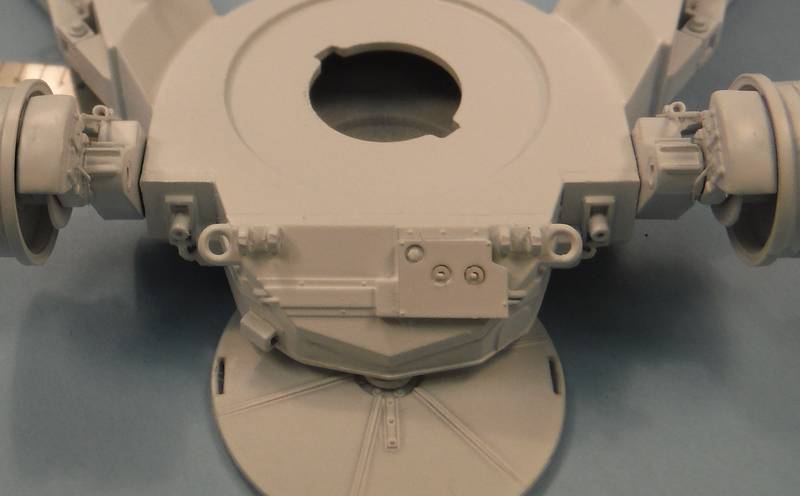
Posted: Sunday, February 28, 2016 - 06:26 AM UTC
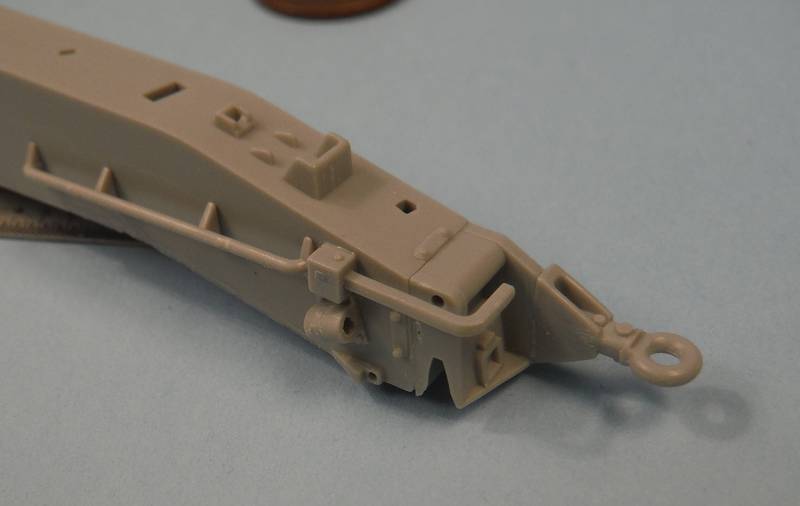
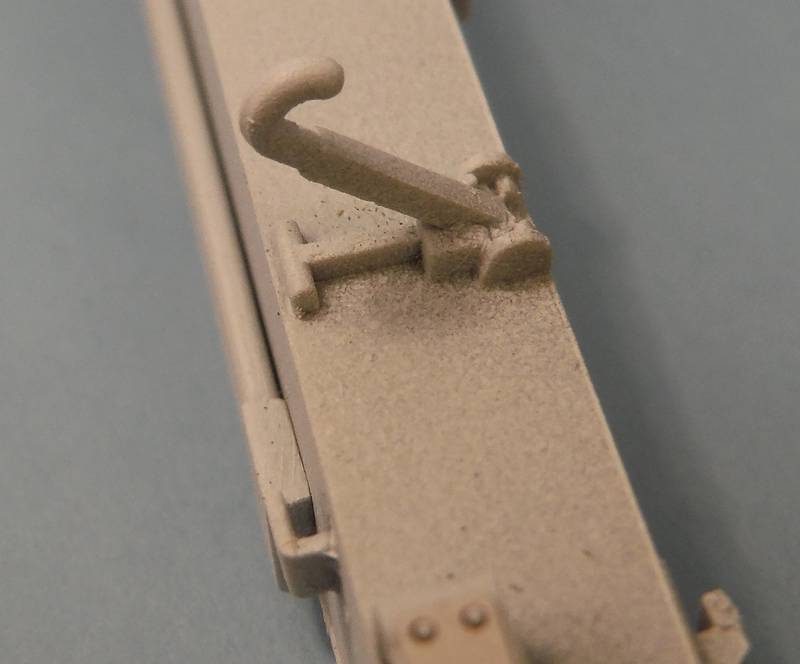
These hooks for the spade storage on the trails do not show up on the Prime Portal M198 gun examples. I am curious if this hook was a common feature or if they were removed to speed up firing set up?
#192
Kentucky, United States
Joined: November 25, 2009
KitMaker: 1,383 posts
Armorama: 1,281 posts
Posted: Sunday, February 28, 2016 - 06:31 AM UTC
Not far from 3 color NATO camo painting now!
#424
Queensland, Australia
Joined: April 23, 2015
KitMaker: 4,648 posts
Armorama: 2,248 posts
Posted: Sunday, February 28, 2016 - 11:24 AM UTC
Hey Stuart,
We never had hooks for the spades on our trails. Ours just sat in the brackets that were welded to the sides of the trails. It takes two men to lift the spades, so gravity is all we needed.
The only time I ever saw a spade come out without two guys lifting it was when one m-198 tipped over in transit after the driver drove one of the wheels over a big rock while making a turn a little bit too fast.
The ones we tok off the MPS ships for Desert Storm didn't have them, either.
Gary
"Artillery adds dignity, to what would otherwise be an ugly brawl."
Frederick The Great
Overijssel, Netherlands
Joined: July 01, 2010
KitMaker: 1,322 posts
Armorama: 1,239 posts
Posted: Sunday, February 28, 2016 - 01:09 PM UTC
Hi Stuart,
What a motivating build log.
I like the gun (which is not too difficult being an arti off).
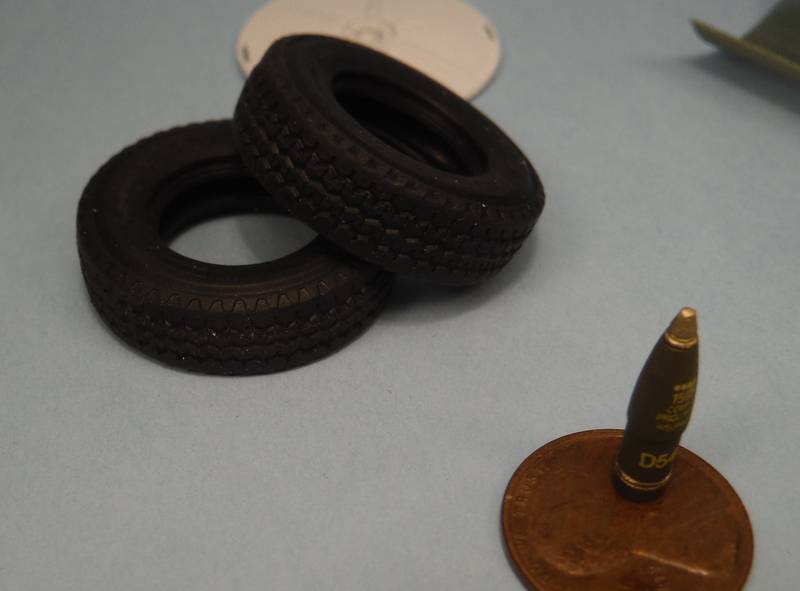
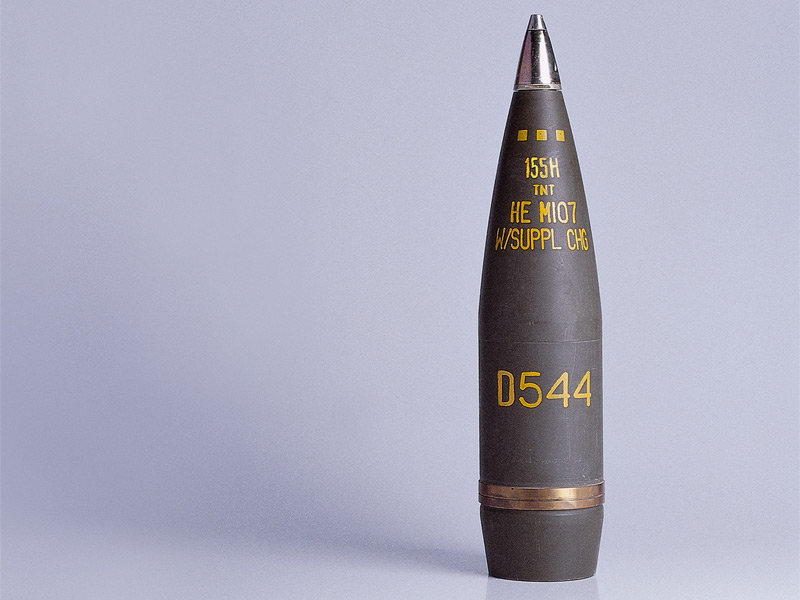
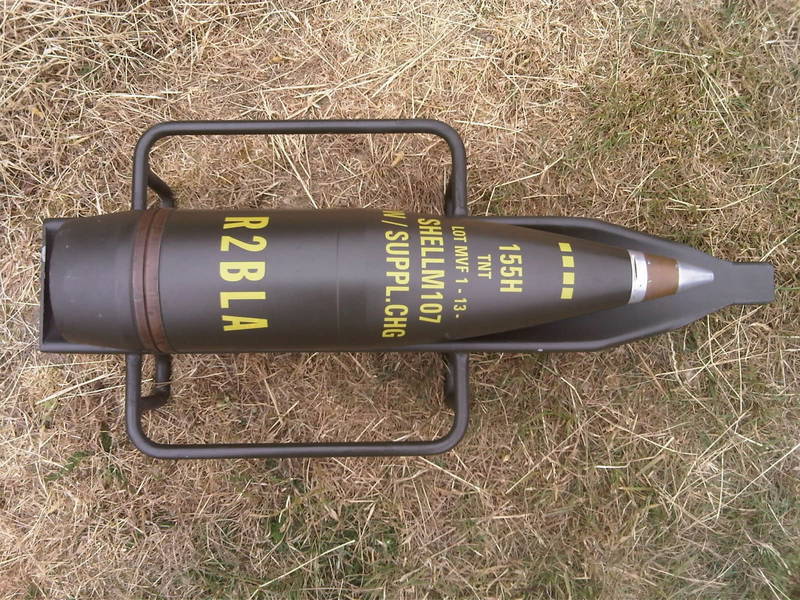
One question: I see you have painted the fuse on the shelll bronze. Is that a US version? We have stainless steel fuses, that why I ask.
Looking forward to see more of your build (already decided about the tractor?)
P.
#192
Kentucky, United States
Joined: November 25, 2009
KitMaker: 1,383 posts
Armorama: 1,281 posts
Posted: Sunday, February 28, 2016 - 05:22 PM UTC
Quoted Text
Hey Stuart,
We never had hooks for the spades on our trails. Ours just sat in the brackets that were welded to the sides of the trails. It takes two men to lift the spades, so gravity is all we needed.
The only time I ever saw a spade come out without two guys lifting it was when one m-198 tipped over in transit after the driver drove one of the wheels over a big rock while making a turn a little bit too fast.
The ones we tok off the MPS ships for Desert Storm didn't have them, either.
Gary
Thank you Gary for the comment! Based on your experience, I think I am going to cut those hooks off of the trails. I am hearing that any thing that slows down the set up for firing gets eliminated. Thanks for following!
#192
Kentucky, United States
Joined: November 25, 2009
KitMaker: 1,383 posts
Armorama: 1,281 posts
Posted: Sunday, February 28, 2016 - 05:44 PM UTC
Quoted Text
Hi Stuart,
What a motivating build log.
I like the gun (which is not too difficult being an arti off).
One question: I see you have painted the fuse on the shelll bronze. Is that a US version? We have stainless steel fuses, that why I ask.
Looking forward to see more of your build (already decided about the tractor?)
P.
Paul- Thank you for your kind words! From the attached photos, you are certainly correct on the fuse color. I was going off of box art alone as I have no actual experience with the ordinance. This is a learning project for me! Thank you for looking in and I appreciate the catch on the fuses as this will be corrected.
As for the tractor...yes. My friend that was in this unit recalls his crew's 5-ton M923A2 truck with the big foot CTIS tires, and a hard top cab. They put wood planking under the canvas over the bed to form a "roof". Looking forward to detailing the 5 ton truck after working this gun and crew. This kit takes up a lot of workspace, so still planning. All the best - Stuart
#192
Kentucky, United States
Joined: November 25, 2009
KitMaker: 1,383 posts
Armorama: 1,281 posts
Posted: Sunday, February 28, 2016 - 11:22 PM UTC
Well I just shared the work in progress with my friend from the crew of the gun I am trying to model. He had never seen the hooks on the trails for the spade storage either. Those hooks and mounts are gonna get cut off the top of my model's trailing arms.
He shared another interesting detail. In order to speed deployment, they tied a rope from the front of the gun's base between the wheels to one of the hand holes on the separate ground base plate. In transport the ground base plate sets on top at the end of the joined trails near the truck's hitch connection. The rope is tied off to the gun front and the base plate, so when the trails are pulled apart and separated, the base plate hits the ground. Then one crew member at the front of the gun can pull the rope and base plate up by himself. Imagine a rope going between the trails up the middle to the front between the wheels. This gets the ground base plate up to the proper location without guys blocking the area between the trails and speeds things up. Six minutes ready to fire! I will add the rope and also remove the ram rod from the inside of the trail.

#192
Kentucky, United States
Joined: November 25, 2009
KitMaker: 1,383 posts
Armorama: 1,281 posts
Posted: Monday, February 29, 2016 - 09:01 AM UTC
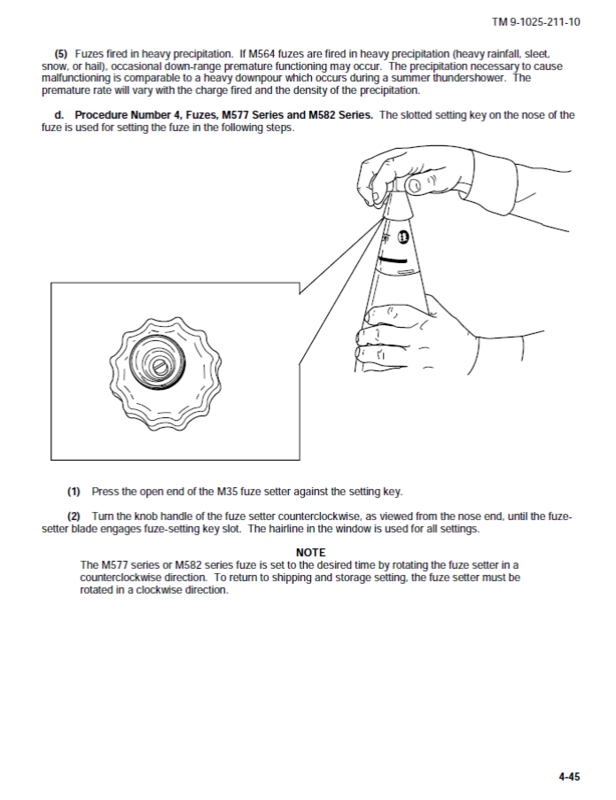
I just found an update on the shell fuze (fuse) color from the M198 user manual. Per ARMY TM 9-1025-211-10 page 313 of 468...
M762 AND M767 SERIES FUZES
These fuze bodies are anodized gold. The rear portion of the ogive is coated with a gold phosphate finish. The forward portion of the ogive is brown plastic for the basic fuzes and black plastic for the M762A1 and M767A1 fuzes. The nose cap is unpainted bronze for the basic fuzes and stainless steel for the M762A1/M767A1.
Those are electronic. For the mechanical fuzes...
The M577A1 and M582A1 fuzes are handled, set, and fired the same as the basic models. Early manufactured basic and A1 fuzes have black (paint finish) ogives while the later produced A1 fuze has a gold (chromate finish) ogive.
This TM goes thru many different fuze (fuse)types and therefore color options, so interesting read.
#424
Queensland, Australia
Joined: April 23, 2015
KitMaker: 4,648 posts
Armorama: 2,248 posts
Posted: Monday, February 29, 2016 - 09:50 AM UTC
Hi Stuart,
Most of the fuzes we used were either the simple yellow-gold-colored impact fuzes, or the black capped VT fuse. We got trained with the others, but never seemed to use them. I can't remember all of their numbers or nomenclatures...that was a long time ago.
Gary
"Artillery adds dignity, to what would otherwise be an ugly brawl."
Frederick The Great
#192
Kentucky, United States
Joined: November 25, 2009
KitMaker: 1,383 posts
Armorama: 1,281 posts
Posted: Tuesday, March 01, 2016 - 02:53 AM UTC
Gary thank you for the good comments. Does this stuff from the TM look familiar? Looks like crew man #2 task?
#192
Kentucky, United States
Joined: November 25, 2009
KitMaker: 1,383 posts
Armorama: 1,281 posts
Posted: Tuesday, March 01, 2016 - 02:59 AM UTC
Or this?
#424
Queensland, Australia
Joined: April 23, 2015
KitMaker: 4,648 posts
Armorama: 2,248 posts
Posted: Tuesday, March 01, 2016 - 11:10 AM UTC
Hi Stuart,
It does look familiar. The mushroom shaped fuse wrench is easy to remember, for sure. Some fuzes had longer stems than others. For this reason there is a cylinder of explosive under the eyebolt of the shell. If your fuse had the long stem you pull the cylinder from the shell and crew in the fuse. Then you dispose of the cylinder with any excess powder.
Although the system of giving each crew man a number for peace time training was used, in the field during Desert Storm, the only guy we talked about with a number was the #1 man. He pulled the lanyard. We used gunner, a-gunner, powder-man, etc. Nobody ever really remembered their number because we would all take different positions to ensure good cross training.
Gary
"Artillery adds dignity, to what would otherwise be an ugly brawl."
Frederick The Great