

Re spade locks,
They are on all the Aussie M-198 as an OH&S feature.
There are apparently a few Aussie features on this kit that was unique to our guns. I don't recall the differences from my service days, however a colleague who made a resin kit pre the trumpeter kit mentioned this. He mastered his kit on a gun from my battery hence was aware of these little things.
Hosted by Darren Baker
M198 PREDATOR A Btry 3-162 FA Yauco

duttons

Joined: June 16, 2007
KitMaker: 193 posts
Armorama: 184 posts
Posted: Thursday, March 03, 2016 - 02:03 AM UTC

amoz02t

#192

Joined: November 25, 2009
KitMaker: 1,383 posts
Armorama: 1,281 posts

Posted: Friday, March 04, 2016 - 01:18 AM UTC
Thank you for the insight Gary. I see where the TM talks about the rotation for cross training tasks. Seems a smart idea!
Good to know Scott. Thank you as the Trumpeter instructions do not mention any of the little detail differences.
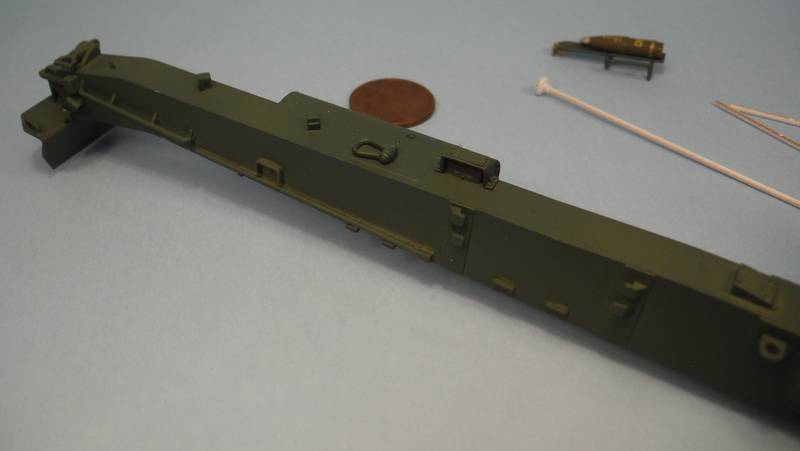
Anyhow the spade locks are gone now...
Quoted Text
Re spade locks,
They are on all the Aussie M-198 as an OH&S feature.
There are apparently a few Aussie features on this kit that was unique to our guns. I don't recall the differences from my service days, however a colleague who made a resin kit pre the trumpeter kit mentioned this. He mastered his kit on a gun from my battery hence was aware of these little things.
Good to know Scott. Thank you as the Trumpeter instructions do not mention any of the little detail differences.
Anyhow the spade locks are gone now...
amoz02t
#192
Joined: November 25, 2009
KitMaker: 1,383 posts
Armorama: 1,281 posts
Posted: Friday, March 04, 2016 - 01:28 AM UTC
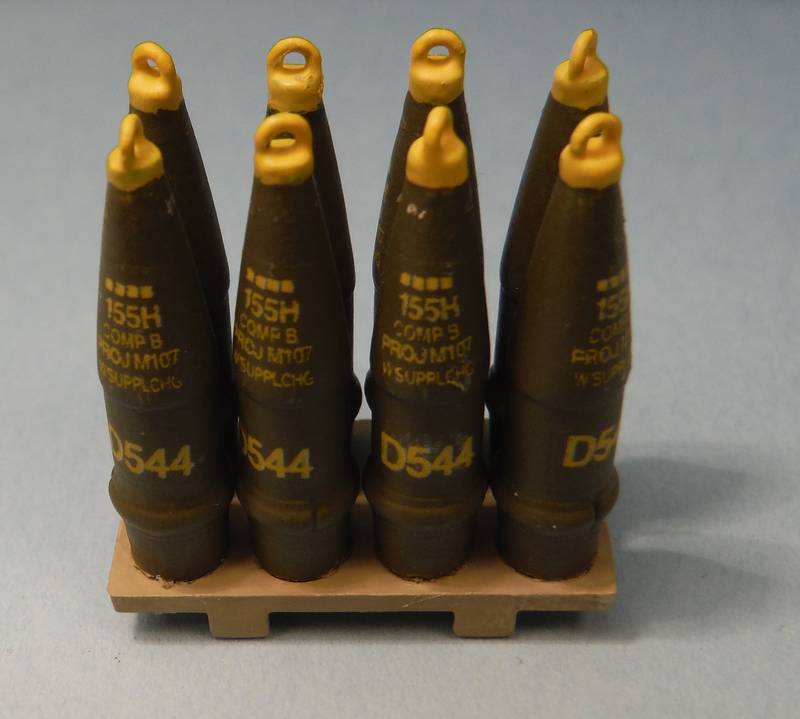
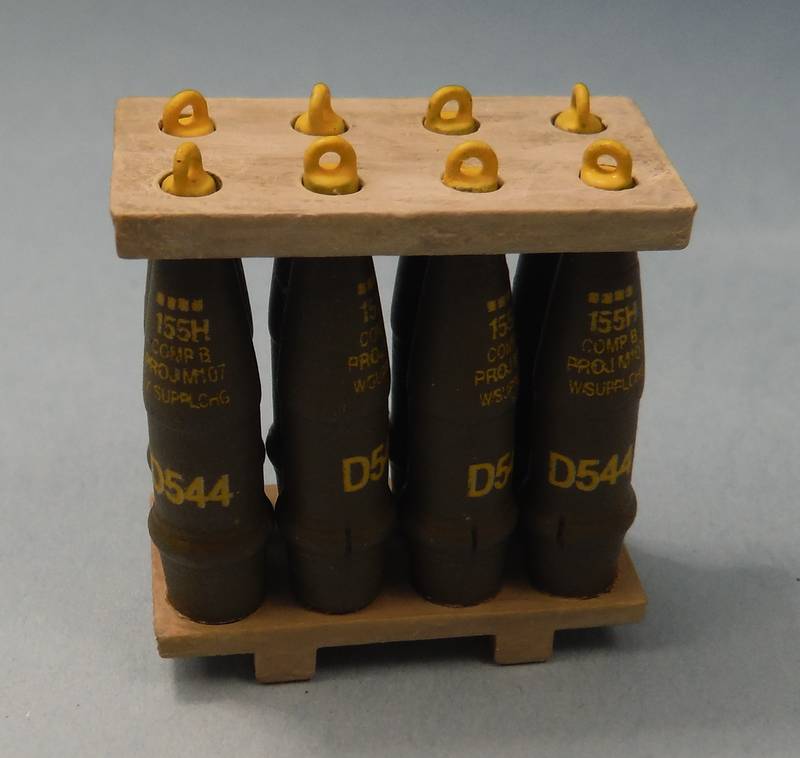
As far as removing things, my friend was very clear that the ram rod sections were out, so I modified the rack ends to look empty. Using .05" diameter brass for the 4 foot ram rod sections.
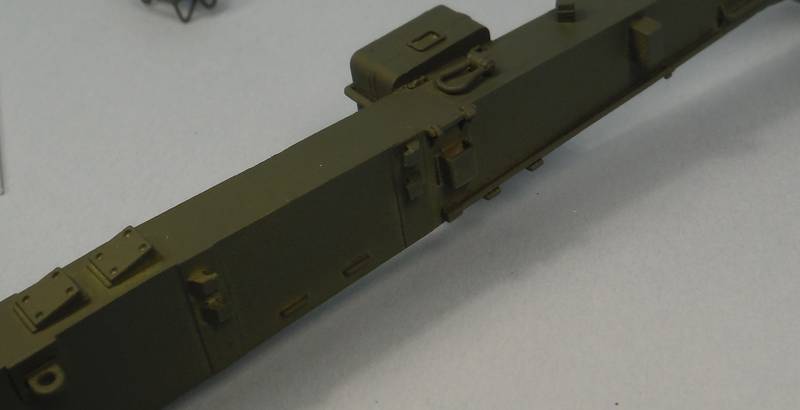
Just experimenting, but 3 sections of rod (12 feet) seems awkward behind an elevated gun?! Perhaps two for 8 foot? The kit has only one and I was trying to be different. This shows 12 feet...
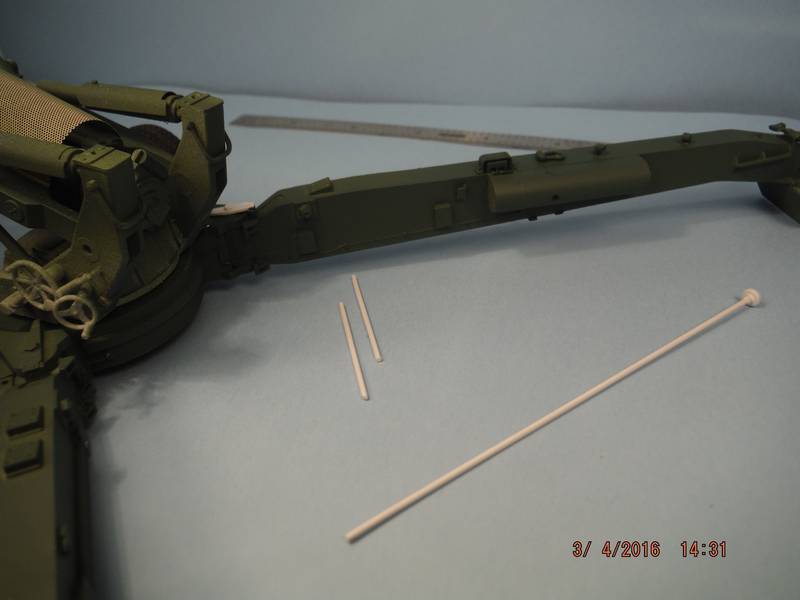

Just experimenting, but 3 sections of rod (12 feet) seems awkward behind an elevated gun?! Perhaps two for 8 foot? The kit has only one and I was trying to be different. This shows 12 feet...
amoz02t
#192
Joined: November 25, 2009
KitMaker: 1,383 posts
Armorama: 1,281 posts
Posted: Friday, March 04, 2016 - 01:35 AM UTC
Much closer to real painting as finding and fixing things under a quick NATO green base coat. As mentioned earlier, very happy with the Archer weld decals as they are more subtle than I first expected but add a little something.

Thanks for looking in and the great comments! -Stuart
Thanks for looking in and the great comments! -Stuart

GazzaS
#424
Joined: April 23, 2015
KitMaker: 4,648 posts
Armorama: 2,248 posts

Posted: Friday, March 04, 2016 - 02:30 AM UTC
Hi Stuart,
We used two sections of rod for ramming. We rarely shot at very high elevations, because once you get past 45 degrees, you are trying to shoot closer than your maximum range. To do this, instead, smaller powder charges are used.
It's a very well designed piece of gear the m-198. Heavy, but well-balanced. Easy to use and clean.... And accurate!
Those weld decals do look pretty good. Keep it up!
Gary
amoz02t
#192
Joined: November 25, 2009
KitMaker: 1,383 posts
Armorama: 1,281 posts
Posted: Friday, March 04, 2016 - 08:27 AM UTC
Hi Gary! Thank you as I think 2 sections (8 foot long ram) looks much more reasonable. Great recall! So could I just lean the unused ram rod sections on a rock some where, or were these sections needed for other uses? I have read about stickers, where the shell needs to be pushed back out the breech with a longer ram and cone. That is just too sporty to even think about!
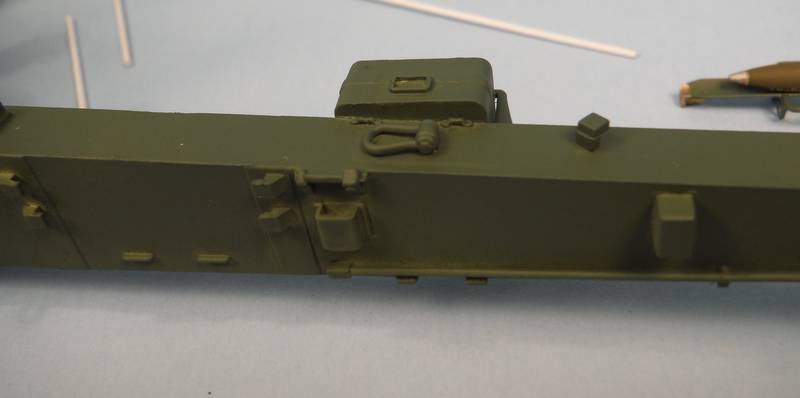
8 foot...
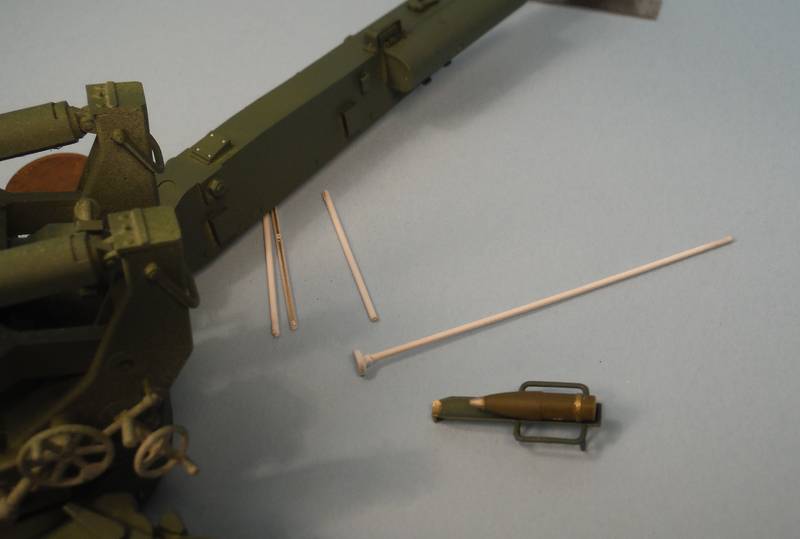
8 foot...
GazzaS
#424
Joined: April 23, 2015
KitMaker: 4,648 posts
Armorama: 2,248 posts
Posted: Friday, March 04, 2016 - 08:51 AM UTC
Hey Stuart,
When not in use, the cleaning/rammer rods were left in the box I wrote about earlier. The cone also stayed in the box. In my entire time, we may have used it once. Gear not needed was kept stowed away.
We didn't clean the barrel every day. If we were in the field for a set period of time, we might not clean it until we got back.
Gary
Removed by original poster on 03/05/16 - 12:56:54 (GMT).
amoz02t
#192
Joined: November 25, 2009
KitMaker: 1,383 posts
Armorama: 1,281 posts
Posted: Friday, March 04, 2016 - 05:56 PM UTC
Quoted Text
Hey Stuart,
When not in use, the cleaning/rammer rods were left in the box I wrote about earlier. The cone also stayed in the box. In my entire time, we may have used it once. Gear not needed was kept stowed away.
We didn't clean the barrel every day. If we were in the field for a set period of time, we might not clean it until we got back.
Gary
Hi Gary - Great details! Thank you. I went back and reread your earlier post where you had already said that you used two sections of rod for the shell rammer. Sorry as I did not grasp that meant 8 foot of ramrod until I had seen the details in the TM. I appreciate your insights and sticking with the build here. I feel this is the magic of our hobby as the plastic model becomes a 3D map to better communicate and help understand the details of the history. Now back to the shop... All the best- Stuart

amoz02t
#192
Joined: November 25, 2009
KitMaker: 1,383 posts
Armorama: 1,281 posts
Posted: Monday, March 21, 2016 - 06:36 AM UTC
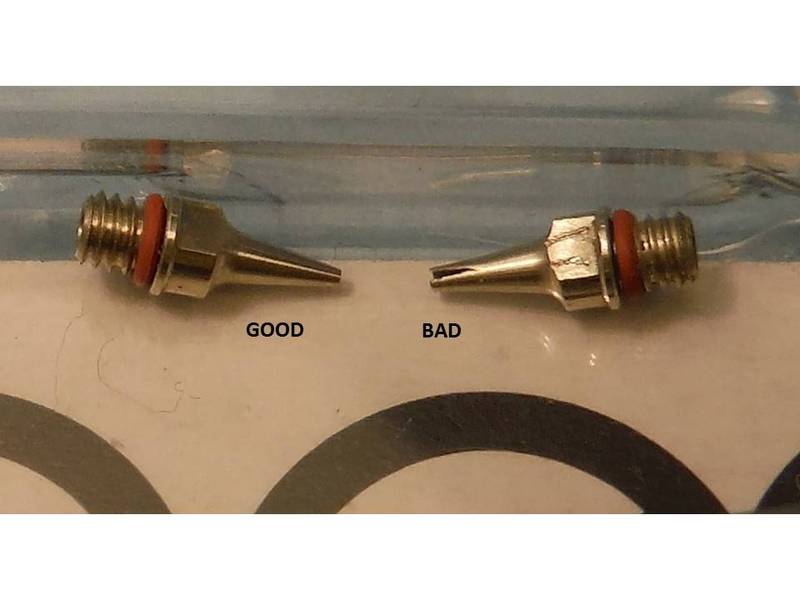
All I can say is be careful cleaning the airbrush! Pushed too hard on the needle. Oh well, back in action now thanks to eBay.
amoz02t
#192
Joined: November 25, 2009
KitMaker: 1,383 posts
Armorama: 1,281 posts
Posted: Monday, March 21, 2016 - 06:48 AM UTC
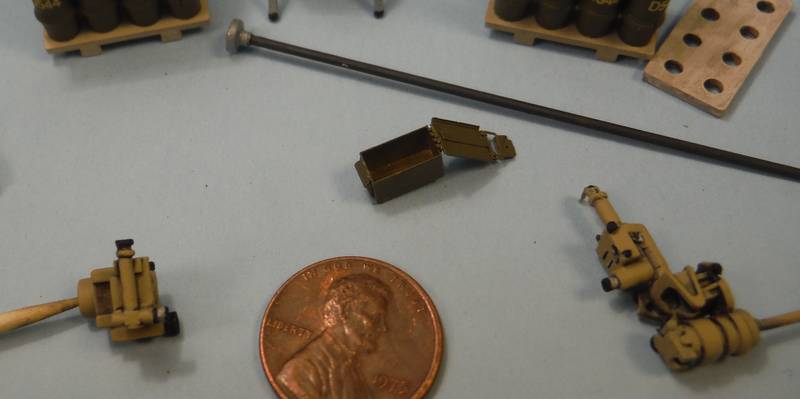
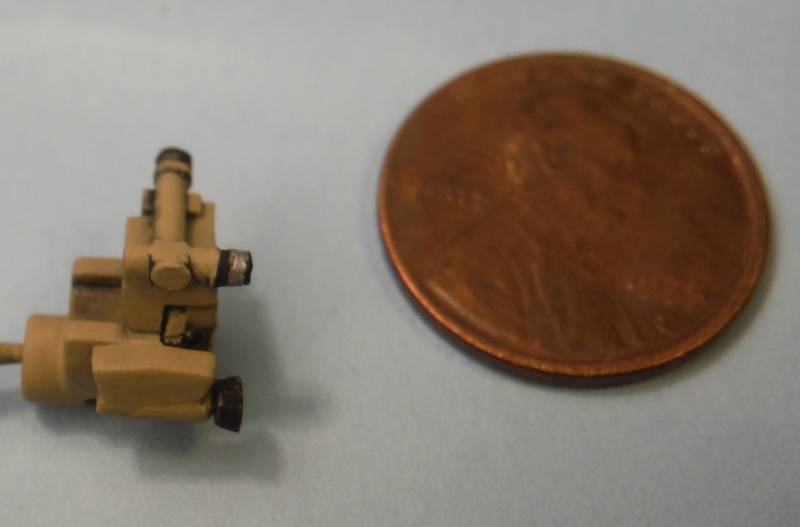
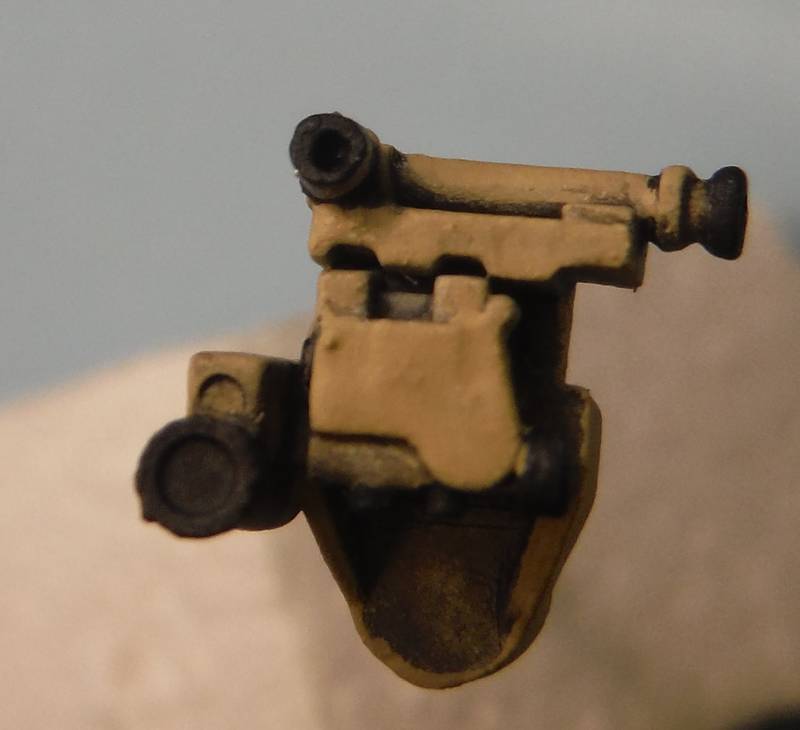
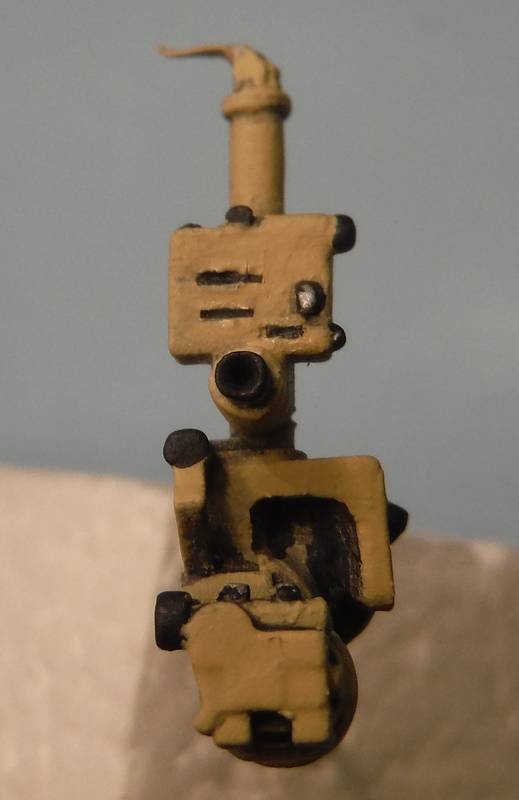
While waiting for parts, started looking at the optics. Much for me to learn...
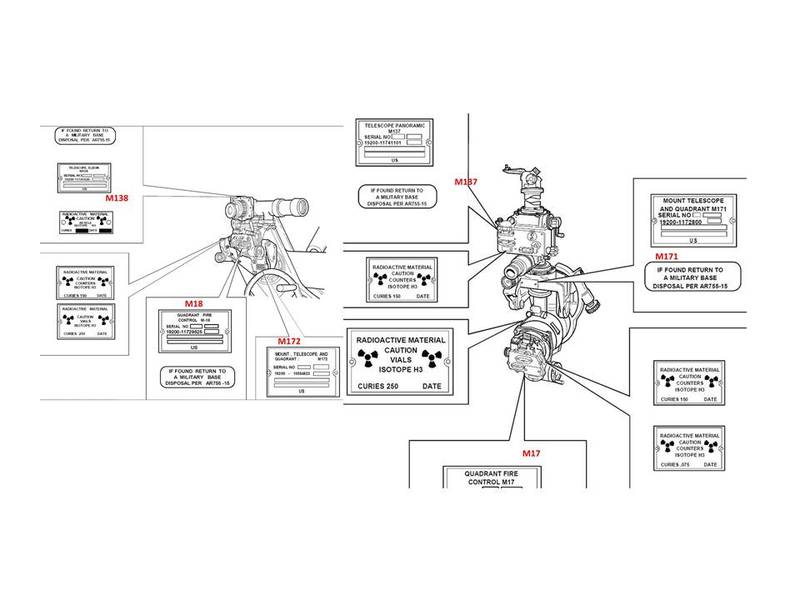
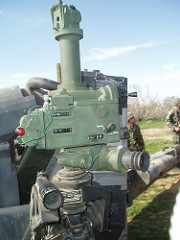
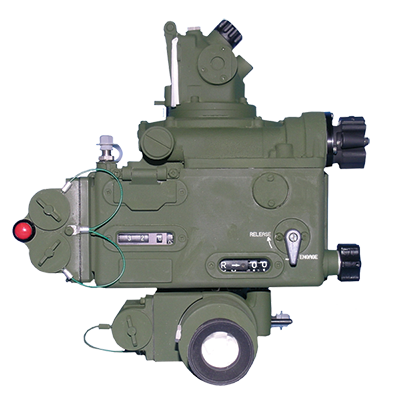
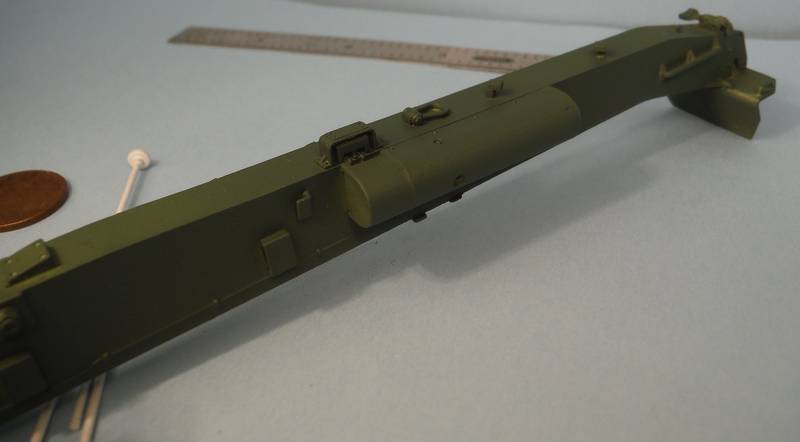
Started carving on parts A16, A19, & C33 to add some detail based on the TM sketches
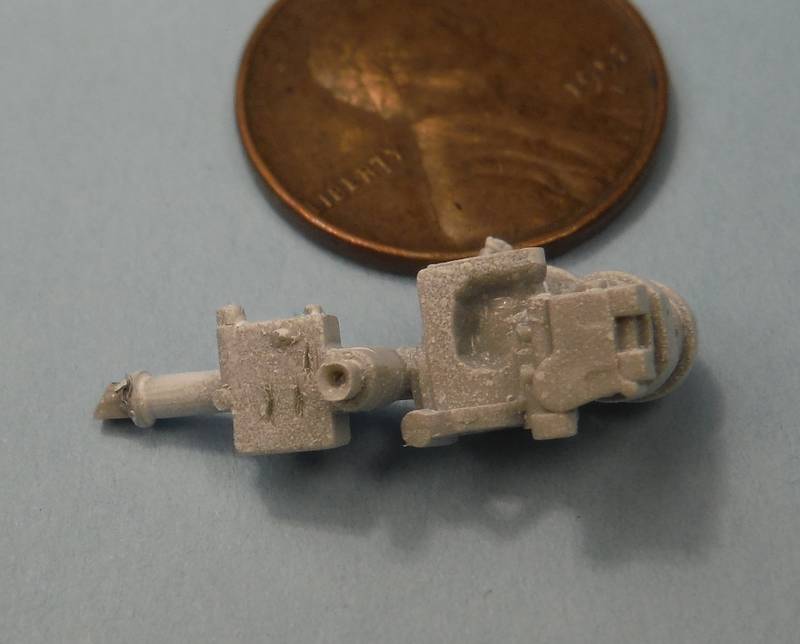
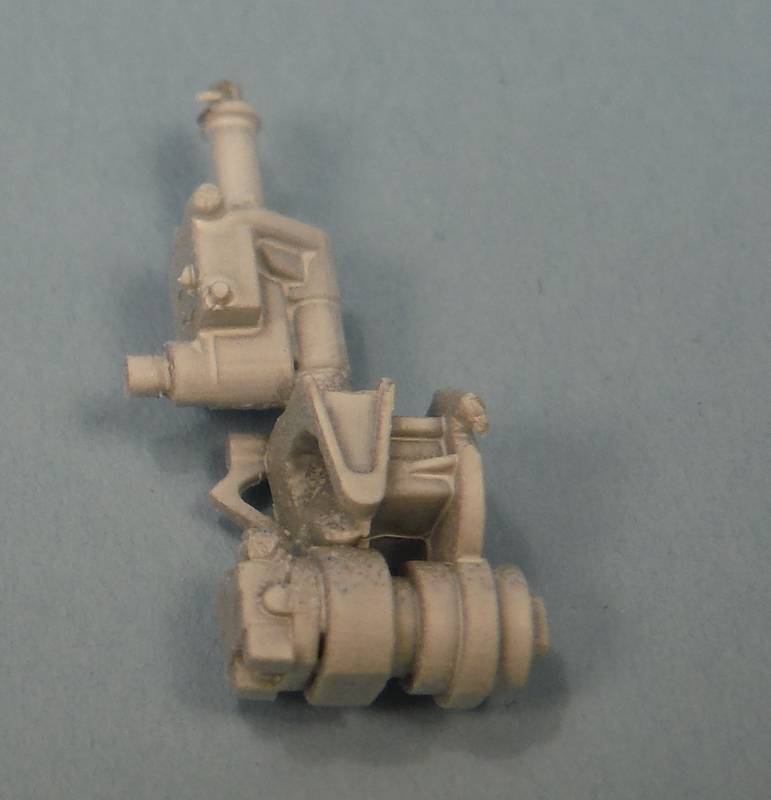
Started carving on parts A16, A19, & C33 to add some detail based on the TM sketches
amoz02t
#192
Joined: November 25, 2009
KitMaker: 1,383 posts
Armorama: 1,281 posts
Posted: Monday, March 21, 2016 - 07:00 AM UTC
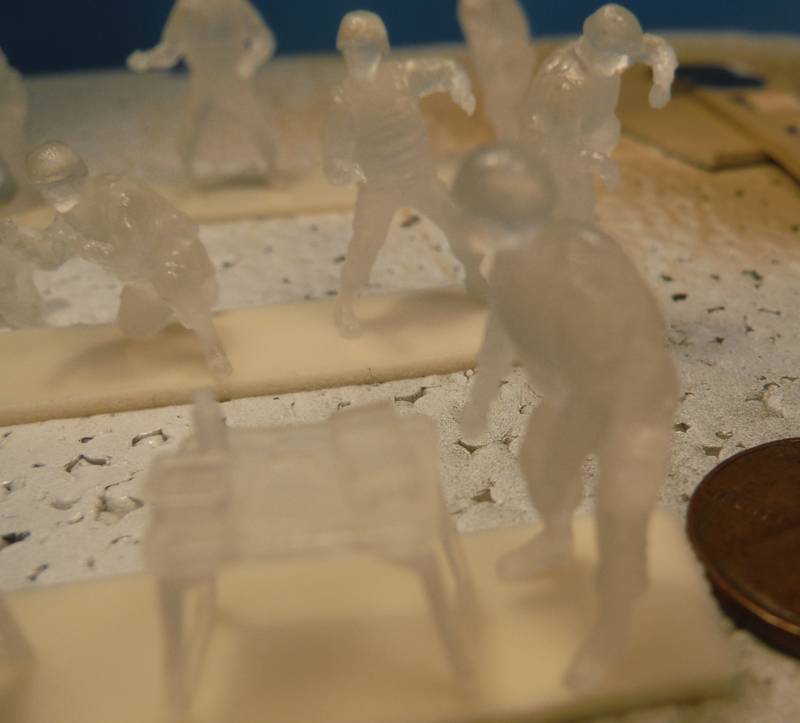
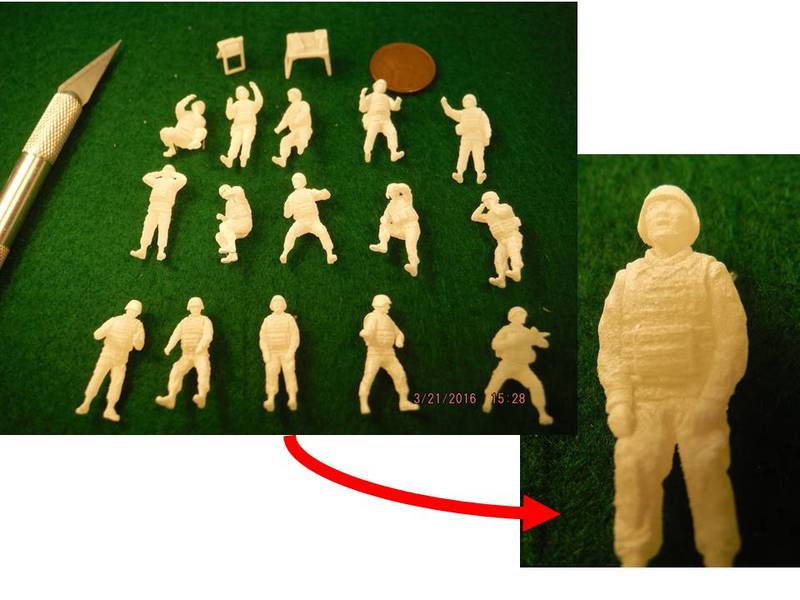
The optics made me think about potential crew figures. Wonder if anyone has done a review on the 3D printed figures by Designer HOLDEN8702 from Shapeways? They are called "US Artillery Crew Cold Weather". I tried the 1/72 braille scale version as I could preview all 15 figures for only $35. I like the poses, but the Shapeways printing seems to limit the detail. Has anyone tried the 1/35 scale figures?
amoz02t
#192
Joined: November 25, 2009
KitMaker: 1,383 posts
Armorama: 1,281 posts
Posted: Monday, March 21, 2016 - 07:09 AM UTC
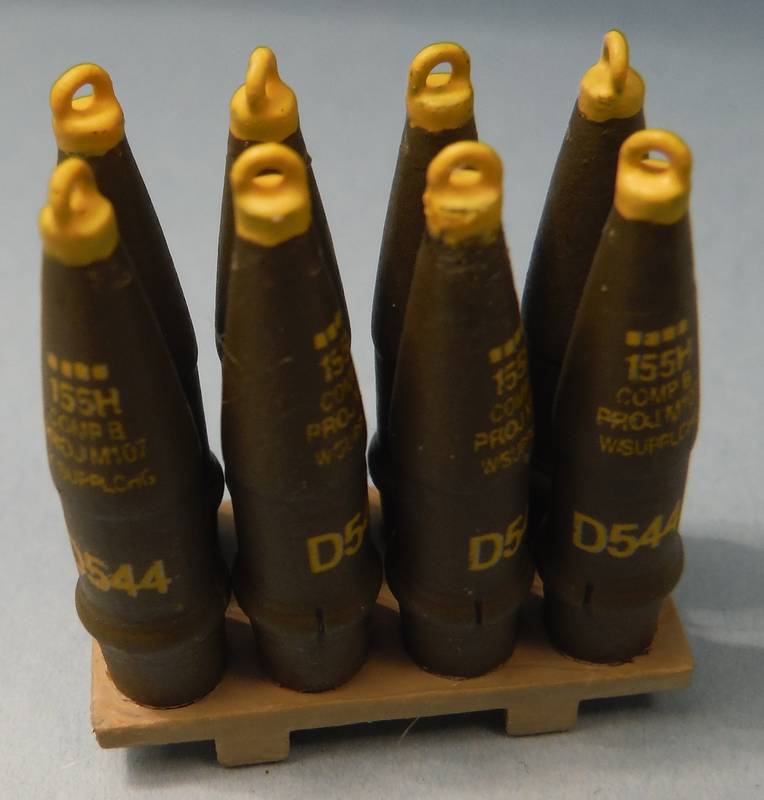
Still much to do before the crew though, like rounds. I agree with redlegs12 comment about how these are a kit by themselves.
Assembly line...


and more
Need to come up with some banding straps. Thanks for looking!
Assembly line...
and more
Need to come up with some banding straps. Thanks for looking!
amoz02t
#192
Joined: November 25, 2009
KitMaker: 1,383 posts
Armorama: 1,281 posts
Posted: Monday, March 21, 2016 - 07:17 AM UTC
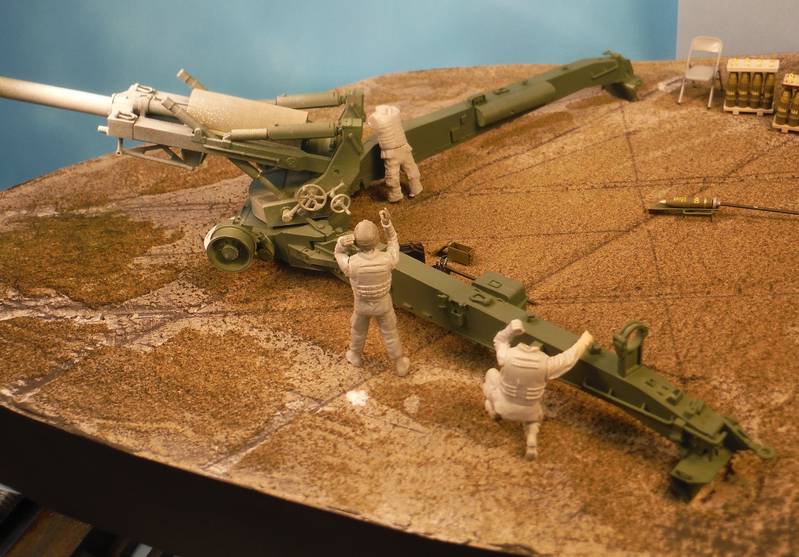
Also thinking ahead to what the display base might look like. I would like to be able to place the 5 ton truck display on the back of this at a later date. The 2 inch thick foam is easy to work with and add different types of ground cover. I hot wire cut an odd shape that fit the gun's foot print. Still a work in process.
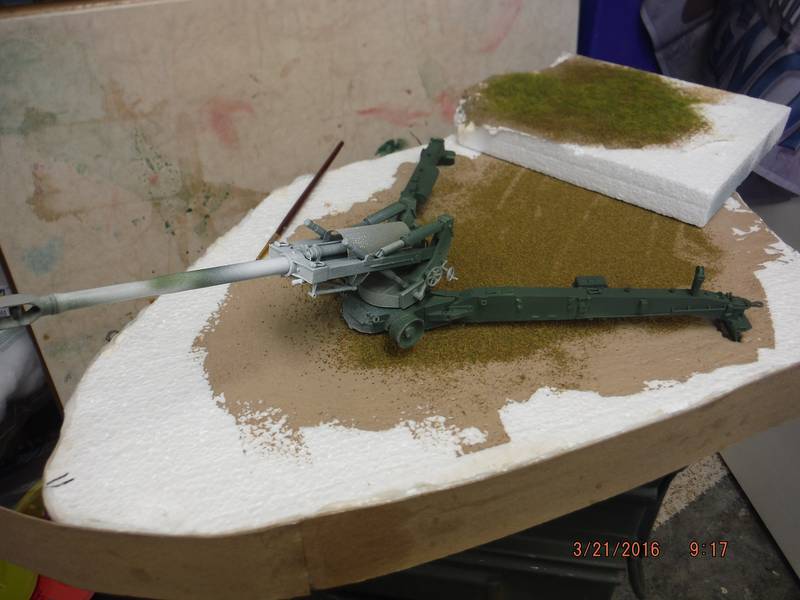
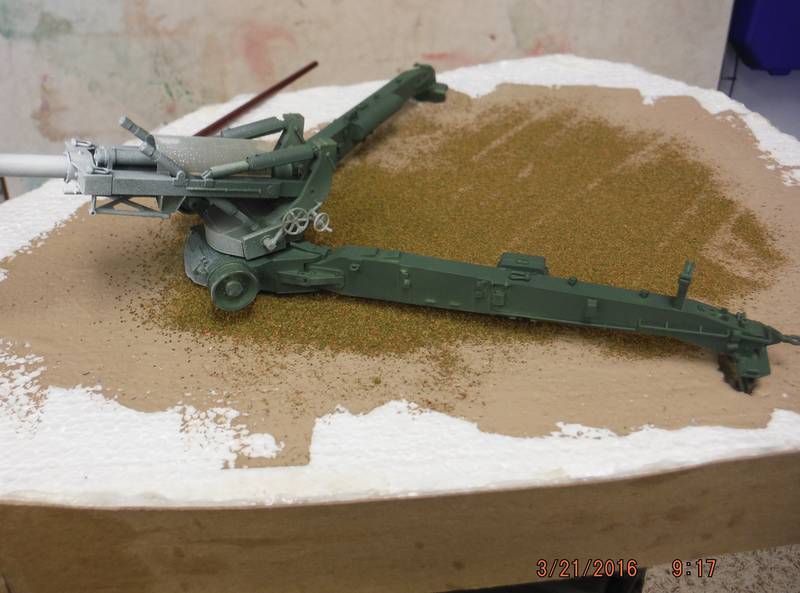

Comments always welcome. Thanks- Stuart
Comments always welcome. Thanks- Stuart

MadModeler

Joined: July 26, 2012
KitMaker: 454 posts
Armorama: 281 posts
Posted: Monday, March 21, 2016 - 09:57 PM UTC
The most fun I ever had while in the Army was working with the Guns. Got to fire a few fire mission rounds. Always neat to watch the dismounting drills. A lot of good memories on the firing line in CFB Gagetown. Kind of wonder if I join the wrong trade. Oh well. Enjoy beinging a retired veteran now.
Keep up the good work.
Cheers,
Tom
Keep up the good work.
Cheers,
Tom
amoz02t
#192
Joined: November 25, 2009
KitMaker: 1,383 posts
Armorama: 1,281 posts
Posted: Tuesday, March 22, 2016 - 01:10 AM UTC
Thank you for looking in and the good words Tom. All the best- Stuart
amoz02t
#192
Joined: November 25, 2009
KitMaker: 1,383 posts
Armorama: 1,281 posts
Posted: Saturday, March 26, 2016 - 08:43 AM UTC
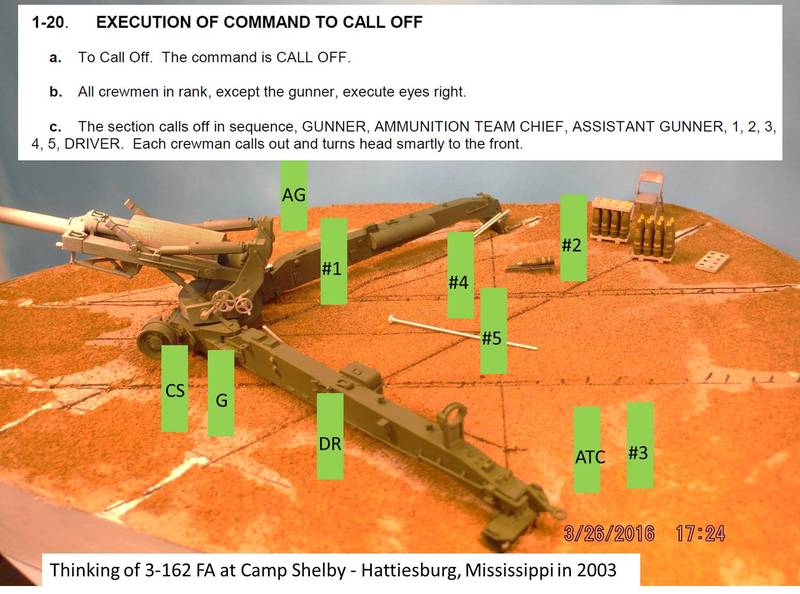
Help! Still more planning as I would like to add a full crew to the model. Want to show after the gun is in a deliberate placement to fire and before emplacement improvements. This is intended to reflect a training exercise in the US before the Guard unit left for Kuwait. I am imagining after the round is loaded and the number one is putting the lanyard in place. Where would each crew member of the gun be at that instant? This is mock up based on comments to date, the M198 manual, and some brief discussions with my friend who was in the unit. I am still looking at YouTube and Mike Del Vecchios website www.REDLEG2SCALE.COM for more insight. Any pointers and comments are welcome. Many thanks- Stuart

Modelrob
Joined: October 20, 2015
KitMaker: 304 posts
Armorama: 293 posts
Posted: Saturday, March 26, 2016 - 03:16 PM UTC
The gun and base are coming along very nicely.
Robert
Robert
amoz02t
#192
Joined: November 25, 2009
KitMaker: 1,383 posts
Armorama: 1,281 posts
Posted: Saturday, March 26, 2016 - 07:11 PM UTC
Thank you Robert. Really enjoying this as much to learn about the towed 155 mm and crews.
amoz02t
#192
Joined: November 25, 2009
KitMaker: 1,383 posts
Armorama: 1,281 posts
Posted: Sunday, March 27, 2016 - 11:06 PM UTC
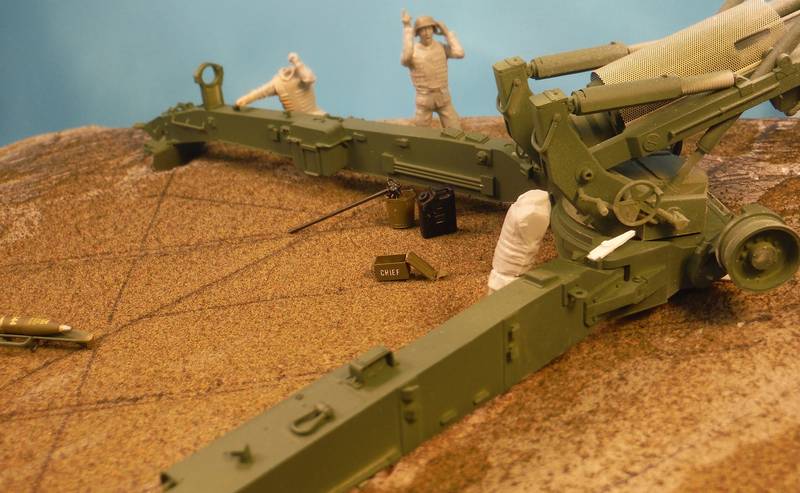
Working on more of the gear. My friend recalled this M198 with the name PREDATOR painted on it as being NATO Tri color repainted over tan. For this reason, I went with tan based gun sights to reflect the mismatch paint schemes. I have seen tan wheels on NATO as well as in Prime Portal website walk around.
Comments always are welcome! All the best
Comments always are welcome! All the best
Removed by original poster on 03/28/16 - 20:38:42 (GMT).
amoz02t
#192
Joined: November 25, 2009
KitMaker: 1,383 posts
Armorama: 1,281 posts
Posted: Sunday, April 03, 2016 - 04:59 PM UTC
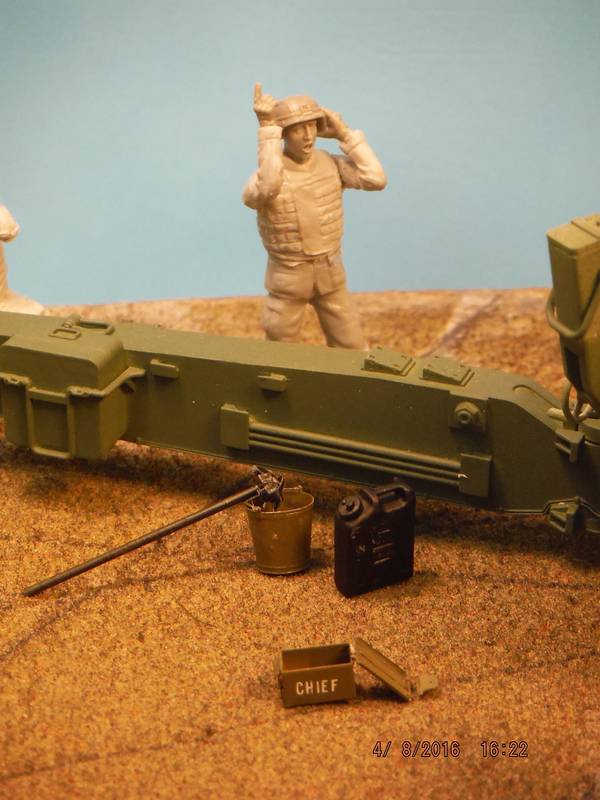
Just got my order in from BNA Model World including a bucket set. This PE bucket set is from Alliance Model Works and includes a perfect pail for the gun mop. Will put a photo out soon, but I highly recommend this $10 item for several different buckets. Be sure to anneal the brass to orange glow as my initial attempt was hard to form into a cone. A circle template and 10x visor help as well. More soon. Thanks- Stuart
amoz02t
#192
Joined: November 25, 2009
KitMaker: 1,383 posts
Armorama: 1,281 posts
Posted: Sunday, April 10, 2016 - 06:58 AM UTC
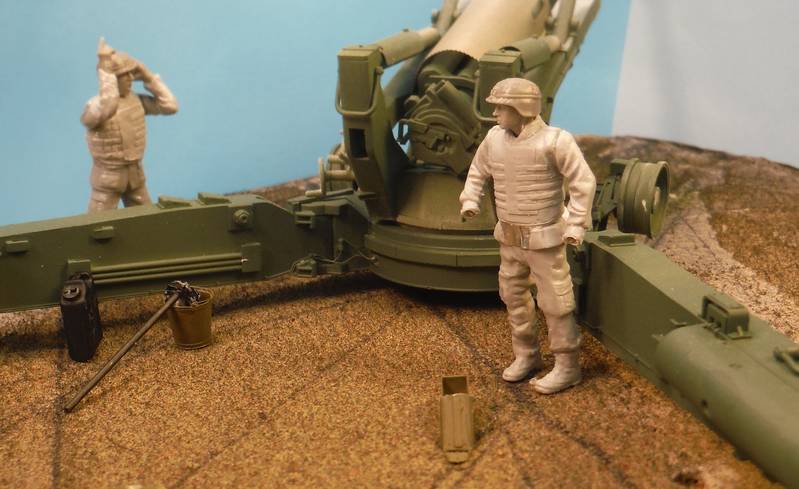
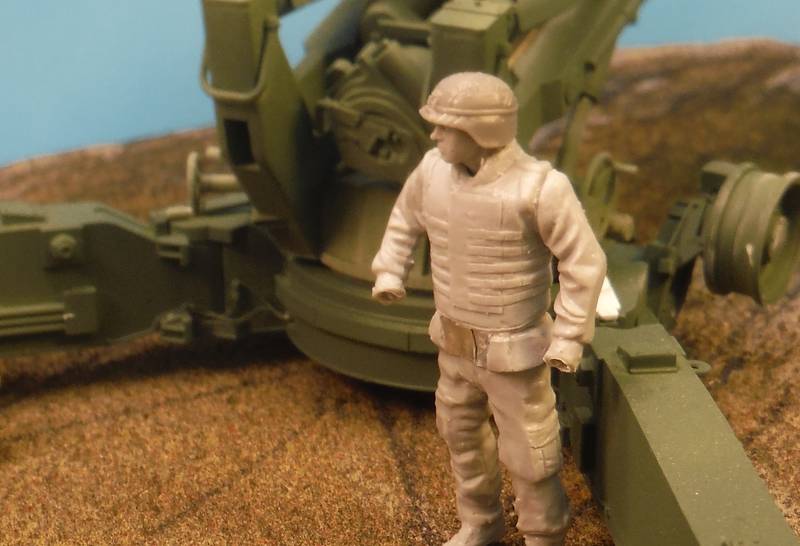
Still working the base and thinking about the crew figures. Starting to work on the section chief and the #1 holding the lanyard. The CS is about to drop his hand and the #1 will then turn his body slightly with the lanyard to send the round. All are preparing for a big noise to come. These are in process using Hornet heads, Live Resin PASGT Kevlar and misc. on Trumpeter figure body parts.
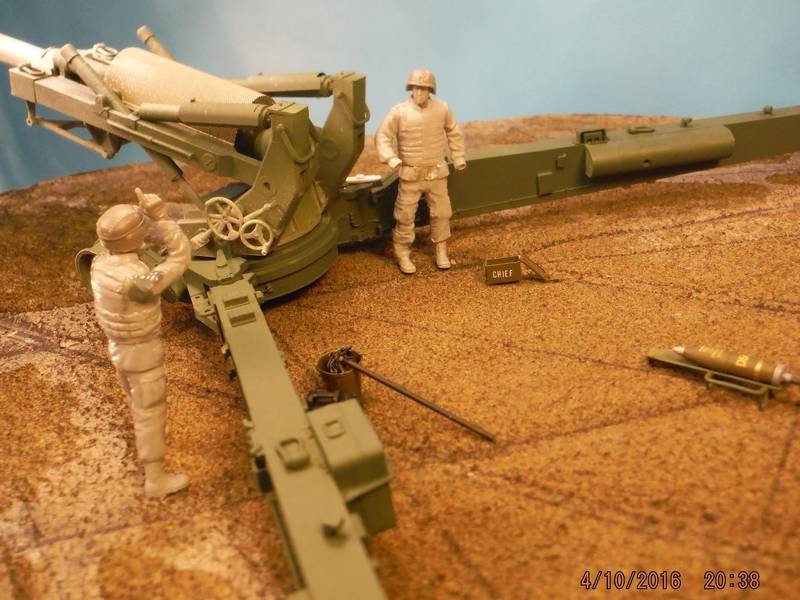
From what I am told, this is where the art and the magic happens with eye direction, placement into triangular arrangements, etc. My composition skills need much work so all comments are very welcome. Thanks!
From what I am told, this is where the art and the magic happens with eye direction, placement into triangular arrangements, etc. My composition skills need much work so all comments are very welcome. Thanks!
amoz02t
#192
Joined: November 25, 2009
KitMaker: 1,383 posts
Armorama: 1,281 posts
Posted: Sunday, April 10, 2016 - 11:12 PM UTC
Now that I see the photo of the CS right arm (with the pointy finger) I think I will shorten the arm and lower the elbow a bit. Just looks odd here. Just saying.
amoz02t
#192
Joined: November 25, 2009
KitMaker: 1,383 posts
Armorama: 1,281 posts
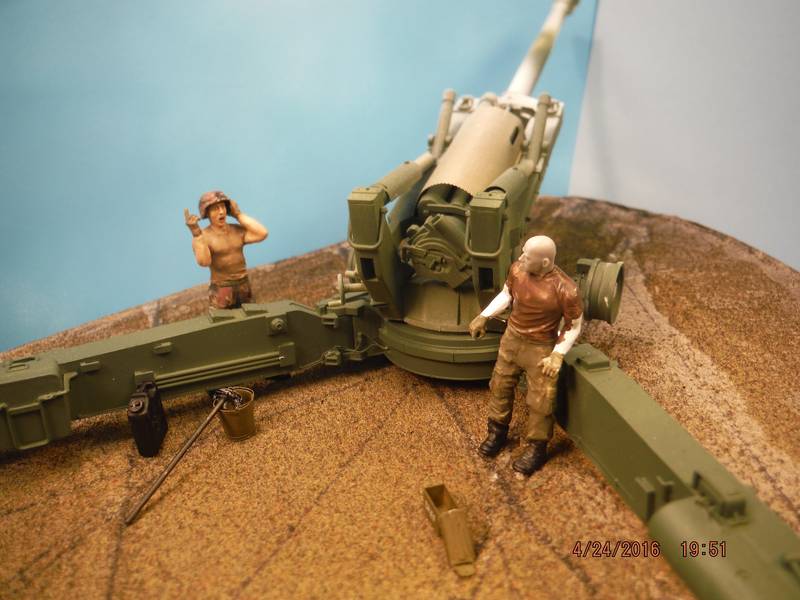
Posted: Sunday, April 24, 2016 - 05:22 AM UTC
Well I have an update on the crew figures. Showed my friend the previous photos in Kevlar and Interceptor body armor. He laughed and shook his head as when in training in Mississippi they were in tee shirts. Too hot and rainy for the vests.
So new approach with helmets, tees, woodland trousers, and black boots. These are figures in process that may not be right either but hope will prompt more discussion.
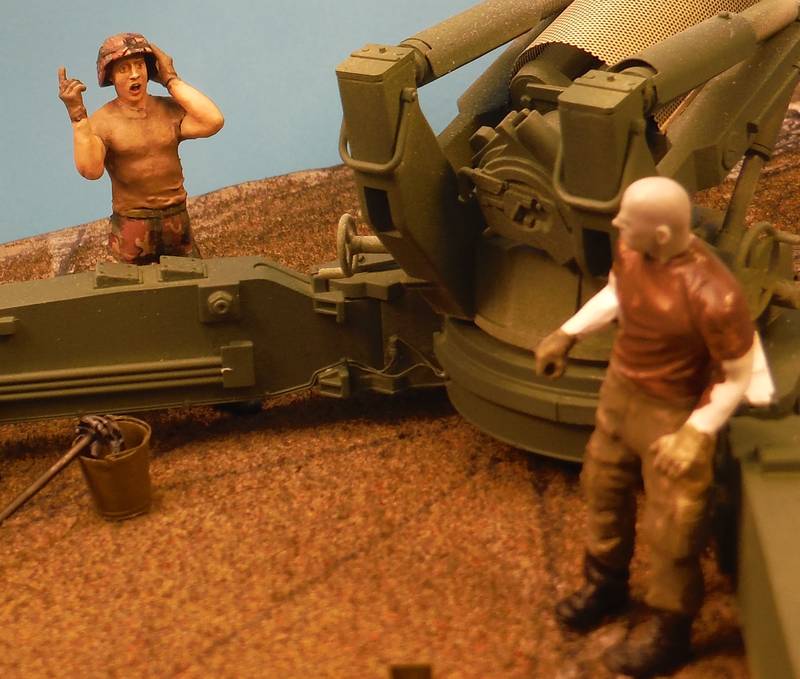
So new approach with helmets, tees, woodland trousers, and black boots. These are figures in process that may not be right either but hope will prompt more discussion.
 |

WEB HOSTING BY


Copyright ©2021 Armorama and Kitmaker Network, a subsidiary of Silver Star Enterprises
All Rights Reserved. Please read our Conditions of Use and Privacy Policy.
All Rights Reserved. Please read our Conditions of Use and Privacy Policy.