Яusso-Soviэt Forum: Cold War Soviet Armor
For discussions related to cold war era Russo-Soviet armor.
Takom T-54B build log
JimboHUN
Visit this Community
Budapest, Hungary
Joined: May 07, 2009
KitMaker: 461 posts
Armorama: 443 posts
Posted: Wednesday, June 01, 2016 - 05:59 PM UTC
Hi,

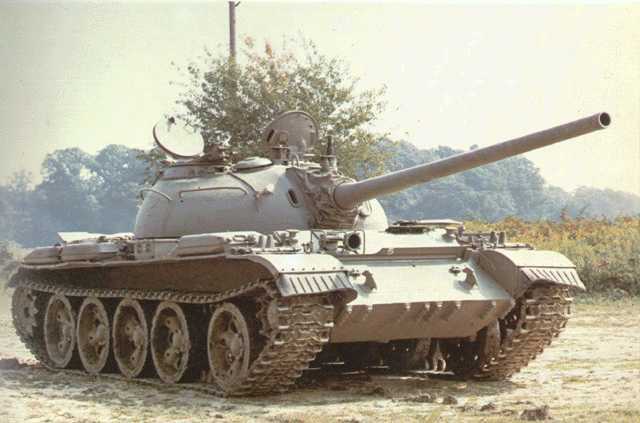
The differences as per Takom:


Cheers,

Adam
Jennings
Visit this Community
Virginia, United States
Joined: April 30, 2016
KitMaker: 73 posts
Armorama: 69 posts
Posted: Wednesday, June 01, 2016 - 06:11 PM UTC
Thanks! Now I can see it.
jamingui
Visit this Community
Spain / España
Joined: February 28, 2008
KitMaker: 28 posts
Armorama: 22 posts
Posted: Sunday, June 05, 2016 - 01:53 AM UTC
My Takom T-54B arrived yesterday. It has the T-55 lower hull. Does anybody know how Takom is going to manage to send the replacement hull to the ones we bought the kit?

Cheers

Javier
WoTmodeler
Visit this Community
New York, United States
Joined: May 15, 2016
KitMaker: 19 posts
Armorama: 19 posts
Posted: Sunday, June 05, 2016 - 06:25 AM UTC

Quoted Text

Hi,

I am jumping to the front for a while – as said before first I will put together the hull before adding any detail...

The mine plough attachments are incorrect in the instructions, they suggest it as seen on the box art:


They add the short arms to the upper side, and nothing to the lower but this is incorrect. I will depict below the three correct options out from box. Please note that nothing is glued and positioning is approximate only – please use your references.

1) – no attachment points: just fill the gaps marked.


2) – ”early” configuration: add the arms as per the instructions and add 8 attachment points to the lower plate, you will have 4 separately in the box, the other 4 should be cut from the T-55 front plate which is also included in the kit (as a bonus both types are in the box: the square and rounded ones – so if not used you will have spares for two vehicles).


3) – ”late” configuration: use the 4 separate attachment points on the upper hull and use the T-55 lower front plate – either add the special T-54 welding to this piece or remove all attachment points and add them to the T-54 front plate. Also you will need to add the two rods next to the fenders.


That’s all for now, some more work was done but I have no photos yet.

Also news of today that Takom is releasing a corrected T-54B lower hull as currently the kit has the T-55 one which is not correct since the two are not the same. They promise replacement to every buyer, so hats off to Takom! To me it’s too late already...


Cheers,

Adam


Hi,good find catching that mistake by Takom
But I do believe you are using the wrong lower hull part,the one you are showing that needs to be modified is wrong.
J4 is the part that needs to be used for the early and late type mine plow attachments,not J1 as it is for a more modern version I believe.


Either way thanks for finding the mistakes,I hope Takom corrects this mistake in the future.
JimboHUN
Visit this Community
Budapest, Hungary
Joined: May 07, 2009
KitMaker: 461 posts
Armorama: 443 posts
Posted: Tuesday, June 07, 2016 - 05:53 PM UTC
Hi,

Luckily both type are in the box, the one I have used was just the example. I am not sure if it is an early/late issue, it maybe depends on the factory, etc. Best to follow the pictures we have

I will have some updates soon, I was on the move lately.

Cheers,

Adam
SEDimmick
Visit this Community
New Jersey, United States
Joined: March 15, 2002
KitMaker: 1,745 posts
Armorama: 1,483 posts
Posted: Wednesday, June 08, 2016 - 06:59 PM UTC

Quoted Text

My Takom T-54B arrived yesterday. It has the T-55 lower hull. Does anybody know how Takom is going to manage to send the replacement hull to the ones we bought the kit?

Cheers

Javier


From what I saw on their facebook page, you need to contact your country's distributor to get the updated parts. I'm waiting till they release it with the proper parts.
JimboHUN
Visit this Community
Budapest, Hungary
Joined: May 07, 2009
KitMaker: 461 posts
Armorama: 443 posts
Posted: Saturday, June 11, 2016 - 01:49 PM UTC
Hi Folks,

After some time away I am back with the blog… I am trying to build a little every day but usually take photos after a couple of steps are done.

The running gear is done (sans the roadwheels – more on this later). There is nothing too tricky however a few points are worth mentioning.


The roadwheel arms are a pretty tight fit, so I just placed them into the holes first until they were correctly algined. Once done I glued them in place without the rest of the parts needed here. That was necessary for the correct positioning. Once dried I have added parts A6 and A7 and it makes more sense adding these after the roadwheel arms as A6 and A7 should be aligned correctly to the housing of each arm.


The last arms on both sides were not sitting properly when placed in their holes, they were angled down a bit. Maybe this is a one-off issue as I have not seen this mentioned in other Takom T-54/55 articles but it can be fixed by sanding down the locating pins and glue the arms with slow setting glue, while making sure of the correct alignment compared to the rest of the arms.

The idler wheels and the driving sprockets should be easy bits normally, but…there is always a but To have a correct fit the two halves of each (both the driving sprockets and the idlers) are keyed but (which is normal) but are of the same size.

Normally one of the parts is smaller in diameter and slides into the other thus creating a good fit. In the Takom kit you need to play around so that the two halves sit on each other perfectly. No big deal but you will need a good pair of eyes, the parts can slide on each other easily.

Thirdly, the holes on the idler wheels should be scraped a bit otherwise they won’t fit.

The roadwheels were advertised as ”can be built as damaged” (i.e. without the rubber rims) but this is not correct. Upon close inspection you will see that the separate rubber parts include the outer edge of the roadwheels in the form of a steel rim. So this does not make painting easier at all plus leaves us with a joint on the inner face of each roadwheel to be filled and sanded which is a bit uncomfortable. Even giving them as one piece would have been better in my opinion.


I will leave the roadwheels for now since there are news from Takom that the roadwheel hubs will be reissued so I will wait for that before addressing the roadwheels in detail.

Ps.:I was just browsing sprue shots from the recent Takom Type-59 release and the roadwheels are now one piece… I am wondering if this will be the standard for all T54/55 kits going forward (ribbing is still too big though).

JimboHUN
Visit this Community
Budapest, Hungary
Joined: May 07, 2009
KitMaker: 461 posts
Armorama: 443 posts
Posted: Sunday, June 19, 2016 - 01:16 AM UTC
Some progress...

As said before, first aim is to put together the hull with the fenders properly fitted, filled and sanded. This is almost done now. Since this is a sample sent to Armorama, there is a time limit on the build blog, so I will not have the time to do all the upgrades I'd normally do, so I will leave most (if not all) of the welding for now. I can add these later when I am off the hook

The photos below are a bit misleading since it seems that I had to use a lot of putty around the engine decks. Well this is true for the turret ring, but otherwise the lower and upper half parts of the hull fit pretty well. Actually there is a very little to fill there, but if you want the sidewalls to sit flush with the deck, this is how it will look after sanding.


Although it will be mostly covered by the turret, it is worth noting that the first and middle parts of the upper hull should be filled and sanded together as seen below. In the reality this is one piece.


I do not really like positioning holes so I've just filled them all.


There is an issue already with the fuel lines. The section on the fender running from the front towards the rear is moleded on - this is not a problem however there should be another one right next to it and it is completely missing from the kit. The cells and the pipes all together are forming a big circle, so on the first fuel cell there are two outgoing pipes: one (the outer one) into the second cell, the other (the inner one) also towards the rear but it goes into the body of the tank.


(the snapshot is from a T-55 but it should be the same)

Next I will add the fender and finally start on the details

Cheers,

Adam
JimboHUN
Visit this Community
Budapest, Hungary
Joined: May 07, 2009
KitMaker: 461 posts
Armorama: 443 posts
Posted: Sunday, June 19, 2016 - 10:35 PM UTC
Re the fuel lines - a better photo, showing the two pipes running next to each other:


Cheers,

Adam
flugwuzzi
Visit this Community
Lower Austria, Austria
Joined: November 02, 2007
KitMaker: 633 posts
Armorama: 599 posts
Posted: Monday, June 20, 2016 - 03:03 PM UTC
Great work Adam ... the level of detail you put into your model is very exciting!

Keep up the good work.
cheers
Walter
CMOT
Staff MemberEditor-in-Chief
ARMORAMA
Visit this Community
England - South West, United Kingdom
Joined: May 14, 2006
KitMaker: 10,954 posts
Armorama: 8,571 posts
Posted: Monday, June 20, 2016 - 03:59 PM UTC
You are doing a really good job of this Adam.
JimboHUN
Visit this Community
Budapest, Hungary
Joined: May 07, 2009
KitMaker: 461 posts
Armorama: 443 posts
Posted: Monday, June 20, 2016 - 11:33 PM UTC
Thanks for the comments Folks.

While I do not always have the patience and/or knowledge to go further then the in-box details, I always aim for a clean construction with proper fitting, filling, etc.

Unfortunately I made a silly mistake with the fenders... I glued them in the proper position with a few drops of glue, and after a few hours of drying I was happy with the result. So I applied plastic cement to the lower side of the joint, to fix them properly and to avoid filling and stored it away for the night.

Next day the fenders were a bit bent towards the ground... Looks like the plastic cement softened the joint and gravity was working on this all night long, while the glue set...


This is not a huge problem but would cause minor fit issues for some parts on the fenders (especially the PE braces that are angled at 90 degrees).

So I have gathered a few of my favourite DVDs and two books, and added now some glue to the upper side of the joint... will see


I will check it every now and then to see if anything is going wrong... hopefully not


Cheers,

Adam
JimboHUN
Visit this Community
Budapest, Hungary
Joined: May 07, 2009
KitMaker: 461 posts
Armorama: 443 posts
Posted: Thursday, June 23, 2016 - 04:55 PM UTC
Hi Guys - no photos this time, sorry.

Unfortunately I have overcompensated the fender issue... now one of them is angled too high... but at least the other one is fine already.

One thing to note - this plastic softens very easily and quickly by plastic cements so use carefully...

Cheers
spongya
Staff MemberAssociate Editor
MODELGEEK
Visit this Community
Budapest, Hungary
Joined: February 01, 2005
KitMaker: 2,365 posts
Armorama: 1,709 posts
Posted: Thursday, June 23, 2016 - 05:19 PM UTC
Awesome; will follow...
JimboHUN
Visit this Community
Budapest, Hungary
Joined: May 07, 2009
KitMaker: 461 posts
Armorama: 443 posts
Posted: Monday, June 27, 2016 - 06:09 PM UTC
So finally the fender crisis has been averted... I managed to soften up the joints with some Tamiya Extra Thin Cement and with some carefully added weights now they are properly set. Now I just need to remove the glue marks...


Some filling still will be required around the front:


While the fenders were resting under the weights, I started to clean up a few parts. Luckily the fuel cells are on a new sprue and are of better quality than the ones for the T-55 kits. The sprue gates are still located on the edges but they are much smaller so removal is easy.


This box is from the T-55 sprues and is made up from 5 parts, nothing too difficult but some filling will be needed for the edges:


The hinges and are not too bad but obviously PE would be more detailed.

More will follow this weekend.

Cheers,
Adam
JimboHUN
Visit this Community
Budapest, Hungary
Joined: May 07, 2009
KitMaker: 461 posts
Armorama: 443 posts
Posted: Friday, July 01, 2016 - 01:04 AM UTC
Hello Folks,

I have worked (a lot) on the removal of all the glue marks after correcting the fenders, it was a bit messy, but luckily most of it won't be visible anyway behind all the boxes and fuel cells. Still I tried by best

The PE braces (is that the right word? ) were also added, and I have included the cleaned-up fuel cells just for the photo.

The front is done, except for the lights but I wll leave those for the very end. The blackout marker lights look good but their base is too thick.


More coming tomorrow!

Cheers,

Adam
JimboHUN
Visit this Community
Budapest, Hungary
Joined: May 07, 2009
KitMaker: 461 posts
Armorama: 443 posts
Posted: Saturday, July 02, 2016 - 12:33 AM UTC
So now that the basic structure is done, I can start adding the details, in the order suggested by the instructions.

The PA frame (4 pieces) on the engine deck is a challenge since it is perforated and bends easily upon removal/clean up. They fit well into position, with a tiny bit of filler I will try to hide the joints (not cleaned up yet). It would be much easier if it were one PE piece. But looks nice anyway.


I also started to remove and clean the fuel lines…while this is a great idea to include it in the box, I must say these area real pain in the hole… They are very fragile and have seam lines to remove – usually the worst combination. Two were already snapped on the spure during postage. It took me 30 minutes to clean one but I will need a brand-new sharp blade so I leave them for a while. Since this is an inbox build, I will use these parts however wire would be better and easier to handle.

jasegreene
Visit this Community
Florida, United States
Joined: October 21, 2013
KitMaker: 751 posts
Armorama: 751 posts
Posted: Saturday, July 02, 2016 - 03:51 AM UTC
I just ordered Takom's Type-59,so this one of the blogs I will be following closely.Everything is looking great so far.
GazzaS
#424
Visit this Community
Queensland, Australia
Joined: April 23, 2015
KitMaker: 4,648 posts
Armorama: 2,248 posts
Posted: Saturday, July 02, 2016 - 08:17 AM UTC
Glad you were able to overcome your fender issues. I'm amazed that the fuel line is molded plastic.

Gaz
JimboHUN
Visit this Community
Budapest, Hungary
Joined: May 07, 2009
KitMaker: 461 posts
Armorama: 443 posts
Posted: Saturday, July 02, 2016 - 01:45 PM UTC

Quoted Text

I just ordered Takom's Type-59,so this one of the blogs I will be following closely.Everything is looking great so far.


Hi,

Don't get surprised if you get less PE in the box... These Chinese editions are less detailed:

http://www.moxing.net/2016/0611/7366.html

The roadwheels are easier though.

Cheers, Adam
JimboHUN
Visit this Community
Budapest, Hungary
Joined: May 07, 2009
KitMaker: 461 posts
Armorama: 443 posts
Posted: Friday, July 08, 2016 - 12:37 AM UTC
Hi Folks,

Quick update on the fuel lines. So I have managed to save one from the broken ones.

The other one was not really a waste since the missing line that needs to be added to the fender is actually thinner, so I would have replaced those parts anyway.

Most of it will not be visible after adding the turret and the toolboxes and other items.

Ther result is below, obviously the filling part is still to be done where the lines attach to the fuel cells or to each other.

Clean up was not as bad as expected originally.

Cheers,

Adam


JimboHUN
Visit this Community
Budapest, Hungary
Joined: May 07, 2009
KitMaker: 461 posts
Armorama: 443 posts
Posted: Monday, July 11, 2016 - 06:11 PM UTC
Hey Folks,

Weekdays I have less time, so there are minor updates for now only.

The fuel drum is well constructed, the middle part is two halves, and we have two parts for each end. They go together nicely with a minimal filling/sanding.

I will not add them to the final model but it is worth mentioning since this is a product review also. The locking mechanism of the straps is there - detailed as much as it is possible in plastic.


Cleaning up individual track links is pretty boring, so normally I do some at the end of each building session

I must say Takom did a really good job with these. Clean up is needed but it is quick: there are two knockout pin marks on each to be sanded down, plus a small molding pip on the outer side.

On the photos below left is the cleaned up one, right is the original:


Some have a tiny bit of flesh here and there but nothing major and I also have like 5 sligthly damaged ones. I have a workable resin set from Miniarm and that takes more time to clean up and quality seems almost the same - actually they fit each other perfectly. I am not sure if I have included in my intro, but these Takom tracks are not workable.

The pattern on the links is a slight bit chunkier then on other tracks I have seen but overall quality seems pretty good to me. Links also have some markings on the outer side. All in all I am happy with this track offering as default in the box. It is good value for money and far better than the Trumpeter track links that come in the T-62 sets.

This is all for today.

Cheers,

Adam
JimboHUN
Visit this Community
Budapest, Hungary
Joined: May 07, 2009
KitMaker: 461 posts
Armorama: 443 posts
Posted: Monday, July 18, 2016 - 12:50 AM UTC
Hi Folks,

I have no big updates this time as I was working on cleaning up some of the fine putty work done recently.

However there is a news from Takom though - looks like the revised starfish wheel hub covers won't happen, it was just a misunderstanding.

I will have two days off this week so hopefully I will have a good amount of updates on Friday.

Cheers,

Adam
JimboHUN
Visit this Community
Budapest, Hungary
Joined: May 07, 2009
KitMaker: 461 posts
Armorama: 443 posts
Posted: Saturday, July 23, 2016 - 02:10 AM UTC
Hello Gang,

Finally I had two days off that I could delicate almost exclusively to building this. Of course I never proceed as much as I plan

But at last the hull is almost done – I just need to clean up a few bits on two of the tool boxes. Most of the boxes and other items are complete but not glued in place yet (just placed them there for the photos).

I am happy with the quality as Takom provides a lot of features out of the box: PE fender support brackets and plastic attachment points that are fixing the fuel cells/boxes to these. Obviously the plastic parts are a bit bulky, if you have the patience you may redo the small strips for the fuel cells from PE but all in all these look OK and are definitely an improvement over the Tamiya T-55 or Trumpeter T-62 features.


The molded on retaining bar for the front mudguard was sanded smooth and will be replaced from wire but only at the last stage in so I won’t break it off 5 times while building the rest This also applies for the headlights’ cage


The rear mudguard is also an intricate assembly involving some PE.


The log usual with Russian tanks is by far the best ever seen in plastic kits, with good painting it will definitely look the part. Should you opt for replacing it, you will need to scratch the brackets as those are molded on the ”log”.


There is a confusing part also, there is a plastic ”cable” which is looped in a weird way. If you follow sections from end to end it just does not make sense to me.


The instructions confuse things further as it marks two points with the icon „to be removed”, however it looks like it should be cut into pieces in order to fit properly over, around, and partially under the pioneer tools and their brackets. I think I
will just leave it off for now.


There’s a part that is pretty much oversized, the cover over the exhaust should be a metal sheet however Takom gives a 1mm thick plastic part. I think I will replace it with a thin foil later or maybe just after finishing the OOB part.


That’s all for now and finally I can start on the turret!

Cheers,

Adam
JimboHUN
Visit this Community
Budapest, Hungary
Joined: May 07, 2009
KitMaker: 461 posts
Armorama: 443 posts
Posted: Monday, July 25, 2016 - 12:34 AM UTC
So I have started the turret.

To my surprise the barrell is movable, and after reviewing the construction of the IR light, if you glue carefully all this can also move. However this is not mentioned in the instructions and would not work since the dust cover for the mantlet is not that flexible.

I have added the lifting hooks as well, the left one on the front should be placed lower so it will be located at the same height as the other one. Some minor filling will be needed around these and also under the MG port and the optics's port as well. In my opinion these are located too close to the mantlet on the Takom kit.


The strange lines are markers for the correct positioning of the tie down points and will need to be removed.


All in all the turret looks a relatively easy one, however the locating holes for the different parts are a bit oversized - maybe due to the hemispherical shape.

Cheers,

Adam