

Hosted by Darren Baker
Aged wood fence - a pictorial SBS

Lokis_Tyro

Joined: March 08, 2016
KitMaker: 128 posts
Armorama: 59 posts
Posted: Thursday, May 19, 2016 - 02:09 AM UTC
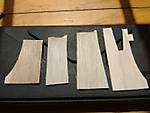
Got pics of my dried balsa scraps that I washed last night. I tried 4 different mixes. From the left; a burnt umber & black artist oils mix, then MM's grey acrylic primer at full strength and the next was a thinned wash with the same primer. Lastly, for esses and gees Vallejo model color Ivory. The left halves, give or take, are sanded as getting wood wet will raise the grain (wet and sand if you're going for a mirror finish on a wood project). I'll get more work done tonight. Sorry for the subpar photos.

Biggles2

Joined: January 01, 2004
KitMaker: 7,600 posts
Armorama: 6,110 posts

Posted: Thursday, May 19, 2016 - 03:56 AM UTC
Looks really good. I did some more experimenting, and, admittedly, just applying a black wash won't give the aged wood look. I gave the unknown strip wood a light gray acrylic wash (not an opaque coat), and when dry, the same black oil wash. Very promising! Pictures at eleven! 

Sticky
Joined: September 14, 2004
KitMaker: 2,220 posts
Armorama: 1,707 posts
Posted: Thursday, May 19, 2016 - 05:54 AM UTC
Looking good, I like the basswood myself - that is what I used. I thought I would give you a better stand alone photo of what I did with just a few more steps than you used.

Biggles2
Joined: January 01, 2004
KitMaker: 7,600 posts
Armorama: 6,110 posts
Posted: Thursday, May 19, 2016 - 10:26 AM UTC
Here's the pics of the strip wood with a gray acrylic wash followed with a black oil wash:

No fancy paint sets.

No fancy paint sets.
Sticky
Joined: September 14, 2004
KitMaker: 2,220 posts
Armorama: 1,707 posts
Posted: Thursday, May 19, 2016 - 03:56 PM UTC
I like the color but it does seem a tad bit to uniform do you think you can vary it? 
Biggles2
Joined: January 01, 2004
KitMaker: 7,600 posts
Armorama: 6,110 posts
Posted: Thursday, May 19, 2016 - 07:21 PM UTC
Certainly! That's just a test. Some additional distressing both before and after treatments, and varying wash intensities for different strips will kill the uniformity. These two pieces are just clipped from a longer strip which received the same amount of treatment. If I was going to actually build a structure, or fence, I would do a few strips with a lighter gray wash and vary the intensity of the black wash, cut the various lengths, and mix them up for a more natural look.

joepanzer
Joined: January 21, 2004
KitMaker: 803 posts
Armorama: 740 posts

Posted: Thursday, May 19, 2016 - 09:00 PM UTC
This is great!! Perfect for those of us who can't afford every paint set that comes out for every situation! Sort of like that whole "Are we Spoiled" thread. The actual craft of modeling is being made more easy and convenient all the time. Takes some of the mystery out of it.
CReading

#001

Joined: February 09, 2002
KitMaker: 1,726 posts
Armorama: 892 posts
Posted: Thursday, May 19, 2016 - 11:32 PM UTC
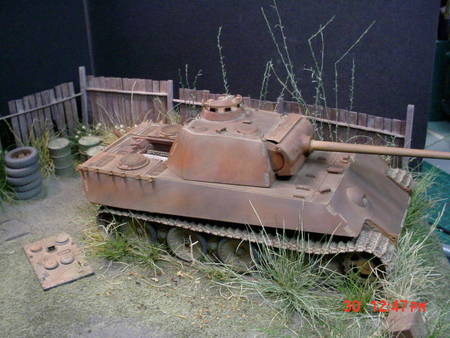
here's a fence I did a few years back. I used stir sticks. I used a 'rail road tie' stain on individual pieces prior to assembling the fence then washed the finished sections in a grey wash. Sorry the pictures aren't specifically of the fence.......
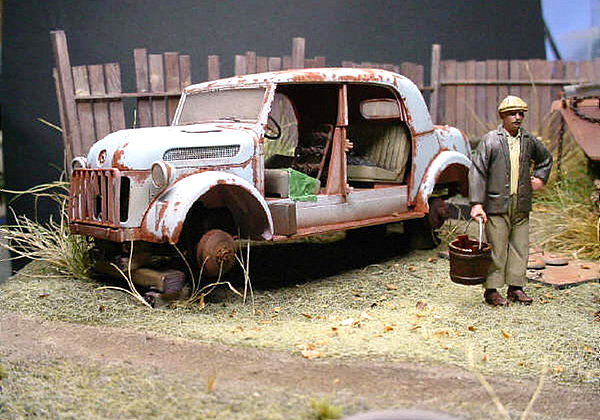
more weathered wood here....
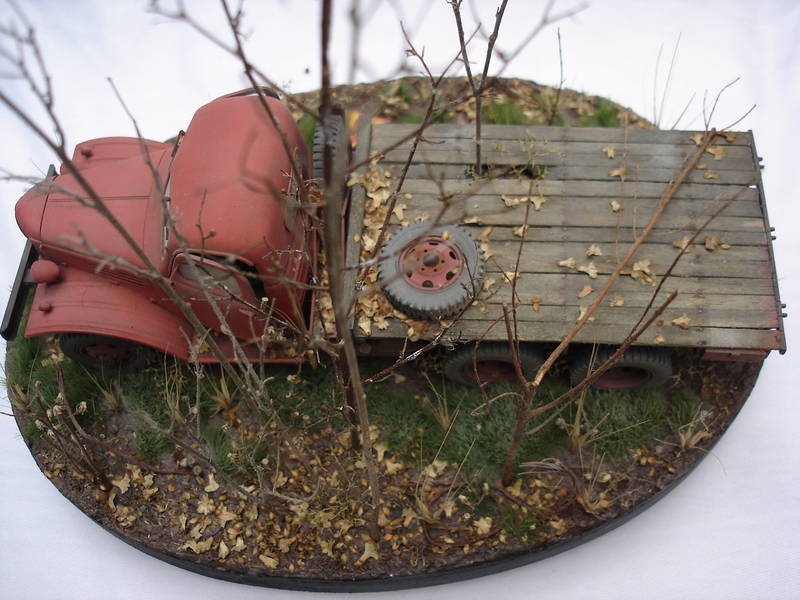
same technique as above, again on stir sticks.
Cheers,
C.
more weathered wood here....
same technique as above, again on stir sticks.
Cheers,
C.
Chapman
Joined: November 20, 2012
KitMaker: 203 posts
Armorama: 198 posts
Posted: Friday, May 20, 2016 - 12:37 AM UTC
These are some great examples gents. Got me motivated to try some of these techniques out this weekend.
Has anyone found dissolving steel wool in vinegar and using that as a wash any better/different than using paint for a grey wash?
Has anyone found dissolving steel wool in vinegar and using that as a wash any better/different than using paint for a grey wash?
Lokis_Tyro
Joined: March 08, 2016
KitMaker: 128 posts
Armorama: 59 posts
Posted: Saturday, May 21, 2016 - 06:27 AM UTC
I'm dissolving some now, but since I didn't use ooo or something close it's taking forever. I think that's the problem. I've read it should start dissolving in around 15 minutes but I've had mine in a jar for over a day. It's not obvious anything has dissolved. Aside from the grade, idk what's up. I figured just stick it in the jar, but are there oils on the wool to prevent rust I was supposed to warsh off? I was looking forward to trying it out though, it looks to give good results.
Sticky
Joined: September 14, 2004
KitMaker: 2,220 posts
Armorama: 1,707 posts
Posted: Sunday, May 22, 2016 - 05:31 PM UTC
Great stuff Charles!
CReading
#001
Joined: February 09, 2002
KitMaker: 1,726 posts
Armorama: 892 posts
Posted: Sunday, May 22, 2016 - 07:46 PM UTC
Thanks John
Cheers,
C.
Cheers,
C.

cheyenne
Joined: January 05, 2005
KitMaker: 2,185 posts
Armorama: 1,813 posts
Posted: Sunday, May 22, 2016 - 07:52 PM UTC
Hey guys all these methods are great and look excellent .
Hope you don't mind me throwin my 2 cents in .
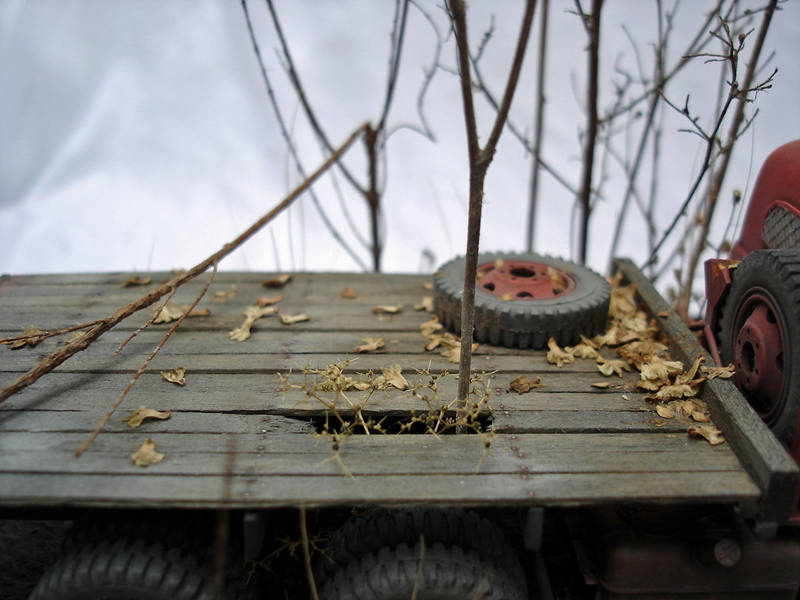
In this case I framed a skylight with a soft balsa .
Soft balsa really soaks stuff up and the color/hue changes a bit after it has soaked in . Basically it gets lighter .
I stained this with dark walnut then splotched dark grey and barnwood [ tannish grey ] , craft store acrylics in areas on the frame .
Then took a small file and removed the paint till I was satisfied with the look .
Then recoated the frame [ lightly ] with more dark walnut .
With the balsa and the paint I got different degrees of soaking into the wood .
The beauty part is if you don't like it , file it off and go again .


Hope you don't mind me throwin my 2 cents in .
In this case I framed a skylight with a soft balsa .
Soft balsa really soaks stuff up and the color/hue changes a bit after it has soaked in . Basically it gets lighter .
I stained this with dark walnut then splotched dark grey and barnwood [ tannish grey ] , craft store acrylics in areas on the frame .
Then took a small file and removed the paint till I was satisfied with the look .
Then recoated the frame [ lightly ] with more dark walnut .
With the balsa and the paint I got different degrees of soaking into the wood .
The beauty part is if you don't like it , file it off and go again .


Biggles2
Joined: January 01, 2004
KitMaker: 7,600 posts
Armorama: 6,110 posts
Posted: Sunday, May 22, 2016 - 09:32 PM UTC
Excellent effects!! 
CReading
#001
Joined: February 09, 2002
KitMaker: 1,726 posts
Armorama: 892 posts
Posted: Monday, May 23, 2016 - 04:13 AM UTC
Great effect Cheyenne. Looks just like the real thing (most of the wood around my house looks like that!)
Cheers,
C.
Cheers,
C.
Sticky
Joined: September 14, 2004
KitMaker: 2,220 posts
Armorama: 1,707 posts
Posted: Tuesday, May 24, 2016 - 06:09 PM UTC


DKdent

Joined: November 27, 2005
KitMaker: 182 posts
Armorama: 180 posts
Posted: Tuesday, May 24, 2016 - 07:01 PM UTC
Hello John,
Thanks for the nice pictures and the tutorial. I like your aged wood very much and might give it a try.
Best Regards
Dennis
Thanks for the nice pictures and the tutorial. I like your aged wood very much and might give it a try.
Best Regards
Dennis
Sticky
Joined: September 14, 2004
KitMaker: 2,220 posts
Armorama: 1,707 posts
Posted: Monday, May 30, 2016 - 10:57 PM UTC
Thanks Dennis.
 |

WEB HOSTING BY


Copyright ©2021 Armorama and Kitmaker Network, a subsidiary of Silver Star Enterprises
All Rights Reserved. Please read our Conditions of Use and Privacy Policy.
All Rights Reserved. Please read our Conditions of Use and Privacy Policy.