Queensland, Australia
Joined: August 06, 2005
KitMaker: 3,353 posts
Armorama: 3,121 posts
Posted: Wednesday, January 03, 2018 - 08:08 AM UTC
Looks like a great masking job on the cockpit canopy Tim.
Does the decal sheet include flames???

On the Bench:
Dust, styrene scraps, paint splotches and tears.

#401
Washington, United States
Joined: December 08, 2013
KitMaker: 323 posts
Armorama: 221 posts
Posted: Saturday, January 06, 2018 - 10:35 PM UTC
Tim, Looking forward to seeing the final product and how you weather the damaged areas.
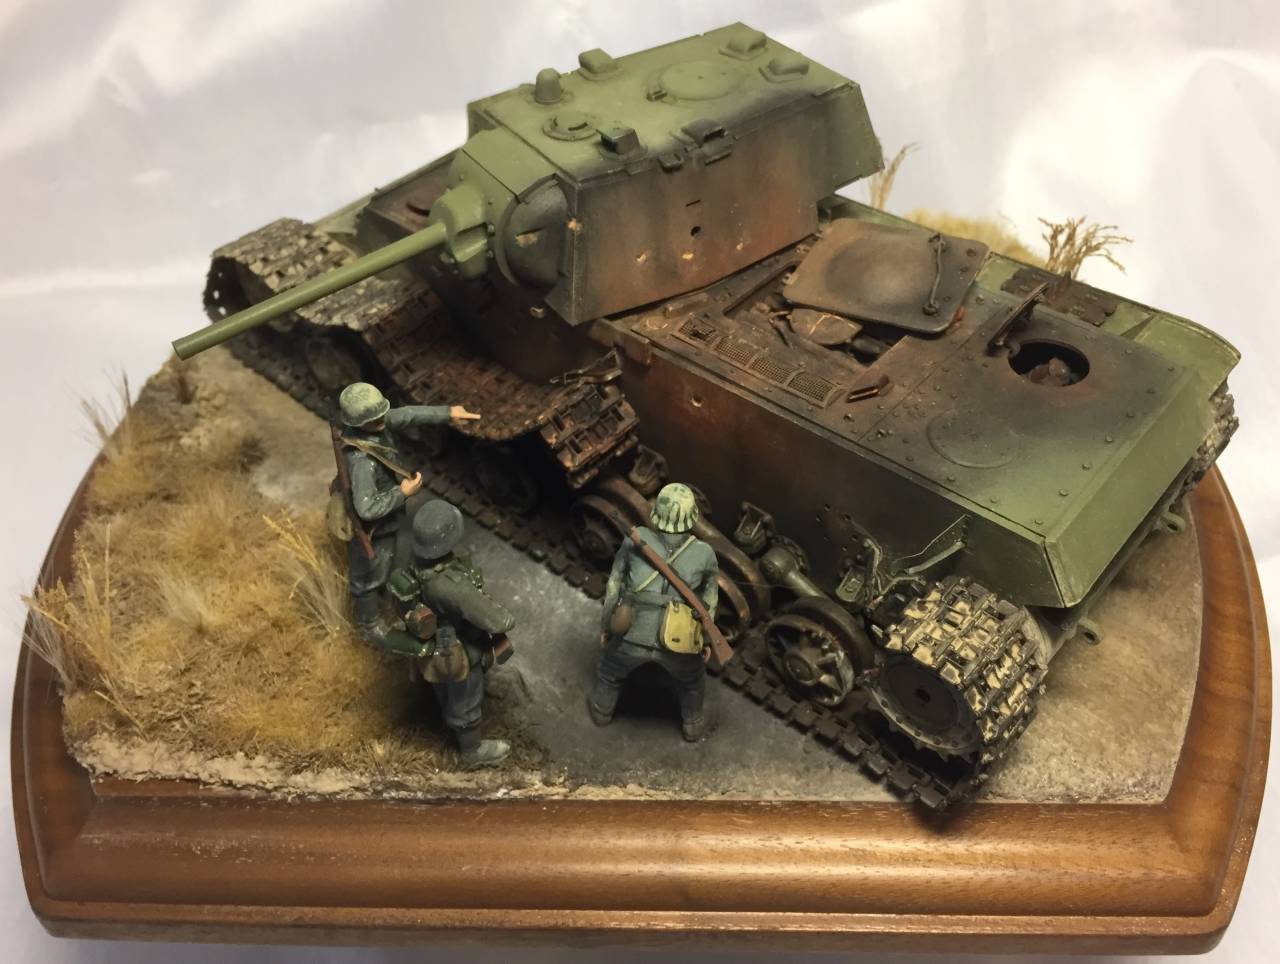
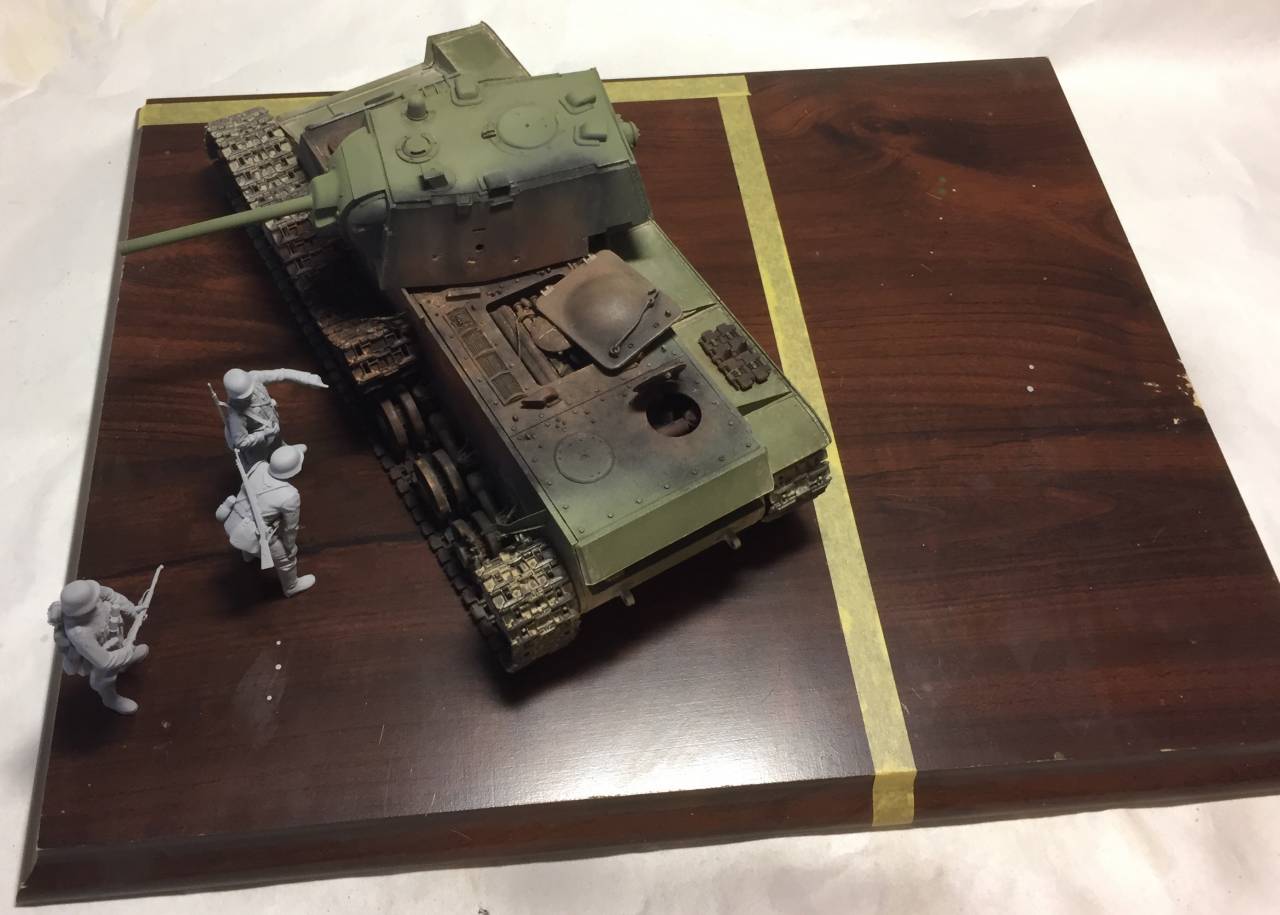
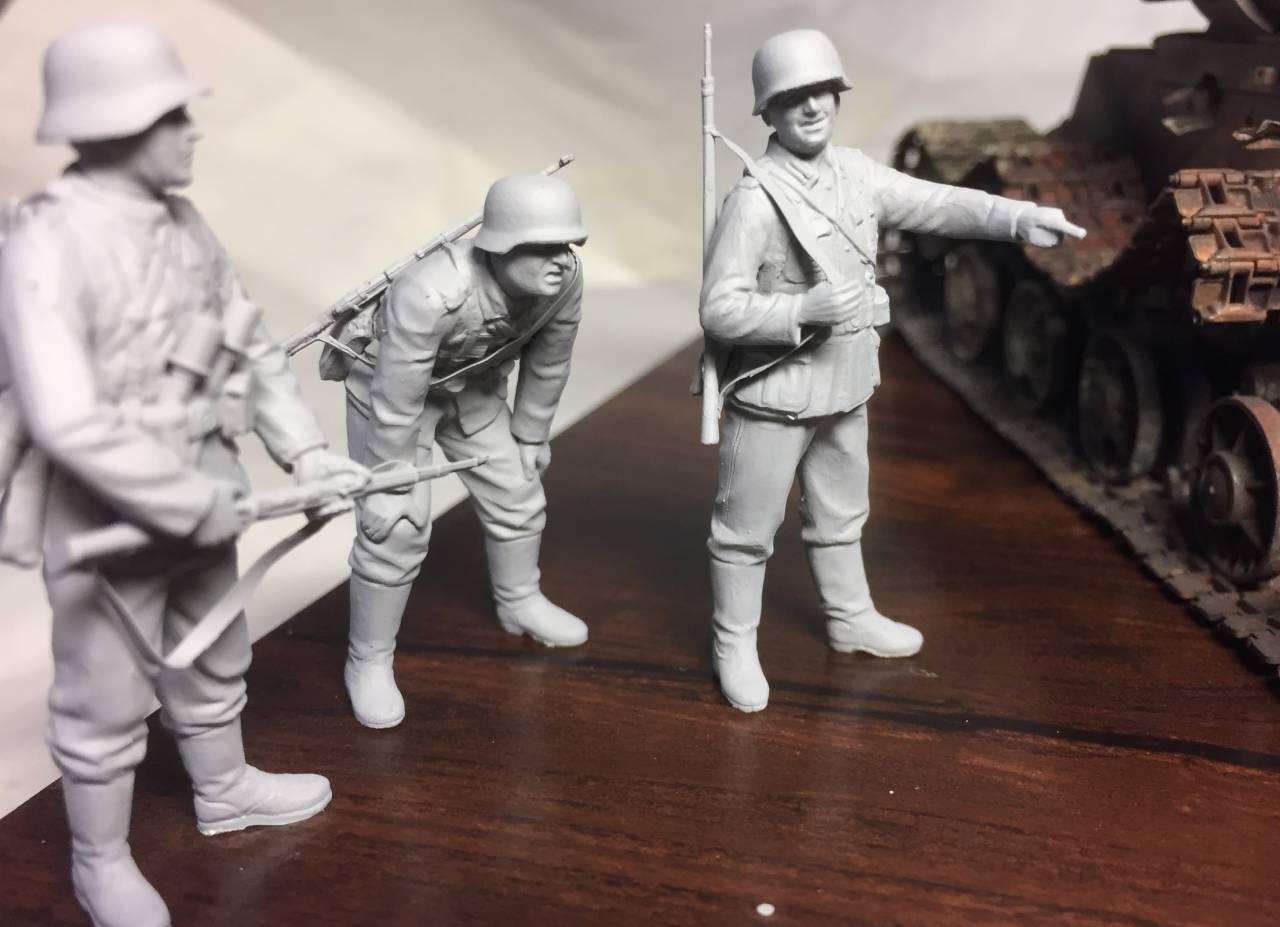
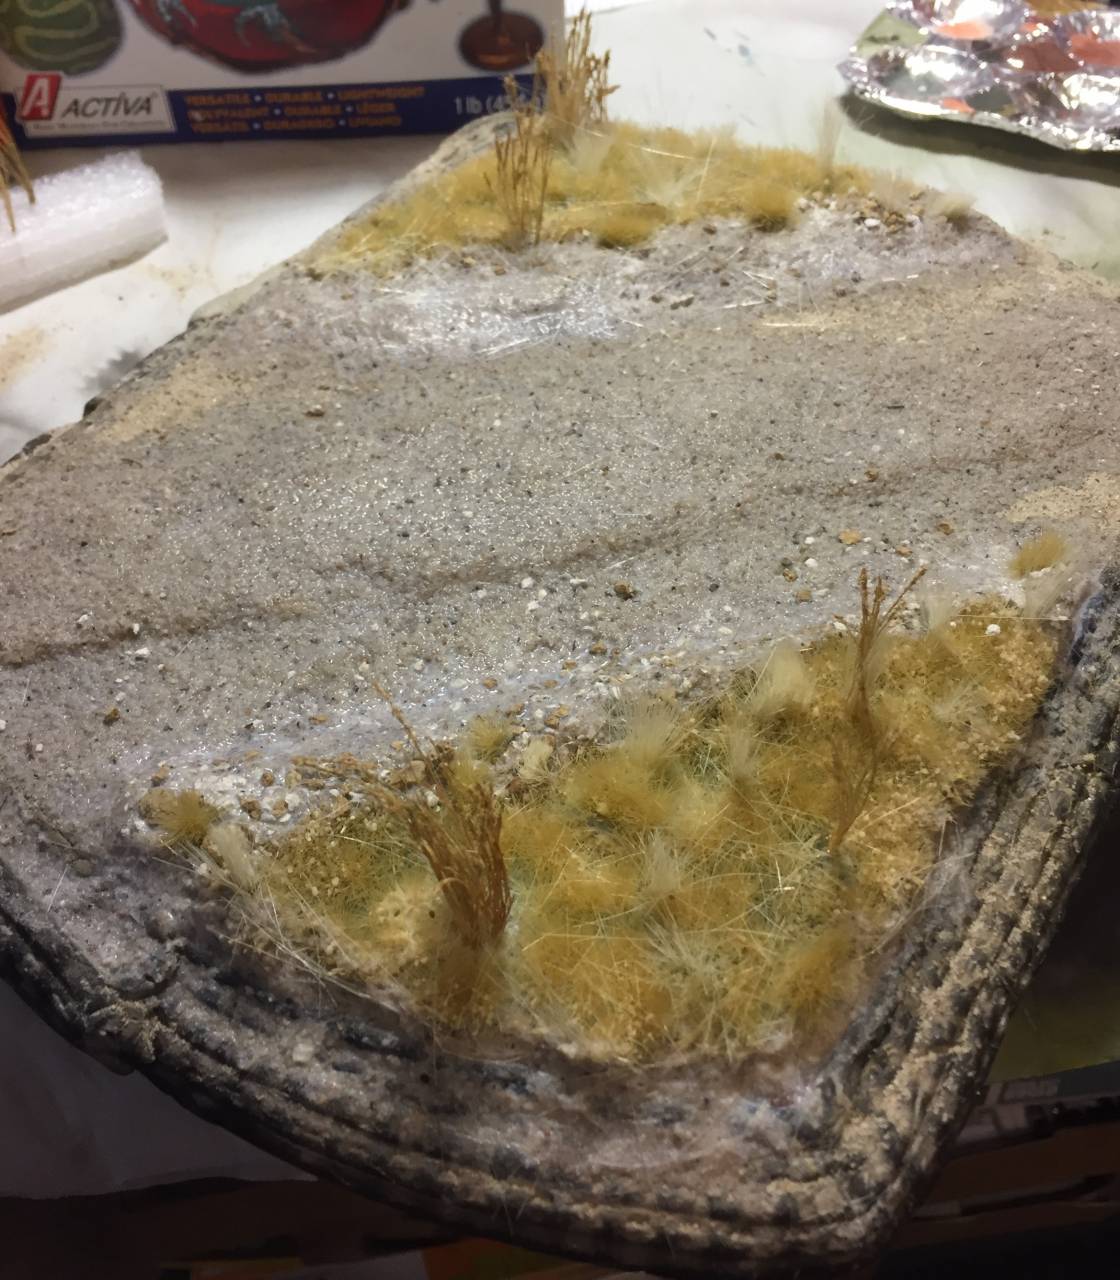
Progress has been slow on the base for the wrecked KV. I have gone through two different bases, and currently waiting on the third one to arrive in the mail. The first base was way too big for the scene (its the base in the first picture below) The second base was way too small, and now the third one seems to be a perfect size (outlined by the yellow tape on the base)
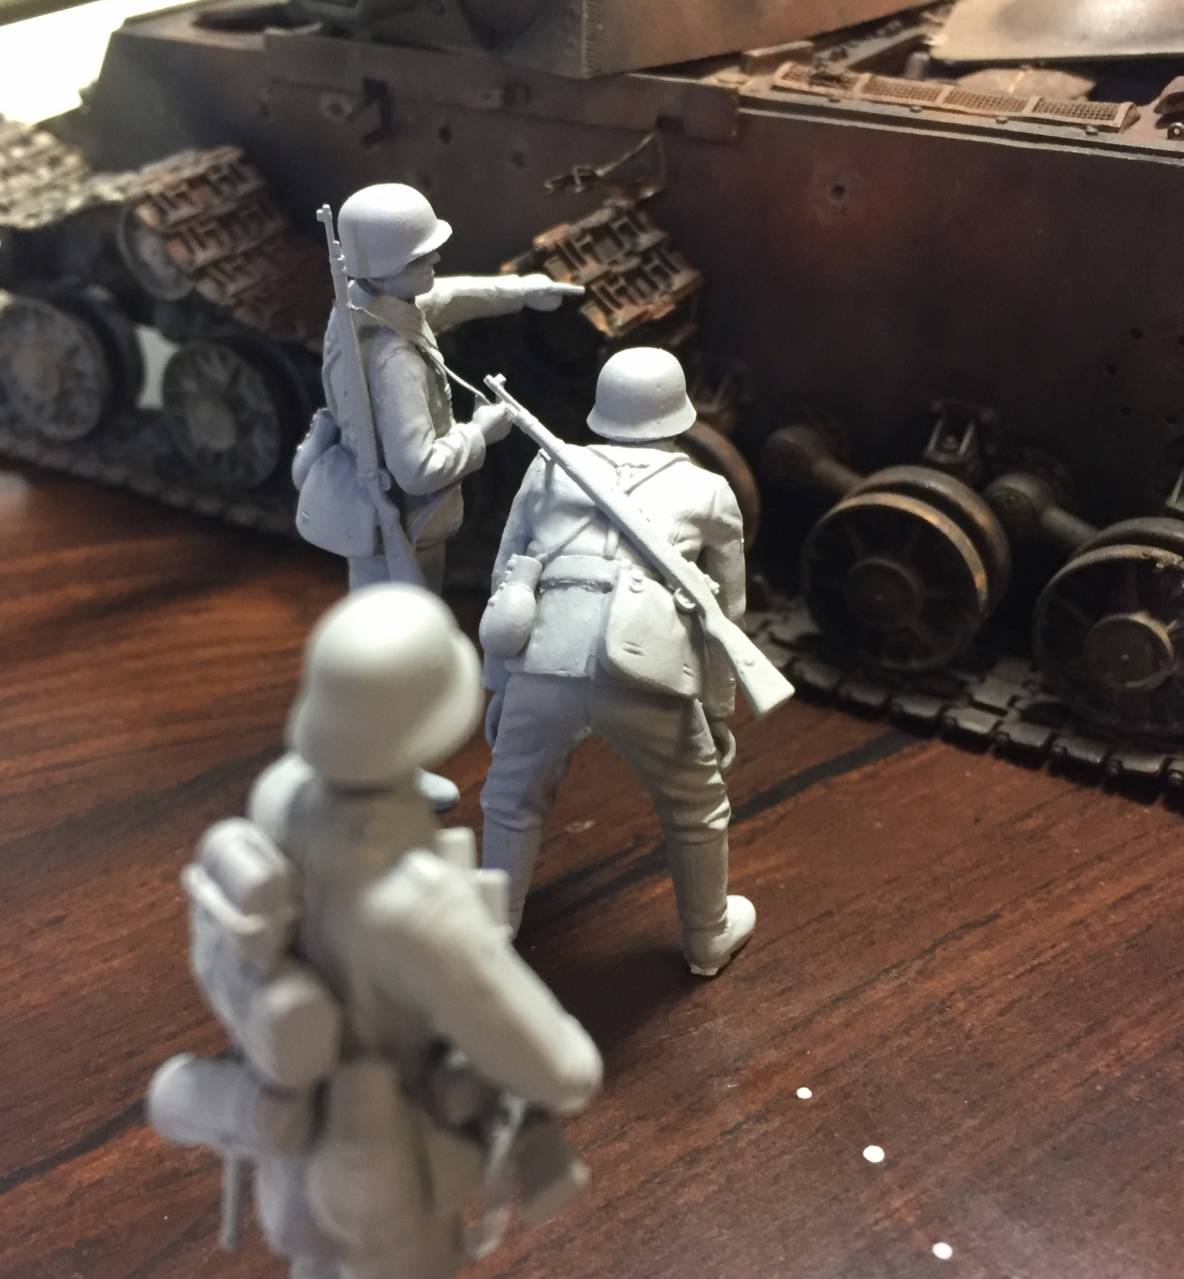
I finished up the assembly of the figures, and primed them yesterday. I will be working on painting and weathering the figures over the next few days as I wait for the delivery of the base.
#454
Georgia, United States
Joined: July 10, 2016
KitMaker: 1,273 posts
Armorama: 1,138 posts
Posted: Saturday, January 06, 2018 - 11:39 PM UTC
I think it will be worth the wait, Shawn!
"I can make armored cars, safe and unassailable...and behind these our infantry will be able to follow quite unharmed and without any opposition."
-Leonardo da Vinci, 1487
ColinEdm
 Associate Editor
Alberta, Canada
Joined: October 15, 2013
KitMaker: 1,355 posts
Armorama: 1,229 posts
Posted: Sunday, January 07, 2018 - 09:23 AM UTC
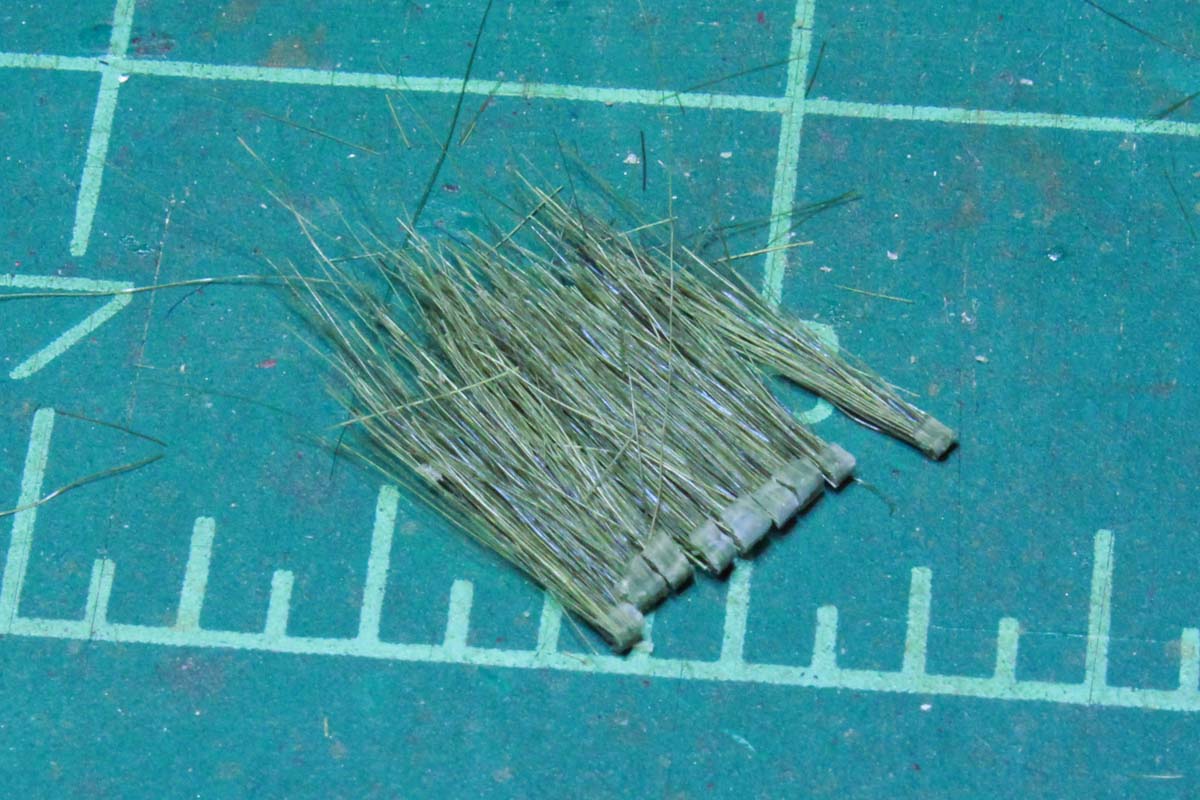
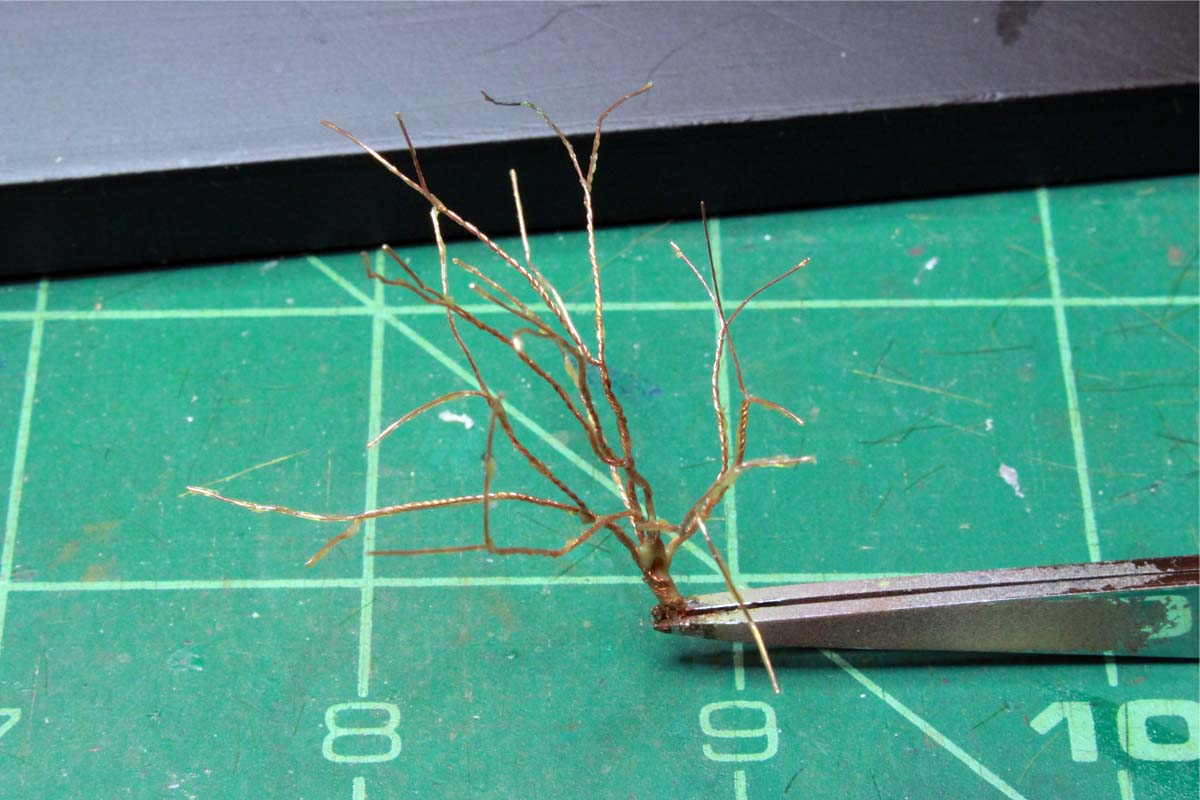
Shawn, your tank and figures look great! That will be a great little dio. I decided to make a simple diorama to display mine, although no figures, just showing the tank as it sat after the war. made some grass clumps and tried my hand at a wire frame bush/tree:
Started on the groundwork, working on the grass growing out from around the tracks, more to add to make it look more natural:
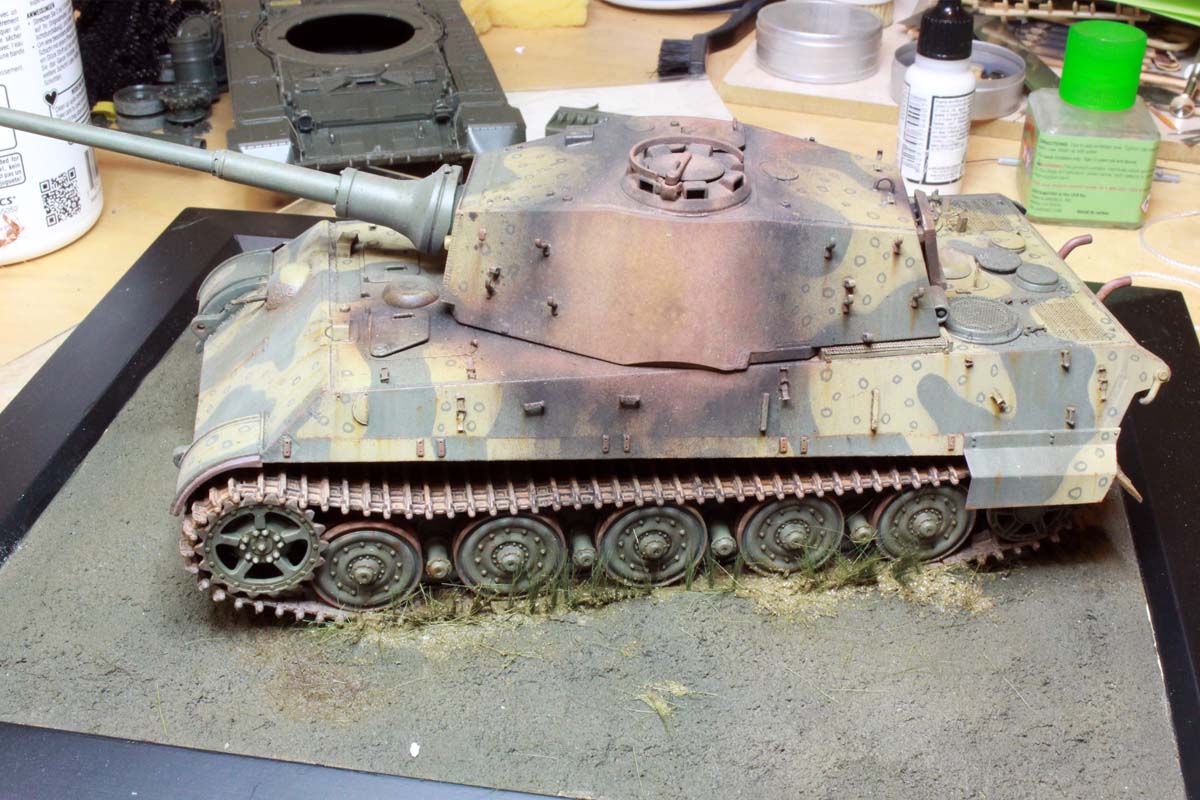
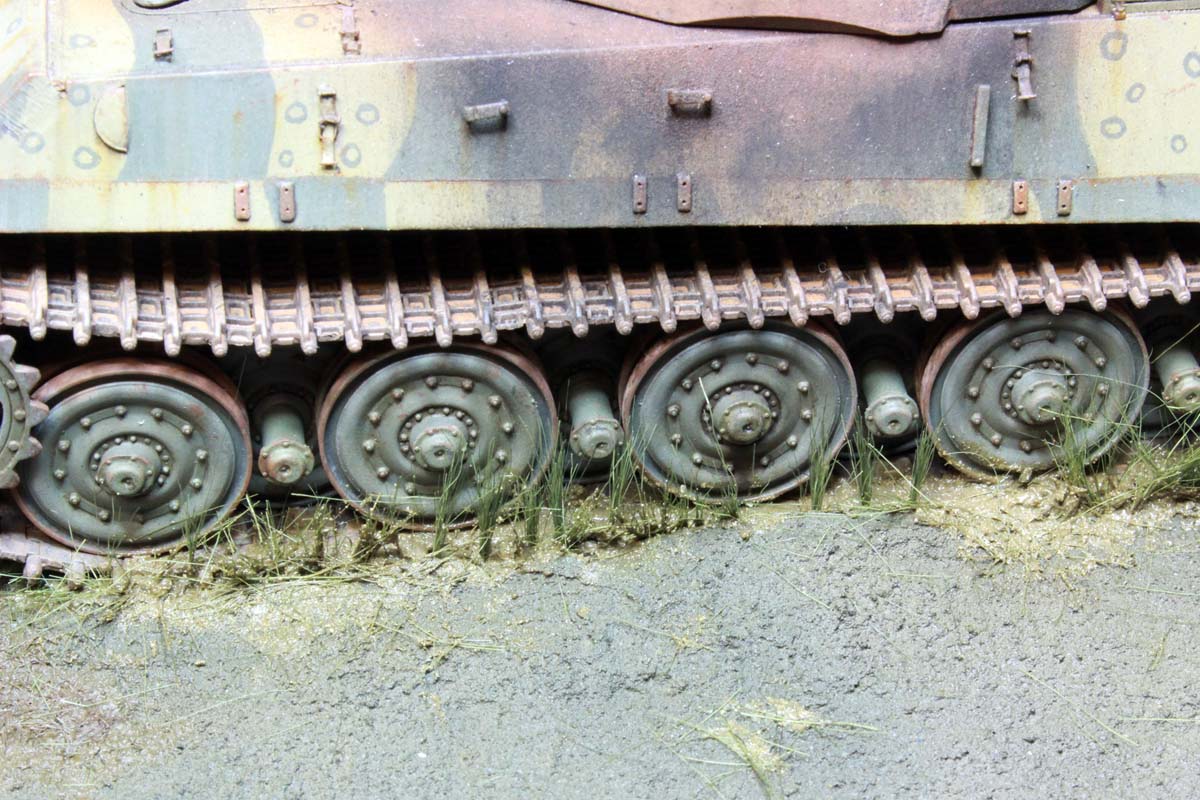
I will work my way out from the tanks with the various foaliage.
The voices are back.....excellent....
TimReynaga
Associate Editor California, United States
Joined: May 03, 2006
KitMaker: 2,500 posts
Armorama: 297 posts
Posted: Monday, January 08, 2018 - 10:44 AM UTC
Colin, your Tiger II looks just right! I look forward to seeing the groundwork come together.
#401
Washington, United States
Joined: December 08, 2013
KitMaker: 323 posts
Armorama: 221 posts
Posted: Monday, January 08, 2018 - 07:36 PM UTC
off to a great start there Colin! I really like the wire bush.
Looking forward to seeing more on this.
TimReynaga
Associate Editor California, United States
Joined: May 03, 2006
KitMaker: 2,500 posts
Armorama: 297 posts
Posted: Tuesday, January 09, 2018 - 07:10 AM UTC
The SRD-5M Kvant cone and the ventral fin were shot with Tamiya Flat Green XF-5.

The MiGs damage received scorching effects with Testors Silver 1146 mixed with some Testors Flat Rubber 1183 to darken it a bit.

TimReynaga
Associate Editor California, United States
Joined: May 03, 2006
KitMaker: 2,500 posts
Armorama: 297 posts
Posted: Wednesday, January 10, 2018 - 09:46 AM UTC
The 1967-vintage decals that came with the kit were a mess, so I used some from Print Scales North Vietnamese MIGS of the Vietnam War set (72-116).

Clear carrier film on natural metal finishes is notoriously difficult to conceal, but these decals were flawless the carrier film behind the national markings, and especially behind the red numbers and stars, just disappeared!


Nice!
Queensland, Australia
Joined: August 06, 2005
KitMaker: 3,353 posts
Armorama: 3,121 posts
Posted: Wednesday, January 10, 2018 - 12:55 PM UTC
Looks fabulous Tim. If only all decals went on that well, but I'm sure the preparation you did and the care applying them contributed to the result
On the Bench:
Dust, styrene scraps, paint splotches and tears.
#454
Georgia, United States
Joined: July 10, 2016
KitMaker: 1,273 posts
Armorama: 1,138 posts
Posted: Thursday, January 11, 2018 - 12:45 AM UTC
"I can make armored cars, safe and unassailable...and behind these our infantry will be able to follow quite unharmed and without any opposition."
-Leonardo da Vinci, 1487
TimReynaga
Associate Editor California, United States
Joined: May 03, 2006
KitMaker: 2,500 posts
Armorama: 297 posts
Posted: Friday, January 12, 2018 - 10:56 PM UTC
I couldnt decide which of the two pilot figures provided in the kit to use, so I painted them both up and test fit each of them in the cockpit.

The first one looked ok, but he seemed too calm given the massive damage to his aircraft, so I went with the one who is about to punch out.

#401
Washington, United States
Joined: December 08, 2013
KitMaker: 323 posts
Armorama: 221 posts
Posted: Saturday, January 13, 2018 - 08:27 AM UTC
Tim,
The decals look perfect! Your Mig is coming along very nicely.
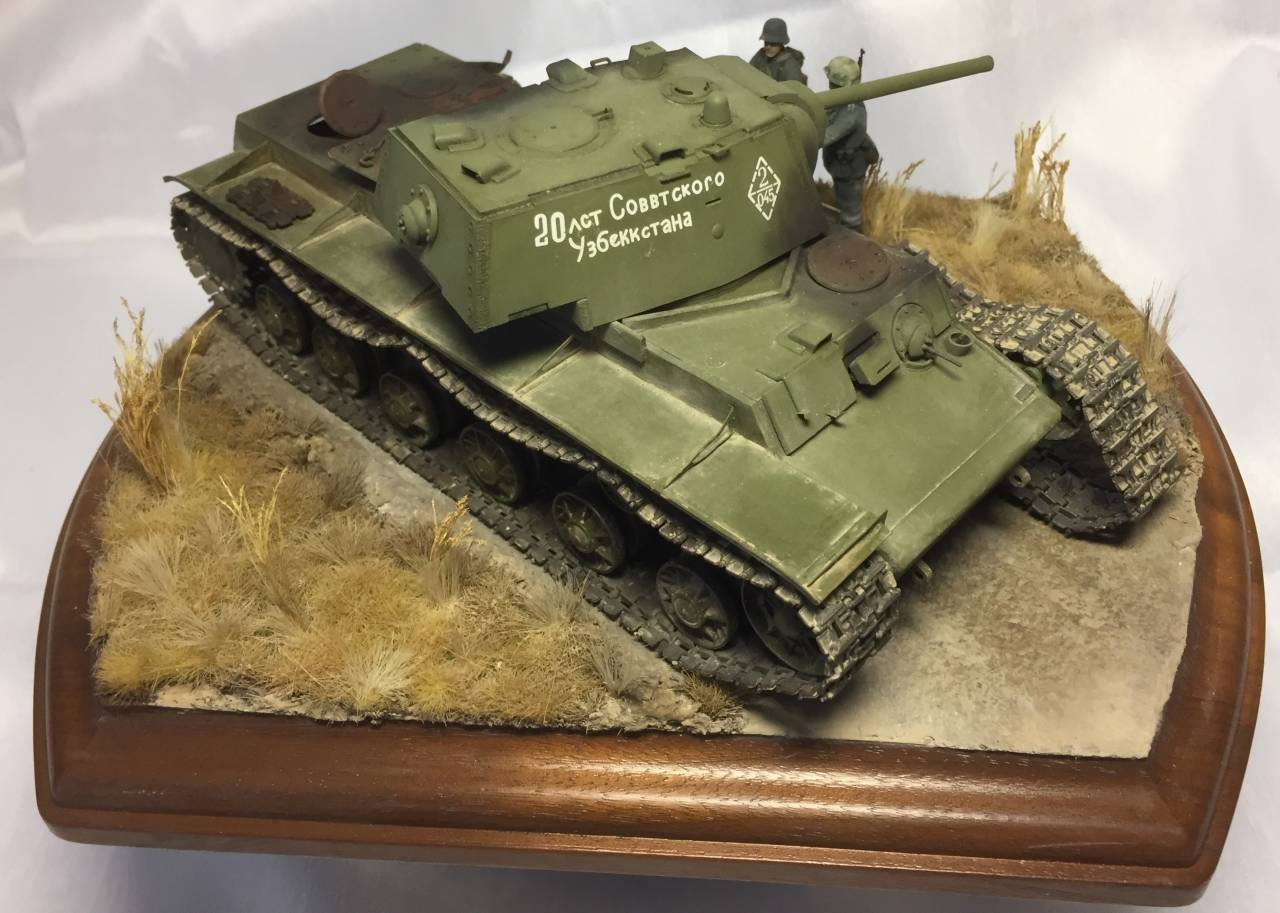
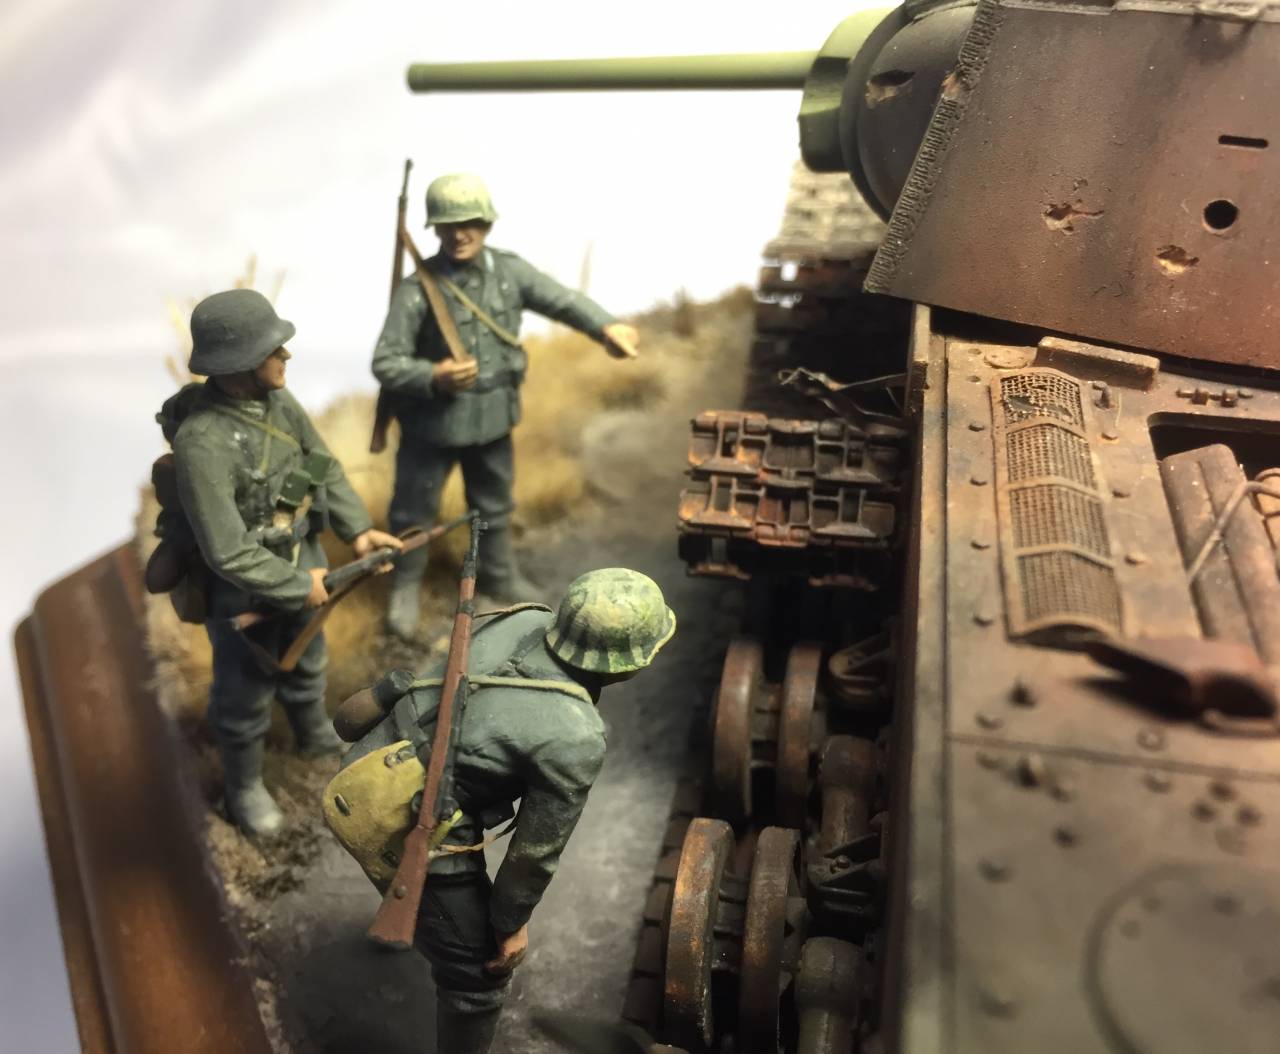
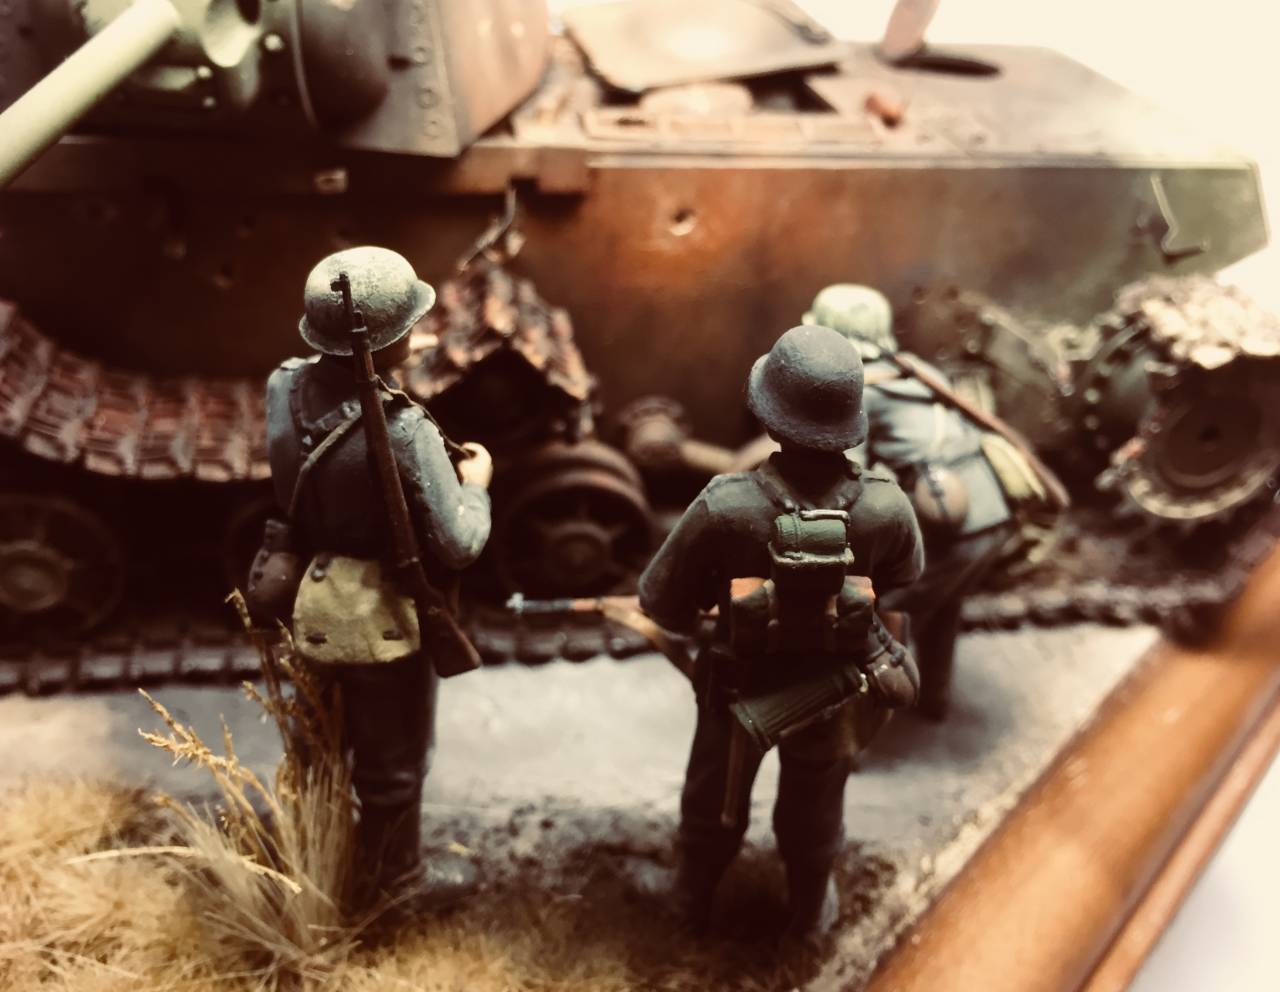
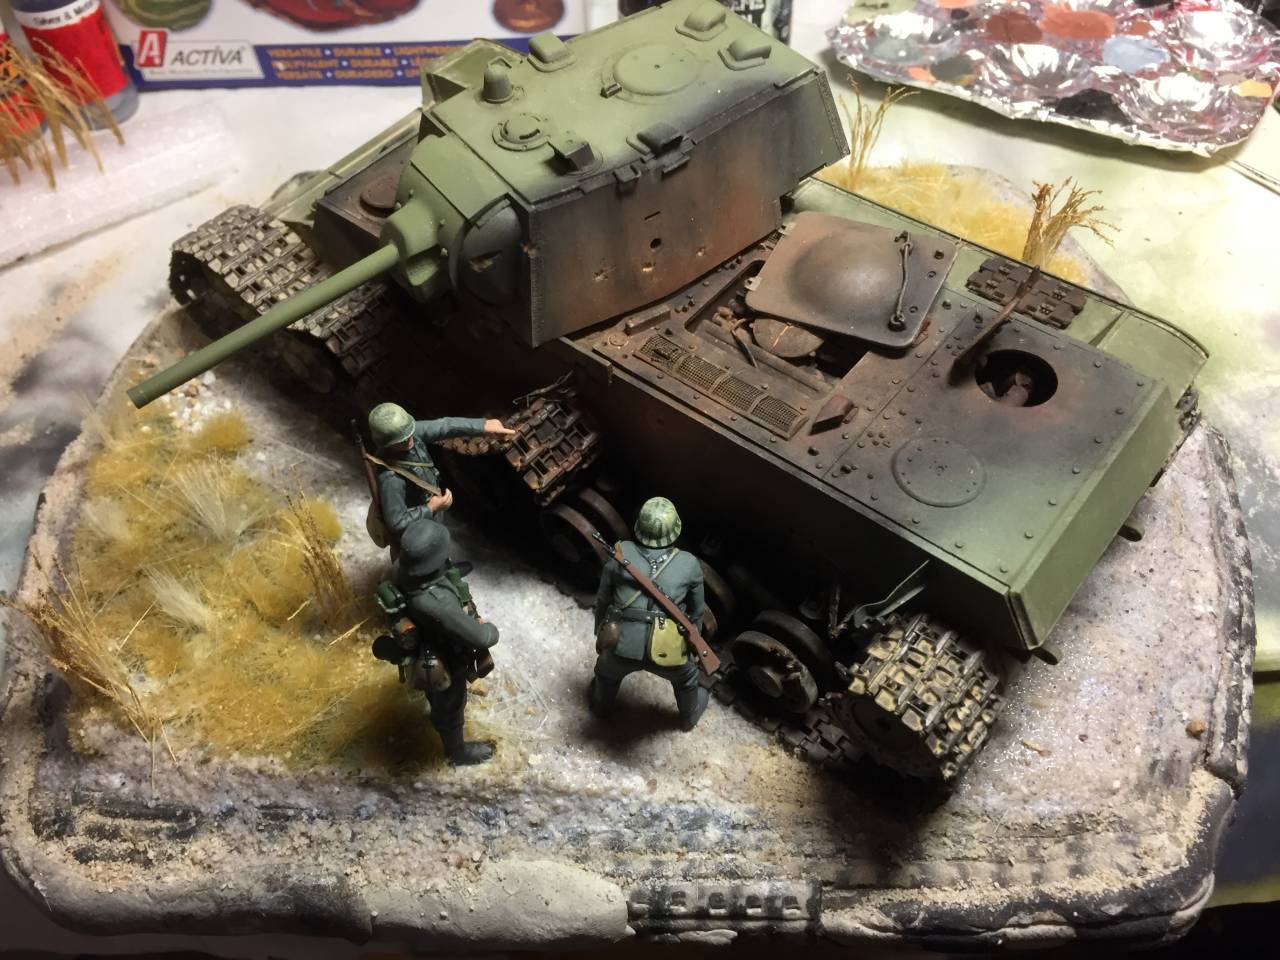
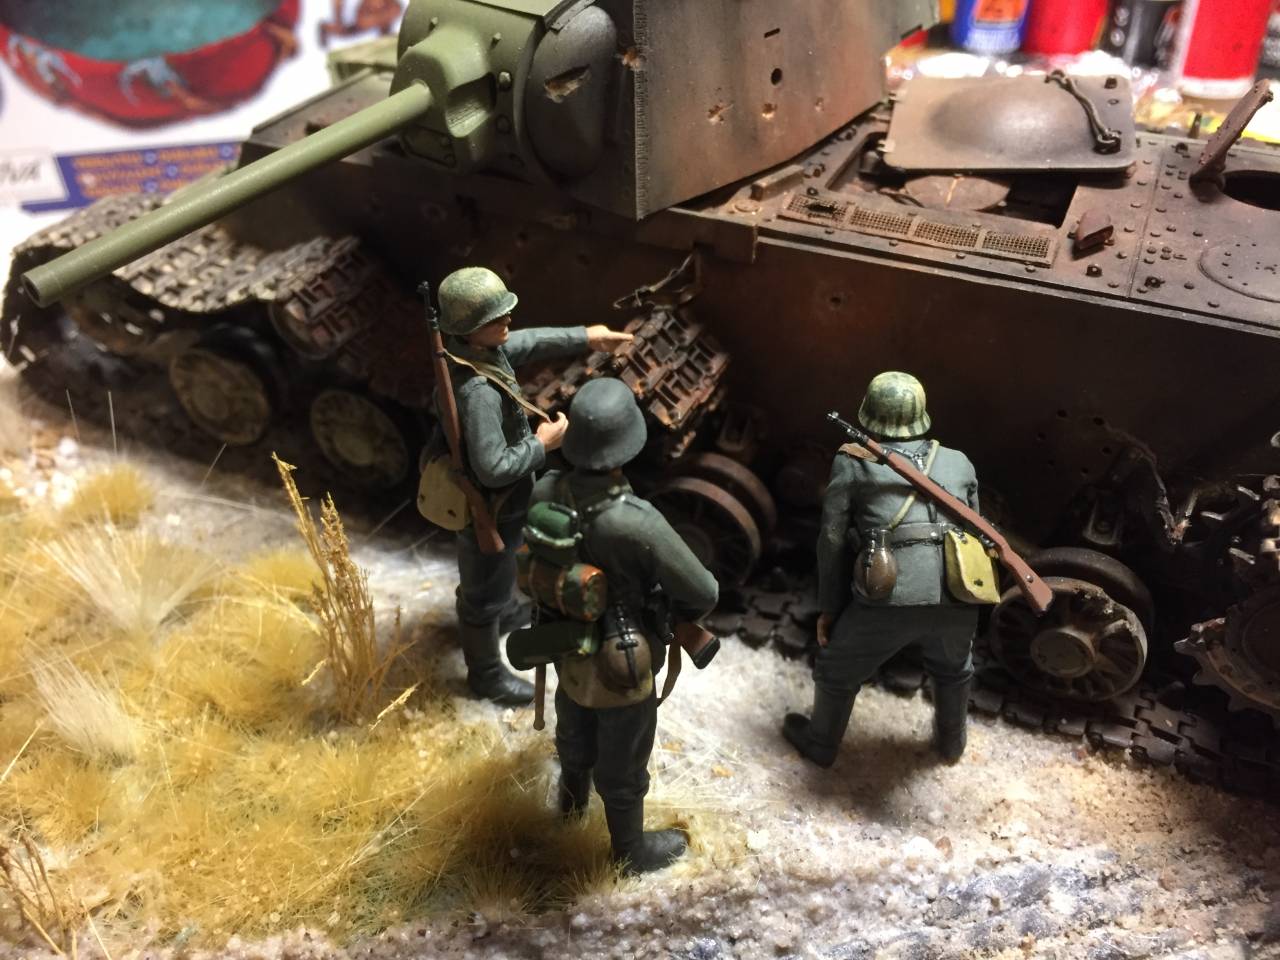
I have been busy this week painting the 3 figures, and last night I Finally worked on the base. Ive been working on weathering the soldiers today as I wait for the plaster on the base to cure all the way.
TimReynaga
Associate Editor California, United States
Joined: May 03, 2006
KitMaker: 2,500 posts
Armorama: 297 posts
Posted: Saturday, January 13, 2018 - 09:10 AM UTC
Shawn,
Your little diorama looks fantastic so far! I can almost hear the banter of the men reminiscing how they killed the giant!
#401
Washington, United States
Joined: December 08, 2013
KitMaker: 323 posts
Armorama: 221 posts
Posted: Sunday, January 14, 2018 - 09:01 PM UTC
TimReynaga
Associate Editor California, United States
Joined: May 03, 2006
KitMaker: 2,500 posts
Armorama: 297 posts
Posted: Sunday, January 14, 2018 - 09:18 PM UTC
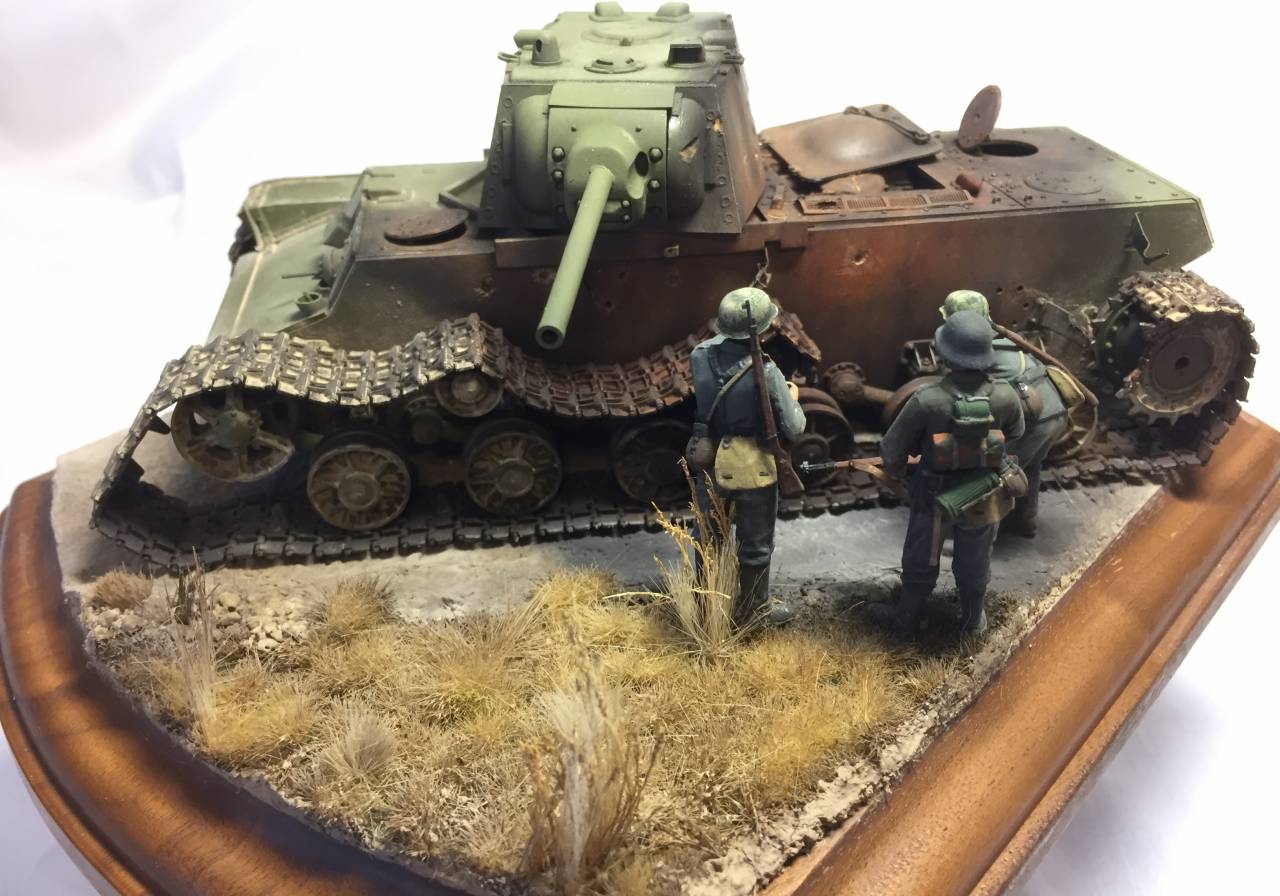
Shawn,
Your little diorama has lived up to its early promise - absolutely stunning work! I learned a lot, thanks for posting it.
United Kingdom
Joined: September 17, 2012
KitMaker: 462 posts
Armorama: 417 posts
Posted: Monday, January 15, 2018 - 02:04 AM UTC
Love the KV and the Mig 21. Both looking very nice...
Great that there is an extension for this campaign. Is it until 31 Jan?
I may just get my GAZ society car finished. I have not been lazy; Ive painted and weathered the interior. Now I just need to mask the windows inside and out, paint em, and get this thing buttoned up. Oh, and drop a large piece of debris on the roof (the battle damage)!
Here are a few pics


Cheers
Matthew
TimReynaga
Associate Editor California, United States
Joined: May 03, 2006
KitMaker: 2,500 posts
Armorama: 297 posts
Posted: Monday, January 15, 2018 - 06:09 AM UTC
Matthew,
That interior looks really good - it will be a shame to button it up!
#401
Washington, United States
Joined: December 08, 2013
KitMaker: 323 posts
Armorama: 221 posts
Posted: Monday, January 15, 2018 - 06:41 AM UTC
Thanks for the kind words guys, this hasnt been a really fun campaign.
Matthew that interior looks perfect! Cant wait to see more on this.
ColinEdm
Associate Editor Alberta, Canada
Joined: October 15, 2013
KitMaker: 1,355 posts
Armorama: 1,229 posts
Posted: Monday, January 15, 2018 - 07:35 AM UTC
Shawn, great work on your KV and dio! Matt, beautiful work on the interior, love the subtle shading you achieved.
The voices are back.....excellent....
TimReynaga
Associate Editor California, United States
Joined: May 03, 2006
KitMaker: 2,500 posts
Armorama: 297 posts
Posted: Monday, January 15, 2018 - 08:00 AM UTC
With basic construction of the MiG finished, all that remained was to attach the PVD air data boom in front of the nose and the blade antenna on the spine.

The kit came with a molded boom, but it was thick and out of round; I made a new one from 1mm and .6mm telescoping brass tubes. The blade was rescued from the spare fuselage part.

Queensland, Australia
Joined: August 06, 2005
KitMaker: 3,353 posts
Armorama: 3,121 posts
Posted: Monday, January 15, 2018 - 01:09 PM UTC
Very impressive Shawn. Love the overall effect and story with the figures.
Matthew, what can I say. That painting finish is superb. It will be a real shame to close it up as Tim has said.
Tim, great work. Shows old kits still bring enjoyment and can be built into a fine looking model. Cheers
On the Bench:
Dust, styrene scraps, paint splotches and tears.
TimReynaga
Associate Editor California, United States
Joined: May 03, 2006
KitMaker: 2,500 posts
Armorama: 297 posts
Posted: Tuesday, January 16, 2018 - 05:40 AM UTC
Colorado, United States
Joined: February 24, 2014
KitMaker: 3,033 posts
Armorama: 2,492 posts
Posted: Tuesday, January 16, 2018 - 07:17 AM UTC
Wow! That MIG came out very nicely! love the background too!🍺
mike
#401
Washington, United States
Joined: December 08, 2013
KitMaker: 323 posts
Armorama: 221 posts
Posted: Tuesday, January 16, 2018 - 07:23 AM UTC
Tim that Mig looks great!
Queensland, Australia
Joined: August 06, 2005
KitMaker: 3,353 posts
Armorama: 3,121 posts
Posted: Tuesday, January 16, 2018 - 04:56 PM UTC
The finished, finished Mig. Fantastic and even better with the background. Great work Tim.
On the Bench:
Dust, styrene scraps, paint splotches and tears.