_GOTOBOTTOM
Armor/AFV
For discussions on tanks, artillery, jeeps, etc.
Dragon King Tiger with Zimmerit on the desk
erichvon
Visit this Community
England - East Midlands, United Kingdom
Joined: January 17, 2006
KitMaker: 1,694 posts
Armorama: 1,584 posts
Posted: Wednesday, May 24, 2017 - 01:21 AM UTC
Firstly I'd like to thank Kitmaker for the opportunity to do a build review on this tank and also to apologise for it taking so long to get around to it. I was without a computer for nearly 3 months. Anyway enough of that onto the kit.

This is Dragon's King Tiger with zimmerit 6840. Zimmerit is one of those things that many of us daren't attempt for fear of wrecking a perfectly good kit so when DML started to release kits with zim already there it was a blessing in disguise. For years the only King Tigers that were available were the Tamiya Porsche and Henchel turreted versions. I've only built the Ardennes marketted one so can't comment on the others but it was a fun build and well..looks like a King Tiger. While I'm building this I'll point out the positives and negatives as there's no point in a build blog if I don't point out problems as well as the good bits

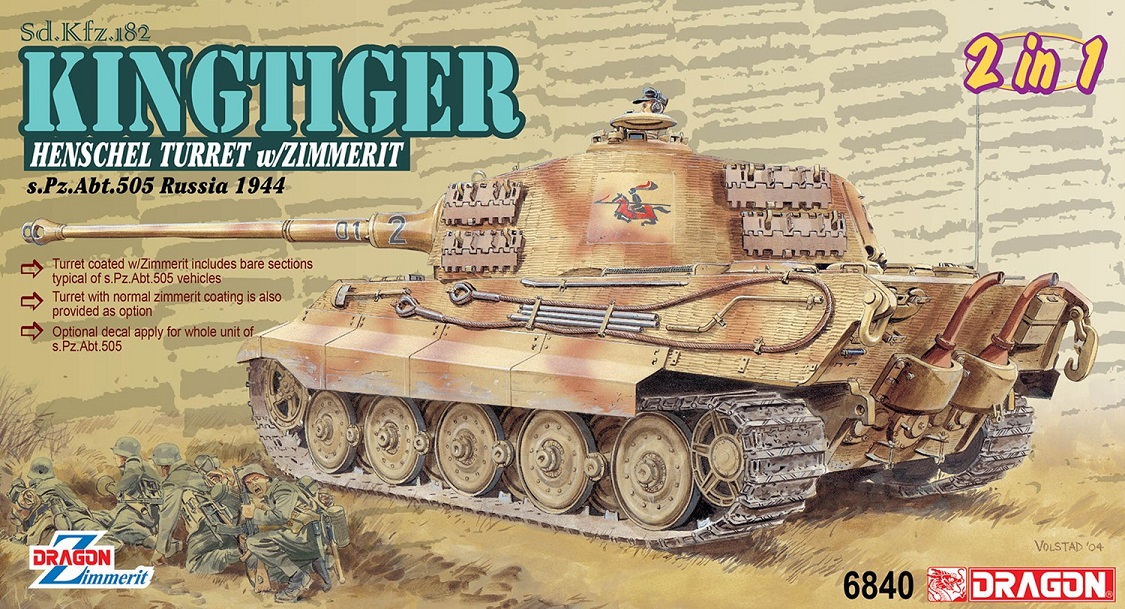

With this kit you have an option on the turrets. The markings are for Schwere Panzer Abteilung 505 which was a Wehrmacht unit. By this stage of the war heavy tanks such as Tigers and King Tigers were in independent Heavy Tank Battalions which were Korps assets and not permanently attached to a division therefore could move from division to division according to where they were needed. All three sets of markings denote tanks of this unit serving on the Eastern Front. One peculiarity of this units King Tigers is that they cleared a square area of zimmerit on the turret for their unit insignia a charging knight on horseback. In the kit there is a turret with complete zim coverage and also one with the square cleared.
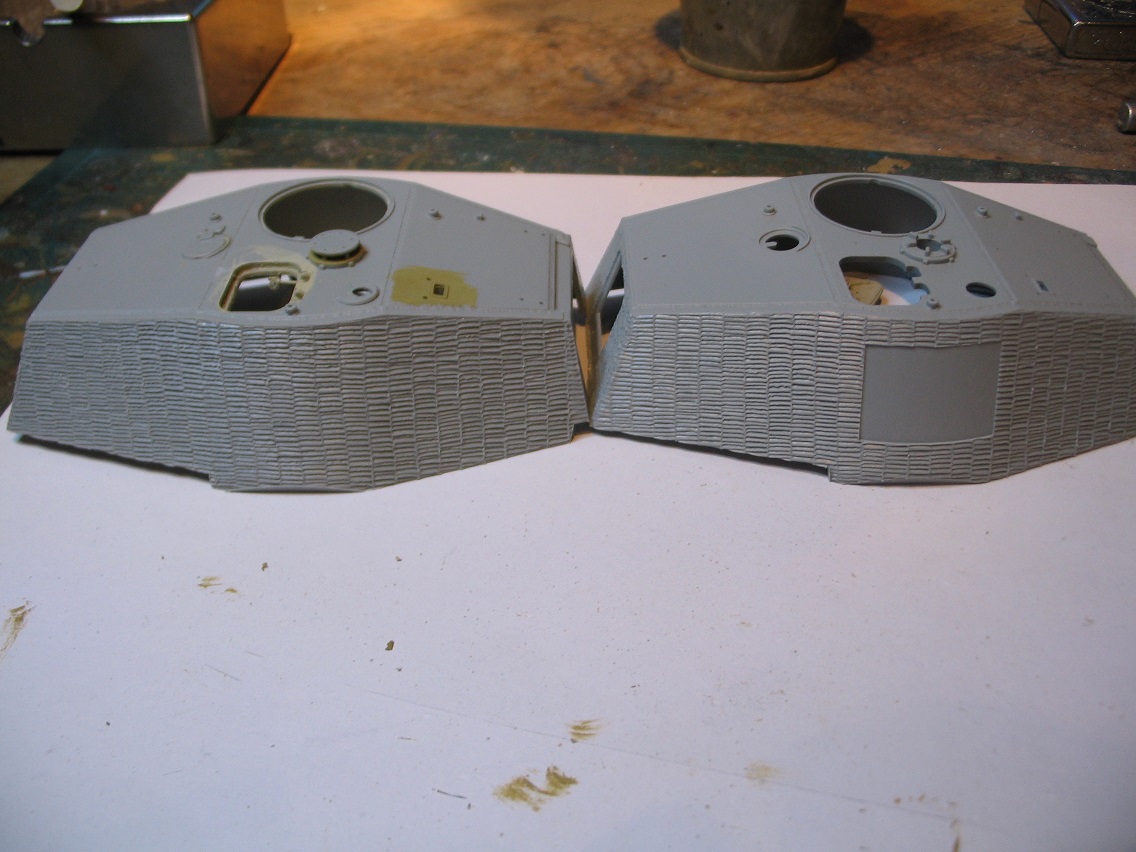


Yes, I'd made a start then realised I'd not taken a photo of the turrets together. The area that's been cleared looks to be the right depth scalewise when you look at the thickness of the zimmerit in profile. I've decided not to build the 505 version but to mark it as a 1 SS Panzer Korps KT so am using the fully zimmerited turret. Not only because I tend to model more Waffen SS stuff but I just prefer the full zimmerit.

Onto business. I decided to build the turret first which is not how the instructions tell you to do it but I find DML instructions quite confusing as a rule and it should be the quickest part to build. In theory anyway. Parts are nicely moulded with a minimum of flash. There are a lot of sprues (twelve) and some contain three sprues in one so familiarise yourself with them. One thing I have noticed while building the turret is that parts that you require are on about 4 or 5 different sprues rather than being grouped logically on one. Makes me think I need a bigger desk. The instructions look easier to follow than I'm used to with DML but we'll see.
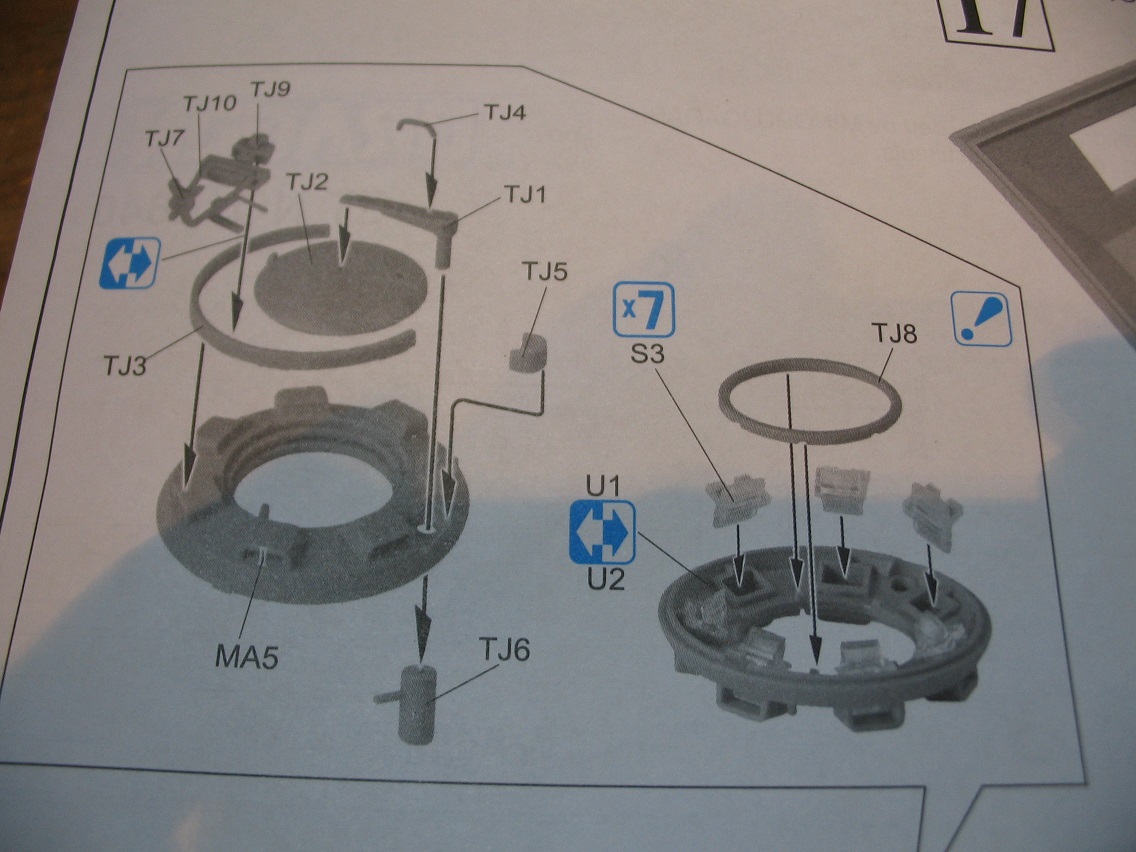


One thing I did notice at this stage is that if you attach TJ1 (the turret hatch arm) to TJ6 (a barrel inside) you can't have the hatch open anymore. I've left it. I plan on having the hatch open but always dry fit hatches when airbrushing so when I've finished I can glue it in place with the right colour sprayed on.

I've given the inside of the turret a quick coat of ivory (Tamiya XF55 Deck Tan + White) just as a base coat There's a rather nice flare discharger (I think) in the turret roof which just needs a cord to finish it off. Unfortunately you can't see it. This however means you get two choices on the hatch on the outside of the turret. One open and one closed.
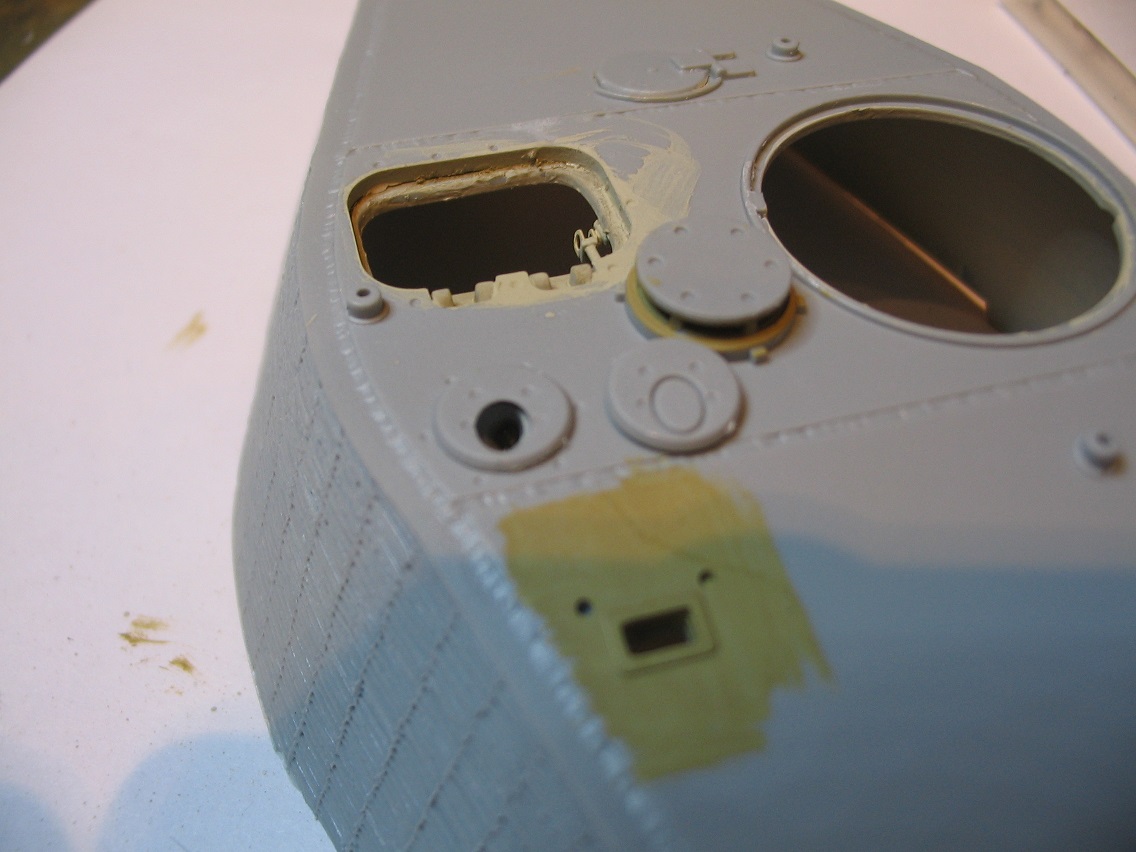


Both shown for comparison. I've gone for the open one.

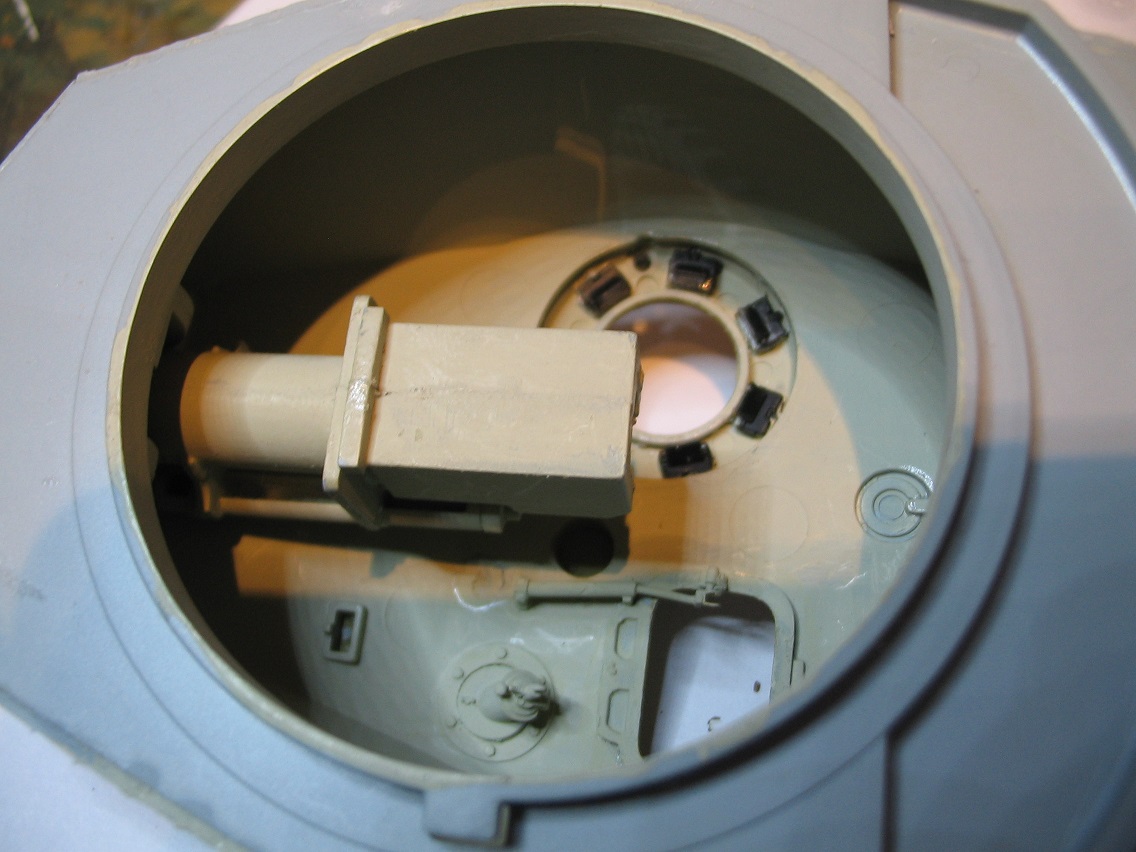
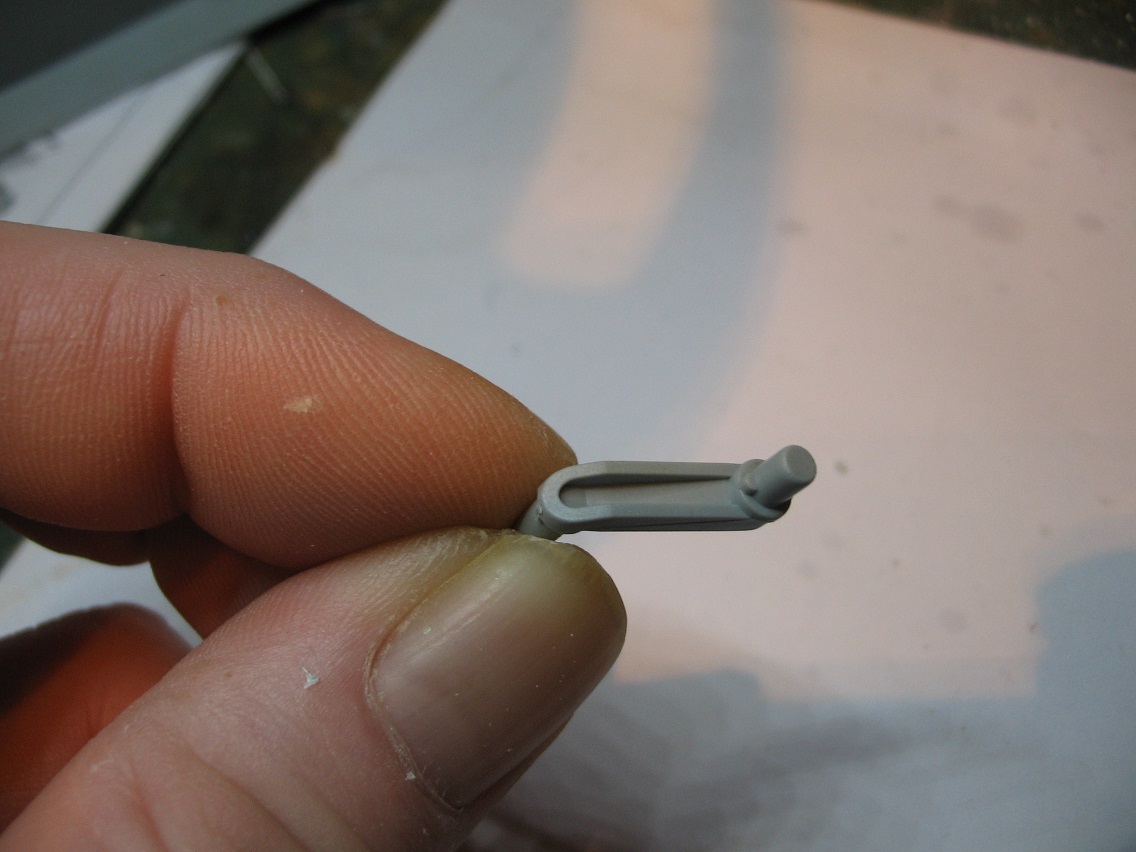
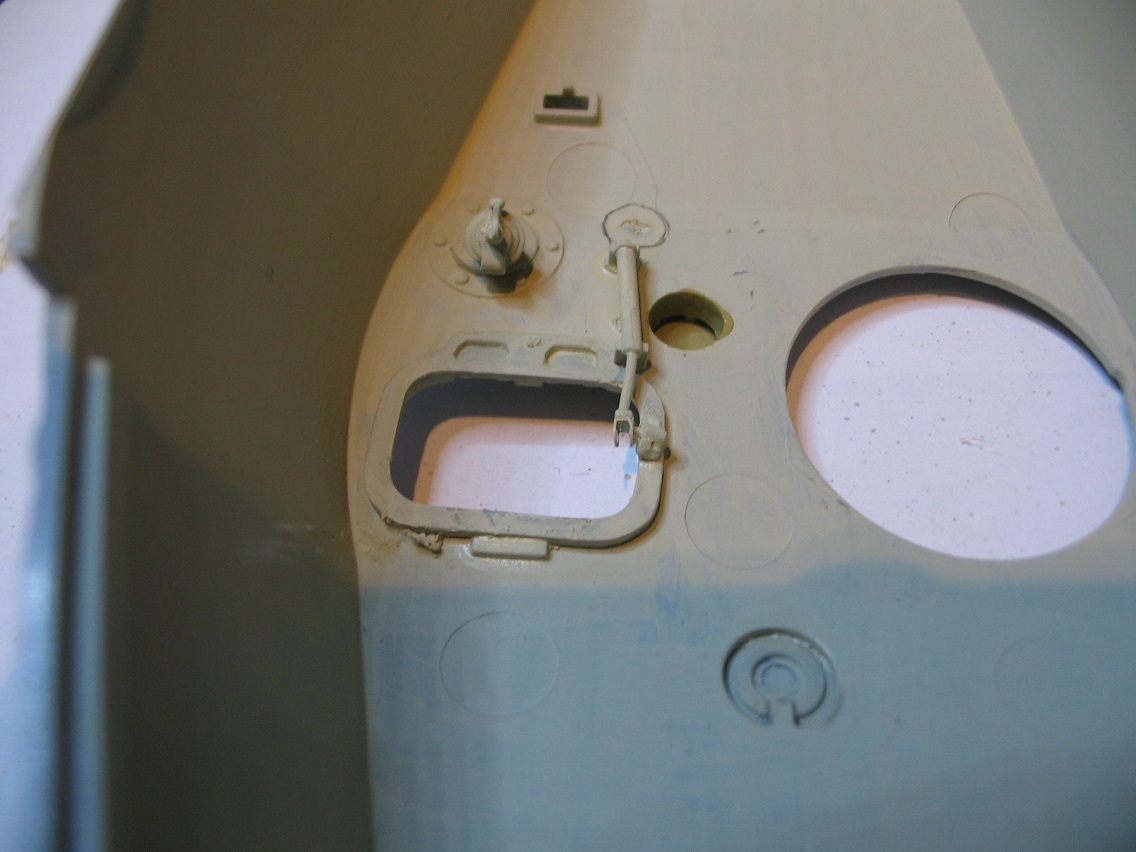
Inside the turret roof as there is the hydraulic mechanism for the loaders hatch. Now this was my first problem. If you attach it as per the instructions it doesn't match up with the connection to the hatch if you want it open. There's a nifty little PE bracket to attach to the end which wraps around the crescent shaped bracket on the hatch. You have to move it quite a way forward. In the photo the circle denotes where it should be as per the instructions. Beware of this part as it's very fragile and mine bent while cleaning it up and didn't want to bend it back for fear of snapping it. As it won't be seen and it now lines up with the hatch bracket I wasn't too bothered about the angle etc. The fit was more important here. I've painted underneath what I assume to be a ventilation cover before attaching the top to make sure I cover it. That's where I'm up to today.
erichvon
Visit this Community
England - East Midlands, United Kingdom
Joined: January 17, 2006
KitMaker: 1,694 posts
Armorama: 1,584 posts
Posted: Wednesday, May 24, 2017 - 01:35 AM UTC
One thing I have just noticed is that there are no racks in the rear of the turret for ammunition or seats in the turret which means my crew will have to levitate when I install them. I have to admit I'm quite disappointed at that as looking at the rear turret hatch it's quite nicely detailed and even the old Tamiya kit has these. Although the turret hatch was primarily for removing the barrel for a replacement if it was worn out/damaged, because there is a gap between the racks ammunition could be passed between them making reloading faster in the field so that's one diorama idea scuppered. You would think though for the price that they'd be there. One to bear in mind when doing comparisons. Obviously if it's buttoned up or if you have no plans to open the rear hatch it makes no difference but it's nice to have the option.
GazzaS
#424
Visit this Community
Queensland, Australia
Joined: April 23, 2015
KitMaker: 4,648 posts
Armorama: 2,248 posts
Posted: Wednesday, May 24, 2017 - 10:37 AM UTC
Great start with some useful info. Gonna follow.

Gaz
RLlockie
Visit this Community
United Kingdom
Joined: September 06, 2013
KitMaker: 1,112 posts
Armorama: 938 posts
Posted: Wednesday, May 24, 2017 - 12:04 PM UTC
That affair on the roof in front of the loader's hatch is the Nahverteidigungswaffe, a short range defence weapon for projecting grenades at approaching infantry. Flares were usually fired from a flare pistol.
erichvon
Visit this Community
England - East Midlands, United Kingdom
Joined: January 17, 2006
KitMaker: 1,694 posts
Armorama: 1,584 posts
Posted: Wednesday, May 24, 2017 - 01:02 PM UTC
Gaz- Thanks for that mate. I'll try to make it as interesting as possible and also as honest as possible. No point in reviewing something unless you point out the warts and all as well.

Robert- Thanks. I thought it was something like that but wasn't 100% sure hence the flares comment.
erichvon
Visit this Community
England - East Midlands, United Kingdom
Joined: January 17, 2006
KitMaker: 1,694 posts
Armorama: 1,584 posts
Posted: Wednesday, May 24, 2017 - 07:36 PM UTC
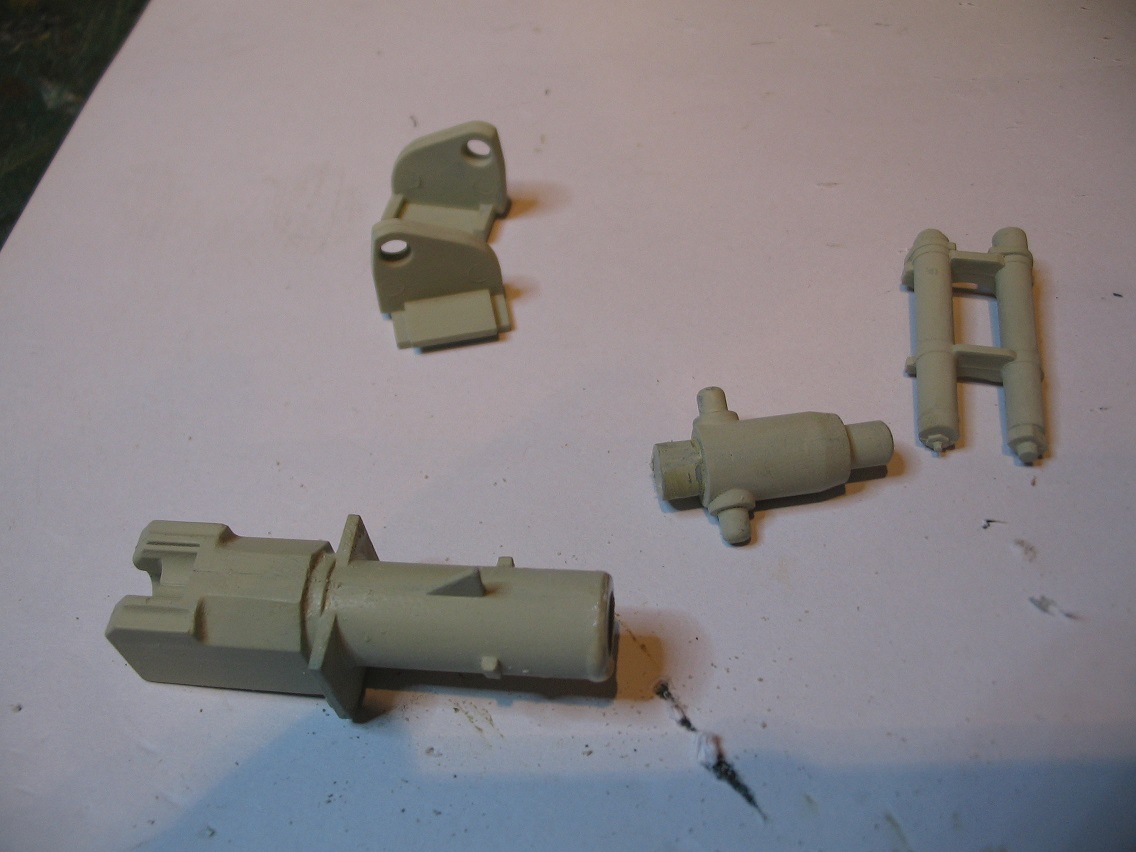
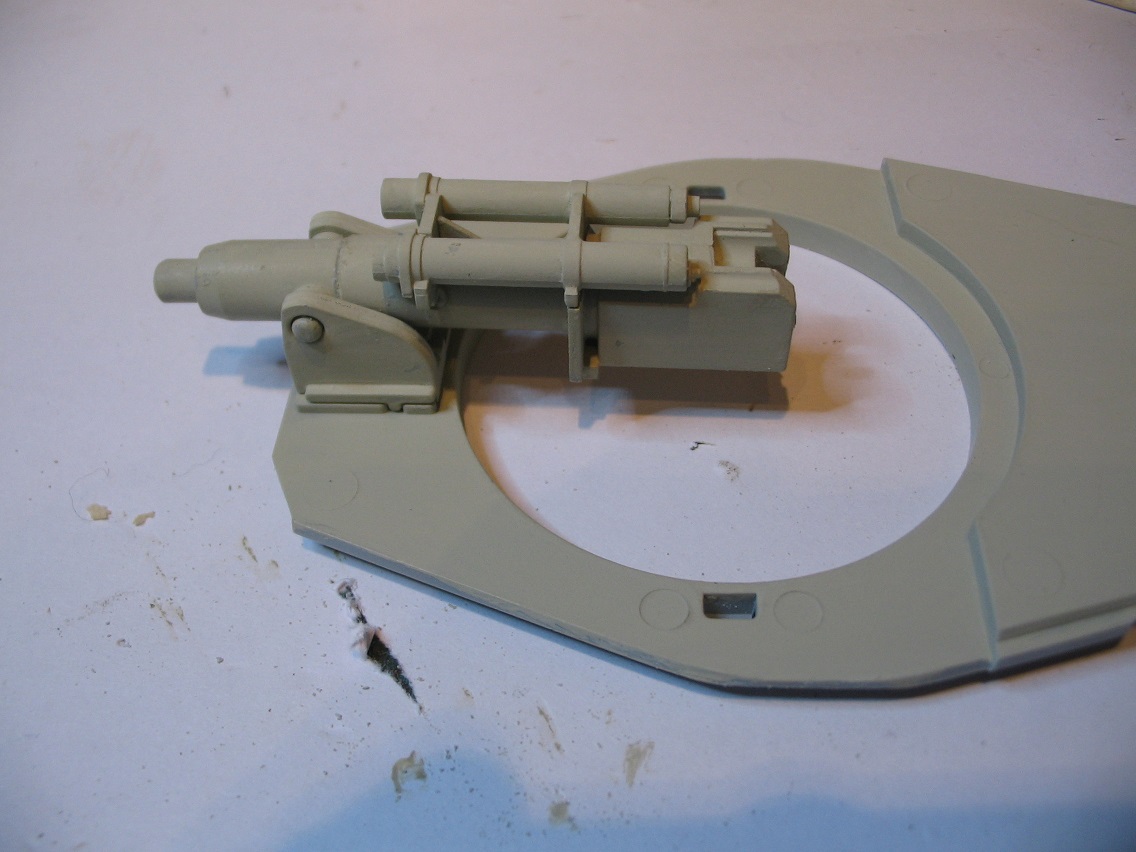
A bit more work done this morning and have encountered my first problems which although minor are annoying. I'm still working on the turret which is pretty basic. I started on the main gun, which as you can see is basic to say the least.


For some reason the part that carries the breech has to have about a centimetre cut off the end. Straightforward but it asks the question why not make it a centimetre shorter? What if you've not got an x-acto saw? It goes together nicely without any problems but I can't help feeling that they could have done more here. The Tamiya kit has the shield on the side of the breech to prevent empty cases going astray but nothing here. The breech has no detail at all. Admittedly you won't see a lot of it even with the hatches open but they've put a nicely detailed grenade launcher in the underside of the roof that you won't see at all so why not detail the main gun! They could have added the sights, the guard, even a working breech and really made it look the business! They've done a really detailed bow machine gun so why not here? I don't understand their logic here at all. Onwards...


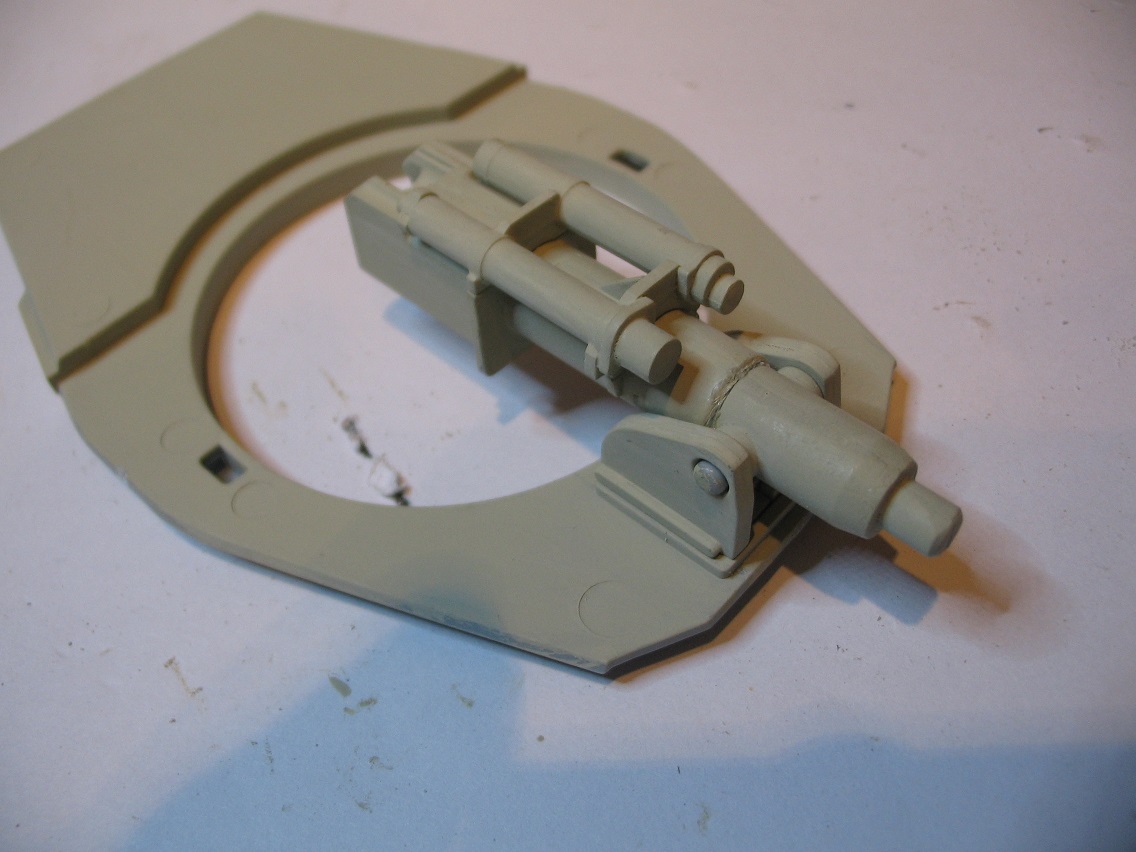
As you can see it fits together quite nicely and when I put the gun support arms into their place on the turret base they went in with a nice resounding click.

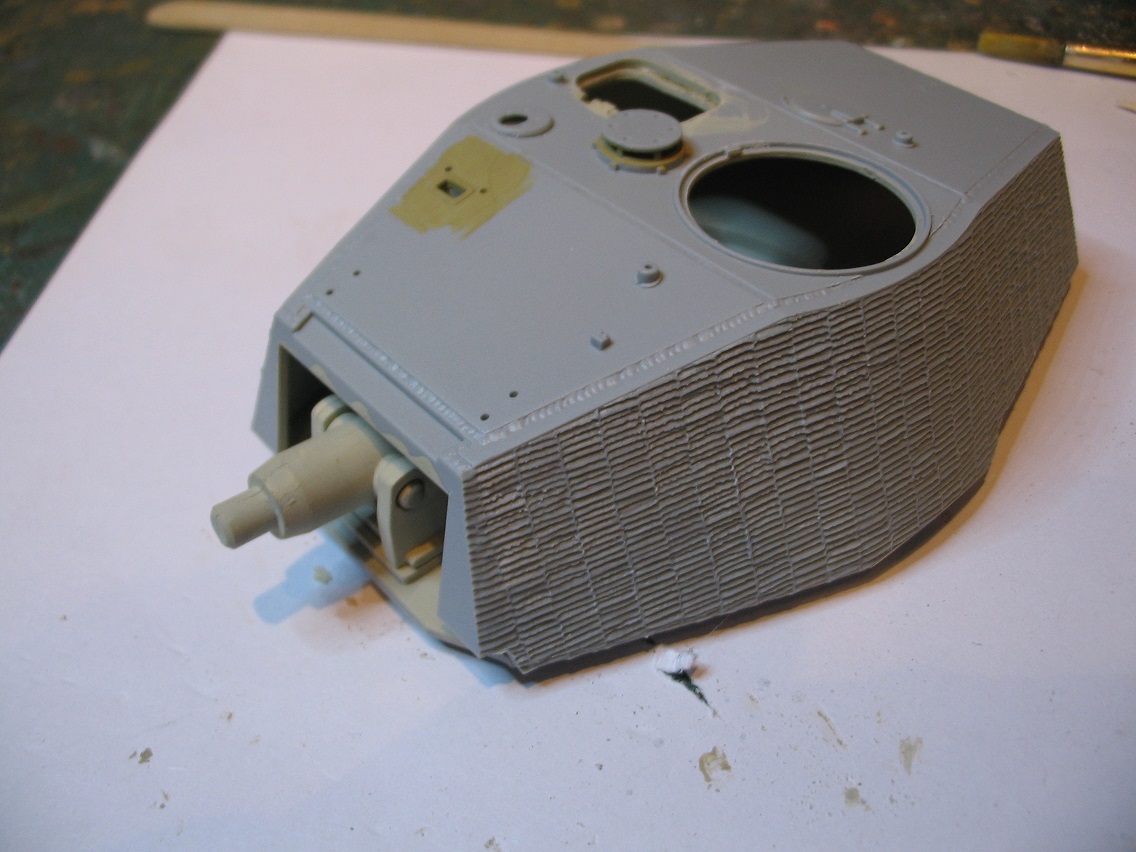
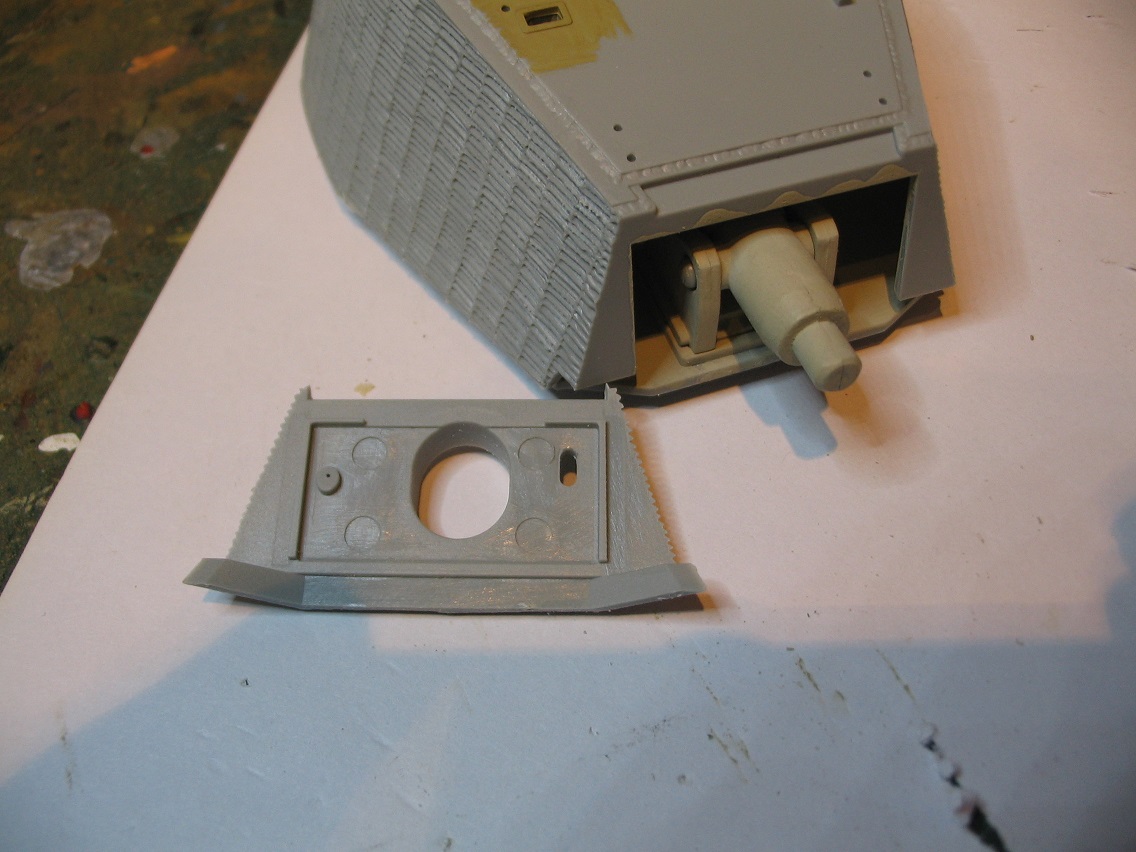
When I attached the base to the turret it was agood fit although it kept pulling apart at the front so I cheated a bit for speeds sake and used some CA. Job done


The turret front has a good solid square locating ridge which fits snugly into the turret. It's a little short on one side so a bit of filing with an emery board is neccessary to get it to look right with the turret side. Be careful doing this otherwise your zim will flatten out. The alternative which I'll look at when I start painting is use some filler to level it out and do some zimmerit lines while it's still soft. I'll decide later when I come to that. Sticking some paint on always shows it up better.


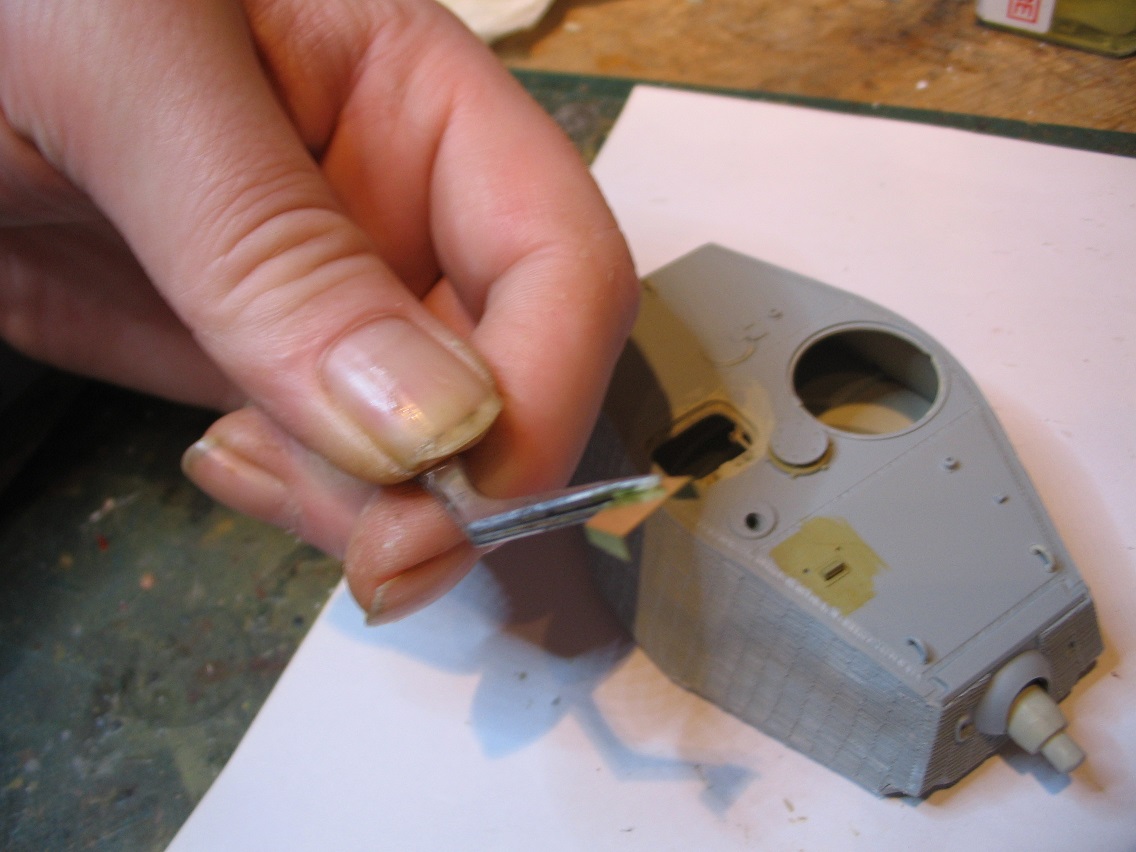
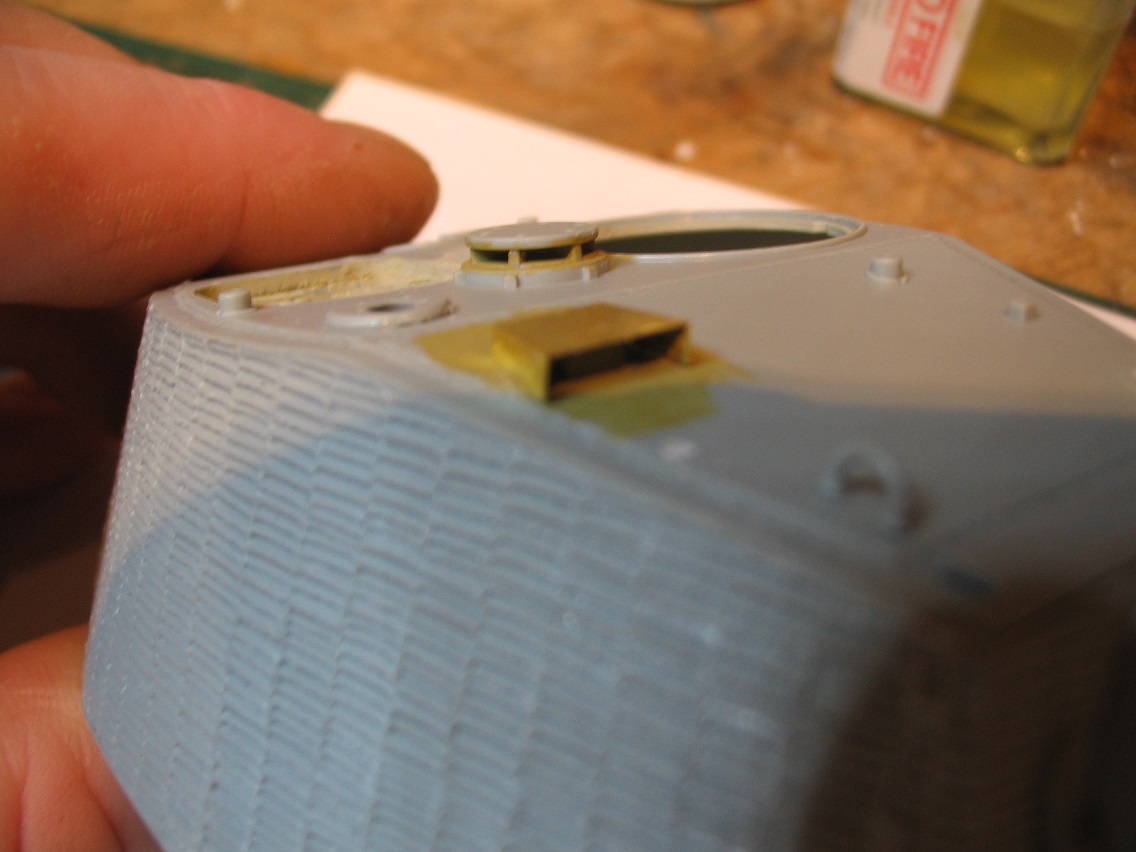
I added the lifting hooks and the gunners pericope. The thing that struck me as odd here was it is a straightforward piece of grey plastic. There are transparencies for the commanders cupola where you can't really see them that well but not one here. This was the first bit of etched metal in the form of the periscope guard. Bizarrely there are two holes to locate it but none on the PE so there must have been a plastic guard at some stage. No problems attaching it with CA.


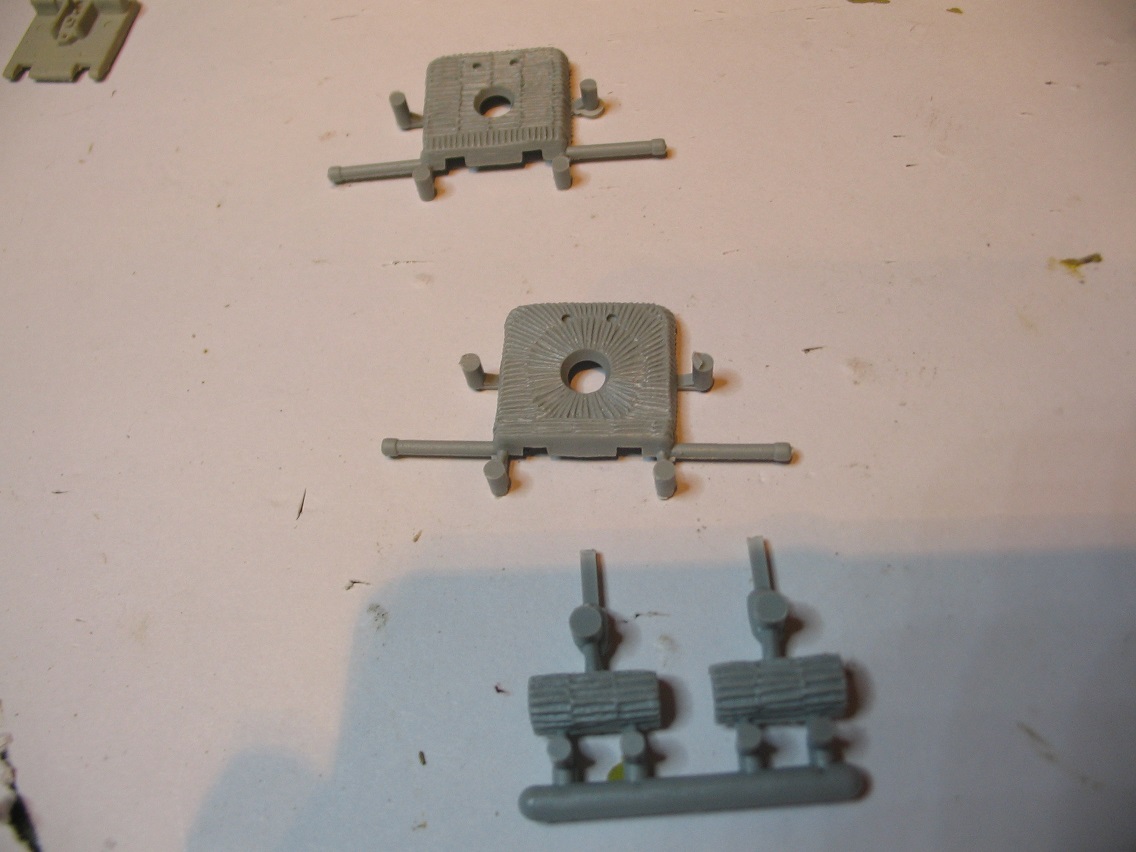
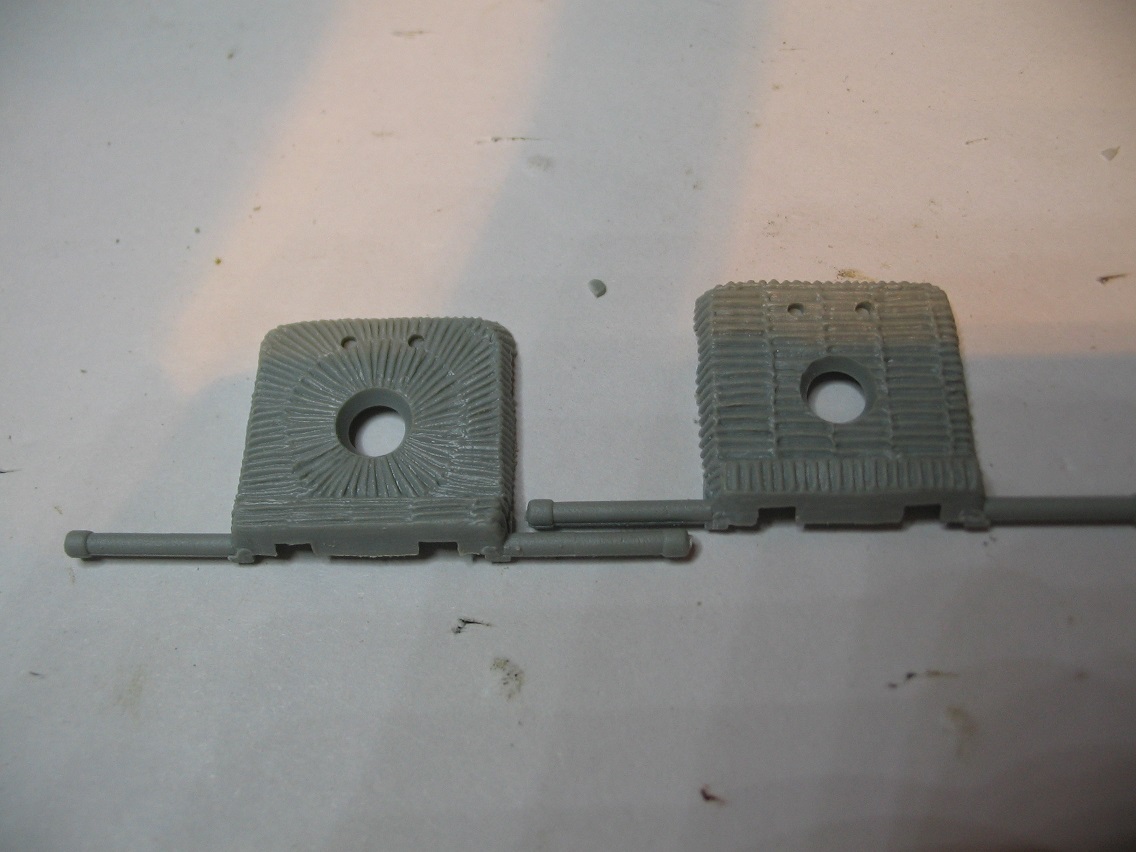
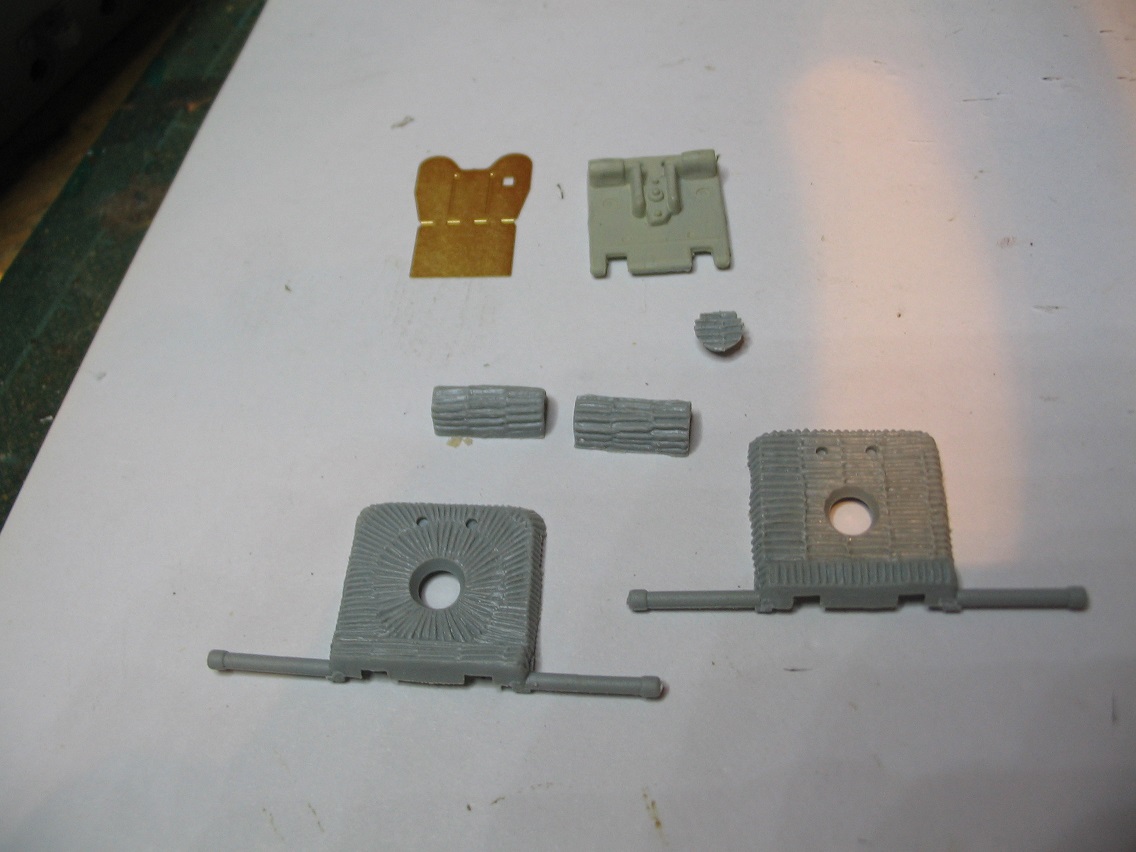
There are two options re the rear door on the turret. Slightly different zimmerit patterns as you can see. The first pic shows how many of those annoying little plastic tags are on it but having said that there's not that many as a whole. Some DML kits I've had to take off hundreds.. You'll need to do a bit of clean up to the back of the door as these leave quite a chunk on the back once you cut them off.


This is after they're off and the doors are cleaned up.


The difference in pattern's quite noticeable with one being circular the other straight. I've gone for the straight one.
There are quite a few bits involved in the assembly of the rear door.


The etched metal piece is a bit of a mystery. The instructions for fitting it are really vague and as you can't see it anyway I left it off. Everything else went together nicely. The part that is the inside of the turret door needed it's edges filing a bit to make it fit properly as it was a bit wide but only needed a bit doing to it.


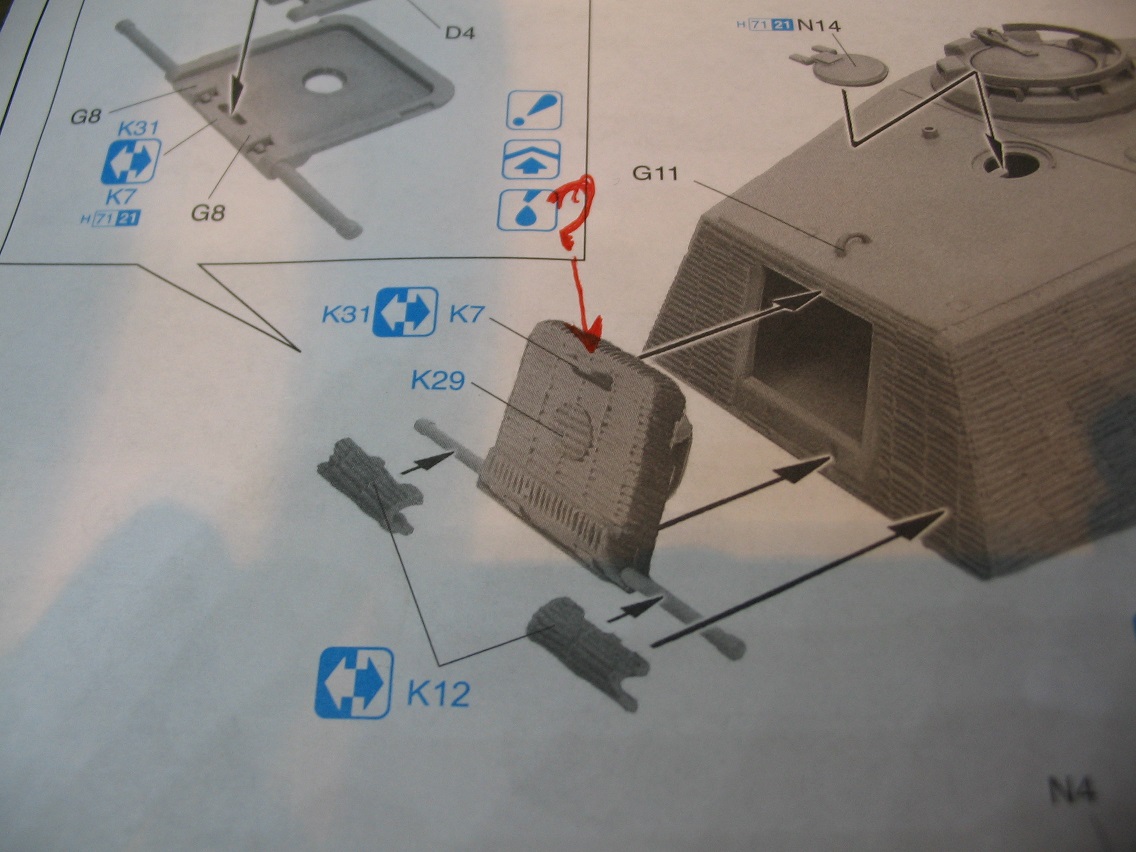
Now this is where Dragon have done their usual trick. You can see where the handle should go on the door.


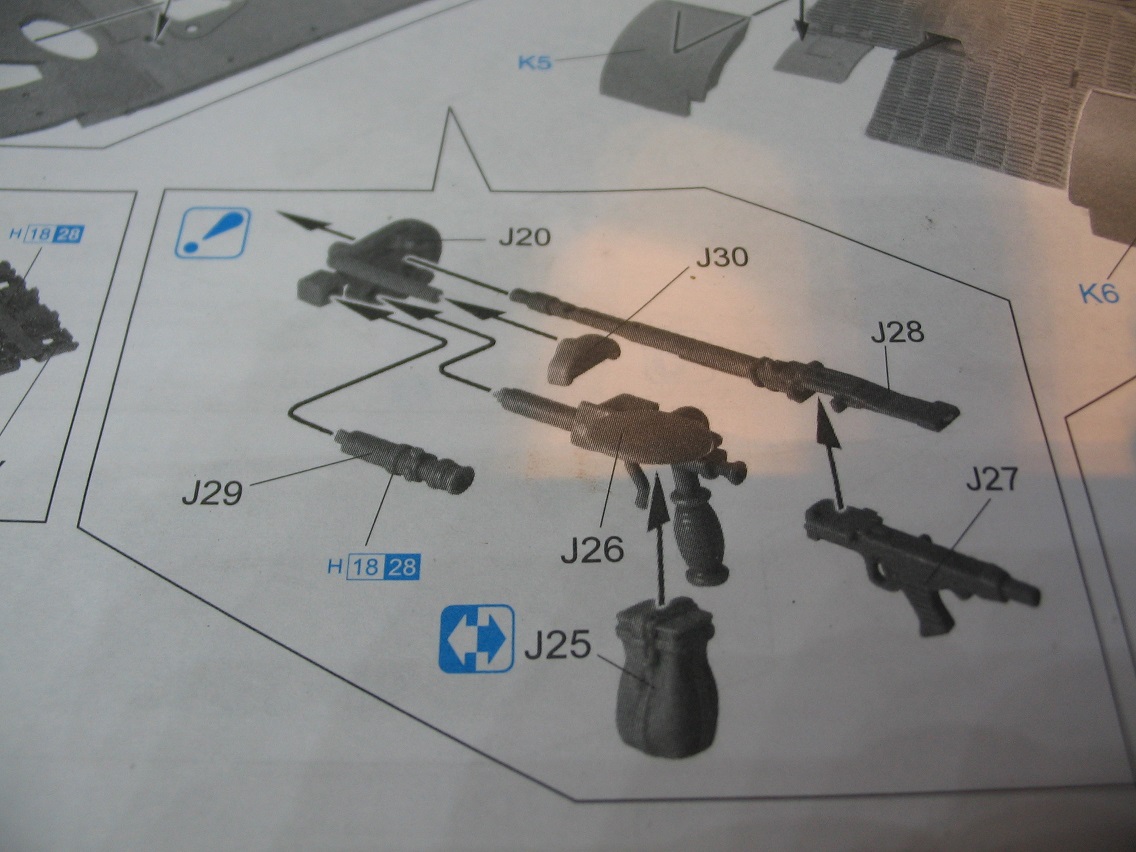
On the instructions (the reds my pointer) you can see K31/K7 pointing to the handle. K31/K7 are actually the alternative doors. What number is the handle and more to the point is there one? Until I've got further on with the build I'm not going to know as they've not said what part number to use. They'd done really well with their instructions so far as well. I wondered how long before it went uber-vague.
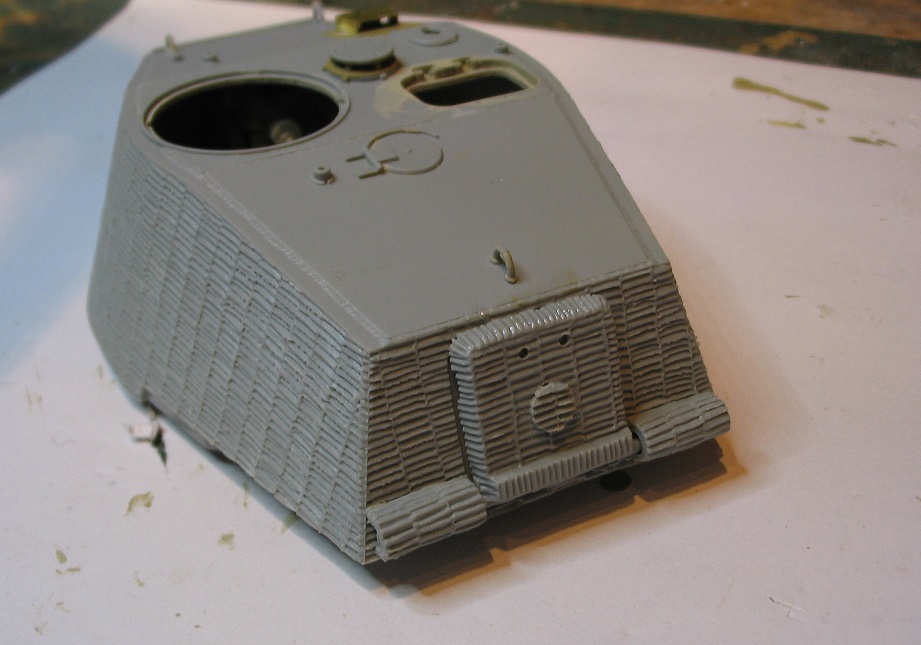
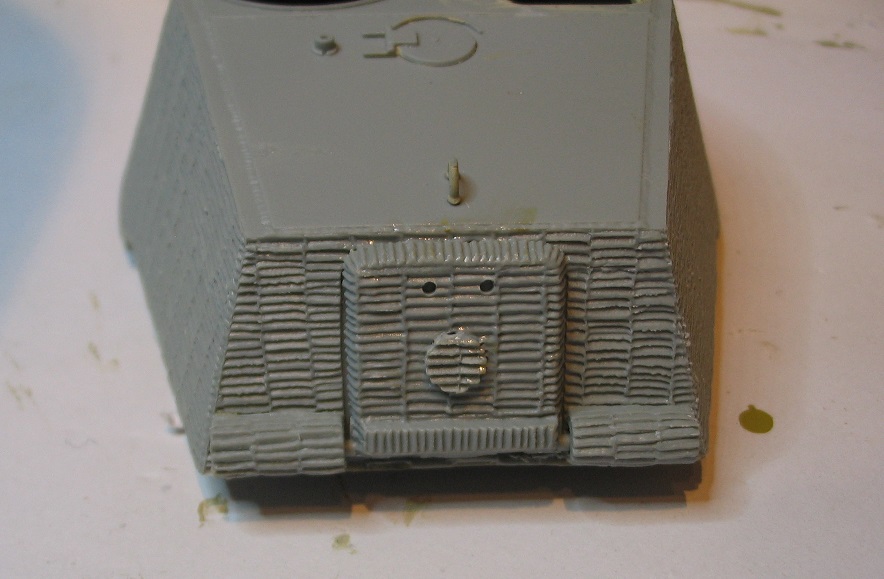
Having said that building the turret has been straightforward and the zimmerit looks good. It looks to be the right depth and is sharp in detail. I like the choice of back door as I would imagine that's useful if modelling a specific vehicle. One thing you'll need to keep an eye on is when you put the front and rear of the back door together, check that the seperate centre is aligned properly with the pattern on the turret as mine moved slightly. All it takes is twisting it slightly back into it's original position which fortunately I noticed before the glue set. I did notice something after I'd glued it all together. When I was working on it I saw that there is a small hole in the rear of it and next to it on the sprue was a small eye bolt. It didn't tell me to put it in so I didn't and with it being out of sight it didn't make any difference anyway. It turns out that the eye bolt does go there and is attached by a chain in reality so the port can be opened and left open dangling on a chain. I would imagine looking at the size of it that empty shells would be thrown out of it to save the turret floor becoming covered in combat. If I'd realised that was what the eye bolt was for I'd have added it, left the port open and attached some PE chain also adding a few spent shells to the engine deck. Oh well my fault I suppose for not knowing but as usual Dragons instructions strike again!
erichvon
Visit this Community
England - East Midlands, United Kingdom
Joined: January 17, 2006
KitMaker: 1,694 posts
Armorama: 1,584 posts
Posted: Monday, June 12, 2017 - 10:23 PM UTC
After a bit of an enforced break (health problems) I've got my modelling head back on and am pressing on. The turret is all together apart from the hatches which I'm leaving open anyway so they won't go near the turret again until I'm ready to paint. The individual periscopes in the commanders turret are a nice touch but in reality you can't really see them unless you look up close.


As you can see they look quite good on the inside of the turret as does the grenade launcher and bracket for the loaders hatch. Shame you can't see any of it. You can however see the breech of the gun which is just a block with no detail. I don't understand the rationale on this. Seven individual periscopes that we can't see but no detail on something we can?


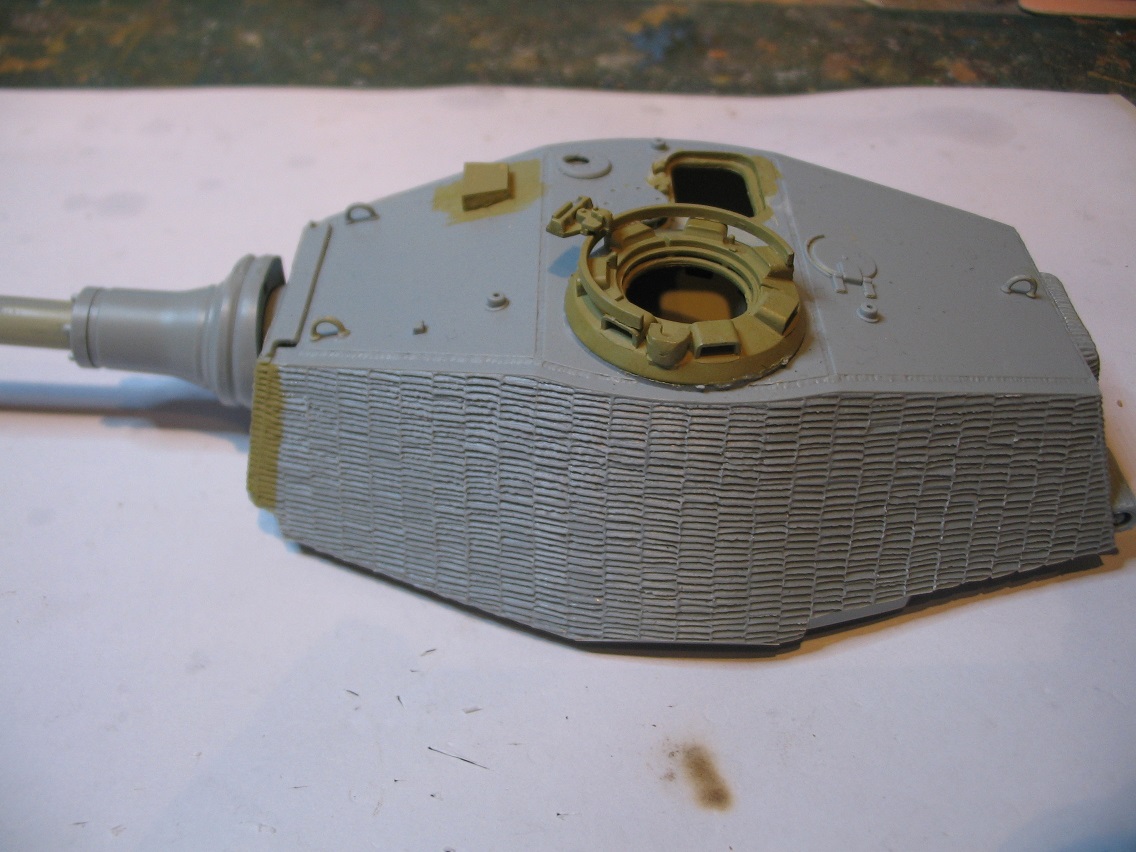
As you can see in this photo the weld lines on the turret top are nicely done and the zimmerit looks pretty true to scale. Zimmerit is something I only tried doing once and decided never again. I'm glad that DML are adding zimmerit to some of their vehicles as a) it makes things a lot easier for us (b) it means that the zimmerit is to the right scale and no messing about with adding after market zim. I used some Eduard etched metal zimmerit on a couple of Stug IV's a while back and once the paint was on you could hardly see it due to its lack of depth. The only drawback I can see so far is that there are no flat areas to add the track hooks to. I'll see if that's a problem when I get to it.

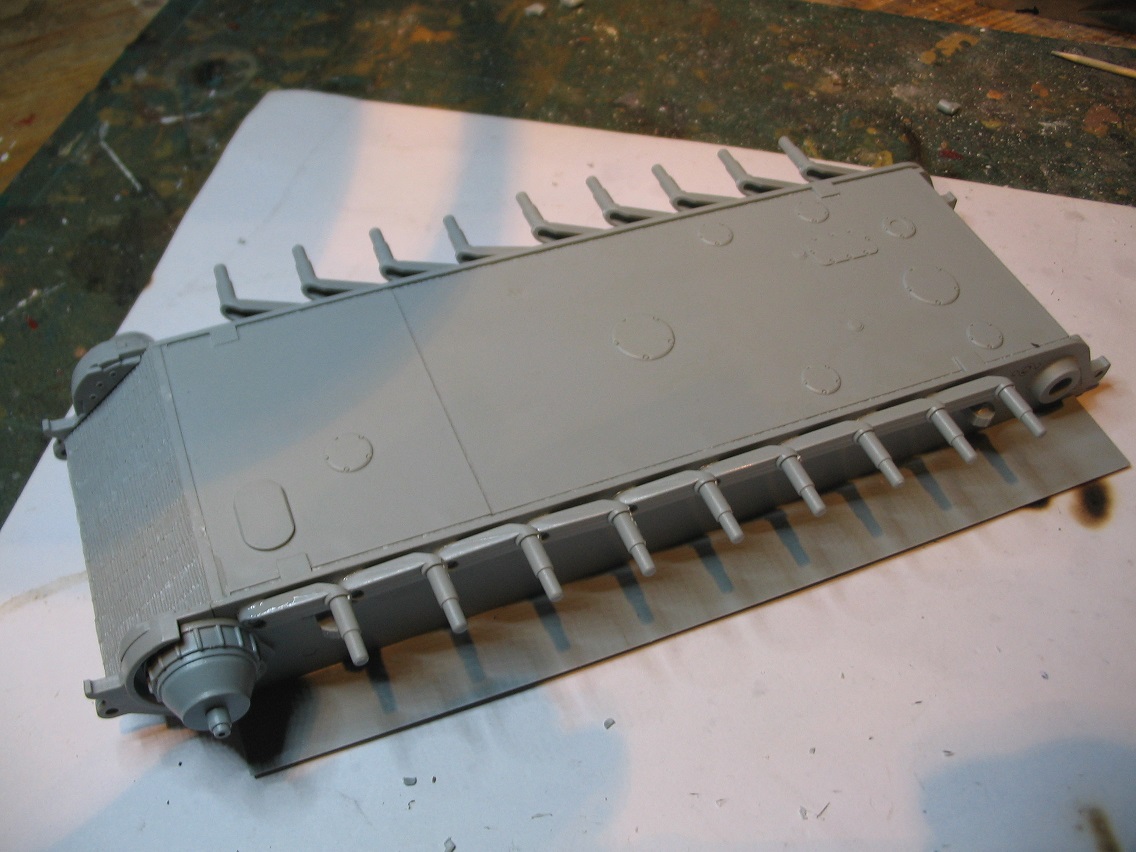
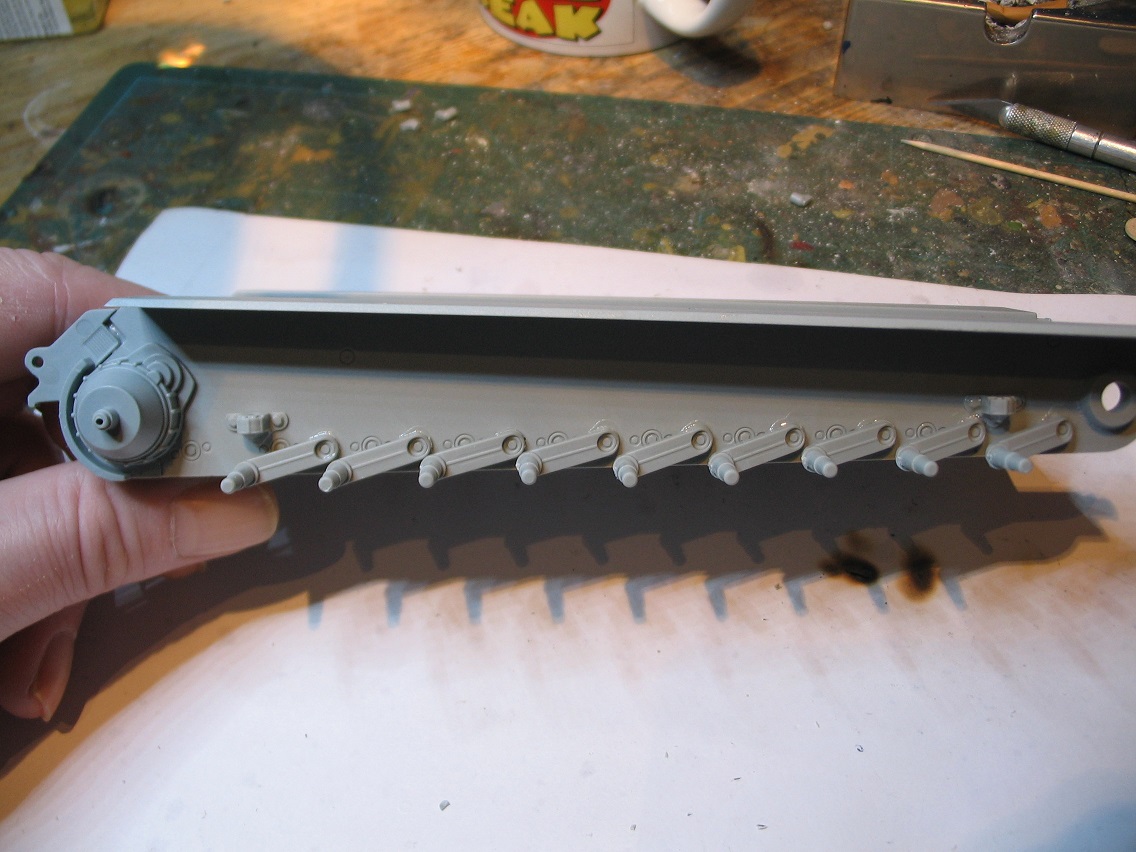
Onto the lower hull. Some quite nice detail on the underside if you were planning on having the KT overturned or on its side as seen in some period photos. The arms for the wheels are nicely mpulded and have a locating lug to mate with the hull holes so that they go in at thye right angle.


No problems here at all. A little bit of play in the arms but if you turn them all to the same point they'll all line up properly. A seperate piece of zimmerit is glued to the hull front here like on the old Italeri Panther but as you can see it all fits together snugly.


While this was drying I decided to start adding bits to the upper hull. It was all going smoothly until it came to this part.


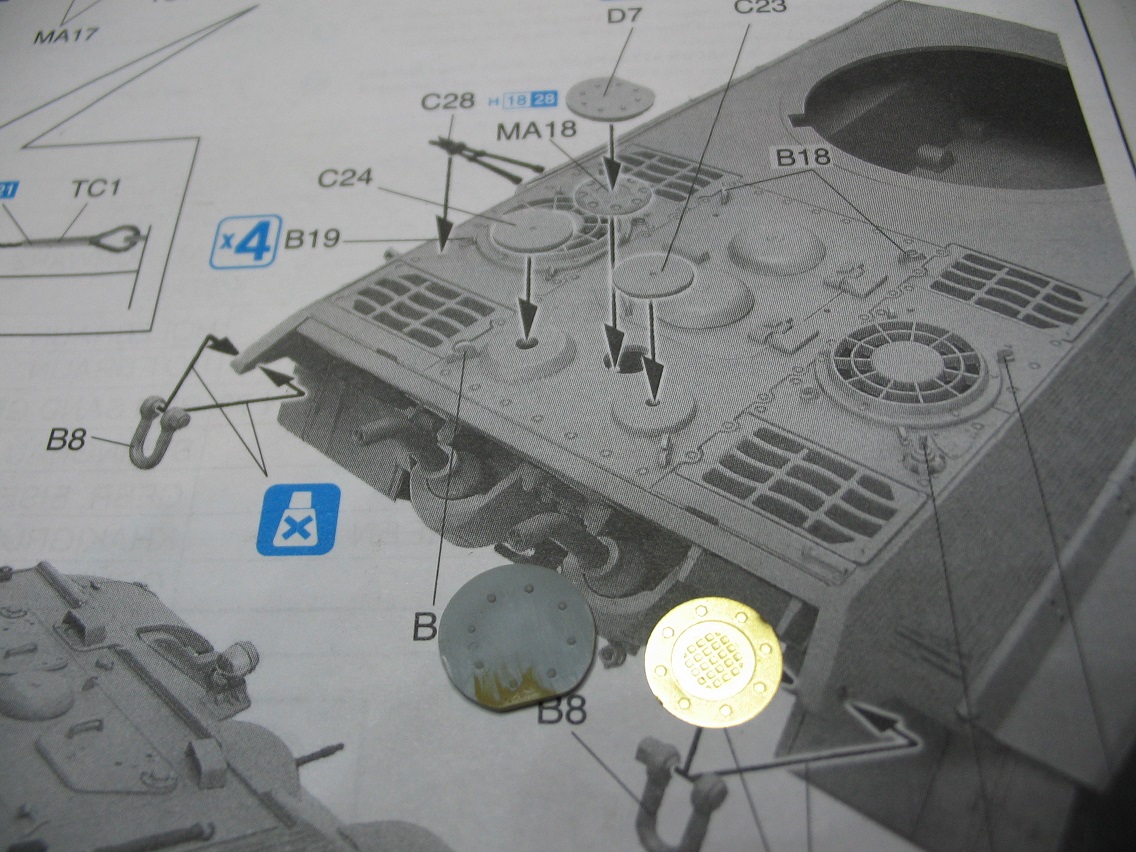
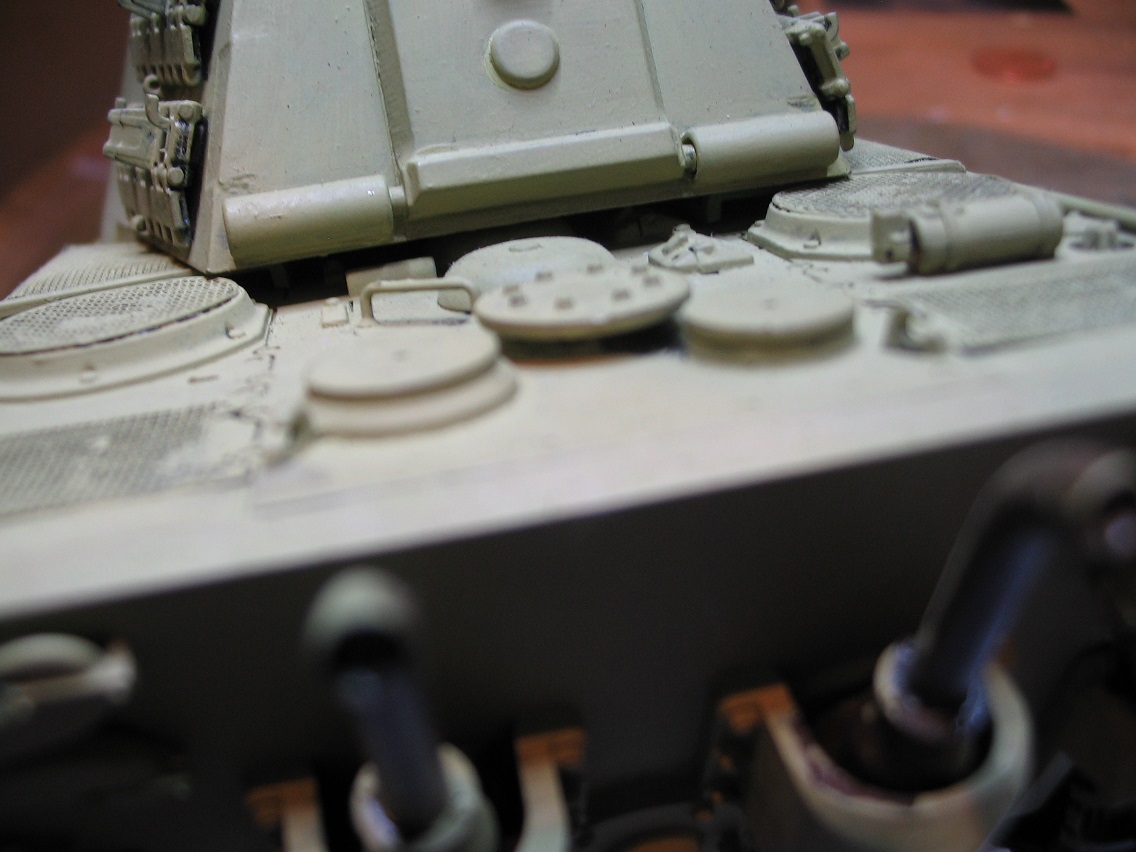
As you can see there is an option D7 in plastic or MA18 in etched metal. Firstly there is no explanation as to why they're different (a bit like the cupola that I forgot to mention but I'll do that in a minute). It's all well and good giving alternatives but if you're not an expert on the King Tiger (I'm not) you won't know which one to put on. It gets worse. Both pieces are flat.


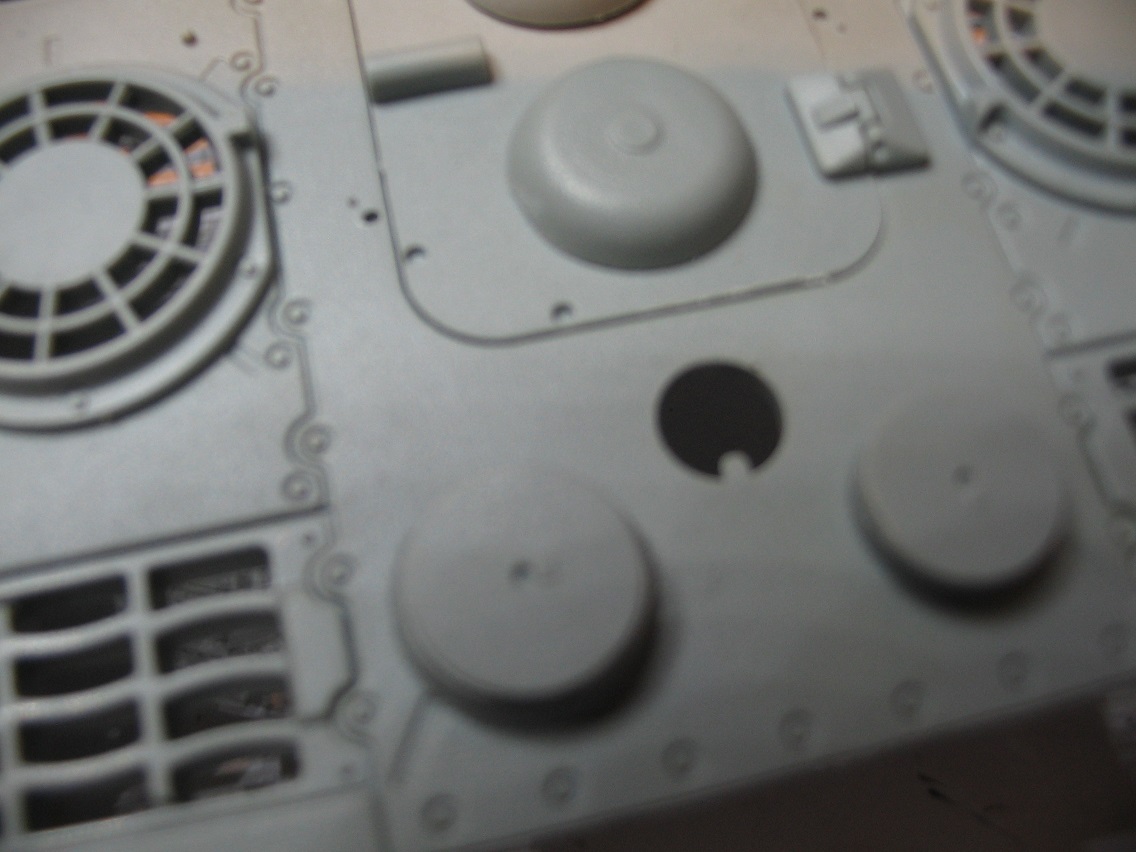
So why has the hole that they are supposed to cover got a lug in it? That leads me to believe that there should be another piece that goes in there. I've got a Tamiya KT I've been redoing so had a look at that.


The same piece but raised up from the engine deck. From memory when I've looked at real King Tigers at Bovington and La Gleize it is raised. Have DML simply forgotten to make a part to raise it up or have they just neglected to put it on the instructions like the handle on the rear hatch? It's not as if it's something small that's hidden away. It's smack on the engine deck! The underside of the plastic part has four indentations which leads me to think that there should be a part with four pins that it glues to yet I can't find anything like that. Baffled.

The next stage is getting the airbrush out to spray the lower hull and wheels before I attempt the tracks. Yes, they're everyones favourite. Individual track links. Admittedly German tracks are a lot simpler than something like a Shermans tracks but the part of a build I dread. I'll get the airbrush out, do some spraying and be back later.
erichvon
Visit this Community
England - East Midlands, United Kingdom
Joined: January 17, 2006
KitMaker: 1,694 posts
Armorama: 1,584 posts
Posted: Monday, June 12, 2017 - 10:35 PM UTC
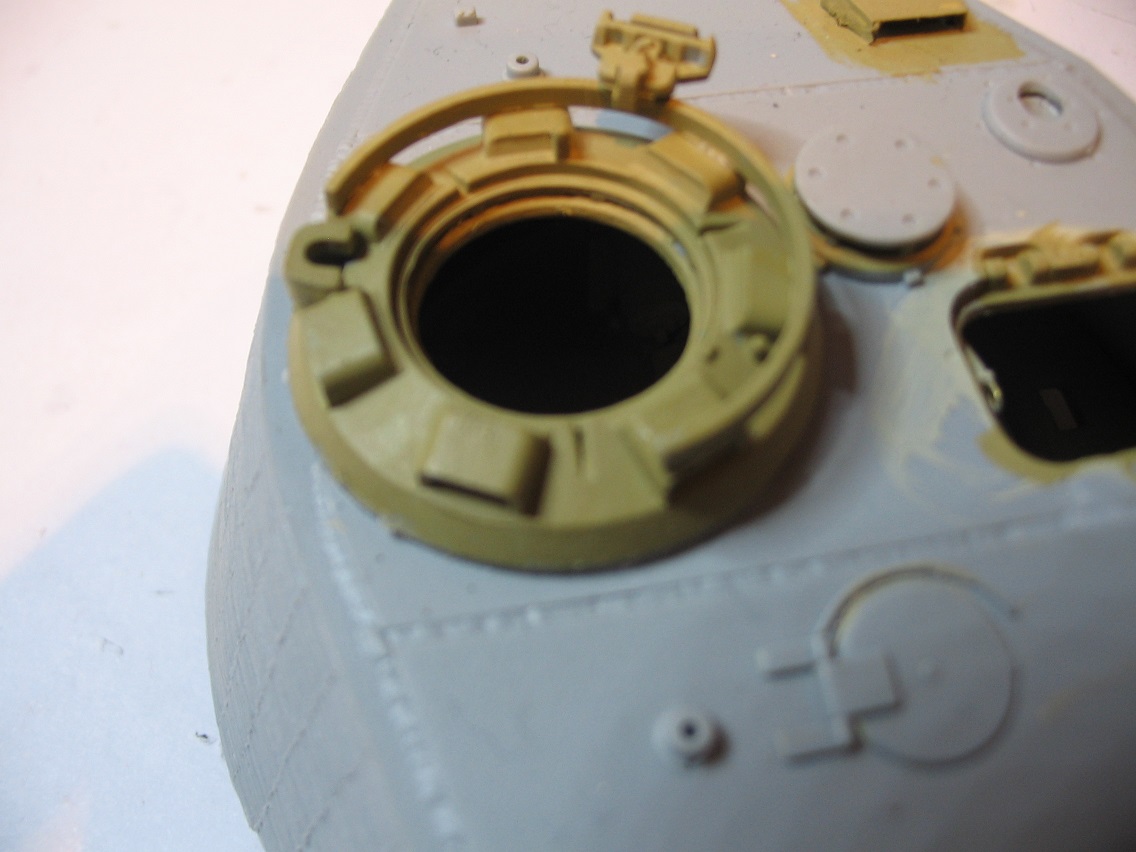
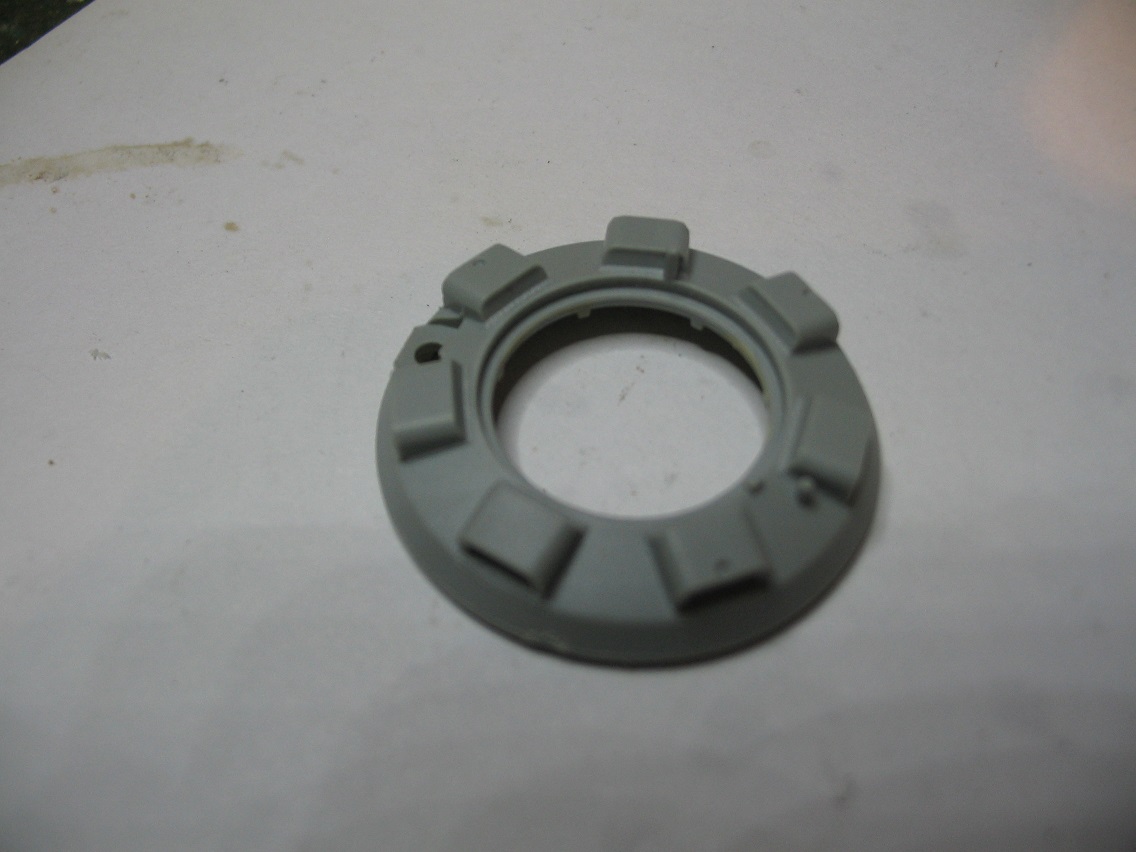
The cupola while I remember. There are two options which initially I couldn't see any difference between them.


It was only when I'd assembled it and painted it before I put the periscopes in that I noticed that it has two grooves in it.


As you can see the other is plain, Unfortunately it was too late to do anything about changing it as it was glued but which one is which. There is no mention in the instructions as to why there are two different cupolas to choose from. Someone on here will know why but it would have been nice if DML had given us an explanation. Were they different models, were they manufactured at a different factory? Are DML deliberately trying to confuse us? It's not particularly noticeable, especially once a figure goes in the turret, but it would be helpful if there was an explanation as to the options. To me, this is my logic, if there is an option then the manufacturer should point out why ie a different Mark, parts for a particular theatre, upgrade at a point in time say December 1944 it changed etc but DML? Nothing.
GazzaS
#424
Visit this Community
Queensland, Australia
Joined: April 23, 2015
KitMaker: 4,648 posts
Armorama: 2,248 posts
Posted: Tuesday, June 13, 2017 - 07:25 AM UTC
Nicework so far! I'm doing a dragon Pz IV, and getting the same thing. TBH I think that by that late inthe war you had machines in and our of the shops, replacing battle damage and stuff... Not to mention enhancements that were happening during the production run, or that since standardized parts were not yet a European practice, some parts from different suppliers just were a little bit different from others.

Gaz
brekinapez
Visit this Community
Georgia, United States
Joined: July 26, 2013
KitMaker: 2,272 posts
Armorama: 1,860 posts
Posted: Tuesday, June 13, 2017 - 09:27 AM UTC

Quoted Text

Nicework so far! I'm doing a dragon Pz IV, and getting the same thing. TBH I think that by that late inthe war you had machines in and our of the shops, replacing battle damage and stuff... Not to mention enhancements that were happening during the production run, or that since standardized parts were not yet a European practice, some parts from different suppliers just were a little bit different from others.

Gaz


I hope you're not implying Dragon had the idea to include extra parts to represent that supply issue.

What I am seeing is Dragon rushing out a product to compete with Takom and Meng's recent releases, and in doing so not necessarily picking the right sprues for the job from the previous KT they put out.

That combined with their apparent use of copywriters who don't seem to discuss the kits with the parts designers means the guys writing the instructions don't know what any of it is or even if they are pointing to the right parts. At least that's my take on it. There is a high level of disconnect at Dragon - except I guess when it comes to bobbleheads.
GazzaS
#424
Visit this Community
Queensland, Australia
Joined: April 23, 2015
KitMaker: 4,648 posts
Armorama: 2,248 posts
Posted: Tuesday, June 13, 2017 - 01:19 PM UTC
I'm not implying anything about Dragon's intentions or lack thereof.

But I have no aversion to spare parts if they will enable me to build a machine I've seen in a photo if I don't like the decal option(s) that come in the box.
ChrisK89
Visit this Community
Nordrhein-Westfalen, Germany
Joined: June 04, 2015
KitMaker: 80 posts
Armorama: 73 posts
Posted: Tuesday, June 13, 2017 - 03:48 PM UTC

Quoted Text

As you can see there is an option D7 in plastic or MA18 in etched metal. Firstly there is no explanation as to why they're different (a bit like the cupola that I forgot to mention but I'll do that in a minute). It's all well and good giving alternatives but if you're not an expert on the King Tiger (I'm not) you won't know which one to put on. It gets worse. Both pieces are flat.


I just looked into my King Tiger Box (6303), you know the original one from a few years ago and the answer to your question is pretty simple:

They changed the complete sprue D. There was a piece numbered D25 which had to be installed into the hole and is pretty much the same piece you got now with your MA18 but made of plastic.
The now called D7 was D22 and was supposed to be installed ontop of piece D25 but I don't know when the germans started to install the armorplate.
My guess is.. early Tiger II (maybe all the Porsche turret ones?)didn't have the armor and the later ones had?

cheers Chris
phantom8747
Visit this Community
Alabama, United States
Joined: March 09, 2015
KitMaker: 281 posts
Armorama: 273 posts
Posted: Tuesday, June 13, 2017 - 06:03 PM UTC
Is there anyone selling the 505 turret separately.It would be nice if Dragon Care offered it.
phantom8747
Visit this Community
Alabama, United States
Joined: March 09, 2015
KitMaker: 281 posts
Armorama: 273 posts
Posted: Tuesday, June 13, 2017 - 06:06 PM UTC

Quoted Text

Firstly I'd like to thank Kitmaker for the opportunity to do a build review on this tank and also to apologise for it taking so long to get around to it. I was without a computer for nearly 3 months. Anyway enough of that onto the kit.

This is Dragon's King Tiger with zimmerit 6840. Zimmerit is one of those things that many of us daren't attempt for fear of wrecking a perfectly good kit so when DML started to release kits with zim already there it was a blessing in disguise. For years the only King Tigers that were available were the Dragon Porsche and Henchel turreted versions. I've only built the Ardennes marketted one so can't comment on the others but it was a fun build and well..looks like a King Tiger. While I'm building this I'll point out the positives and negatives as there's no point in a build blog if I don't point out problems as well as the good bits


With this kit you have an option on the turrets. The markings are for Schwere Panzer Abteilung 505 which was a Wehrmacht unit. By this stage of the war heavy tanks such as Tigers and King Tigers were in independent Heavy Tank Battalions which were Korps assets and not permanently attached to a division therefore could move from division to division according to where they were needed. All three sets of markings denote tanks of this unit serving on the Eastern Front. One peculiarity of this units King Tigers is that they cleared a square area of zimmerit on the turret for their unit insignia a charging knight on horseback. In the kit there is a turret with complete zim coverage and also one with the square cleared.


Yes, I'd made a start then realised I'd not taken a photo of the turrets together. The area that's been cleared looks to be the right depth scalewise when you look at the thickness of the zimmerit in profile. I've decided not to build the 505 version but to mark it as a 1 SS Panzer Korps KT so am using the fully zimmerited turret. Not only because I tend to model more Waffen SS stuff but I just prefer the full zimmerit.

Onto business. I decided to build the turret first which is not how the instructions tell you to do it but I find DML instructions quite confusing as a rule and it should be the quickest part to build. In theory anyway. Parts are nicely moulded with a minimum of flash. There are a lot of sprues (twelve) and some contain three sprues in one so familiarise yourself with them. One thing I have noticed while building the turret is that parts that you require are on about 4 or 5 different sprues rather than being grouped logically on one. Makes me think I need a bigger desk. The instructions look easier to follow than I'm used to with DML but we'll see.


One thing I did notice at this stage is that if you attach TJ1 (the turret hatch arm) to TJ6 (a barrel inside) you can't have the hatch open anymore. I've left it. I plan on having the hatch open but always dry fit hatches when airbrushing so when I've finished I can glue it in place with the right colour sprayed on.

I've given the inside of the turret a quick coat of ivory (Tamiya XF55 Deck Tan + White) just as a base coat There's a rather nice flare discharger (I think) in the turret roof which just needs a cord to finish it off. Unfortunately you can't see it. This however means you get two choices on the hatch on the outside of the turret. One open and one closed.


Both shown for comparison. I've gone for the open one.

Inside the turret roof as there is the hydraulic mechanism for the loaders hatch. Now this was my first problem. If you attach it as per the instructions it doesn't match up with the connection to the hatch if you want it open. There's a nifty little PE bracket to attach to the end which wraps around the crescent shaped bracket on the hatch. You have to move it quite a way forward. In the photo the circle denotes where it should be as per the instructions. Beware of this part as it's very fragile and mine bent while cleaning it up and didn't want to bend it back for fear of snapping it. As it won't be seen and it now lines up with the hatch bracket I wasn't too bothered about the angle etc. The fit was more important here. I've painted underneath what I assume to be a ventilation cover before attaching the top to make sure I cover it. That's where I'm up to today.


Karl What are you going to do with the other turret top?
d6mst0
#453
Visit this Community
Texas, United States
Joined: August 28, 2016
KitMaker: 1,925 posts
Armorama: 601 posts
Posted: Tuesday, June 13, 2017 - 07:48 PM UTC

Quoted Text

The same piece but raised up from the engine deck. From memory when I've looked at real King Tigers at Bovington and La Gleize it is raised. Have DML simply forgotten to make a part to raise it up or have they just neglected to put it on the instructions like the handle on the rear hatch? It's not as if it's something small that's hidden away. It's smack on the engine deck! The underside of the plastic part has four indentations which leads me to think that there should be a part with four pins that it glues to yet I can't find anything like that. Baffled.


Karl,

I checked all of my DML Tiger II kits and they have all the same parts along with hole with the tab so I checked my reference book "SuperKing" by David Parker. There are pictures of a Tiger II and the cover sits flat on the deck and there are Tiger II's with the cover slightly raised. By the picture it looks like the cover is thick piece of ringed metal. If you use the PE part I would put a .5mm piece of styrene under it and add the PE and that should give you the correct height.

Marcus

brekinapez
Visit this Community
Georgia, United States
Joined: July 26, 2013
KitMaker: 2,272 posts
Armorama: 1,860 posts
Posted: Tuesday, June 13, 2017 - 11:18 PM UTC
What I know from the books I have is that they used a bell cover over the air intake vent until roughly June 1944. After that, a plate with a mesh screen in the center was bolted on, and this was kept until about mid-September, when they changed it to a solid metal plate.
wedgetail53
Visit this Community
Queensland, Australia
Joined: October 02, 2008
KitMaker: 658 posts
Armorama: 629 posts
Posted: Wednesday, June 14, 2017 - 03:54 AM UTC
[quote]
Quoted Text

The same piece but raised up from the engine deck. From memory when I've looked at real King Tigers at Bovington and La Gleize it is raised. Have DML simply forgotten to make a part to raise it up or have they just neglected to put it on the instructions like the handle on the rear hatch? It's not as if it's something small that's hidden away. It's smack on the engine deck! The underside of the plastic part has four indentations which leads me to think that there should be a part with four pins that it glues to yet I can't find anything like that. Baffled.


G'day Karl

The opening to which you refer is for the snorkel, which was discontinued fairly quickly. Earlier DML KT kits had a plastic piece to go in the hole, as you suggested, rather than an etched brass piece. D7 is the bolted cover, which, surprisingly, Takom have left off their new KTs with interior - I had to scratch build one.

A point to note is that the piece of steel on the engine hatch door immediately above part C23 in your picture is a handle for opening the engine hatch, and should be a hollow tube. The idea was that as the engine hatch was 40mm steel, it was a bugger to lift, so the crew would but the end of a crowbar in the hole and lever the hatch open. To this date, I don't think any KT kit manufacturer has moulded it hollow, but it definitely should be.

Hope all this helps.

Regards

Rob
erichvon
Visit this Community
England - East Midlands, United Kingdom
Joined: January 17, 2006
KitMaker: 1,694 posts
Armorama: 1,584 posts
Posted: Wednesday, June 14, 2017 - 08:20 AM UTC
I'm glad someone's reading this LOL. Some interesting info there. Thanks guys.

Gary- I feel your pain man. They're not made easy are they by the crap instructions. DML never cease to amaze me as to how bad their instructions are. You would have thought by now after thousands of comments from modellers on various sites that they'd have taken note that their instructions are bad and maybe imrpoved them! Not only do they miss out parts but the diagrams leave a lot to be desired. I've got mixed feelings on this new style "photo" type instructions. They lack detail which is what is needed with their instructions. How is it that the other manufacturers can get it right but DML consistently fail to provide instructions that are clear and easy to follow.

Chris- This appears to be one of the problems with using generic sprues. There are a fair few spare parts, like a zimmeritted Porsche mantlet, but there are parts missing like the handle on the rear door on the turret and something to fill the hole which you've identified. You would think that before they release the kit onto an unsuspecting public that they'd sit down with a pre-release kit and build it to see if there were any problems with the build. I've already found a few and I'm not even halfway through! If they'd done that they'd have realised that there were parts missing.

Bob- I've not really given it any thought to be honest. Once I've finished the build if I've not thought of a use for it it'll be up for grabs if you want first refusal. You'll have to use some bits off the one you've got however as it's not a complete turret ie no front plate, mantlet etc. If you've got a standard zimeritted one you should be okay though as you can just use the bits off that one to finish it off

Marcus/Rob- Thanks for the detailed info. I should be able to work out a way around it now thanks to your info. It's bad though isn't it, having to scratch build parts to build a kit OOB because the manufacturer hasn't put the correct parts in!


erichvon
Visit this Community
England - East Midlands, United Kingdom
Joined: January 17, 2006
KitMaker: 1,694 posts
Armorama: 1,584 posts
Posted: Wednesday, June 14, 2017 - 09:21 AM UTC
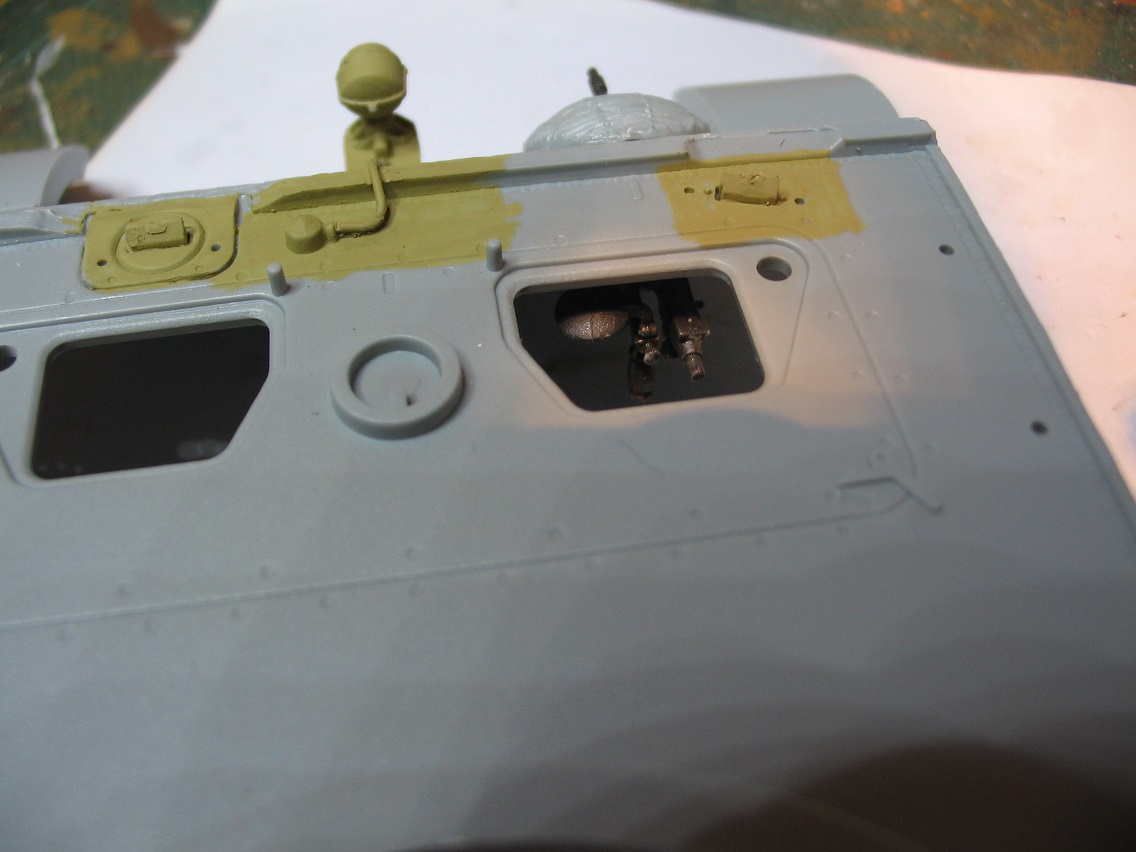
I went off in a slightly different direction yesterday and decided to do some work on the top of the hull before doing any spraying as I realised I needed to get the grilles on the engine deck first so they could be sprayed. Hopefully with spraying them they shouldn't get clogged up. As I was doing the top it was time to tackle the bow MG.

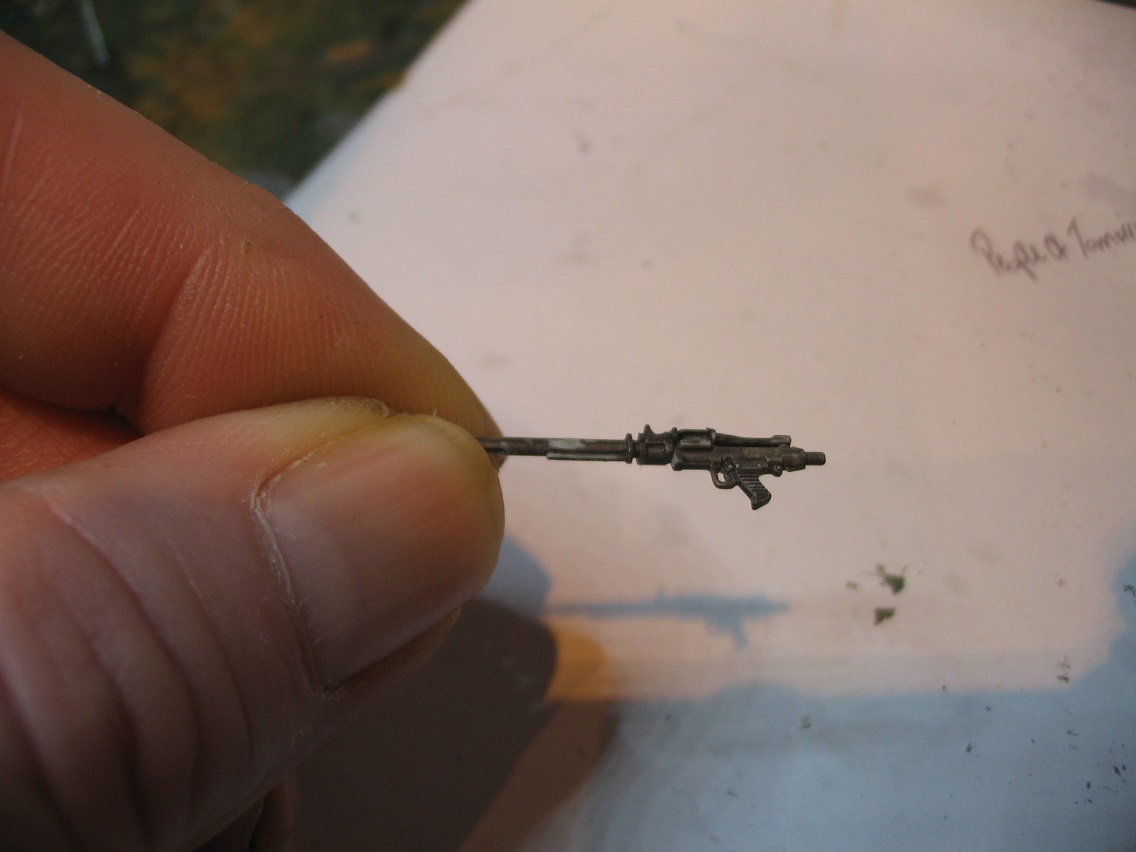
If there's one part of this kit that really shines it's this. It's the full works even down to the plate which rested on the gunners head while he looked through his sight. The instructions are bit vague however.


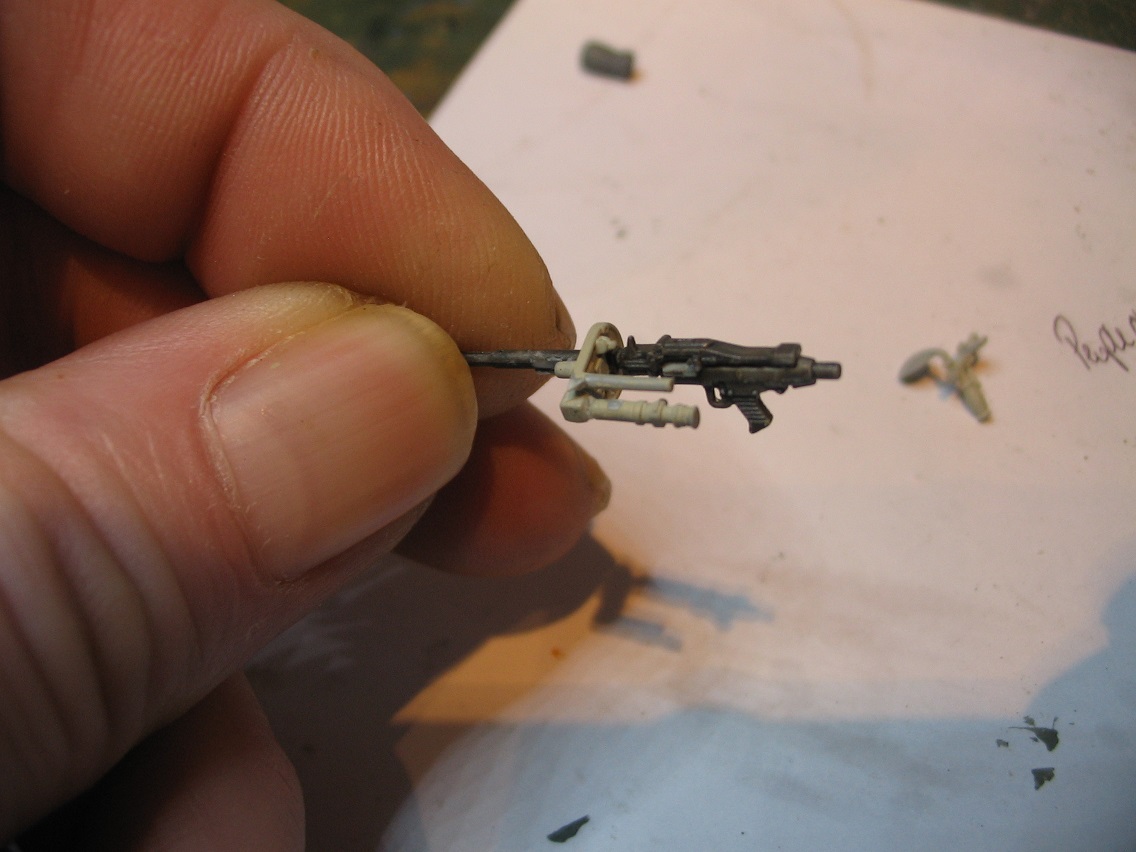
Yes,it shows where the individual parts go but not in what order. With this being such a fiddly assembly it would have helped a lot if they'd broken down the assembly into stages. The MG34 itself comes in two parts. Barrel and top cover to the receiver. Detail is very nice and there is even a guide underneath so that it slots into the MG plate (?) at the right angle.


As you can see the detail on the various parts is sharp,adding to the overall look of the weapon.


As you can see with it partially assembled, it does look like the real thing. I did have some problems after this stage and had to shorten a flat piece that comes off the side of the headrest part. I couldn't work out if it was supposed to go under the MG34 as a support or go inside the MG on the feed tray. Either way it didn't fit so I cut it right back and glued it to the side. You can't see it anyway as the gap is so small between the two parts. I left the ammo bag off as I can use that on something else with it not being visible.


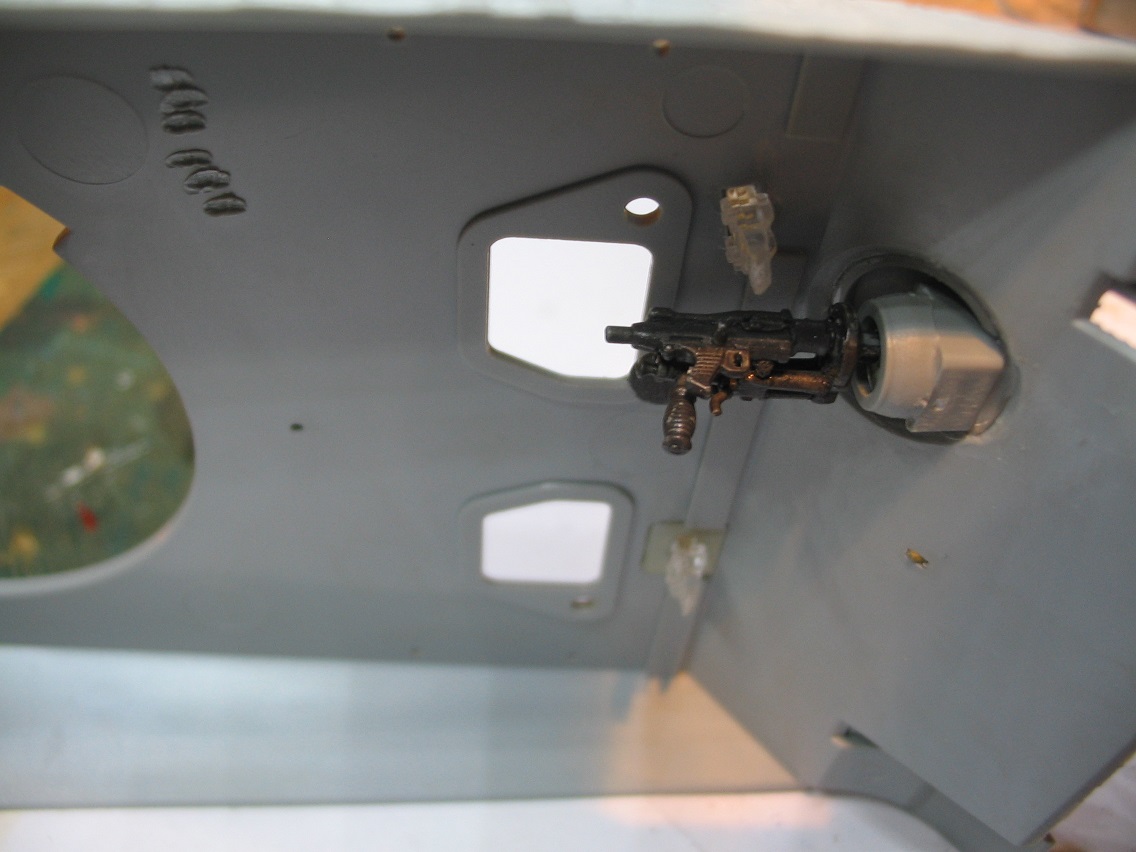
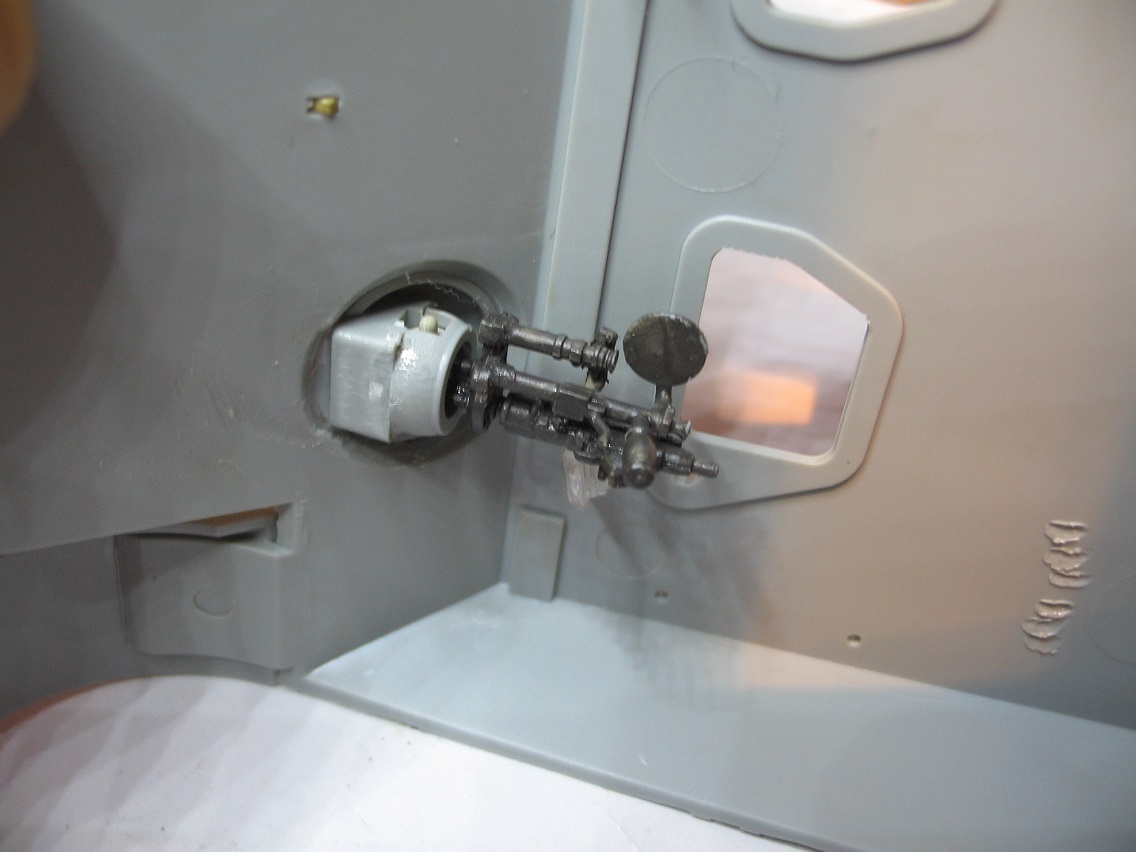
As you can see it builds up into a fairly accurate rendition of the bow MG after a lot of swearing and sticking it to my fingers. Due to it being fiddly and the locating points not being very strong I used CA as liquid poly was taking too long to dry and parts were moving into the wrong position. It really is fiddly but does look good. The sad thing is you can't actually see much of it once it's in situ. Now it's in place firmly I can finish off painting it. I haven't bothered painting the periscope inside the tank as you can't see it although I will give the inside a coat of ivory to hopefully get a bit more light in there. Given the fact that they've put so much effort into the MG it would have made sense if they'd supplied a rudimentary driver and radio op/gunner position. Just a couple of seats would have been enough as it does look very bare with the hatches open.

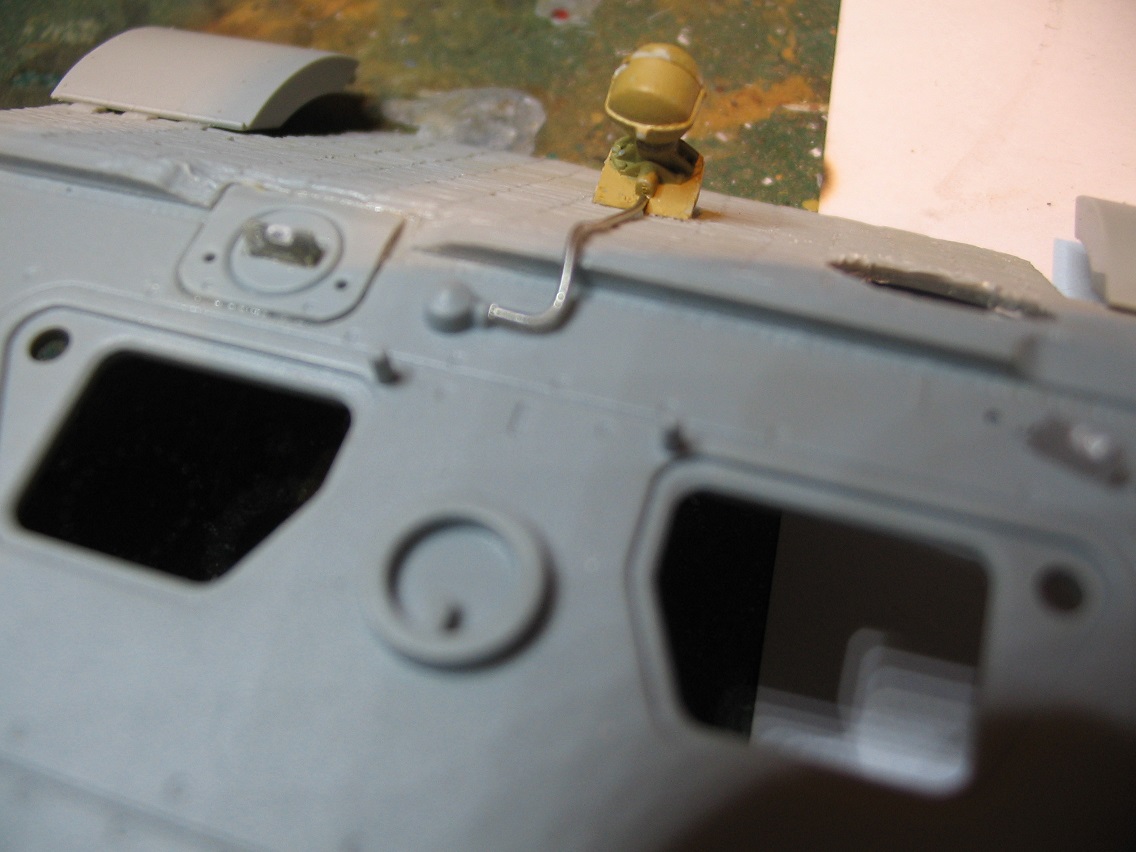
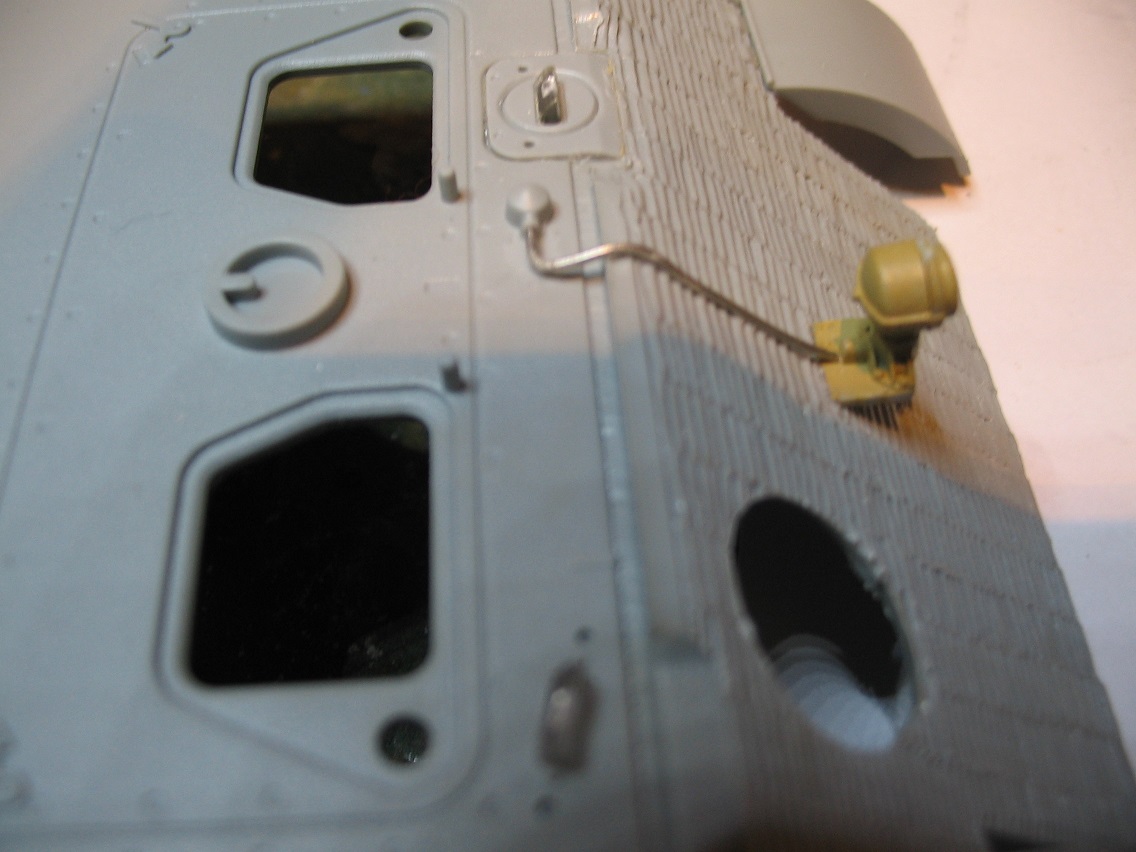
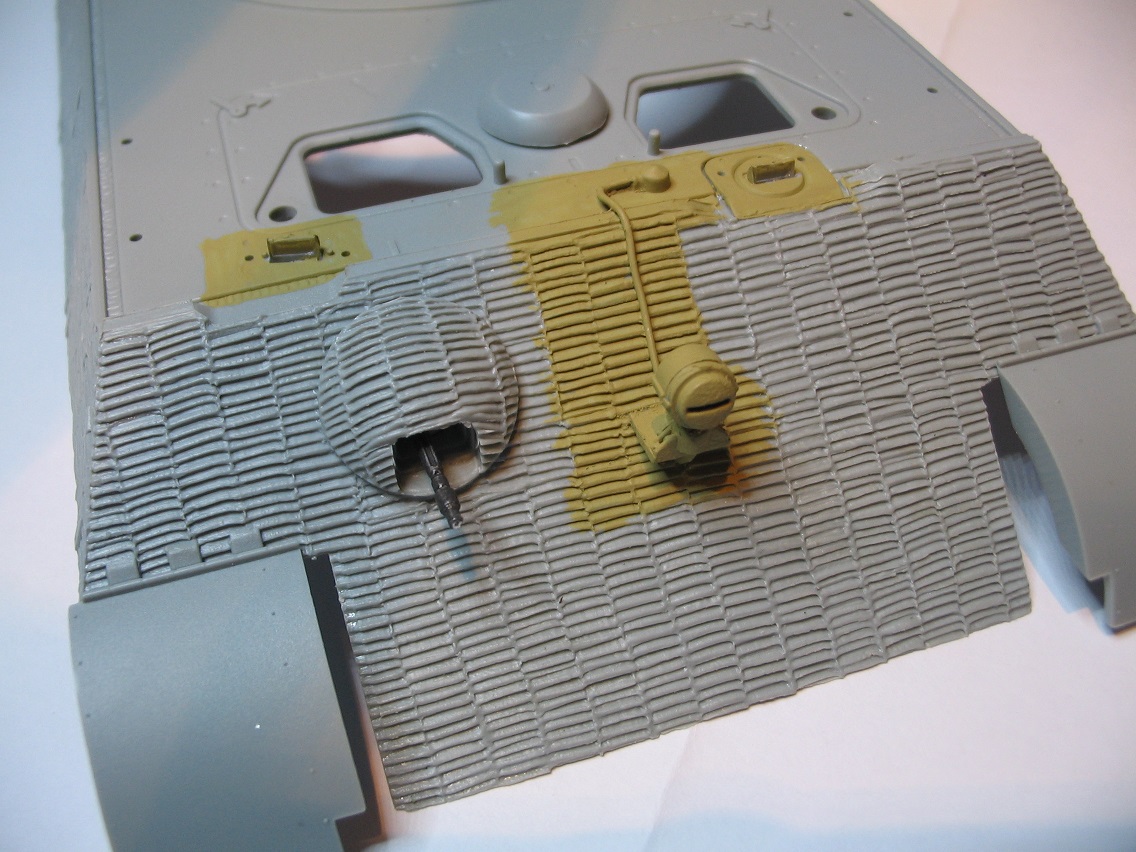
The front headlight's a bit of a strange one. It's nicely detailed and even has a clear plastic insert to go inside to show through the narrow slit. Only trouble is if you put that inside the front and back of the headlight won't mate up so I ditched it. You can't really see it anyway as the slit is about 1 millimetre in height. The bracket that holds it has the housing for the electrical cable and on the front deck there is the corresponding opposite so that if you choose you can add the wiring. I used a piece of fusewire to do this as I find that with it being such soft metal it lends itself ideally to making electrical conduit and once bent doesn't spring back.


I've just noticed on the second photo it's a tiny bit short going to the headlight but I'll leave it as it took a few goes to get the length right and the gap is negligible.


Here's the front end once the bow MG is fitted and the cabling is done. There are three pieces holding the MG in the back of the bulge. The ball mount has a groove for the MG's ridge to fit into. You'll find that once you put the ball into it's mount it will probably turn so I used a cocktail stick to rotate it back into a level central position before attaching the MG. Once that was done it fitted snugly into the back of the bulge. There's even a tiny hole in the ball mount for the gunner to look through his sight then through the hole. Nice touch as some manufactureres forget about this.

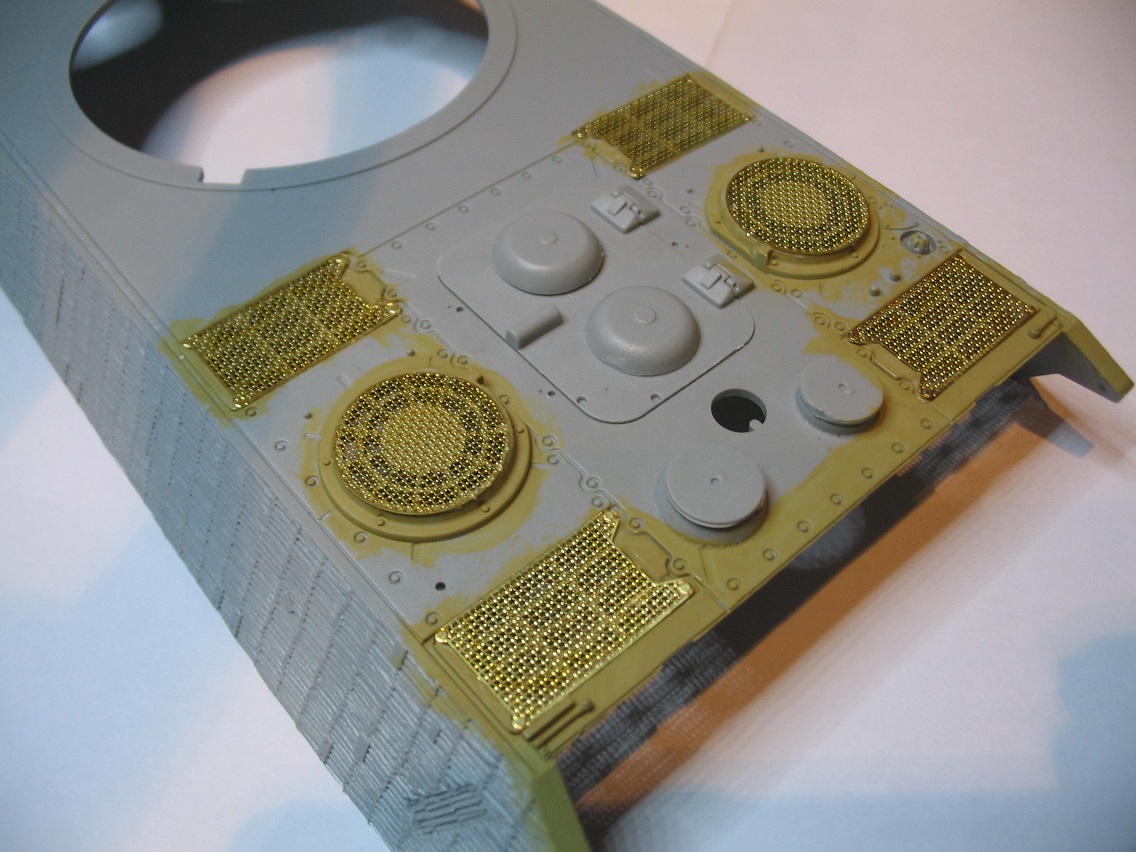
The last thing I did was to attach the grilles to the engine deck. There's quite a bit of PE to attach during the build but some of it I'm not going to use as it would look wrong. The hooks on the sides of the turret for spare tracks are supposed to be PE according to the instructions but in reality they would be so thin that they'd bend so I'll use the plastic ones which are technically spare parts. I don't see the point in using PE just for the sake of it. As I mentioned earlier the periscope guard for the loaders position looks too thin to me with PE. Plus because it's so thin the join between the turret roof and the guard is very weak. If I find a plastic replacement then that's being changed. I'll know when I've thinnned the parts out if there's an alternative.


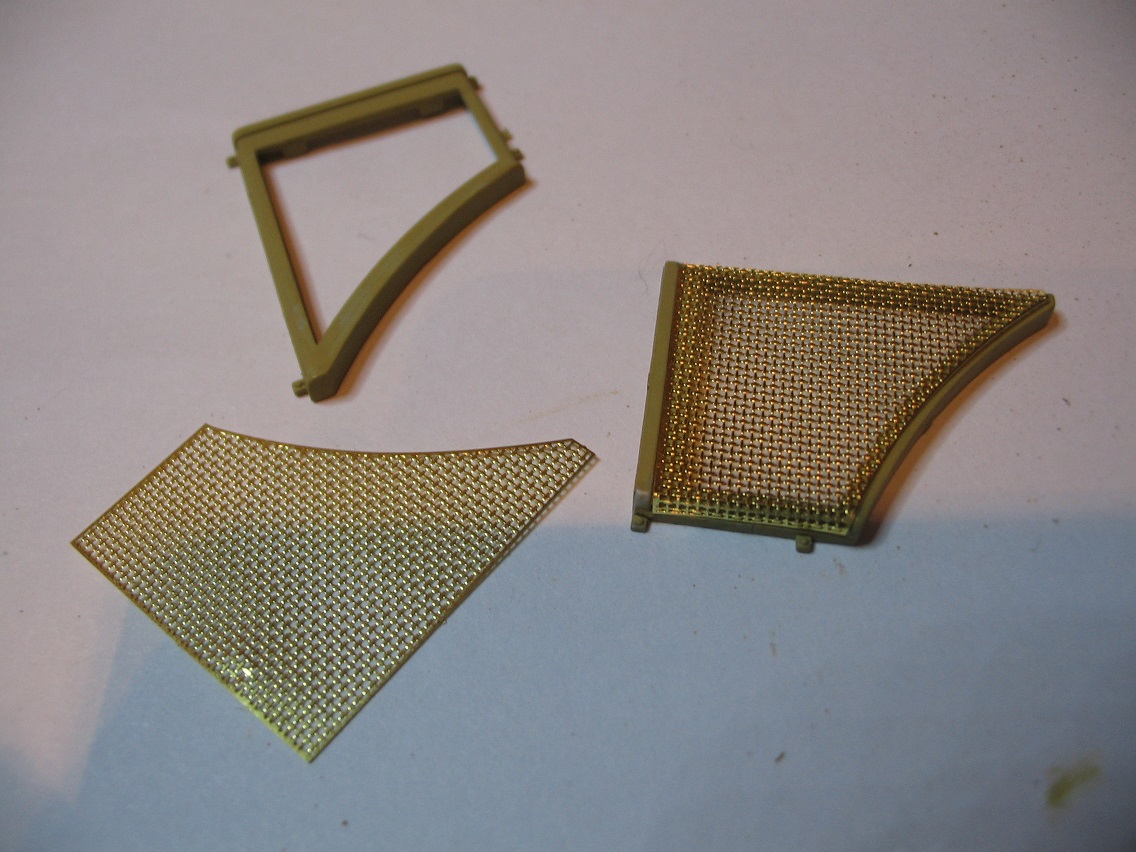
The grilles closest to the turret are actually covered by a large frame with another grille in the middle but they can't go on until I've got the first lot of paint on. You won't be able to see much of them once the second grille's over the top however. I like the fact that the grilles are enclosed as that saves us money. In the past PE grilles have always been an added extra and to be honest I don't think a model looks right without them. I'm quite surprised that DML haven't included PE track guards. When you consider that the kits got indy links, you would think if they've gone to that length then PE guards would be natural. Especially with the amount of photographs that show either missing sections or damage to them. I've got a set knocking about so I may use them instead of the kit's all in one piece guard. I'll decide when I get to it.
wedgetail53
Visit this Community
Queensland, Australia
Joined: October 02, 2008
KitMaker: 658 posts
Armorama: 629 posts
Posted: Wednesday, June 14, 2017 - 01:34 PM UTC
G'day Karl

Yes, I agree, it's a very nice well detailed MG. However, there should be TWO girtsacks side by side. Looking from the breech end, the one on the left held the ammunition, the one on the right caught the empty cartridges. IIRC on the MG34 and 42 the empty cartridge cases dropped out the bottom, the links came out the right hand side (still joined together I think which is why they didn't need to be caught).

Regards

Rob
Tojo72
Visit this Community
North Carolina, United States
Joined: June 06, 2006
KitMaker: 4,691 posts
Armorama: 3,509 posts
Posted: Wednesday, June 14, 2017 - 04:13 PM UTC
Im enjoying following along.I have the same kit,I got it on Ebay from Phoenix Hobby,surprisingly they included a set of PE fenders as a bonus which I look forward to trying them out.
erichvon
Visit this Community
England - East Midlands, United Kingdom
Joined: January 17, 2006
KitMaker: 1,694 posts
Armorama: 1,584 posts
Posted: Wednesday, June 14, 2017 - 04:14 PM UTC
Hi Rob, if memory serves me right the Germans used non disintegrating belts. I remember seeing some footage once of ammo belts being reloaded with a special tool that forced the rounds into the belt. Not something I'd be keen on as after a while there'd be wear in the links which could potentially lead to stoppages. As an ex-machine gunner I suppose I'm bound to favour disintegrating belts with it being what I was used to. Having said that I wish I'd had a machine for making belts as clipping them together round by round is a ball ache and after a while my thumb would go numb! I've never seen a tank MG with two bags, only the one but it would make sense to catch the spent rounds as the floor of the tank would be covered in them, especially if the turret MG was used as well. You're right in that spent casings came out of the bottom of the MG. I think it's the case with most LMG's. My Gimpy did.
phantom8747
Visit this Community
Alabama, United States
Joined: March 09, 2015
KitMaker: 281 posts
Armorama: 273 posts
Posted: Wednesday, June 14, 2017 - 05:59 PM UTC
Thats no problem using some parts of my kit.Let me know on the turret. I've got the Dragon 1st issue with Zimmerit kit it woul fit on.
wedgetail53
Visit this Community
Queensland, Australia
Joined: October 02, 2008
KitMaker: 658 posts
Armorama: 629 posts
Posted: Thursday, June 15, 2017 - 04:50 AM UTC

Quoted Text

Hi Rob, if memory serves me right the Germans used non disintegrating belts. I remember seeing some footage once of ammo belts being reloaded with a special tool that forced the rounds into the belt. Not something I'd be keen on as after a while there'd be wear in the links which could potentially lead to stoppages. As an ex-machine gunner I suppose I'm bound to favour disintegrating belts with it being what I was used to. Having said that I wish I'd had a machine for making belts as clipping them together round by round is a ball ache and after a while my thumb would go numb! I've never seen a tank MG with two bags, only the one but it would make sense to catch the spent rounds as the floor of the tank would be covered in them, especially if the turret MG was used as well. You're right in that spent casings came out of the bottom of the MG. I think it's the case with most LMG's. My Gimpy did.


G'day again

The source for my information is David Parker's series of articles which lead to the Superking book, if you're interested.

Regards

Rob
erichvon
Visit this Community
England - East Midlands, United Kingdom
Joined: January 17, 2006
KitMaker: 1,694 posts
Armorama: 1,584 posts
Posted: Friday, July 07, 2017 - 07:04 PM UTC
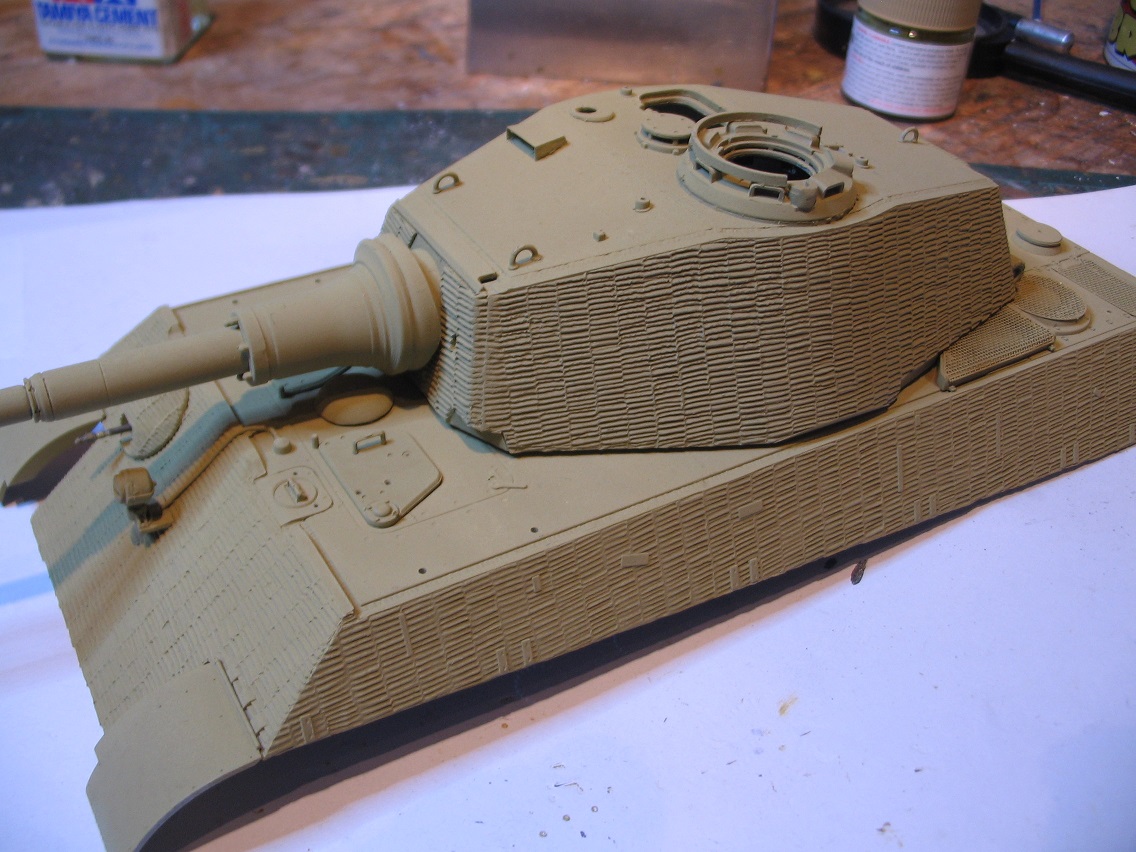
Finally got opportunity to do some more work on the kit. I'm making a concerted effort this weekend to get plenty done. The first thing I wanted to get done was the grilles on the engine deck. My reasoning being that once I'd got those on the upper hull will be about done bar the really small hooks and tools. It also meant that I could give it a coat of paint at the same time as spraying the wheels etc.


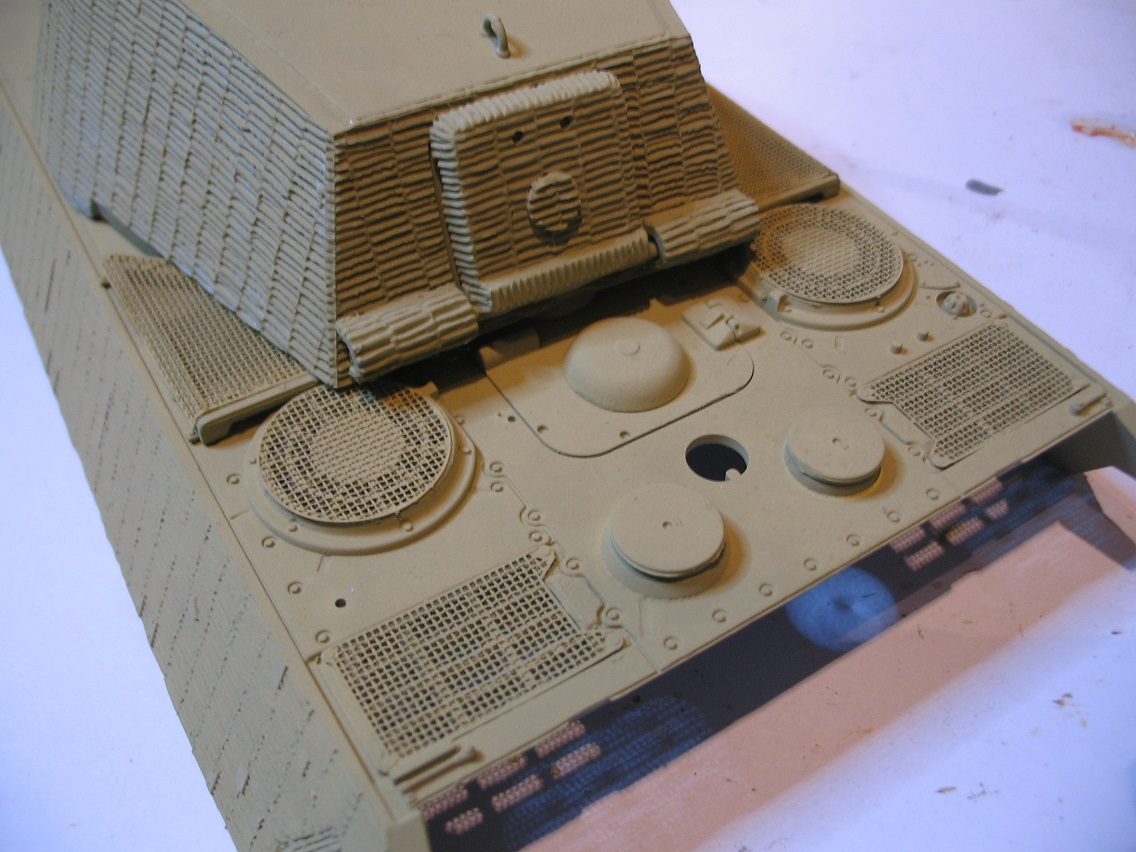
As you can see the grilles really add a nice finishing touch to the engine deck. This had to be sprayed before I could put the additional grilles under the turret on. I don't know whether it would have made any difference in that the bottom grille would be covered but if doing a job do it properly.


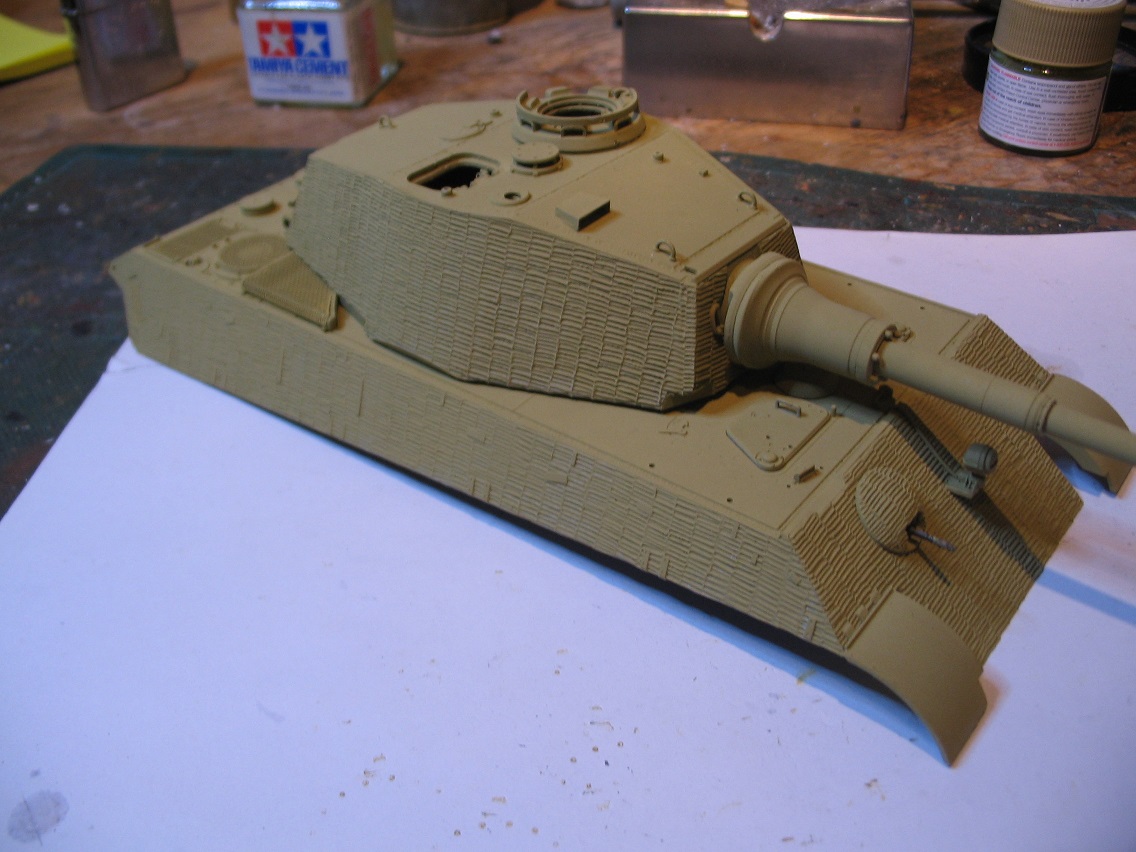
As you can see these are very nicely done. Infinitely better than the plastic gauze on the Tamiya kits. They do a PE set for their Kng Tiger but for some reason don't include these two? Attaching these was no problem as the recess for them is well defined so a bit of CA sparingly applied and they sit in nicely. Bending the edge over was straightforward enough but make sure that it's seated properly otherwise you'll have problems. Now this was done the airbrush could come out and I could put a first coat on. Once it's all together then I'll give it anothercoat of dunkel gelb to cover any bits I may have missed. I noticed that a couple of the holes in the grilles were blocked with paint (my fault entirely from being heavy handed) but sorted that out quickly with a cotton bud and some isopropyl alcohol. Quick rub and it was gone allowing me to recover it. As you can see now it's got a coat of paint on it, the zimmerit is nicely defined. It also shows up "bald patches" where I assume cables and tools are going which I'd not noticed before. I was wondering how I was going to stick those to an uneven surface but DML had obviously thought of that. You'll notice that I'm building totally out of sequence to the instructions. Two reasons for that. Firstly it's a DML kit so the less you look at the instructions other than for part numbers the better and secondly I think my sequence makes more sense. It does to me anyway lol.


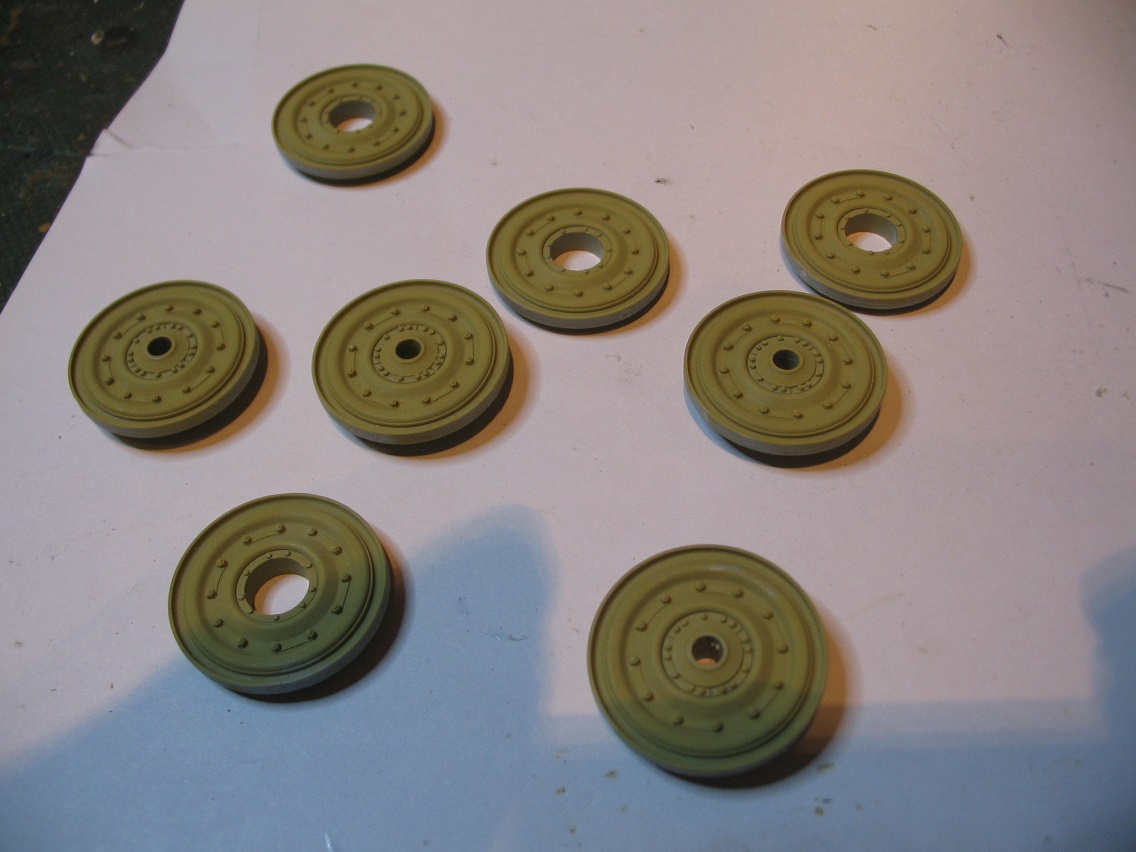
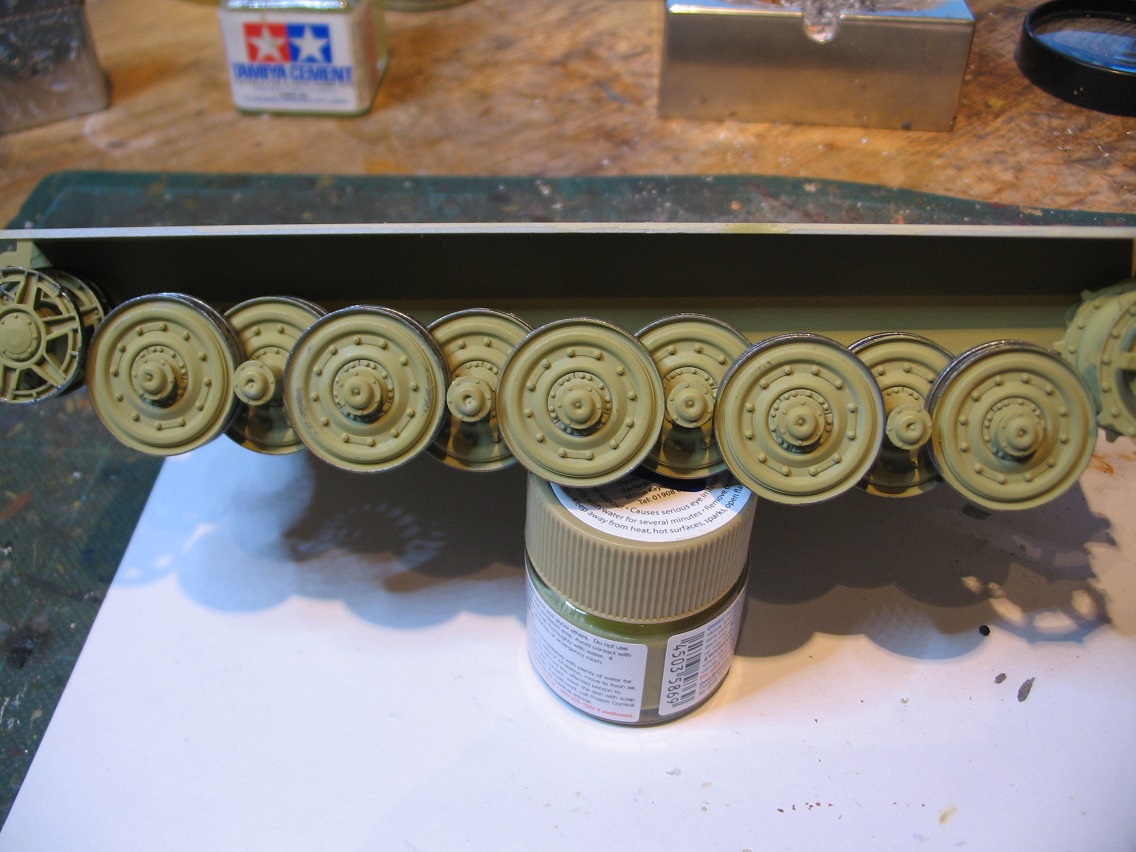
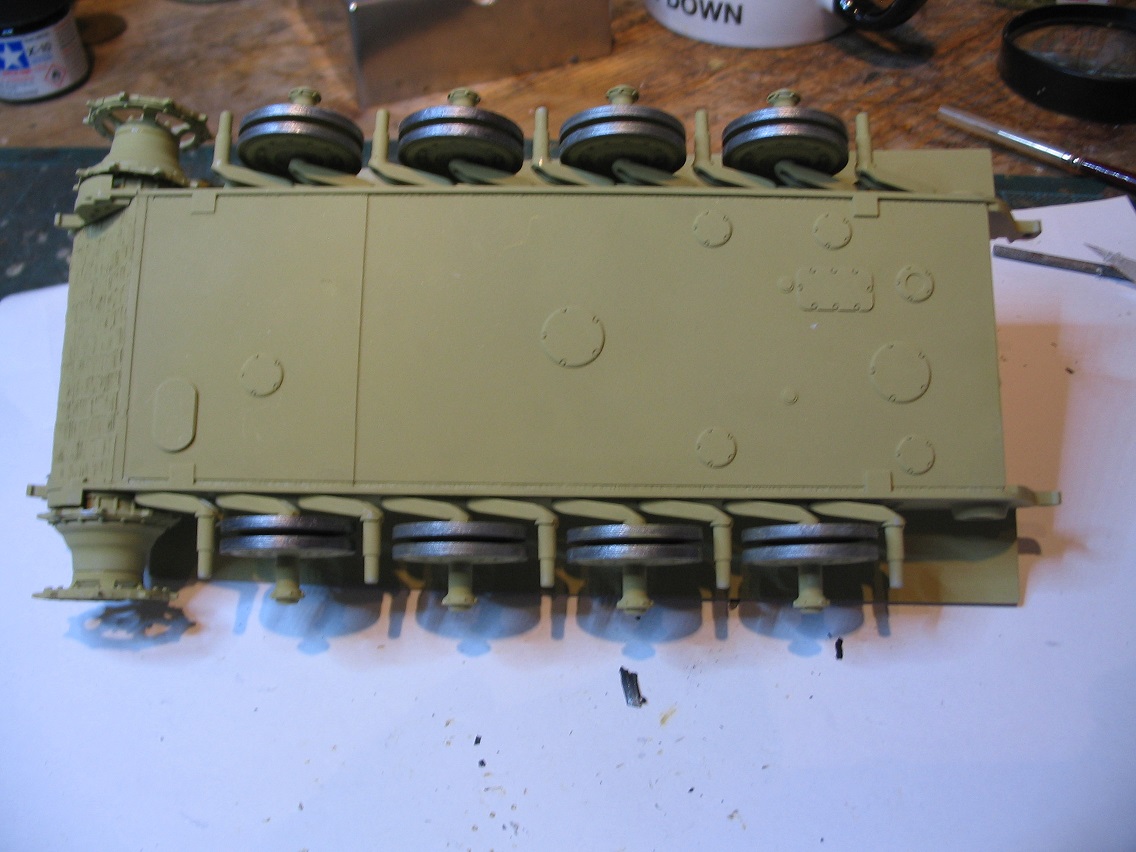
Onto the lower half of the hull. Thankfully the KT has steel wheels with no rubber. Hoorah! That's the one thing that drives me mad about German tanks, the rubber tyres. Not because they're difficult to paint, just because it's monotonous painting so many on something like a Panzer IV. The detail on the wheels is nice and sharp and to all intents and purposes look right. I'm not a rivet counter so I assume they're right. The King Tiger is unusual where it comes to German tanks as by this stage of the war they'd given up on the idea of interwoven wheels due to the problems that they caused on operations. Snow and ice getting packed in between them and worst of all if one wheel needed to be changed due to damage it meant taking off other wheels as well to get at the back ones. Not something you'd want to be doing when time is a precious thing.
I'd already put the swinging arms on so that they were dry before I put the wheels on. The holes for the swinging arms have a small notch on them that fits into a cutout in the hole for them. There's a little bit of play so make sure you turn them all to the full extent one way so they'yre all lined up properly.
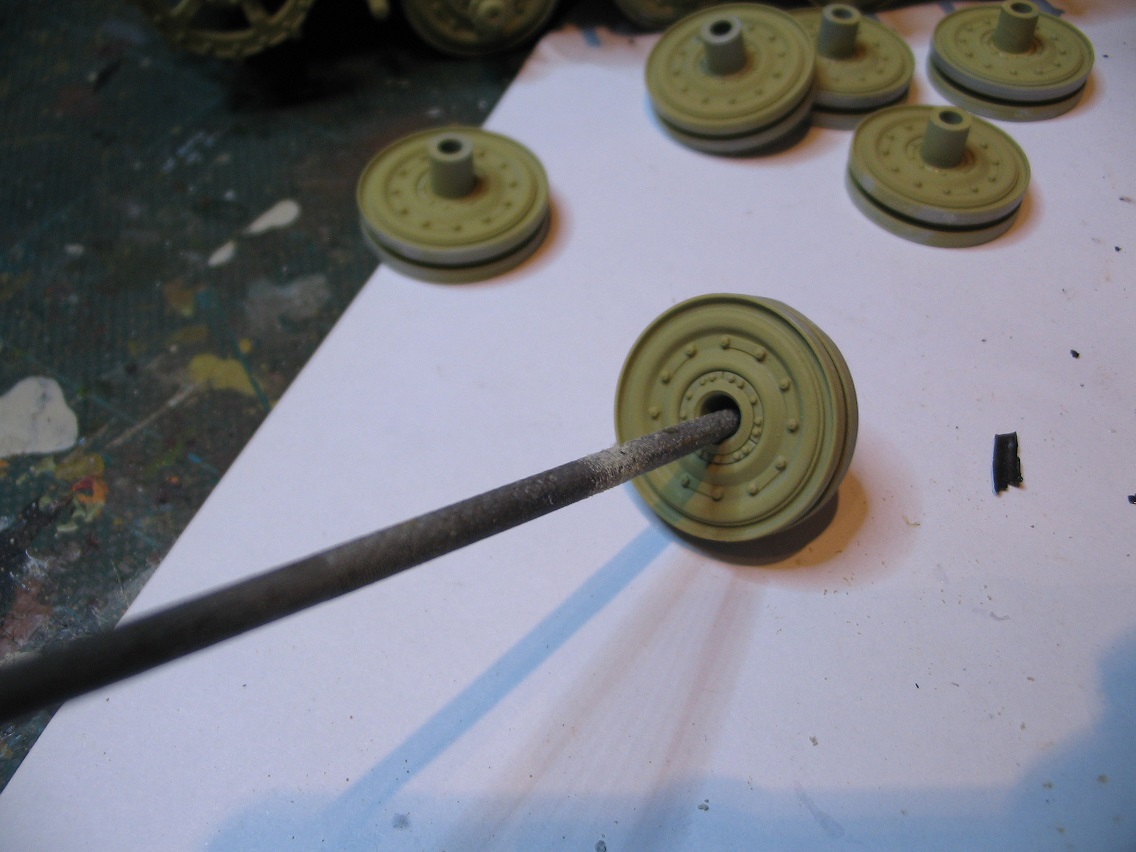
This is when the problems started. I'm used to putting a bit of liquid poly on the swinging arm's end then sliding the wheel on. Not with this King Tiger. In fact I've not used amy glue at all on either the wheels or the bosses (i'm not sure what their real name is)in the centre of the wheel they were that tight. In fact they were that tight I've had to enlarge the holes on all of them with both a round file and a number 11 blade!


The outside of the wheels aren't too bad but when the two halves are put together I thought it prudent to enlarge the holes on both sides.


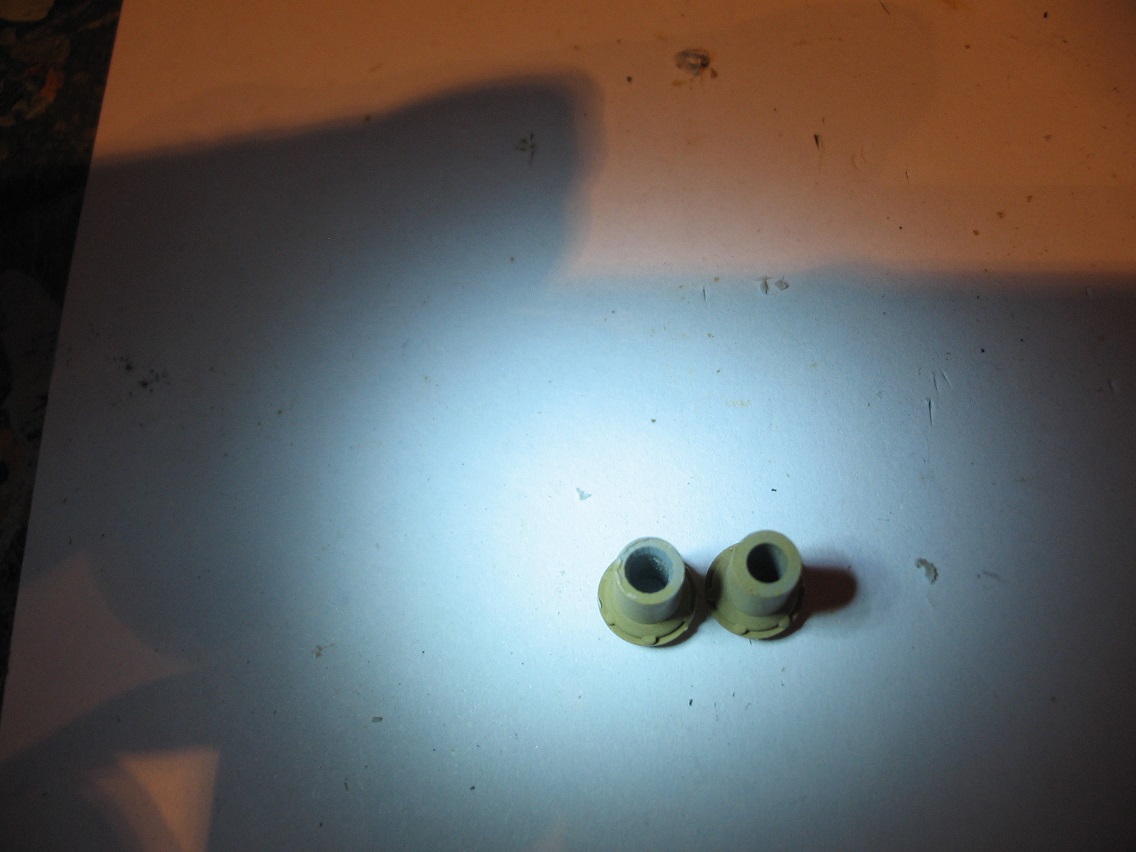
It's a bit of a balancing act as I didn't want to make the hole so big that the wheels were sloppy so left them as a very tight fit which I twisted onto the swinging arms. Be careful doing this as there's the possibility of snapping them. It's really your judgement call as to how much you want to enlarge the holes. If you want them to just slip on then obviously you've got more sanding or reaming to do but that's probably the safer option. Fortunately that didn't happen but I was very concious of that happening. I thought that would be it now the wheels were on. Wrong! The hole on the bosses was too small to go over the swinging arm as well! I found myself having to do the same thing again for all 18 of those. You can see in the photo below just how small the holes actually are and how much I had to ream them out.


While straightforward to do I wasn't very impressed that I was having to do this. They went into the outer wheel straightforward enough but I'd already reamed them out. Now some may say that because I'd put a layer of paint on first that's why they were tight. Not at all. The paint on the swinging arms was very thin, more a touch than anything as they were going to be covered up so I didn't put much on. You can see form the above photo just how small the holes were before I opened them up. Even after I'd altered them they were all still a very tight fit to the extent that no glue was required. In fact after a dry fit I couldn't get them back off so left them as they were lol. Thankfully I'd painted the running surface of the wheels before I tried fitting them. I've painted them with gun metal as being in contact with the tracks they'd wear the paint away in no time and be back to bare metal. I'll deal with chips, rust etc once it's finished.


As you can see they look nice once on although there's not a lot of clearance between the front and back wheels and they are right to the back. The final wheel was a problem in itself due to DML's infamously crap instructions. They give you no clue as to what angle the wheel goes at or clearance with the last of the road wheels. As usual with their instructions I went for the best option and consulted the net for photographs of the real thing to check on it's angle. Armed with the correct info I glued them on (yes I finally used glue on the wheels)adjusting them to the right height etc. I've just checked a Tamiya Porsche King Tiger in my stash and that has a plug in the same hole so you can only put the arm in one way which makes a lot more sense. That's where I am now. Whilst it's shaping up to be a nice looking kit and the zimmerit looking great, this is not a kit for someone with no patience. It's not a good thing when you have to alter 55 parts to get them to fit properly. That's every part of the wheel assembly. If I drank I'd say I deserved a few after that fiasco lol.

Next thing up is the tracks. Whilst not a fan of indy track links these come in two seperate bags all ready to put together. No nipping off of those irritating little plastic nuggets left from the injection process, no having to file off attachment points. In theory this should be straightforward. I say in theory as nothing has been straightforward so far

I shall tackle those later today....
 _GOTOTOP