

Hosted by Richard S.
Campaign 150- Mk. II

Mrclark7

Joined: June 04, 2017
KitMaker: 503 posts
Armorama: 477 posts
Posted: Friday, February 16, 2018 - 03:56 AM UTC
Mark, the camo looks outstanding.

Buckeye198
Joined: May 02, 2010
KitMaker: 596 posts
Armorama: 265 posts

Posted: Friday, February 16, 2018 - 07:51 AM UTC
Ditto the complements for Mark's camo! I've been struggling getting sharp masks lately. I've tried blue painter's tape, regular masking tape, and frisket film...what kind of tape are you using?

Armored76

Joined: September 30, 2013
KitMaker: 1,615 posts
Armorama: 1,500 posts
Posted: Friday, February 16, 2018 - 10:27 AM UTC
@Mark: Elaborate, indeed but well worth the effort!
@Kelly: Great progress! Turning into the home stretch.
@Kelly: Great progress! Turning into the home stretch.

d111298pw

#456
Joined: September 22, 2016
KitMaker: 654 posts
Armorama: 638 posts
Posted: Friday, February 16, 2018 - 02:23 PM UTC
To all,
Thanks for the positive comments. I didn't take any pics during the painting process, so I just now took a few to show the steps I went through.
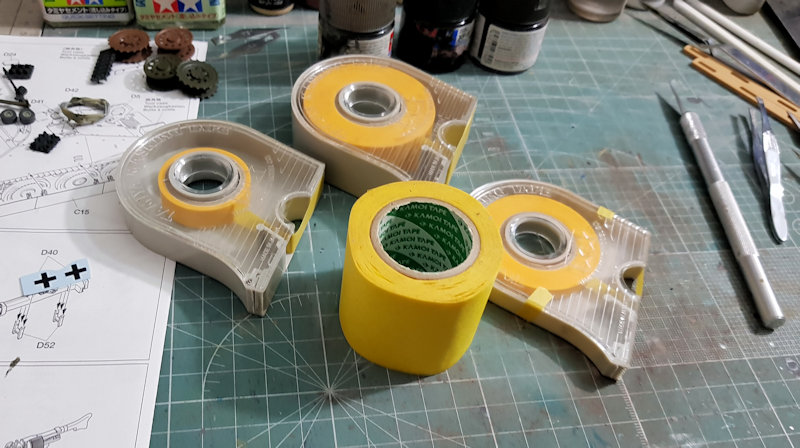
My tools. Different widths of Tamiya tape, knife and tweezers.
I started with Tamiya's painting guide.I scanned it and rescaled it to match the size of the model. I use Corel Photopaint Pro X9 for image editing.
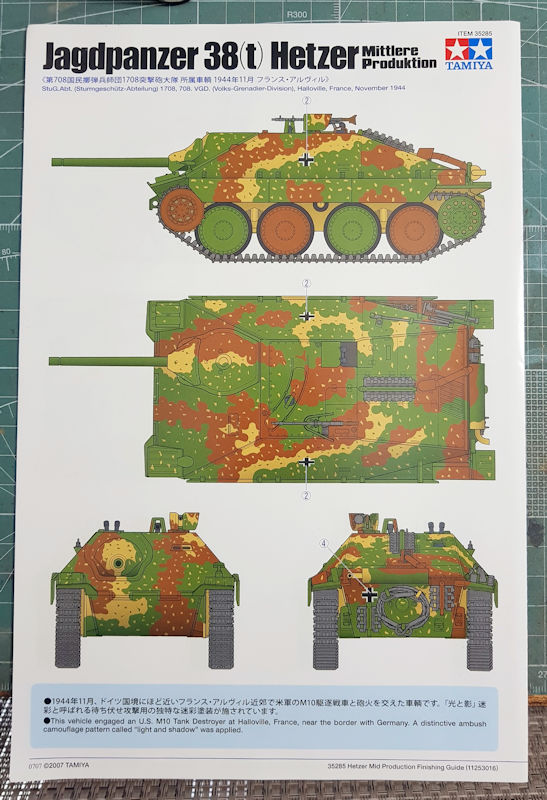
Once I had the scale worked out, I printed several copies to use as templates. Here are some of the templates I used.

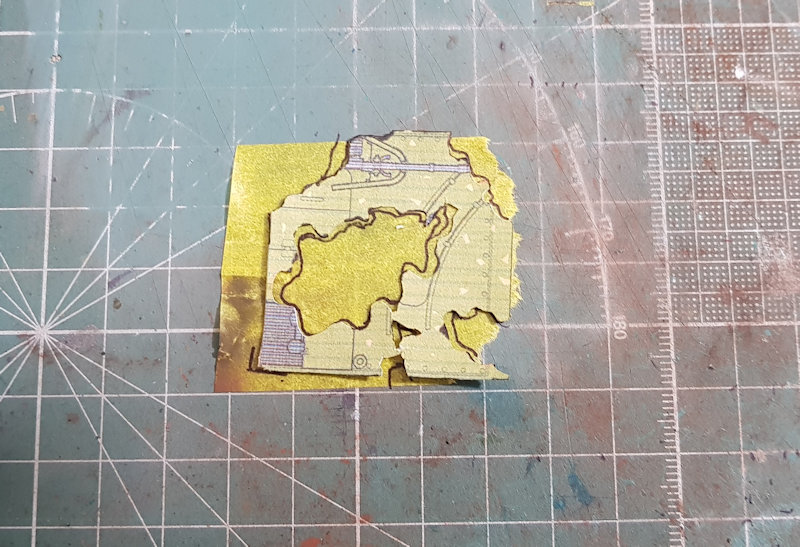
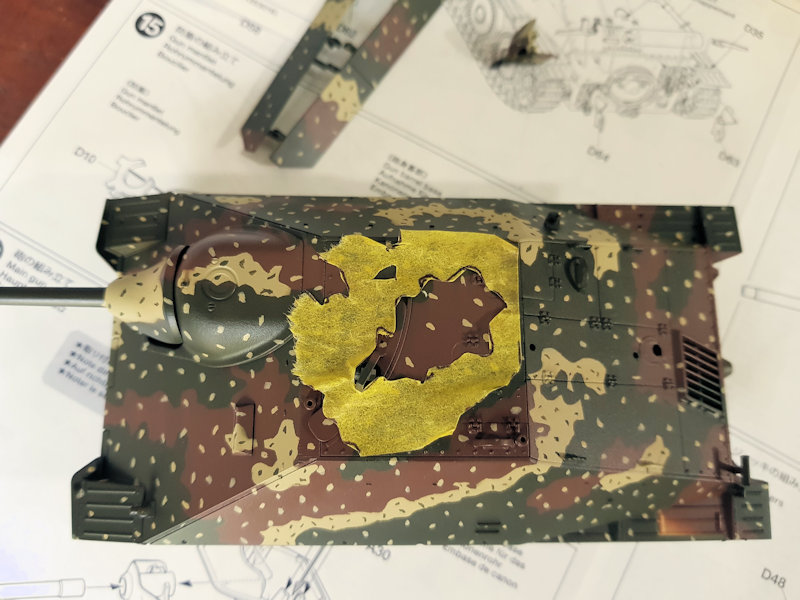
I then cut a piece of the wide Tamiya tape and placed the template on top. This example is rather messy as I did quickly for this pic. When cutting the actual template, I very carefully traced the pattern.
With a fresh #11 blade, I removed the part I didn't need. and I'm left with the area to be painted rotbrun.
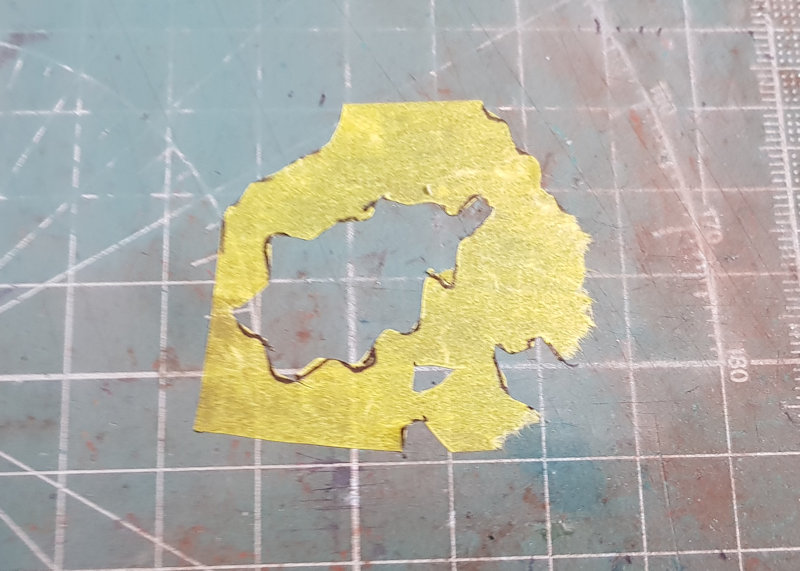
Then carefully place on the model. (not very carefully done in this example). I was a lot more careful when doing the actual masks. BUt, this gives you an idea what I was doing.
Once all the masks for a specific color were applied, I sprayed it. After about 10 minutes, I removed the tape and started on the next color.
Very time consuming, but I'm happy with the results. First time I tried doing this.
Thanks for the positive comments. I didn't take any pics during the painting process, so I just now took a few to show the steps I went through.
My tools. Different widths of Tamiya tape, knife and tweezers.
I started with Tamiya's painting guide.I scanned it and rescaled it to match the size of the model. I use Corel Photopaint Pro X9 for image editing.
Once I had the scale worked out, I printed several copies to use as templates. Here are some of the templates I used.
I then cut a piece of the wide Tamiya tape and placed the template on top. This example is rather messy as I did quickly for this pic. When cutting the actual template, I very carefully traced the pattern.
With a fresh #11 blade, I removed the part I didn't need. and I'm left with the area to be painted rotbrun.
Then carefully place on the model. (not very carefully done in this example). I was a lot more careful when doing the actual masks. BUt, this gives you an idea what I was doing.
Once all the masks for a specific color were applied, I sprayed it. After about 10 minutes, I removed the tape and started on the next color.
Very time consuming, but I'm happy with the results. First time I tried doing this.
d111298pw
#456
Joined: September 22, 2016
KitMaker: 654 posts
Armorama: 638 posts
Posted: Friday, February 16, 2018 - 02:56 PM UTC
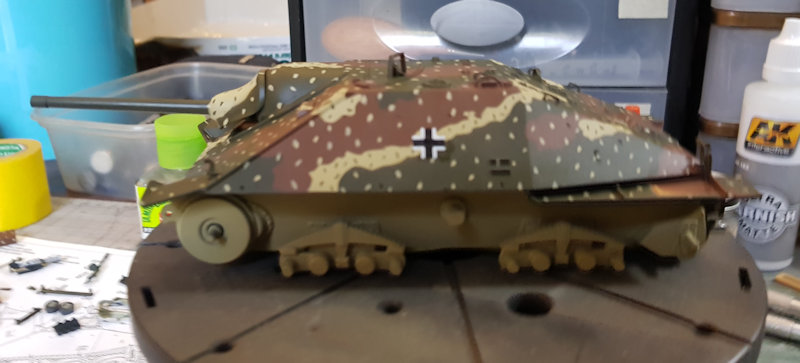
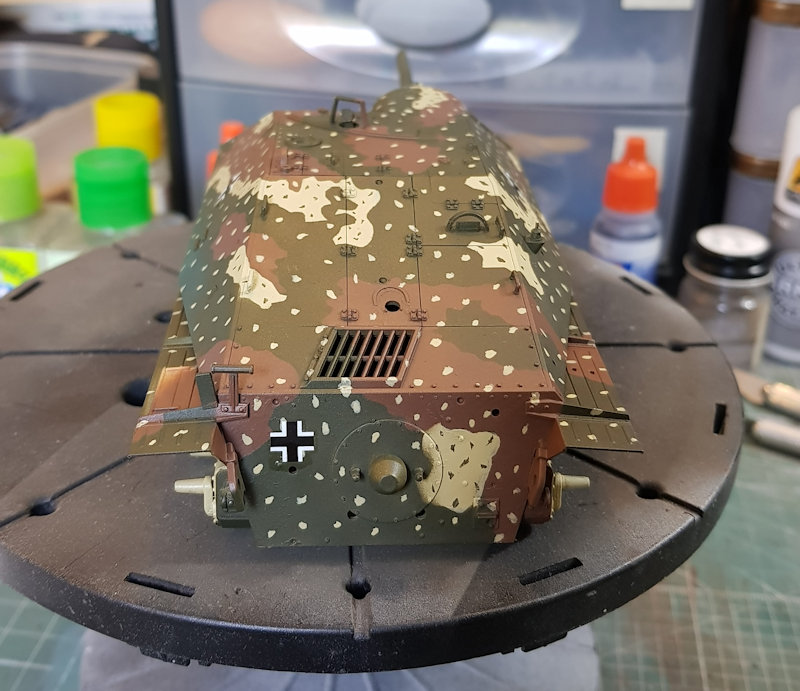
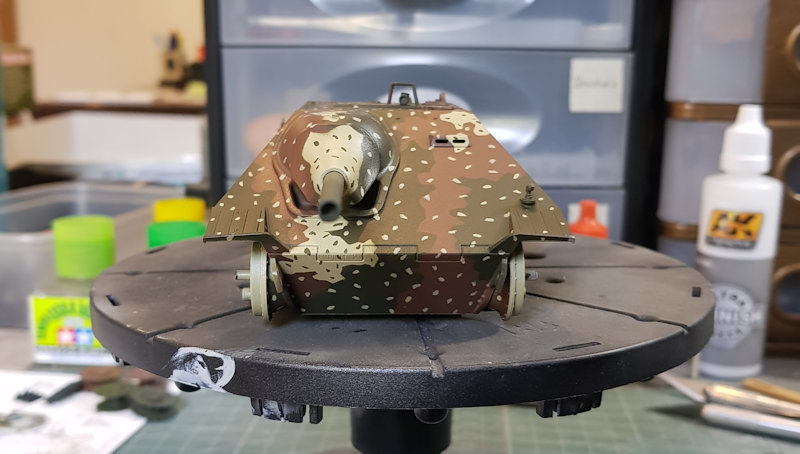
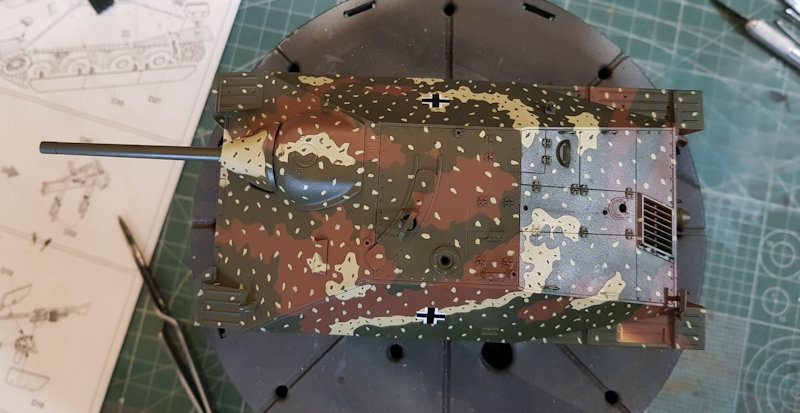
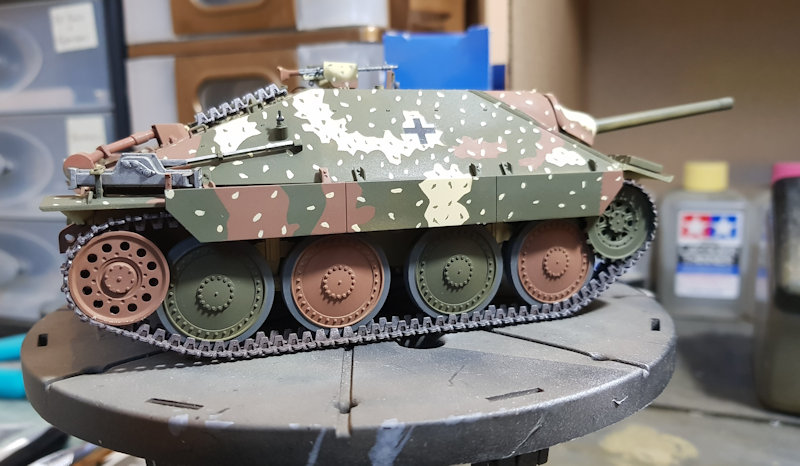
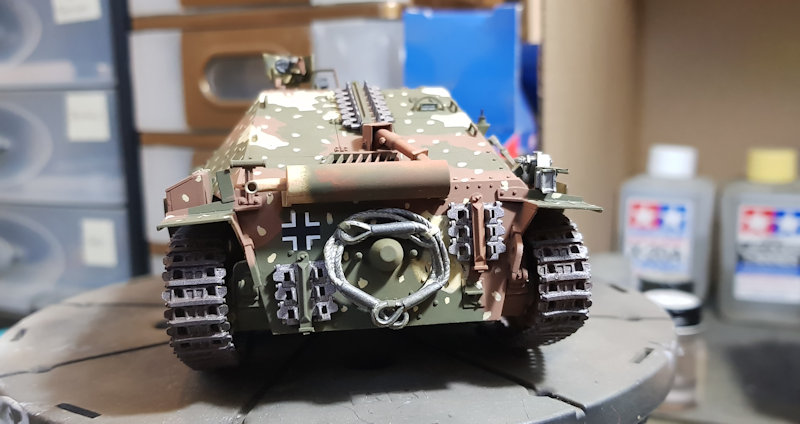
Ambush scheme is complete and decals applied. Once decals are dry, I'll seal them. Need to get the external bits painted and installed. Then the tracks.
Buckeye198
Joined: May 02, 2010
KitMaker: 596 posts
Armorama: 265 posts
Posted: Friday, February 16, 2018 - 06:07 PM UTC
Stunning results!! And thank you for the tutorial...the pictures really added to your explanation, much appreciated  looking forward to the final product!
looking forward to the final product!d111298pw
#456
Joined: September 22, 2016
KitMaker: 654 posts
Armorama: 638 posts
Posted: Friday, February 16, 2018 - 06:14 PM UTC
Quoted Text
Stunning results!! And thank you for the tutorial...the pictures really added to your explanation, much appreciated
Glad you found it helpful.
Armored76
Joined: September 30, 2013
KitMaker: 1,615 posts
Armorama: 1,500 posts
Posted: Friday, February 16, 2018 - 09:27 PM UTC
Thanks for taking the time to describe the process with images. It's VERY much appreciated!
The "dots" look spot on. Brush painted, I guess?
The "dots" look spot on. Brush painted, I guess?
Removed by original poster on 02/17/18 - 18:00:09 (GMT).
d111298pw
#456
Joined: September 22, 2016
KitMaker: 654 posts
Armorama: 638 posts
Posted: Saturday, February 17, 2018 - 11:26 AM UTC
Quoted Text
Thanks for taking the time to describe the process with images. It's VERY much appreciated!
The "dots" look spot on. Brush painted, I guess?
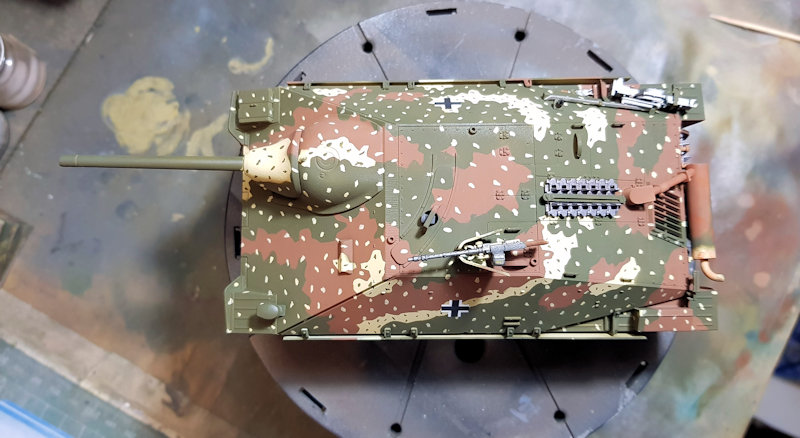
Yes, I did brush on the "dots". I used a 000 size brush.
First I sprayed a light coat of TS-79 (semi-gloss clear). This sealed the base camo coat. This way, when I applied the "dots", I'm doing it onto a clear coat, and not the base color. That way, no issues with the colors not covering properly. Also, it lets me remove the "dots", with a Q-tip, if I don't like how it looks without damaging the base coat. It also gives me a surface for the decals.
After 24 hours, I'll re-spray with another light coat of TS-79. That will seal everything. Once the rest of the pieces are installed, I'll spray a final coat of AK Ultra Matte Varnish over the entire vehicle.
d111298pw
#456
Joined: September 22, 2016
KitMaker: 654 posts
Armorama: 638 posts
Posted: Sunday, February 18, 2018 - 04:04 PM UTC
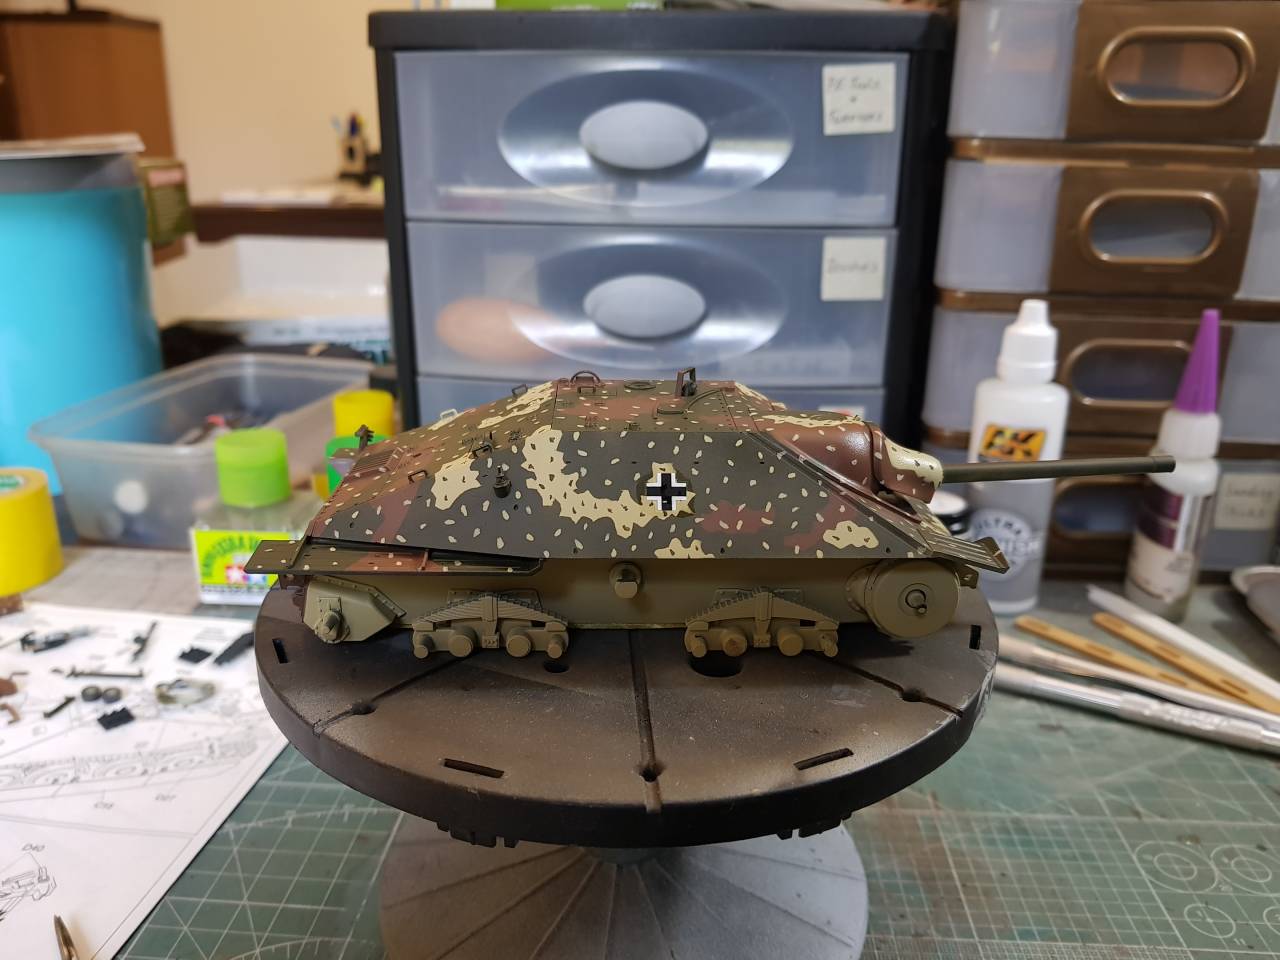
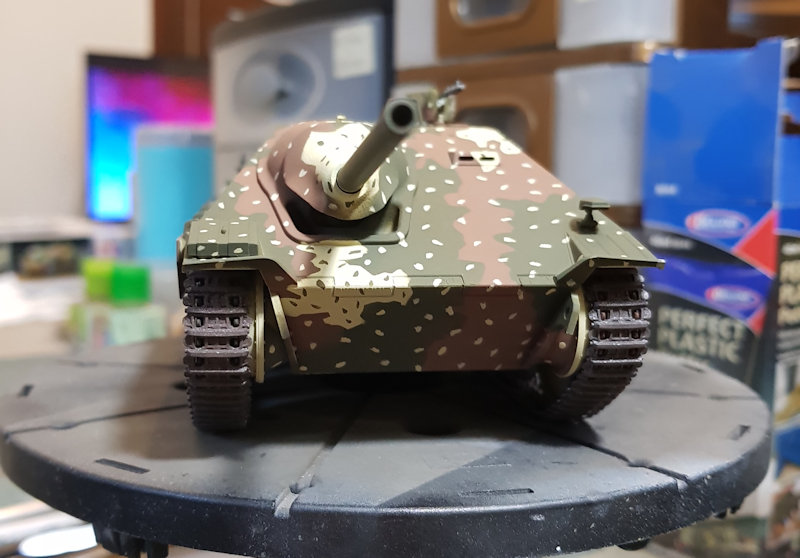
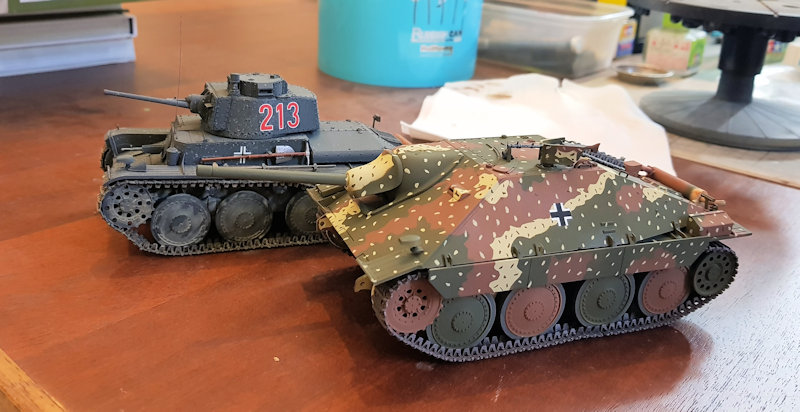
She is complete. Not planning to do any weathering. Pics in the campaign gallery.
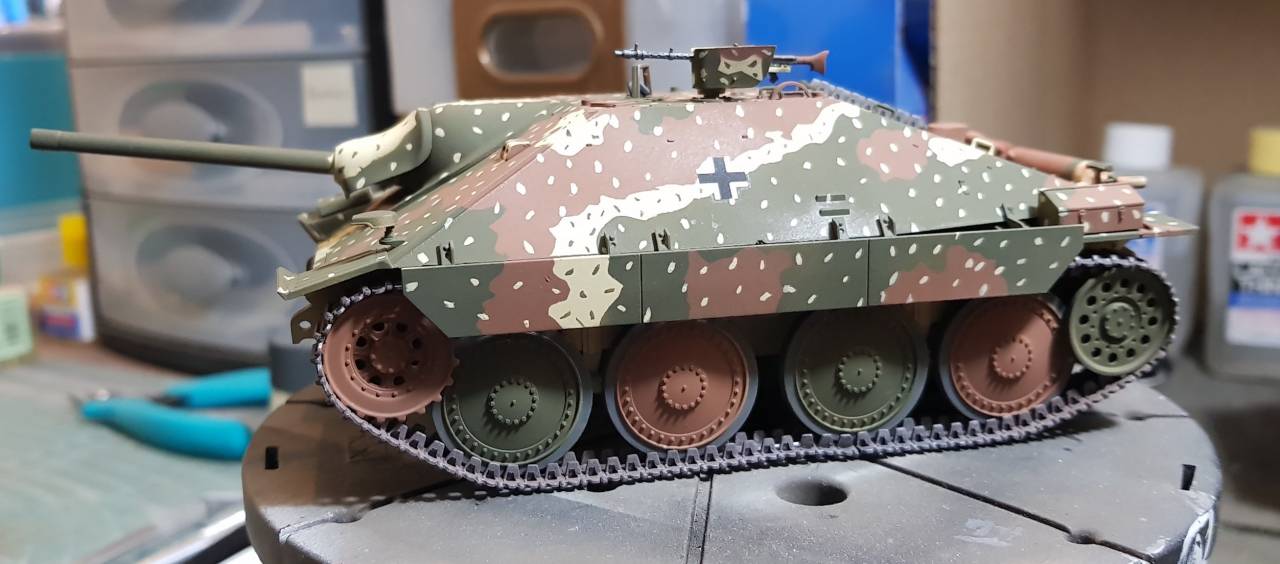
One with her older sibling, Panzer 38(t) Ausf. B
One with her older sibling, Panzer 38(t) Ausf. B
Armored76
Joined: September 30, 2013
KitMaker: 1,615 posts
Armorama: 1,500 posts
Posted: Sunday, February 18, 2018 - 08:12 PM UTC
Congrats on the finished build!
d111298pw
#456
Joined: September 22, 2016
KitMaker: 654 posts
Armorama: 638 posts
Posted: Sunday, February 18, 2018 - 08:21 PM UTC
Quoted Text
Congrats on the finished build!
Thanks Cristian

eMan
#298

Joined: August 08, 2002
KitMaker: 1,182 posts
Armorama: 665 posts

Posted: Monday, February 19, 2018 - 09:41 PM UTC
Thunderbirds "The Mole" progress update. 


Lakota
#123
Joined: November 17, 2008
KitMaker: 1,202 posts
Armorama: 635 posts
Posted: Tuesday, February 20, 2018 - 02:10 AM UTC
Howdy Y'all 
@ Mark-Thank you for sharing your method for painting that beautiful camouflage job. Great work, excellent model.
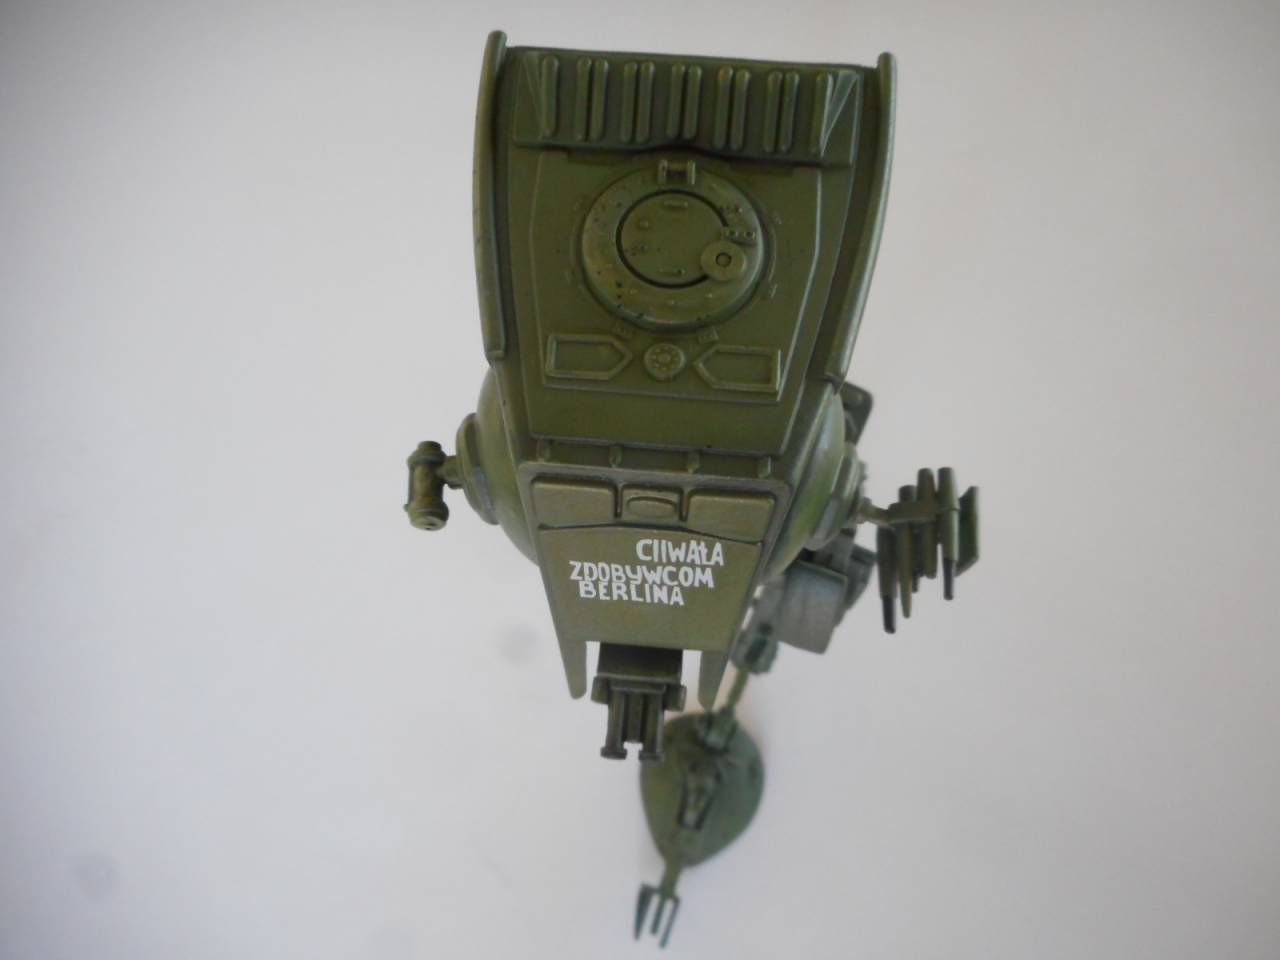
I'm starting to see the finish line on my MPC AT-ST. It's a WIF from the Cold War era. I did some decaling today, hoped to get more done over the 3-day weekend but had a nasty cold.
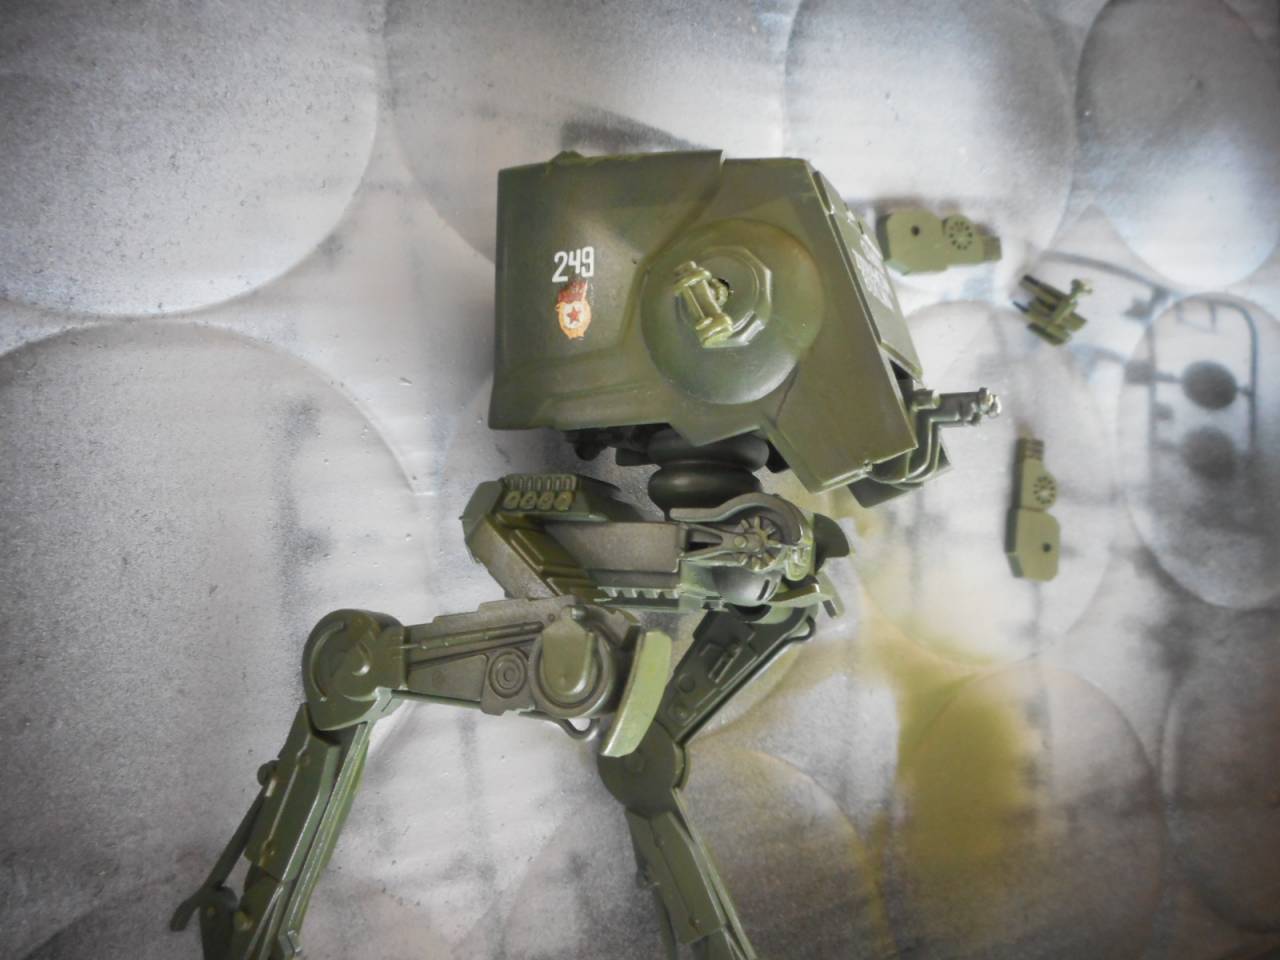
I took the model to a club meeting for the "Works In Progress" table and some of the parts fell off on the trip home.
Hope to complete this next weekend with minimum weathering. I figure this is a Guards unit during the Cold War era and was well taken care of-minimum dirt, minimum rust. That's my story and I'm sticking to it.
Take care,
Don "Lakota"
@ Mark-Thank you for sharing your method for painting that beautiful camouflage job. Great work, excellent model.
I'm starting to see the finish line on my MPC AT-ST. It's a WIF from the Cold War era. I did some decaling today, hoped to get more done over the 3-day weekend but had a nasty cold.
I took the model to a club meeting for the "Works In Progress" table and some of the parts fell off on the trip home.
Hope to complete this next weekend with minimum weathering. I figure this is a Guards unit during the Cold War era and was well taken care of-minimum dirt, minimum rust. That's my story and I'm sticking to it.
Take care,
Don "Lakota"
RivetCounter

Joined: October 26, 2012
KitMaker: 65 posts
Armorama: 62 posts

Posted: Tuesday, February 20, 2018 - 03:49 PM UTC
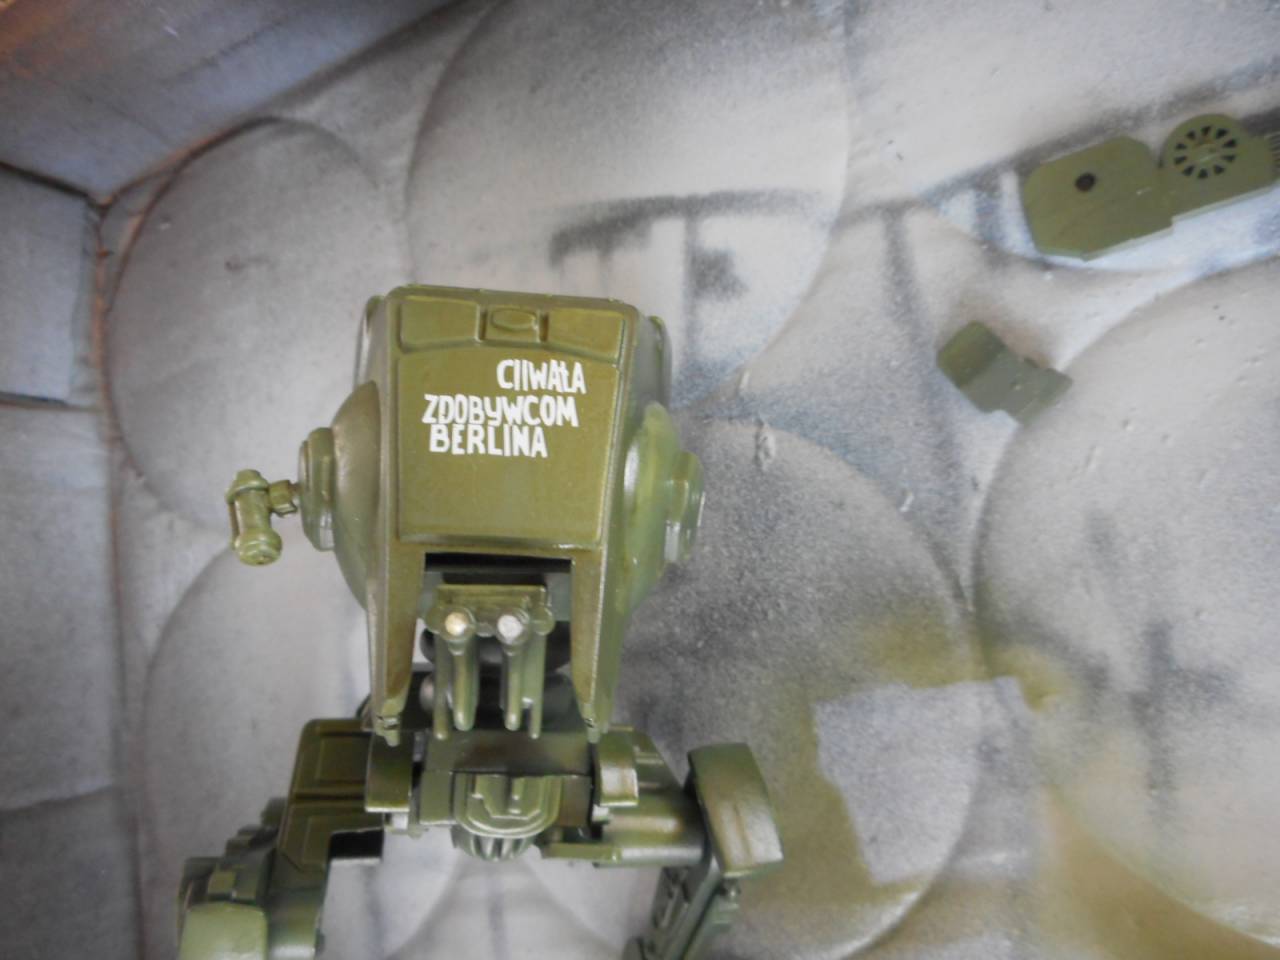
Don, do you know that the slogan on your AT-ST is in Polish and it means Glory to the conquerors of Berlin? 
And here is my G-13. My little tank is almost ready, I'll finish it today. And I hope I will be able to paint it in the upcoming weekend.


And here is my G-13. My little tank is almost ready, I'll finish it today. And I hope I will be able to paint it in the upcoming weekend.
Lakota
#123
Joined: November 17, 2008
KitMaker: 1,202 posts
Armorama: 635 posts
Posted: Tuesday, February 20, 2018 - 05:51 PM UTC
Hi Marek,
Thank you for the information. I knew it said, "Glory to the Conquerors of Berlin", from the information I had. I didn't know it was in Polish. At this stage it is too late to paint it out.
I just need to change my story:
The AT-ST was manufactured in Poland from plans found from a galaxy far, far away from a long, long time ago. This particular AT-ST was sold to the Soviet Union and equipped a Guards unit.
Hope that works.
Thank you for the "heads up", your Hetzer is looking nice. That's about the amount of detail I would like to add to my builds.
Take care,
Don "Lakota"

ayovtshev
#490

Joined: September 22, 2016
KitMaker: 1,432 posts
Armorama: 1,390 posts

Posted: Thursday, February 22, 2018 - 12:43 PM UTC
My finished 2,0 cm Flakvierling 38 received it's tractor(Hanomag SS100):
https://armorama.kitmaker.net/forums/248425&ord=&page=23
https://armorama.kitmaker.net/forums/248425&ord=&page=23
Mrclark7
Joined: June 04, 2017
KitMaker: 503 posts
Armorama: 477 posts
Posted: Saturday, February 24, 2018 - 08:49 AM UTC
uugg, trying to finish tonight, this grey isnt going to work. Time for reshoot.

Armored76
Joined: September 30, 2013
KitMaker: 1,615 posts
Armorama: 1,500 posts
Posted: Saturday, February 24, 2018 - 12:05 PM UTC
Great progress everyone!
We only have a few more days to the finish line!
We only have a few more days to the finish line!
Lakota
#123
Joined: November 17, 2008
KitMaker: 1,202 posts
Armorama: 635 posts
Posted: Sunday, February 25, 2018 - 02:43 AM UTC
Howdy Y'all
I'm calling this one done. I have "stubby" guns on it as the originals broke off and I can't find them.
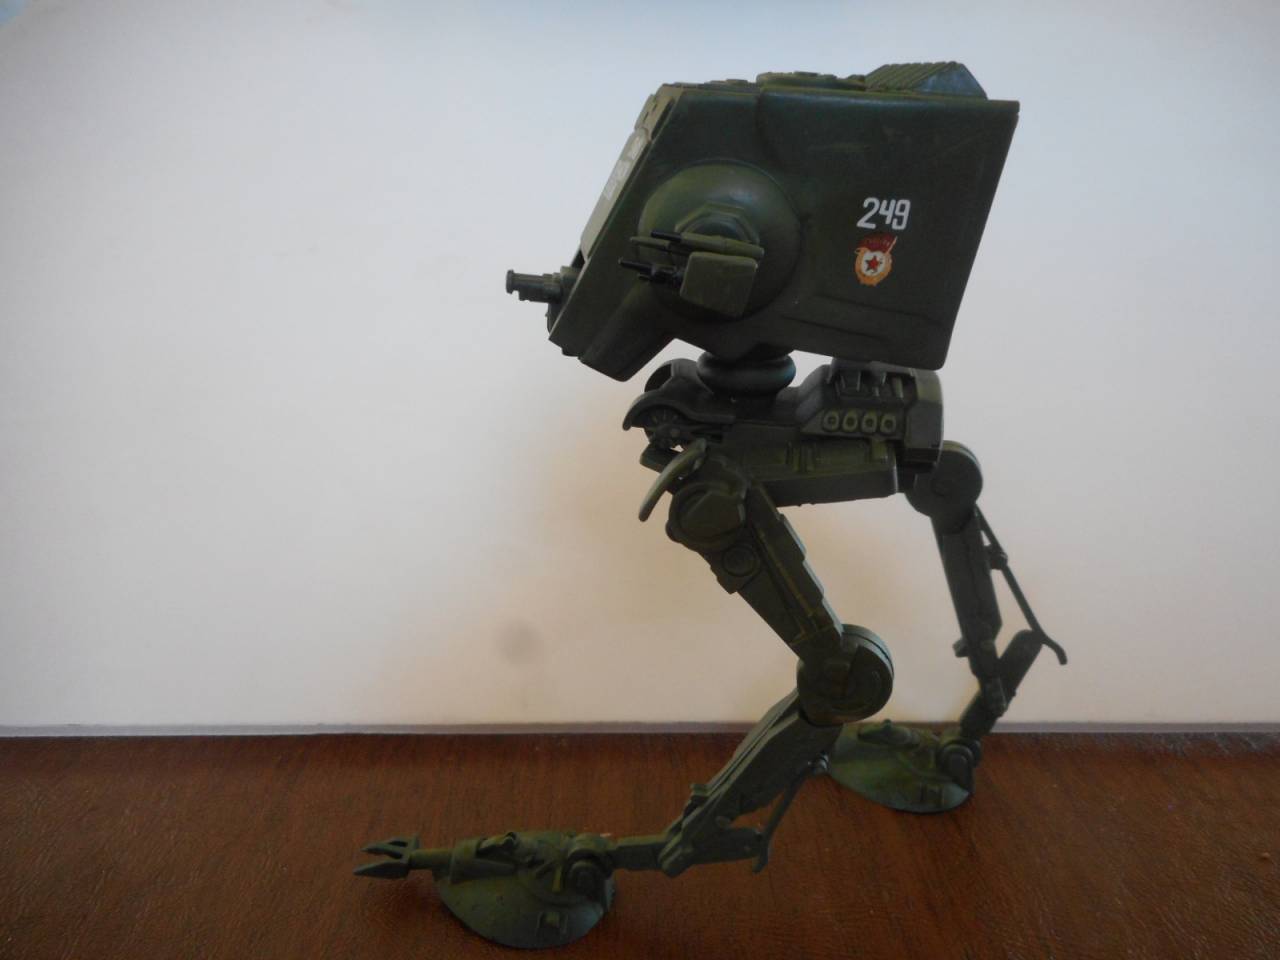
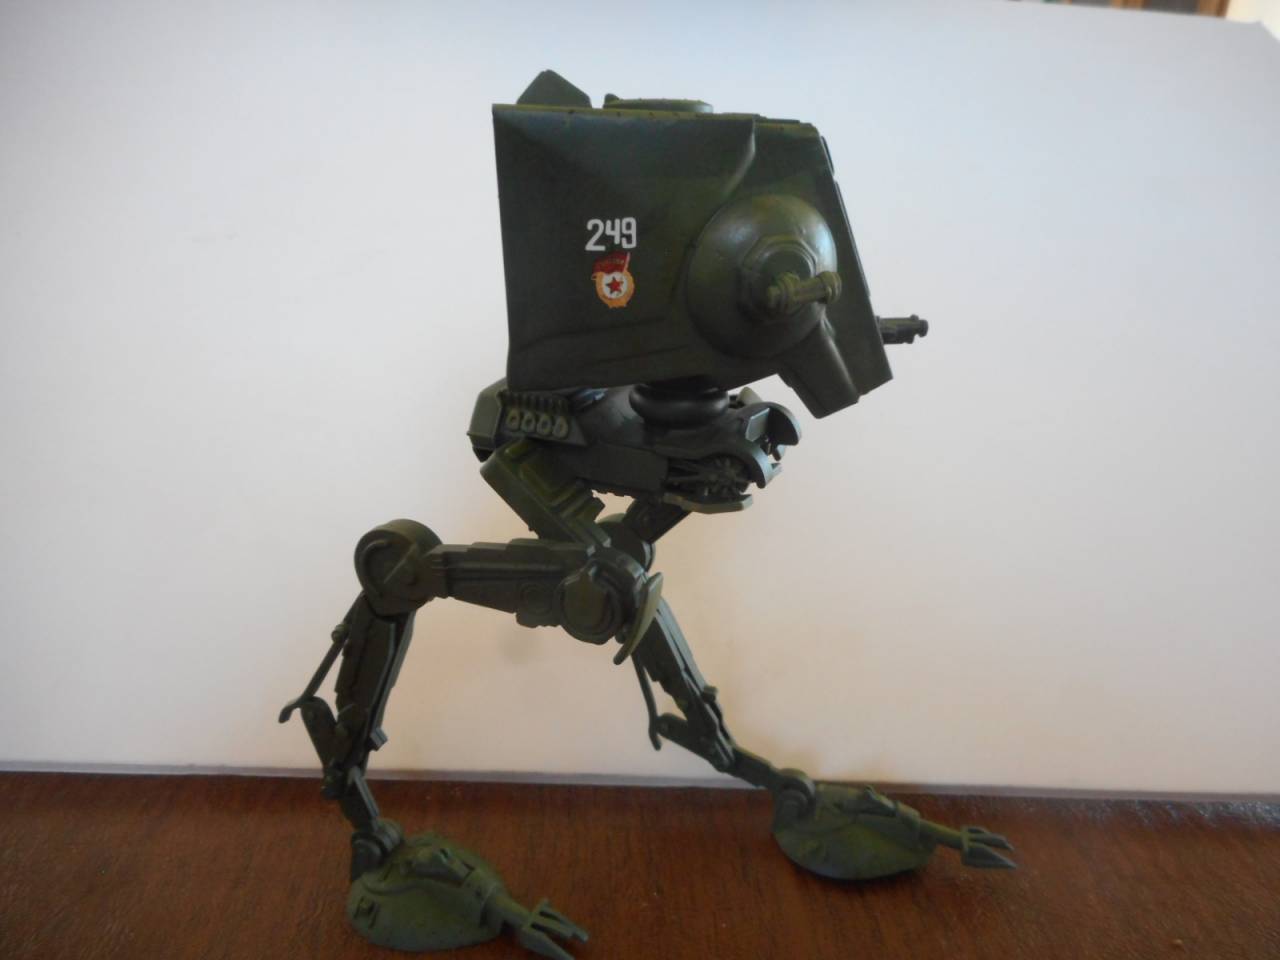
I would've like to add longer guns and do more weathering but alas, time is running out.

Take care,
Don "Lakota"
I'm calling this one done. I have "stubby" guns on it as the originals broke off and I can't find them.
I would've like to add longer guns and do more weathering but alas, time is running out.
Take care,
Don "Lakota"
Mrclark7
Joined: June 04, 2017
KitMaker: 503 posts
Armorama: 477 posts
Posted: Monday, February 26, 2018 - 10:45 AM UTC
okay, I am calling this finished. I have other builds I have put off till this was finished as silly as it was, I didnt want to start another build until this was off the table.
Thanks for the campaign.


Thanks for the campaign.

bm4247

Joined: December 29, 2014
KitMaker: 88 posts
Armorama: 60 posts

Posted: Tuesday, February 27, 2018 - 12:03 AM UTC
Finished at last.
First model completed for 12 months.
Struggled using a hairy stick and mottling.
Bit rough but here are some in-progress shots.


Finished article follows.


Some good builds guys. well done and thanks for running a great campaign.
First model completed for 12 months.
Struggled using a hairy stick and mottling.
Bit rough but here are some in-progress shots.
Finished article follows.
Some good builds guys. well done and thanks for running a great campaign.

spongya


Joined: February 01, 2005
KitMaker: 2,365 posts
Armorama: 1,709 posts

Posted: Tuesday, February 27, 2018 - 12:17 AM UTC
I've built Armory's VK 72.01 (K)


Please let me know what you think.
Please let me know what you think.
Lakota
#123
Joined: November 17, 2008
KitMaker: 1,202 posts
Armorama: 635 posts
Posted: Tuesday, February 27, 2018 - 06:35 AM UTC
Kelly, Brian & Andras,
Love those builds-something different you don't see every day.
I loved Mark's Hetzer and tutorial.
Christian-thanks for another great campaign.
Take care,
Don "Lakota"
Love those builds-something different you don't see every day.
I loved Mark's Hetzer and tutorial.
Christian-thanks for another great campaign.
Take care,
Don "Lakota"
 |

WEB HOSTING BY


Copyright ©2021 Armorama and Kitmaker Network, a subsidiary of Silver Star Enterprises
All Rights Reserved. Please read our Conditions of Use and Privacy Policy.
All Rights Reserved. Please read our Conditions of Use and Privacy Policy.