Campaigns: Completed Campaigns
Campaigns that are completed should be grouped here.
Hosted by Richard S.
Dragon Campaign 2018
Charlie-66
#186
Visit this Community
Texas, United States
Joined: May 24, 2006
KitMaker: 771 posts
Armorama: 750 posts
Posted: Wednesday, April 11, 2018 - 12:35 AM UTC
Been working on the tracks. I use this jig from Hobbytrax which makes the magic tracks much easier.. Once the glue has set a little while I put the tracks on the model and use pieces of foam ear plugs to get the sag I want.


Once everything is completely dry the tracks and all the road wheels sprockets etc slide off for painting.

Got the turret done as well. I usually don't try to put figures in the side hatches on Pz 3's, but may make an exception this time.


the figure is from a Dragon set. Also need to clean up some putty around the gun mantlet.
d6mst0
#453
Visit this Community
Texas, United States
Joined: August 28, 2016
KitMaker: 1,925 posts
Armorama: 601 posts
Posted: Wednesday, April 11, 2018 - 12:48 AM UTC
Guy,

Nice technique with the tracks. The panzer III is looking mighty nice.

Mark
Charlie-66
#186
Visit this Community
Texas, United States
Joined: May 24, 2006
KitMaker: 771 posts
Armorama: 750 posts
Posted: Wednesday, April 11, 2018 - 04:51 AM UTC

Quoted Text

Guy,

Nice technique with the tracks. The panzer III is looking mighty nice.

Mark


Thanks Mark,
Still debating what markings to use. I found a picture on the internet that looks really good, but I need to dig through my decals box to make sure I have everything.
johhar
Visit this Community
Alabama, United States
Joined: September 22, 2008
KitMaker: 476 posts
Armorama: 447 posts
Posted: Wednesday, April 11, 2018 - 09:27 PM UTC
Guy, that track sag looks perfect and I can't wait to see the crew in there when it's all painted.

To all, I'm a little confused on the German fall camo for the fall/winter overalls like in Dragon Models 6509. There are a few different patterns I found pictures of. Any help in making up my mind would be appreciated, like definitive color reference photos. I just can't narrow it down. Please and thank you.
d6mst0
#453
Visit this Community
Texas, United States
Joined: August 28, 2016
KitMaker: 1,925 posts
Armorama: 601 posts
Posted: Wednesday, April 11, 2018 - 09:48 PM UTC

Quoted Text


Quoted Text

Guy,

Nice technique with the tracks. The panzer III is looking mighty nice.

Mark


Thanks Mark,
Still debating what markings to use. I found a picture on the internet that looks really good, but I need to dig through my decals box to make sure I have everything.


Guy,

Maybe you should base the markings on which campaign and division/regiment/battalion you want the Pz III assigned too. Be careful that you may end up using markings for a command vehicle that isn't one. Most units had colorful markings early in the war and very little or none late in the war.

Me, I would like to see armor vehicle marked up like they do with war planes.

Mark
Chaman911
Visit this Community
United States
Joined: August 28, 2015
KitMaker: 319 posts
Armorama: 308 posts
Posted: Wednesday, April 11, 2018 - 10:59 PM UTC
Charlie-66 nice Panzer III! Where did that crew figure sitting in the turret side hatch come from? I really think he looks great there.
Bluestab
Visit this Community
South Carolina, United States
Joined: December 03, 2009
KitMaker: 2,160 posts
Armorama: 1,906 posts
Posted: Thursday, April 12, 2018 - 09:33 AM UTC
I had planned on posting the build in one go, showing it from start to finish. Just something a little different. I ran in to a bit of a problem so I'll go ahead and post what I have until I can fix it.

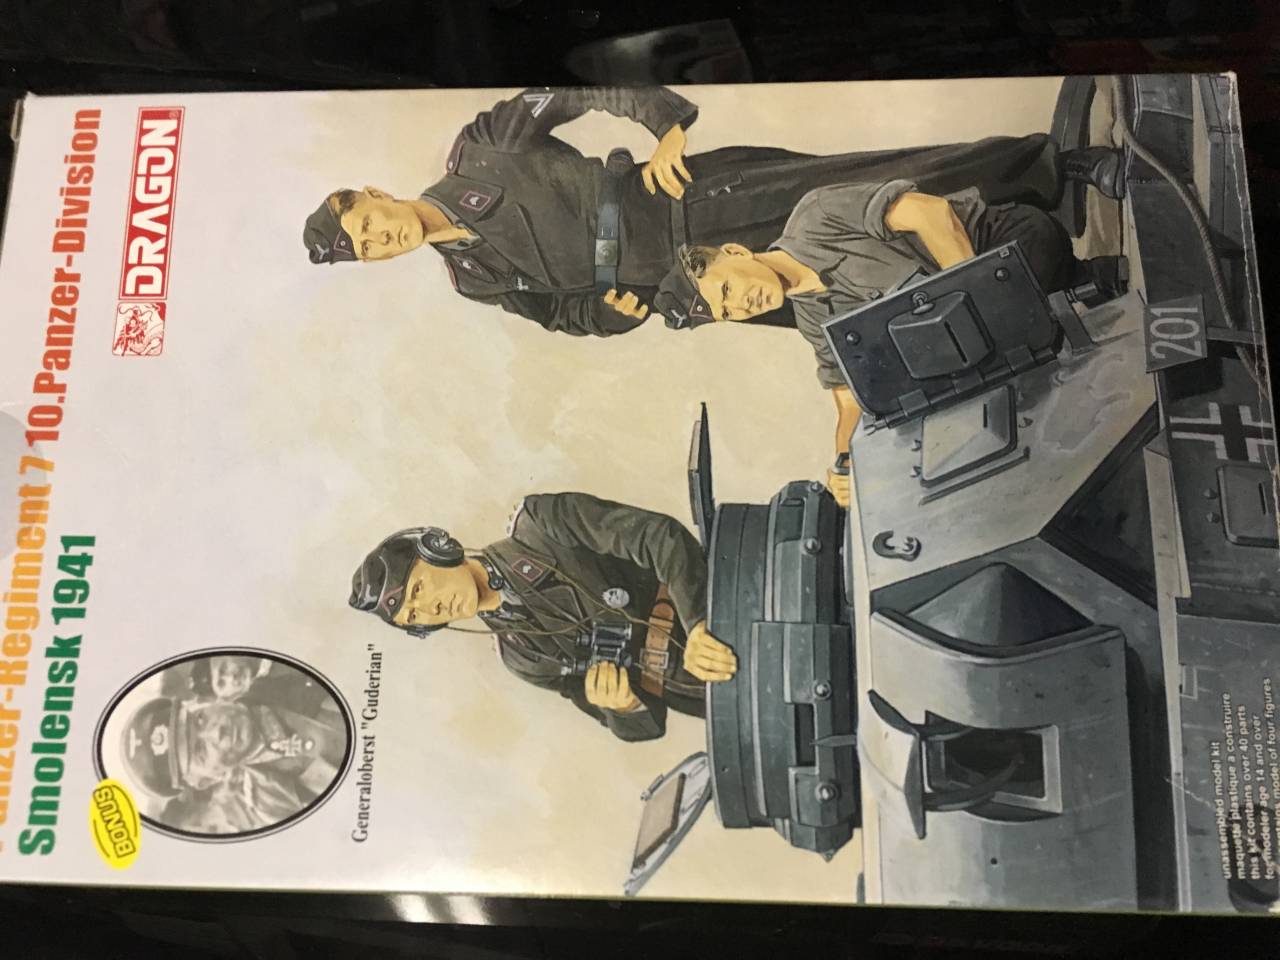
I'm building CyberHobby's Sd.Kfz.250 Neu (9149). It's okay looking. It comes with a figure set...Armored Recon Wiking Division (Hungary 1945). It also comes with PE doors for the exterior storage bins. Of course, indie tracks.

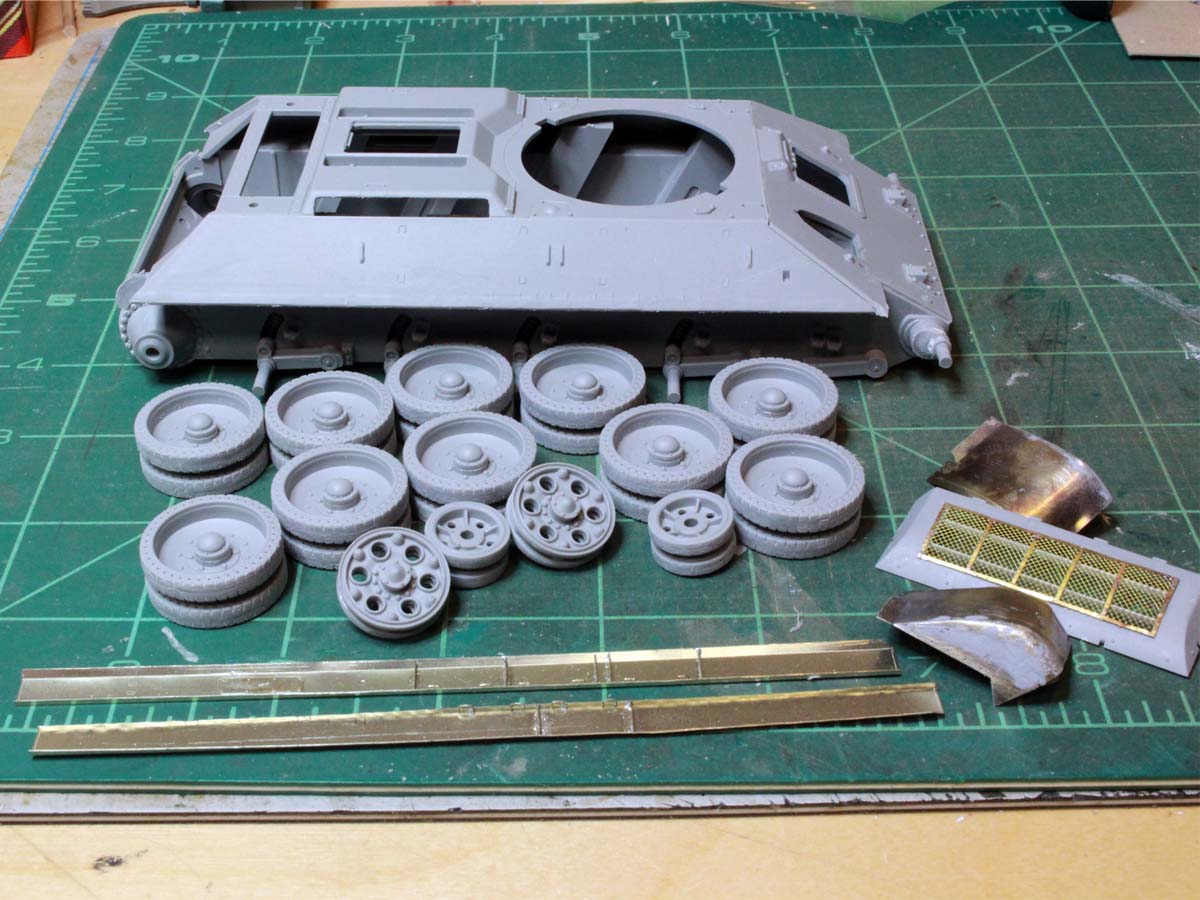
I began by pre-painting the lower hull, roadwheels, and some of the fighting compartment.
dragon-sdkfz250_01

I started with the multi-piece lower hull...which I dislike. Fit was not great...note the gaps. In hindsight I should have placed the driver's firewall to act as a jig to set the sides. As is, they are angled inward at the top a bit. It would have made placing the fighting compartment, firewall, and driver's seats easier.
Suspension arms are delicate...really delicate. And they seemed determined to avoid lining up.
dragon-sdkfz250_02

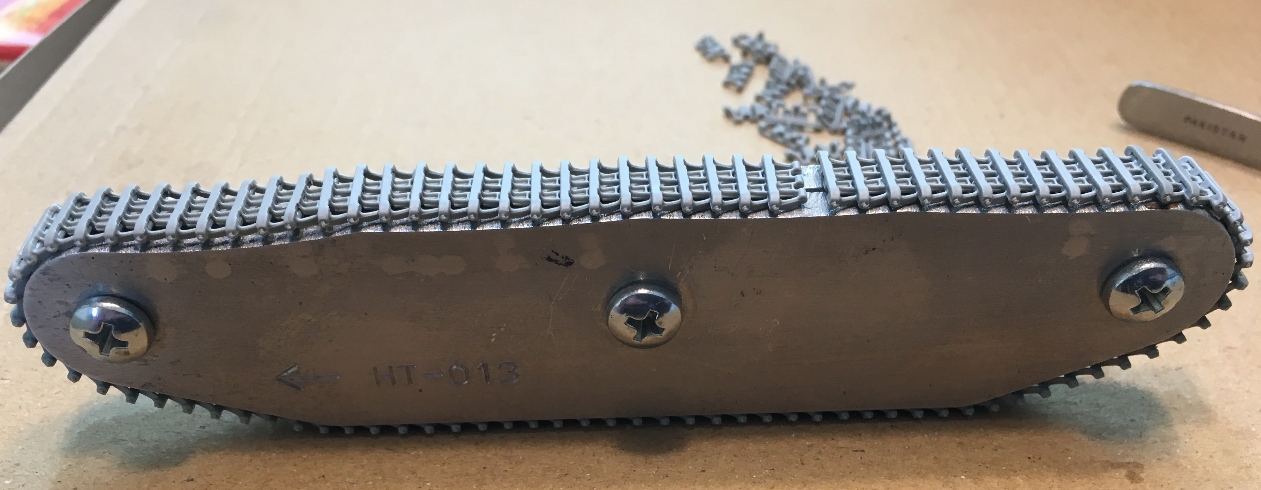
Once I got that setup, I turned to the tracks. They are indie links. The U-shaped links fit together. You add the rubber track pad and it covers the connection points. If you are careful, you can make them workable. As an aside, these tracks are similar to Zvezda's but the rubber pads fit alot easier.
Used two wooden sticks as a guild. I placed 5-7 links and then added the rubber pads. It went quickly and they look good.
dragon-sdkfz250_03

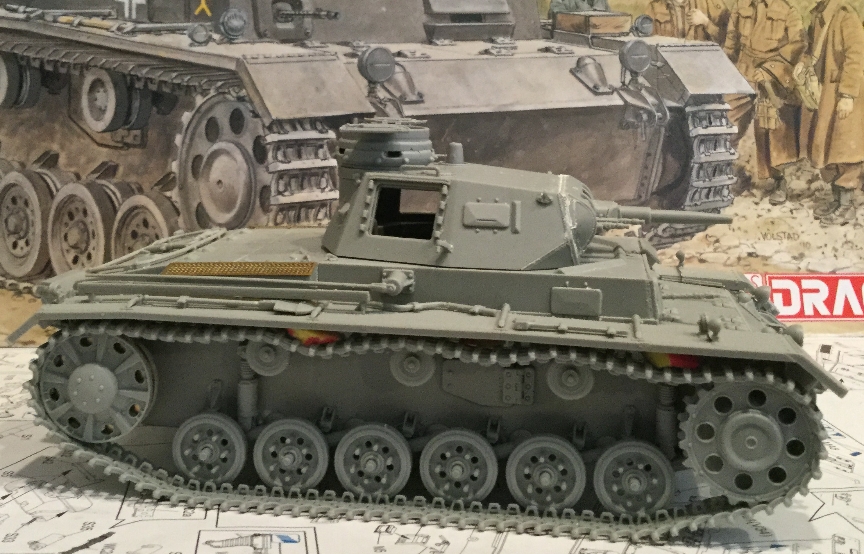
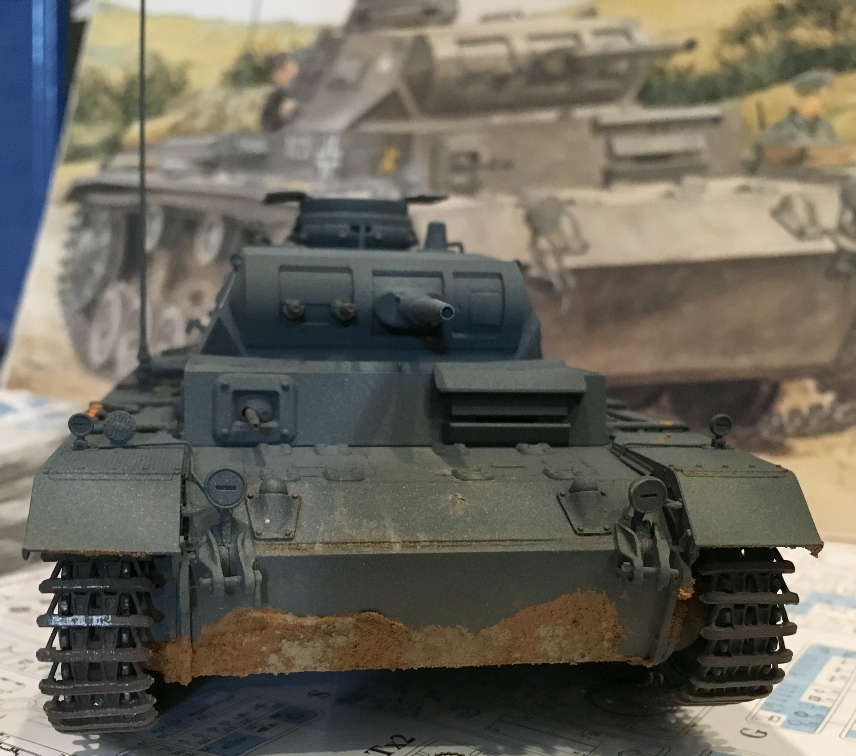
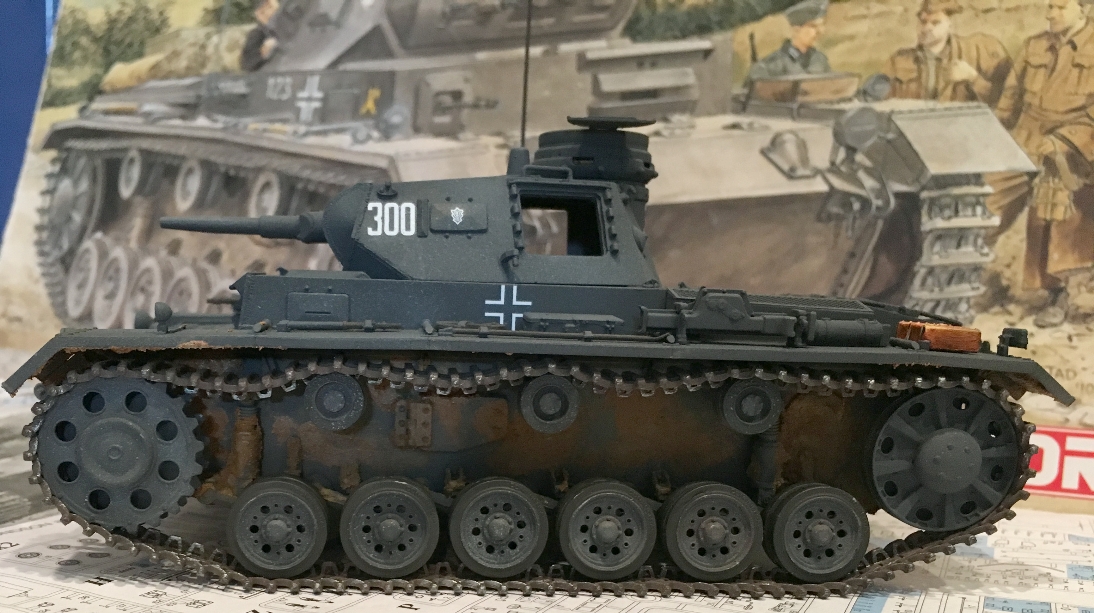
I painted the tracks using Rustoleum dark gray auto primer. I like the graininess and the texture it gives them...it also works well for tires.Tracks mounted well.
I didn't get a picture but I will dry-brush them heavily with red-brown, then a light drybrush of steel. The rubber pads will get painted Tamiya Dark Gray.
dragon-sdkfz250_04

Fighting compartment components assembled. Some had been pre-painted. I went ahead and painted the side interiors.
dragon-sdkfz250_05

I went back and assembled the front suspension.
dragon-sdkfz250_06

The instructions for the driver and radio operator's vision blocks are vague. It would have been nice to position them open. Maybe mold them in clear styrene or with the armored glass clear and separate parts.
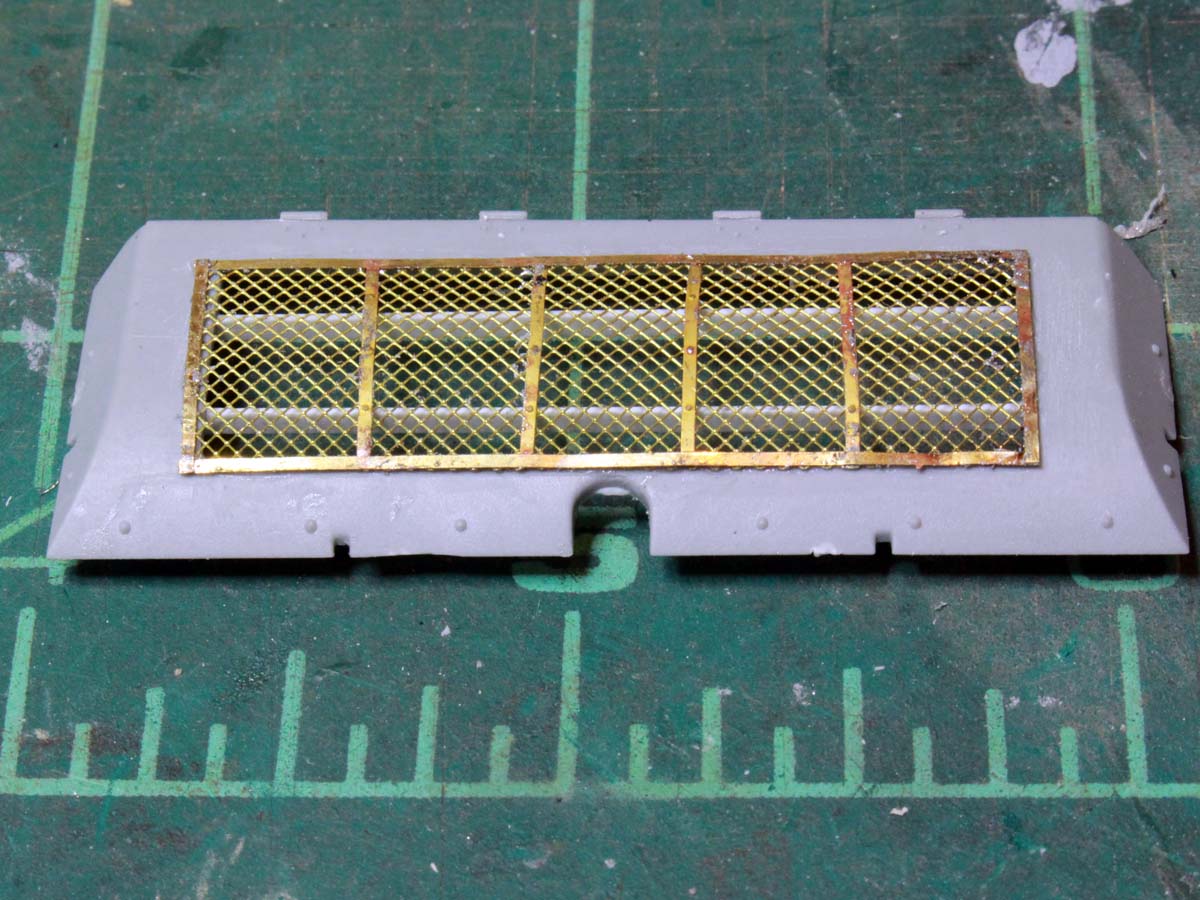
The intake grills are typical nylon mesh. PE would have been nice. I added a styrene strip to back them and give added support.
Front fenders went together easy. I left off the pioneer tolls and convoy marker posts until later.
dragon-sdkfz250_07

Fighting compartment side walls. Dragon filled the sides with raised position lines for heaven knows how many variants. I forgot to do it before I painted...that's my little mess-up I spoke about earlier. The cover for the storage bin...I would cut that off later and just have it open. I also would change out the ammunition holder for the MP40 for two infantry MP40 ammo pouches. That's just a little quirky detail I wanted in there.
dragon-sdkfz250_08

Inside upper section of the fighting compartment mostly assembled and base painted. I added the instrument panel and radio. I left the rifles out of the rifle rack until they could be painted.
dragon-sdkfz250_09

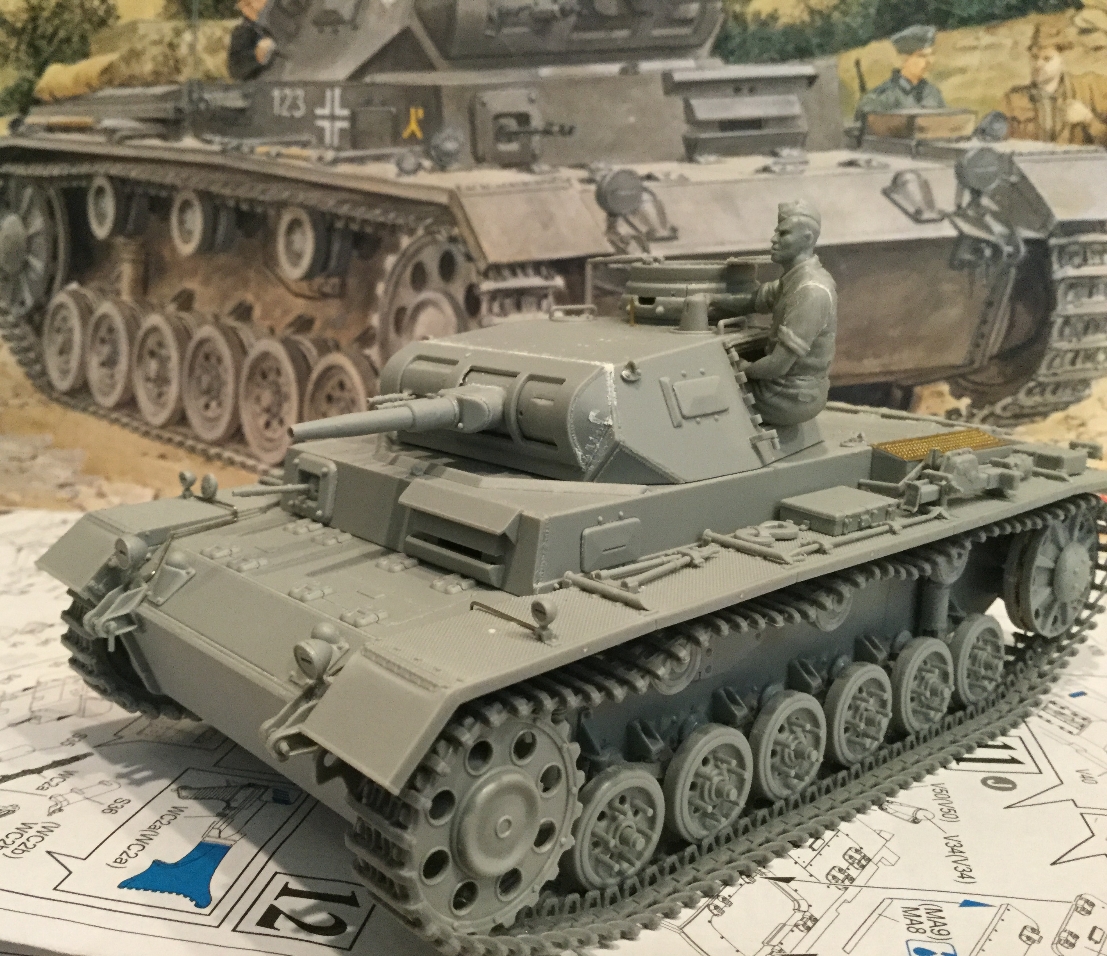
Side walls added to hull. Rifles added. You can see the canvas MP40 pouches. I added two gasmasks and an ammo holder for the MG42. I probably will add a MP40 from the spares. Spare armored glass painted. Seats painted and you can see where I cut the storage box cover.
Also, I have built a coupel of the Dragon/CyberHobby halftracks. Fit has always been a problem. I test fit the top and found that the firewall needed to be notched behind the radio so the top can fit properly.
dragon-sdkfz250_10
dragon-sdkfz250_11

Anyway, that's where I am. I have to go back and try to remove the raised locator lines on the side walls. Other than that, assembly should wrap up soon-after. I probably won't add a crew or build the supplied figures. I have plans for this for a project.
d6mst0
#453
Visit this Community
Texas, United States
Joined: August 28, 2016
KitMaker: 1,925 posts
Armorama: 601 posts
Posted: Thursday, April 12, 2018 - 04:48 PM UTC
Alex,

I can see why you are having fit issues the tooling for this model is twenty years old, yet you are doing a wonderful job of putting it together.

Mark
Charlie-66
#186
Visit this Community
Texas, United States
Joined: May 24, 2006
KitMaker: 771 posts
Armorama: 750 posts
Posted: Friday, April 13, 2018 - 06:01 AM UTC

Quoted Text

Charlie-66 nice Panzer III! Where did that crew figure sitting in the turret side hatch come from? I really think he looks great there.


Bryan,
I'm posting the box art from the set he came in. I'll probably use the tank commander figure as well.

Charlie-66
#186
Visit this Community
Texas, United States
Joined: May 24, 2006
KitMaker: 771 posts
Armorama: 750 posts
Posted: Friday, April 13, 2018 - 06:07 AM UTC
Maybe you should base the markings on which campaign and division/regiment/battalion you want the Pz III assigned too. Be careful that you may end up using markings for a command vehicle that isn't one. Most units had colorful markings early in the war and very little or none late in the war.

Me, I would like to see armor vehicle marked up like they do with war planes.

Mark[/quote]

Mark,
here's what I'm debating for markings. Both pictures are of the Ausf. F with the older style Cupola and the 37mm main gun. There were some Ausf F's that were built or retrofitted with the 50mm gun and newer cupola, and of course there mix and match vehicles built during the transition. I plan on doing a 50mm Ausf F this year as well.

The first pic caught my eye because that vehicle is included in the decals that come with the kit. It still retains the "tarn klappe" on the turret roof that was deleted during the production run of the Ausf F.


the second image I found on the internet. Also an Ausf F, but in this case without the tarn klappe. It would be a simple thing to remove the tarn klappe from the kit at this point if I decide to go with this vehicle.

d6mst0
#453
Visit this Community
Texas, United States
Joined: August 28, 2016
KitMaker: 1,925 posts
Armorama: 601 posts
Posted: Friday, April 13, 2018 - 08:51 AM UTC
Charlie-66,

The tank in the second picture looks to be from the 11th Panzer Divison, 15th Regiment, 3rd Company the 5th tank attached to Army Group Centre during Barbarossa and the drive to Moscow in 1941.

The first picture looks like a Panzer III Ausf E because it is missing the Rommel Kit (storage box) on the rear of the turret. Also the markings look to be a signal or command tank from the 1st Panzer Divison 3rd company during the French Campaign.

Mark


Charlie-66
#186
Visit this Community
Texas, United States
Joined: May 24, 2006
KitMaker: 771 posts
Armorama: 750 posts
Posted: Friday, April 13, 2018 - 08:59 AM UTC

Quoted Text

Charlie-66,

The tank in the second picture is from the 11th Panzer Divison, 15th Regiment, 3rd Company the 5th tank attached to Army Group Centre during Barbarossa and the drive to Moscow.

The first picture looks like a Panzer III Ausf E due to it is missing the Rommel Kit (storage box) on the rear of the turret. Also the markings look to be from the 1st Panzer Divison


Mark, they are both F's. They both have the armored covers for cooling the brakes added on the F on the front armored plate. the Rommel kiste is not a totally accurate indicator as they were frequently back fitted to earlier models.
d6mst0
#453
Visit this Community
Texas, United States
Joined: August 28, 2016
KitMaker: 1,925 posts
Armorama: 601 posts
Posted: Friday, April 13, 2018 - 09:17 AM UTC
Charlie-66,

I sure you are right about which version that first tank is, but my gut tells me it a Ausf E. Which means I am very likely wrong..LOL. Well which ever way you go I sure it will be fine build. I have a liking for Panzer IIIs.

Mark
Charlie-66
#186
Visit this Community
Texas, United States
Joined: May 24, 2006
KitMaker: 771 posts
Armorama: 750 posts
Posted: Saturday, April 14, 2018 - 01:50 AM UTC

Quoted Text

Charlie-66,

I sure you are right about which version that first tank is, but my gut tells me it a Ausf E. Which means I am very likely wrong..LOL. Well which ever way you go I sure it will be fine build. I have a liking for Panzer IIIs.

Mark


Mark,
I've circled the armored vents for cooling the brakes. if you look on page 3-2-39 of Panzer tracts No.3-2 you'll see this picture along with the caption from Jentz and Doyle identifying it as an Ausf. F

johhar
Visit this Community
Alabama, United States
Joined: September 22, 2008
KitMaker: 476 posts
Armorama: 447 posts
Posted: Wednesday, April 18, 2018 - 12:08 AM UTC
I need feedback and help. These two images are from the same photo, one cropped so it enlarges and the failure of my first attempt at the oak leaf pattern becomes much more apparent. I'm putting these here to ask for any suggestions, other than using smaller brushes, which I'm off to buy. I have reference photos, so that's how I know how unlike the real thing this looks. Any help would be appreciated.


Charlie-66
#186
Visit this Community
Texas, United States
Joined: May 24, 2006
KitMaker: 771 posts
Armorama: 750 posts
Posted: Sunday, April 22, 2018 - 04:50 AM UTC
got a lot of the painting done, and the first layer of weathering. lot's to clean up, and pin wash and dot filter to do.


d6mst0
#453
Visit this Community
Texas, United States
Joined: August 28, 2016
KitMaker: 1,925 posts
Armorama: 601 posts
Posted: Sunday, April 22, 2018 - 05:10 AM UTC
Guy,

The weathering is looking really good. That is really one nice looking Panzer III.

Mark
Charlie-66
#186
Visit this Community
Texas, United States
Joined: May 24, 2006
KitMaker: 771 posts
Armorama: 750 posts
Posted: Sunday, April 22, 2018 - 05:12 AM UTC

Quoted Text

Guy,

The weathering is looking really good. That is really one nice looking Panzer III.

Mark


Thanks Mark!
ColinEdm
Staff MemberAssociate Editor
ARMORAMA
Visit this Community
Alberta, Canada
Joined: October 15, 2013
KitMaker: 1,355 posts
Armorama: 1,229 posts
Posted: Friday, April 27, 2018 - 09:03 AM UTC
Some good builds going on here. Couple progress pics on my T-34 Mod 1941:

I didn't like how the PE engine deck mesh supplied with the kit looked so I made new mesh of my own, looks much more like the real thing.
LikesTanks
Visit this Community
Wales, United Kingdom
Joined: May 07, 2013
KitMaker: 242 posts
Armorama: 234 posts
Posted: Monday, April 30, 2018 - 07:25 AM UTC
As I got no complaints about the StugIIIb rebox, I've got going


The kit comes with Dragon's standard Pz.III/IV tracks with the solid guide horns so, because I'm cheap, I spent some merry evenings hollowing them out


The hard work is done....
Charlie-66
#186
Visit this Community
Texas, United States
Joined: May 24, 2006
KitMaker: 771 posts
Armorama: 750 posts
Posted: Tuesday, May 01, 2018 - 04:28 AM UTC
Great start on the Stug!
Kustaanmiekka
Visit this Community
Hame, Finland
Joined: April 30, 2018
KitMaker: 4 posts
Armorama: 2 posts
Posted: Friday, May 04, 2018 - 07:48 AM UTC
Dragon Campaign 2018. Decided to do 1/700 USS Philippine Sea CG-58 (7045). It has some PE.


slayer
Visit this Community
California, United States
Joined: October 01, 2011
KitMaker: 96 posts
Armorama: 95 posts
Posted: Monday, May 07, 2018 - 08:19 AM UTC
I know im a little late joining but i was wondering can i still join this campign. I am currently working on Dragons M1A1 AIM. Totally out of the box no aftermarket parts.
Kaktusas
Visit this Community
Vilnius, Lithuania
Joined: April 12, 2017
KitMaker: 196 posts
Armorama: 196 posts
Posted: Monday, May 07, 2018 - 11:47 AM UTC
Finished painting and weathering the engine. Normally, i would ad oil, dirt dust etc in the mix, but in this case, almost nothing will be visible, so this is where i stop. Btw, for a base coat, its my first go at Mission Models paints. They are awesome.


RobinNilsson
Staff MemberTOS Moderator
KITMAKER NETWORK
Visit this Community
Stockholm, Sweden
Joined: November 29, 2006
KitMaker: 6,693 posts
Armorama: 5,562 posts
Posted: Monday, May 07, 2018 - 02:48 PM UTC

Quoted Text

I know im a little late joining but i was wondering can i still join this campign. I am currently working on Dragons M1A1 AIM. Totally out of the box no aftermarket parts.


Of course you can still join
There is nothing in the rules that says anything about how started the kit can be (how much work that has been done before the start of the campaign).
/ Robin