MichaelSatin
 Campaigns Administrator
Colorado, United States
Joined: January 19, 2008
KitMaker: 3,909 posts
Armorama: 510 posts
Posted: Tuesday, June 11, 2019 - 12:18 AM UTC
Quoted Text
Hi Guys. Haven't contributed for a while but still follow the campaign avidly. Although I posted pictures in the blogs (eventually after some difficulty) how do I post in the campaign gallery?
Norman,
Just went to
the gallery and your Centurion is there. Looks like you figured it out!
Michael

On the bench:
Sorta depends on your definition of "on the bench"...
Scotland, United Kingdom
Joined: July 26, 2018
KitMaker: 279 posts
Armorama: 265 posts
Posted: Tuesday, June 11, 2019 - 11:18 AM UTC
Yeah, thanks Michael. I was over complicating as usual
Queensland, Australia
Joined: August 06, 2005
KitMaker: 3,353 posts
Armorama: 3,121 posts
Posted: Tuesday, June 11, 2019 - 08:20 PM UTC
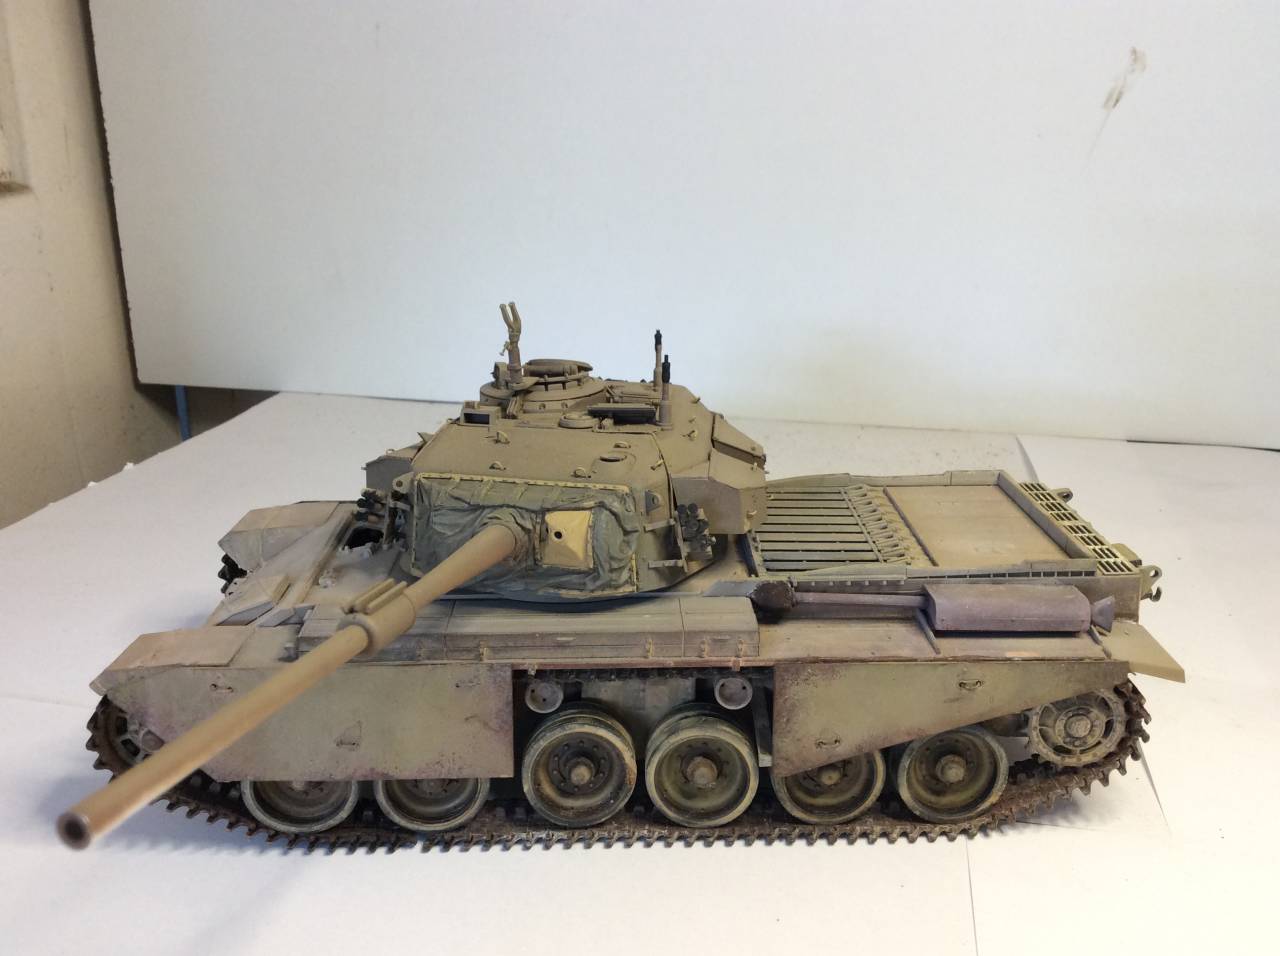
Looks great Ken, even with the cursed tracks !
Tamas the close up pic rally does look real. Well done.
David, looks like I am doing the Challenger with you. Hope mine turns out as good as yours has.
I have the old Verlinden set that came out when Tamiya first released the standard Challenger kit. Maybe there will be something useful in it - we will see.
I thought I had posted a start up pic....

On the Bench:
Dust, styrene scraps, paint splotches and tears.
Klaus-Adler
Campaigns Administrator Scotland, United Kingdom
Joined: June 08, 2015
KitMaker: 1,505 posts
Armorama: 840 posts
Posted: Tuesday, June 11, 2019 - 08:36 PM UTC
Quoted Text
David, looks like I am doing the Challenger with you. Hope mine turns out as good as yours has.
I have the old Verlinden set that came out when Tamiya first released the standard Challenger kit. Maybe there will be something useful in it - we will see.
I thought I had posted a start up pic....
if you want to cut corners and save yourself some pain then you don't have to make full tracks for both sides of the tank and a lot of it will be hidden by the side skirts. it will also reduce the weight of the kit if you use this short cut.
barkingdigger
Associate Editor 
#013
England - East Anglia, United Kingdom
Joined: June 20, 2008
KitMaker: 3,981 posts
Armorama: 3,403 posts
Posted: Wednesday, June 12, 2019 - 09:30 PM UTC
Hi gang, some great work going on here! I've been held up with other projects and am a tad late to the show, but will build Trumpeter's C1 Ariete if all goes well. If I can get the plastic done in the next week and then primed, I should be able to throw paint at it in July to cross the line in the nick of time...
My start pic, taken this morning:
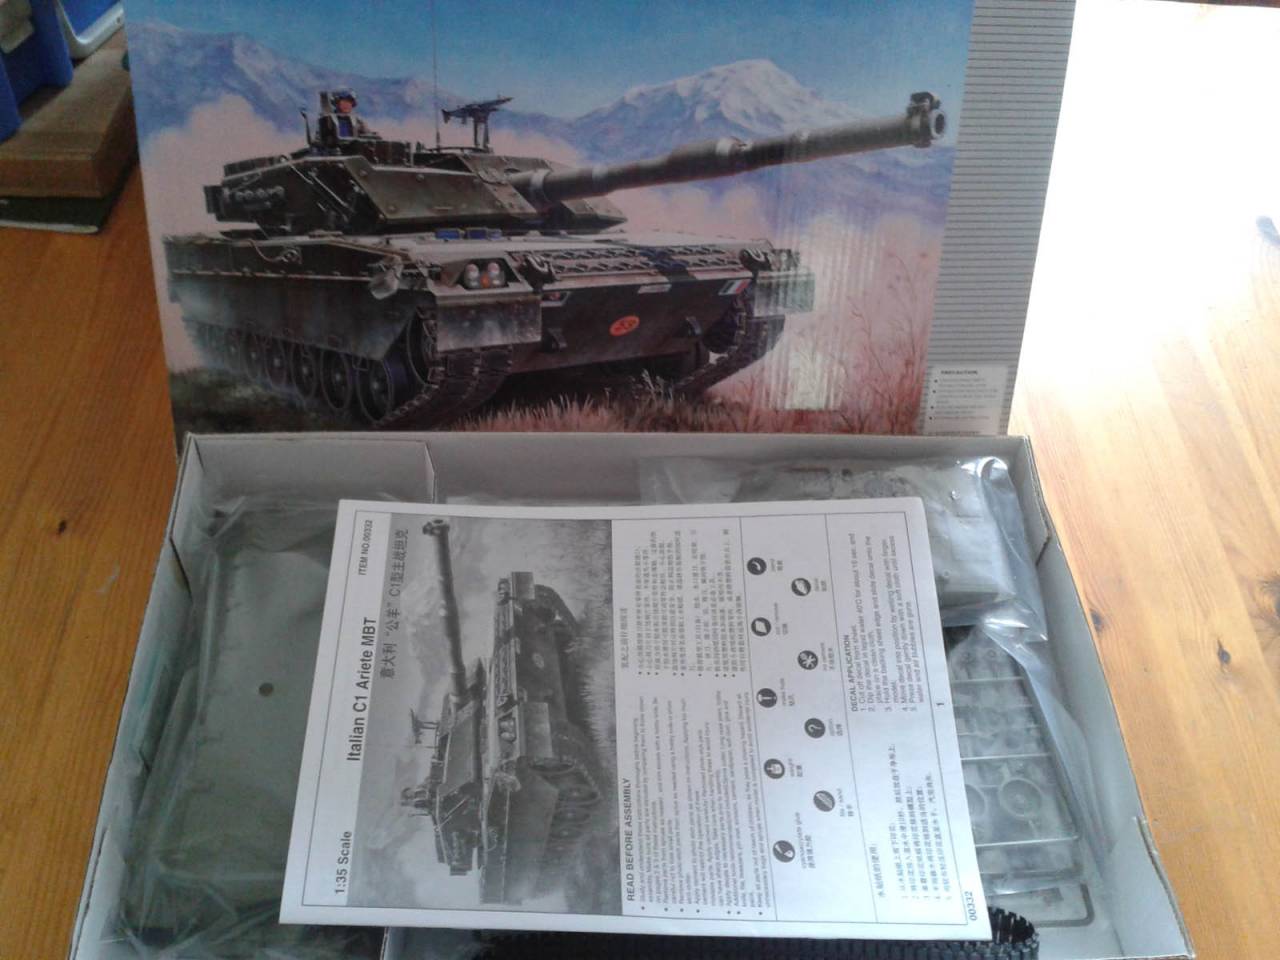
(I was going to do the Tamiya Leclerc, but it is in storage...)
"Glue, or Glue Not - there is no Dry-Fit" - Yoda (original script from Return of the Jedi...)
Queensland, Australia
Joined: August 06, 2005
KitMaker: 3,353 posts
Armorama: 3,121 posts
Posted: Thursday, June 13, 2019 - 08:17 AM UTC
Nice choice. Good luck in finishing Tom.
On the Bench:
Dust, styrene scraps, paint splotches and tears.
California, United States
Joined: December 06, 2004
KitMaker: 3,694 posts
Armorama: 2,693 posts
Posted: Saturday, June 15, 2019 - 12:41 PM UTC
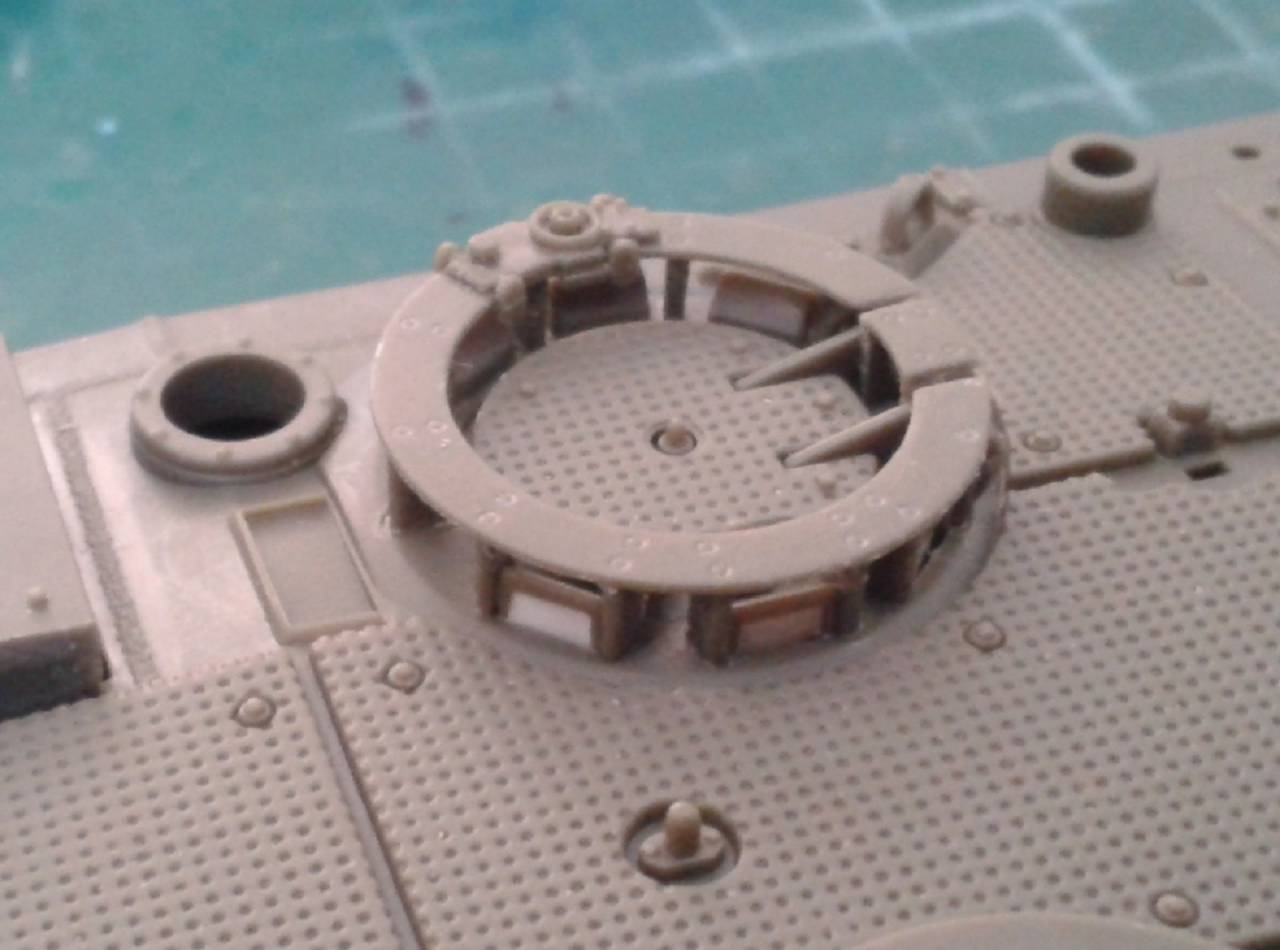
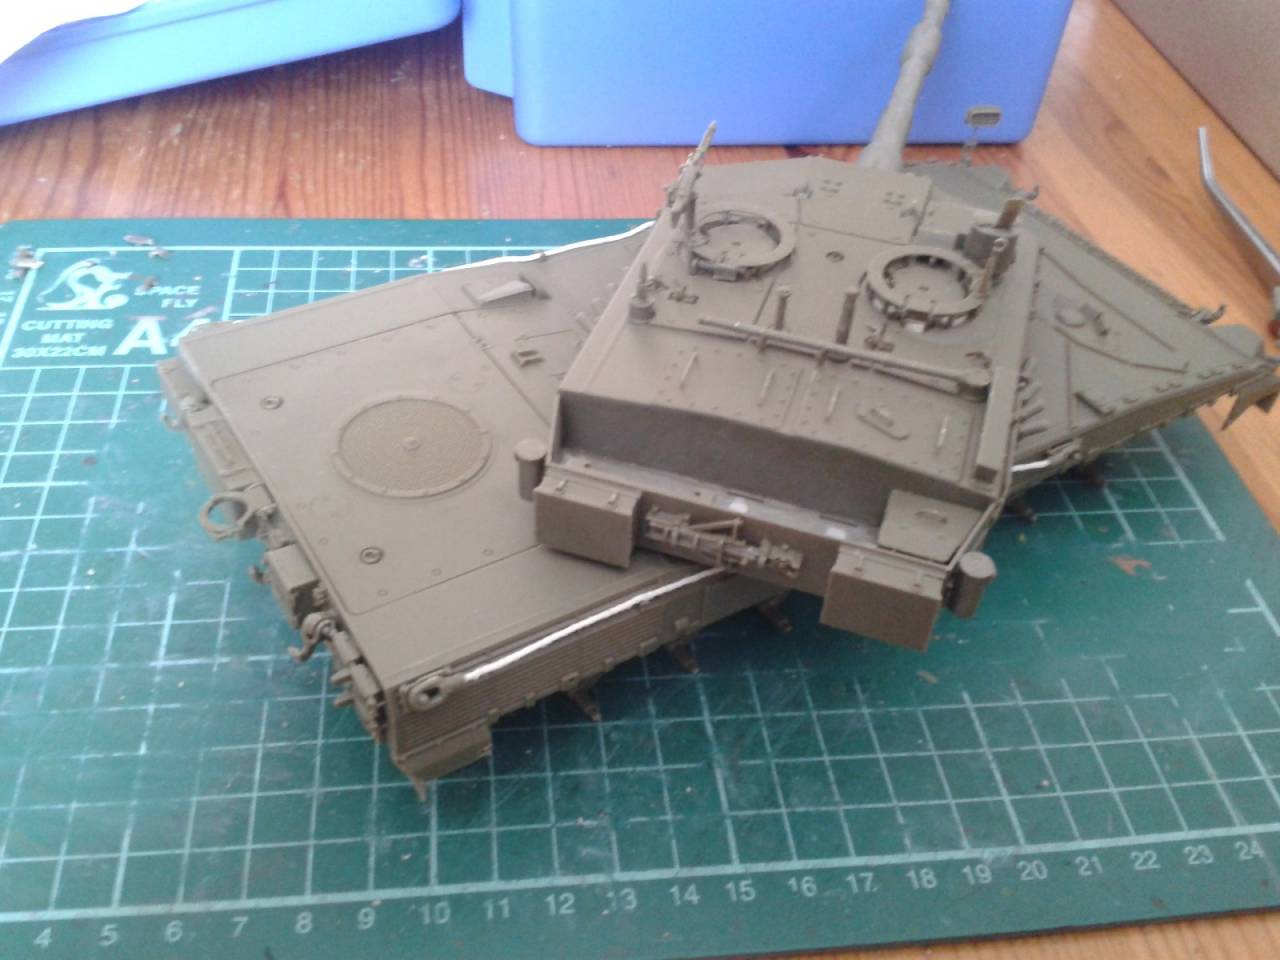
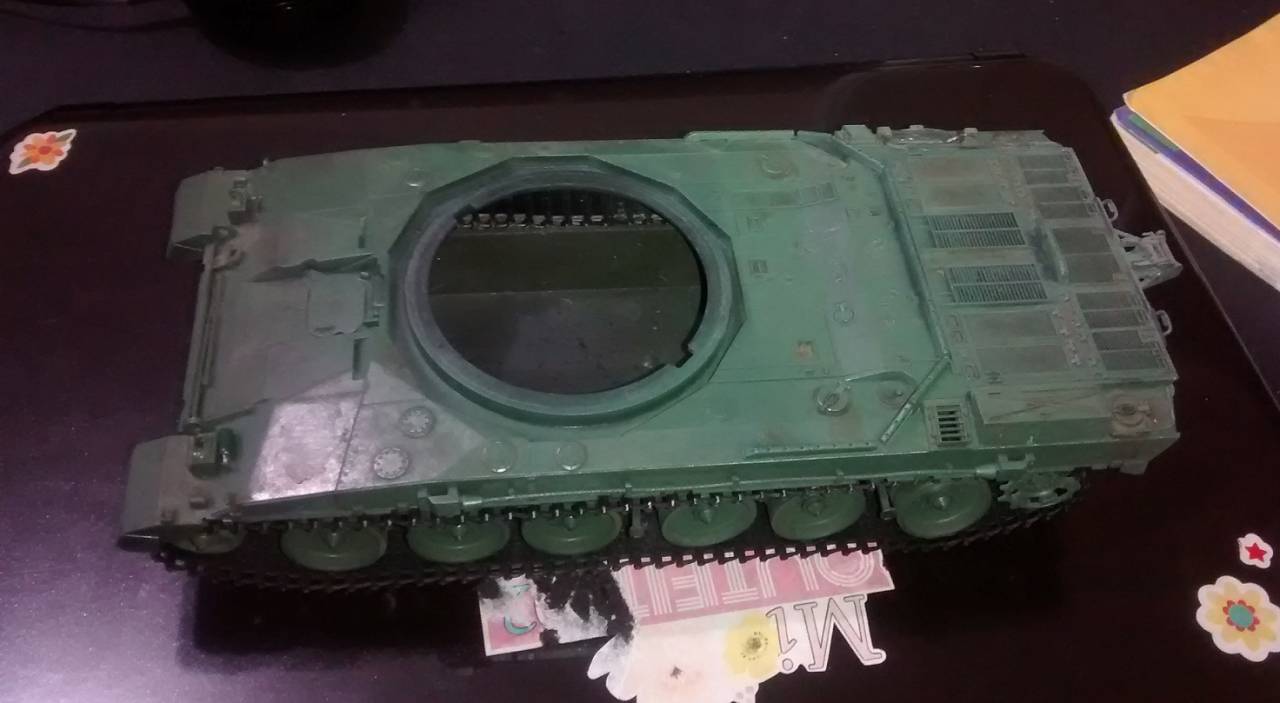
Small update. A turret antenna bracket was a short shot so the missing plastic had to be replaced with putty and scrap styrene.

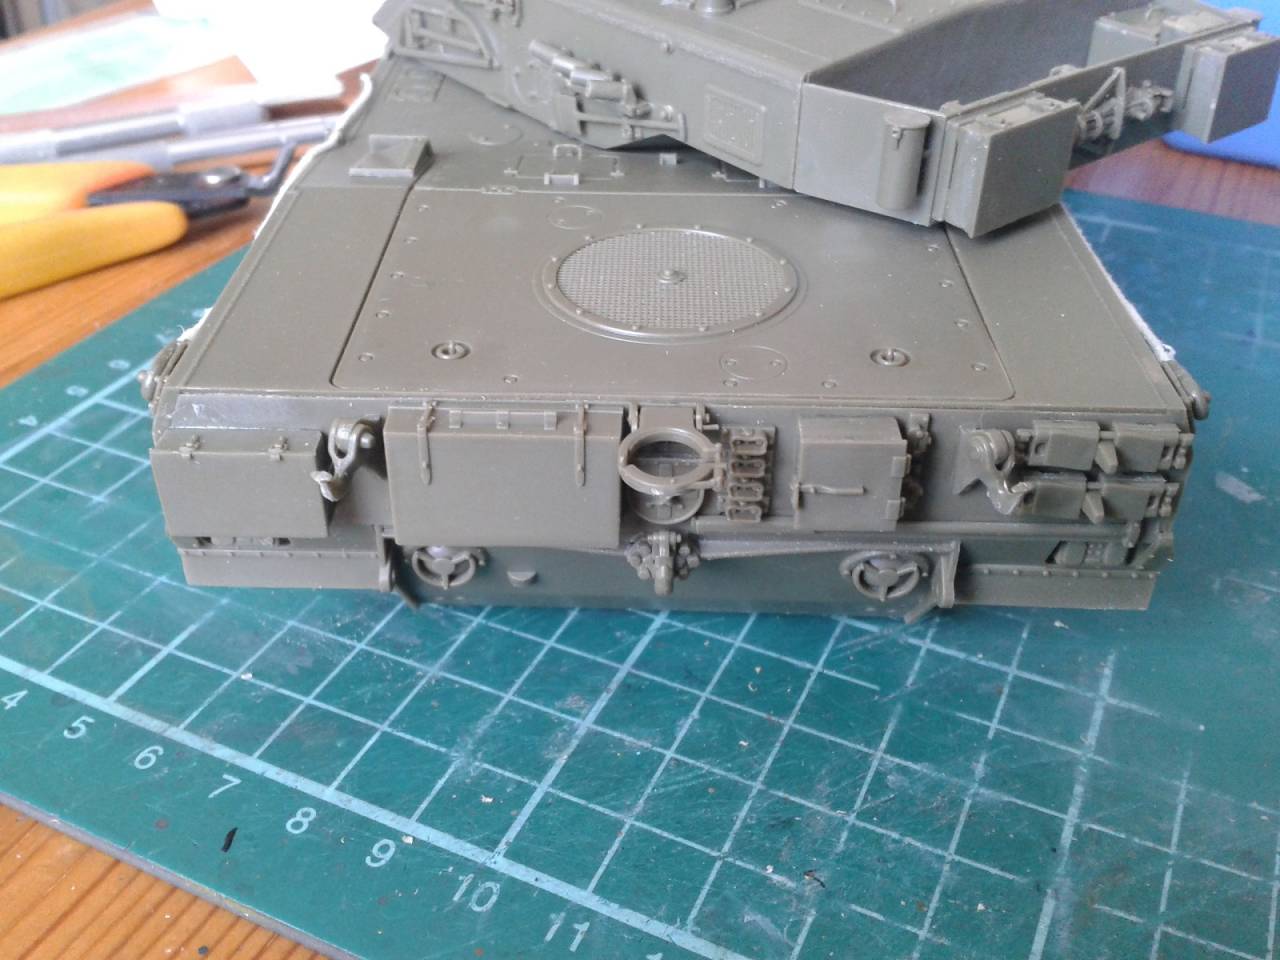
Detail parts on the rear hull plate are all put on. The tail lights are a lady. There's base plate then the light assembly but the cutouts on the back of the light assembly look like they are gouged out by hand after removing from the molds. And of course, they need further gouging. The starboard base plate isn't even needed!

The rear plate finally glued in place

Once the antenna bracket is in place, work can continue mounting the stowage boxes.
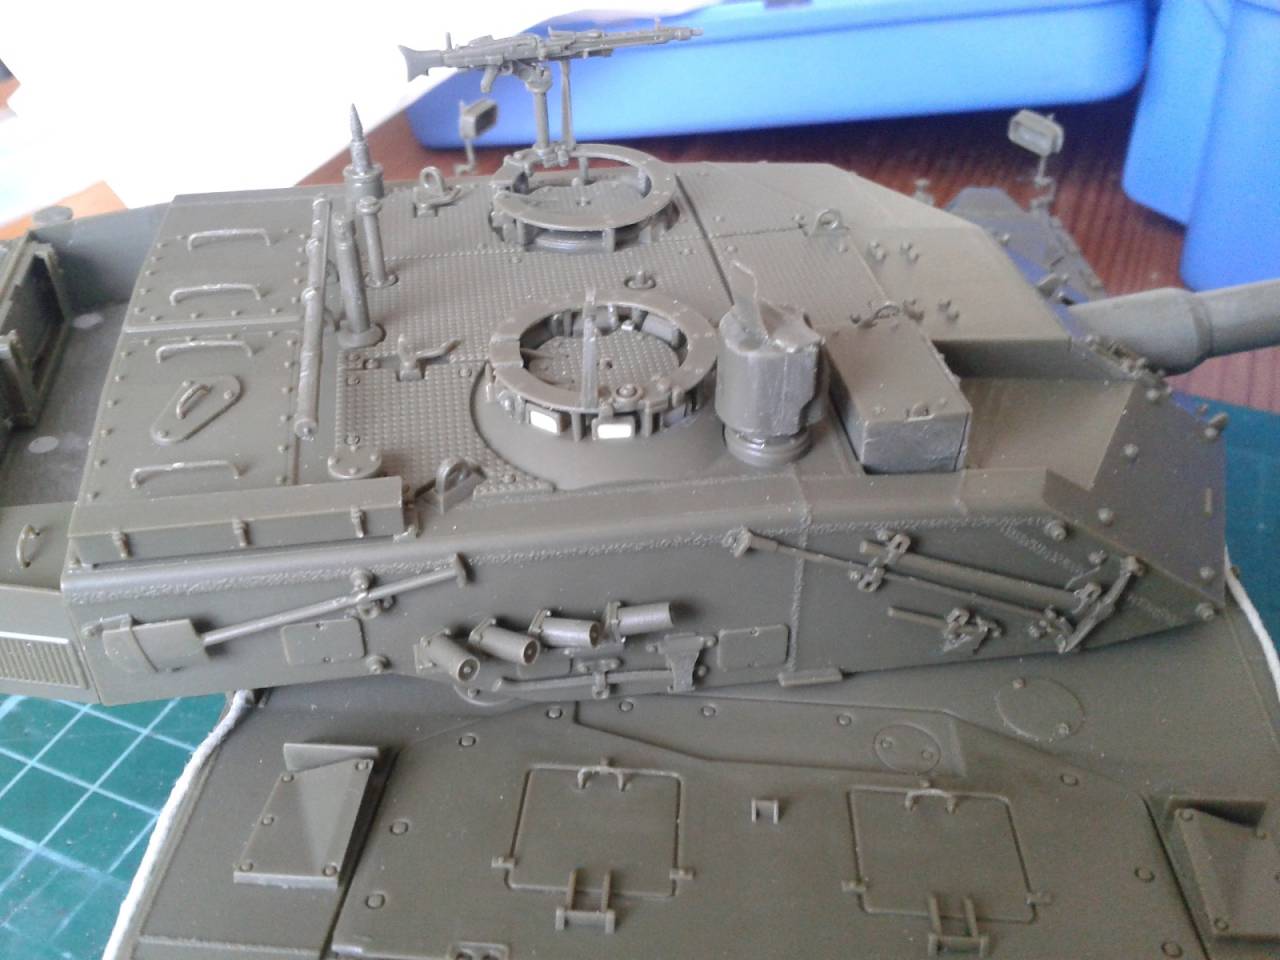
Update:
The tank commander's panoramic sight is not the right shape.

Sofiya, Bulgaria
Joined: November 26, 2017
KitMaker: 393 posts
Armorama: 369 posts
Posted: Sunday, June 16, 2019 - 04:24 AM UTC
#016
England - East Anglia, United Kingdom
Joined: March 18, 2009
KitMaker: 142 posts
Armorama: 138 posts
Posted: Monday, June 17, 2019 - 06:45 PM UTC
is it a different upgrade possibly
California, United States
Joined: December 06, 2004
KitMaker: 3,694 posts
Armorama: 2,693 posts
Posted: Monday, June 17, 2019 - 08:06 PM UTC
Quoted Text
The tail lights are a lady.
I have no idea what i meant to type.
As for the sight, I can build something to go around the original part or just build the part from scratch. I think the latter case would be easier. I may save that for last and continue with the upper hull and turret.
Queensland, Australia
Joined: August 06, 2005
KitMaker: 3,353 posts
Armorama: 3,121 posts
Posted: Monday, June 17, 2019 - 08:41 PM UTC
Great progress there guys.
On the Bench:
Dust, styrene scraps, paint splotches and tears.
#016
England - East Anglia, United Kingdom
Joined: March 18, 2009
KitMaker: 142 posts
Armorama: 138 posts
Posted: Monday, June 17, 2019 - 11:52 PM UTC
More progress on the Shot just sorting out decals then weather the turret add final details and stowage
Sofiya, Bulgaria
Joined: November 26, 2017
KitMaker: 393 posts
Armorama: 369 posts
Posted: Tuesday, June 18, 2019 - 02:45 AM UTC
Well done, David.
It seems quite real. Congratulations on the good work.
Kalin
Budapest, Hungary
Joined: March 09, 2018
KitMaker: 206 posts
Armorama: 205 posts
Posted: Tuesday, June 18, 2019 - 03:00 AM UTC
Hi David,
This tank looks beautiful for me. Congrats!
Tamas
Budapest, Hungary
Joined: March 09, 2018
KitMaker: 206 posts
Armorama: 205 posts
Posted: Tuesday, June 18, 2019 - 03:02 AM UTC
Hi Tom,
I have built this kit some 3 years ago and used the Lion Roar photo etch detaild up set. Highly recommended, it adds a lot.
Good luck to your project, will follow with interest.
Tamás
Budapest, Hungary
Joined: March 09, 2018
KitMaker: 206 posts
Armorama: 205 posts
Posted: Tuesday, June 18, 2019 - 03:07 AM UTC
Hi Kalin,
Very clean build, congrats! Pls keep on posting pics.
Regards, Tamas
Sofiya, Bulgaria
Joined: November 26, 2017
KitMaker: 393 posts
Armorama: 369 posts
Posted: Tuesday, June 18, 2019 - 04:17 AM UTC
Thanks, Tamas.
Now I painting the interior of the turret, and at the moment it's ready I'll show it.
Kalin
Buenos Aires, Argentina
Joined: May 21, 2012
KitMaker: 765 posts
Armorama: 438 posts
Posted: Tuesday, June 18, 2019 - 02:26 PM UTC
This is my entry
 IMG_4973
 by
Shaky962, en Flickr
Those Radial Fighters Campaign: 1/72 FW 190 A5
Delta 2 Campaign: 1/48 Hobby Boss Mirage IIIC
Navy Boys on those Postage Stamps 1/72 Airfix Sea Harrier FA2
Working: Trumpeter A-5 Vigilante
Waiting: Phantom 60 Campaign
Sofiya, Bulgaria
Joined: November 26, 2017
KitMaker: 393 posts
Armorama: 369 posts
Posted: Thursday, June 20, 2019 - 07:52 AM UTC
Queensland, Australia
Joined: August 06, 2005
KitMaker: 3,353 posts
Armorama: 3,121 posts
Posted: Thursday, June 20, 2019 - 02:56 PM UTC
David and Kalin
Looking sweet guys. The paint work you have done is just excellent.
On the Bench:
Dust, styrene scraps, paint splotches and tears.
Sofiya, Bulgaria
Joined: November 26, 2017
KitMaker: 393 posts
Armorama: 369 posts
Posted: Saturday, June 22, 2019 - 05:53 AM UTC
barkingdigger
Associate Editor #013
England - East Anglia, United Kingdom
Joined: June 20, 2008
KitMaker: 3,981 posts
Armorama: 3,403 posts
Posted: Saturday, June 22, 2019 - 06:30 AM UTC
Kalin - wow! Looking great!
As for me, I've managed a speed-build of the Ariete and it is now in the shed with the primer drying. It was built almost straight OOB, except I had to add a stiffener across the inside of the upper hull just behind the turret ring (similar to the Leopard 2 kits of tanks that the Italian engineers were copying when they designed the real Ariete), and I replaced the turret periscope "glass" with Evergreen strip. (I hate those gimmicky clear parts, and prefer to paint my scopes.) The idler wheel was troublesome with a peg only 2.3mm diameter and a hole 2.6mm, so I found tubing that was a snug fit on the peg and drilled out the idlers to receive it as a bushing. I plan to add the wheels after painting, but before I add the track. Oh, and I had to add 0.010" shims under the turret because the rear fouled some bolt-head detail on the engine deck. All the hatches are sealed because it just isn't possible to pose them open without some hinge surgery, even though they do have some interior detail.
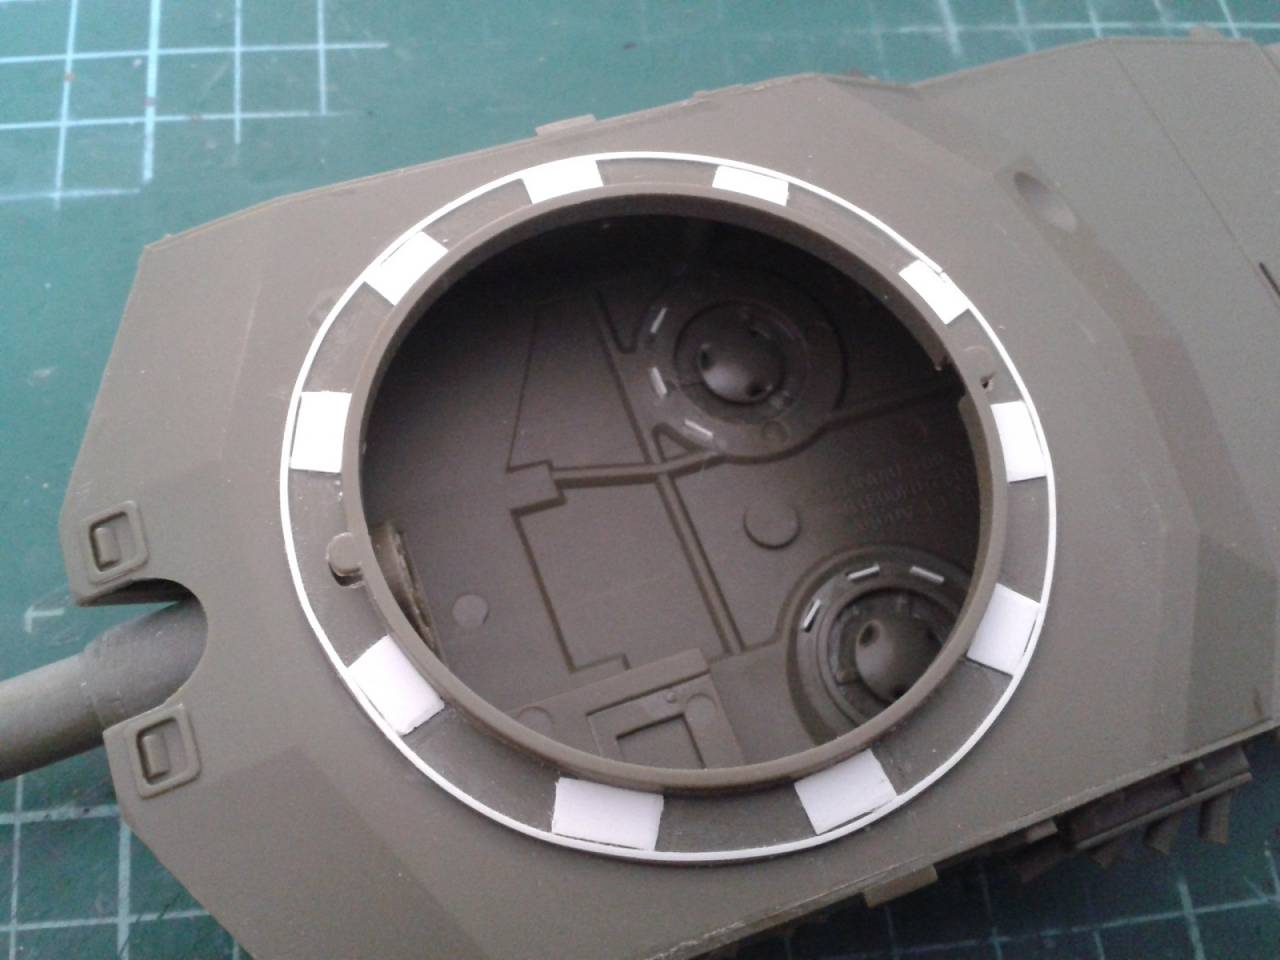
Gotta say, this is typical Trumpeter - some super-crisp details, but some really poor engineering too. Still, with a little effort it certainly builds up ok.
"Glue, or Glue Not - there is no Dry-Fit" - Yoda (original script from Return of the Jedi...)
Sofiya, Bulgaria
Joined: November 26, 2017
KitMaker: 393 posts
Armorama: 369 posts
Posted: Saturday, June 22, 2019 - 09:02 AM UTC
Thanks, Tom!
I think your project is a very good hit. I expect to track his painting and weathering. Good luck!
Kalin

Guatemala
Joined: April 12, 2005
KitMaker: 343 posts
Armorama: 223 posts
Posted: Tuesday, June 25, 2019 - 11:54 AM UTC
WIP of my Challenger Mk3
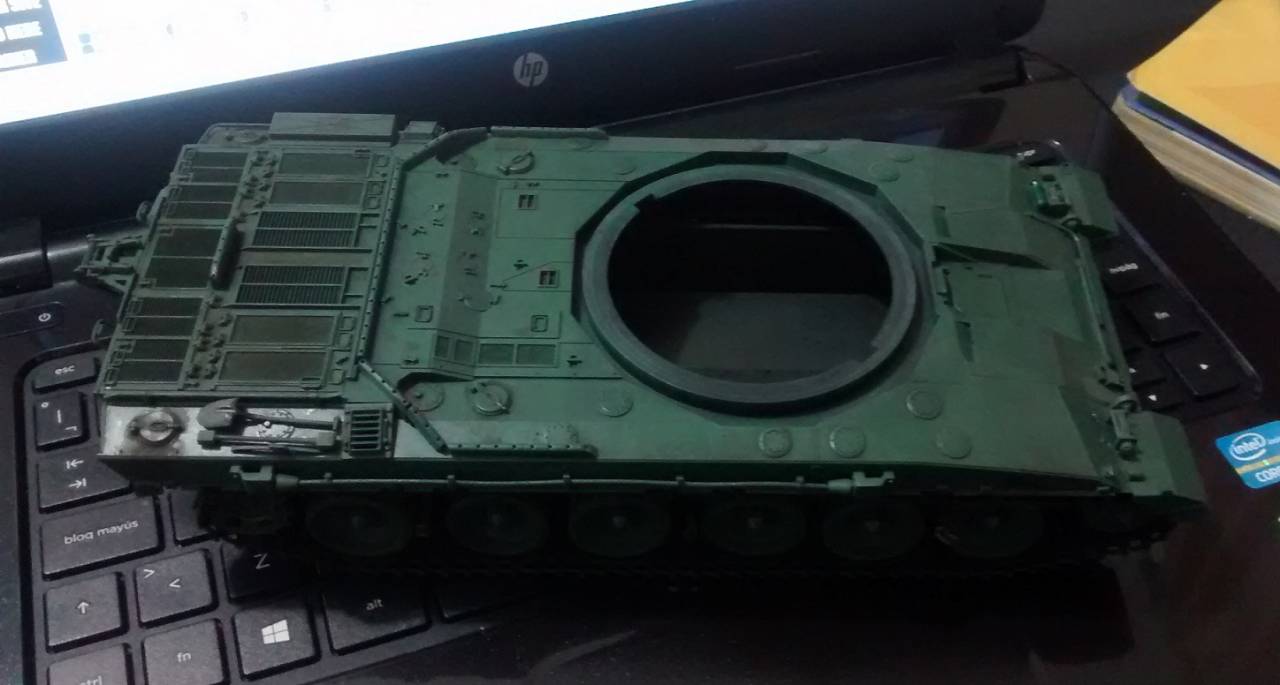
some amazing work around here!! Congrats!!
If you are not part of the solution, Don't be a part of the problem.
Queensland, Australia
Joined: August 06, 2005
KitMaker: 3,353 posts
Armorama: 3,121 posts
Posted: Wednesday, June 26, 2019 - 03:09 PM UTC
Looking Great Kalin. Coming along very nicely.
Interesting to see you needed to shim Tom. A kind of rookie error in the manufacturing design on Trumpeter's behalf. I hear you on the clear periscopes too. The Ariete's look black from any distance apart from touching your nose to them

The only time clear parts are of use is when the front and rear are both open and light passes through.

Byron - another Chally builder. Nice to see your contribution. Looking good too.
On the Bench:
Dust, styrene scraps, paint splotches and tears.