_GOTOBOTTOM
Armor/AFV
For discussions on tanks, artillery, jeeps, etc.
KV-1/KV-1S Hybrid
MrNeil
Visit this Community
New Jersey, United States
Joined: November 01, 2005
KitMaker: 266 posts
Armorama: 262 posts
Posted: Saturday, May 09, 2020 - 12:40 PM UTC
Now I returned to the tracks.

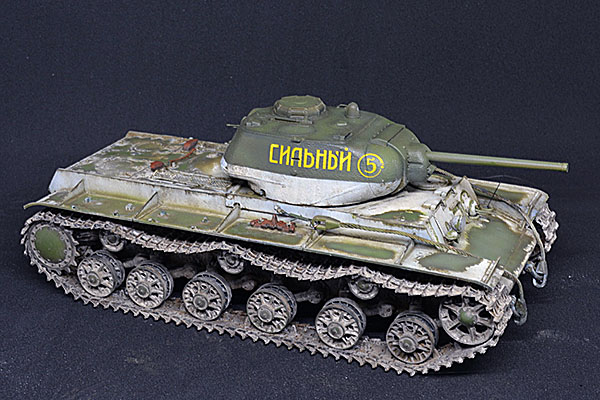
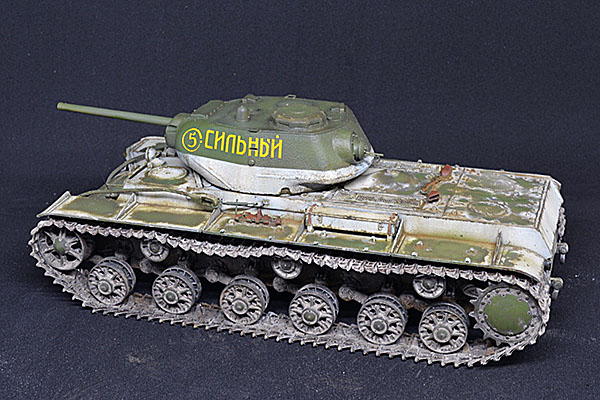
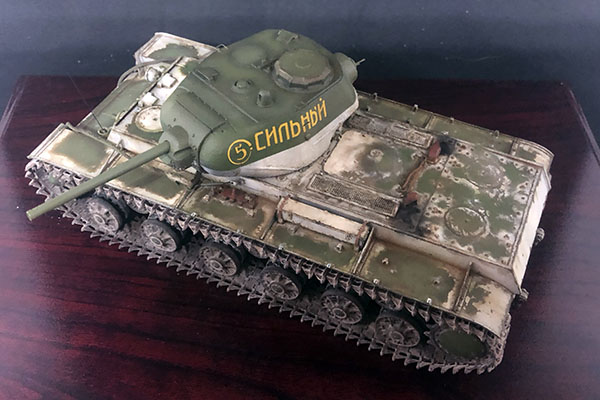
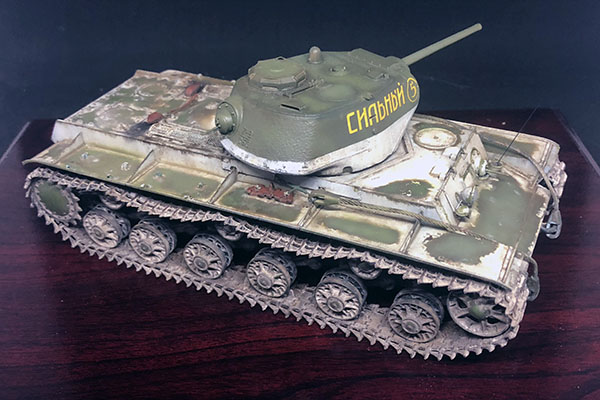
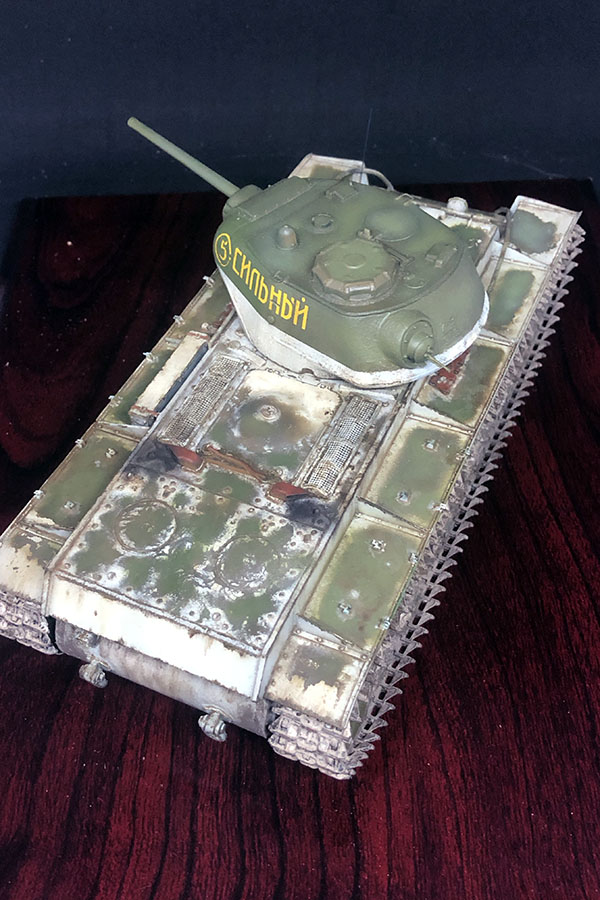
As we discussed earlier in this build log, the initial production KV-1S carried 608mm tracks, as opposed to the 700mm tracks on the KV-1. The primary design principle of the KV-1S was to reduce weight in order to increase speed and improve reliability by easing the strain on the drivetrain. Reducing the width of the tracks alone saved 1500kg.

The 608mm tracks were found to increase the vehicle's ground pressure however, and therefore reduced its ability to cross soft terrain. The tracks were therefore redesigned to be 650mm wide, and these revised tracks were fitted from November 1st 1942 onwards.

Since 'Strong' was an October 1942 production example, it was fitted with the earlier 608mm tracks, as borne out by the original photograph.

As noted earlier, I used Masterclub's MTL-35030 set. After assembly, I primed them with black followed by a coat of Vallejo Model Air Raw Umber, and a heavy dry brush of Vallejo Model Color Oily Steel to represent wear on the outside from contact with the ground, and on the inside from abrasion by the steel-tired wheels.


The steel color is a little bright right now but will tone down when I weather the tracks.
MrNeil
Visit this Community
New Jersey, United States
Joined: November 01, 2005
KitMaker: 266 posts
Armorama: 262 posts
Posted: Wednesday, May 13, 2020 - 02:43 AM UTC
Next, I went to town on the tracks with a few different pigments - Vallejo Natural Umber and the old Mig Productions Russian Earth, all secured with Vallejo Pigment Binder.


The pigments toned down the steel color on the tracks quite nicely, while just leaving a hint of it showing through in places.
MrNeil
Visit this Community
New Jersey, United States
Joined: November 01, 2005
KitMaker: 266 posts
Armorama: 262 posts
Posted: Friday, May 15, 2020 - 08:40 AM UTC
After allowing the pigments to dry thoroughly, I fitted the tracks in place.


The original vehicle used 88 links per side but I found 90 links gave a better sag across the top run. The tech manual specified that the sag should be 50mm at correct tension, which put the bottom of the track link (not the guide tooth) roughly level with the center of the return rollers.

The photograph of 'Strong' showed it carried a 1m radio antenna. I added the antenna from a 27.5mm length of 10-thou brass wire, glued into a hole in the top of the antenna mount.

pgb3476
Visit this Community
Texas, United States
Joined: March 11, 2007
KitMaker: 977 posts
Armorama: 976 posts
Posted: Friday, May 15, 2020 - 09:04 AM UTC
Love that last picture. Not certain if you mentioned where you sourced the decals from?
MrNeil
Visit this Community
New Jersey, United States
Joined: November 01, 2005
KitMaker: 266 posts
Armorama: 262 posts
Posted: Friday, May 15, 2020 - 09:46 AM UTC

Quoted Text

Love that last picture. Not certain if you mentioned where you sourced the decals from?


Greg, the decals are from Armo set 35409 KW Family Pt.2. They went on ok but the carrier film was extremely soft and they required very delicate handling.
MrNeil
Visit this Community
New Jersey, United States
Joined: November 01, 2005
KitMaker: 266 posts
Armorama: 262 posts
Posted: Tuesday, May 19, 2020 - 10:13 AM UTC
Coming close to the end now, I added a light dusting of snow over the tracks, wheels and lower hull using some white pigment. The original photo of 'Strong' doesn't show the running gear but other photos of KVs in the Stalingrad campaign show a more snowy and less muddy look.

I messed about quite a bit with it, dabbing it on and rubbing it off with a damp Q-tip, before I got it to a state I was reasonably happy with.


MrNeil
Visit this Community
New Jersey, United States
Joined: November 01, 2005
KitMaker: 266 posts
Armorama: 262 posts
Posted: Tuesday, June 02, 2020 - 12:58 PM UTC
After some touch up paint to the tow cables and shackles, I'm finally calling this one done. At ten months - I started it last July, though I took a couple breaks to build review kits - this is possibly the longest build I've ever done. Despite that though, it's been a lot of fun to go all-out on depicting a specific and quite rare vehicle.


In case anyone's interested, the base came from an Amazon seller named Plaque Attack. At roughly $20 including shipping, it was a better quality base than I could hope to make myself. I figured that, after all the effort I've put into this model, it deserved a suitable base.
 _GOTOTOP