Armor/AFV
For discussions on tanks, artillery, jeeps, etc.
Tamiya Cromwell build.
TopSmith
Visit this Community
Washington, United States
Joined: August 09, 2002
KitMaker: 1,742 posts
Armorama: 1,658 posts
Posted: Thursday, April 02, 2020 - 07:41 AM UTC
Thank you for your replies. I now have some sources.

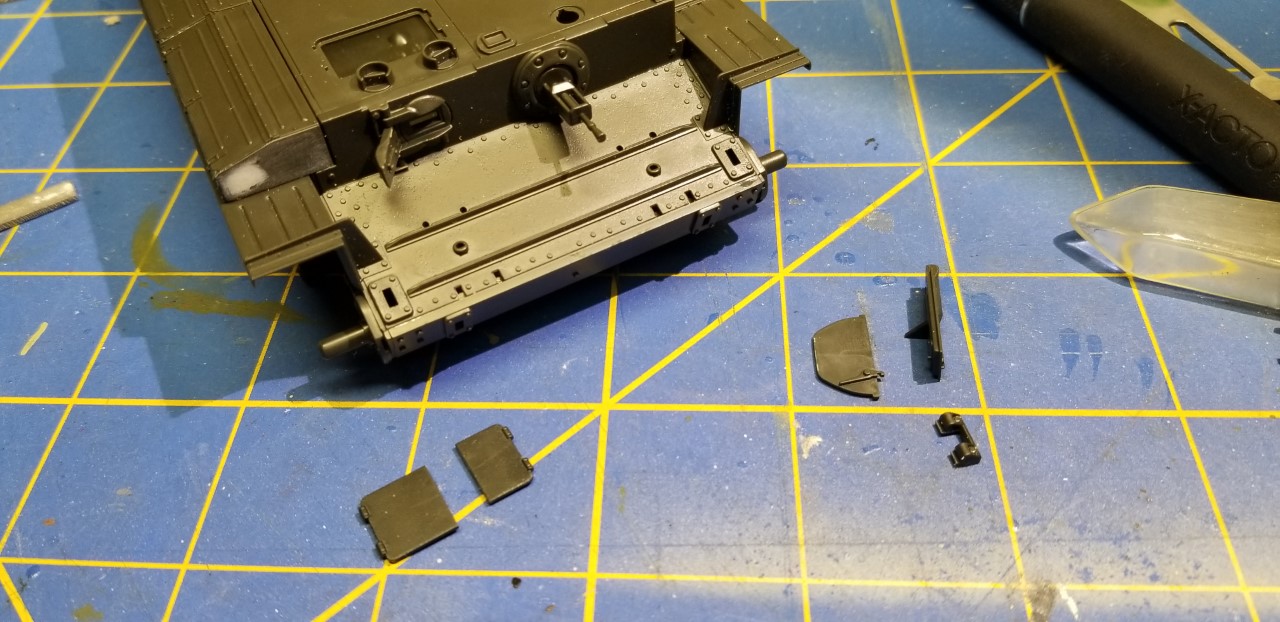
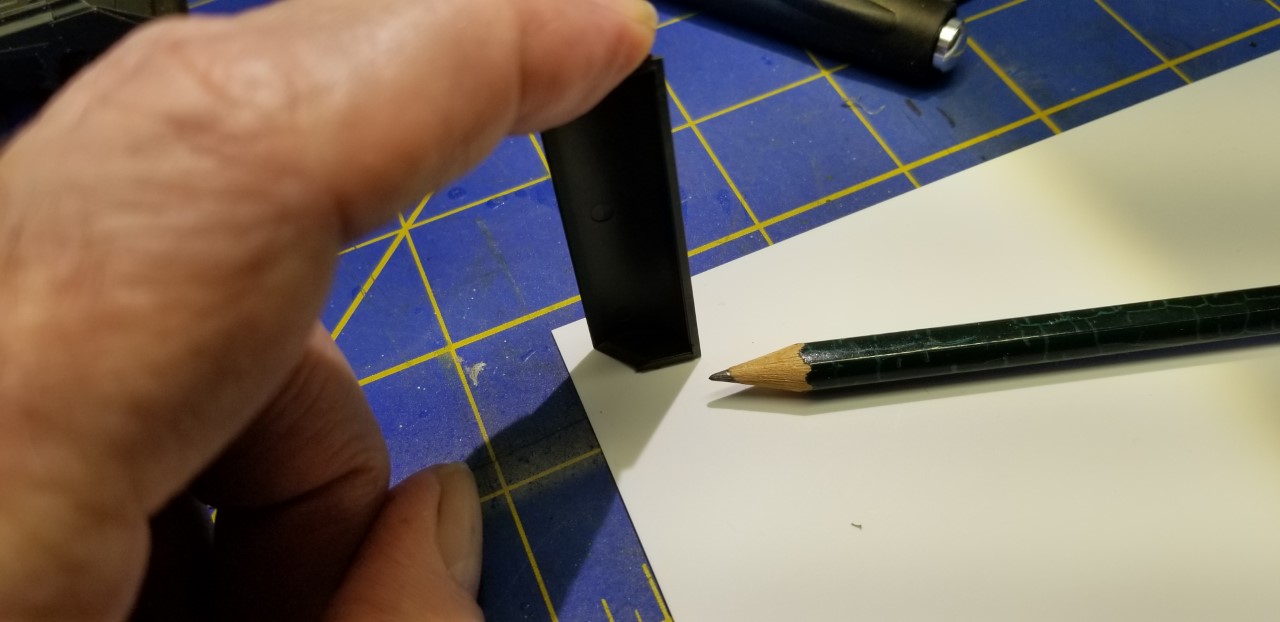
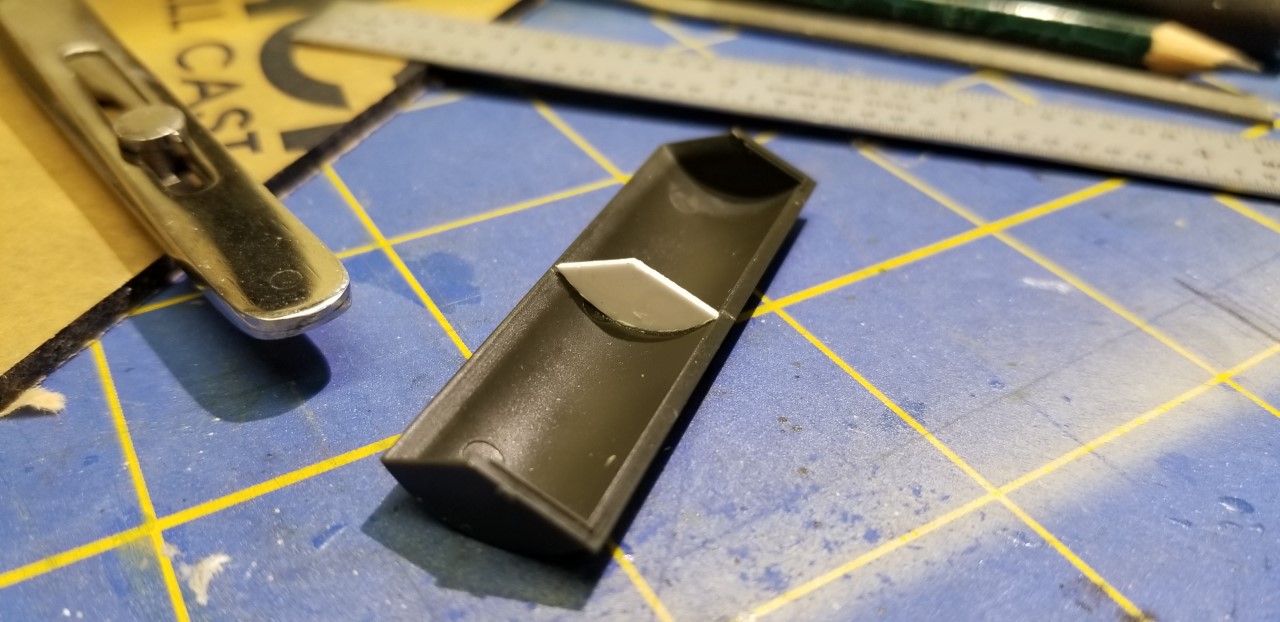
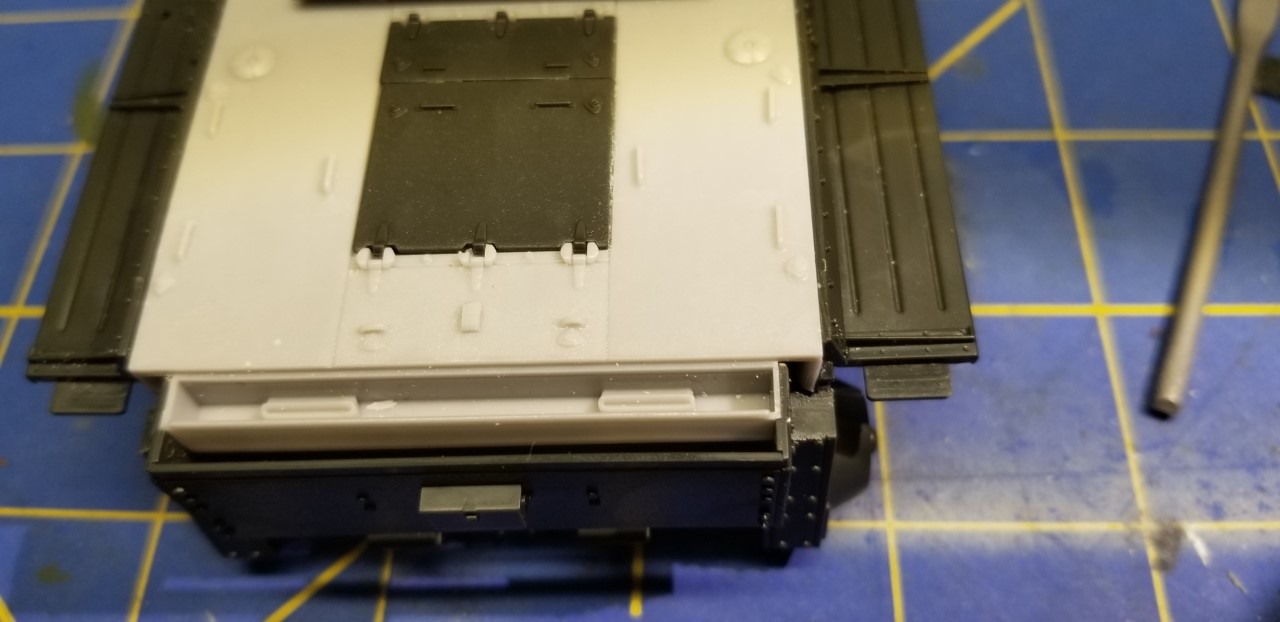
My next step is to put the rear deck cover on. I quickly noticed that the kit part did not fit. The L shapes mounting lug on the deck was wider than the female mounting receptacle.


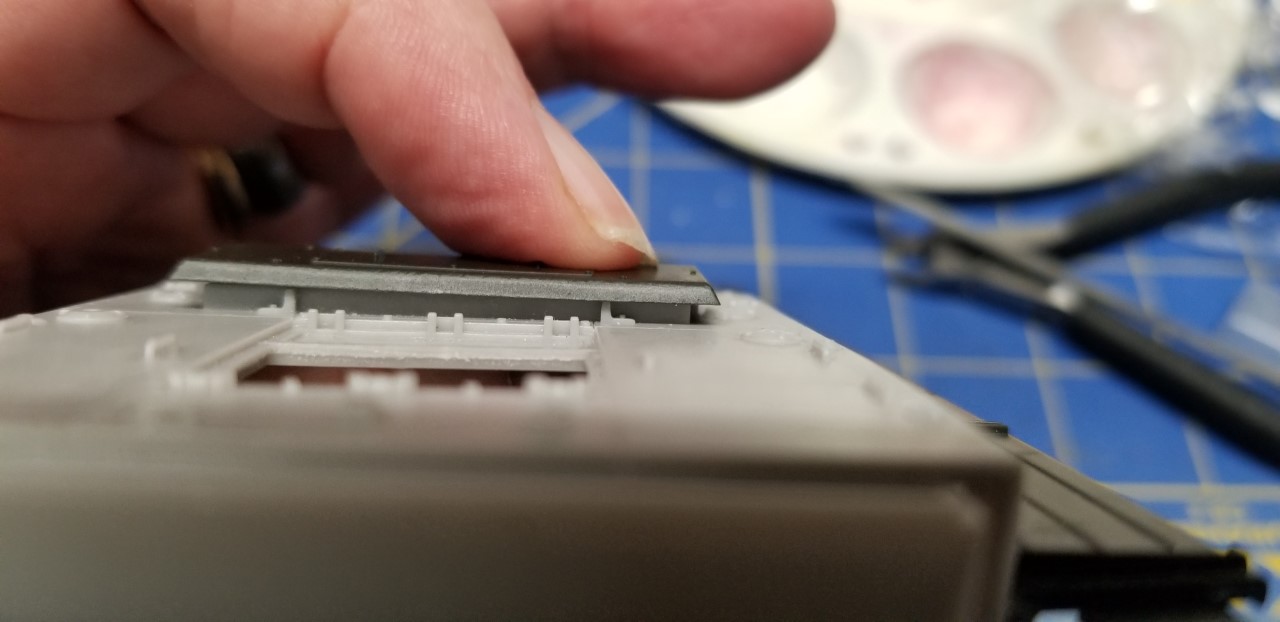
I ended up cutting the left side male mounting lug on the deck and now the cover fit fine.

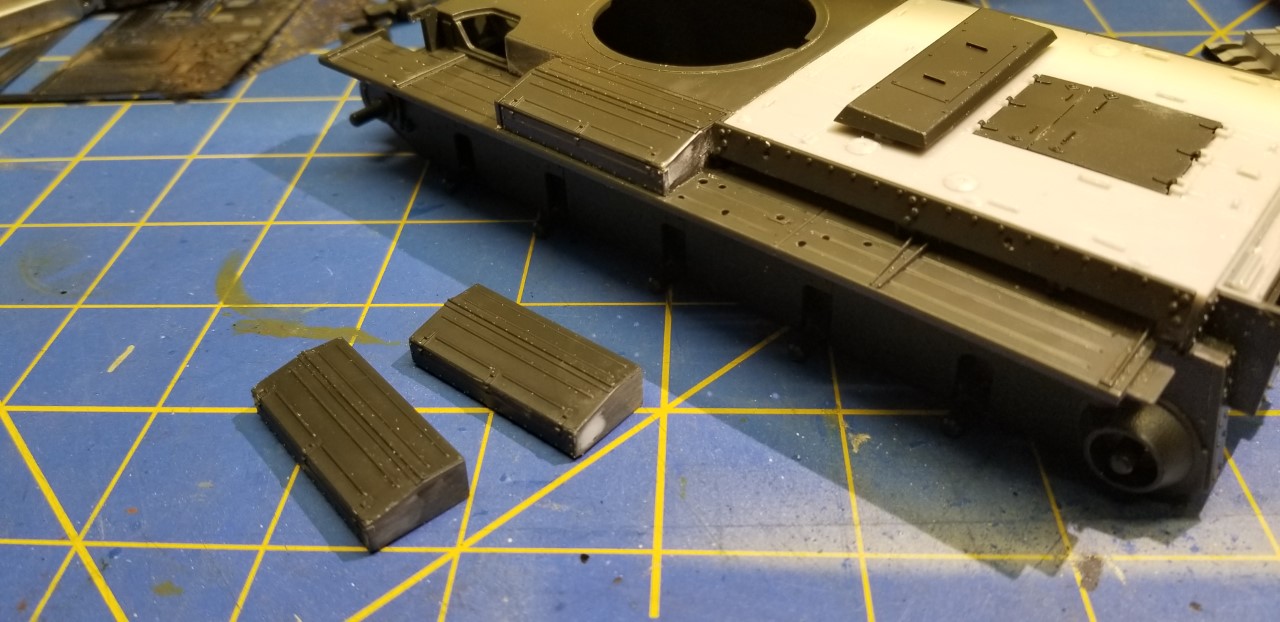
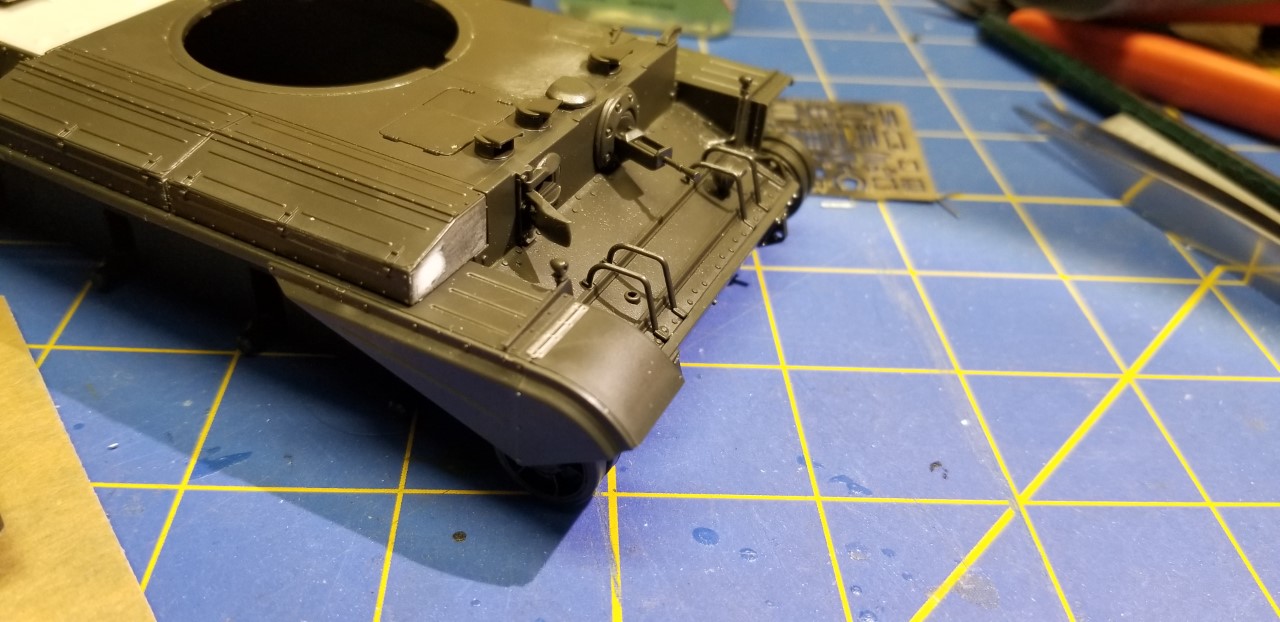
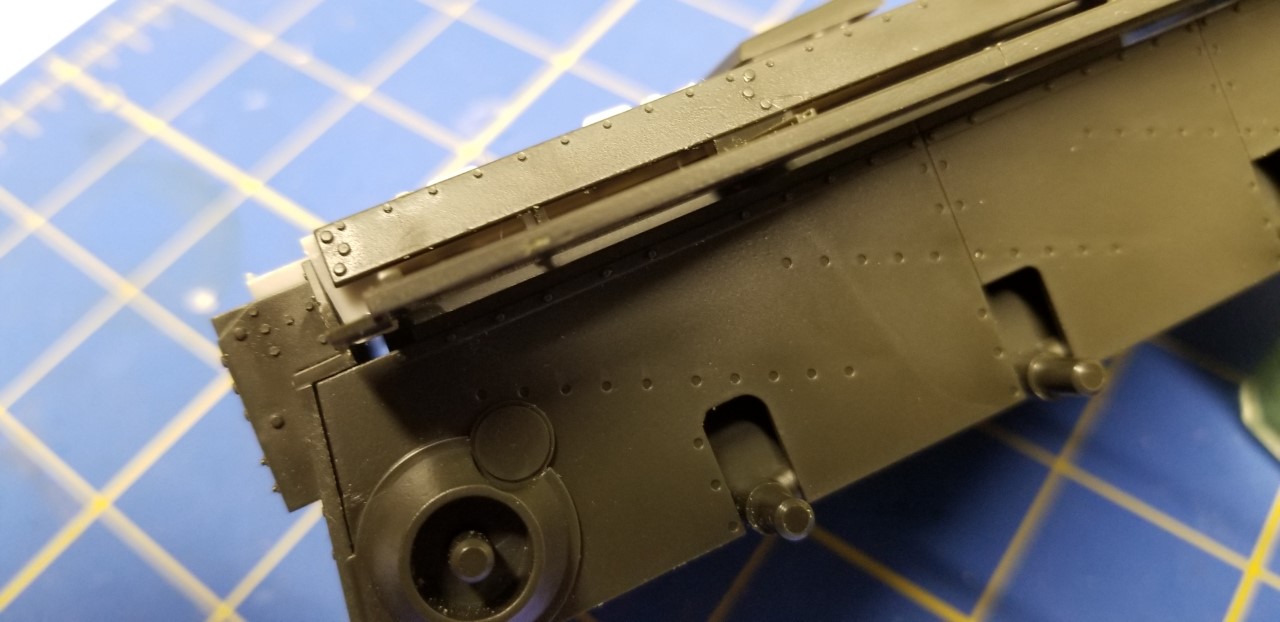
I now installed the rear armored side plates for the rear deck.


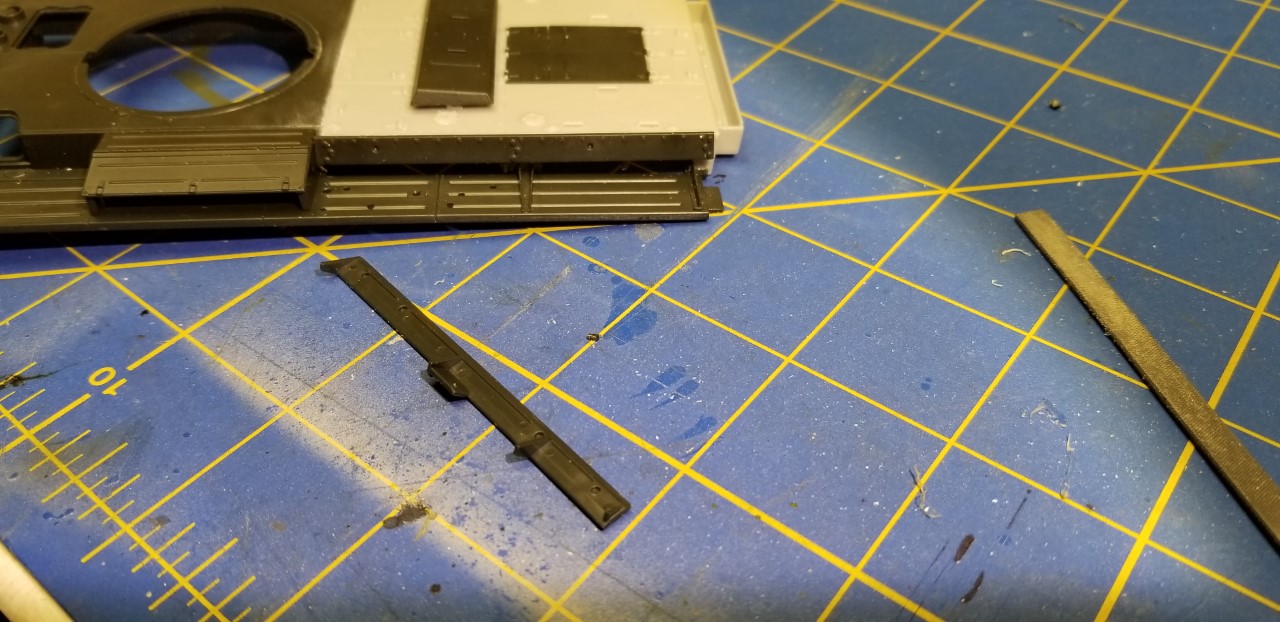
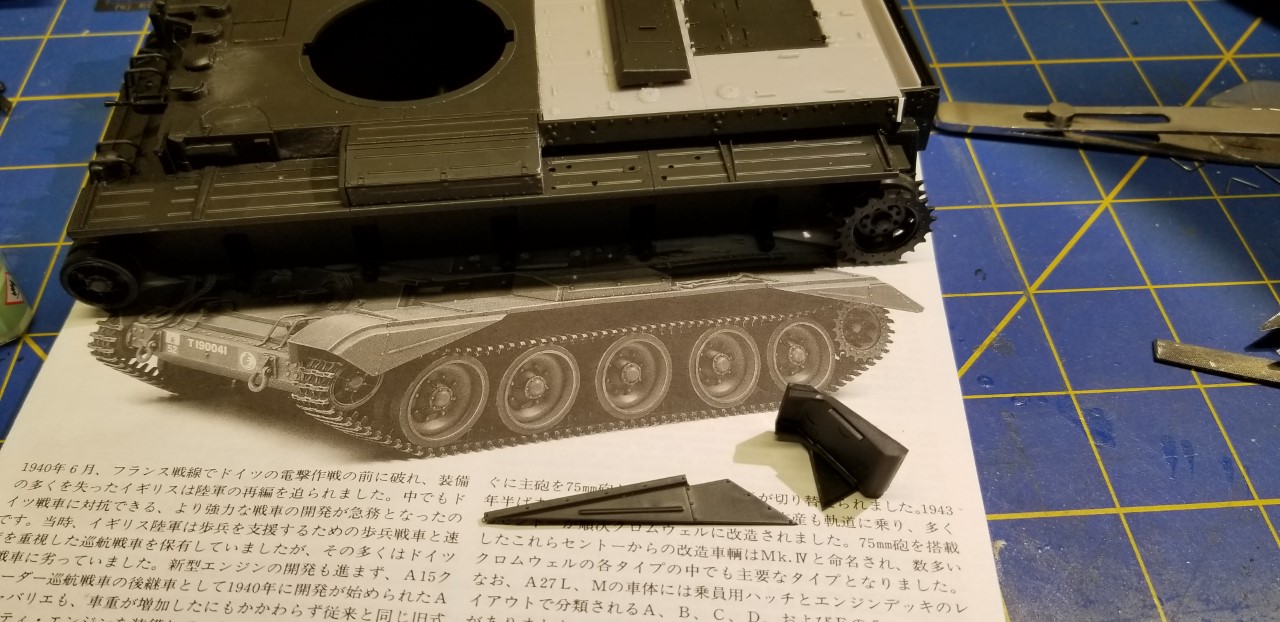
It appears that the deck is longer, the side armor is shorter or I somehow did not fit the deck correctly.


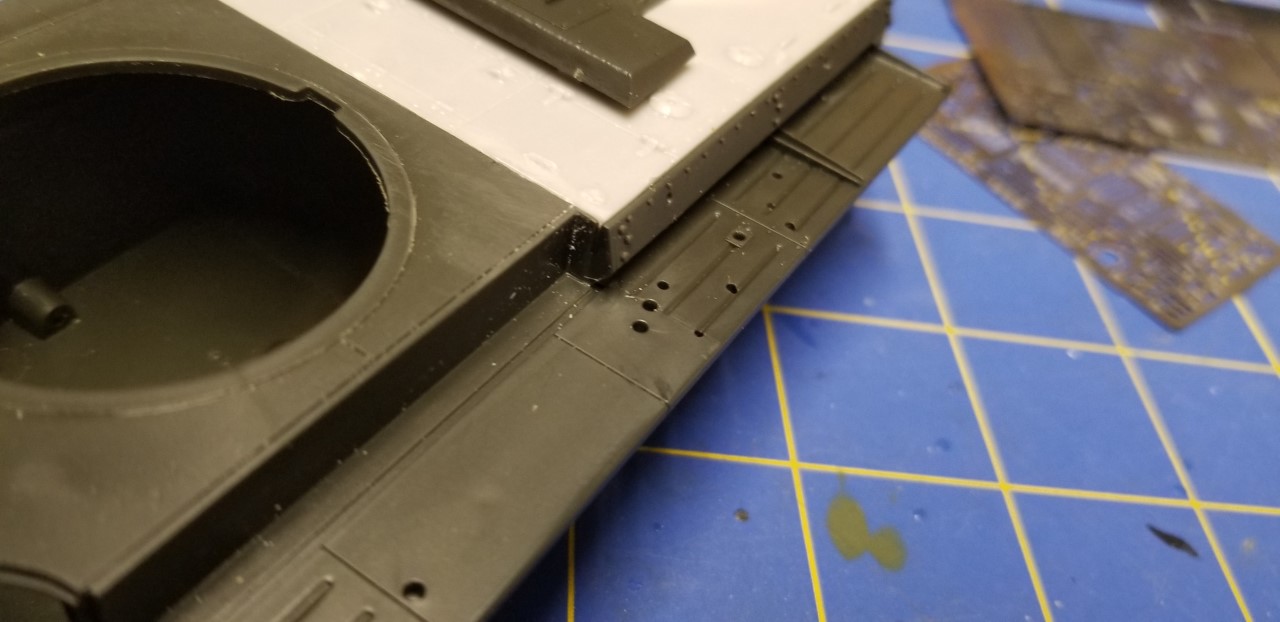
I checked the front fit. Looks OK


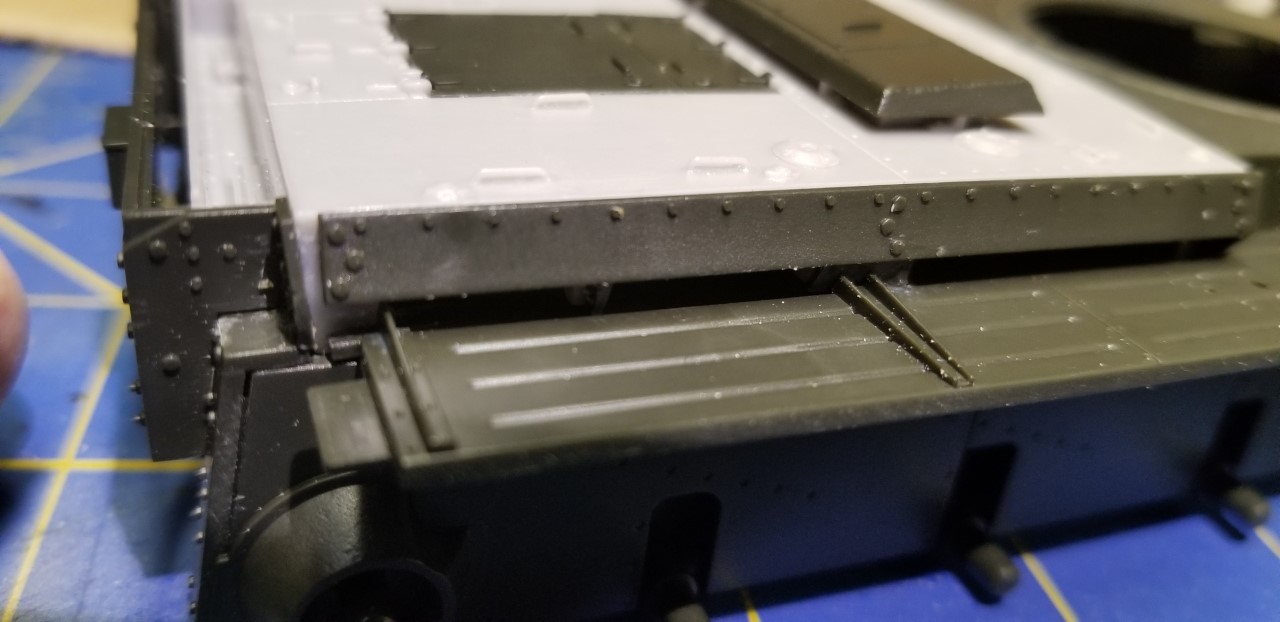
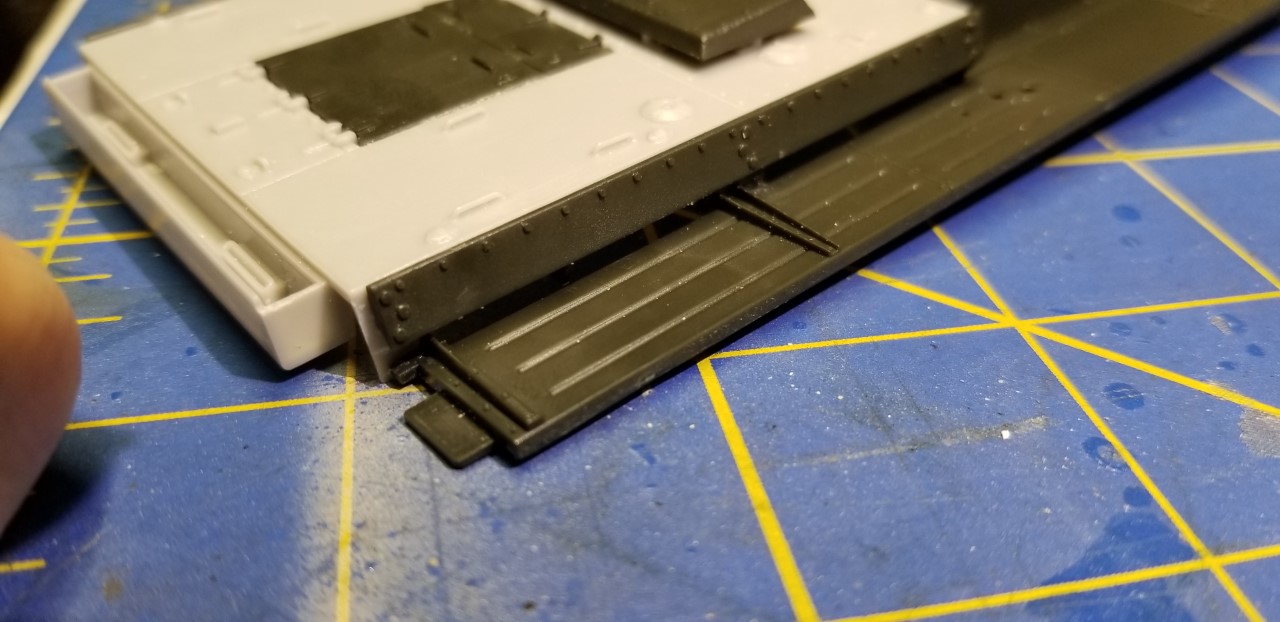
I did a trial fit and the deck was too long and the upper hull would not sit flush with the lower deck.


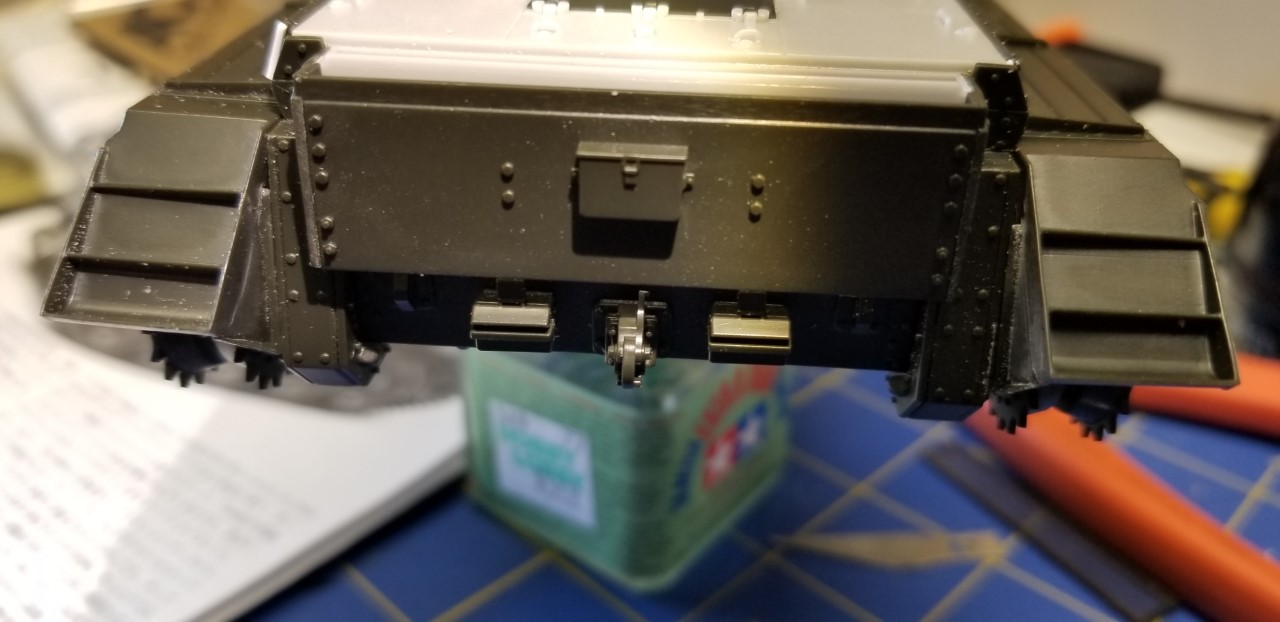
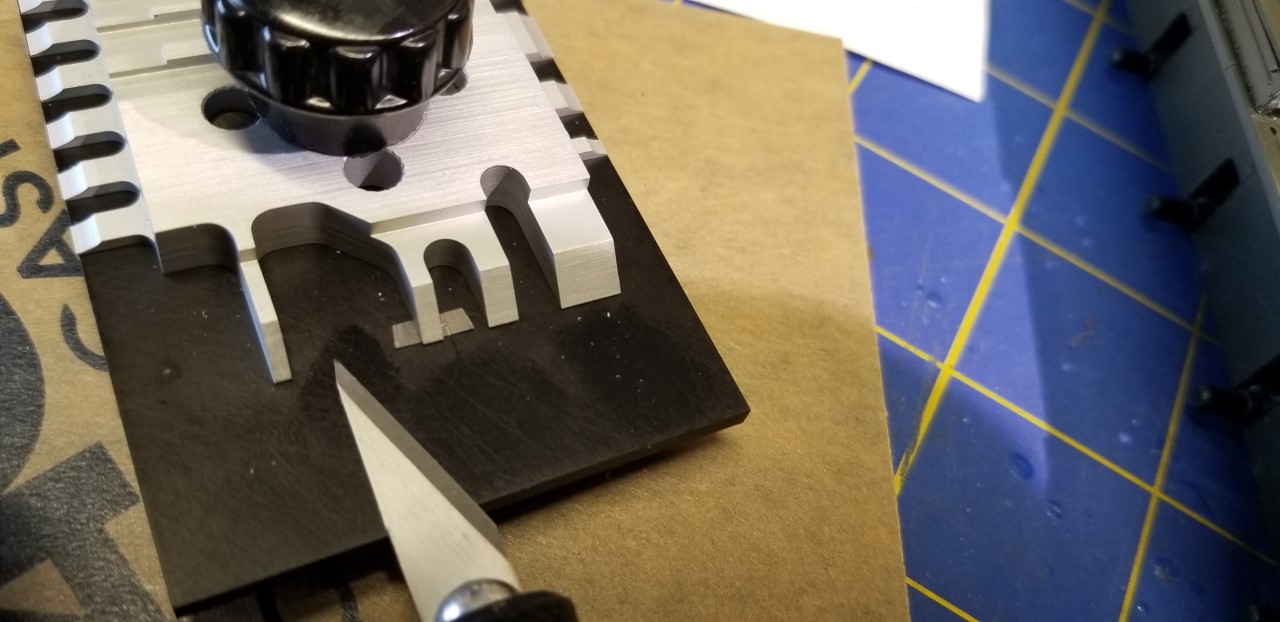
I started by removing part of the rear hull plate.


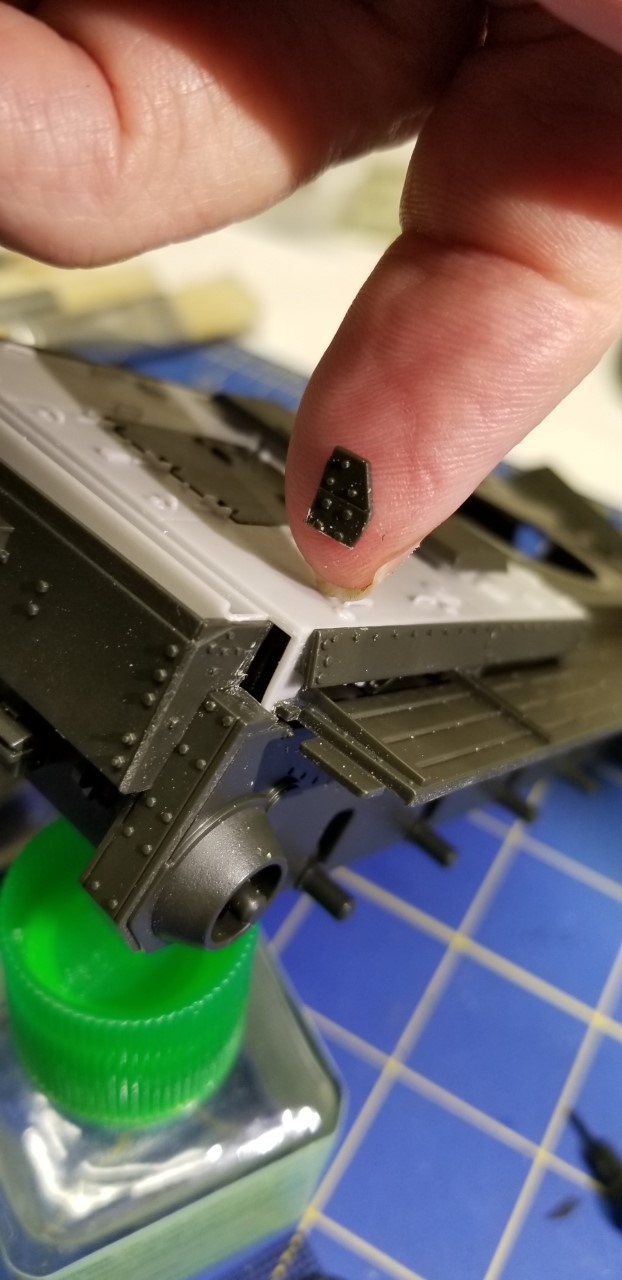
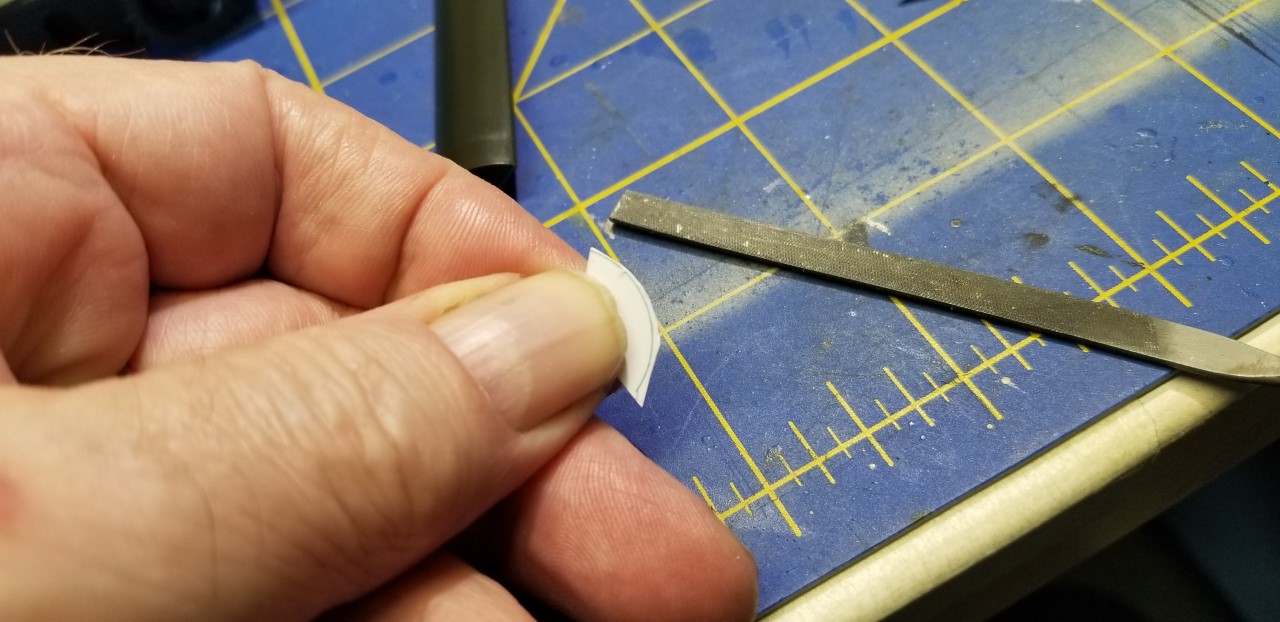
That helped some but not enough. I beveled the lower rear deck( may come back to haunt me) and carved some notches into part of the rear hull plate.


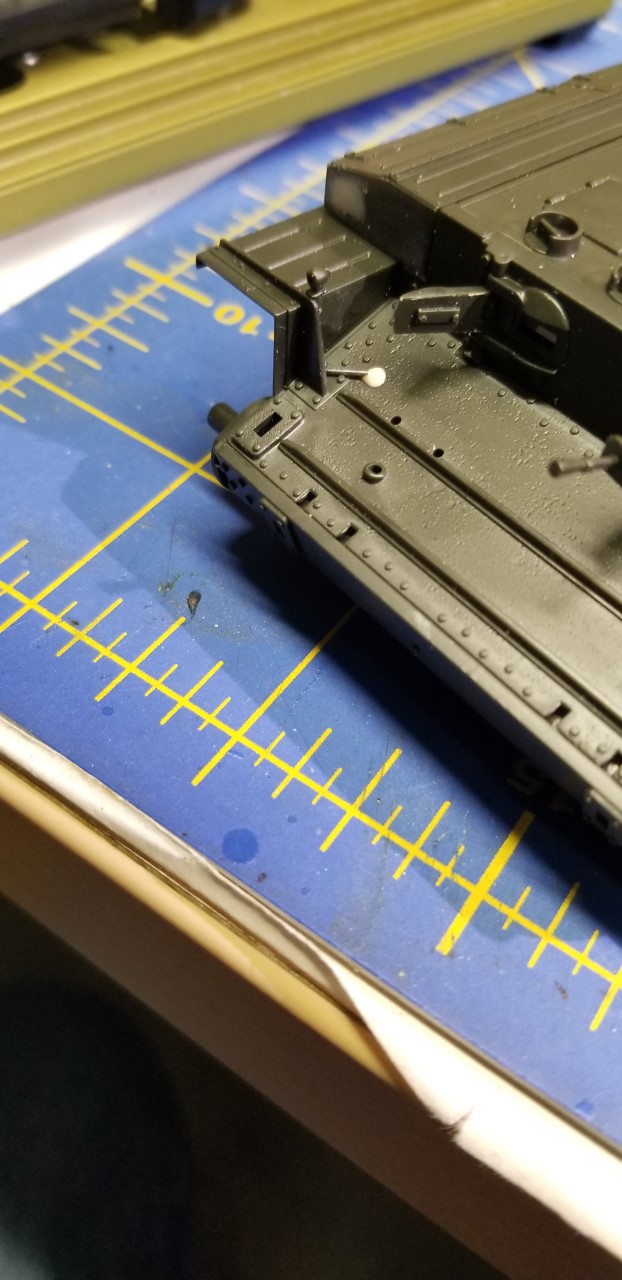
Now the upper hull fits correctly on the lower hull and I glued the two together. (another hind site piece of advice, I would not glue the upper hull until after I glued the parts that fit on the front of the upper hull) I now glued the rear hull tabs back on and I see I will need to fill in the gap that remains. If you have used this rear deck conversion, what did you do? Did yours fit fine and I missed the memo or did you have a better way?


CMOT
Staff MemberEditor-in-Chief
ARMORAMA
Visit this Community
England - South West, United Kingdom
Joined: May 14, 2006
KitMaker: 10,954 posts
Armorama: 8,571 posts
Posted: Thursday, April 02, 2020 - 08:28 AM UTC
I had exactly the same issue including the kit hatches fitting better than the Accurate Armour parts. I have raised this with Accurate Armour at last years Scale Model World and have not had a reply as yet. I had to cheat and sand the area at the rear off the turret ring and a little off of the resin to get a good fit.
clovis899
#155
Visit this Community
California, United States
Joined: May 05, 2002
KitMaker: 774 posts
Armorama: 605 posts
Posted: Thursday, April 02, 2020 - 10:23 AM UTC
Greg,
It is looking good! I always recommend the Cromwell for anyone just getting into the hobby.
To bad about the fit issues. Many of us have been there before,"it should be just an easy drop in change". Best intentions and all that. Good luck the rest of the way and I'll be following along for the remainder of the journey.

Cheers,
Rick
TopSmith
Visit this Community
Washington, United States
Joined: August 09, 2002
KitMaker: 1,742 posts
Armorama: 1,658 posts
Posted: Thursday, April 02, 2020 - 03:14 PM UTC
The actual kit parts fit well it is the resin pieces that have been challenging.
CMOT
Staff MemberEditor-in-Chief
ARMORAMA
Visit this Community
England - South West, United Kingdom
Joined: May 14, 2006
KitMaker: 10,954 posts
Armorama: 8,571 posts
Posted: Thursday, April 02, 2020 - 11:51 PM UTC
Sorry Greg that is what I meant it that the kit hatches fit the resin deck better than the resin ones.
barkingdigger
Staff MemberAssociate Editor
ARMORAMA
#013
Visit this Community
England - East Anglia, United Kingdom
Joined: June 20, 2008
KitMaker: 3,981 posts
Armorama: 3,403 posts
Posted: Friday, April 03, 2020 - 12:09 AM UTC
Sounds like the AA part is too long. Was this part really designed for the Tamiya kit, or is it just recycled from one of their own full tank kits? If the latter, that would explain why it is a problem. But those doors are another issue - they designed both the doors and the deck so they really should fit!

In terms of a fix, you could take the resin deck off and trim the front edge until the total length is correct. Or you could carefully cut off the exhaust bay at the rear, file rear of the deck to fit the sides, and then glue the exhaust bay back on after. Either way will be a challenge.
jrutman
Visit this Community
Pennsylvania, United States
Joined: April 10, 2011
KitMaker: 7,941 posts
Armorama: 7,934 posts
Posted: Friday, April 03, 2020 - 01:56 AM UTC
Another way to avoid all the fit issues just described is to just modify the kit part for the back deck. There is not a whole lot that needs changing IIRC.
Just a thought. Anyway,that is what I did when I built mine last year.
J
TopSmith
Visit this Community
Washington, United States
Joined: August 09, 2002
KitMaker: 1,742 posts
Armorama: 1,658 posts
Posted: Sunday, April 05, 2020 - 03:25 AM UTC
Tom, I think you have the easiest solution. I didn't realize there would be an issue (you would think the too small doors on the deck would be a clue to other issues) and glued the deck on. It was then I discovered the extra length and chose to fight the battles on the back of the rear deck. In hindsight, Shaving the front off the deck would be so much less of a headache. The material you would have to remove would not be noticeable. You would have to replace the front mounting lugs from the resin deck but you could use some scrap plastic from the removed kit deck for that.
TopSmith
Visit this Community
Washington, United States
Joined: August 09, 2002
KitMaker: 1,742 posts
Armorama: 1,658 posts
Posted: Monday, April 06, 2020 - 09:37 AM UTC
The next item is the sponson boxes. After assembling, they needed some sanding and putty and they were ready to install.


I cut and installed the spacer where the rear deck was too long. The plastic in the kit is dark and the spacer was white and the contrast was making it difficult to see so I fired up the mag lite. It is a challenge to find enough light when you get older.


Looking at some walk around photo's I noticed the front marker lights were wired so..I wired them. I thought just use some solder. However, a clever idea appeared to use some of the staples I had leftover from the track. I could not get the staple into the proper position. All of my tweezers/forceps were magnetized and I couldn't get the staple to let go from the tweezers. So I went back to the solder and I had no problem then.


Next, I started putting on the small Hardwear on the front of the hull.


I am leaving off one of the lights because it will be easier to paint the lens and install it after painting.


The roadwheels and sprockets are next.


Now is a point you need to make a decision. If you install the sand shields on the fender now you will need to install the idler wheel and the sprocket first and paint them later while on the hull.


Bravo36
Visit this Community
Arizona, United States
Joined: January 11, 2002
KitMaker: 247 posts
Armorama: 229 posts
Posted: Monday, April 06, 2020 - 10:23 AM UTC
Greg, I too use solder (RadioShack) for all of my wiring and grab-handles. At least to me, it's easier than metal wire (brass, copper or aluminium.) I also roll it flat for straps. Good stuff...
dhines
Visit this Community
Nova Scotia, Canada
Joined: November 17, 2015
KitMaker: 407 posts
Armorama: 373 posts
Posted: Monday, April 06, 2020 - 02:34 PM UTC
Great job so far Greg, I am following with much interest and look forward to seeing it built. Best regards.........Dale
PRH001
Visit this Community
New Mexico, United States
Joined: June 16, 2014
KitMaker: 681 posts
Armorama: 603 posts
Posted: Monday, April 06, 2020 - 02:45 PM UTC
I’m enjoying and following along with your build. This one is on my list of future build a so I’m definitely taking notes.

Cheers
TopSmith
Visit this Community
Washington, United States
Joined: August 09, 2002
KitMaker: 1,742 posts
Armorama: 1,658 posts
Posted: Tuesday, April 07, 2020 - 02:03 AM UTC
Thank you for the comments so far. I was looking at a picture of the exhaust deflector and noticed the support piece in the center (which the kit lacks) and wondered if this was a one-piece deflector that ran from one side to the other with a center support or was it a two-piece item?


Bulldog
Visit this Community
Ohio, United States
Joined: March 09, 2004
KitMaker: 41 posts
Armorama: 35 posts
Posted: Tuesday, April 07, 2020 - 08:47 AM UTC
As I am planning a Cromwell myself and watching your work here helps a great deal. I too wanted to display spare road wheels on the turret. Having said that I got all my books out that might contain Cromwell photos and started looking. They did indeed use the lifting eyes or lugs as they are called in different places from what I have seen the crew ran a heavy piece of wire through the bolt holes on the tire and then hung the wheel on the lifting eye. I hope this helps in some small way. I will keep watching your progress on this kit. Best Regards, Brock
TopSmith
Visit this Community
Washington, United States
Joined: August 09, 2002
KitMaker: 1,742 posts
Armorama: 1,658 posts
Posted: Tuesday, April 07, 2020 - 12:55 PM UTC
Black Dog makes a resin set you might be interested in. The British Cromwell Hessin and Storage set.

TopSmith
Visit this Community
Washington, United States
Joined: August 09, 2002
KitMaker: 1,742 posts
Armorama: 1,658 posts
Posted: Thursday, April 09, 2020 - 02:57 PM UTC
There are three parts to the rear fender.


Be careful when fitting the fender skirt to the rear hull plate. the attachment point is not that obvious.


The front fender went on with no issues. I decided to leave one fender off.


Next, I want to make the divider/support piece in the exhaust deflector that was visible in the picture. I traced out the deflector side piece.


I cut out the piece and filed it to shape.


I then measured the center of the deflector and glued it in.


I didn't do much PE for this kit. To me, the PE part needs to be noticeably better than the kit part or for a part the kit does not furnish. I am using the screen that covers the exhaust, the front fender hinge and the thingie on the rear deck hatch cover (I think it is a stop to prevent the door handles from damaging the rear exhaust screen when opened)at this point.


TopSmith
Visit this Community
Washington, United States
Joined: August 09, 2002
KitMaker: 1,742 posts
Armorama: 1,658 posts
Posted: Friday, April 10, 2020 - 03:34 AM UTC
That back deck again, the gift that keeps on giving. Because it is longer, it pushes the exhaust frame and screen past the end of the rear hull plate.


To solve that issue will require resizing the frame and screen. I started by trimming part of the rear frame out, leaving the sides intact so I could trim the sides to fit, then reattaching the rear frame piece. I figured with the deflector in place the chances of seeing the frame repair would be negligible.


I then had to trim the screen to match the frame.


I now reattached the screen using some acrylic floor polish on the frame rails and sat the screen on the frame.


The final product fits correctly now.

RLlockie
Visit this Community
United Kingdom
Joined: September 06, 2013
KitMaker: 1,112 posts
Armorama: 938 posts
Posted: Saturday, April 11, 2020 - 06:58 PM UTC
The official Normandy cowl was a single assembly but prior to its arrival units improvised locally made examples from discarded wading trunking and possibly other sheet metal. There are photos around (Desert Rats at war 2 has at least one). The later Comet had two separate cowls, one each side, before the fishtail exhausts were installed in the rear plate.

Apparently if the vehicle sat stationary with engine running, the exhaust gases accumulated over the decks and would be sucked into the fighting compartment, so the cowl ejected them rearwards to avoid the problem.
CMOT
Staff MemberEditor-in-Chief
ARMORAMA
Visit this Community
England - South West, United Kingdom
Joined: May 14, 2006
KitMaker: 10,954 posts
Armorama: 8,571 posts
Posted: Sunday, April 12, 2020 - 08:59 AM UTC

Quoted Text

Thank you for the comments so far. I was looking at a picture of the exhaust deflector and noticed the support piece in the center (which the kit lacks) and wondered if this was a one-piece deflector that ran from one side to the other with a center support or was it a two-piece item?


That is the two part one as you can see the seam continues around the curve.
TopSmith
Visit this Community
Washington, United States
Joined: August 09, 2002
KitMaker: 1,742 posts
Armorama: 1,658 posts
Posted: Sunday, April 12, 2020 - 03:14 PM UTC
Thanks Darren and Robert. My thought was that there was a center segment and you could see the rivet pattern on the top side. However, Darren you are probably correct. I have seen pictures of a variety of homemade deflectors and manufactured deflectors. Due to the effort to make them, the crew must have thought it important.

The next thing to think about is the paint job. I was looking at a photo of a T34 that was posted in the Russian forum and wanted to create the same shadow patterns.


I plan on spraying Tamiya's Fine white primer and spray black onto the shadow areas then spray the olive drab without completely being opaque. I like to paint with Tamiya paint and a contributor to the forum provided a Tamiya paint mix for the 1944 British olive drab.
If you have a better mix recipe please feel free to join the conversation. I realize the color faded differently than the American olive drab so expert rivet counter's opinions would be appreciated.

TopSmith
Visit this Community
Washington, United States
Joined: August 09, 2002
KitMaker: 1,742 posts
Armorama: 1,658 posts
Posted: Monday, April 13, 2020 - 02:53 PM UTC
I started the painting process by applying a coat of Tamiya's white fine primer.


I discovered I had left off the turret spotlight wiring. I found two photos online that showed how the light was wired.


I drilled out the hole in the light mount using a #69 drill bit.


The hole needs to be on the back half of the mount.


I used the solder again for the wiring.

TopSmith
Visit this Community
Washington, United States
Joined: August 09, 2002
KitMaker: 1,742 posts
Armorama: 1,658 posts
Posted: Thursday, April 16, 2020 - 02:40 PM UTC
I haven't done the preshading before on a dark color so it is time to experiment. I painted the deck I cut off white as a test piece.


I then painted 2 sides Neutral Gray and Two sides Flat Black.


I then used the British Green mix and painted the deck.


The Flat Black does make a more pronounced shadow area. The gray is more subtle. The next step is to plan my shadows. I have a feeling it would be better to more conservitive in the shadow zones so as not to over do it.

My question is for the British armor fans, is this the correct color green?

RLlockie
Visit this Community
United Kingdom
Joined: September 06, 2013
KitMaker: 1,112 posts
Armorama: 938 posts
Posted: Thursday, April 16, 2020 - 05:50 PM UTC
Cowls would have been made in unit LADs rather than by crews. After all, they needed welding and other metalworking kit which is not something a tank crew has need to carry, or necessarily the opportunity or skills to use. Hence they often appear similar within a unit, like the Sherman sandshields attached to 4AB hull rears.
barkingdigger
Staff MemberAssociate Editor
ARMORAMA
#013
Visit this Community
England - East Anglia, United Kingdom
Joined: June 20, 2008
KitMaker: 3,981 posts
Armorama: 3,403 posts
Posted: Thursday, April 16, 2020 - 11:14 PM UTC

Quoted Text

I plan on spraying Tamiya's Fine white primer and spray black onto the shadow areas then spray the olive drab without completely being opaque. I like to paint with Tamiya paint and a contributor to the forum provided a Tamiya paint mix for the 1944 British olive drab.
If you have a better mix recipe please feel free to join the conversation. I realize the color faded differently than the American olive drab so expert rivet counter's opinions would be appreciated.


Ah - that's Mike Starmer's "old" mix for SCC15. There is a revised version that I haven't tried yet:

XF81 - 5 parts
XF58 - 1 part
XF-71 - 1 part

Not sure if it'll matter once you start throwing weathering on it! (I use the "old" mix, over a base of thinned XF-62 OD. The whole point of SCC15 was that it looked like OD when new, so Lend-Lease tanks could be modified and only the new parts needed to be painted to match the factory OD. But it certainly seemed to fade more "green" than the brown colour OD faded to.)
RLlockie
Visit this Community
United Kingdom
Joined: September 06, 2013
KitMaker: 1,112 posts
Armorama: 938 posts
Posted: Friday, April 17, 2020 - 05:04 AM UTC
Isn’t that because it contained chromium oxide whereas OD No.9 was a mx of ochre and black?