England - South West, United Kingdom
Joined: October 17, 2017
KitMaker: 944 posts
Armorama: 928 posts
Posted: Wednesday, September 23, 2020 - 01:58 AM UTC
Quoted Text
Love the progress you make... That fish must be deaf and blind!!!
On the serious side, do add the carrier in time! the tracks, wheels ,and possibly, rear of the vehicle must be submersed!!!!
Hi Erwin,
Deaf and blind...and definitely dumb,

...think I modelled him on myself,

.
I have given the Carrier its basic green coat, so working on it.
Luckily, because of how Carriers sit on their tracks, and because of the location I picture it in, no track in contact with the surface sits in water, but a reasonable length will overhang it and be subject to splashes etc. Hopefully that comment will make more sense as the build progresses,

.
Cheers,

,
G
An optimist is a pessimist without all the facts.
England - South West, United Kingdom
Joined: October 17, 2017
KitMaker: 944 posts
Armorama: 928 posts
Posted: Wednesday, September 23, 2020 - 02:13 AM UTC
Hi all,
Very little progress over the last few days to report, but work still proceeds,
.
Looking at images of cascading/flowing water there is a lot of turbulent, bubbling whiteness and I have been trying to find a way of doing this.
Initially I tried painting it on with white oils 'pin-pricked' into the surface of the water, plan 'A'...a bit like tattooing...but, imho, it didn't look right, especially once it had dried, so it was back to the drawing board.
The images below show plan 'B', believe it or not, it does, imho, look considerably better than painted on,
.


The Carrier has also had its first coat of 'green'.
Cheers,
,
G
An optimist is a pessimist without all the facts.
Pennsylvania, United States
Joined: April 10, 2011
KitMaker: 7,941 posts
Armorama: 7,934 posts
Posted: Wednesday, September 23, 2020 - 02:57 AM UTC
Welllll...looks convincing to me! For sure.
J
New South Wales, Australia
Joined: May 04, 2016
KitMaker: 1,476 posts
Armorama: 1,463 posts
Posted: Wednesday, September 23, 2020 - 03:21 AM UTC
Me too - I don't pretend to know how the water/acrylic is applied but I had another crazy thought for bubbles - inject a hyperdermic into it when wet, either pump air or water or something that'll make it froth?
England - South West, United Kingdom
Joined: October 17, 2017
KitMaker: 944 posts
Armorama: 928 posts
Posted: Thursday, September 24, 2020 - 03:55 AM UTC
Quoted Text
Welllll...looks convincing to me! For sure.
J
Hi Jerry,
Thank you for your reassurances,
.
Cheers,
.
G
An optimist is a pessimist without all the facts.
England - South West, United Kingdom
Joined: October 17, 2017
KitMaker: 944 posts
Armorama: 928 posts
Posted: Thursday, September 24, 2020 - 04:06 AM UTC
Quoted Text
Me too - I don't pretend to know how the water/acrylic is applied but I had another crazy thought for bubbles - inject a hyperdermic into it when wet, either pump air or water or something that'll make it froth?
Hi Tim,
Thank you,
.
The acrylic I've been using is poured in thin layers, 3mm depth at the most each time. It then takes at least 24hrs before the next layer.
I'm no expert as it's my first ever attempt at water of more than a few mm's as used in the water trough on my snowy diorama, so it might work. However, I think the bubbles would rise out, especially the number you'd need to represent turbulent waters, if put in too early, and would force the surface to balloon if put in once it has skinned over.
But, as I say, I'm no expert, maybe someone has tried it and could comment on their experience(s)?
Cheers,
,
G
An optimist is a pessimist without all the facts.
England - South West, United Kingdom
Joined: October 17, 2017
KitMaker: 944 posts
Armorama: 928 posts
Posted: Thursday, September 24, 2020 - 04:14 AM UTC
Hi all,
Thought I best spend the next few days painting up the Carrier so that I can incorporate it into the last few layers of water.
I've started to give it some tonal variation (see images below).


I still need to add some oil washes to create more contrast, also the camouflage net and holder need painting, plus the addition of some decals, crew and stowage...so a long way to go just yet,
.
Cheers,
,
G
An optimist is a pessimist without all the facts.
Pennsylvania, United States
Joined: April 10, 2011
KitMaker: 7,941 posts
Armorama: 7,934 posts
Posted: Thursday, September 24, 2020 - 05:42 AM UTC
Carrier looks the biz so far.
Washington, United States
Joined: January 31, 2009
KitMaker: 380 posts
Armorama: 366 posts
Posted: Friday, September 25, 2020 - 04:24 AM UTC
Noord-Holland, Netherlands
Joined: October 25, 2002
KitMaker: 1,757 posts
Armorama: 914 posts
Posted: Friday, September 25, 2020 - 05:22 AM UTC
Somehow I imagined that the water would be deeper... Hence my remarks..

It looks great, though I have one remark: the upper level of the fall would only have froth if any obstacle would be present. Which in this case doesn't seem to be present?
Ex- PFC Erwin Leetink, RNLA
Napoleon Bonaparte:
"A soldier will fight long and hard for a bit of colored ribbon."
New Jersey, United States
Joined: January 05, 2005
KitMaker: 2,185 posts
Armorama: 1,813 posts
Posted: Friday, September 25, 2020 - 08:26 AM UTC
Cool G , love it !!
Whole new perspective with the carrier added .
England - South West, United Kingdom
Joined: October 17, 2017
KitMaker: 944 posts
Armorama: 928 posts
Posted: Wednesday, September 30, 2020 - 04:25 AM UTC
Quoted Text
Carrier looks the biz so far.
Hi Jerry,
Thank you for the kind feedback,
.
Cheers,
,
G
An optimist is a pessimist without all the facts.
England - South West, United Kingdom
Joined: October 17, 2017
KitMaker: 944 posts
Armorama: 928 posts
Posted: Wednesday, September 30, 2020 - 04:27 AM UTC
Hi Ski,
Thanks, much appreciated,
.
Cheers,
,
G
An optimist is a pessimist without all the facts.
England - South West, United Kingdom
Joined: October 17, 2017
KitMaker: 944 posts
Armorama: 928 posts
Posted: Wednesday, September 30, 2020 - 04:37 AM UTC
Quoted Text
Somehow I imagined that the water would be deeper... Hence my remarks..
It looks great, though I have one remark: the upper level of the fall would only have froth if any obstacle would be present. Which in this case doesn't seem to be present?
Hi Erwin,
As previously mentioned...and I could be wrong, again,
...if it was deeper I imagined that the downstream cascade wouldn't occur...but I'm no expert, as my next sentence will demonstrate,
.
It would seem that you are right regarding the upper level, I have looked at a number of pictures and there only appears to be turbulent water at the 'fall' side,

. I imagined, wrongly, that the deeper water hitting the ford stonework would force the water upwards, thus causing turbulence on the surface.
Lesson learnt,
, I will see if I can lessen the effect when I put the wavy surface on.
Cheers,
,
G
An optimist is a pessimist without all the facts.
England - South West, United Kingdom
Joined: October 17, 2017
KitMaker: 944 posts
Armorama: 928 posts
Posted: Wednesday, September 30, 2020 - 04:39 AM UTC
Quoted Text
Cool G , love it !!
Whole new perspective with the carrier added .
Hi Cheyenne,
Thank you, glad you're liking it,
.
Cheers,
,
G
An optimist is a pessimist without all the facts.
England - South West, United Kingdom
Joined: October 17, 2017
KitMaker: 944 posts
Armorama: 928 posts
Posted: Wednesday, September 30, 2020 - 04:52 AM UTC
Hi all,
Not had chance to do anything this past week due to outdoor stuff needing doing as Autumn (Fall) approaches, but the weather turned wet and windy today, so a return to painting the Carrier (see images below).


It's knowing when to stop adding high and lowlights on this type of vehicle as much of the paintwork will be hidden under crew, dirt and stowage.
The gap between the vertical front plate and the driving/gunners compartment sidewalls is not an error,
...honest,
...it's that I haven't yet glued them in position until the crew are installed,
.
Cheers,
,
G
An optimist is a pessimist without all the facts.
Noord-Holland, Netherlands
Joined: October 25, 2002
KitMaker: 1,757 posts
Armorama: 914 posts
Posted: Wednesday, September 30, 2020 - 08:38 PM UTC
Ah, we are al here to learn from eachother and to learn from our own mistakes, aren't we?
We not only share our work to get compliments (however nice they are), but to see if we are on the right track... And mostly, I think you are!!! To give an extra tip: AK wet effects works very nice to recreate the wet tracks/wheels/etc. Better than varnish...
Ex- PFC Erwin Leetink, RNLA
Napoleon Bonaparte:
"A soldier will fight long and hard for a bit of colored ribbon."
England - South West, United Kingdom
Joined: October 17, 2017
KitMaker: 944 posts
Armorama: 928 posts
Posted: Friday, October 02, 2020 - 03:35 AM UTC
Quoted Text
Ah, we are al here to learn from eachother and to learn from our own mistakes, aren't we?
We not only share our work to get compliments (however nice they are), but to see if we are on the right track... And mostly, I think you are!!! To give an extra tip: AK wet effects works very nice to recreate the wet tracks/wheels/etc. Better than varnish...
Hi Erwin,
Indeed we do, though I was certain I'd seen a photo showing something similar, and when I looked back I found it was one of the images that had inspired me in the first instance (see image below).

Whilst it's not as excessive of mine it does mean I'm happy to stick with a little whitewater at the top edge of the ford.
Thanks for the tip on the 'wet effects', I might give it a try,
Thanks again, and cheers,
,
G
An optimist is a pessimist without all the facts.
England - South West, United Kingdom
Joined: October 17, 2017
KitMaker: 944 posts
Armorama: 928 posts
Posted: Friday, October 02, 2020 - 03:53 AM UTC
Hi all,
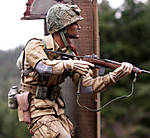
Started today to give some thought to the crew, especially the driver as I can't fit the front plates until he's done.
I had intended to use the Tamiya driver as he comes but he sits too low, imho, within the 'cockpit'. If used 'as is', he wouldn't be able to see as the vision ports are not openable on the kit.
Having looked at several images it's not uncommon to find a driver with his head almost popping up over the parapet. I believe the gunner's seat was adjustable, heightwise, though the drivers seat doesn't look as if it is,

. However, I have tried raising the legs slightly, and used a longer torso to get a higher position.
I have also started to think about the stowage and have begun adding bits and bobs to the rear of the Carrier. One of my pet hates is plastic tarpaulins, so have ignored the kit supplied one and made one from paper and white glue (see images below).


Cheers,
,
G
An optimist is a pessimist without all the facts.
England - South West, United Kingdom
Joined: February 08, 2012
KitMaker: 978 posts
Armorama: 965 posts
Posted: Friday, October 02, 2020 - 04:59 AM UTC
I probably sound like a broken record when it comes to British Army kit (or other nations for that matter) but don't forget the rifle slings.
All looking very good Gareth - especially the water effects - a practical tutorial for all to benefit from. Keep at it!
Brian
New South Wales, Australia
Joined: May 04, 2016
KitMaker: 1,476 posts
Armorama: 1,463 posts
Posted: Friday, October 02, 2020 - 01:25 PM UTC
Hey G it looks like just you & I didnt get the memo
did the other builders get entrapped in the beta forums this week? Great work on the carrier & tarp (passing a flame fast real fast over the tarp would remove any furriness), weatherings ideal - maybe a couple of random oil/stains & a fender-ding too? Always wondered how this vehicle was introduced for field trials
Yes Generals weve designed a (s)lightly armoured vehicle in which in an ambush situation only the crews heads will get blown off. And we recommend its only deployed in flat desert terrain, so that the enemys fire passes over horizontally and cant set off any munitions being transported. Jolly good well take two thousand.
Crazy idea #94: Depending on how long the water takes to cure, you could apply a layer, put the dio on top of a washing machine & set it to extended spin-cycle - instant rippled effect

North Carolina, United States
Joined: April 29, 2014
KitMaker: 1,112 posts
Armorama: 886 posts
Posted: Friday, October 02, 2020 - 09:54 PM UTC
Nothing constructive to add, just still following along and liking everything you done so far. Keep it up.
Pennsylvania, United States
Joined: April 10, 2011
KitMaker: 7,941 posts
Armorama: 7,934 posts
Posted: Saturday, October 03, 2020 - 02:31 AM UTC
The layers of detail you are adding to the carrier are lookin good man. I like the way your paper tarp "folds" and it looks the bill in that regard. Maybe find a way to remove the fuzz as Martin says? It does give the impression of being a large blanket right now.
I am still taking notes and continue to be impressed by your "waterworks",
J
Washington, United States
Joined: January 31, 2009
KitMaker: 380 posts
Armorama: 366 posts
Posted: Saturday, October 03, 2020 - 06:07 AM UTC
Hey, the water works is looking great! Ruck On bby!
England - South West, United Kingdom
Joined: October 17, 2017
KitMaker: 944 posts
Armorama: 928 posts
Posted: Sunday, October 04, 2020 - 12:19 AM UTC
Quoted Text
I probably sound like a broken record when it comes to British Army kit (or other nations for that matter) but don't forget the rifle slings.
All looking very good Gareth - especially the water effects - a practical tutorial for all to benefit from. Keep at it!
Brian
Hi Brian,
Thanks for the positive feedback, and you're not sounding like a broken record, it's always good to be kept on the straight and narrow by the good folk in here,
.
Cheers,
,
G
An optimist is a pessimist without all the facts.