

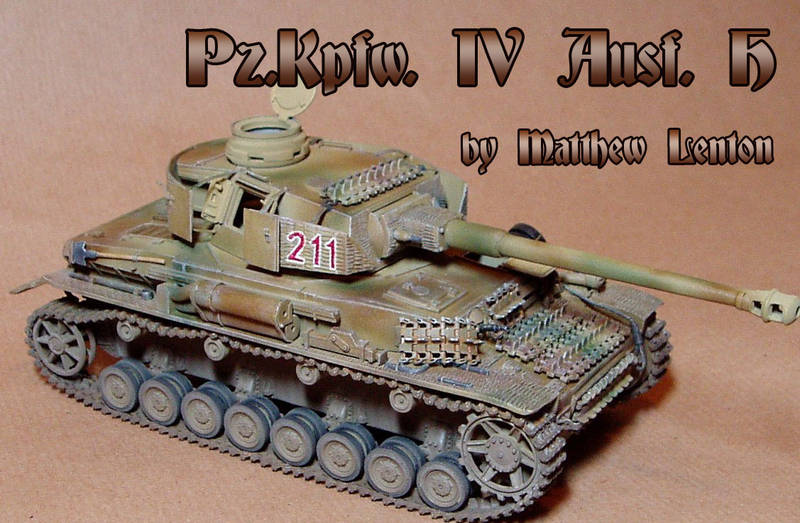
1⁄48Pz.Kpfw.IV Ausf. H
10
Comments
Introduction
Like a lot of forty-something modellers, I had been on a decades-long break from the hobby. It began again while off work ill for a week. After three days in bed I needed some air, so went shopping with the wife to buy a toy for our daughter to take to a birthday party. . . and so I discovered the plastic kit selection in the department store. I could see straight away the way things were the same, but also had moved on. The cheaper Tamiya kits were the same ones you could get in the 70s, like the PzKpfw II with Afrika Korps soldiers. Great box art, but I remembered some of the parts and especially the figures, werent so great.. Then there were two versions of the Sdkfz 251 the same old one with the guy kneeling, then a brand new one for double the price. I thought this could be something to do for the remainder of the week as I couldnt face yet another afternoon movie. Curiosity led me to spending £25 on the Italeri Sahariana, a vehicle Id never heard of before; it was relatively small, so I thought it wouldnt take too long, plus it had some resin and etched bits, something I hadnt come across back in the old days. Four months later (!) I had this finished desert fighting truck thing on the bookshelf in the lounge, my wife having kind of stopped bothering to resist its open display. Of course, I knew I needed more, and had been thinking of this cupboard at my mothers place. All the kits I ever made or didnt make were in there, including the last one I had been working on when I was love-struck by my first girlfriend at the age of 15. I think I stopped making models and stopped biting my nails in the same week I met her. Still, thats definitely another story . . . it was a Bandai 1/48 PzKpfw IV Ausf H. Being the last one I was worked on, it was also one of the best Id managed, and showed definite signs of ambition. I had already cut the doors out of one side of the turret schürzen, and had also commenced zimmeriting. The interior had already been built and painted, all the wheels were on, and the gun was assembled. The superstructure had the beginning of a grey paint scheme, and some bolted-on armour had been added to the glacis. So whats wrong with that? So now we know that by the time of the Ausf H, German tanks were being delivered in dark yellow. But that was easily fixed, especially as the paint job wasnt even finished. But then it is also true that the Ausf H was already up armoured in the factory, and from studying shots in the Squadron/Signal Panzerkampfwagen IV in Action it was apparent that the Ausf G was probably the last one to have had armour appliquéd on to the glacis plate, and even that was probably welded rather than bolted (or riveted like mine) Still, my 15 year old self had done it quite well, so I thought Id just stuff the historical accuracy, and besides pulling it off was going to make a nasty mess as it had actually been riveted on with stretched sprue rods inserted into tiny holes, then melted back to form rivets. (Visible in Fig 1. Historically inaccurate, maybe, but I wasnt about to consign all that effort to the dustbin. I remembered buying this kit after making the Bandai 1/48 Wespe that someone had given me without instructions (or tracks). Im not sure what the consensus on these kits was at the time, but Bandai claim on the box that this is the first series of mini-models to have a detailed cockpit and engine. By current standards the detailing is fairly simple, but its certainly true that the moulding is very crisp and parts fit well compared with some kits from the same era. OK, to the adventure of (almost) completing this build that started in 1980. . .Moving On
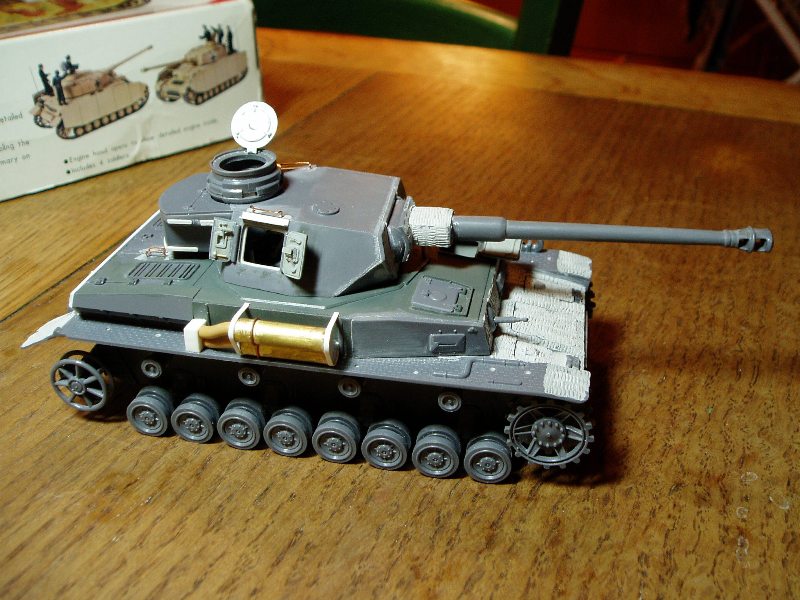
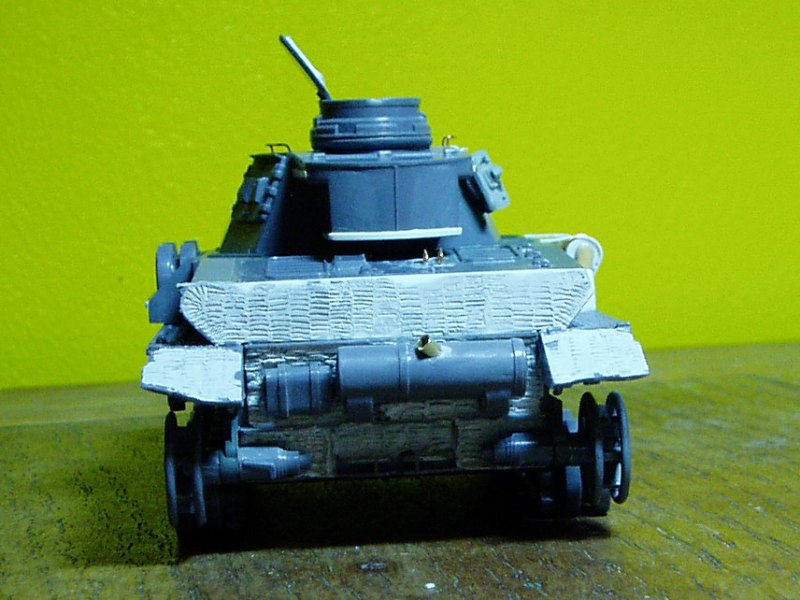
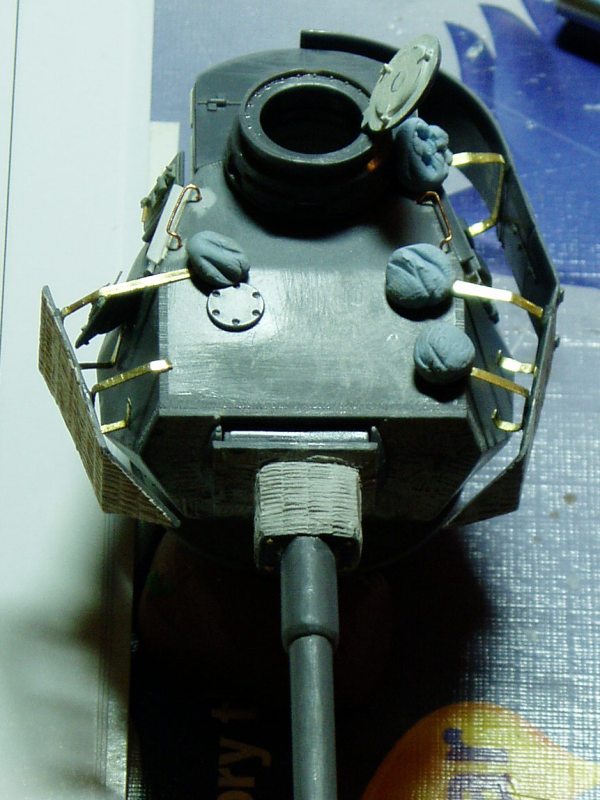
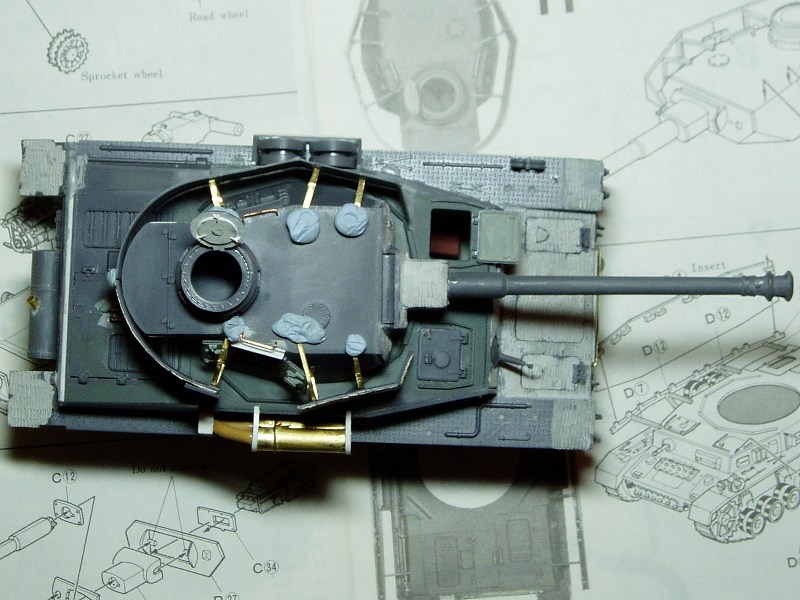
The first problem was the Filzbalgvorschalt luft filter air pre-filter installation on the righthand track-guard. The supplied item was rubbish. I sympathise with the guys who created this kit, because it has to be said that finding a clear view of this gizmo from contemporary photos is not easy. I think this component only appeared on the Ausf H, and since most of them had side skirts, it is almost always obscured, and it is also only on one side of the vehicle. So youre reduced to a quite small number of photos that show this thing at all, and I couldnt find a single picture that shows the front of the filter with any clarity. If anyone knows of one, please let me know. For those interested, the best general view I found is on page 24 of Ospreys New Vanguard Panzerkampfwagen IV Ausf. G, H and J 1942-45, but this is a rear three-quarter view. I couldnt be bothered to start hunting around for some bit of tubing that was the right diameter, and, with that feeling you often get working late at night, I needed to make progress on it there and then, so started cutting up brass sheet and bending it with pliers around some sprue to make one of the cylinders. Eventually I forced it into the right shape, and then managed to make another, almost identical. Here Ill reveal that Id bought Tony Greenlands well-known Panzer Modelling in order to educate myself on at least one persons take of more modern techniques than I had been used to. This book is useful, but also entertaining in a probably unintentional kind of way. Despite what he says about soldering brass parts, I got the superglue out and assembled the two cylinders into a single unit. This twin-tube unit appears to be mounted on the track guard and hull side by flat metal strapping and some kind of square bracket. I tried to fabricate these from some microstrip that I had kept all those years this is visible in the photos - but the strips were now brittle and eventually cracked, so I remade them from brass. Pipes extend from the rear of each cylinder and feed into a box which I guess ducts air to the engine. The box was laminated sheet, while the pipes were formed from sprue, sanded smooth to a round profile then gently heated and slightly bent; I made several pieces of various lengths and curves until I managed to get two lengths which fitted closely together in the right kind of way, a lot like a two into one exhaust pipe on some air-cooled motorcycle engine. This is one of those things where making the component is to me anyway - more a question of trial and error and getting it to look right, rather than being able to create it perfectly accurately straight off by using measurements. The installed component can be seen in Fig 2. Then there was the turret doors. As I said, Id cut the doors off one side of the turret armour, so it was either put the doors back, or open the hatch as well. By now, you can imagine, I was getting deeply into this, so despite Bandai having made no provision to allow these hatches to be open, I prised off the loaders hatch that had been glued there for nearly thirty years. I almost thought better of it and glued it back on again, but then marked out the line of the opening on the turret wall and proceeded to drill around the inside of the line. I surprised myself by what a neat job it was; having cut the piece out, the flat and round files produced a perfectly formed aperture. The same shape, but about a millimetre smaller, was made in a sheet of thin plastic card, and cemented inside the turret to create a lip within which the hatch door would sit. Then I was left looking at the totally undetailed inside of the hatch doors. The one good thing was that there was already a cavity on the inside of the front door which would provide a basis for the detailing which I was now committed to. First the hatch was split in two. Unlike with the Filzbalgvorschalt luft filter, there are loads of photos of open hatches, and the internal details look to be the same in all of the later PzKpfw IVs, and even the PzKpfw III. The totally invaluable In Action book even has a sketch of these interior details (page 30). The window handle type levers, which lock the hatch closed, were made up from wire and bits of scrap. There is then some kind of lever (enlighten me, someone, what this is for) which protrudes at an angle from the cavity in the centre of the fore door a flat bar with a cylindrical handle, quite easily rendered with strip and rod, and a triangular plate with three rivets. At this stage I hadnt yet become hacked off with making rivets from stretched sprue melted at the end, and as a result, some of these rivets are a bit on the big side. I decided I could live with these, but it did lead me to buying some Grandt Line rivets before finishing the kit. Then there is this apparently cast vision port which looks like it contained a glass block with a little flap cover over it. This I moulded from Fimo clay. Not sure if Fimo is used by modellers that much, but I like it. It models like plasticine, but then bakes to hard plastic finish in 20 minutes, doesnt crack, shrink or crumble, and paints quite easily. You can even get it in Woollies. I must say, all of this was a bit much in 1/48 scale see how tiny it all is in the photo (Fig 3). Above the hatch is a strip to prevent rainwater from running into the interior; this had been moulded with the door, but was destroyed when I cut the doors in two, so was recreated with strip. Above each door is a grab rail which I made from copper wire; similar copper handles were added to the engine covers on the rear deck - all visible in Fig 4. The rear upper plate was next. Bandai moulded it with the tow cable incorporated, but at least it was a separate piece, so I used it as a template to create a new blank plate. With that in place I finished off the zimmerit. I remember when I did this in 1980 I used the ridged grip of a pair of tweezers to emboss the pattern into the Humbrol filler paste. No-one else uses this type of filler for zimmerit from what I can tell, but I thought Id better continue with the same stuff even if I didnt have those tweezers any more. I ended up using a thin electricians screwdriver to make the pattern, so it was done totally by hand yes, probably just like the real thing. Again, this is quite rough in places, and doesnt exactly match the tweezer pattern, but it looks OK to me. I restricted it to the ends of the track guards, the turret schürzen, the rear vertical plates and the front of the superstructure. Photos definitely show great variation in the amount applied, and though my model isnt based on an individual tank, it is vaguely based on those on page 39 and 43 of the In Action book - turret schürzen but no side skirts, not even the rails to hang them on. Returning to the rear, the upper plate on the real thing was fitted with three hooks mounted on small vertical plates, two of which were added from wire into tiny drilled strips (one has broken, you see ), then I got to use the Grandt Line hex bolts on the left and right edge of the plate these things are great fun to use. The kit tow cable having gone with the original plate, I made one from picture wire tightened up by rotating in the hand chuck. The ends were just wrapped round and secured with brass strips. I decided against trying to make the eyelet liners from brass. See Fig 8 for these details; Other modifications visible are the replacement exhaust pipe extending up out of the main baffle, the tiny exhaust pipe from the top of the two stroke baffle, and the straps with which this small baffle is installed. This small baffle was for the separate motor which drove the turret. I decided against side skirts, partly not wanting to cover up all that work on the air filter, and also because I couldnt be bothered to remake all the rails and stuff, since the kit items were big chunky brackets. I knew I was going to be doing this for the turret armour in any case, as well as thinning down the edges of the schürzen to get a more realistic profile. Strangely I saw photos of a model where someone had remade all the skirts from brass sheet, and I dont know why, it just didnt look right, somehow it looked too flimsy, or so I told myself. This was probably the hardest bit of the whole project, making the schürzen mounting brackets the right size and shape so that they sat on the turret in the right location while holding the plastic armour at the right height and angle. Homebase sell the most excellent set of five miniature pliers for £7-99 and the bent nose ones really helped with this fiddly task. You can see the phaffing around with bits of blue tac that went on during all of this in the photos (Figs 5 to 7).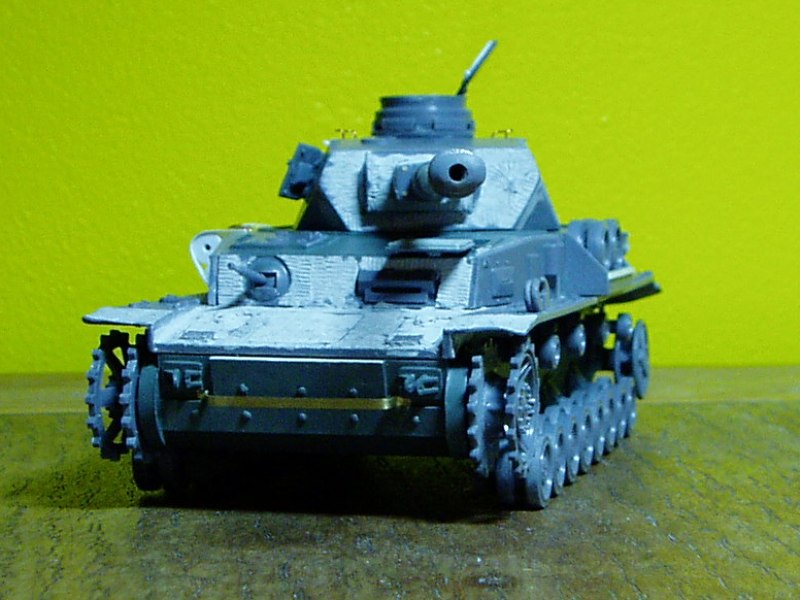


About the Author

FROM: ENGLAND - SOUTH EAST, UNITED KINGDOM
Earliest model memory is a Super Sabre my grandmother bought for me around 1972. Have always dabbled in painting and making things, and rediscovered doing that with plastic in 2008. Vowed then to complete the 30 year old stash, and have made some progress. Hobby goes hand in hand with BBC Radio 3...
Comments

Matthew you have done a good job of resurrecting this old kit, well done. Please do not use that yellow background again it hurt my eyes.
DEC 30, 2008 - 12:20 PM

Very impressive piece of construction. Might consider a cat or dog whisker for the antenna. With luck you can find one more or less the right size, and they taper nicely.
JAN 01, 2009 - 09:25 AM

nice wall colour certainly attracts the peoples attention lol!
great panzer 4 though
JAN 01, 2009 - 10:08 AM

[quoteMight consider a cat or dog whisker for the antenna. With luck you can find one more or less the right size, and they taper nicely.[/quote]
Strangley, I did think of that, and we even have a black cat who stays in doors all the time, but I have no idea what she does with her old whiskers as I can't remember finding one for ages. Not sure if it is possible to straighten them? In the end I made the antenna from a piece of Plastruct 0.5mm round section rod and achieved a bit of taper by sanding down progressively from one end. Something I discovered in Halfords (a car spares shop) is P1500 sand paper which will abrade something that fine and without kicking up any granules of plastic. Once it starts to clog up a bit, it can actually be used to polish plastic back up to a sheeny surface again.
Sorry about the yellow, that is our dining room wall! It looks a bit less bright under normal lighting conditions. Next time I might take photos in the hall which is bright orange . . .
I did send in some photos of the fully finished version, complete with some crew - and the aerial - not sure if they will be published, or I might upload them later if I can get around to working it all out.
JAN 02, 2009 - 12:35 PM
Matthew if you have some new pictures by all means send them along as they can always be added to the feature for you.
JAN 02, 2009 - 01:02 PM

Matthew,
Well done! Good to see another Bandai fan.
I have put two Bandai reviews up, with more pending. If you care to join in the endevour, please do.
Hope to see more of your work, Bandai or others.
Fred
JAN 09, 2009 - 08:36 AM

Considering their age, I thought the Bandai 1/48 was pretty good. Although the Pzr IV H had a very large (diameter) gun barrel. Did you taper it down some - it looks more the right size. I did my zimmerit with green stuff (body putty) and parts of an old hacksaw blade. Interesting that 1/48 armour didn't catch on back them, but now that everything else has been done and redone in 1/35, they are getting back to it. I just wish that Tamiya would quit using the metal parts!
JAN 11, 2009 - 06:09 PM
Must admit I didn't notice a problem with the barrel diameter, but must admit that I had to do a fair amount of filing and sanding to get rid of the join in it, so by the time you've done that and tried to keep the cross section round, the diameter was considerably reduced any way. I think in fact the barrel isn't quite round any more, but it doesn't show much. . .
Yes, I think they were good for the time - being mainly brought up on Airfix and Matchbox, they were certainly better than those, and as good as a lot of the Tamiya. I remember the Wespe as being very enjoyable build which led me to buy the P.IV. Might get around to revamping that one some time. I was tempted recently to buy a Bandai Tiger from eBay, but the price went a bit too far. I wonder if people are collecting these things in order to keep them in the box? I'd certainly build it !! Was half thinking about a Tiger / Pz IV diorama, such obvious companions.
JAN 16, 2009 - 05:32 AM

So I guess this one took about as long as one of my builds?
Nice job.
Scott
JAN 16, 2009 - 08:59 AM
Copyright ©2021 by Matthew Lenton. Images and/or videos also by copyright holder unless otherwise noted. The views and opinions expressed herein are solely the views and opinions of the authors and/or contributors to this Web site and do not necessarily represent the views and/or opinions of Armorama, KitMaker Network, or Silver Star Enterrpises. All rights reserved. Originally published on: 2008-12-30 00:00:00. Unique Reads: 20474

WEB HOSTING BY


Copyright ©2021 Armorama and Kitmaker Network, a subsidiary of Silver Star Enterprises
All Rights Reserved. Please read our Conditions of Use and Privacy Policy.
All Rights Reserved. Please read our Conditions of Use and Privacy Policy.