

1⁄35Pz.Kpfw.IV Ausf H
20
Comments
Introduction
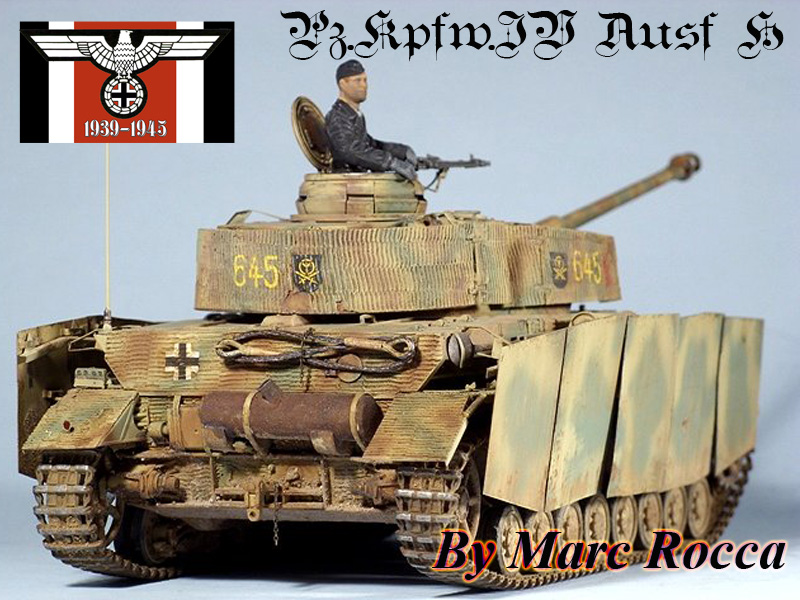
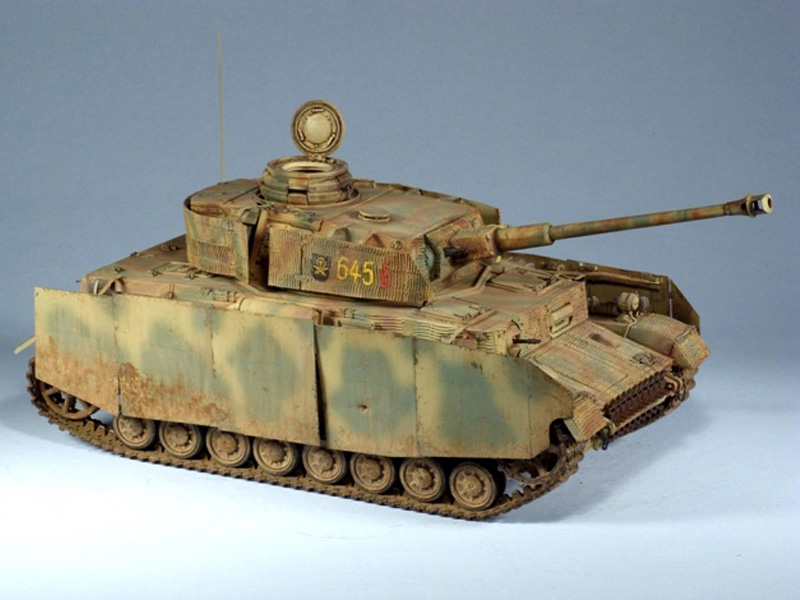
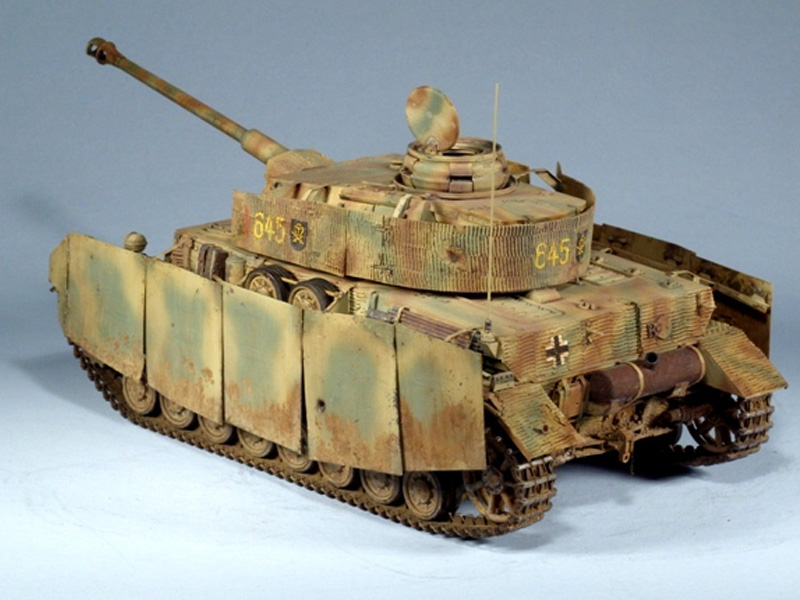
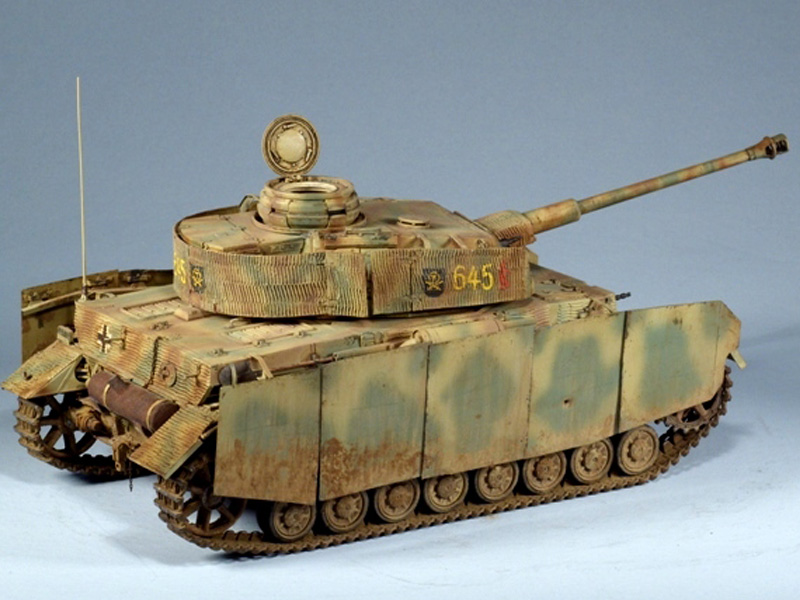
I know most people like to start their articles with a bit of history about the subject. I took up armor less than a year ago so all of you probably know more about the subject than I do. I am learning but please bear with me if I get the name of a part or two wrong. I always try to push myself with each build to try something new whether its a new technique or even just something more complex. Maybe thats why I am so taken with armor lately, everything I do is new. I have used lots of PE detail sets for both aircraft and armor but the PE shurtzen & detail set used here was a real test of my patience. The only other AM upgrade is Cavalier set CV109 made for the Tamiya kit of the Pz.Kpfw.IV Ausf HThe Build
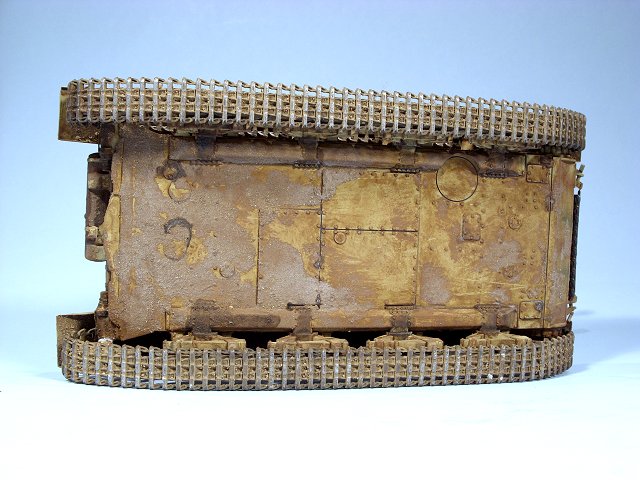
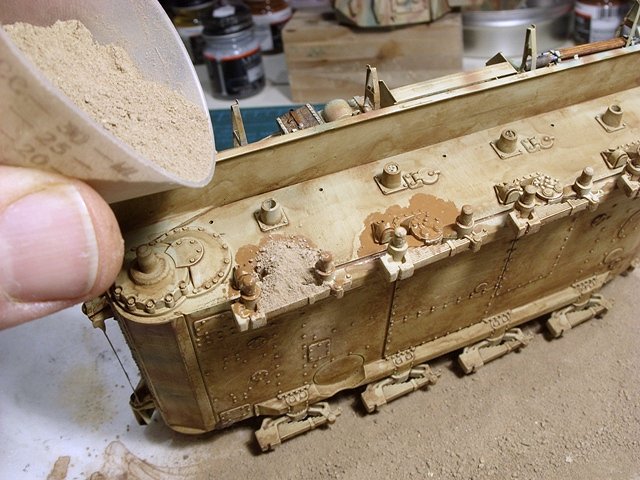
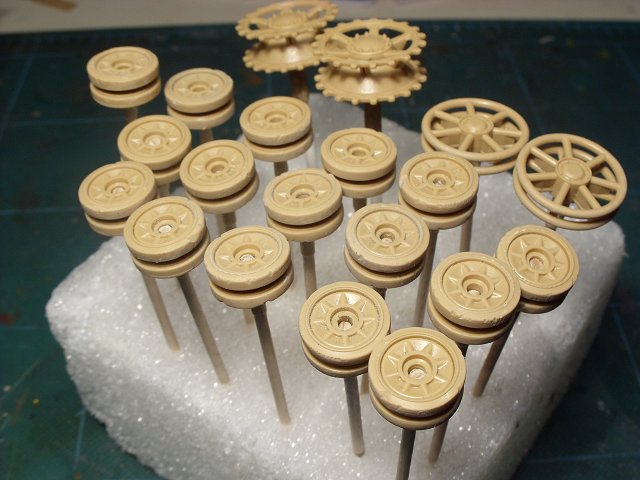
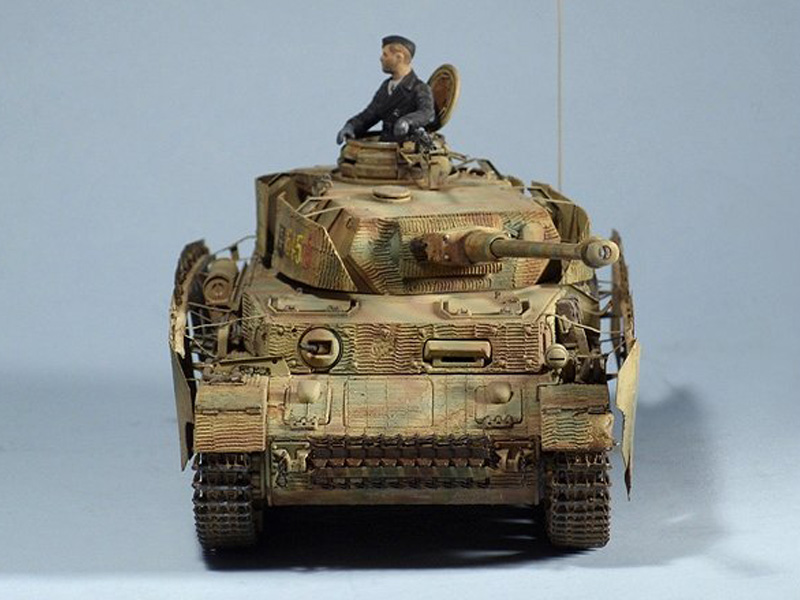
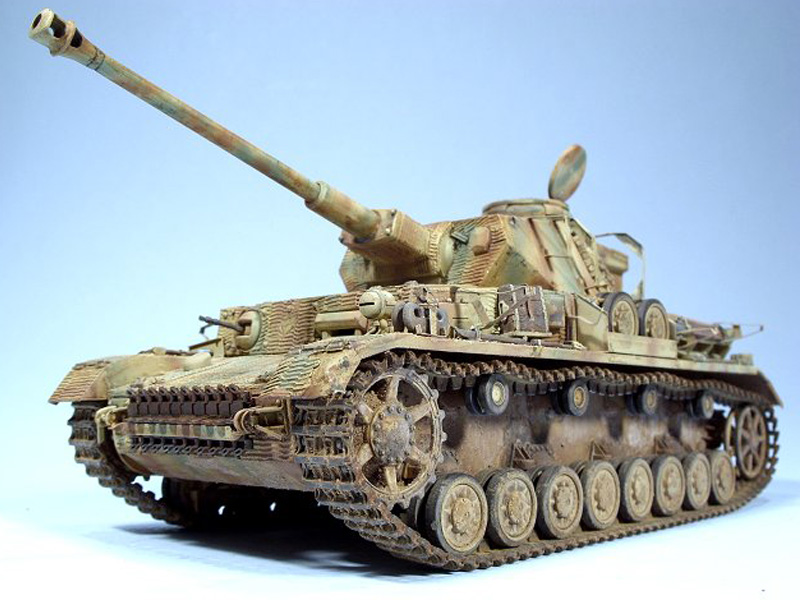
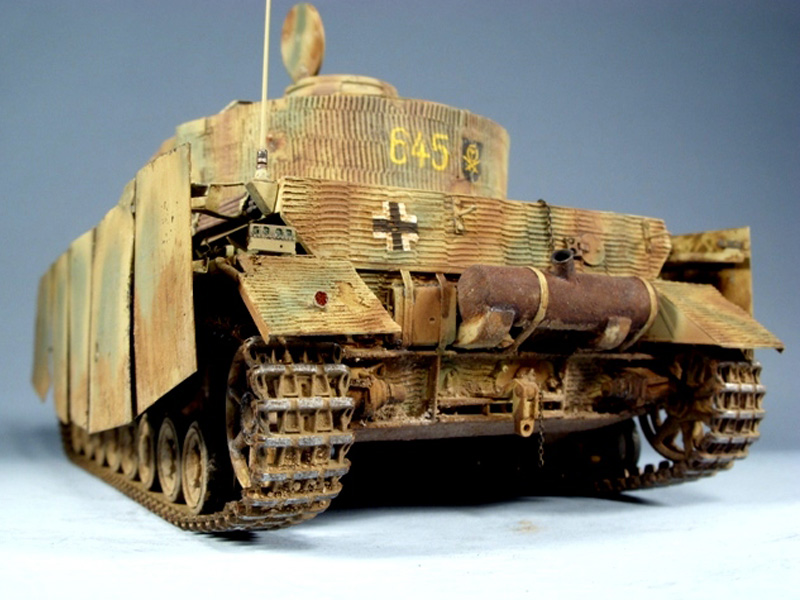
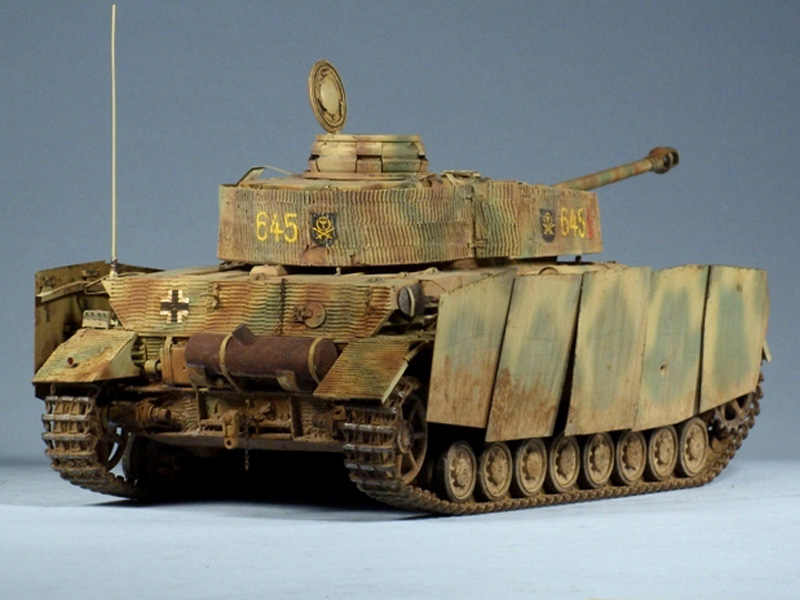
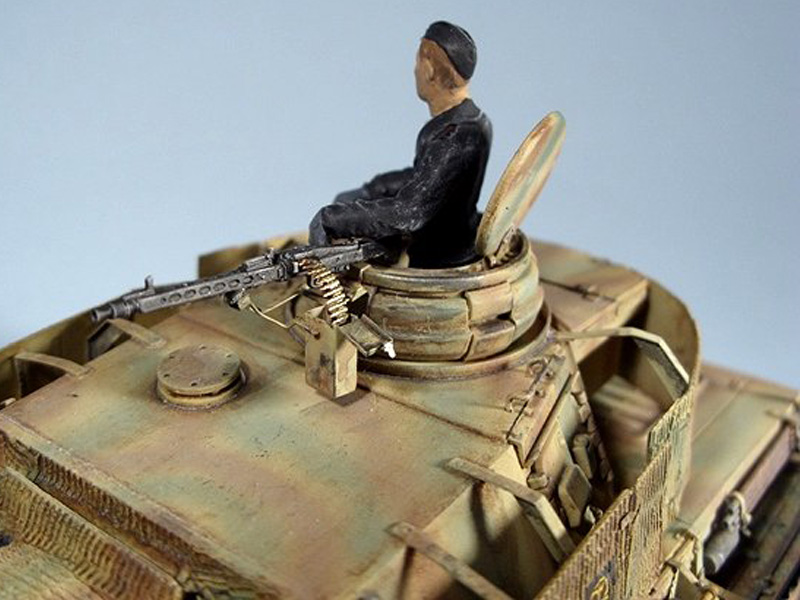
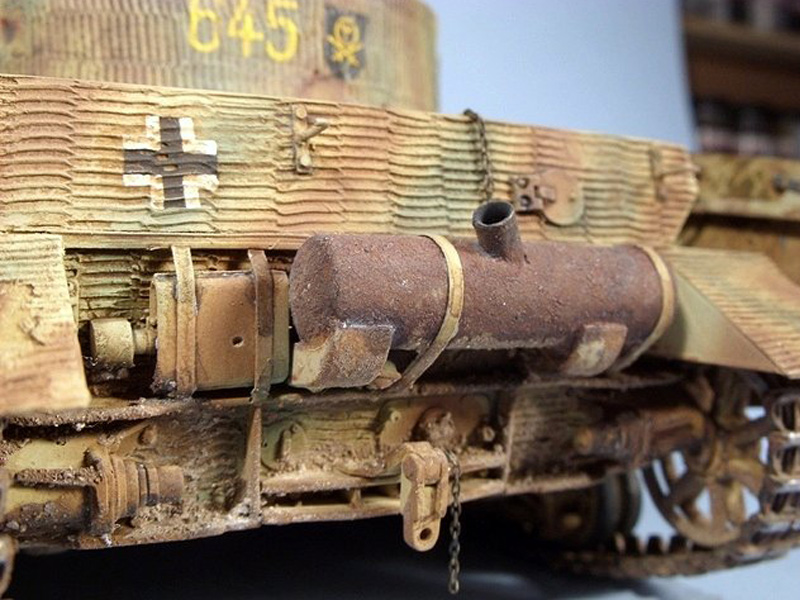
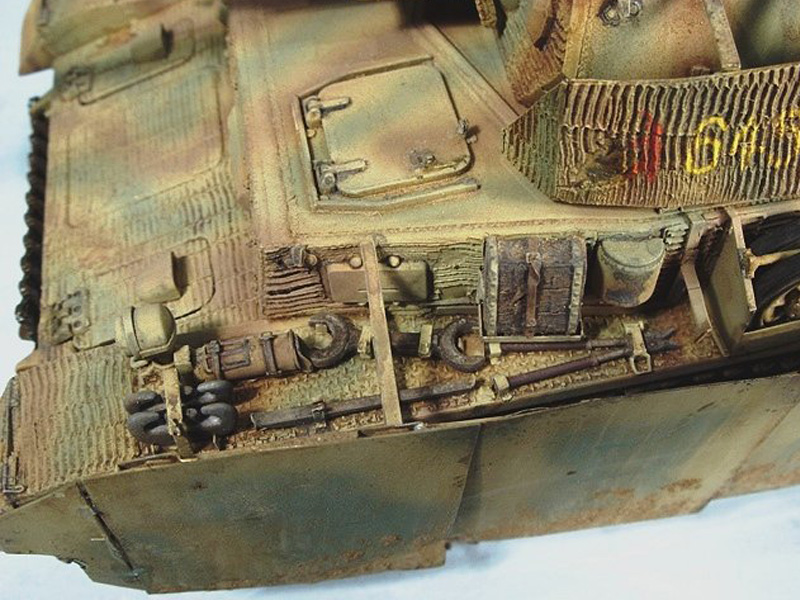
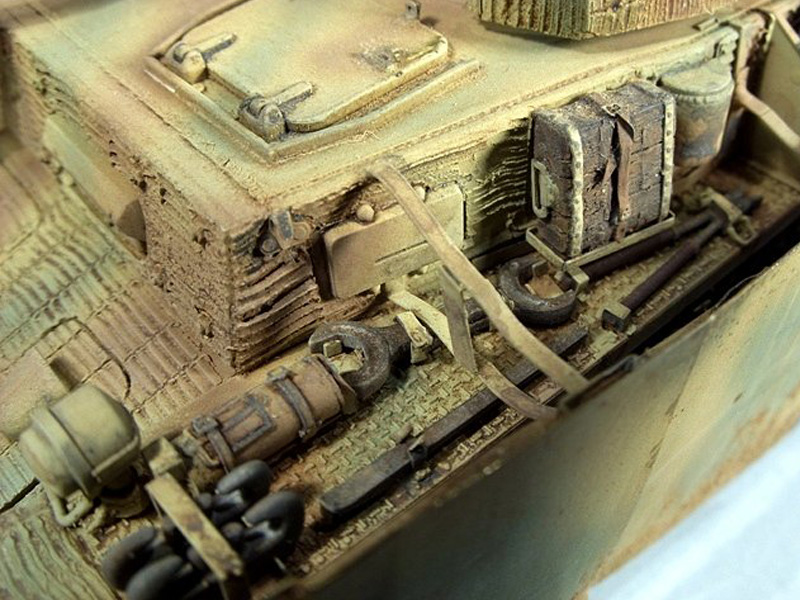
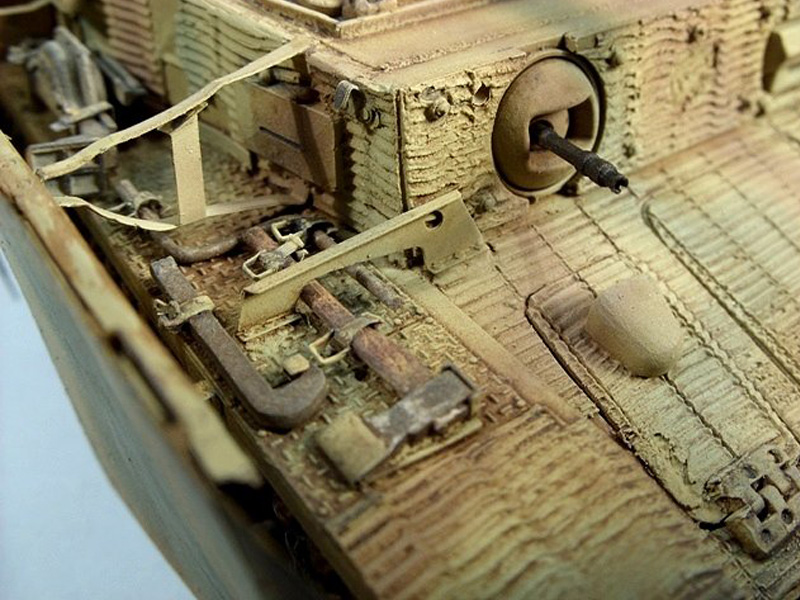
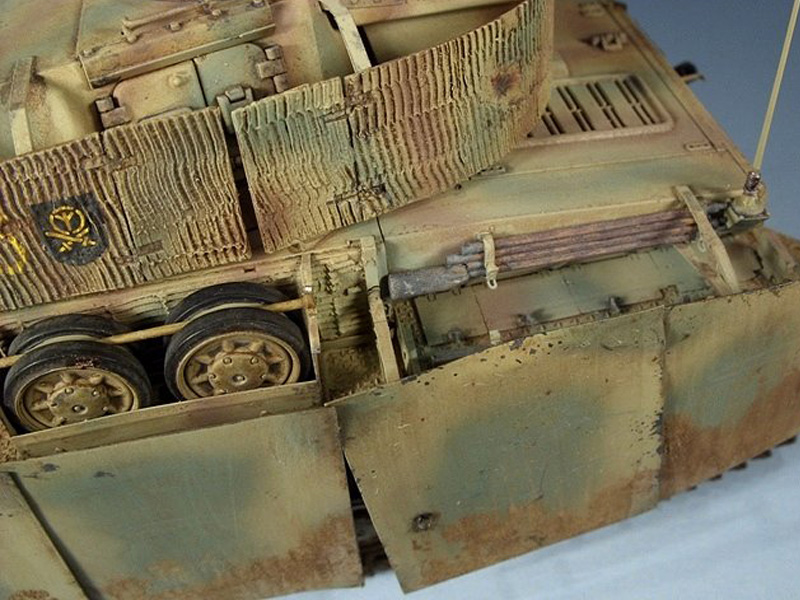
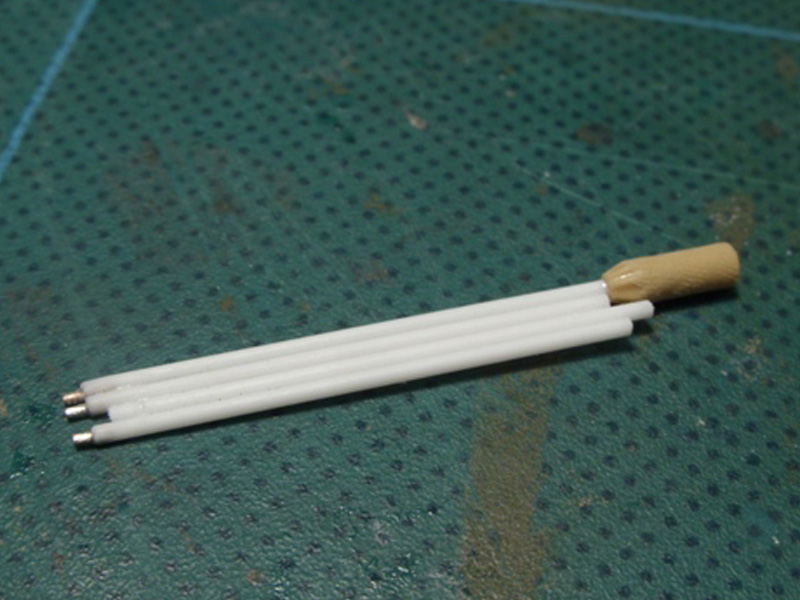
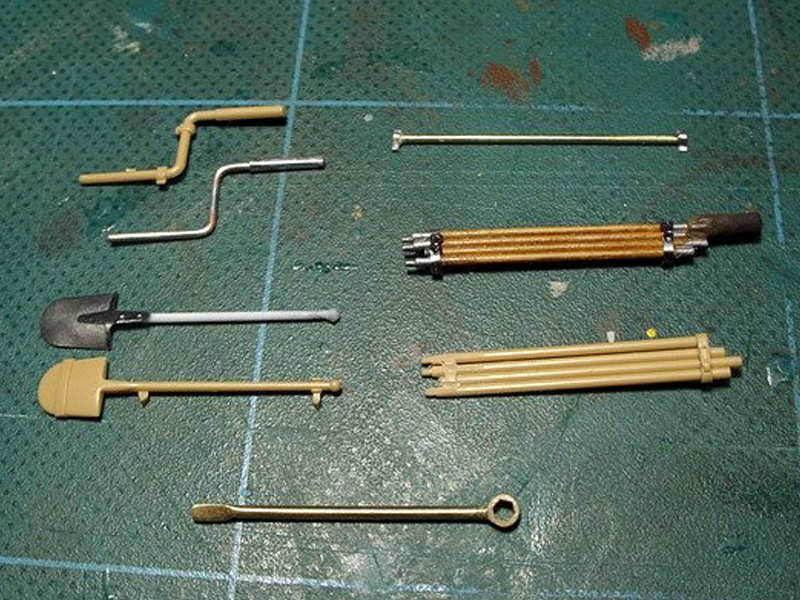
Construction of the kit was straight forward with no real fit issues. There were large openings under the fenders on either side of the hull that needed to be blanked off. Some ejector pin marks needed attention at the same time. I did have an issue with the Cavalier zimmerit. The cast replacement parts, which are kits parts with zim added and re-cast in resin, were drop in replacements with perfect fit. One of the idler axle molds did not fill completely but it was an easy task to cut off the plastic axle to glue in its place. The problem I had with the sheet of zim panels was having used this product several times the panels have been perfect fits every time. When I cut out the panel for the front upper deck the piece was too big in both dimensions. It was not possible to trim and of the hatches out to use since nothing lined up. I ended using a sheet of their generic zim and cut the pieces to fit. A few of the other panels were a tad wide or long but they were able to be trimmed and used. I contacted Darren Montgomery from Cavalier and he said the sometimes if the sheet is removed from the mold too soon it might stretch. Ha ran some tests molds and he said they all fit and that maybe mine was a one off. If you have that set compare the panels before you cut them out. The PE shurtzen was, as I mentioned earlier, a real test of my patience. The bends for all the brackets etc were not that complicated but once glued on they are extremely delicate and I lost count of how many times I had to re-glue all of them. I also figured it is time to learn how to solder this stuff since I want it to be as strong as possible. That had a learning curve all its own. Four hands would have made lining up the turret skirts a lot easier too. While glue and paint dried I busied myself with the fiddly bits that are all over armor. Not being happy with the way the tools looked after removing the molded on clasps I ended scratch building some of them. The tow cable n the kit is string that glues into slots on the cable ends. I cut off the cable part and attached that to a short piece of aluminum tubing that was chucked in a Dremel and tapered at the end. The photo shows some AM cable but it was too stiff to get around the pins on the rear so I used Bill Plunks idea of embroidery robe that I stiffened with paint. I had an extra set of DML Magic Tracks (MT) that I planned to use since I had never used rubber band tracks before and had it in my head they wouldnt look good. I noted the kit racks had solid guide horns and the MT are open. I decided to use the rubber band tracks. Since the extra track would be right up front the solid horns were cut off the kits extra track and glued to the MT because they looked better with the oval part at the sides being molded open instead of solid. Turns out I was wrong about rubber band tracks. I found the tracks very easy to use. They glued up fine, took all the same finishing I do for weathering. I darkened some thin brass rod with Blacken-It then glued them into holes I drilled into the hull for the sag between the return rollers. Even without the shurtzen, you cant see the pins. I was very pleased with the way they turned out.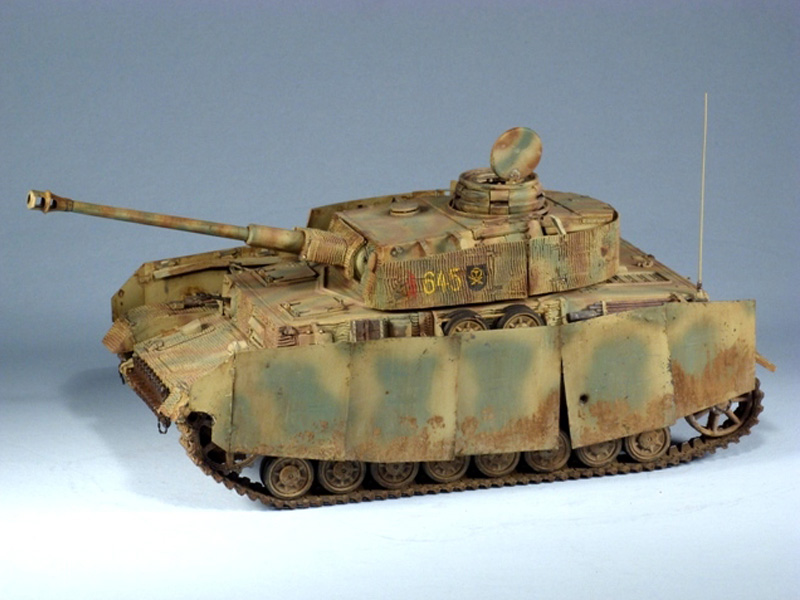


About the Author


FROM: NEW JERSEY, UNITED STATES
Like so many others my modeling has been an on again/off again affair. I started in high school with the first break form the hobby coming with college, work, marriage, kids. You know the drill. As you can probably tell by my screen name I was all aircraft all the time. I had a short "TOPGUN" ph...
Comments

Thanks for all the support and comments everyone. Yup Bill... all form Avenel.
JUN 01, 2009 - 05:12 AM


Marc, I like your build, really want to see the pix of it finished - I did a PIV-H last year and it's interesting to see someone else's take on something that you get to know so well over the months of work.
I totally agree with you about how tough it is getting those turret schurzen lined up. It's like the plates have to align perfectly with the turret, but through the medium of some wobbly thin bits of metal.
I also like the way you improvised some of the details rather than relying on purchased items for everything.
JUN 03, 2009 - 08:56 AM
Matthew, thank you for the feedback and nice comments.
After it was done someone, I think it was Bill Plunk, posted a great photo of the H from directly above. It would have made aligning it all so much easier. I should have saved the photo. I can't remember if the turret schurzen mounts are just welded on or is there a rivet at the end as well. I want to do another H and i was thinking that using those micro brass bolts glued into a drilled hole would make the whole affair a little sturdier.
JUN 03, 2009 - 12:36 PM

Nice work Marc, looks pretty darn good from here. Thanks for sharing your work!
Cheers -
Tim
JUN 03, 2009 - 12:55 PM
Marc, I think I know the photo you mean, it is in the PzKpfw IV G,H,J book by Hilary Doyle (New Vanguard 39), it is what I used. You are correct that the brackets are riveted to the turret with single flat headed rivet. I used Grandt Line rivets. They are a bit small in 1/48, but you can just about see them in the photo:
My Pz IV H
Really recommend the Squadron Pz IV In Action book as well by the way, if you don't have it already.
JUN 04, 2009 - 10:08 AM

Another excellent model Marc, glad to see it in the features. You know I'm a big fan of the PZIV and this is a beauty. The camo is very convincing and weathering spot on, keep up the awesome work and I'm glad you switched to armor. Hope to see this one in Sept at AMPS.
Rob
JUN 10, 2009 - 11:09 PM

Simply amazing the amount of detail put into this model. Looking to be building one myself in a couple of weeks. Will definitaly have to keep this around as a reference. I do have one question. Where you trying to increase the appearance of being heavily armored when you added the side armor? After all the attention you put into the tracks, I would be showing them off. Excellent build all the same.
Matt N.
AUG 29, 2009 - 01:49 AM
Copyright ©2021 by Marc Rocca. Images and/or videos also by copyright holder unless otherwise noted. The views and opinions expressed herein are solely the views and opinions of the authors and/or contributors to this Web site and do not necessarily represent the views and/or opinions of Armorama, KitMaker Network, or Silver Star Enterrpises. All rights reserved. Originally published on: 2009-05-31 00:00:00. Unique Reads: 23436

WEB HOSTING BY


Copyright ©2021 Armorama and Kitmaker Network, a subsidiary of Silver Star Enterprises
All Rights Reserved. Please read our Conditions of Use and Privacy Policy.
All Rights Reserved. Please read our Conditions of Use and Privacy Policy.