

1⁄1The Mud Technique
12
Comments
Introduction
Looking for dirt and filth? Then youve come to the right place! (Steady lads!) Theres lots of ways to make mud on models and scenery. You can use the real thing, plaster/filler, ready-made mixes, pigments etc. Theres a lot of options open for mud basically! Therefore the following technique is not the be all and end all of mud but it is a relatively fast and simple way to do it.What Youll Need
Stage-1
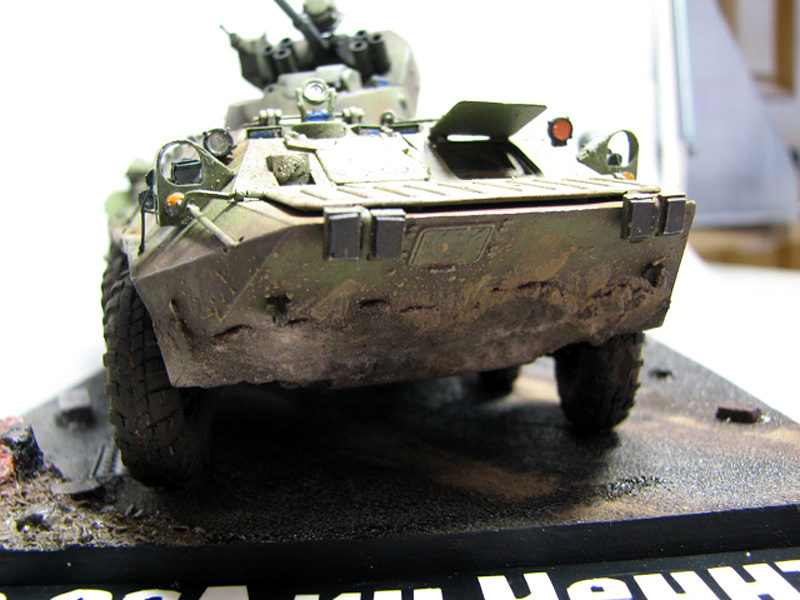
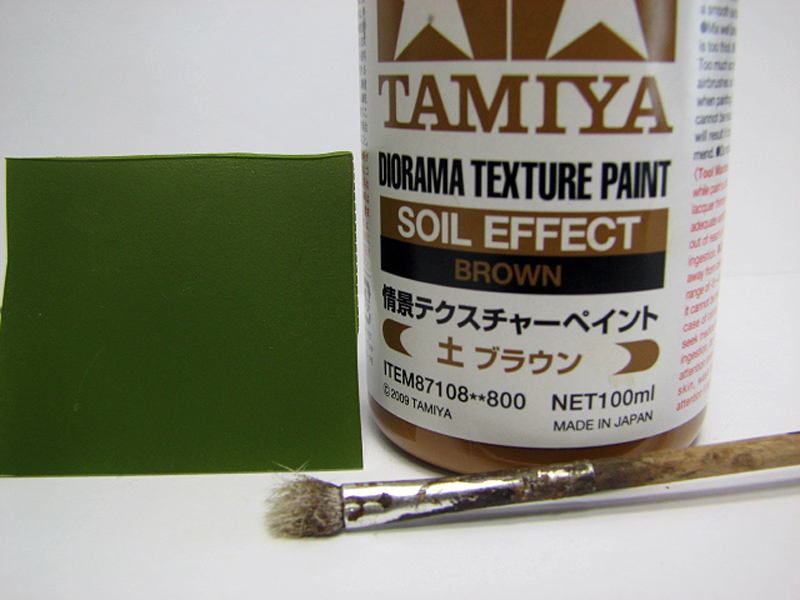
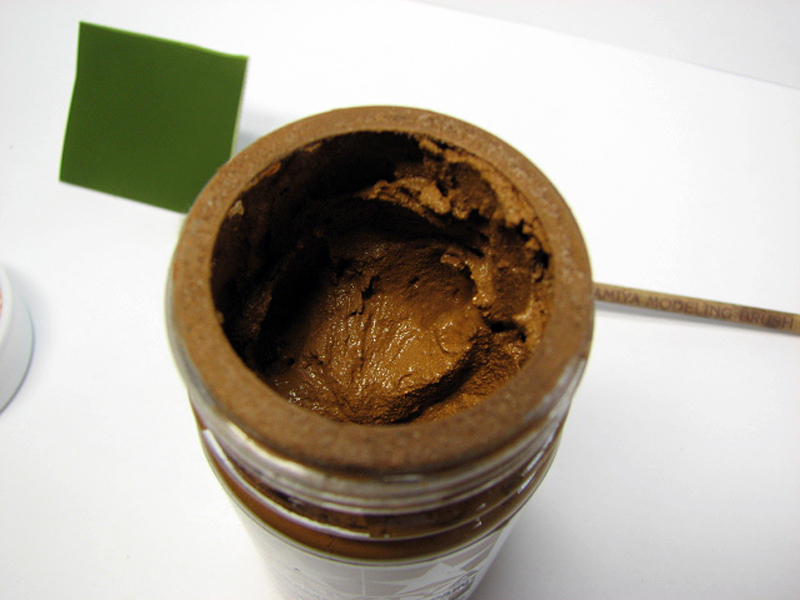
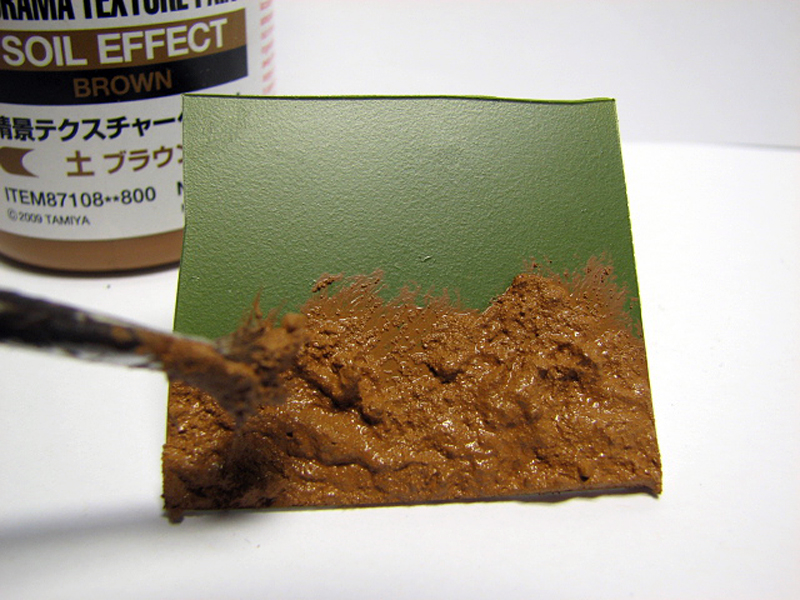
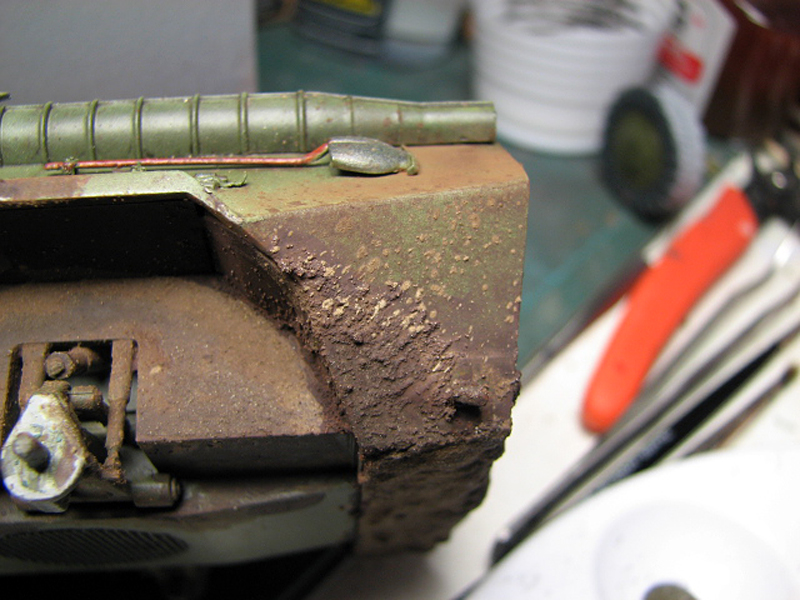
Make sure you have a varnish coat on your model to seal the paintwork. Matt, Satin, Gloss or Jonsons Klear are all good for this. You can pre-dust your model with dry pigments if you so wish but there is no real need. To get the mud texture Im using Tamiya Texture Paint-Soil Effect Brown. This is rather like pumice stone mixed with paint in appearance. Take care when applying this as when it dries it does so to a very hard finish. You can thin it with water if you wish but you will lose the texture. This stuff will destroy a brush so use an old one! Give the bottle a stir before applying and then apply like paint, making sure to get a good build up of texture and not just color. Also look out as this stuff will clump on the brush. Once on, the texture paint will take a while to dry- give it half a day or at least two hours if you are in a hurry. Touch-test it gently to make sure its dried hard. It will not flake off like plaster so you dont have to be too gentle.Stage 2
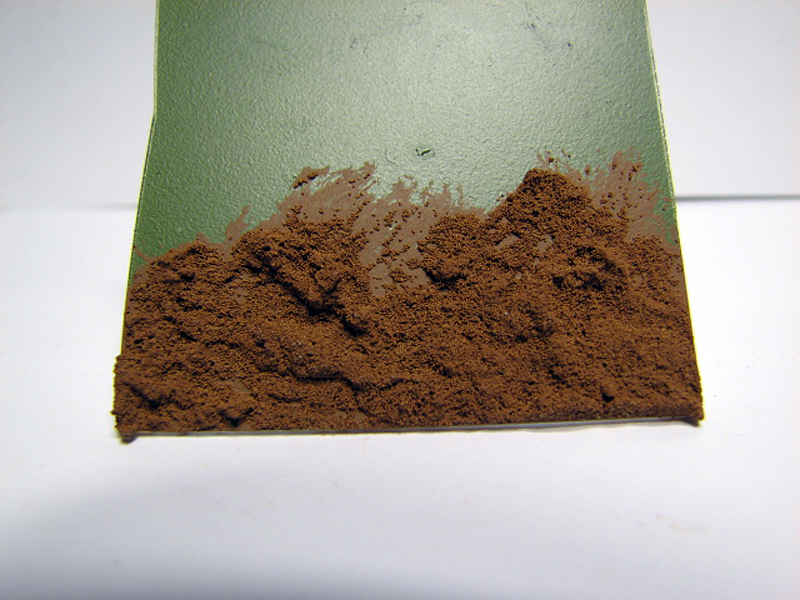
Next up is to give the mud some variation in color- that starts with a wash. Now you can use any color wash you want to achieve whichever color of mud you are looking for. The Mig Pigments Dark Wash used here is for a dark mud. Brush it on and leave it to dry. If you put on too much you can use a thinner moistened brush to remove it.Stage 3
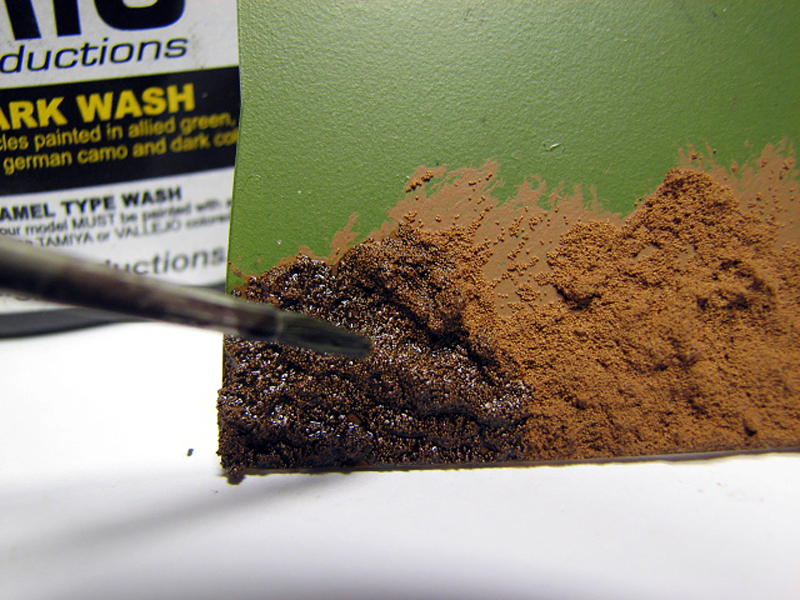
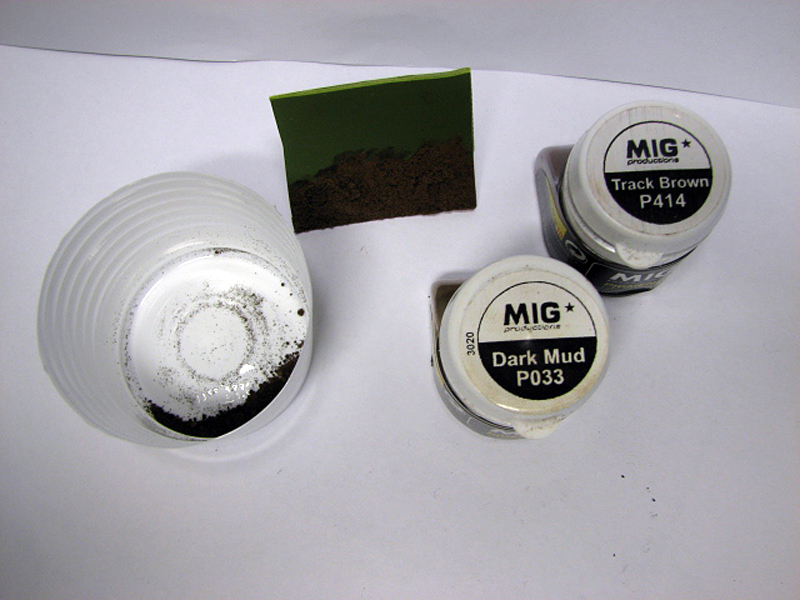
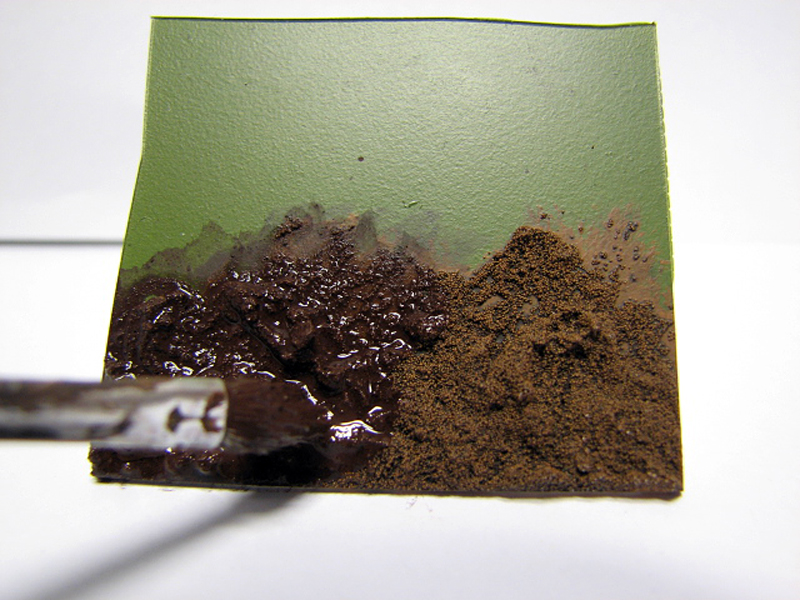
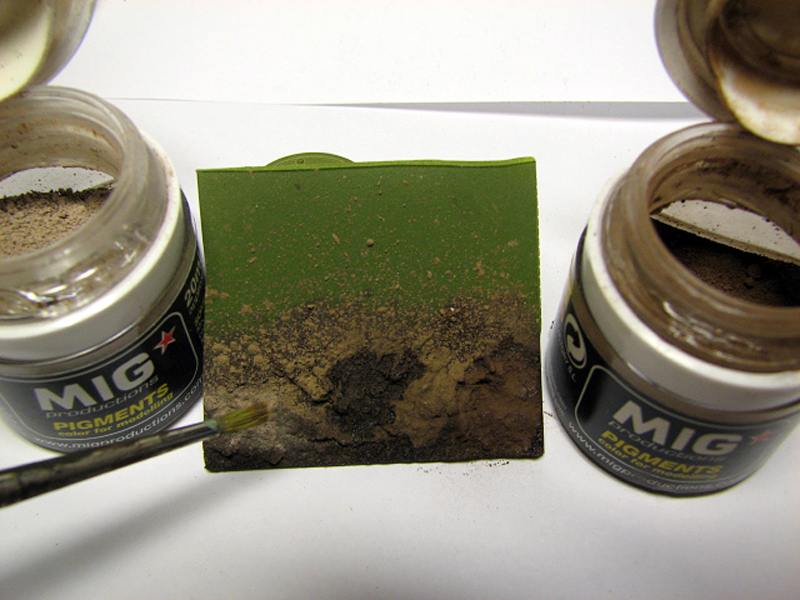
Once the wash is dry its time to add some more color using pigments. Again you can choose whichever colors you like although Id advise sticking to earthy tones at this stage. For this dark mud Im using Mig Pigments Track Brown and Dark Mud. Be careful if you are using Track Brown as it is very dark and can overwhelm lighter colors. Mix this with water and apply liberally with a brush making sure to get some of it above the mud-line.Stage 4
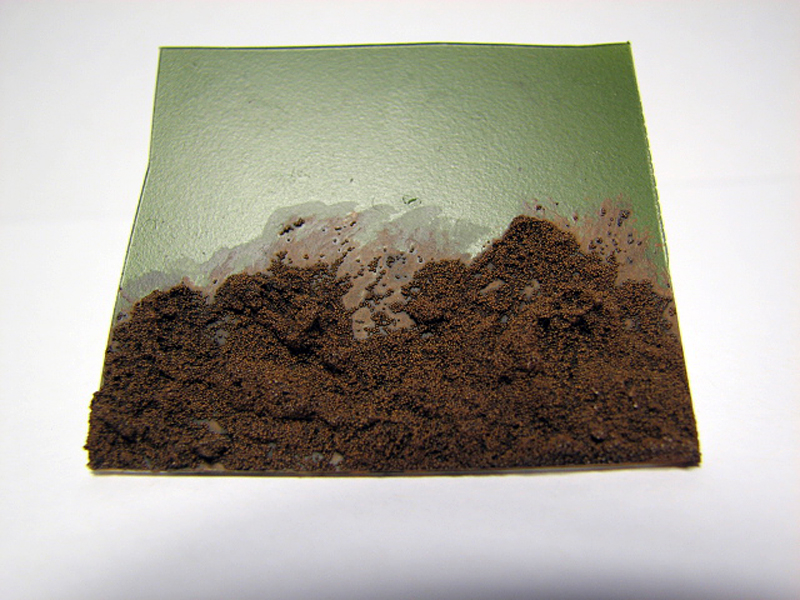
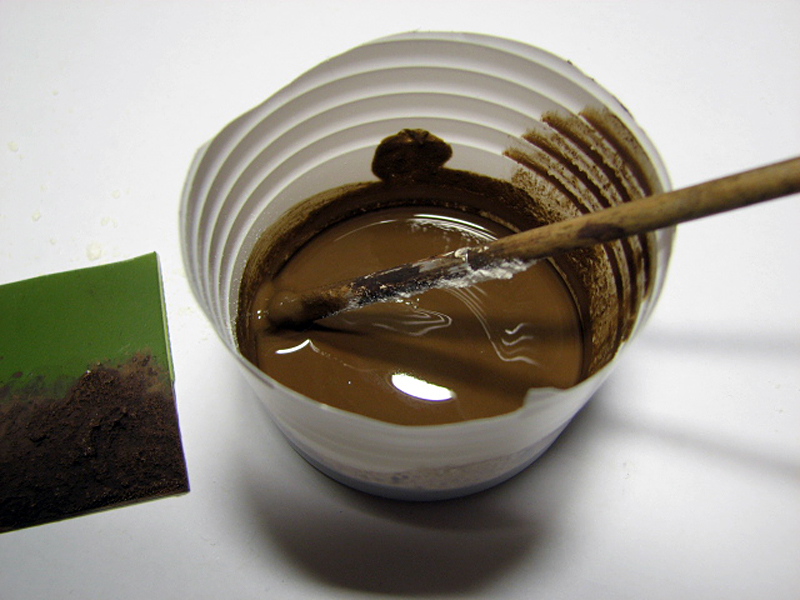
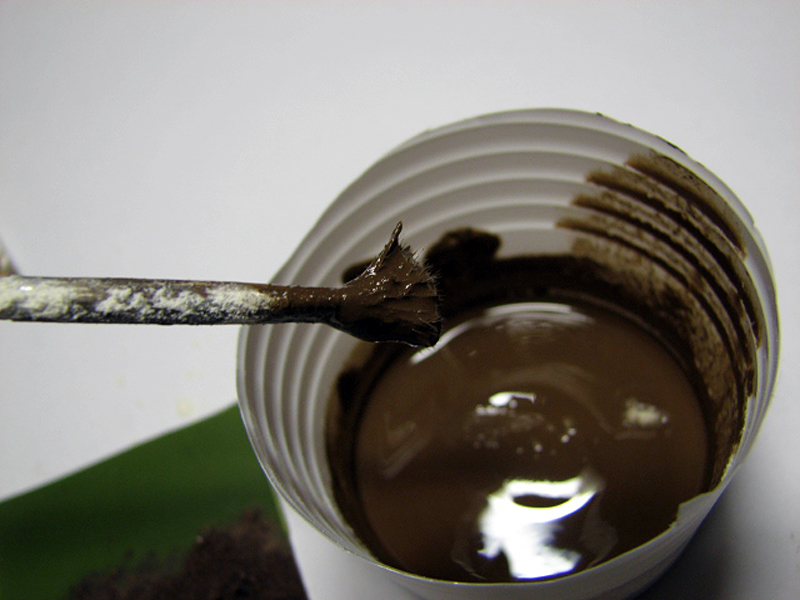
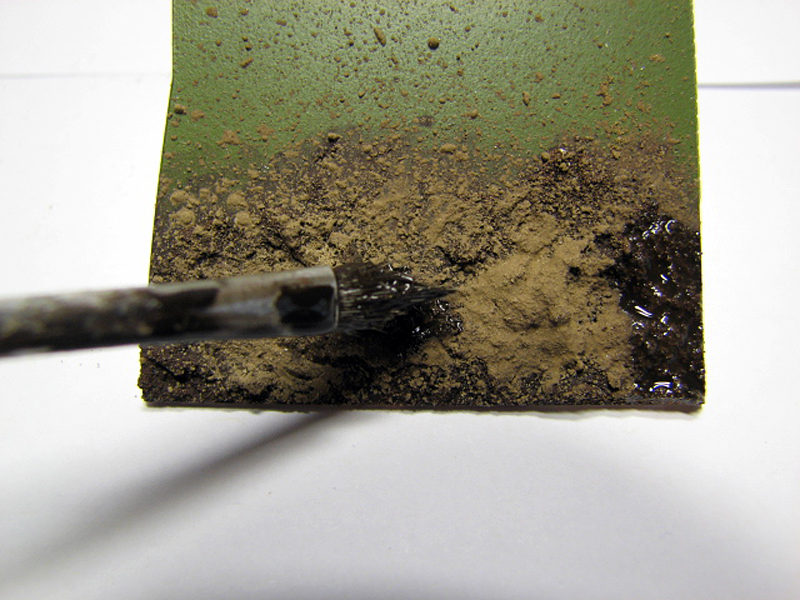
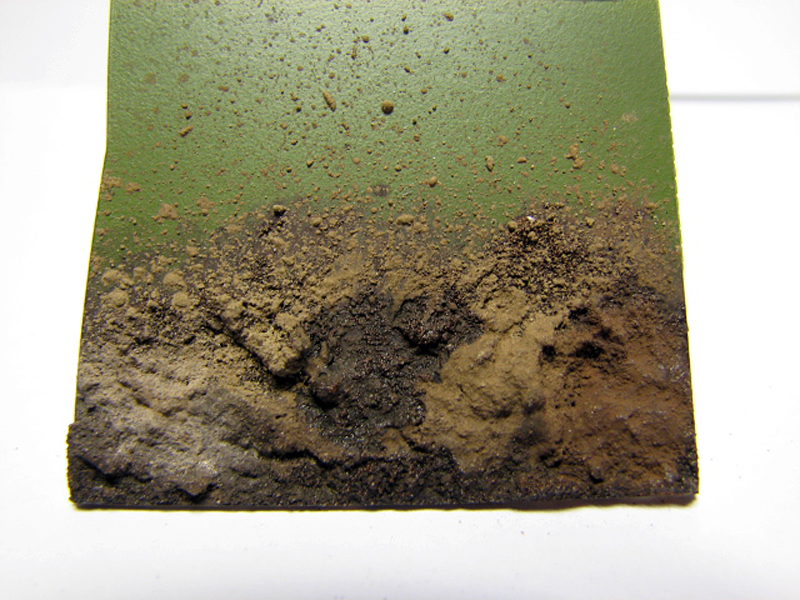
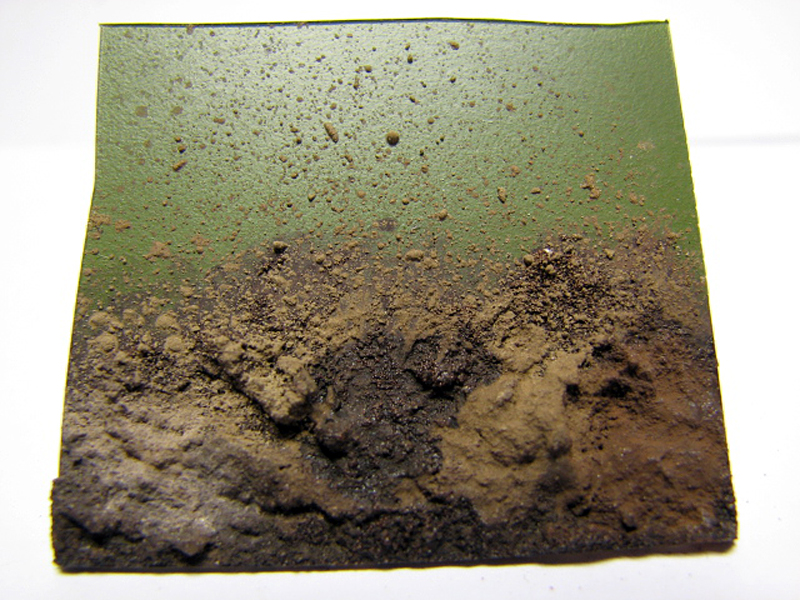
When the wet pigments are dry we have a nice dark finish. Now its time to add some lighter tones and spatter. In order to give the mud a bit of body (so it looks like actual clumps of mud thrown up onto the vehicle) you should use household powder filler or plaster. You can mix this with enamels or with wet pigments or even paint to achieve the color you desire. However, for this Im using AK Interactive Dark Mud which, when added to plaster, gives a nice finish that isnt too dark. Use a plastic cup or similar receptacle to mix up the Dark Mud with the plaster. The consistency were looking for here is like a milkshake- you dont want stodgy clumps in this technique although that can be useful for other techniques. As you can see on the brush the mix isnt too thick nor is it dripping off the brush- it still has a bit of body. Now you can dab this on with a smaller brush than you mixed it with so you have more control over where it goes. You can also spatter the mud by flicking the mixture on the paintbrush against a piece of plastic card. Have a go on a bit of paper first before applying it to your model. (You can also use an airbrush to spray the spatter on from behind the brush but I find this unpredictable and I get more control with the cardboard and flicking.)Stage 5
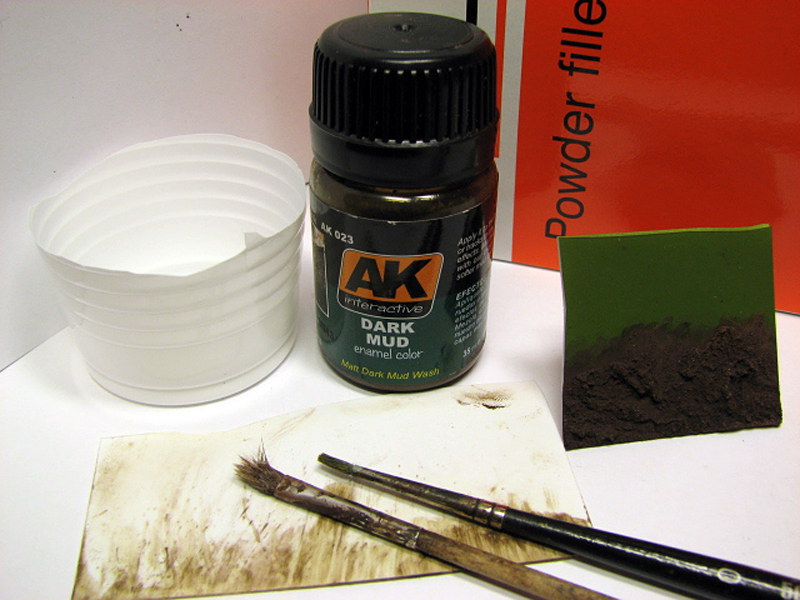
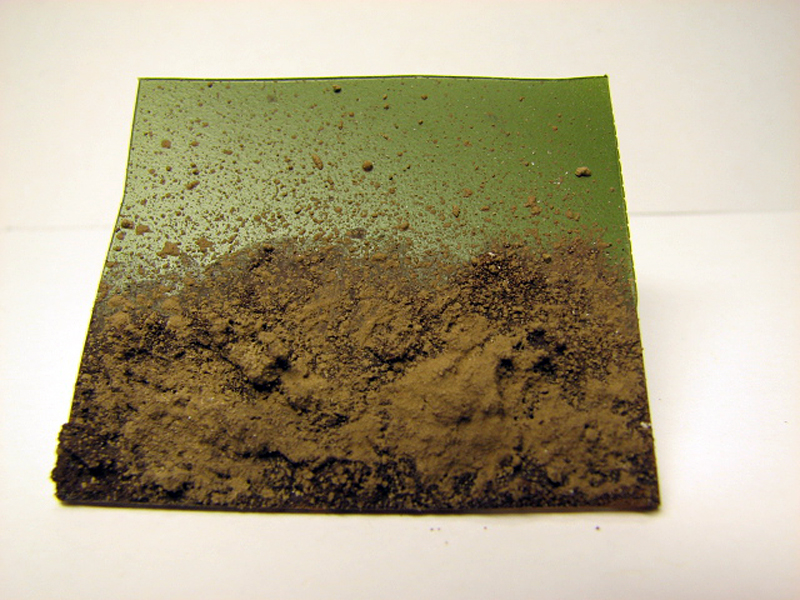
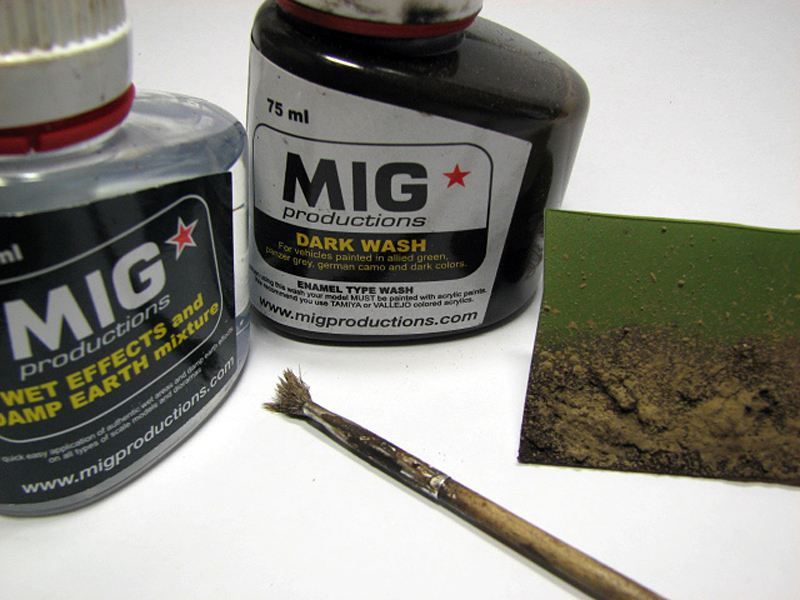
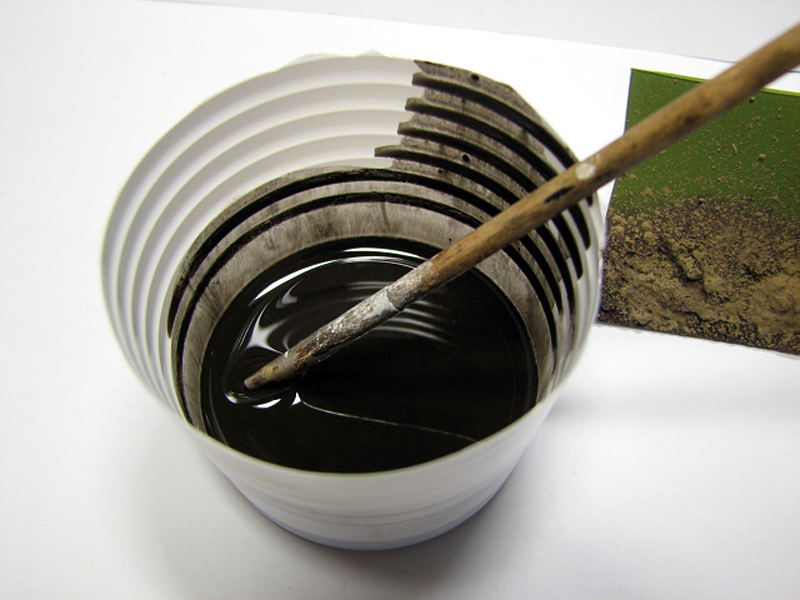
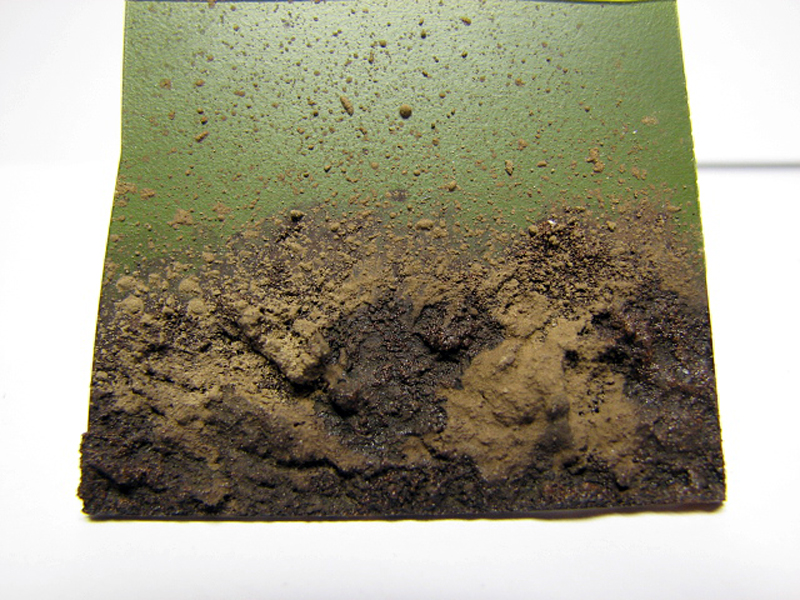
As you can see the spatters are not flat- they are little clumps of dirt- like real mud spatters. Be careful when handling after this stage as the plaster/filler will rub and flake off easily. Now we can add some damp areas (if you so wish). I find the best way to do this is with enamel washes and gloss varnish- mixed up together. For this example Im using the Mig Productions Dark Wash again as well as their Wet Effects and Damp Earth Mixture. Mix them both up and apply in random patches to simulate mud that is still damp/wet. If you want it to look even more damp/wet then, once the mix is dry on the model, you can apply another coat of gloss varnish or Wet Effects (Johnsons Klear works well too).Stage 6
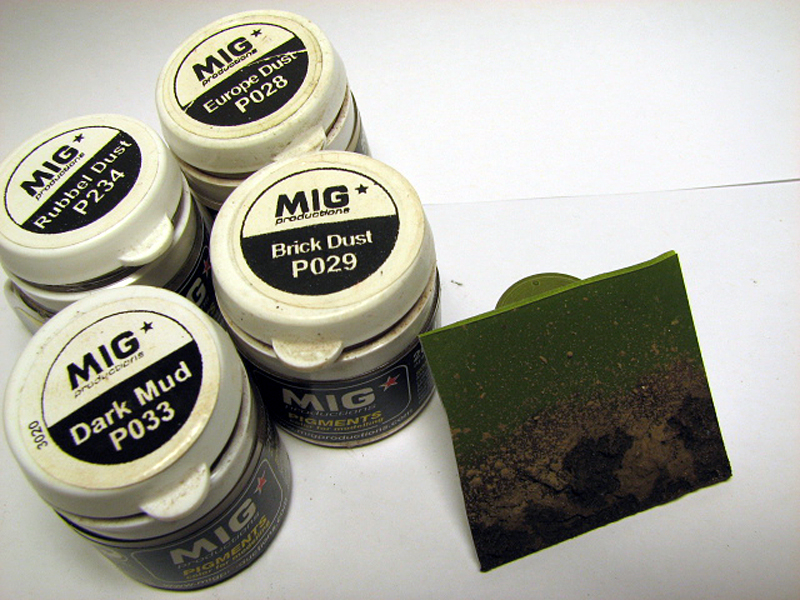
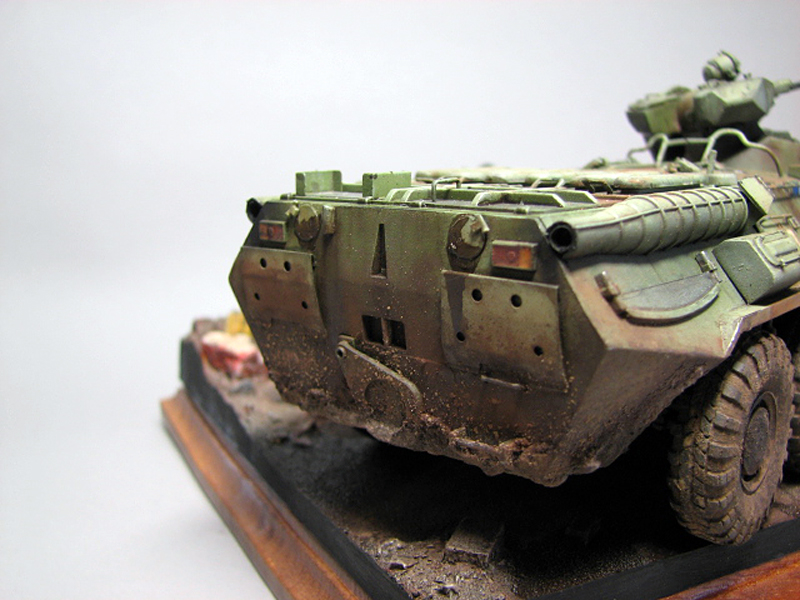
Once that is dry you can leave it there or you can add some more pigments for more color variation depending on what kind of look you want for the model. If it was in a city, for example, you might want to add grey tones and if it was in the countryside then more earthy tones. I added Mig Pigments Rubble Dust to the left and Dark Mud to the right of the example. And thats it. Remember that if you are not certain about this technique (or any technique for that matter) then try it out on a scrap model or some scrap card- dont ruin your latest masterpiece by mistake!!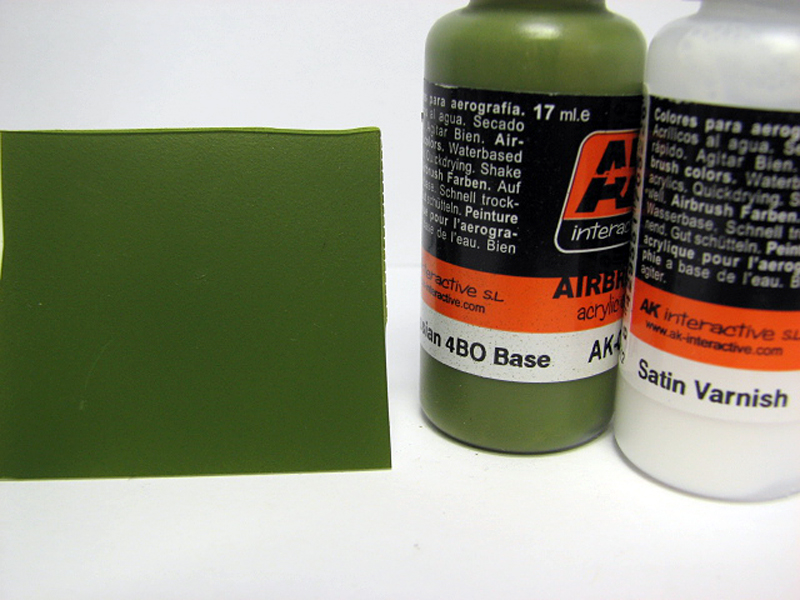


About the Author


Comments

You can also just mix the base mud color paint with spackling paste. Stiple on. Let dry. Highlight dried mud with lighter colors of earth tones.
JUL 09, 2011 - 01:20 AM

Karl, thanks a lot for your great tutorial. Results look great.
I´ll try this with one of my next models.
Cheers
Walter
JUL 09, 2011 - 02:28 AM

Something Other Than Plaster
I just wanted to pass along the method I use for mud. Follow the link, you may have to scroll down the page a bit. Part 5-What a Bloody Mess!!
The Basic difference is the Plaster or lack there of since I use Liquitiex Acrylic Gel. I let it dry over night. Follow the rest of the steps as shown in the this Feature. Not sure if you can get the brand shown in the UK but Art supplies shops should have some thins similar.
I hope this helps and please feel free to ask any questions.
Enjoy
JUL 09, 2011 - 09:08 AM

Thanks a million Karl, I'll follow your tutorial for sure
Cheers
JUL 09, 2011 - 09:12 AM

Thx for this
I need to hunt down some Liquitiex then, Art shops should have it I hope, just one question, what is it like to work with ?, is it a sticky goey mess or fairly easy to work with ?
The reason I ask is because I need to make some mud in very small areas with a huge amount of repetition involved.
JUL 09, 2011 - 09:56 AM
Hey Matt;
Since this stuff is acrylic its really easy to work with, no gooey mess or anything like that. If you make mistake or need to remove some because you have much on it just wipe it off. Being water based you can thin it real easy. In fact I apply it in layers one after the other once the previous layer is dry.
One thing to note is that there are different types of acrylic gel. If you notice in my pictures I'm using one call 'Blended Fibers" this one is really good for a heavy coating of mud that is still wet/damp on the vehicle. Another is call Stucco (I think) and it's best use for a more lighter coat of mud that has dried on the vehicle. So check out what your local art store has and chose the one you think will work best.
If you have any problems finding this stuff check ebay or drop me an email and maybe we can work something out to get you some.
Let me know if you have any other questions
Good Luck!
JUL 09, 2011 - 01:23 PM
Thx Eric
And Karl sorry for hijacking your Mud feature a little with my question, it's just when you mentioned powdered filler/ plaster it triggered my memory with regards to a little job I gotta do.
The powdered filler/plaster mud method is very good, used it alot for groundwork on bases, it has a good texture.
JUL 09, 2011 - 02:20 PM

My mud techniques are somewhat simpler and off the shelf.
First I use all acrylic craft paints and in doing so use a thinned black wash of paint on the areas I want to be muddy. Next I scrape artist's or billiard chalk onto the wet areas using a dull hobby knife. I mix in Polycrylic wood sealer,the glossy type for a wet muddy effect. For dried mud I leave out the wood sealer.
This technique is shown on my M8 Greyhound which appears on past Features pages.
It takes about 10 minutes to get the desired effects and there are products used that a readily available on not a special item.
johncpo
JUL 10, 2011 - 03:52 AM

Matt- no problem, I'm glad this feature has prompted discussion!
Mauro- thanks mate !
JUL 10, 2011 - 05:14 AM
Copyright ©2021 by Karl N. Hoy. Images and/or videos also by copyright holder unless otherwise noted. The views and opinions expressed herein are solely the views and opinions of the authors and/or contributors to this Web site and do not necessarily represent the views and/or opinions of Armorama, KitMaker Network, or Silver Star Enterrpises. All rights reserved. Originally published on: 2011-07-08 00:00:00. Unique Reads: 32683

WEB HOSTING BY


Copyright ©2021 Armorama and Kitmaker Network, a subsidiary of Silver Star Enterprises
All Rights Reserved. Please read our Conditions of Use and Privacy Policy.
All Rights Reserved. Please read our Conditions of Use and Privacy Policy.