

1⁄35Hunter Killer?
15
Comments

About the Author

FROM: ENGLAND - SOUTH EAST, UNITED KINGDOM
I've been nailing kits together since I was in single figures and Airfix releases came in plastic bags, with a card header. Now I have the privilege of building for the brand through their in-house mag, Airfix Model World. Finding myself in an amazing golden age of modelling, with Wingnut Wings an...
Comments

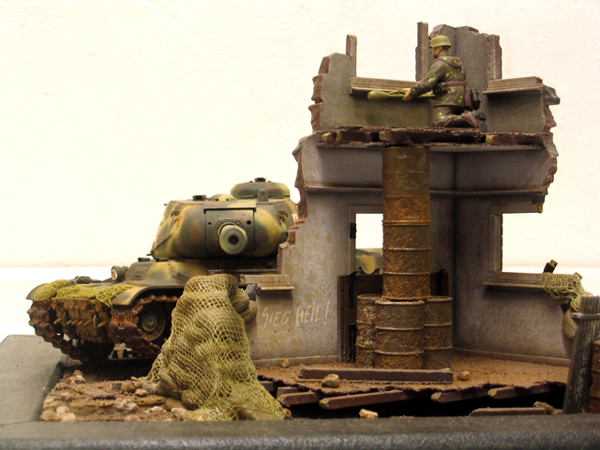
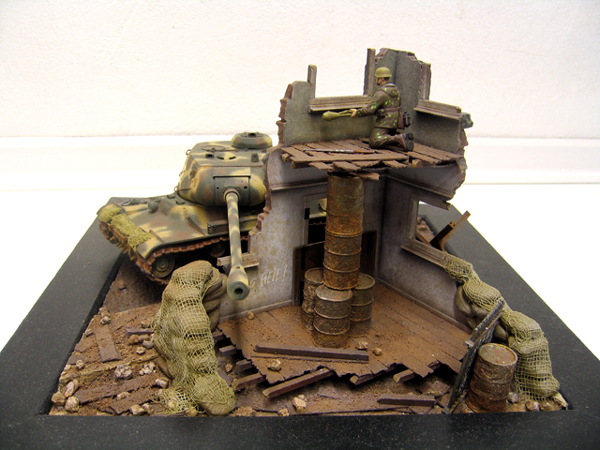
I like the concept and the lay-out. It tells a story in a small space. All too often it's hard to show both sides of a fight as in a modern war enemies just don't get that close.
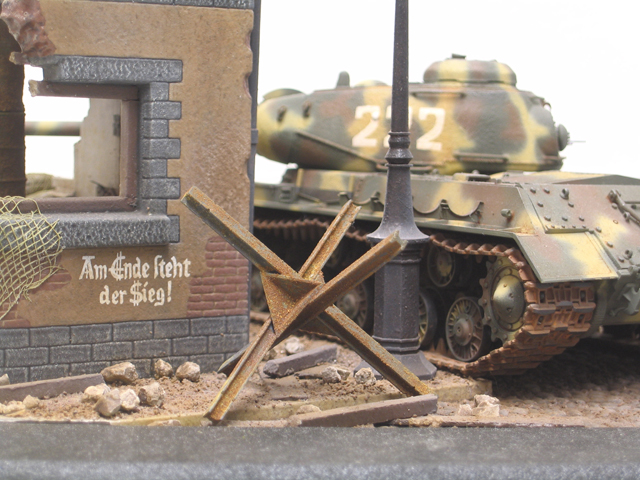
I believe that both the tank and the scene are too clean. Not enough dirt & rubble (where is the rest of the building? It should eb piled up all around...) The Russians were notoriously bad at maintaining their vehicles. Even a new JS2 would have accumulated a lot of rust & dust.
In any case - good work
NOV 02, 2004 - 07:07 AM

I like the dio, but at first I paniced because I thought I was getting stalked for not bringing any content to the site...
I must say I like the composition alot! Very well utilized area!!
NOV 15, 2004 - 06:42 AM

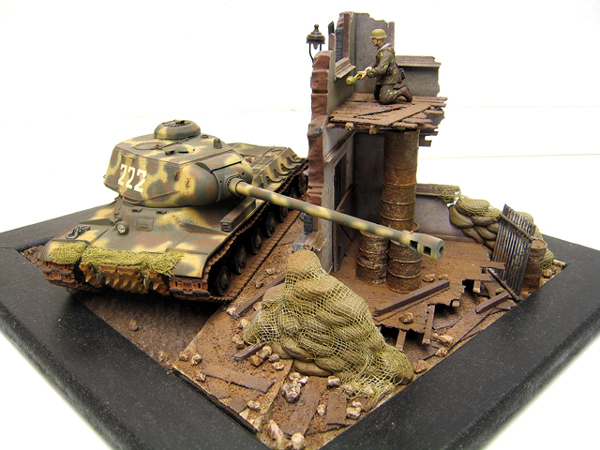
Teh diorama looks fantastic. The color scheme on the Js11 looks wonderful. I also like the ruined house and all the rubble in the street. Overall good feel to it.
NOV 15, 2004 - 02:07 PM

Hi - Sorry about the dely responding.
You'll find a colour side profile of the tank (part of the 4th Guards Tank Army in summer 1944 at:
LINK
The site is a mine of great info and well worth a spin.
Apologies for the poor quality photos of the dio - I'm just starting out on the digital photos front - the next submission will be much lower contrast and well up to speed.
Best regards
Ogri
NOV 21, 2004 - 12:52 AM
Hi - Sorry about the dely responding.
You'll find a colour side profile of the tank (part of the 4th Guards Tank Army in summer 1944 at:
LINK
The site is a mine of great info and well worth a spin.
Apologies for the poor quality photos of the dio - I'm just starting out on the digital photos front - the next submission will be much lower contrast and well up to speed.
Best regards
Ogri
NOV 21, 2004 - 12:55 AM
Hi - Sorry about the dely responding.
You'll find a colour side profile of the tank (part of the 4th Guards Tank Army in summer 1944 at:
LINK
The site is a mine of great info and well worth a spin.
Apologies for the poor quality photos of the dio - I'm just starting out on the digital photos front - the next submission will be much lower contrast and well up to speed.
Best regards
Ogri
NOV 21, 2004 - 12:57 AM

I like the dio very much.
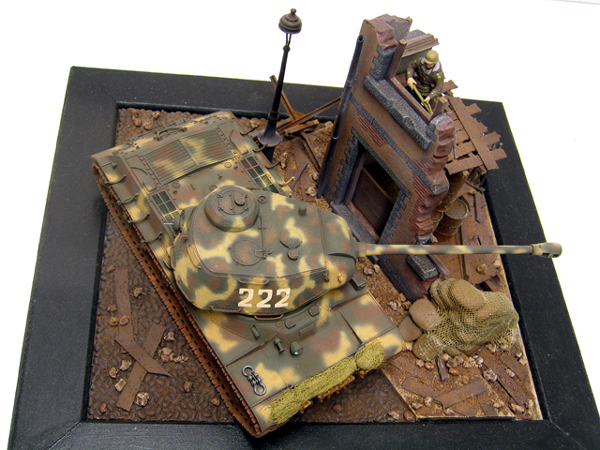
The camo scheme is interesting and very well painted, but I think some more weathering would improve the look of the tank.
The tracks are amazing.
How did you create the net?
Cheers!
Ori
DEC 16, 2004 - 09:24 AM

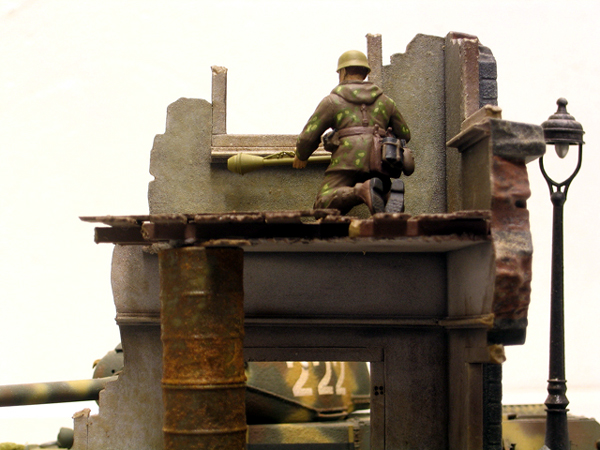
That fellow has found himself in a interesting position. Do you wait to shot or nail it now. Very nice dio.
DEC 16, 2004 - 02:47 PM
[quote]I like the dio very much.
The camo scheme is interesting and very well painted, but I think some more weathering would improve the look of the tank.
The tracks are amazing.
How did you create the net?
Cheers!
Ori
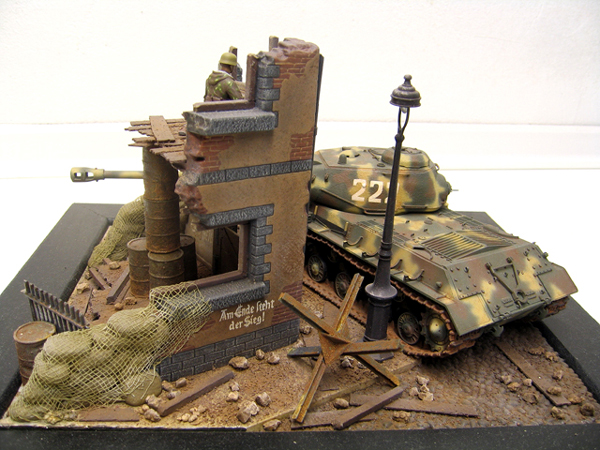
Hi, Sorry about the delay in responding. Thanks for all the comments - much appreciated and helpful feedback. There's no magic about the net - it's a plain old Verlinden diorama accessory fixed with watered down white glue. An overspray of matt varnish (heavier in places) mutes the original colour and gives something of a weathered feel. The tracks were sprayed Tamiya Dark Earth followed by the ubiquitous Verlinden 'protective layer of matt varnish. This was followed by a heavy application of various shades reddish / brown pastel chalks (about five or six in all I think). The chalk was 'fixed' with another spray of matt varnish. Simply varying the quantity of varnish sprayed on (i.e. keeping it patchy and a bit random) gives some mixed tones around the tracks - the varnish 'washes' some of the chalk into crevices and up against raised features which again changes the appearance. Varnish always reduces the effects of the chalk so it's necessary to 'over do' the effect in order for it to look ok after the varnish is on. My tank's been running in dry conditions for a while before finding itself at the street corner. Best regards to you and happy modelling!
DEC 26, 2004 - 11:14 PM
[quote]That fellow has found himself in a interesting position. Do you wait to shot or nail it now. Very nice dio.
Thanks Mike - I appreciate you taking time out to post some comment. Best regards, Steve (:-)
DEC 26, 2004 - 11:17 PM
Copyright ©2021 by Steve Budd. Images and/or videos also by copyright holder unless otherwise noted. The views and opinions expressed herein are solely the views and opinions of the authors and/or contributors to this Web site and do not necessarily represent the views and/or opinions of Armorama, KitMaker Network, or Silver Star Enterrpises. All rights reserved. Originally published on: 2004-10-19 00:00:00. Unique Reads: 14515

WEB HOSTING BY


Copyright ©2021 Armorama and Kitmaker Network, a subsidiary of Silver Star Enterprises
All Rights Reserved. Please read our Conditions of Use and Privacy Policy.
All Rights Reserved. Please read our Conditions of Use and Privacy Policy.