

1⁄35Accurizing the DML USMC M1A1HC

Introduction
The kit used is the reference 3531 from DML which comes with a basic interior. It is the first USMC Abrams DML already released a while ago. Meanwhile, this manufacturer has released another kit as a consequence of OIF. Basically the new kit is a reboxed one with added parts and a new decal sheet.
Originally, I just intended to improve my DML kit taking benefit of the release from Tamiya of its M1A2 with its USMC parts. In the end, I will have done a lot more than anticipated for many reasons. First, I wanted a sand-colored OIF Marine tank, thus I selected in the Echelon Fine Details appropriate decal sheet (T35004) the Sinister Minister tank which proved to have the bustle rack extension (missing in both Tamiya and DML kits). Second, the study of pics of various parts of the Marine version (MCD and APU) proved necessary to do some extra job to increase the kit accuracy. Third and last, the Missing Link Tweak list proved to be a goldmine but once in you cant easily get out ! Its like suffering from a kind of superdetailing syndrome, a variant of the AMS !
My first step was to collect enough data to have the most accurate kit as possible. At this stage, I have to thank many Armorama members for their valuable help (Vodnik, Tankleader, Don Burik, may the ones I forgot forgive me). Then only I started the building.
The turret
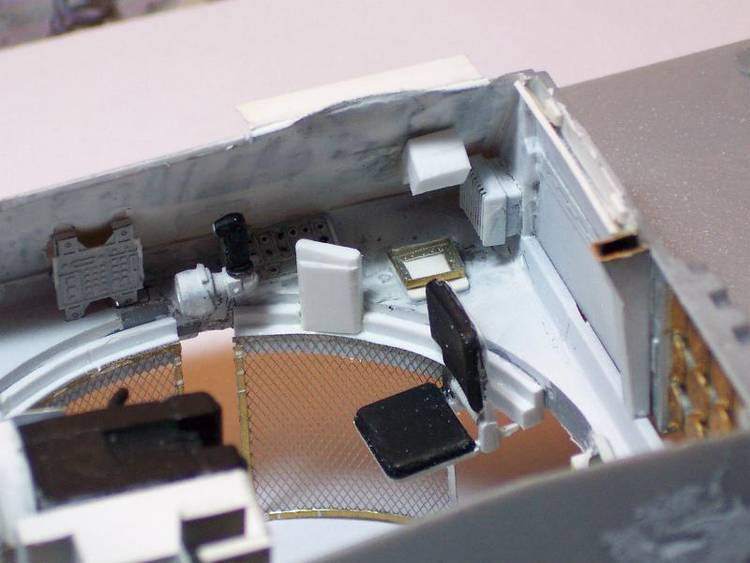
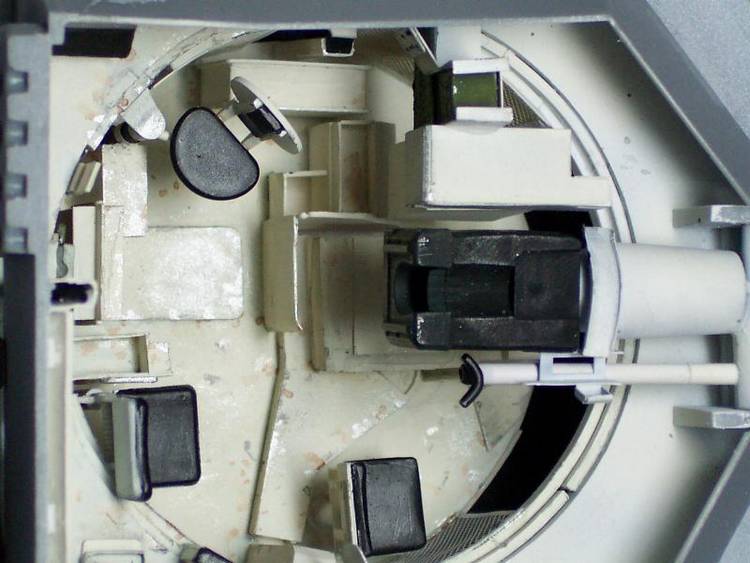
The interiorThe main challenge was to represent the turret interior as detailed as possible. I used the DML parts, the Eduard PE set and a lot of pics. The hardest with the latter was to discriminate the variants. The DML parts are not fully accurate but constitute a good base. The Eduard set corrects a lot but presents some flaws too. The loader station is the worse area as the parts provided seem to belong to a M1 and not a M1A1. The coax ammo rack suffers from the same mistake. The job done by both Eduard and DML on the TC and gunner stations is rather good even if not perfect.
The job was divided into three separate tasks : the turret lower half and the basket, the floor and the turret upper half building.
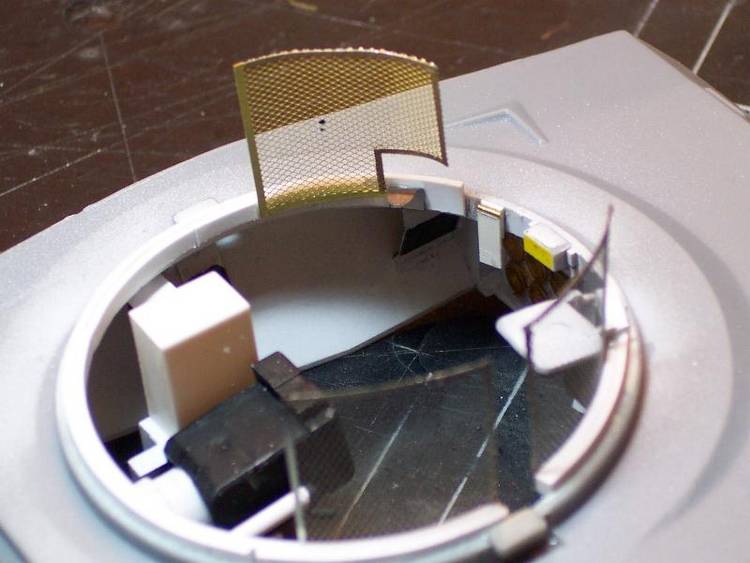
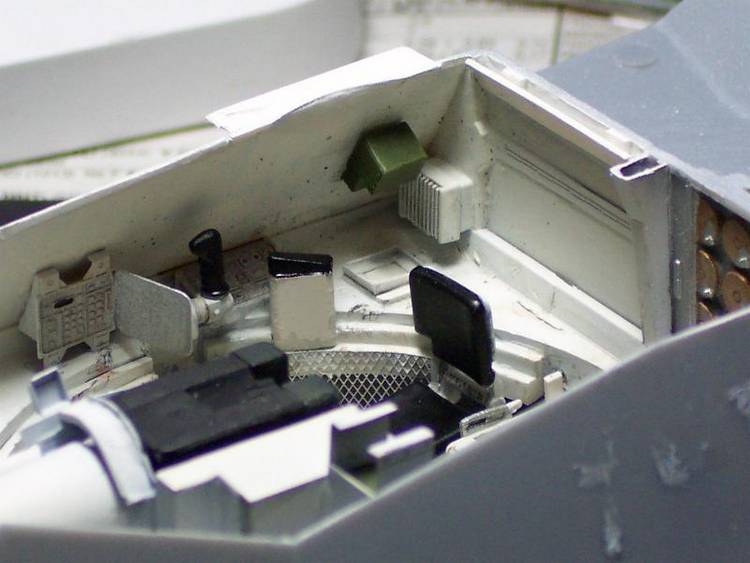
The lower halfI thickened the turret ring behind which is hidden the rotating system and added the mesh protections. The seats were not glued at this stage as they rest on supports bolted to the floor (being also parts joining the floor and the ring for real). I detailed the inner walls with various switch boxes, stowage racks and radio sets. The ammo compartment wall got PE parts like the vertical reinforcing support. The shell aft end caps come from the PE set. The gun area was improved with PE parts to detail the coax MG mount and its ammo feeding system. The secondary/auxiliary gun sight has been added with plastic tubing directly glued to the gun "axle". All the sights received the oval shaped forehead rest.
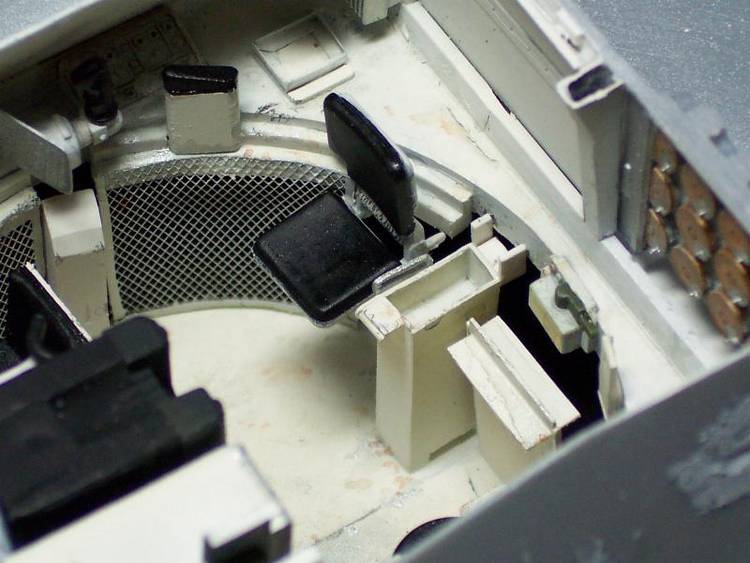
The floorThe floor was done thanks to pics of Rob McCune own project and of the real vehicle. First, I cut a plastic card discus of the turret ring diameter. I glued on the upper surface a thin plastic lip inside which will be glued the basket mesh. The seats and their supports are added as well as the various "boxes" under the gun breech assembly. When completed, I put together the floor and the lower half.
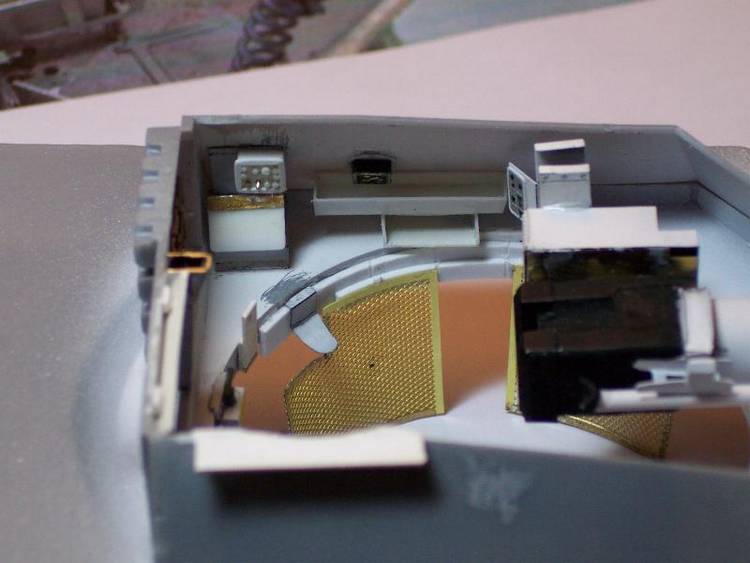
The upper halfThe upper half received the sights and the fire control panels from both Eduard set and DML parts. Be cautious when placing the parts as when ill-located they may forbid the final assembly.
The fit of the turret halves was a nightmare. The inner wall of the TC station showed a gap when looking through the hatch. I had to file it and add some putty to fix that. The ammo compartment wall needed to be sanded to allow a perfect fit. Finally, I had to fill the gaps of the mantlet location prior its installation.
The exteriorSome details are missing in the kit while several parts are ill-shaped too. Hence some extra work to do before getting a proper M1A1.
The DML TC weapon station appearing grossly cast, the Tamiya one was preferred to it. The vision blocks are filled with plastic card parts. The parts inside the cupola comes from the DML kit. The M2 is improved by sanding the sights, drilling the barrel and replacing the ammo box support by the Eduard one. The M2 mount is drilled out along its whole length as in real it is not a solid block. (This is where the spare cases are expelled through) A rectangular part is added on the support arm close to the left side of the M2 back. The TC sight inner face is slightly carved. (The DML part is correct unlike Tamiya one) The inner of the hatch is detailed with a strap, a T shaped handle and a PE locking handle.
The loader weapon station has the MG ring replaced by the Eduard one. The MG mount is detailed with the two visible pins at its base. The interior of the hatch is replaced by the Eduard part, the vision block being built from an angled plastic strip.
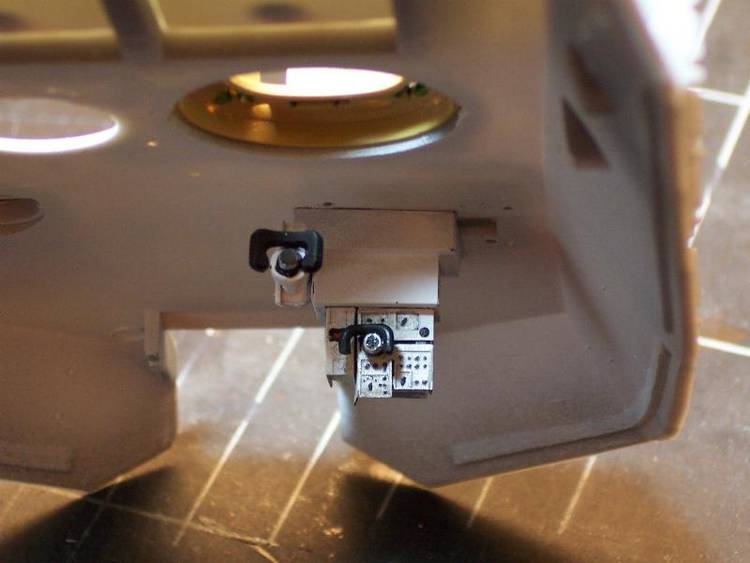
The roof is improved with the adjunction of the J shaped APU conduit behind the loader hatch as well as the straight conduit running along the blast panel. The APU connection box is scratchbuilt using Tamiya part as a template. Finally, the APU is totally redone using Tamiya parts as templates once again. From the DML kit part, I just kept the rivets. The MCD (missile counter-measure device) comes from the Tamiya kit and has been detailed with the handle on the top of it and the side heatsinks made from lead foil. The wiring is represented as well as the junction box on the left of the MCD mount. The wrong connection seen on the in-progress pics has been corrected before the painting stage thanks to valuable info given by Tankleader.
The smoke grenade launchers are replaced by the Tamiya ones whose detail is by far crisper. The electric wire and its triangular protection is added too. The grenade storage boxes are enhanced with the lid from Eduard and hinges made from brass rod. The tow cables are detailed. Their molded hooks are sanded and replaced by PE ones. The positioning pins are removed to allow a better fitting of the cables on the turret side. The bulgy part in front of each cable needs to be re-located. The stowage bins have their handles removed and replaced by Eduard ones. One padlock is added. One broken handrail has been replaced by plastic rod. The others need a thorough sanding to remove the ill-positioned sprue marks.
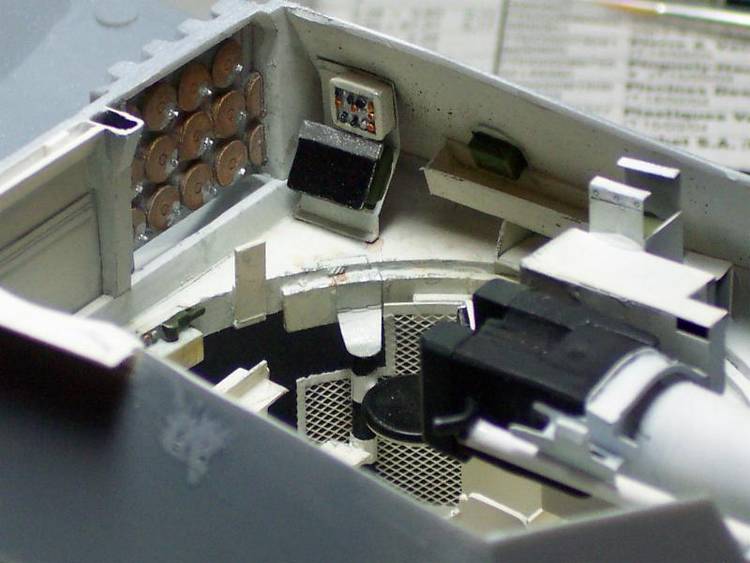
The bustle bin is done after having thinned the various parts and removed the ejector pin marks. The fit is not that bad unlike what I read in the ML tweak list. The mesh comes from the PE set. The vehicle I decided to represent has the extension rack fitted so I scratchbuilt it from plastic strips, rods and brass mesh. The data come from Tankleader as a Word file with pics and measurements. Some adjustments were needed to perfectly fit the DML bustle rack.


About the Author


FROM: CORREZE, FRANCE
I have been in the hobby for years and I'm still learning. As a modeler, I only build 1/35 modern military vehicles, mainly armored ones. I also run a website where I share a lot of walkarounds. Just click on my banner to pay a visit to it.


All Rights Reserved. Please read our Conditions of Use and Privacy Policy.