This is the first of a series of reviews in which I will take a close look at various models of LVTP7/AAVP7 series of USMC Amtracs - amphibious tracked vehicles. In this review I will describe the oldest of Amtrac kits: Tamiya LVTP7A1.
THE AMTRAC
LVTP7 (Landing Vehicle, Tracked, Personnel) was designed in late 1960s, first prototypes were built in 1967 and full scale production begun in 1970. A few of early examples were tested in Vietnam, but their production started too late for those vehicles to replace LVTP5 Amtracs in USMC units in Nam. Early LVTP7 were powered by GM diesel engine. Those earliest versions of LVTP7 are recognizable by large round recesses in front armor plate housing headlights. In early 1980s SLEP - Service Life Extension Program was initiated to upgrade the fleet of Marine Amtracs to LVTP7A1 standard.
Most important changes included replacement of diesel engine with Cummins multifuel unit and installation of electric motors for traverse and elevation of the weapon station, instead of hydraulic systems used previously. The suspension was strengthened. Most noticeable external difference between A1 and older variant were new headlight clusters, located in rectangular recesses on top of front armor plate. In 1984 USMC, without changing a single bolt in the design, changed designation of the Amtrac from LVTP7A1 to AAVP7A1 (or just AAV7A1 to describe the whole family of vehicles) - Assault Amphibious Vehicle, Personnel, 7A1. In following years two construction changes were introduced: older weapons station equipped with just one M2 .50 " cal. machine gun, was replaced with Cadillac Gage station equipped with Mk.19 40mm (grenade) machine gun in addition to M2 gun. The new weapons station was sometimes referred to as UWS or UWGS - Upgunned Weapons Station.
The other noticeable change was installation of trim vane kit on front of the vehicle - it was necessary to compensate the effect of increased weight of weapons station when operating afloat. Next major upgrade for AAVP7A1 vehicles was installation of EAAK (Enhanced Appliqué Armor Kit). This new armor package consists of a set of removable corrugated steel plates, bolted to the armor. All AAVP7A1 were equipped with EAAK installation brackets (small rectangular metal blocks with holes for bolts in them) welded to side and top armor surfaces, but not all vehicles received the actual armor plate kits. This became a problem during Operation Iraqi Freedom, where some USMC units had to improvise and use flat armor plates instead of EAAK sections. All mentioned changes to the original LVTP7 design caused significant increase in vehicle weight, what put excess strain on suspension system. The ground clearance of the vehicle changed from original 16 inches to less than 12 inches. Power to weight ratio also dropped significantly reducing the mobility of the vehicle.
To remedy this problem the Reliability, Availability, Maintainability/Rebuild to Standard (RAMS/RS) program was started in November 1998. Under this program AAVP7A1 vehicles are being rebuilt with Bradley IFV engine, transmission and whole suspension kit. The ground clearance returned to 16 inch and power to weight (horsepower to ton) ratio increased from 13 to 1 to 17 to 1. Not all vehicles were rebuilt to new standard, so during the Operation Iraqi Freedom, the mixture of AAVP7A1 and AAVP7A1 RAMS/RS vehicles was used. Rebuilt vehicles are recognizable by new large exhaust muffler installed on top of the hull and new suspension with return rollers, not present in original LVTP7 design.
THE KIT
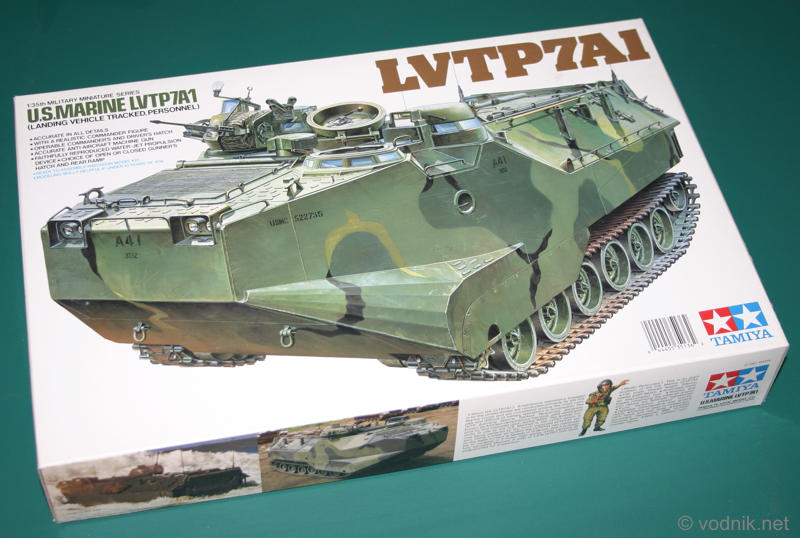
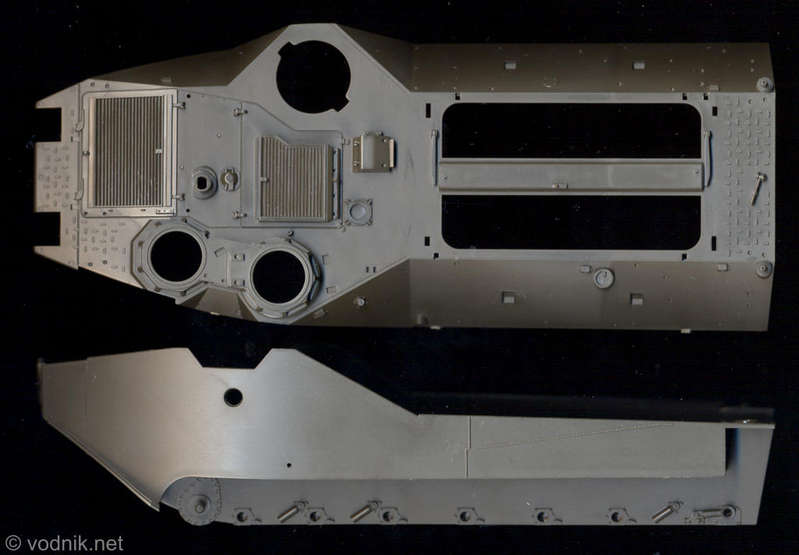
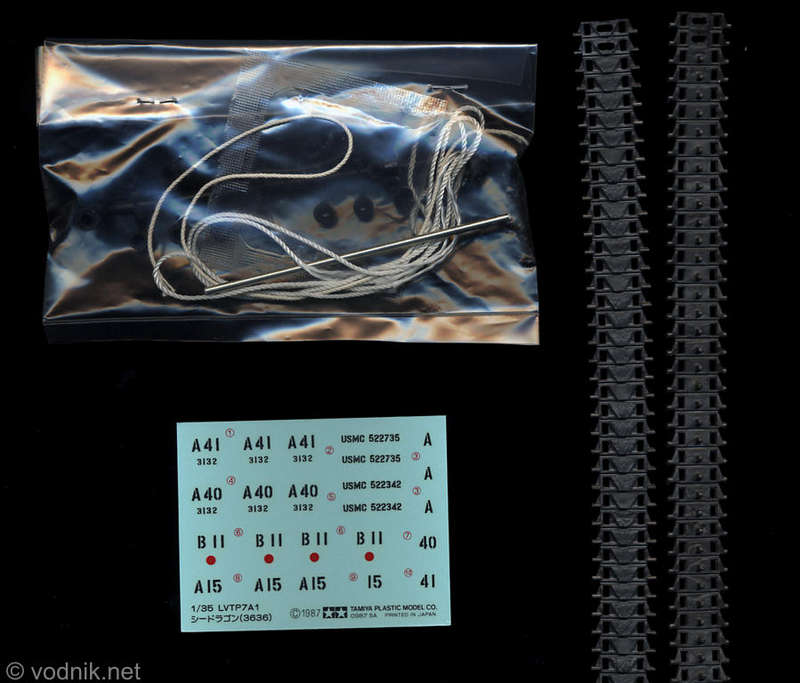
Tamiya kit reviewed here was manufactured in 1987. It represents LVTP7A1 / AAVP7A1 vehicle with old style weapons station. Tamiya used older LVTP7A1 name on the kit box, but in the instructions it is mentioned that they are "known as the AAV7A1 at FMC" what is not quite true. The name change was Marine Corps idea, not manufacturer's. Many modelers ask if this kit can be used for Operation Desert Storm vehicle - the answer is yes, it can! There were still many older Amtracs without UGWS used in Kuwait and Iraq in 1991 (see page 5 in Verlinden's Warmachines No.13 book "On the Road to Kuwait, Marines in the Gulf"). This kit is however not suitable for Operation Iraqi Freedom - you need to get later Tamiya 35159 kit. The kit comes in Tamiya usual top opening box with a box art illustration of Amtrac in green/green variation of MERDC camouflage scheme. On box lid side there are pictures showing camouflage pattern in four views - be sure to keep this part of the box, as the right-side view shown here is not included in instructions. Inside the box we get three dark green plastic sprues plus two large separate parts for hull top and bottom. Two identical sprues containing mostly suspension parts are packed in one plastic bag and the third larger sprue is separately packed. In addition to plastic parts you get flexible vinyl tracks and a small bag with poly caps, steel rod for idler wheels axle and two lengths of twine - thinner for towing cable and thicker for moorings. Small decal sheet contains markings for three vehicles, all in variations of four color MERDC camouflage scheme. 11-step instructions are provided, presented in typical clear Tamiya style with funny cartoons showing some of the kit features.
Close examination of parts didn't reveal any ejector pin marks in places where they would be visible on finished model, with exception of those on the inside of all openable hatches. The only shallow sink marks I found are on troop compartment hatch support columns (parts A17) and on spare track links. All parts are virtually flash free, so cleanup should be really quick and easy. There are some nice details present, but nothing spectacular by today's standards - after all this kit is 17 years old! Still the impression is very positive and all details we get are cleanly and sharply molded, as we are used to see in Tamiya kits.
All hatches on top of the vehicle are moveable and the rear ramp can be installed open or closed, but its hinges are not workable. Door on the ramp is molded as one part with it, so it can't be opened. Unfortunately there are no interior parts included in the kit, so opening larger hatches means that you would just see large hollow space inside the model... Surprisingly, 17 years from the model release date we still don't have any aftermarket interior set for it! It may soon change as Propaganda Company from France are working on a set, but it will be for latest AAVP7A1 RAMS/RS vehicles, so may not be accurate for older kits. And to make things worse detailed information about the interior layout, necessary to attempt scratchbuilding it, are sparse and hard to find.
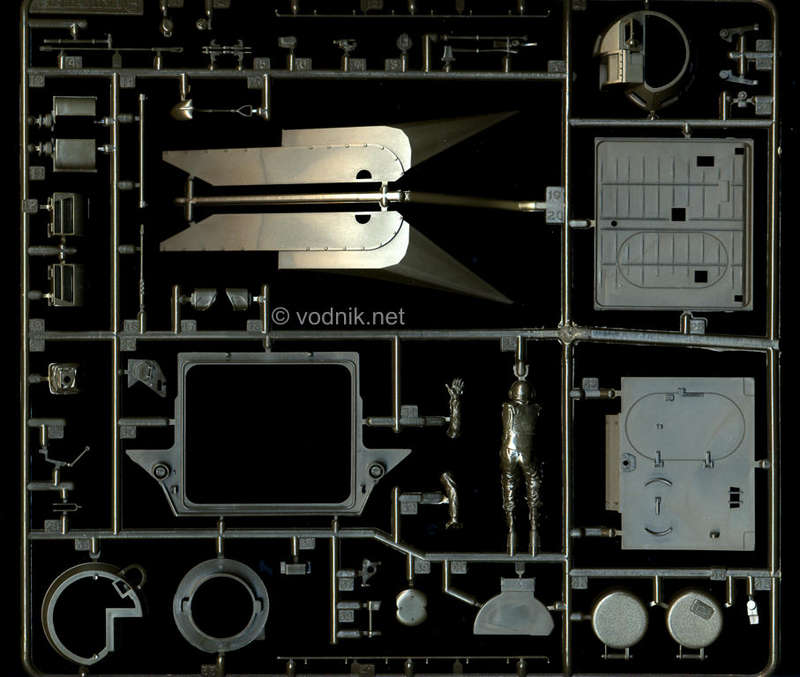
You get one figure in the kit - it is a standing crew member in a pose that can be interesting for a diorama, as he seems to be signaling the distance between the Amtrac and some obstacle to the driver (unfortunately not included).
DETAILS & ACCURACY
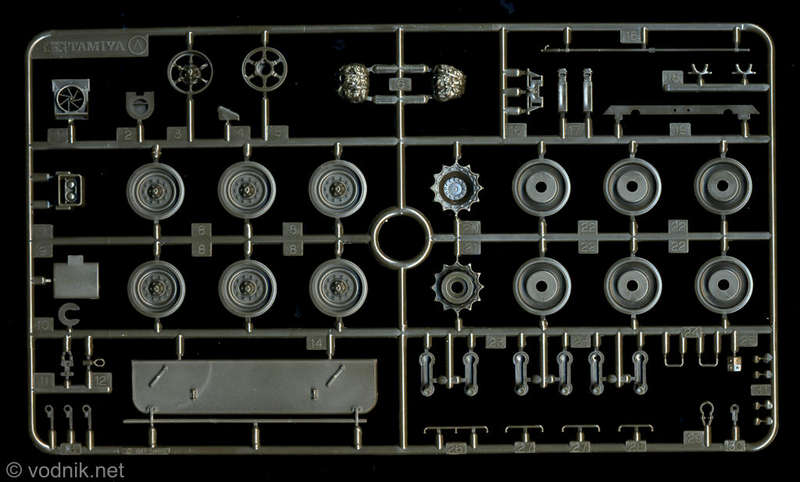
Suspension parts are quite well done in the kit. Suspension arms are separate parts, so you can easily change their positions if you want to put your model on rough terrain on a diorama. Shock absorbers and track adjusters are molded on lower hull part, but look rather convincing. Road wheels and idlers are quite well done, although a circle of small bolt heads is missing from road wheel rims. Sprocket wheels are worse, cause while their shape is generally accurate, each lacks five big oval mud relief holes. They are not difficult to add using drill bits and files, and their absence is somehow understandable as they are extremely difficult to mold correctly using injection molding technology. Vinyl tracks are of non-glueable type and are rather poorly detailed. I strongly suggest replacing them with individual link tracks available from Modelkasten, Friulmodellismo and Academy (cheapest, but hard to find).
At the rear of the hull, above tracks, are two water jet units. Tamiya made the water jet doors moveable, but in reality they generally remain closed on land, unless manually opened for inspection. All parts of water propulsion in the kit are reasonably accurate, but only if you look at the kit from sides of from the back. Tamiya molded the whole underside of the sponsons flat and horizontal. This way they didn't leave any way for the water to actually enter water jets! In reality the plate that makes underside of sponson raises towards the rear of the vehicle, creating open space behind hull walls there. In this space most of the jet system parts including the propeller shafts are hidden. If you want to make your model more accurate you may need to modify this area of the kit and add some details there. But as I mentioned earlier, kit parts look correct if seen from the side - the problem becomes visible only if you look at sponsons from below.
On part B20, which is sort of armored front fender (left), Tamiya omitted details, which are clearly shown on the box art picture - six small strips of metal welded to the surface to provide some non-slip area for the driver to put his foot on while boarding the vehicle.
Sides of the vehicle are completely flat and almost featureless, with exception for some weld seams, reasonably reproduced by Tamiya, and two round recesses with steps in them. Steps inside those recesses are simple pieces or steel rod in real vehicle - Tamiya molded them as flat surfaces inside parts A2, but this simplification is easy to correct by replacing them with pieces of wire or styrene rods.
Details on rear hull and ramp are accurate if slightly simplified. The only minor error is the shape of right taillight. In the kit it is the same as the left one - with one oval and one rectangular recess, while for full accuracy it should have just two rectangular recesses.
Two headlight clusters are molded integrally with their rectangular shield parts, but they look reasonably accurate. The only problem - again immediately revealed by comparing kit parts with box art, is the lack of pattern of metal non-slip patches welded to the upper surface of headlight shields.
There are some small inaccuracies on the upper hull. The engine access hatch opening levers are molded on the hull part, so are not quite correct shape. Lifting eyes on that hatch are molded solid, so holes should be drilled in them for better appearance. Intake and exhaust grilles in the kit lack mesh shields, so some photoetched mesh should be used here (There was a very old Eduard PE set available for this kit 34044, now out of production, but it was almost useless. There are no meshes in it and some of 25 parts that are included are less accurate than kit ones! Don't waste your time trying to find it). Two small details are missing in front of the driver's hatch. I don't know what they are, so will not try to describe them - take a look at the photo below to know what I'm talking about.

All vision blocks under driver's and commander's hatches are molded solid, so the glass will need to be simulated with paint (unless you are an adventurous kind and decide to open those blocks to fit pieces of clear styrene in them). One thing worth mentioning is very nice non-slip coating on top of commander's and driver's hatches - really nice touch! What a pity that similar coating is missing in a model from all other horizontal surfaces of the vehicle top. Hatches are poorly detailed inside, so some work is necessary here if you plan to leave them open. Opening levers are missing also on outer side of hatches and those should be added even to closed hatches. Between hatches is a commander's sight, which is molded empty, so you should add a glass made of clear styrene inside it.
Parts B39 and B17/B18, which are engine intake and exhaust parts are molded solid and no attempt was made to show meshes installed in them in reality, so some generic PE mesh should be used here again. Also note that there is some rectangular structure in the very middle of the hull behind engine exhaust grille, molded on the upper hull part, which is open at the rear. You may wish to put a piece of fine photoetched mesh in this opening as well.
Weapons station is rather accurate, although several smaller detail parts are missing. You may wish to add lifting eyes, hatch opening levers and handle. The biggest part missing near the right smoke grenade launcher is hard to describe, so take a look at picture below to see it. Again artist painting the box lid illustration did his/her? homework and this part is clearly visible there as well. Well visible on box art picture are aiming aids for machine gun, also missing from the kit. Vision blocks in the weapons station are molded open, but you don't get any "glass" to fill those holes, so you need to fit pieces of clear styrene there yourself.

On the left side of the hull, just above the edge of upper hull part is a semiround opening. In the kit it is just a hole without anything to put in it. In reality there is no hole in the hull in this place at all: the semiround shape is just a thin metal shield above the small extinguisher handle attached to the hull surface here.
Details on both side slopes of upper hull are generally correct, although if you choose not to attach supplied pioneer tools, you may wish to add numerous tie-downs instead.
Two large troop compartment hatches have operable hinges, but opening them does not make much sense as there is nothing to show inside the vehicle. The center section of the hatch is molded in one piece with upper hull and cannot be opened. Opening levers are molded on top of hatches, but undersides of hatches are completely featureless - another reason to keep them shut.
As a bonus there are four small (too small?...) ALICE packs included in the kit, which can be attached to side rails to give the model slightly busy look. You also get a twine for towing cable, but I suggest using some brass cable instead (e.g. Karaya). While designers of the vehicle prepared a place for the towing cable on the rear ramp, it is rarely carried there - and even Tamiya suggests attaching it to front of the vehicle. Slightly thicker white nylon twine is included in the kit for moorings and it can be used once painted.
FINAL VERDICT
I would say that this is quite a decent kit. Not outstanding by any means, but there are no glaring accuracy errors, mostly omissions that should be easy to correct. Dry fit of main hull parts didn't reveal any major fit problems and I didn't notice any tricky assembly steps, so the model should be easy to put together even by less experienced modeler. Kit built out of the box will look slightly boring, but let's be honest - there is nothing sexy in real Amtracs either... For those wanting to improve accuracy replacing vinyl tracks with some individual link ones is highly recommended, although those included can probably look acceptably once painted and weathered. You should also find a source for some very fine photoetched mesh as adding it in a few places can highly improve the look of finished model. The biggest problem of this kit is the lack of interior. Without it the model is just a huge empty box. As the exterior of this version of Amtrac does not leave a lot of space for super detailers to show their talents, they should be happy to build the complete interior by themselves. I personally wait for Propaganda interior set and in the meantime build all my Amtracs buttoned up.
Link to the review of Academy's LVTP7 kit.
Link to the review of Tamiya'a AAVP7A1 w/UGWS kit.
Link to the review of Mini Hobby Models's AAVP7A1 w /EAAK kit.