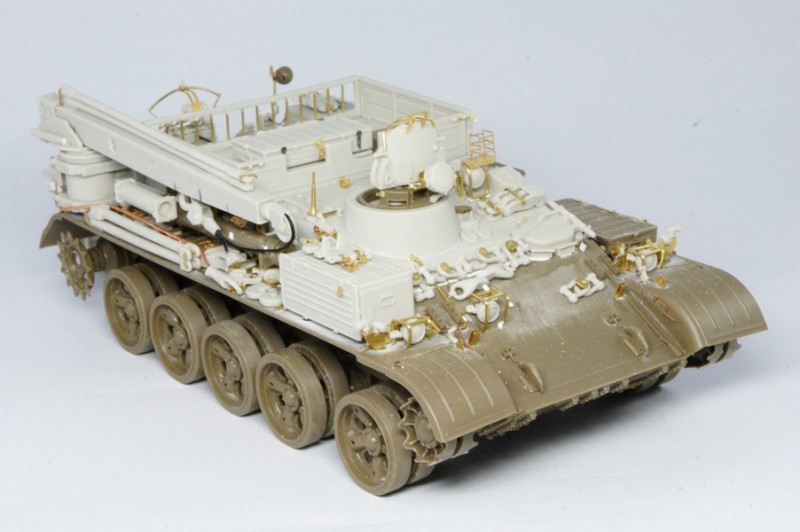
I promised myself to build this
Legend Productions conversion out of the box, however, as you will see below, I quickly realised that, despite being a great conversion
Legend Productions have missed a few details and there is a few areas that are not quite right. I purchased the
Modelkasten tracks for the T-55 and the
CMK BTU-55 dozer blade, which is often fitted to this vehicle.
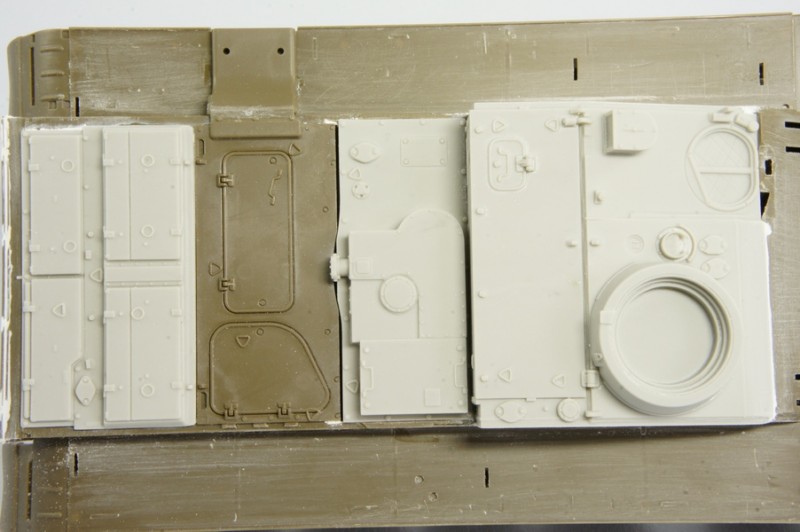
Starting on the VT-55 it quickly becomes apparent that the instructions do not cover any details about what should be kept or fitted from the original
Tamiya model. The instructions feature a photograph from above of what upper hull parts should be cut away but I strongly recommend doing lots of dry fitting only one measurement is provided. Also note that on the real vehicle there are welds around the point where the
Legend Productions upper superstructure mounts onto the
Tamiya body. I suggest following the
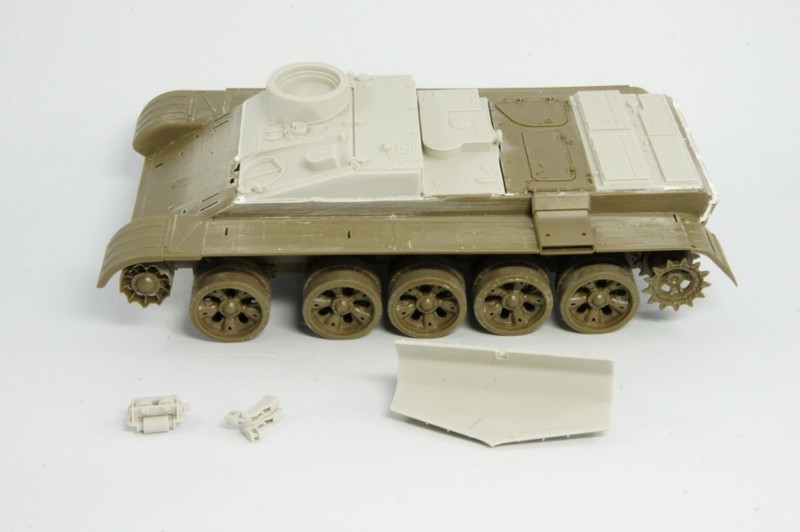
Tamiya instructions steps 1-3, leaving off the unditching log parts and filling the holes for the mounting points. Also fill the mounting points for the fuel drum brackets. I did note that there is a gap left between the forward most engine plate (
Legend Productions part) and the middle (
Tamiya part) plate meet, where there is a small semi-circular cut-out the pictures I have do show a gap filled by plates underneath. Unfortunately I had fitted these parts before I noticed the gap, however these decks are covered by the upper hamper anyway so should be hidden when complete. I rebuilt the exhaust shroud from lead foil embossed over the kit part. The photographic instructions are well printed so it is easy to see where parts are fitted, but I did find myself referring to on-line references along with the
Wings and Wheels reference book to get the exact locations and to ensure things fitted in the correct place.
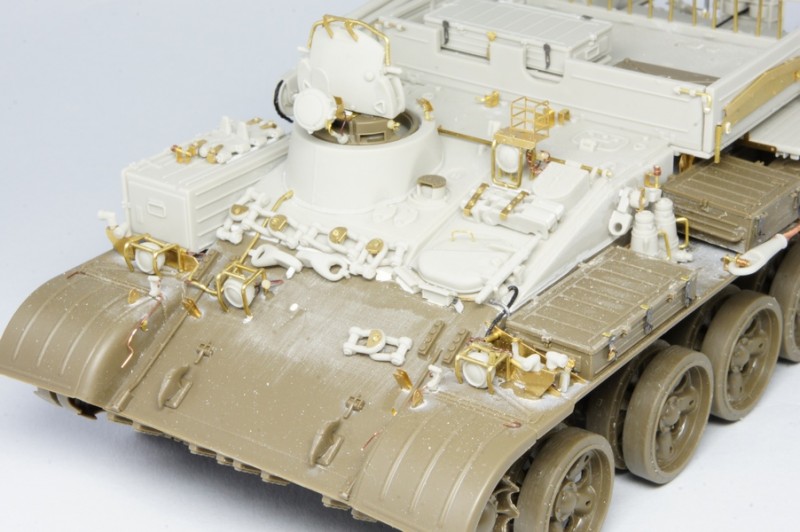
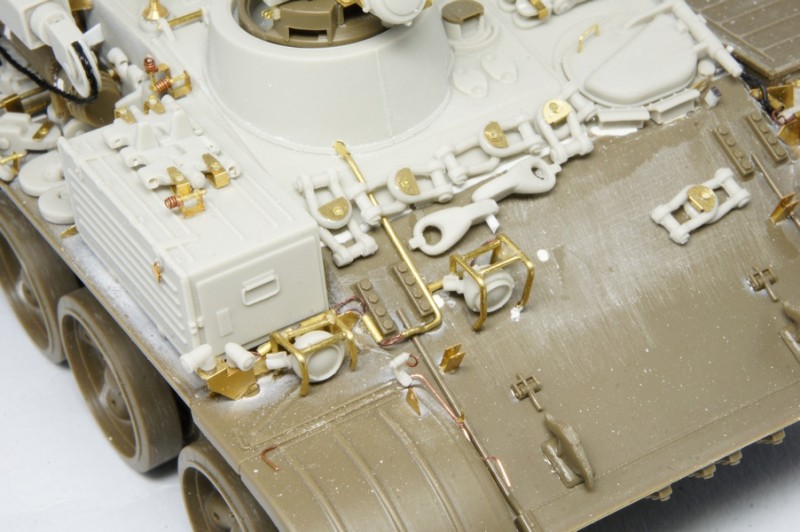
Once you have the superstructure fitted everything else is just mounting the smaller parts. Moving towards the bottom of page 1 on the instructions I ended up doing a bit of extra detailing around the front right and left main lights and positioning lights. The
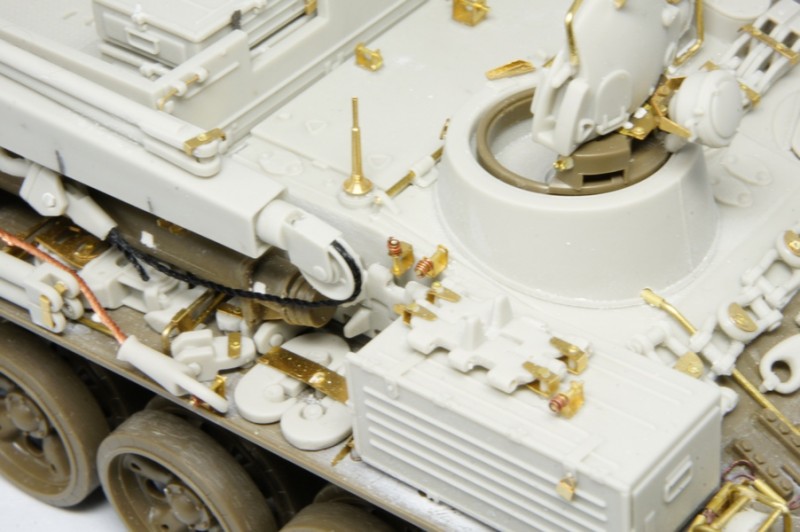
Legend Productions lights are well moulded but bear no resemblance to the mounting points on the real thing - Why manufacturers do not realise that the main lights are mounted onto the tubular case in which they sit; not onto the hull or fenders? I made the protective frames for the main lights from the provided 0.7 mm brass wire. The bottom front of the frames slope inwards - this is not shown in the instructions. I would have liked to see some plans here to help the modeller obtain the right shape as in other parts of the instructions. I also added some brass tube to replicate the conduits for the electrical wires and an extra mount for the washer container on the front right fender. Note here that the
Legend Productions instructions would have you feed the rubber tube (for the periscope washers) through the fender mounting bracket to where the washer container would be on the normal T-55. This is not the case here as the washer container is now mounted sideways between the two front fender brackets. There is quite a bit of electrical cable running around these areas which was added with fine copper wire. The
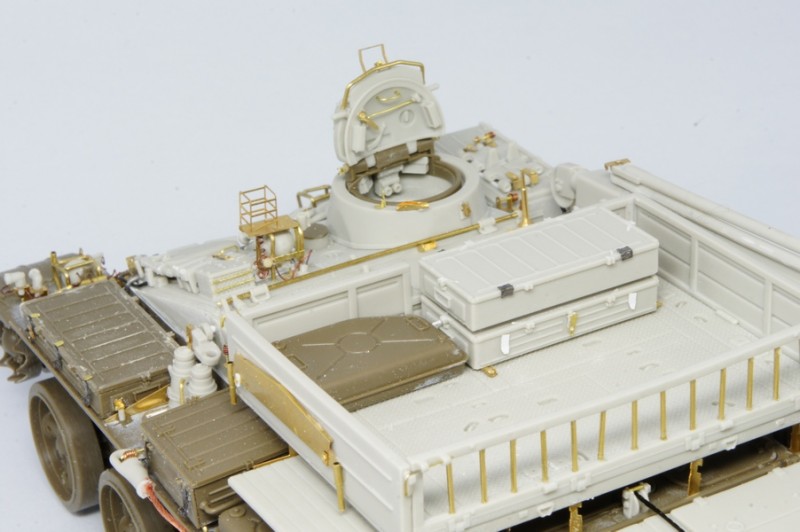
Tamiya stowage box is used on the front right fender however the reference photographs show that they have a modified lid, with the turn buckles removed and replaced with hinges and hinged locking latches. I scraped off the turnbuckles and fitted the hinged latches with parts from the spares box. I did not add the hinges at the rear of the box as they are well hidden when the box is fitted to the fender. The rest of the fittings in this area are brackets and shackles. Be aware that the supplied spare tracks need the pin holes drilling out and a track pin fitted to one end.
Moving to the top of the second page of the instructions you assemble the Commanders station together. Again, the kit parts are used as well as the hatch from the conversion set. The AA MG mount is missing the mounting bracket in the middle this was fitted from spare etched brass. There is also a prominent locking latch that needs to be fitted to the right of the hatch hinge. The Commanders searchlight is not mounted correctly it actually fits onto a plate which protrudes above and forward of the Commanders periscope. The next few instruction stages have you fitting the various brackets and shackles to the front hull be aware that there are two shackles to be fitted on the lower left of the front glacis plate above the splash plate. The instructions show these but they are not labelled. There is also the light and hazard beacon station to be fitted next to the Drivers position. Note that this is made up of round and flat profile parts not just 0.7 mm brass rod as per the instructions. There is a cable to the light to be added here including a cable to the emergency beacon; again the
Wings and Wheels book proved to be very useful.
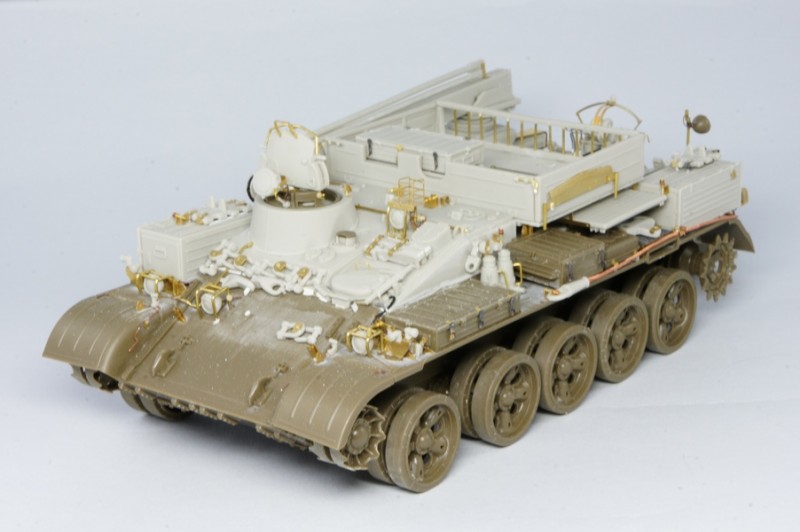
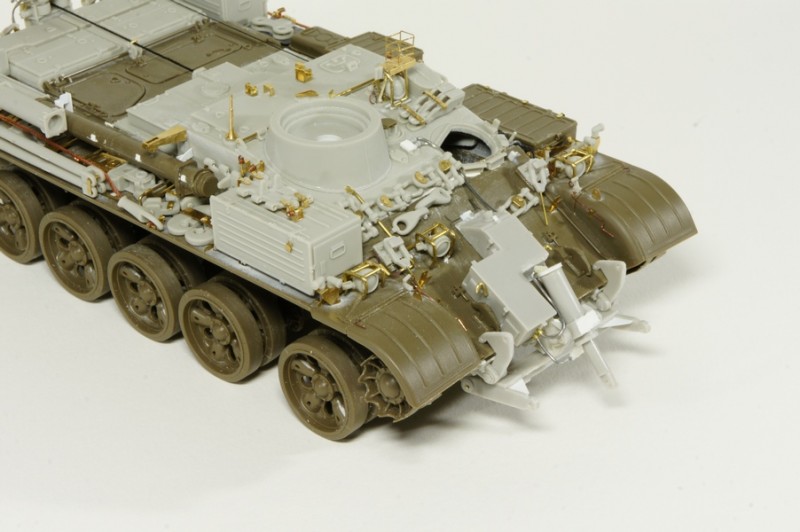
Working down each fender there are more tool boxes and brackets to fit unfortunately
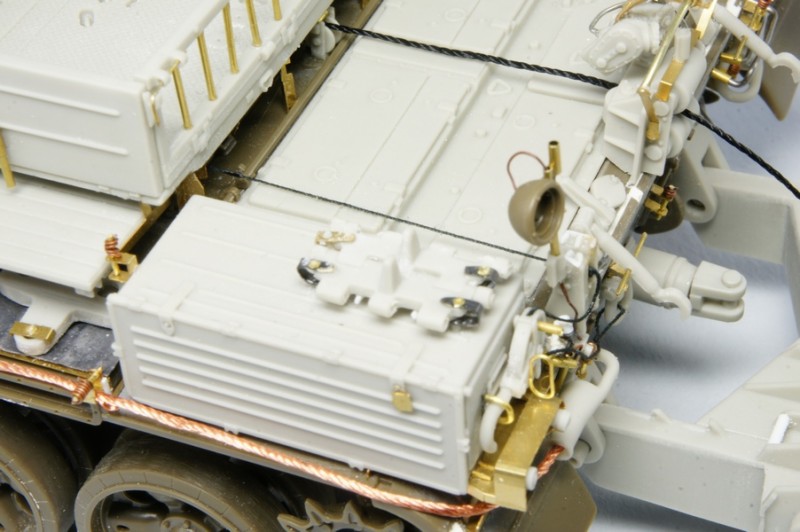
Legend Productions only give you three sets of spare tracks, but only two sets of fixing brackets. I managed to make a set from spare etched brass. Ensure you measure up the two upright tool bins as they differ by about 1 mm. I fitted the smaller one to the front right fender by mistake. By the time Id realised my mistake it was too late I hid my error by adding the longer one to the rear right fender. In real life the difference would be about 3 cm so I was happy to leave it as is. On the rear of the vehicle there are two cable feeds; one for the winch cable and one for pulling up the spade. Note that the pulley fitted to the upright bin in this area is the pulley which is used to pull up the spade, and should be connected to the cable the instructions do not show this. There is also a bit of detail missing from the smaller cable feed. There should be two E shaped ribs on the top of the feed. I made these from plastic stock. There are also a number of electrical cables and conduits which need to be fitted on the rear right of the vehicle. The fittings on the larger cable feed have been slightly simplified I used the
Wings and Wheels book to add the missing detail and hydraulic hoses. The larger cable feed is well represented by the resin, but a bit fiddly to fit. Build the sub assembly first, allow to set and then fit. The uppermost cable scrubbing device, which fits to the curved horizontal round bar needs two u bolts adding over the top of the bar where it is fitted. 3 hoses (2 hydraulic, 1 electrical) are fitted here which, again these are shown in the instructions but it is not overly clear where they emerge from at the rear of the hull there are 3 holes in the back of the hull with surrounds, I added these using brass tube.
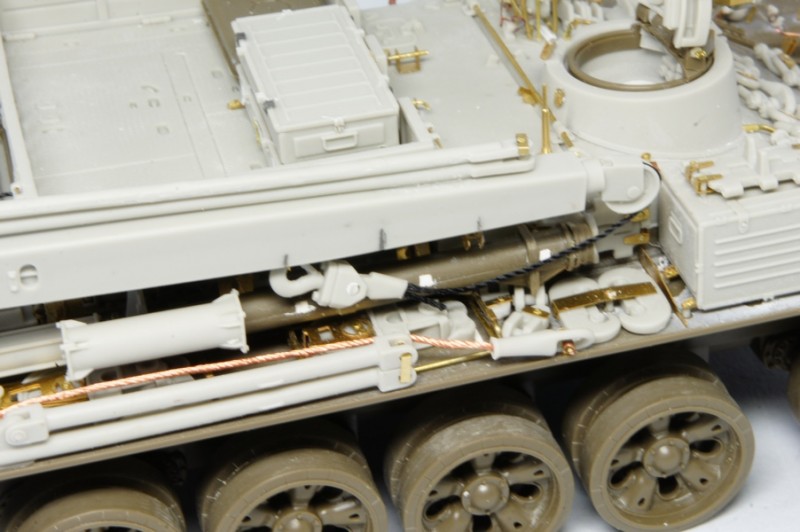
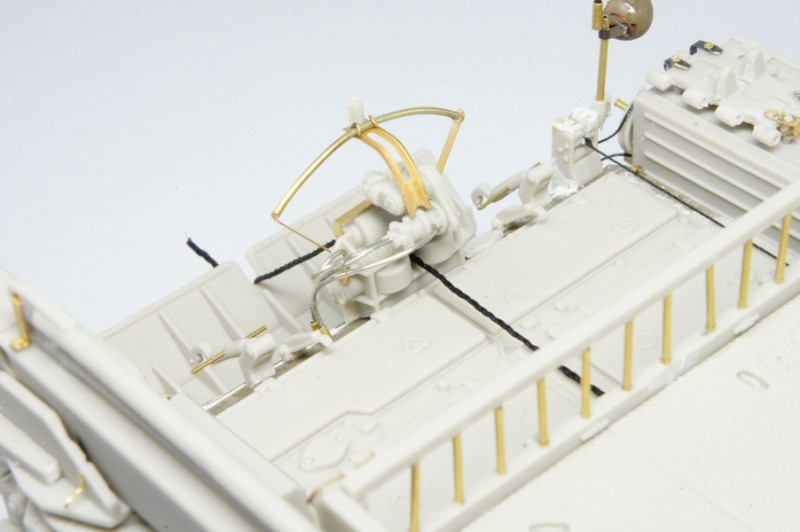
The penultimate page of the instructions gets you building the top hamper and the remainder of the fittings on the left and right fenders. You will also build the crane and fit it here. The top hamper is complex and needs some measurement and marking out here I would have liked to see some detailed guidance here, although with a little thought it should be straight forward fitting the various feet onto the bottom of the hamper. Fitting the sides to the top hamper is quite straight forward the rungs on the rearmost side are again fiddly, but with a bit of care they will line up straight. The top slat for this area was very slightly warped using hot water straightened this up. Typically once completed I dropped the top hamper breaking off many of the parts! Once repaired I left the top hamper off for painting. The snorkel parts on the right fender need a bit of attention. You use the kit supplied longer tube, which is actually fitted to the hull sides with brackets. These brackets are not supplied and need to be made up with plastic stock. I was not too precise on this, as the brackets will be hidden once the crane is fitted above them. The smaller tube fits onto the longer tubes side, this is represented by a thin block of resin in the kit and seems a bit simplified, but I could not find a good picture so just left it as is. I used a spare brass antenna base in place of the resin supplied device, but there is nothing wrong with the supplied part. The vehicle jacks are also fitted here but I found that they snagged on the shackles fitted above them on the side of the hull. I removed the shackles and refitted once Id got the jacks placed up against the brace which they are buckled to.
The Crane is quite straight forward and I drilled out the pistons to make it workable. There is a couple of tie down points(?) either side of the crane base that can easily be added with a length of shaped brass rod. Make sure you mark up the position of the locking brace as this needs to align with the etched brass spigot on the bottom of the crane. At the rear of the crane is the control panel this should have two hydraulic hoses going into the back of it. The hinged cover at the rear has been simplified and moulded as a solid piece it should be hollow with the control handles underneath. I did not bother modifying this as I was not going to display it in the open position. After fitting the hook and cable I left the crane off for ease of painting. There are two hydraulic hoses that run from the back of the hull into the cramped area behind the control panel. I added these with thin solder although I am not 100% of their position as I struggled to find photographs of this area.
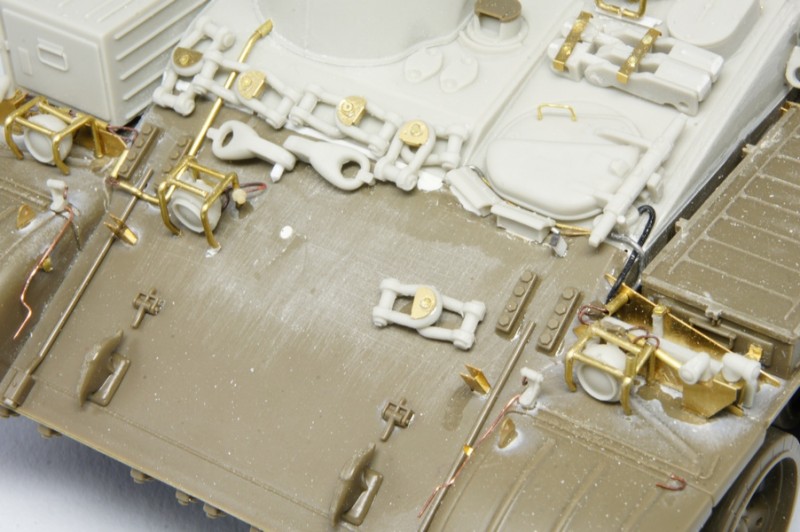
The final page is mainly overall pictures of the completed vehicle there are a few brackets to fit to the top of the crew compartment and the tow cables need to be added. In adding these it is worth putting the locking pins in the many cable locking brackets. These are spring loaded pins which spring closed once released. I made these with brass rod and coiled electrical wire with an etched brass bolt on the end.
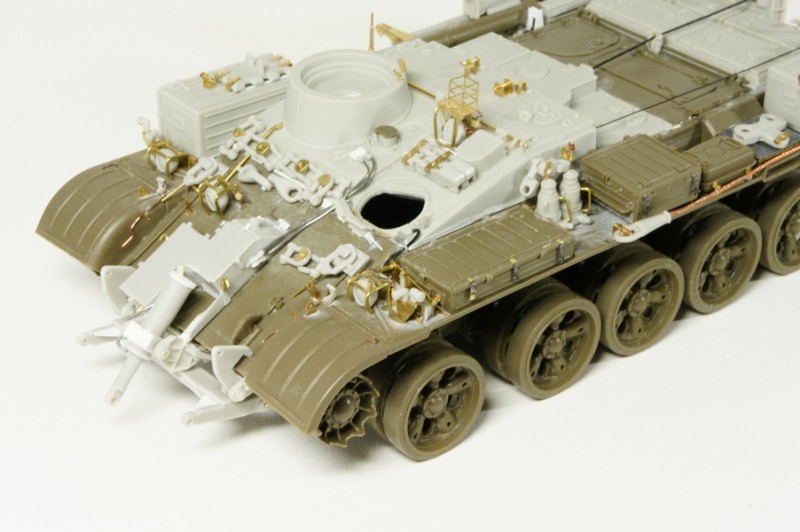
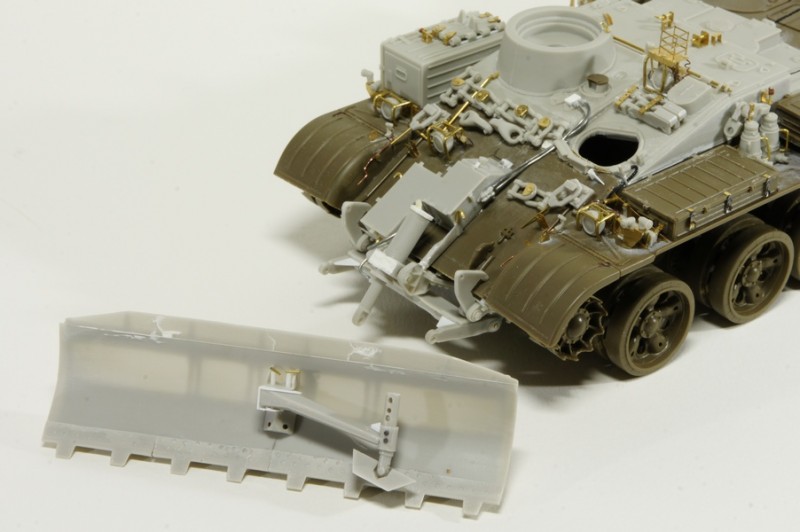
I purposely left off the etched brass splash plate on the glacis as I wanted to fit the
CMK BTU-55. In comparison to the
Legend Productions conversion this was a difficult kit to assemble as the casting blocks are bulky and placed in very visible areas. The resin is also very brittle and cracks and snaps when trying to remove parts from the blocks. The main parts of the kit are ok, but missing detail the bolts are missing completely from the top of the hydraulic pump housing. I drilled out the hinges and fitted brass pins as well as drilling out the hydraulic ram to make it work. Despite my best efforts I could not get the dozer blade to fit in the stowed position. I had to grind away portions of the rear of the dozer blade to get it to fit. This is hidden once the blade is fitted. Finally I added hydraulic hoses to the ram once again I left the dozer blade off for painting.
and thats all there is to it! At this point the tracks had just arrived so I was happy to start painting without them fitted (as I always do).
You can read my in box review of this conversion
HERE Live links


Comments