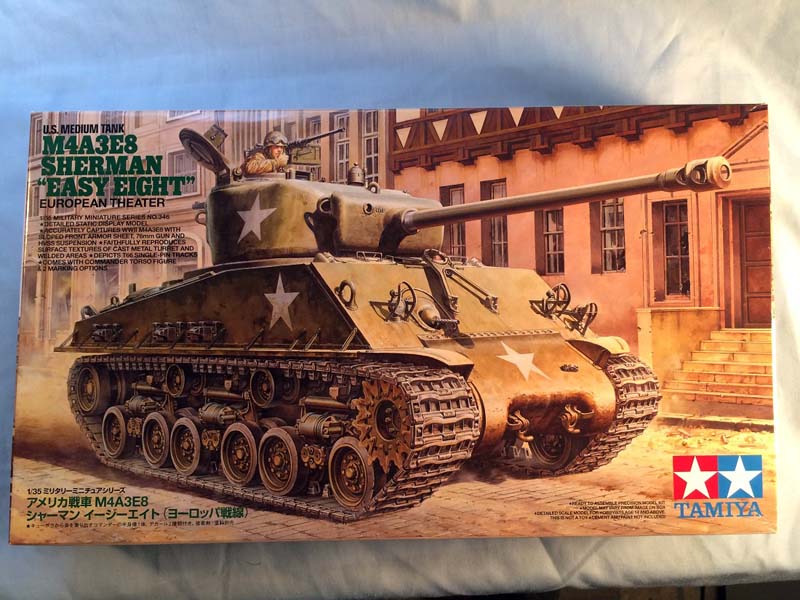
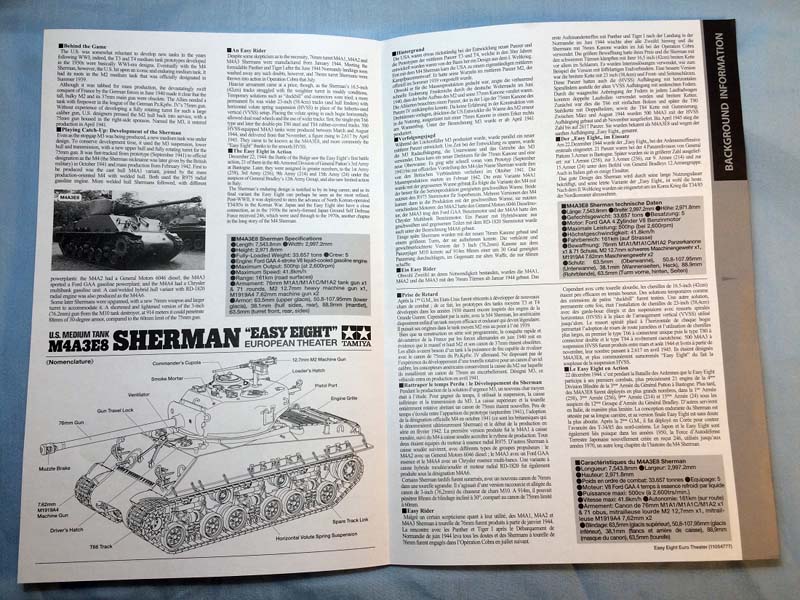
Tamiya has recently released a new molding of the Sherman M4A3E8, just in time for the holidays. The first time Tamiya released a kit of this tank was way back in the dark ages of modeling in the late 1960s but this new molding has nothing to do with the older version other than name and the company logo.
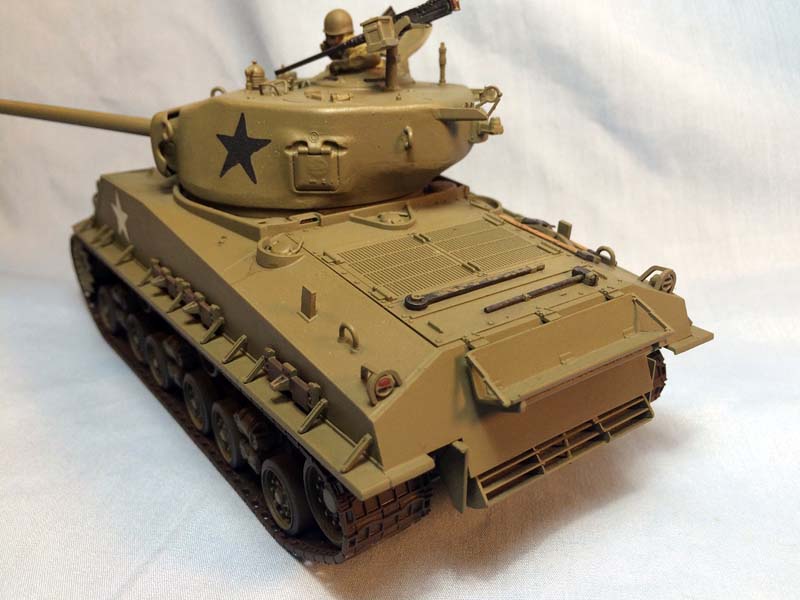
The Sherman was produced throughout the war and this version was the first to sport the new HVSS suspension system which was a considerable upgrade from the earlier VVSS system that the Sherman was initially fitted with. This particular version first made an appearance in late December at the Battle of the Bulge as part of the 4th Armored Division and then served through the rest of the war and far into the 1950s and even the 1960s as part of many allied armies.
Review
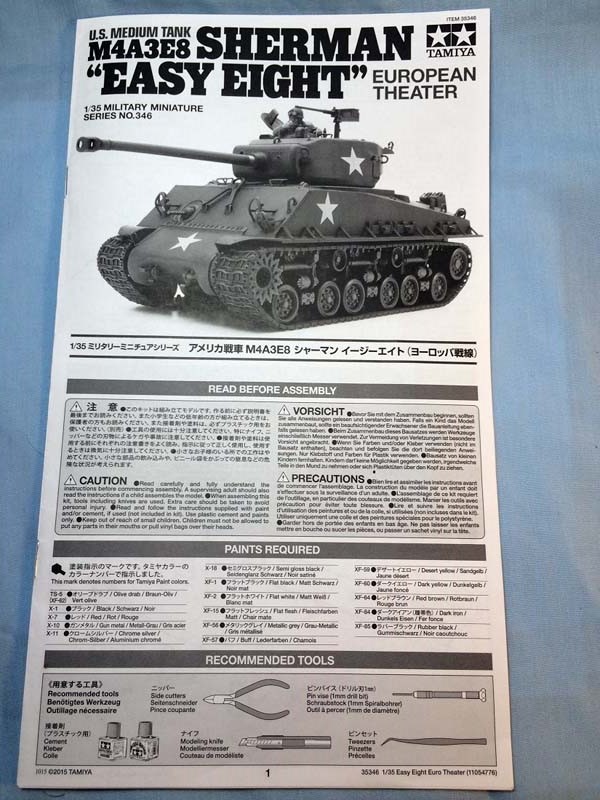
You will notice right after opening the standard slip cover style box that the contents seem to be at something of a minimum; 5 full sized sprues, the upper hull, the upper half of the turret, 1 small sprue for the machine gun, 1 clear sprue, the two runs of track, small set of decals, and instructions and that is it. Indeed, forget the 500 part behemoths that you may have recently encountered, Tamiya has engineered this fellow down to less than 300 parts, a real feat considering what you get in the kit.
If you want a good look at what the sprues look like before being cut off and cleaned up check out Jim Starkweathers excellent video unboxing review here as I dont have the same camera capabilities; (https://armorama.kitmaker.net/features/6840)
I followed the Tamiya instructions almost to a T (no pun intended!) as I found them well done and easy to follow. It is all done in typical Tamiya style with arrows indicating where a part attached as well the order of attachment if that was an issue. They have a very clean, uncluttered look that aided in the ease of the build.
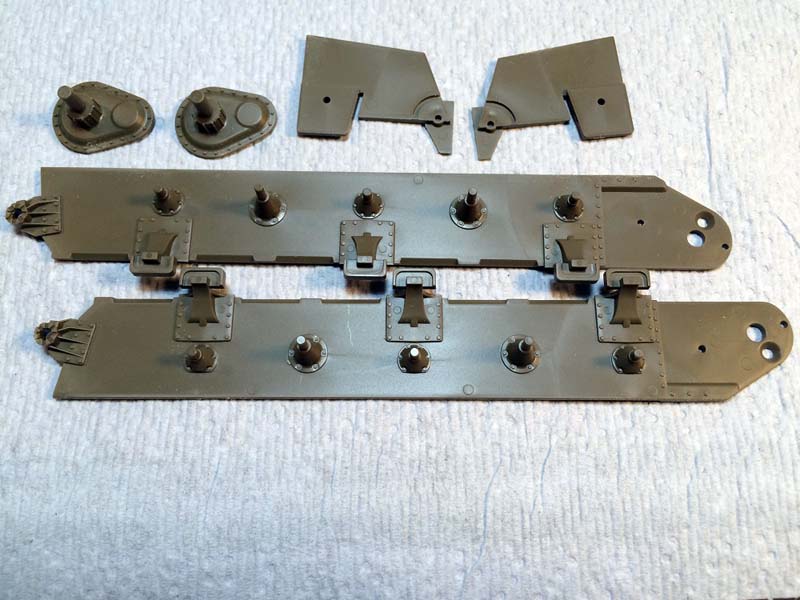
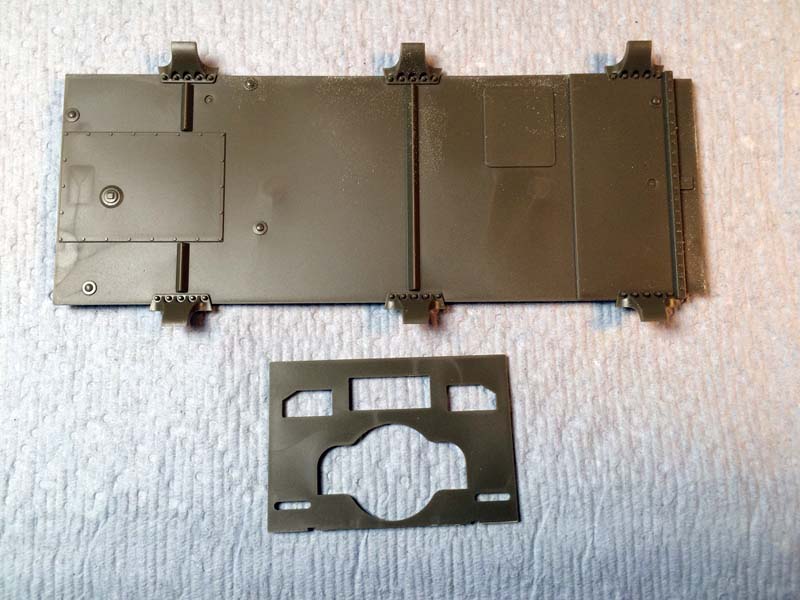
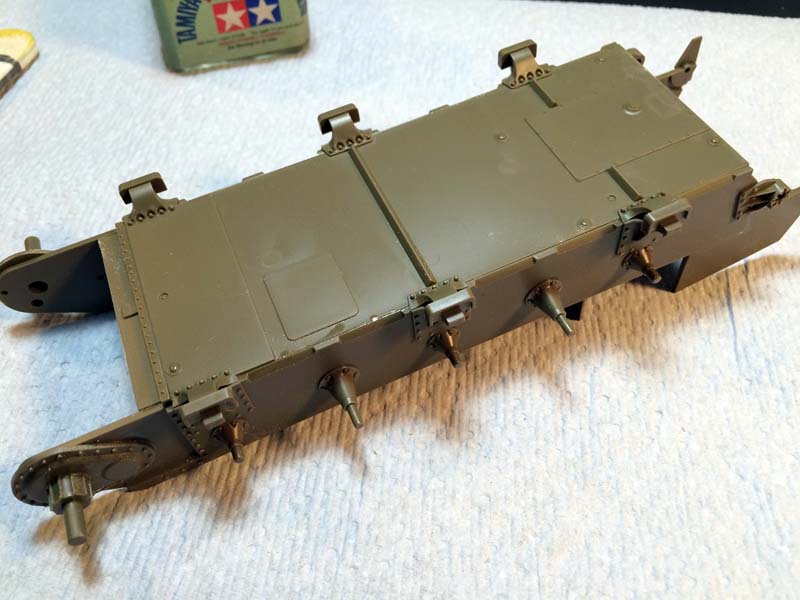
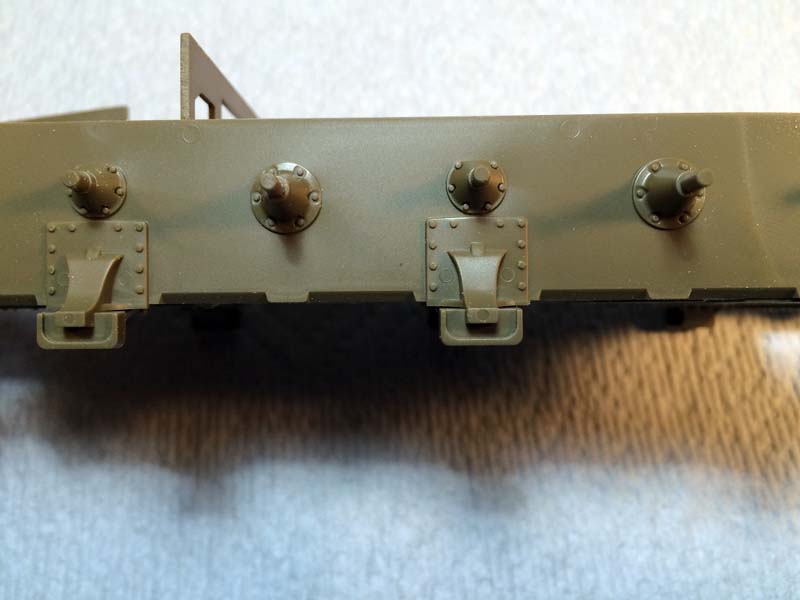
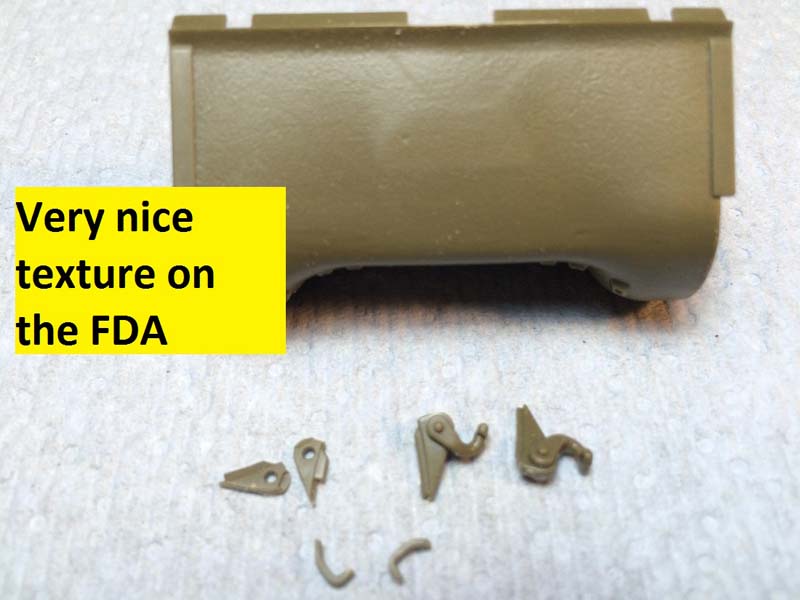
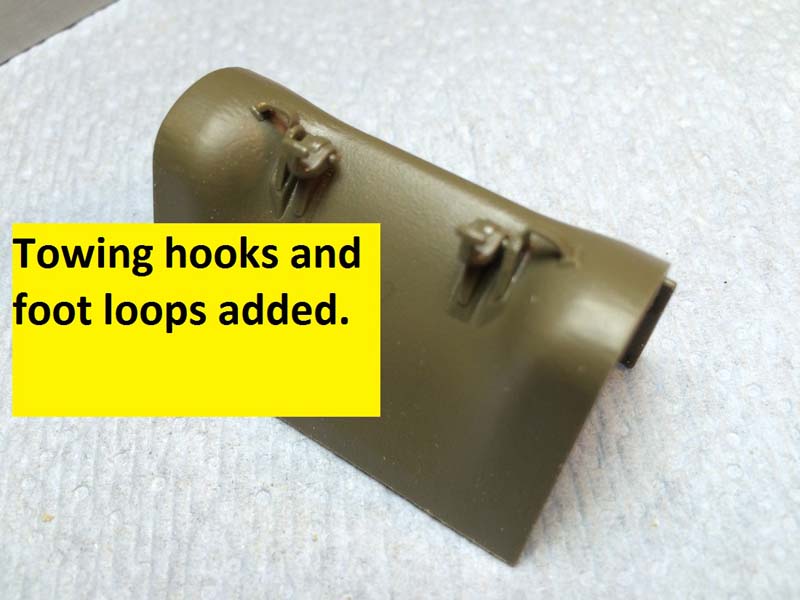
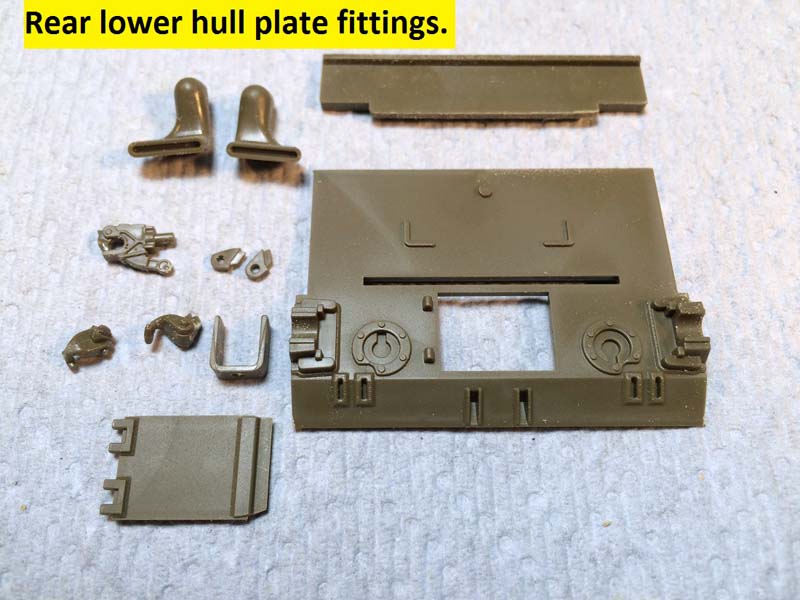
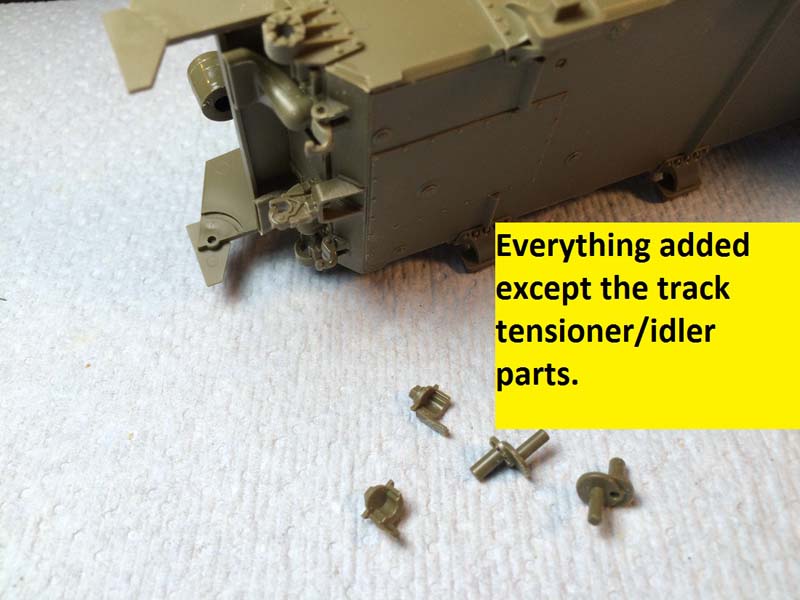
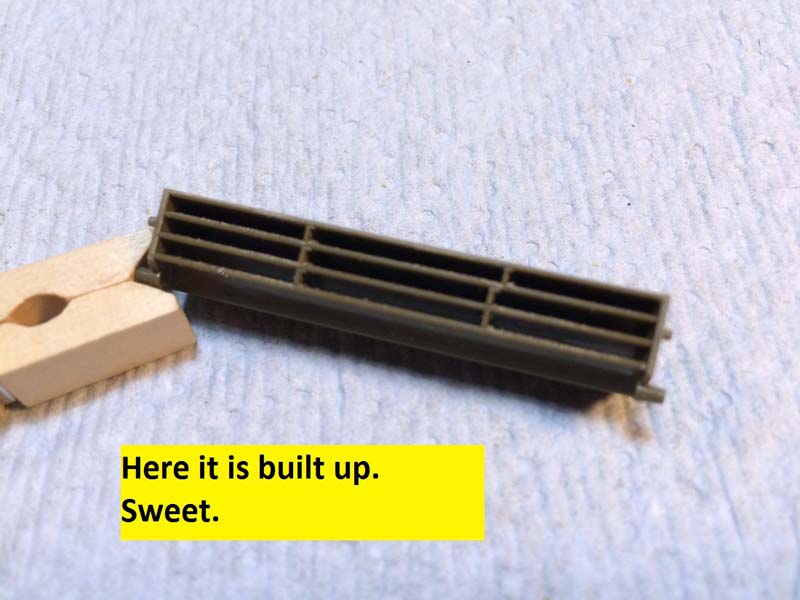
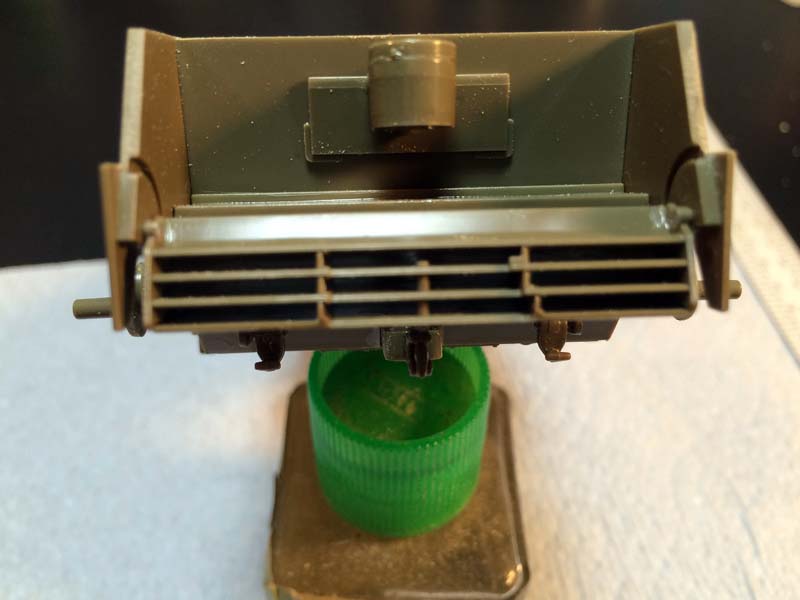
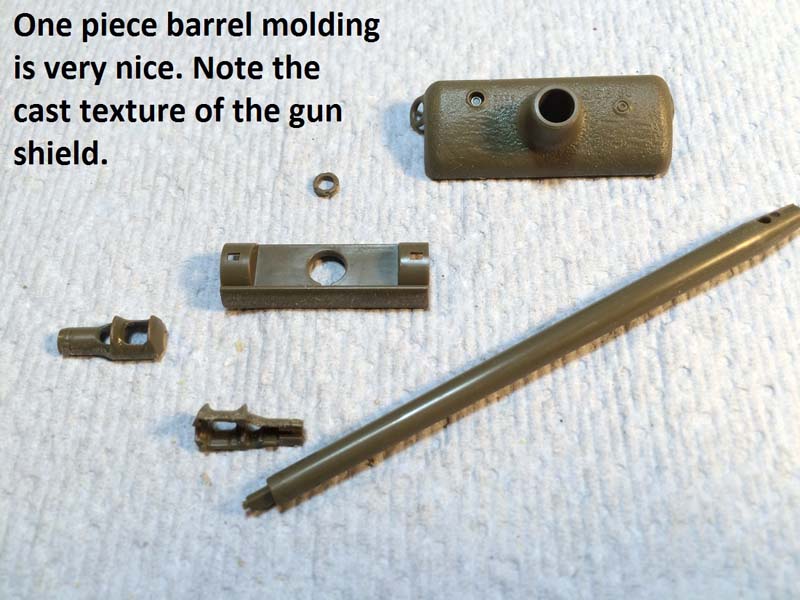
The hull tub is built up from individual panels, two pieces for each side, the hull bottom, and the internal fire wall that separates the engine compartment from the fighting compartment. I was impressed with how easily this all went together and how quickly. The firewall is molded with an eye toward the aftermarket crowd with appropriate access openings already cut into the wall. The rear hull panel gets all of its fittings attached before it is added to the hull. The fittings such as the towing pintle, pad eyes, and exhausts are all well up to the standard that Tamiya has set for itself. The jewel of the rear end is the 6 piece deflector assembly. It sandwiches together and can be displayed either up or down on the finished kit.
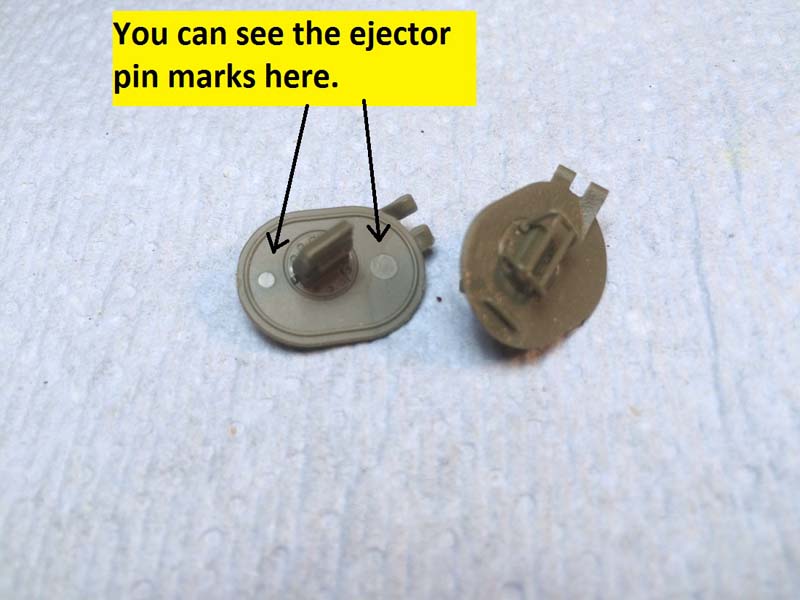
The front transmission cover is also added in this area of the build. The towing clevises, foot loops, and bolt strip are all well molded. This may start to sound a bit repetitive as everything in the kit is well molded with superb attention to both detail and modelers needs to minimize ejector pin marks as well as attachment points that might mar a part.
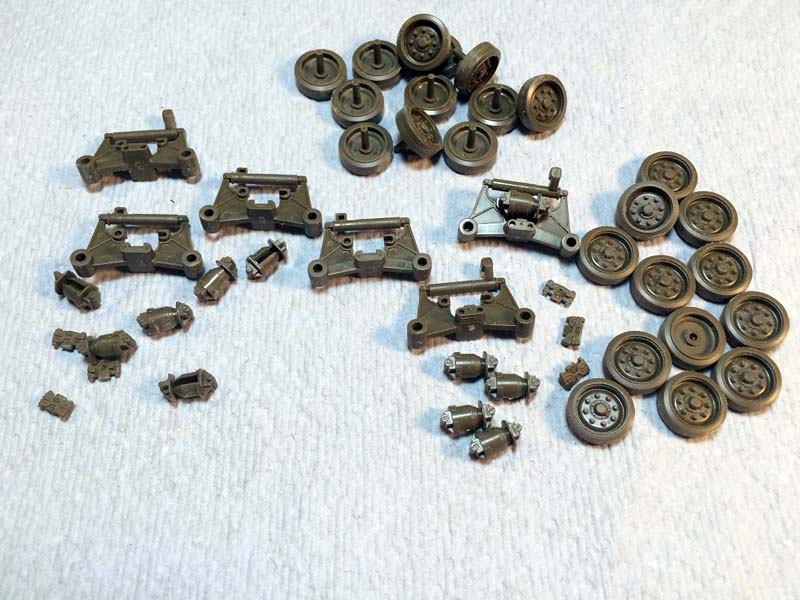
The wheels and HVSS bogie units go together next. The wheels are the correct 10 bolt pattern with the dust cap and the grease fittings all clearly evident. The double return rollers also have the correct grease fitting and dust cap. The bogie assembly is well done with all the gudgeon pins and mount bolts in place although the foundry mark on the assembly is missing. The real beauty of the assembly is that Tamiya has managed to get all the correct detail in with just four parts for the bogie assembly, coupled with the four wheels for a total of only eight parts per bogie. It makes this part of the build slide past rather quickly. My only nitpick was that the attachments for the return rollers was a bit shallow so some extra care will be needed to keep them flush to the hull sides. I appreciated both the idlers and the drive sprockets as Tamiya fits them using poly caps making for easy on and off during the painting process and a good solid foundation for the tracks.
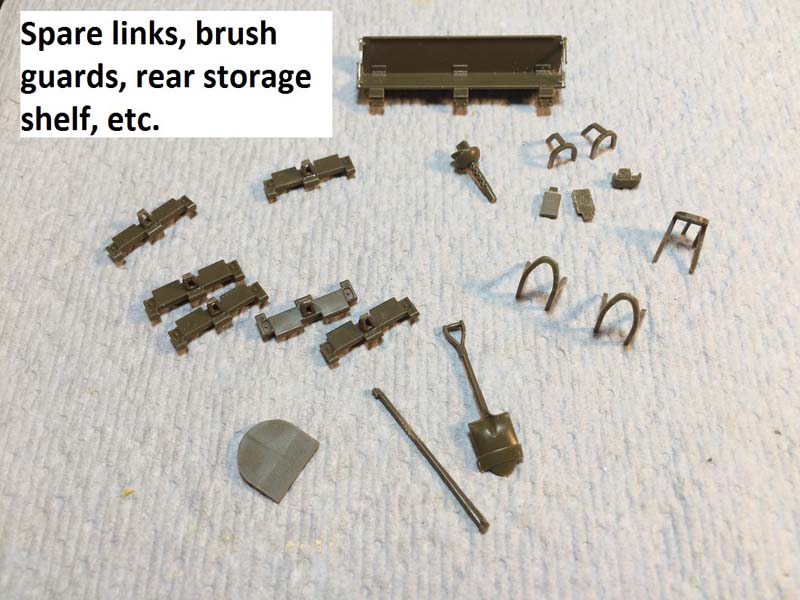
The tracks are the T-66 style tracks with the center guide horn. The guide horn should be hollow front to back, Tamiya has molded in some nice indents to mimic the hollow appearance but they are not actually hollow. Oh yes, and they are one piece moldings of the glueable type vinyl, or whatever they are made from. Some folks hate the one piece, others swear by them, your choice, but this is what Tamiya provides. On the plus side I didnt have any cleanup at all before I painted and installed them.
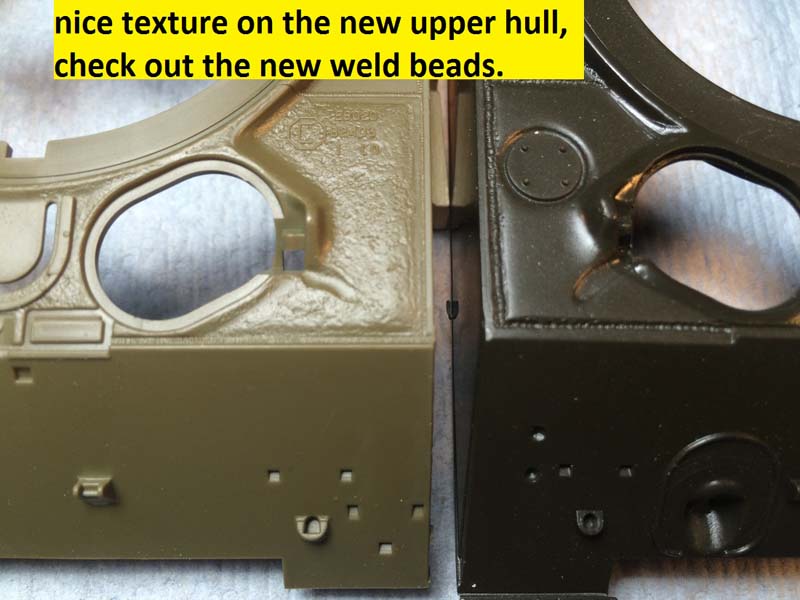
After the lower hull was finished up it was time to move on to the upper hull. First, this kit has nothing in common with the earlier release of kit #35122, the M4A3 with the VVSS suspension from 1981. This large hatch upper hull has the correct weld beads that are flush with the top of the hull and features the 47 degree with a foundry mark for American Steel Foundries in East Chicago, Indiana. I have included a side by side photo of the new upper hull and the upper hull from the previous kit; you can see with a close look that they are indeed totally different.
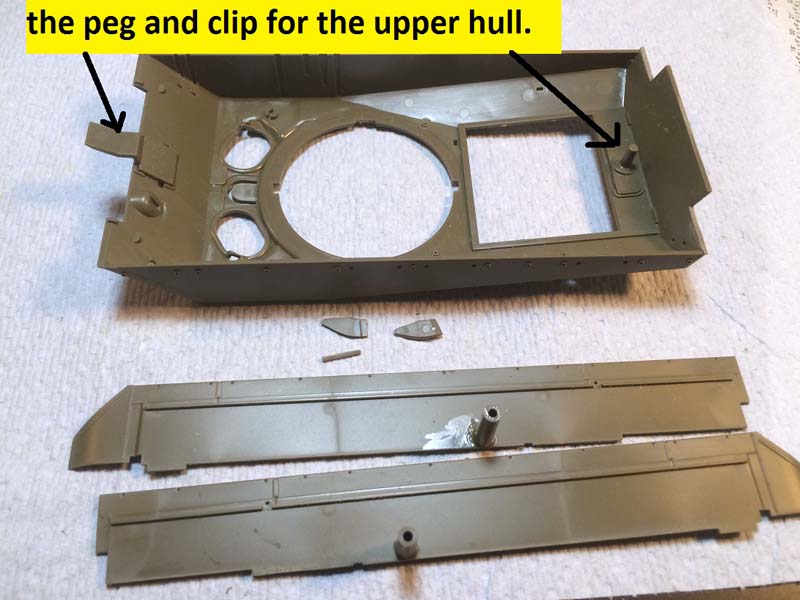
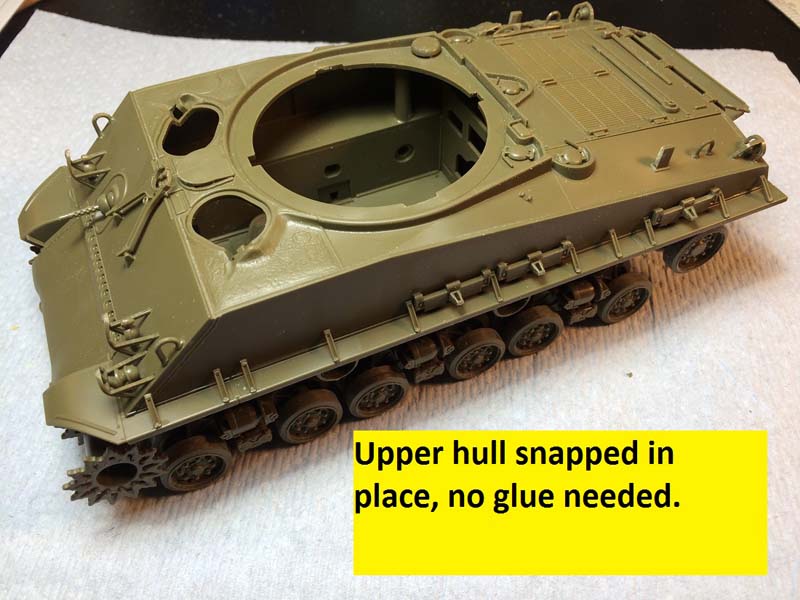
The upper hull now includes left and right fender pieces that close off the sponsons, always one of the huge knocks against the earlier Tamiya Sherman tank releases. The sponsons remain stable and horizontal to the bottom edge of the upper hull with a spacer that keeps everything nice and square. The upper hull will eventually attach to the lower hull with a well thought out clip for the front and a large pin that fits into a poly cap arrangement that is attached to the lower rear hull panel. The whole arrangement is a perfect example of how Tamiya has engineered this kit with ease of assembly for the average modeler in mind.
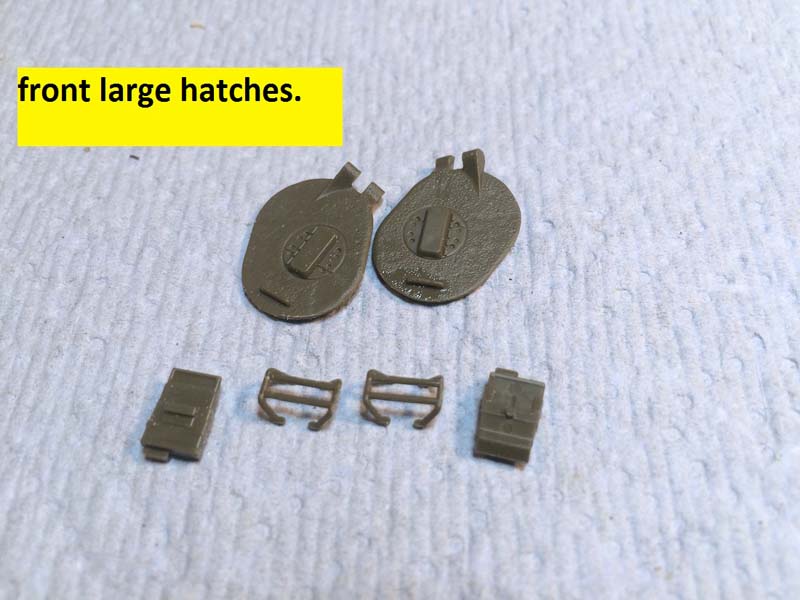
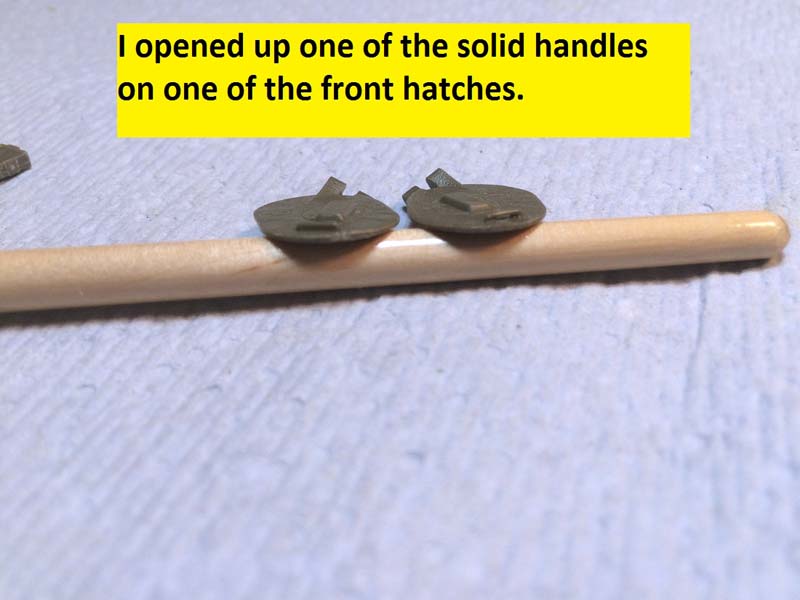
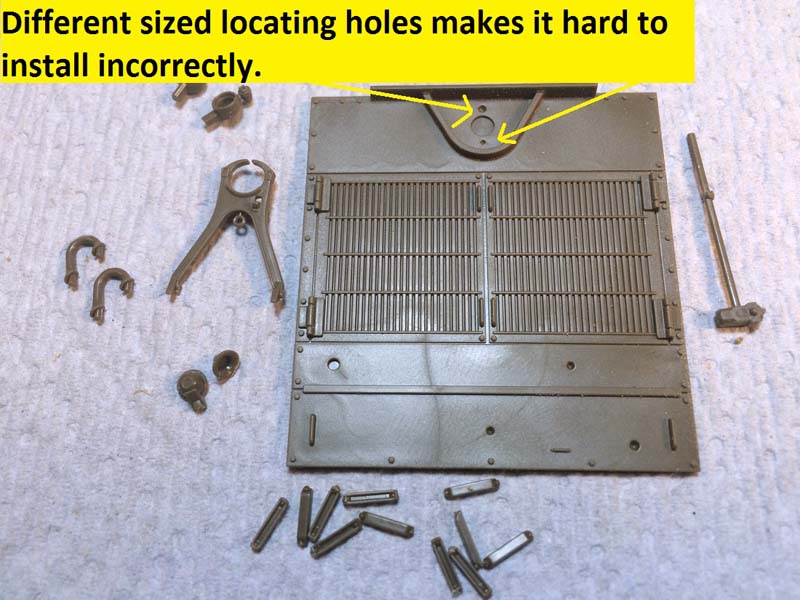
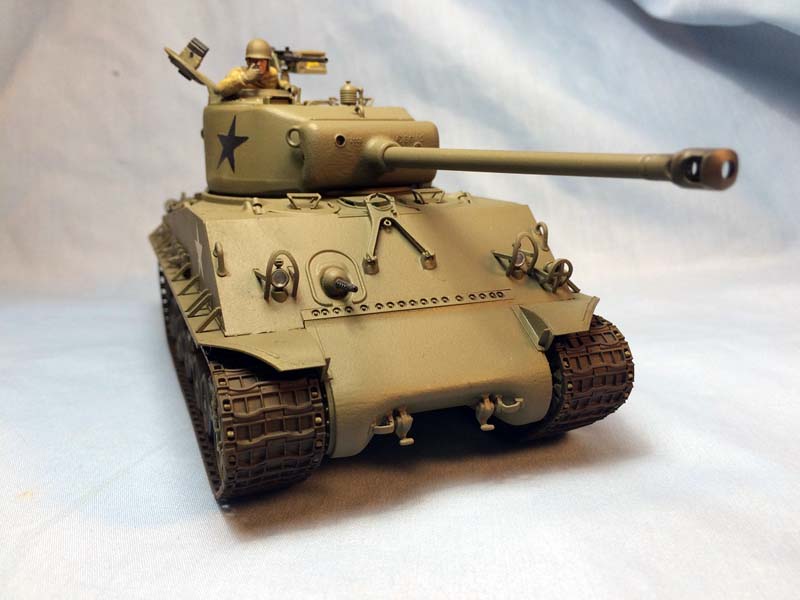
The front of the upper hull is an easy assembly; two headlights, lifting rings, horn, brush guards, and gun crutch. Each of these are well molded with no real problems with clean-up although the brush guards are in plastic which means that they are a definitely on the thick side, many modelers will undoubtedly replace them with an aftermarket PE offering. You are required to pre-drill the four locating holes for the lifting rings. Im guessing that this is a molding limitation as the locating holes are right on the edge of the front glacis panel. The two front large hatches include the periscope for the interior side of the hatch and the periscope guard for the outside of the hatch. The interior side does have two mold ejection pin marks that will need to be removed if you are going to display the hatches in the open position.
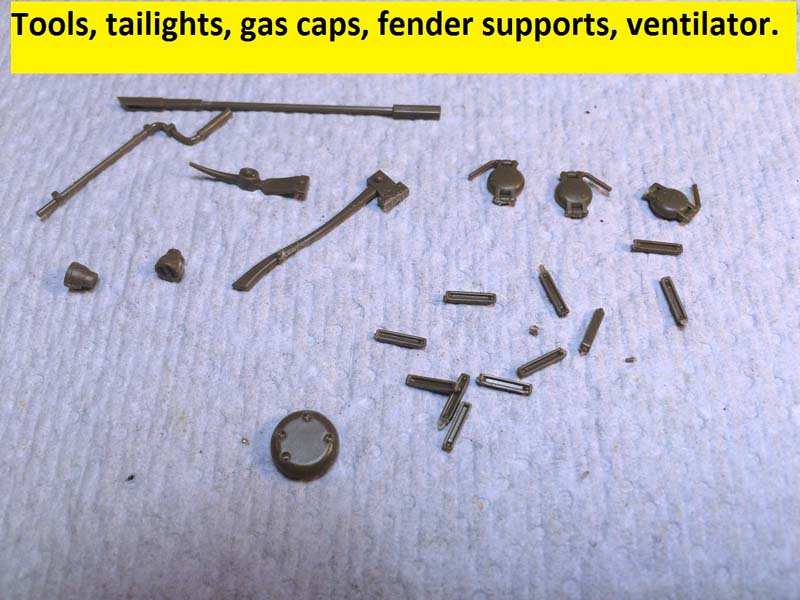
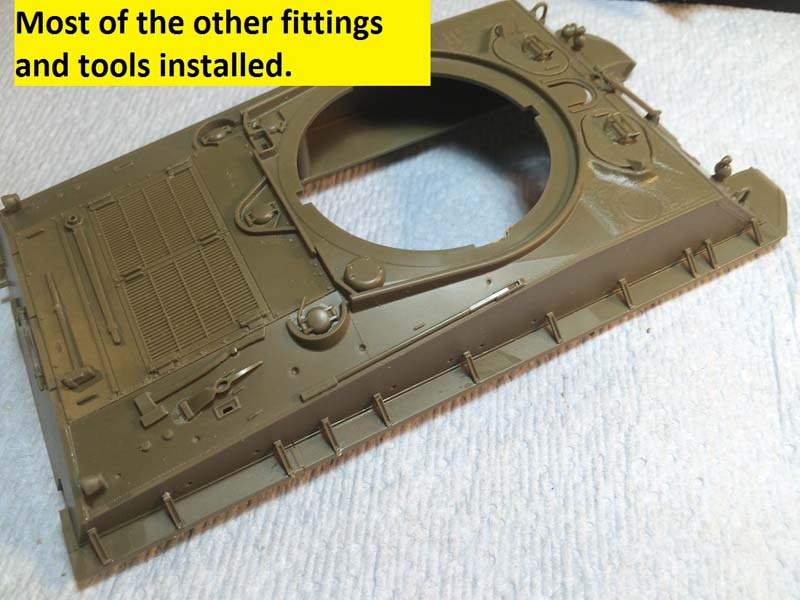
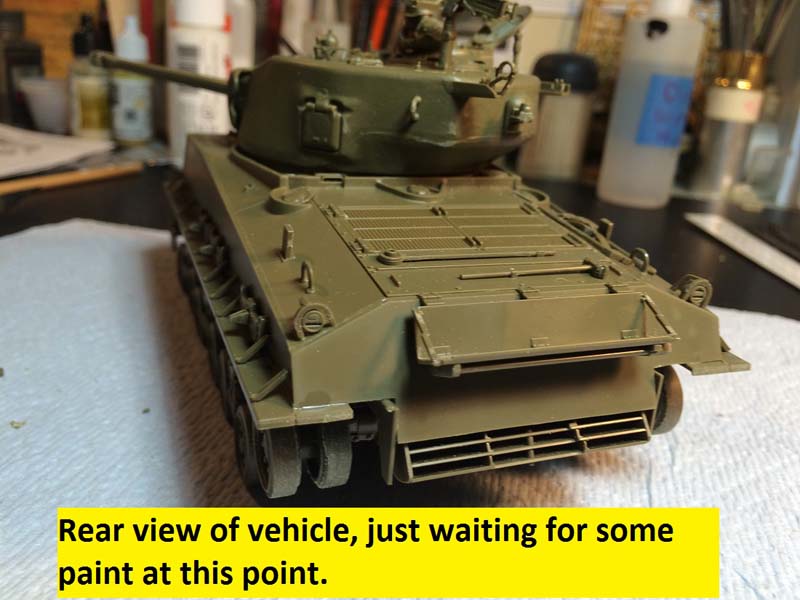
The fenders are held in place with the small U-channel braces that Tamiya has engineered as easy snap in place pieces. The rear of the upper hull was a fairly standard affair with a separately molded engine deck with the latter split rear panel. The on board tools are well done although no buckles or straps are provided. The lifting rings, rear lights and brush guards, engine deck stops, ventilation and locking gas caps are all provided as separately molded pieces. The gas cap areas are missing the small drain holes machined into the splash shields. Again, the brush guards for the rear lights are a bit thick and many folks will want to replace them when they add the straps and buckles for the tool suite. Oddly, Tamiya has provided no towing cables so you may want to find a suitable aftermarket alternative. All of this builds up quickly and easily and is engineered in such a way that it is nearly impossible to get anything in the wrong position, backwards, or inside out. With everything now done the only thing left was to snap the upper hull into place onto the lower hull, the fit was tight as a glove and the whole thing went together as easy as could be.
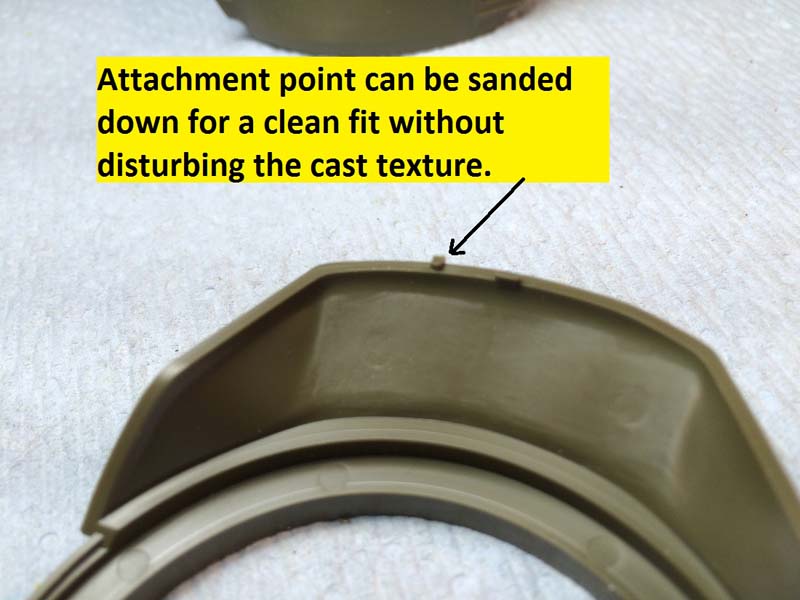
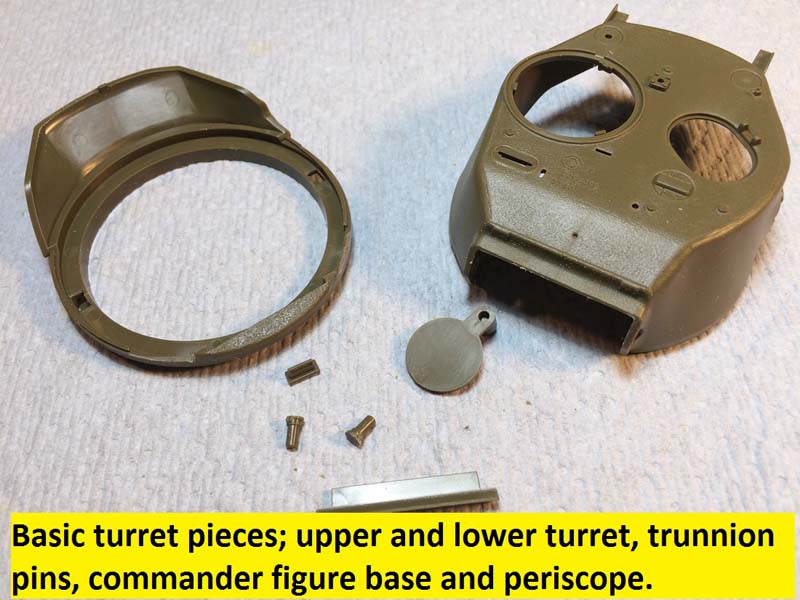
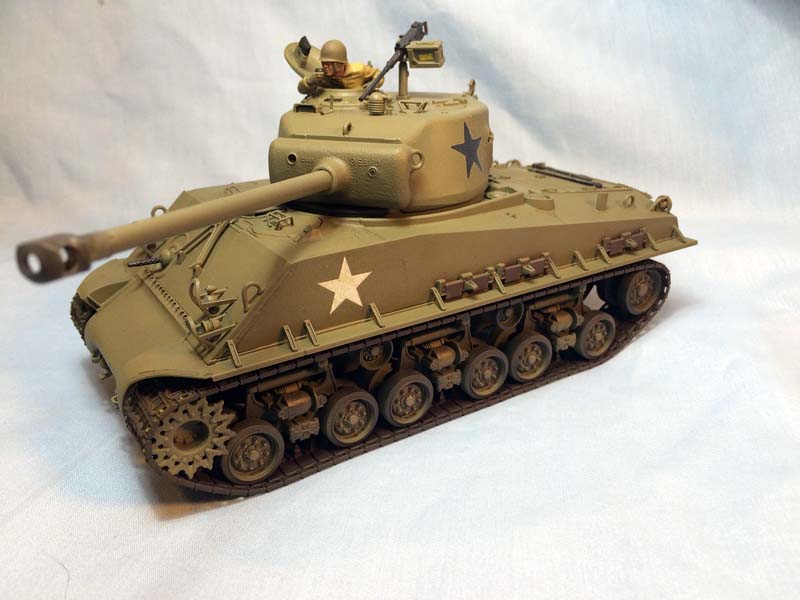
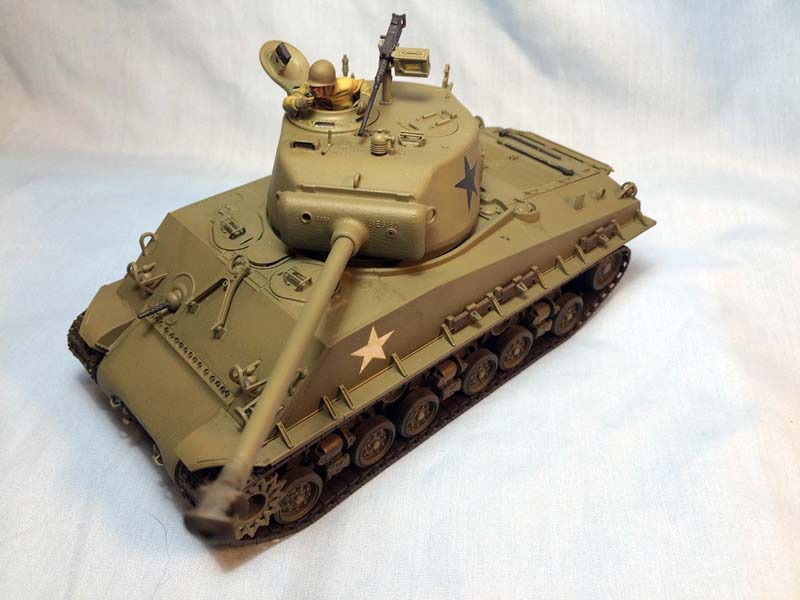
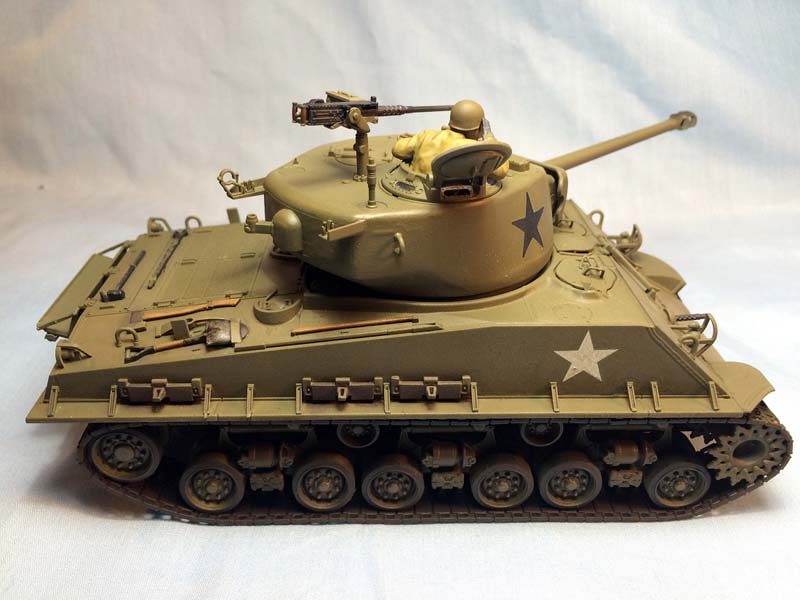
When the vehicle hull was finished I moved on to the turret, the 76mm armed turret is a 7054366 American Steel Foundries casting from Granite City according to the foundry marks provided on the kit. The turret is a two piece affair with the lower turret and turret ring joining the upper turret piece leaving a small seam around the bottom of the turret bustle. The fit between the two parts is so good however that the seam is very easy to deal with, I used a bit of sprue shavings and extra liquid glue to help make the joint disappear. One of the things that Tamiya has done to make it all a bit easier is to locate the attachment points for the turret pieces to the sprue runner in such a way that the removal and cleanup of the attachment doesnt mar the piece.
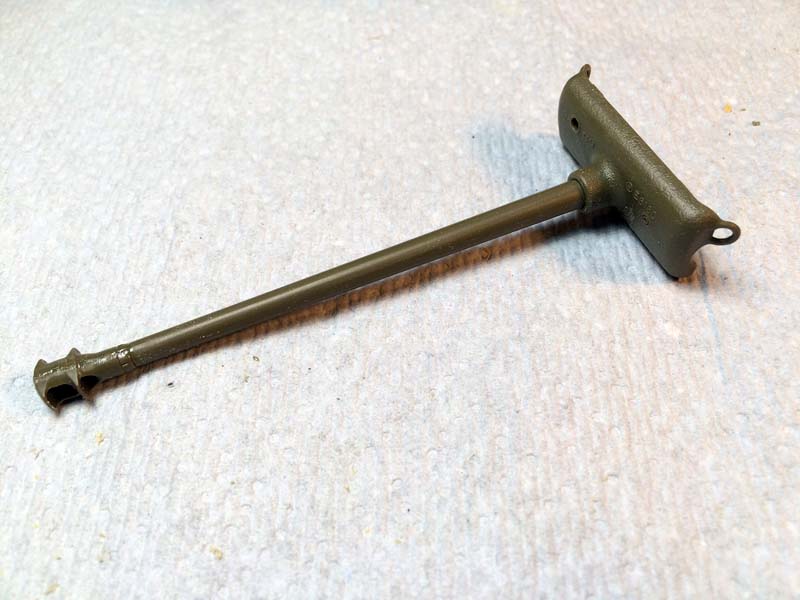
Once again Tamiya employs poly caps in the kit for moving parts, this time with the gun trunnions, using two trunnion pins that insert into the front of the gun housing casting with the poly caps placed inside a housing that fits onto the pin. The housings both have a key which keeps the gun shield and rotor nice and straight and gives a solid footing for the gun. The gun is a one piece casting that requires only minimal cleanup. The three part muzzle break did require a bit more cleanup to give a good look to but we are only talking about five minutes or so with a bit of filler and a few files to get the seam to disappear. The gun and muzzle are keyed making it impossible to attach either incorrectly. I would paint the 3 mm metallic silver section of the gun barrel first and then mask it off before attaching the barrel something I neglected in my build.
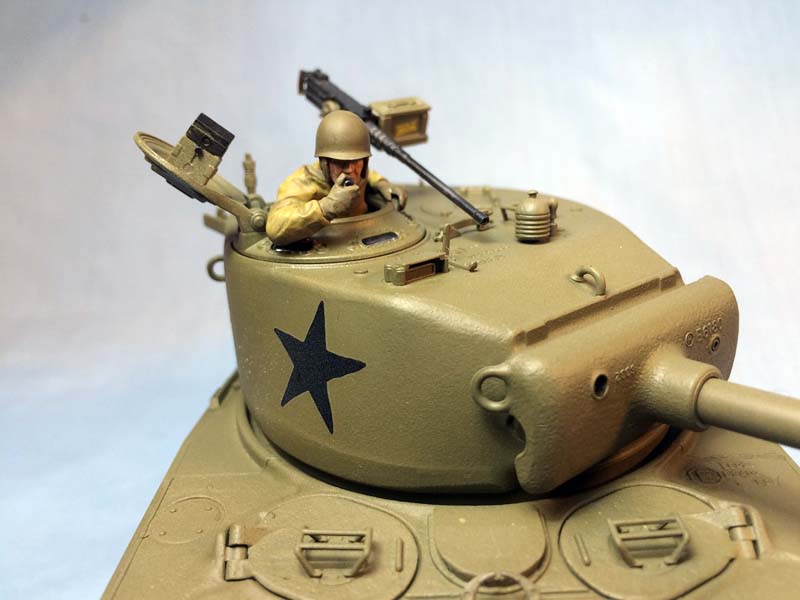
The remainder of the turret fittings are also all well detailed and require only a minimum of cleanup; shell ejection port door, spotlight, brush guard and periscope cover, commanders vane sight, antenna mount, 2 inch mortar plug, and .50 caliber MG barrel clamp. I wish the MG clamp had been in two parts so that it would have been positionable but alas, Tamiya didnt consult me on that one. As it is these along with the additions for the rear of the turret; MG stowage clamps, lifting rings, rear vent, and rear turret MG pintle provides all the smaller fittings for the turret.
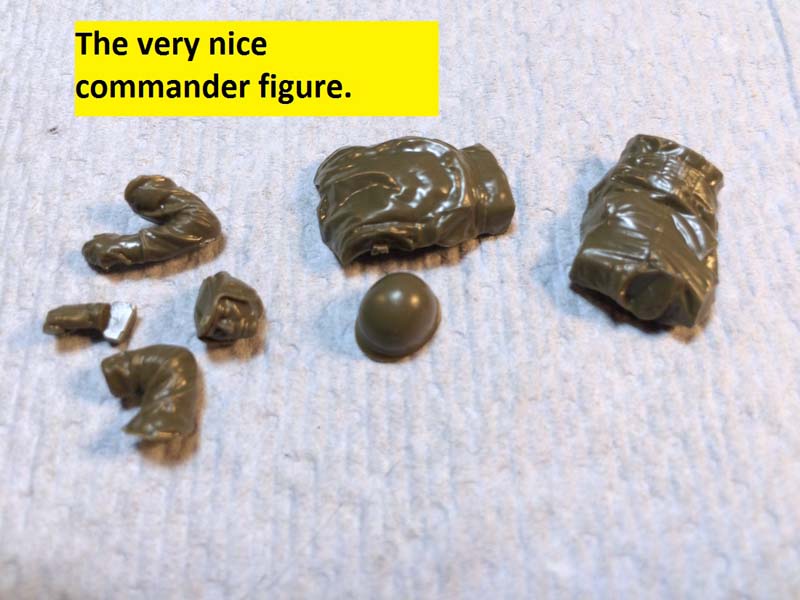
The two hatches for the turrets are well detailed also; this version has the oval loaders hatch and the commanders cupola with the six clear vision blocks as well as the periscope and can be displayed in either the open or closed position. I choose to close the loaders hatch and leave the commanders hatch open so as to be able to use the included commanders figure. The inside of the hatch does have a pesky ejection pin mark that you will need to deal with if left open.
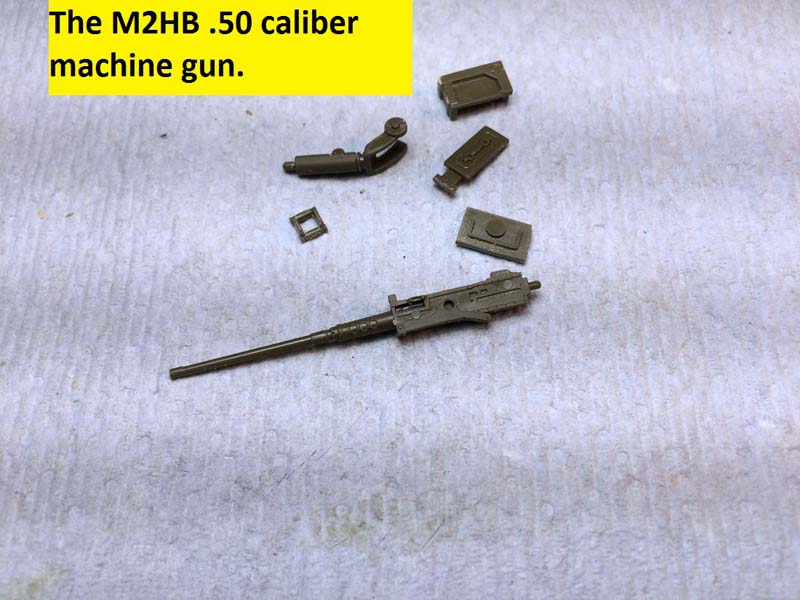
The .50 caliber M2HB machine gun is a molding that Tamiya has used for several years now, since at least the M8 if the coding on the sprue is to be believed. Nevertheless, the machine gun is still well detailed although the muzzle will need to be drilled out for a better look. The gun is also missing the prominent barrel carry handle although the very nice box top cover art shows it in place. The machine gun mount is the 6580030 heavy duty cradle and ammo box assembly with the spring housing common to most (all?) late war tanks. The kit decals include markings for the ammo box which is always a nice touch.
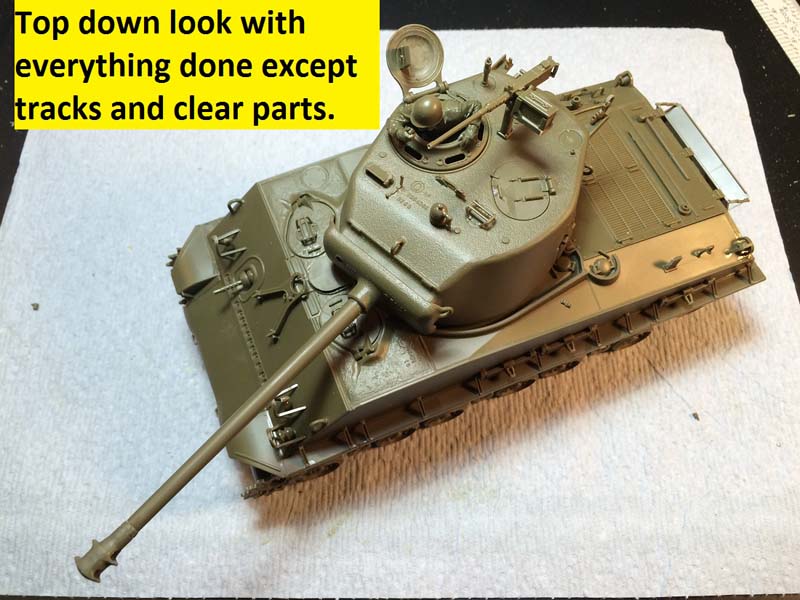
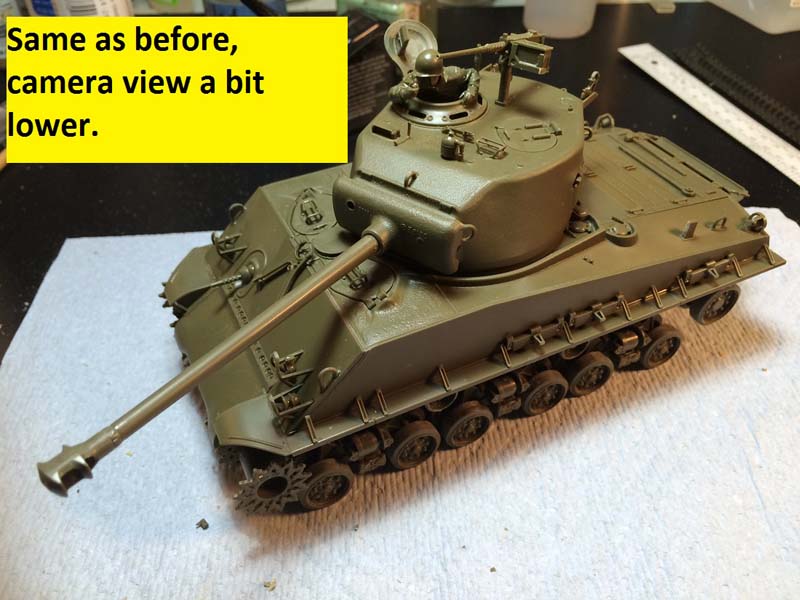
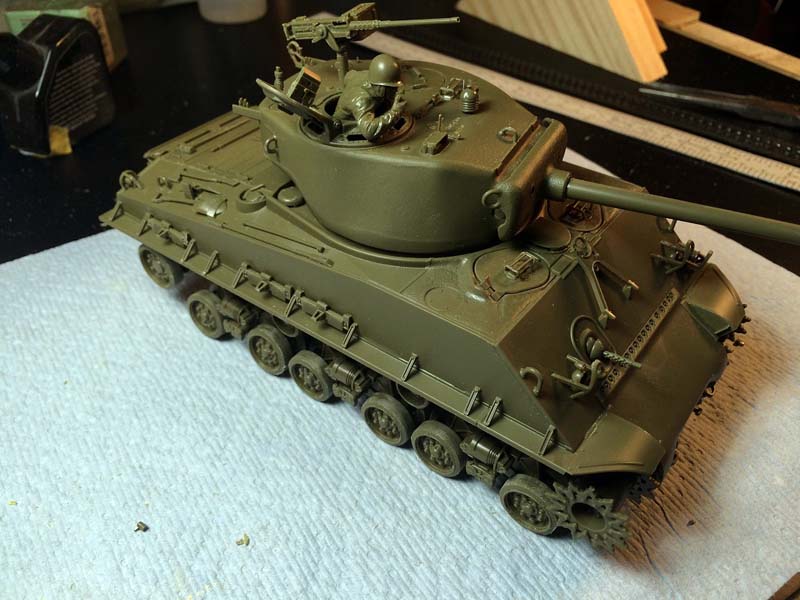
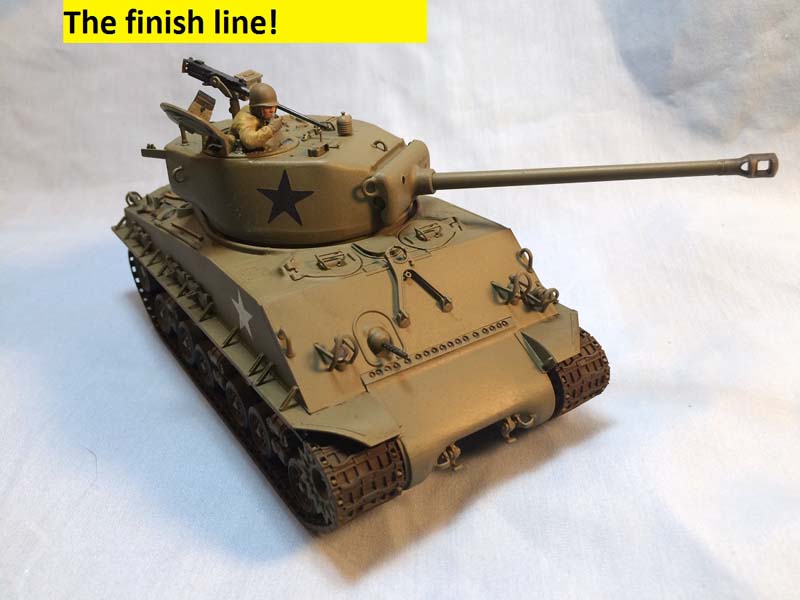
With the addition of the .50 caliber machine gun the build of the vehicle is at an end. I did build up the tank commander and was very impressed with the level of uniform detail and how well he fit into the commanders hatch. With all this done it was time to venture into the paint drawer for some proper colors for this beauty.
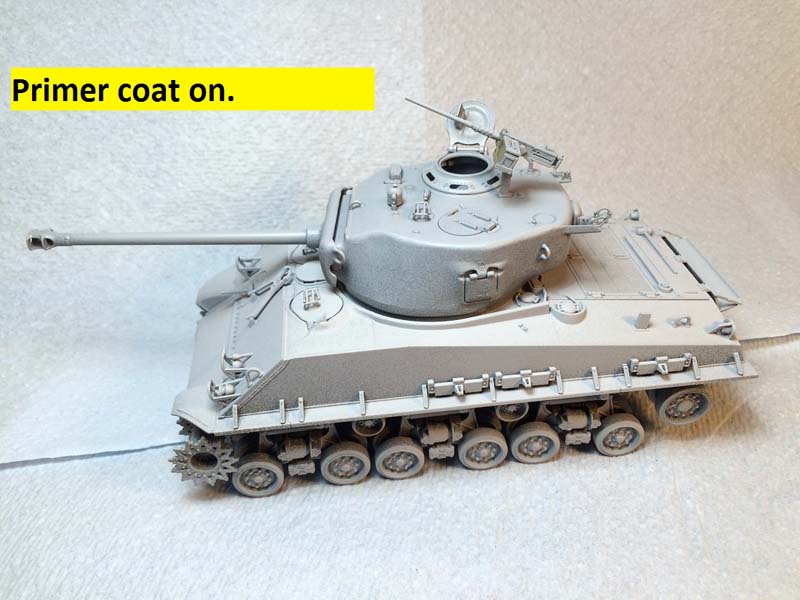
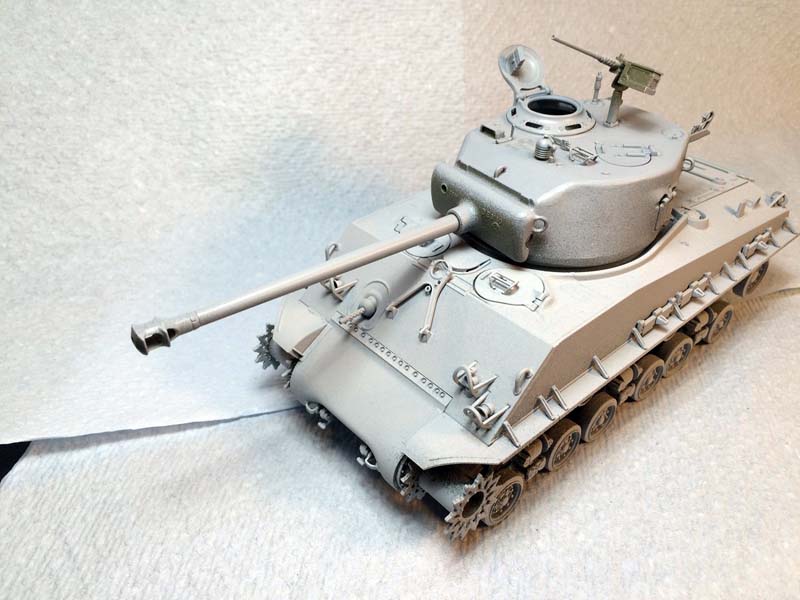
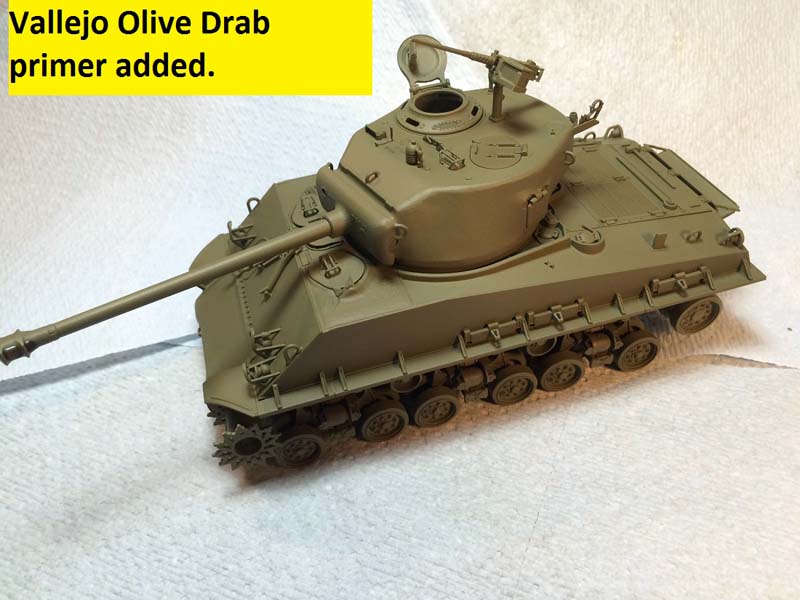
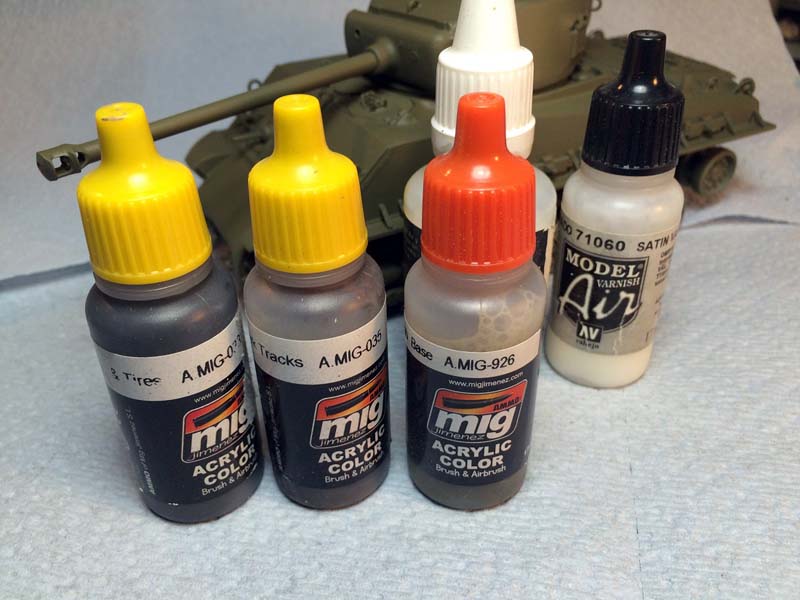
For the finish I started with a nice primer from Mr. Surfacer 1000 in the spray (rattle) can. Just to be safe, after that dried for a day I sprayed the whole thing with Vallejo Olive Drab Surface Primer as well. When that had set up I started with some Mig 033 Tires and Rubber for the road wheels and idlers. I used a mask to protect the rubber tires and sprayed the rest of the vehicle with Mig 926 Olive Drab Base/ I lightened the olive drab with some Model Color 914 Green Ochre for some of the upper areas and large surfaces. I finished off the painting with Mig 035 Dark Tracks for the one piece tracks. I didnt want to add any real weathering for the purposes of this review but may go back later and add a bit more to enhance the look of the kit.
Tamiya provides two sets of markings for the tank; one a 5th Armored Division vehicle in April, 1945 while in Germany and the other a 4th Armored Sherman from January, 1945 during the Battle of the Bulge. I choose the 4th AD vehicle as these were the first M4A3 HVSS vehicles to see combat and I have always liked the blacked out turret stars. Neither set of markings comes with registration numbers for the hull but it looks like you can find more than a few late war M4A3 HVSS Shermans without any clear markings other than hull and turret stars.
With everything done I measured the basic dimensions of the vehicle. According to the Steve Zaloga book, Armored Thunderbolt, the length of the vehicle should be 24.7, with a width of 9.8, and a height of 9.7. According to my (crude) measurements using an old Armor Research Center scale ruler and a couple of blocks of square wood the length of the tank appears to be about 2 scale inches short, while the width appears spot on perfect. The height of the vehicle also appears nearly perfect if measured to the top of the commanders hatch.
Conclusion
This new kit will be a real hit. The ease of construction will please a large number of modelers while the level of detail will also be well received. The near perfect fit throughout the kit as well as the ingenious ways that Tamiya has engineered out the possibility of a wrong placement for many of the parts will make everyone happy. There are some missing small details, buckles, straps, barrel carry handle, that and the limitations of molding the brush guards with proper scale thickness means this is not a perfect kit, but if you are looking for the best balance between ease of build and level of detail this fits the bill perfectly.
References
Stansell, Patrick and Laughlin, Kurt. The Sherman; Design and Development. Delray, FL: Ampersand Group, 2013.
Zaloga, Steven. Armored Thunderbolt: The U.S. Army Sherman in World War II. Mechanicsburg, PA: Stackpole Books, 2008.
SUMMARY
Highs: Very easy kit to build of a very popular subject. Highly detailed despite low parts count. Tamiya quality and engineering throughout. Great commander figure. One piece glueable vinyl tracks. Easy to follow instructions. Lows: Some missing or overly thick details. One piece glueable vinyl tracks. Limited markings included with no registration numbers. Verdict: Highly recommended. This kit is very nearly the equal of kits with 2 to 3 times the number of parts with nowhere near the same difficulty of assembly.
Our Thanks to Tamiya, Inc.! This item was provided by them for the purpose of having it reviewed on this KitMaker Network site. If you would like your kit, book, or product reviewed, please contact us.
About Rick Cooper (clovis899) FROM: CALIFORNIA, UNITED STATES
I have been modeling for about 30 years now. Once upon a time in another century I owned my own hobby shop; way more work than it was worth. I tip my opti-visor to those who make a real living at it. Mainly build armor these days but I keep working at figures, planes and the occasional ship.
Based on what I saw when I just cracked the box on the one I currently have, I'll be buying more, and probably selling the Asuka/Tamiya kit I also have.
I picked mine up from LuckyHobby for $38 shipped, very reasonable.
Hello all,
Yes, the MSRP is correct from the Tamiya USA website. It may well be more in Canada, but like Roy and Russell noted online sellers have much better prices. I like the Lucky Model price (a lot!) but Sprue Brothers (the only online shop I checked) had it at 43 USD, so deals are out there.
To answer the question, no there is no hint of a breech at all. The other thing I would have liked would have been a stand for a half figure in the loaders hatch like they have done on older kits. I know it is easy to add but nonetheless I like the ease of having it provided.
Cheers,
Rick
Rick, I noticed your tracks are nice and snug and was wondering if you removed a link or two or if the adjustment on the idler was sufficient to get the right fit? I'm about 40% done with mine and will be getting into the tracks soon so it'd be nice to know, TIA
Pedro,
I didn't need to do anything to the track, I didn't mess with the idler, left it just like the instructions laid out. Tamiya has it set at the perfect length and tension right out of the box. Enjoy the rest of your build, it's a good one!
Cheers,
Rick
That's good to know about the idler.
And I've got a couple of the old Italeri Shermans in the pile that can cough up the breech-end of the guns easily enough.
Great to know! Thanks a bunch Rick! I'm so impressed with the kit tracks that I will be using them on my build. I threw some add on armor on mine to resemble the 3rd Army's tanks. So that is taking some time to research, scratch, modify to tamiya's kit, and detail properly with welds and such. Otherwise I'd probably be done building by now, the kit goes that well together it's really a snap to build.
Hi Biggles,
I paid $35.79 (plus shipping) for mine at Scalehobbyist.com. Definitely hard to believe the price is so low for such a nice kit, but it's true! Happy New Year!


Comments