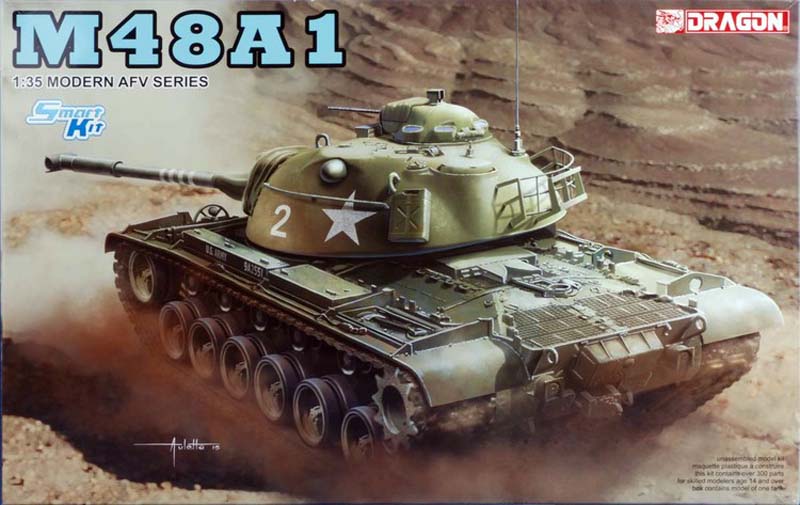
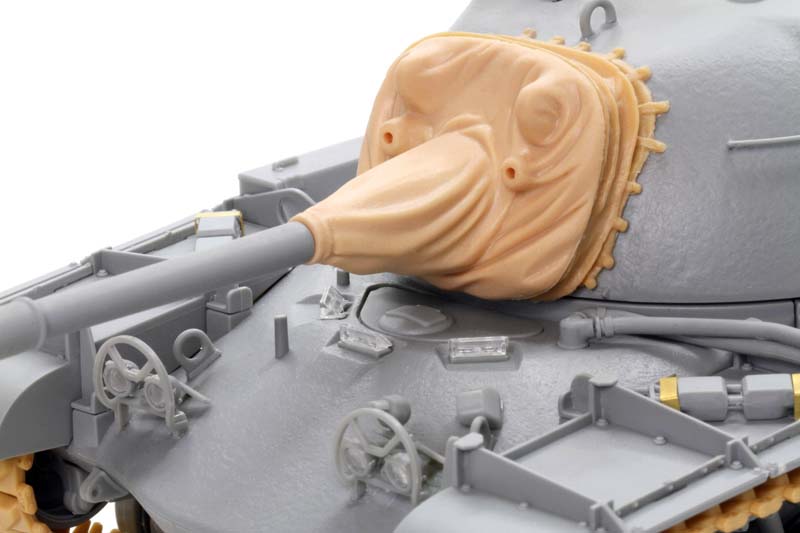
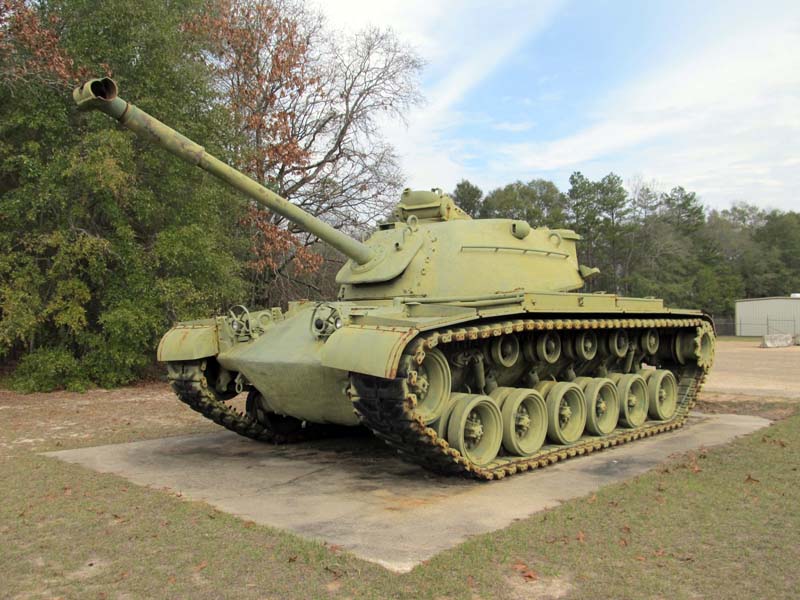
The M48 tank was introduced in 1952 and used large castings for its turret and hull for ballistic protection. This hull design gave the vehicle its characteristic look; a squat, elliptical turret and a boat-shaped hull, with the bow resembling the nose of a frog. It was seen as a capable tank to counter the Soviet tanks of the day. It was fitted with a 90mm main gun and a gasoline engine. It was the third tank to be officially named after General George S. Patton, commander of the US Third Army during World War II and one of the earliest American advocates for the use of tanks in battle. It was a further development of the M47 Patton tank. The M48 Patton was in US service until replaced by the M60 and served as the US Army and Marine Corps' primary battle tank during the Vietnam War and early days of the Cold War in Europe. It was also widely used by US Cold War allies, especially other NATO countries.
The M48A1 version was produced in 1955 and incorporated changes that included a new M1 commanders cupola with an internally aimed and fired .50 cal machine gun. This new cupola also had a roof periscope for all-round visibility and a rear hinged hatch. But it was also cramped, and ammunition storage was severely limited to 50 instead of 100 rounds inside the cupola. Other modifications also included a larger drivers hatch.
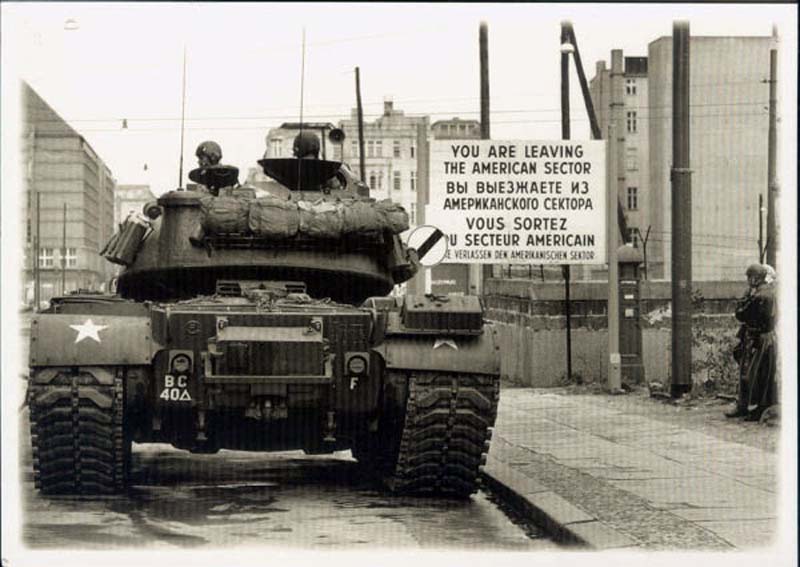
One of the most notable actions that the M48A1 was involved in was the Berlin Crisis of 1961 when a standoff occurred between US and Soviet forces at Checkpoint Charlie after the USSR demanded that all allied forces withdraw from West Berlin. On Oct 27 and 28 of 1961, US M48A1 tanks and Soviet T54 tanks were a mere 100 meters apart and loaded with live ammo as a challenge to who could cross the border. After a peaceful resolution to the standoff, the partitioning of Berlin was solidified with the erection of the Berlin Wall.
The Kit
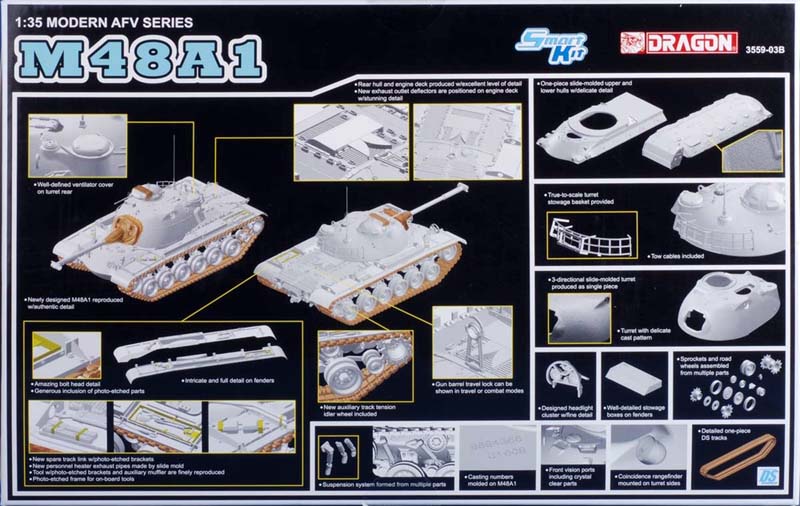
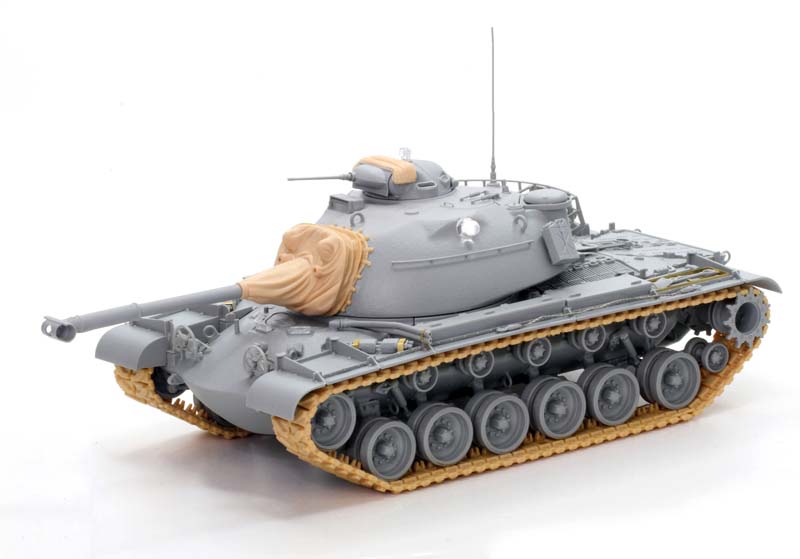
Dragon Models continues their M48 tank line with this kit of an early M48A1. Previous to this release, the only way you could get an M48A1 was by using the Tamiya M48A3 kit and an expensive resin conversion set. This kit fills a gap with what looks to be a great model. Upon opening the box, you will not be disappointed with this kit.
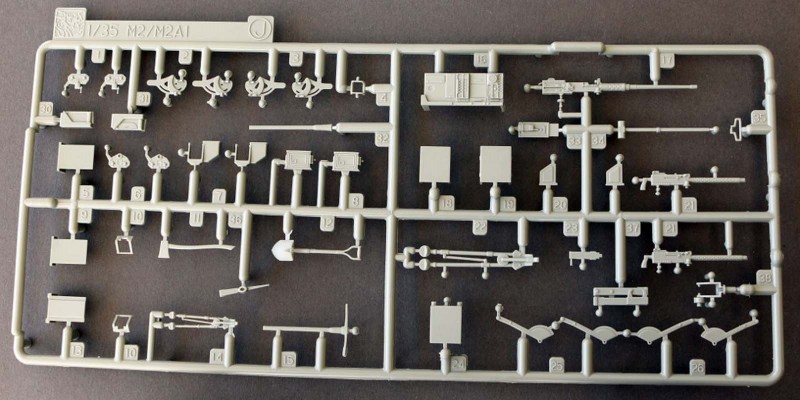
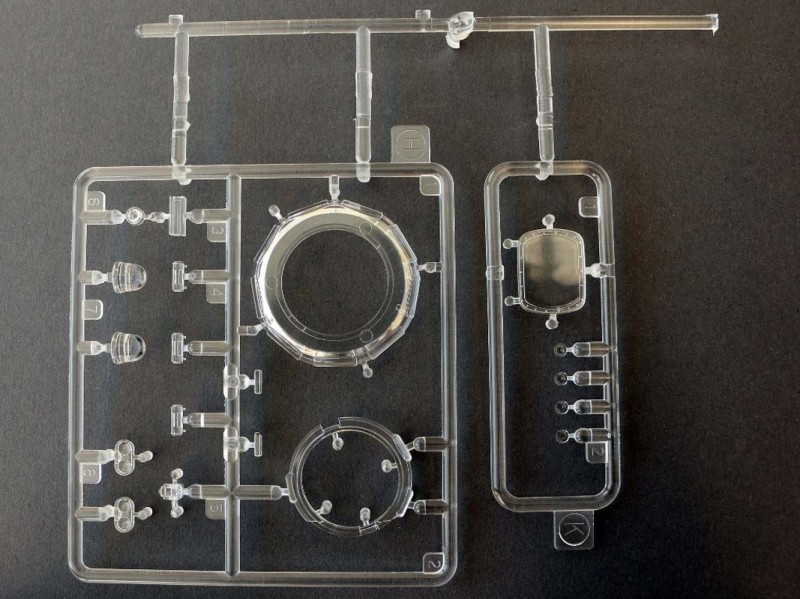
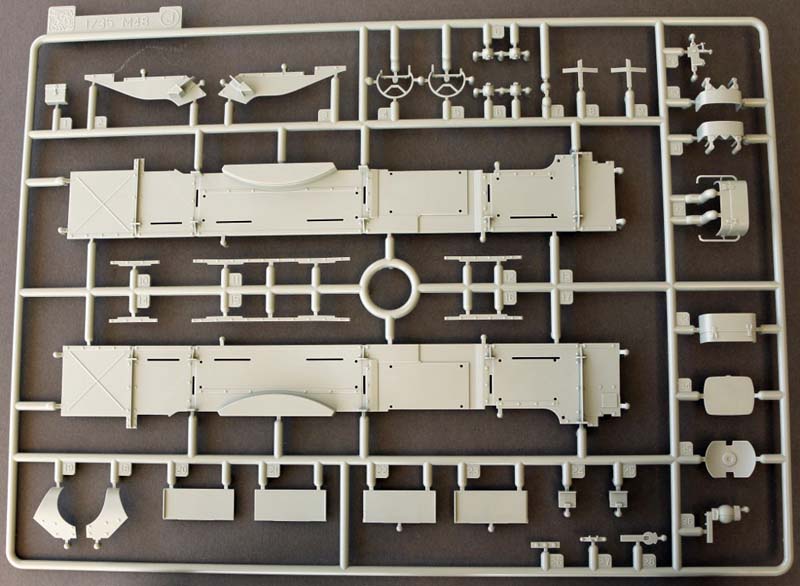
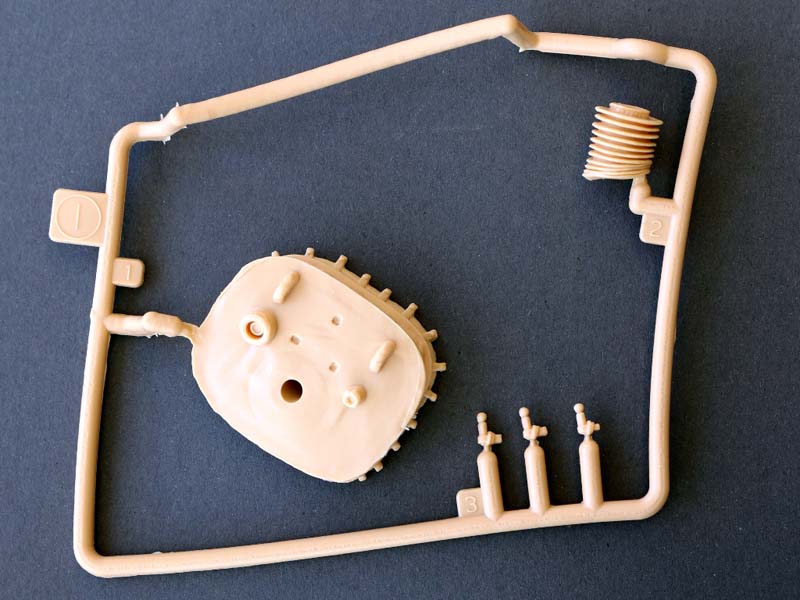
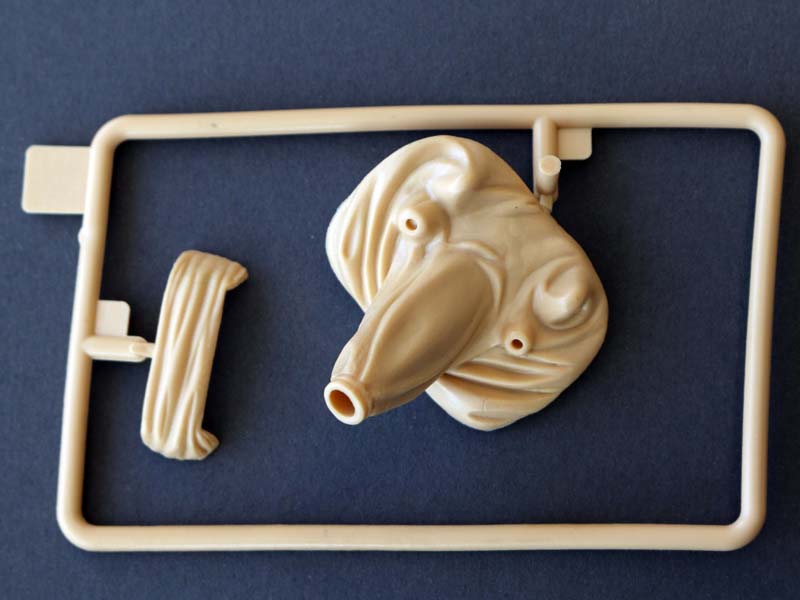
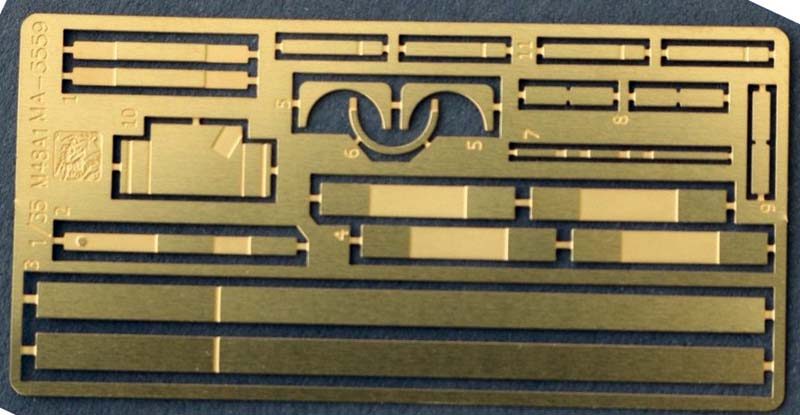
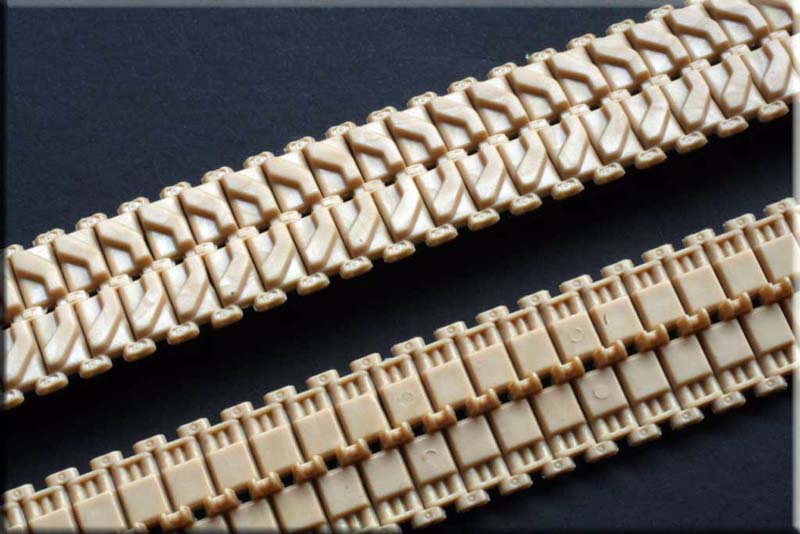
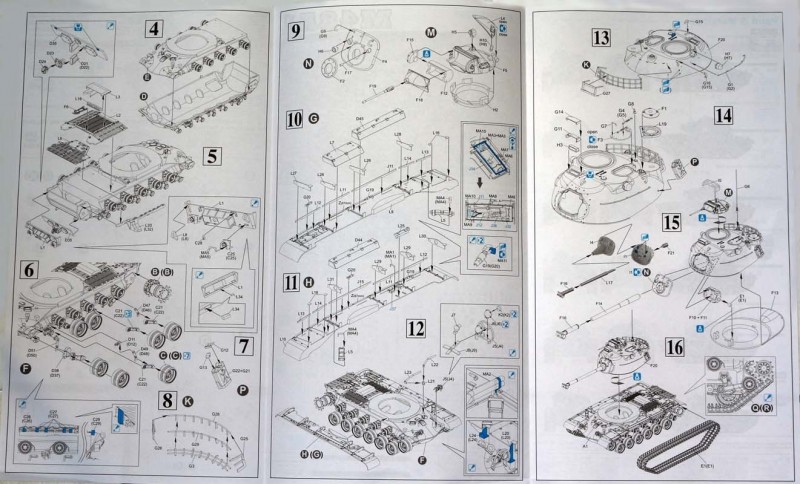
The kit comes on nine sprues of gray plastic with no visible flash. It also includes a set of T97 tracks in DS styrene, a length of braided wire for the tow cables, a set of 2 polly caps, two sprues of DS styrene parts for the mantlet dust covers, two clear parts sprues, a sheet of PE parts, and a decal sheet which includes markings for seven vehicle; six US Army tanks (2 from 3-35 AR, Lebanon, 1958; 4 AD, Germany, 1959; 3 AD, Germany, 1960, and two from the 40th AR BDE, Berlin, Germany, 1961), and one unidentified West German Army (Bundeswehr) tank from 1965. The instruction sheet is the typical Dragon Models sheet with blue and black line drawings of the kit which are crowded, but readable. They have the numbers clearly shown with lines for easy placement of parts. The instructions cover the build in 16 steps.
Dragon Models continues with their practice of adding, deleting, or swapping sprues from other kits to build different versions of their models. The extra (not used) parts left on the sprues are plentiful. I believe that you could build an M48A2/A3 as well from this kit since there appear to be all the needed parts left on the sprues.
The Build
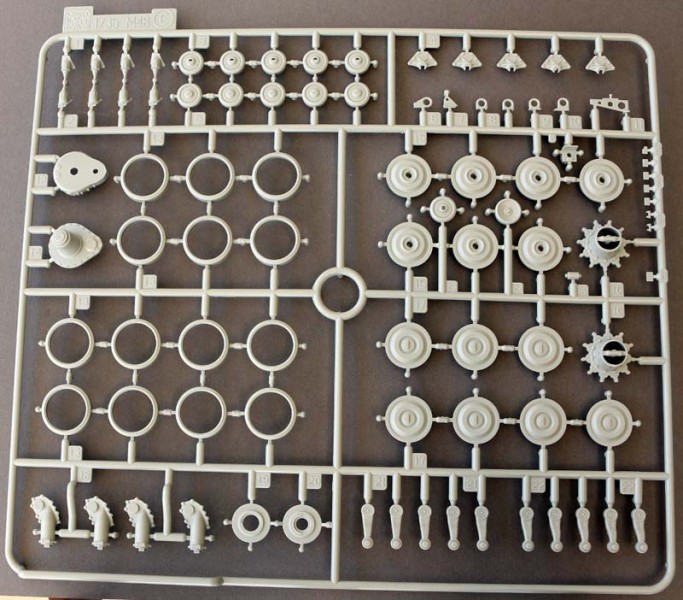
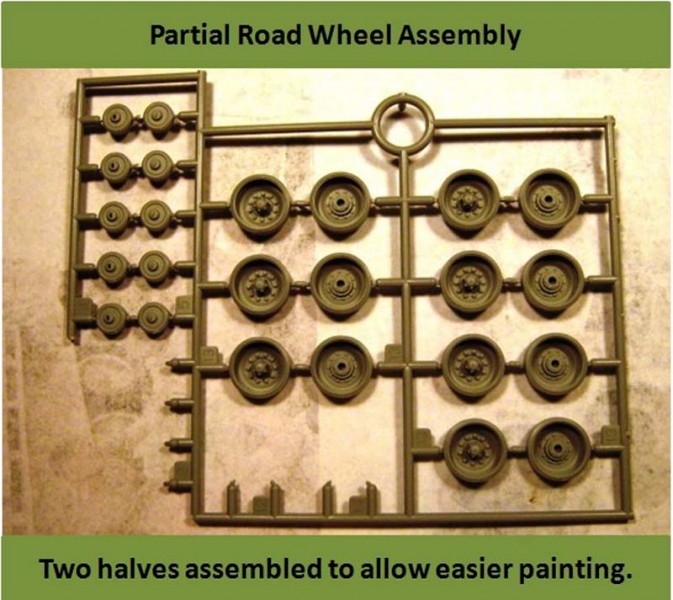
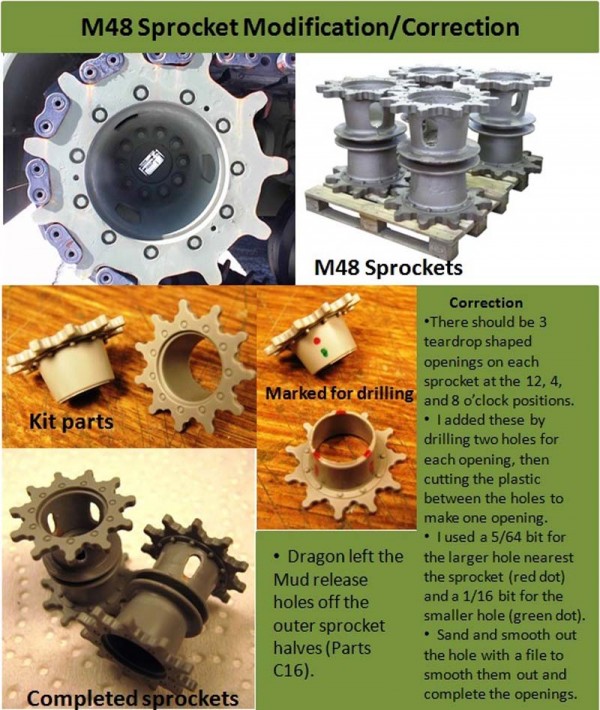
The build starts in step 1 with the familiar format of the building of the road wheels and rear sprocket. The road wheels are nicely done as four separate parts so that the proper undercut of the face is well represented. The face of the sprockets are also nicely done, however most M48A1s had three teardrop-shaped mud release holes in the sides of the outside halves (C16), which are not represented. These holes should be at the 12, 4, and 8 oclock positions. Check your references. If yours had them, they can be easily added using a couple of drill bits and a small file. To make them, I drilled two holes and then connect them to make the teardrop shaped openings. I used a 5/32 bit for the larger end nearest the sprocket and a 1/16 bit for the smaller end. I then connect the two holes and file the opening smooth with a small file. I also partially assembled the road wheels by placing the inner dished surfaces (C15, C17) inside the outer rings (C13), but left them on the sprue to make painting them easier. You also build the small tensioner wheels and their arms (sub-builds Q and R), to be added after the tracks are attached (step 16) so it is properly tensioned against the track.
Step 2 continues with the lower suspension. The suspension is very detailed and looks great. The separate bump stops and road wheel arm mount housings really bring up the level of detail. You should add a small piece of sheet styrene under the rear portion of the forward double bump stop (parts D17 and D18) as this was changed during the production, but the hull was already cast for a single bump stop. There are a lot of parts here, so take your time. The parts go together well and I had no issues with assembly or alignment.
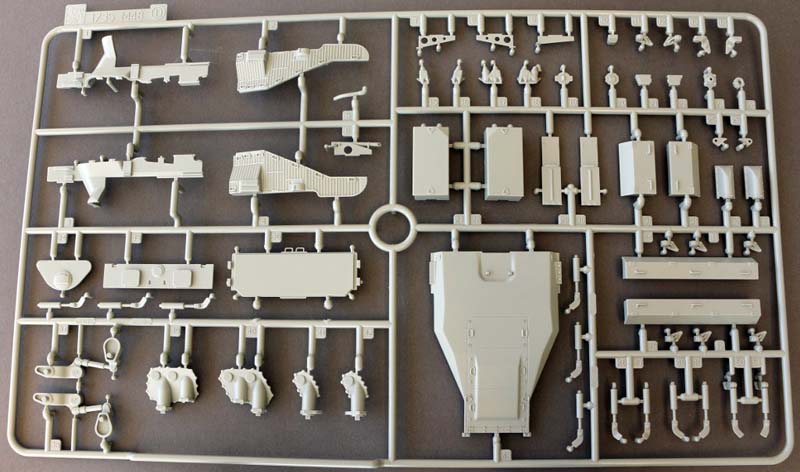
Step 3 begins the upper hull. Here you add the drivers hatch and some smaller details like the drivers periscopes and front lift rings. You also add 5 return rollers per side. These items went on without any problems. There are also a few raised areas that are called out to be removed as they are not needed for this version. I also added texture to the curved portion of the upper sides of the hull which will be under the fenders on part A1. I did this the old fashioned way of brushing liquid glue onto the part then touching it with my finger to craze the surface a bit. This leaves a nice cast texture effect.
**Of note here, there is a leftover from earlier M48 instructions. Part A4 is called out for the opposite side of A3 (cover for bilge outlet). A4 should be left off as the personnel heater exhaust will be glued into that hole at a later step.
Step 4 mates the upper and lower hulls.
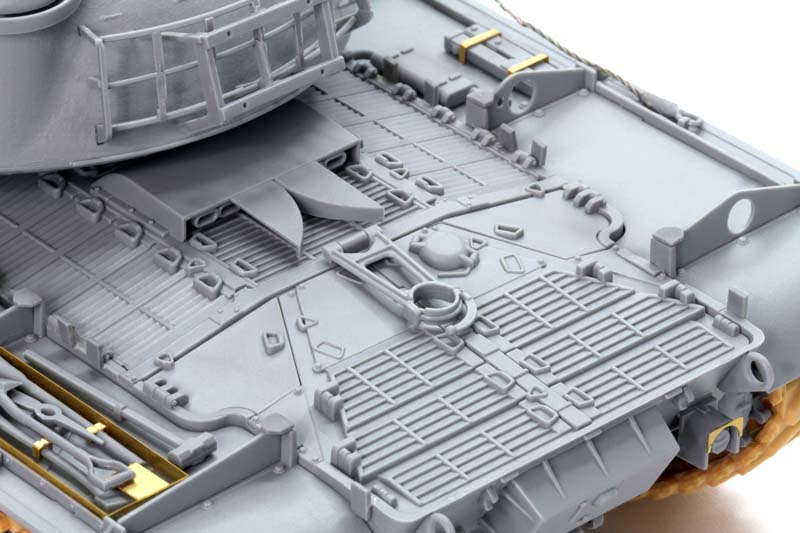
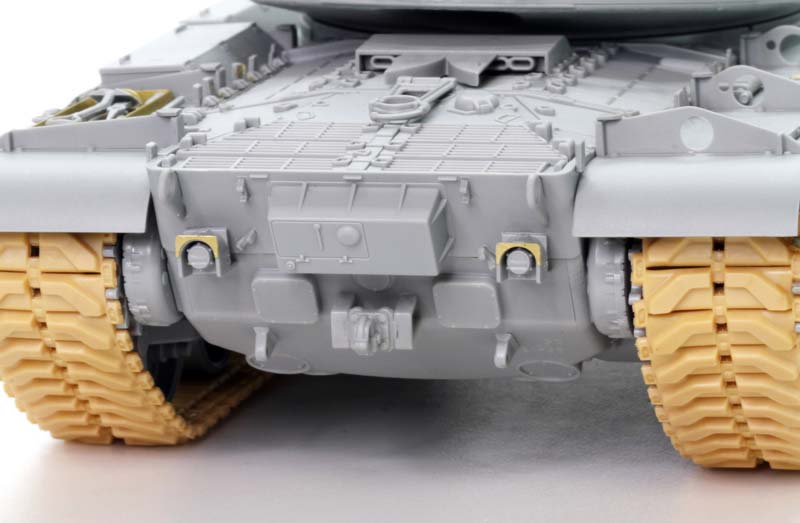
Step 5 moves to the rear of the hull with the addition of the engine covers with exhaust and travel lock parts, Telephone Intercom box, and the taillights on the extended upper rear plate, and the lower rear plate with a very nice tow pintle. There are also small, half-moon PE pieces to add a lip to the taillights and very nice lift rings added here as well. There are also a couple areas that require filling that are shown in callouts within this step. I also added texture to these pieces in the same manner as I did the hull above.
Step 6 continues with the suspension by adding the road wheel arms, shocks, and rear final drives and sprocket assemblies. You also add stops/supports for the engine deck lids here as well. There were no issues with alignment or fit of the parts.
Step 7 is a small drawing showing the four-piece construction of a water jerry can. It is specifically for water due to the flip-top lid as opposed to the more commonly modeled fuel can with a castellated, screw-on lid.
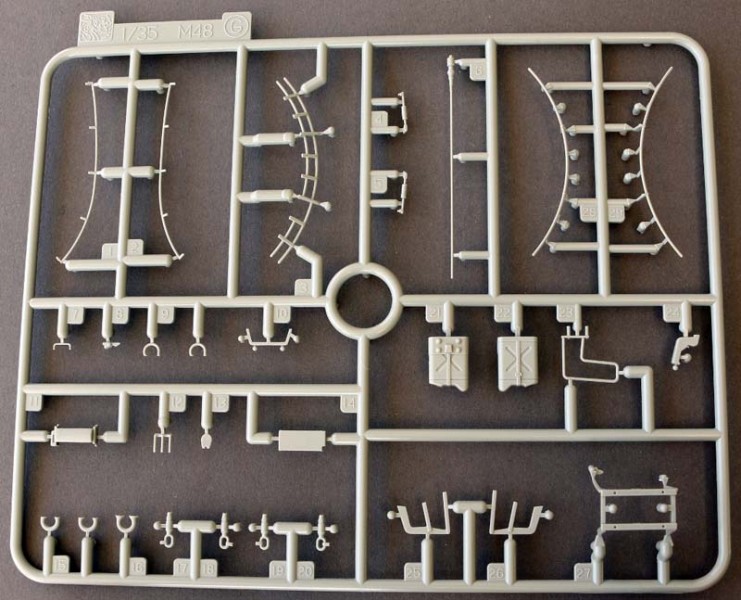
Step 8 builds the rear turret bustle rack from 5 separate pieces. Take care when assembling this part so it is correctly aligned and not twisted. It is easy to get this part crooked.
Step 9 begins the turret construction. Here you build the mantlet and commanders cupola subassemblies. The uncovered mantlet (covers are optional parts from DS styrene, added later in step 15) has smaller items such as the lifting rings, direct fire site lens, and coax MG barrel added. You also build the upper part of the commanders cupola with vision blocks for the upper part of the cupola made up of clear plastic inserts. The dust cover on the commanders cupola MG mount is also added later (step 15) from DS styrene.
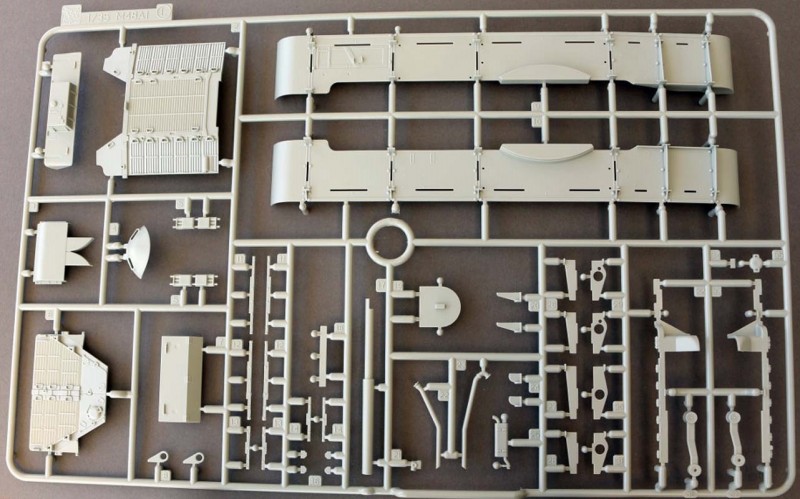
Step 10 begins the construction of the separate fenders with the left side fender. It goes together well with mostly having to add the stiffening parts, supports, and a few smaller items to the large, single piece fender. You also add the tool boxes and air cleaner assemblies. Be sure to select the proper fender (L9) with rounded ends. There are two types of fenders in the kit, one set (later style with squared-off ends) are not used.
Step 11 builds the right fender in the same manner as you built the left in step 10. You also build the left fender tool storage area out of PE sides and with tools from the kit. The tools are well defined and look very good.
Step 12 attaches the two fenders and adds the headlights and their guards to the front glacis plate. You also add the exhaust for the crew heater. Again, no issues were noted.
Step 13 continues with the turret construction adding smaller items such as grab handles, lift rings, range finder blisters, and the rear turret basket. There were no issues with this step of construction.
Step 14 has you add more detail pieces to the turret. Here you add the loaders hatch, the gunners primary sight (made of clear plastic) and its covers, the turret fan intake housing, and the water can from step 7. Again, a couple of holes are called out to be filled here as well. This step is also straight forward with no issues or problems.
Step 15 completes the turret construction by adding the commanders cupola assembly. You also add the earlier built mantlet, the gun barrel, and the bottom of the turret. In this step, you are given the option of with or without manlet cover. There are two different barrels that also go with the mantlet covers. The cover is a two-piece affair made out of DS styrene. I was initially a little apprehensive about the two-part DS styrene mantlet and whether it would go together well and how it would look. When I started working with it, I was pleasantly surprised. The two parts glued together seamlessly using Plastruct Plastic Cement, my standard liquid glue. The rest of the turret went together well with no putty needed to close up the turret halves. It is engineered very well.
Step 16 completes the build by marrying the turret to the hull and adding the very nice set of DS T97 tracks. The tracks were a little loose and I found removing one link per side tightened them up nicely. After adding the tracks, you add the aforementioned tensioner wheels (sub-builds Q and R in step 1) to the positions just in front of the sprocket on either side. This allows them to snug up nicely to the tracks and look as if they are actually adding tension.
Decals
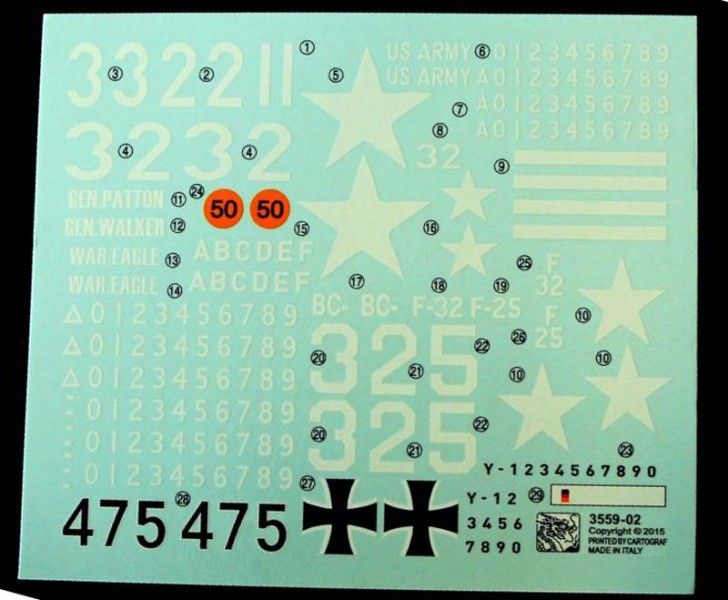
The last step (unnumbered) shows the decal placement and markings for seven tanks; six US Army tanks and one unidentified West German Army (Bundeswehr) tank from 1965. The color call-out for all four tanks is for FS34087 OD green which is the wrong color for Cold War era tanks, as most of them were in FS24087 semi-gloss or FS14087 gloss olive drab. The markings are for two tanks from 3/35 AR Bn in Lebanon, 1958; and two tanks from Germany, 4 AR and 3 AR from 1959 and 1960 respectively.
The last two US Army tanks cover two vehicles from the 1961 Berlin Crisis mentioned in the history portion of this review. They are from the 40th AR BDE (Berlin BDE). They represent tank F25 War Eagle and F32 GEN Walker/GEN Patton. There are some discrepancies as to the accuracy of the markings on these two tanks. They are mostly correct, but do not show the star on the top of the turret which was present on both, and probably the other US Army tanks represented as well. Also, there is some discussion that the GEN Walker/GEN Patton tank was actually only GEN Walker and was later changed to GEN Patton, or vice versa, but did not have both names at the same time. Also missing is the Crouse Hinds search light that both tanks had, along with a 40 AR BDE patch in color on the front of the searchlight cover. I will be adding the Tank Workshop Crouse Hinds searchlight to my tank, since it will be F25 War Eagle.
Conclusion
Overall this is a good kit that goes together well. There are no major issues with it and only a few minor ones that are easy to overcome. It is a major improvement over the Tamiya kit in both details and dimensions. It looks really good once done as well. I do wish it was complete with the Crouse Hinds search light, but they can be sourced pretty easily and is pretty cheap. Anyone with average modeling skills will find this a joy to build. I highly recommend this kit to anyone who enjoys building Cold War-era tanks and vehicles.
SUMMARY
Highs: Very nicely molded with a options for a few different versions of M48A1.Lows: It would have been nice to have included the Crouse Hinds searchlight that was seen on this version. The decals for the two Berlin Brigade tanks are incomplete.Verdict: A very nice kit of the M48A1. Nicely molded and it goes together easily. I highly recommend this kit to anyone who enjoys building Cold War-era tanks and vehicles. This model definitely shows that Dragon can still produce a masterpiece of a kit.
Our Thanks to Dragon USA! This item was provided by them for the purpose of having it reviewed on this KitMaker Network site. If you would like your kit, book, or product reviewed, please contact us.
About Gino P. Quintiliani (HeavyArty) FROM: FLORIDA, UNITED STATES
Retired US Army Artillery Officer, currently a contractor at MacDill AFB in the Tampa, FL area. I have been modelling for the past 40+ years, really seriously on armor and large scale helos (1/32, 1/35) for the last 35 or so.
I like your quote about "Bill's First Law of Modelling" at the bottom of your "page"- SO TRUE!!!
I bought at least 2 or 3 each of TAMIYA's M48A3, M60A1, M60A2 and M60A3 kits, along with an ACADEMY -A3 RISE, Plus ALL kinds of resin updates and conversion sets, PE sets, BRONCO Indy-link "early" and "late" Track sets for all of the above, and even a LEGEND M48A1 Conversion kit for one of my TAMIYA M48A3s- NOT a TOTAL LOSS, as I can at least use the PE sets for the newer DRAGON M48s and AFV CLUB's M60A1 and -A2s, and all of the BRONCO Track sets. I bought BRONCO's M1 Track sets for my DRAGON M1s, too. Talk about "dedicated"!
Wonder if AFV CLUB will ever do an M48-series, an M60, or even a new series of 105mm M1s..? Be nice if they got around to it eventually...
Haha yeah as I get older my fingers are getting less coordinated and more and more tiny pieces are lost. It's an amazing time for armor modelers. My dream is to build an almost seamless line from m26 to m60a3. And then do the same with soviet / russian armor. I won't live that long but the kits are pretty much available. I welcome an accurate rendering so should also thank DRagon
That's a great goal to shoot for! Personally, I'm primarily a US/Allied fan, and the vast bulk of my 1/35 AFV and Soft-skins collection is comprised of US/Allied Armor, 1916 to "Present Day" modern stuff, though I DO also model some of the "major" types of other nations, as well. My "first love" in modelling remains 1/48 Aircraft. I also have a great interest in HO brass, "high-end" Hybrid" and plastic Steam Era Locomotives and Trains. I also model Classic 1/24 and 1/25 Automobiles, and 1/35-120mm Figures...
They already showed their new M48 turret test shot a couple of years ago, even before they announced the M60A1. My guess is they planned to release M48 first, but then changed their mind when Dragon released theirs. But I'm pretty sure they will get back to M48 family eventually.
This fills the last gap in my collection of the tanks of the 50th Armored Division New Jersey Army National Guard 1946-1996.
Now to save up the money and get it past the wife.
They already showed their new M48 turret test shot a couple of years ago, even before they announced the M60A1. My guess is they planned to release M48 first, but then changed their mind when Dragon released theirs. But I'm pretty sure they will get back to M48 family eventually.
[/quote]
I wish that AFV CLUB would have released their M8 HMC (75mm Howitzer) that they just let float out into Limbo, after having announced this kit as coming "Soon" in their "Future Products" ads, several years ago...
Would have been nice to have seen AFV's "take" on an M48-series. Would also be nice to see them do an M60, as part of their expanding M60A1, -A2, and upcoming -A3 series of kits, AND to actually have their M8 HMC come to fruition...


Comments