In the 1960s the US Army began to develop a lightweight gun and missile launcher to replace the traditional main gun on tanks. The new launcher system, called Shillelagh could fire anti-tank guided missiles and the standard ammunition. This system was installed into a newly designed turret for the M60. The M60A2 also used one of the first laser rangefinders. 526 M60A1 were upgraded to the A2 standard. During use it was discovered that the system was overly complex and never popular with crews. The A2 was so complicated and difficult to use, that it was called a starship. M60A2s were withdrawn from service after only a few years. Many of them had their turrets removed and were converted to armored vehicle bridge launchers.
The kit
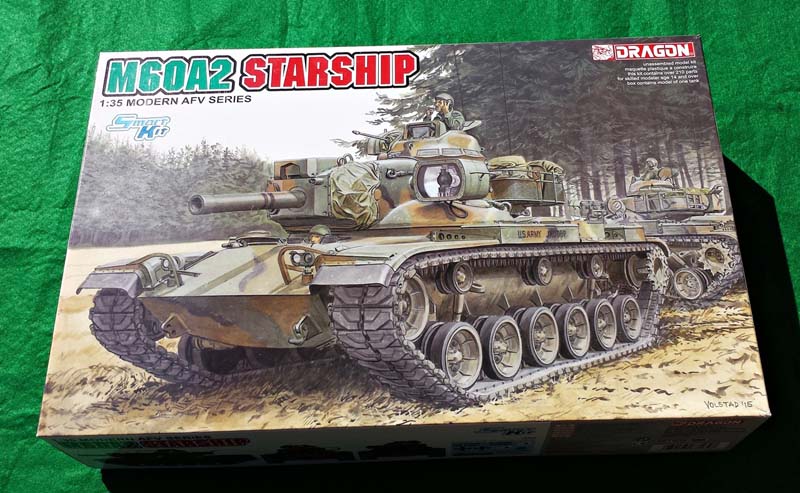
The newly released Dragon Models M60A2 follows after M48s and M60 and continues the "Patton" series from this producer. To this time if somebody wanted to build the M60A2, one of the most interesting and best looking cold war era tank they had to resort to the ancient Tamiya kit. Recently three producers released M60A2 Starship offerings. I looked at the model from Dragon.
Contents
This model kit contains:
7 gray plastic sprues
2 vinyl tracks
2 small clear sprues
Photo etched sheet
One sprue made from DS vinyl
One small decal sheet
Instruction
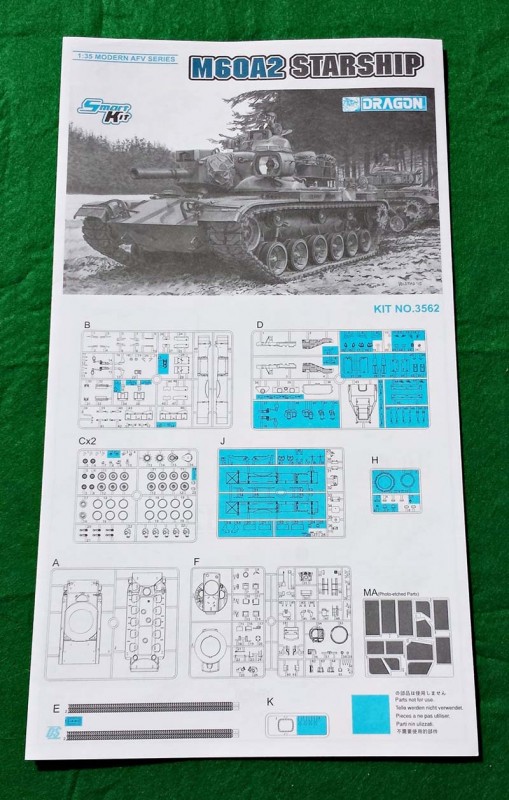
All of the contents are packaged in sturdy box with nice box art that shows the M60A2 on the edge of the forest. Despite the large size of the box the contents fill the entire space inside. The sprues are packaged individually in plastic bags, except where the sprues are duplicated. The model parts are molded in Dragon models standard grey plastic and is very well done. This includes many of the previously release sprues, from M48 and M60 kits. On the back of the box Dragon Models provides details of some of the different elements of the model with a short descriptions.
Review
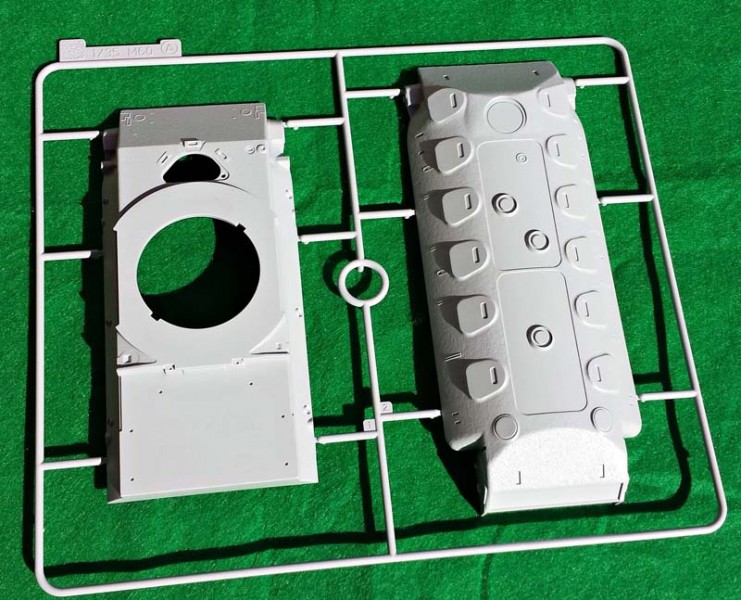
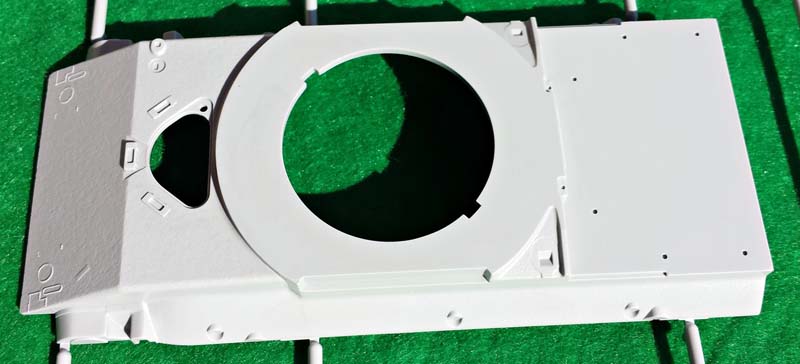
Sprue A:
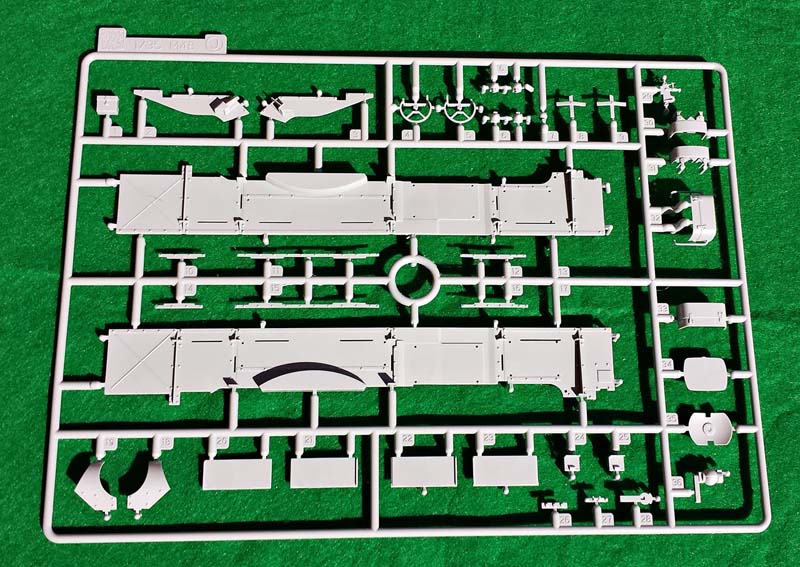
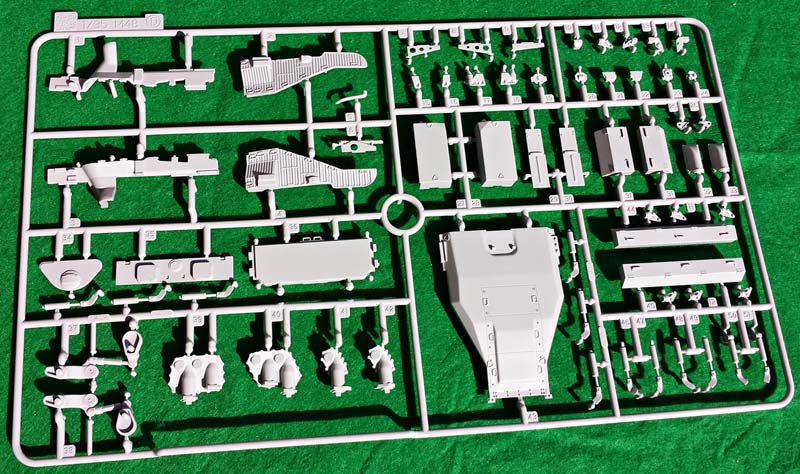
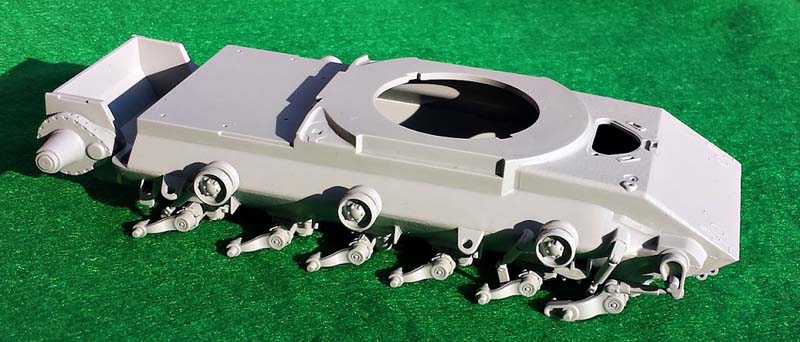
This sprue contains two main hull pieces, it's marked as the sprue from the M60. This is because the M60A2 version had a hull form M60A1. Both pieces are very well moulded and the cast texture on them is one of the best that I've ever seen in plastic kit. It's visible but not over scale, good job Dragon.
Sprue B:
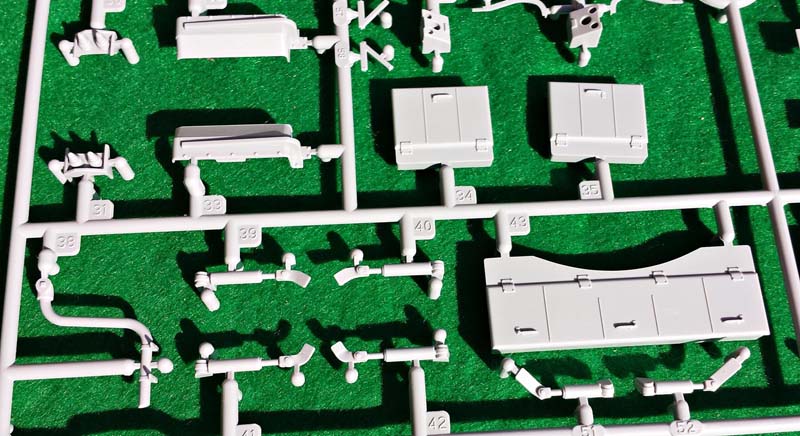
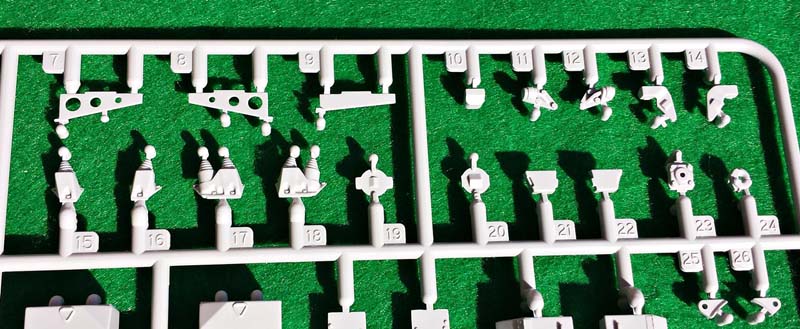
On this sprue the producer placed almost all of the details that are needed to finish the hull: fenders, fender braces, air cleaners, and other smaller details. It's also marked as sprue from M60. All parts are well done, I had no any reservations while checking this sprue. I should mention about the fenders. They are excellent, very thin and without any pin marks or others issues, even on bottom side.
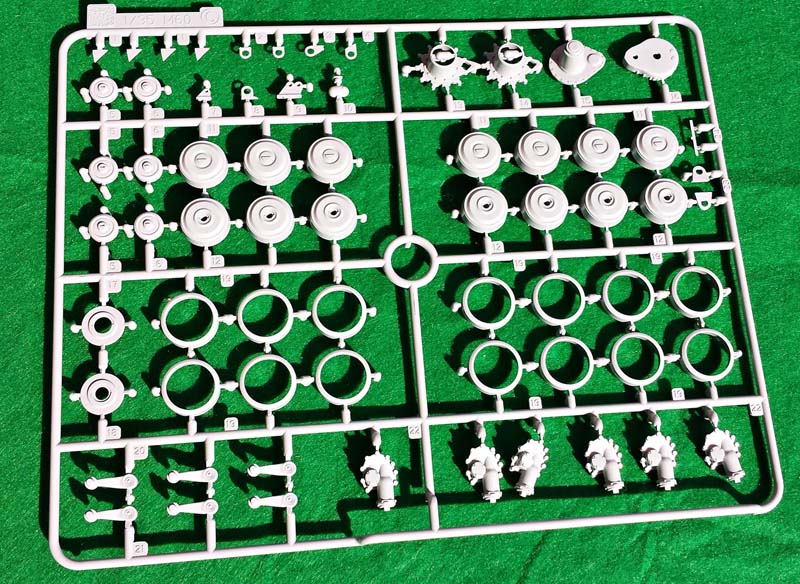
Sprue C:
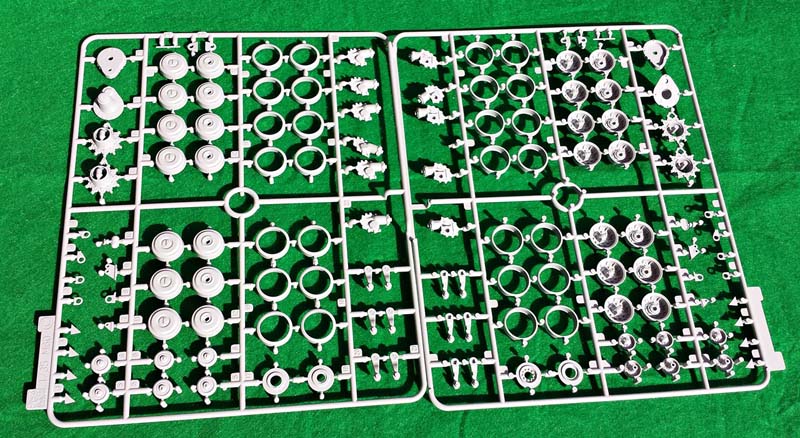
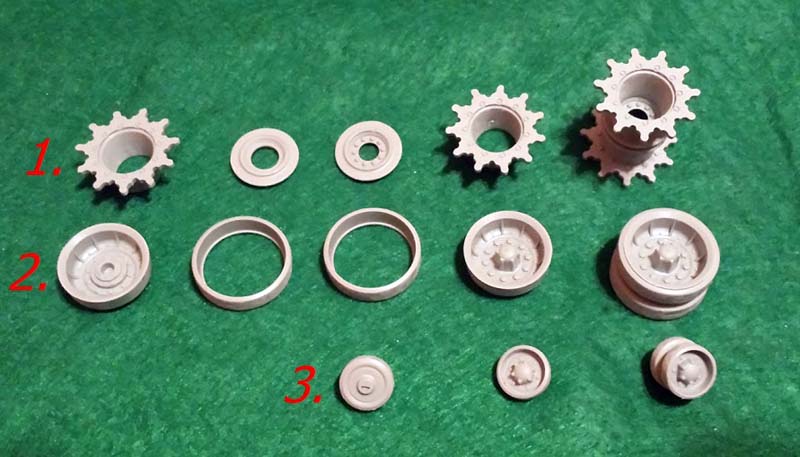
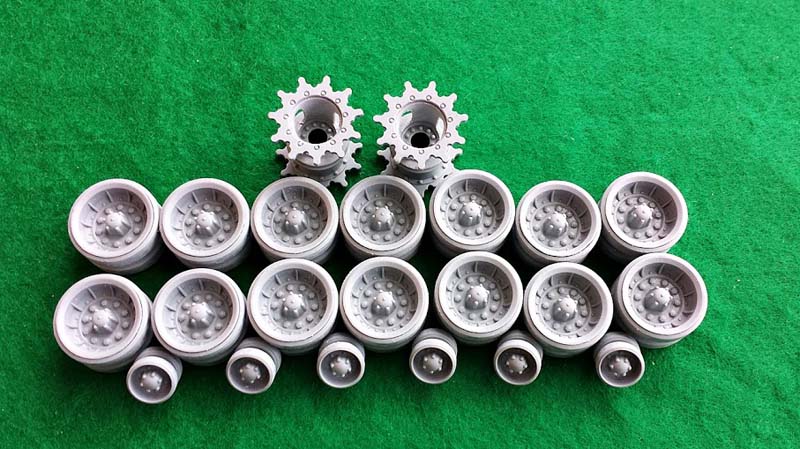
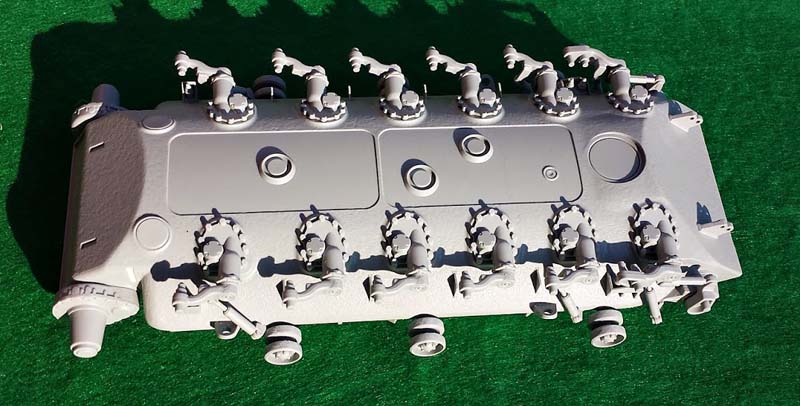
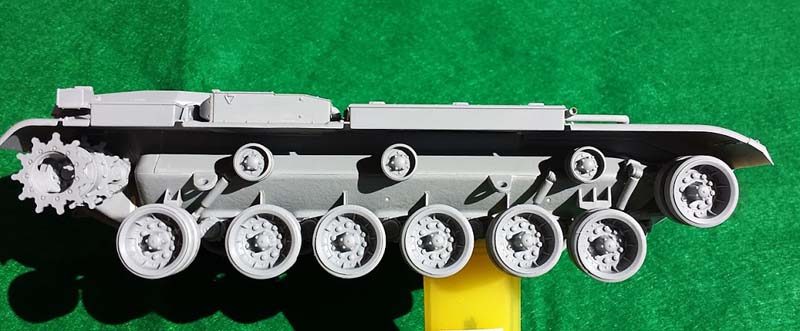
These are all chassis parts: swing arms, road wheels, drive sprockets, idlers return rollers etc. In the box there are two C sprues. Quality- without any reservations.
Sprue D:
This sprue comes from the previously released M48 Patton. There are many different parts, but to build M60A2 we only need the engine cover and driver hatch. The rest of the parts like the suspension components, bump stops etc, go to box with spare parts. The engine cover is beautifully moulded, molding is clean and sharp, also there are some fine details like handle grabs which look great too.
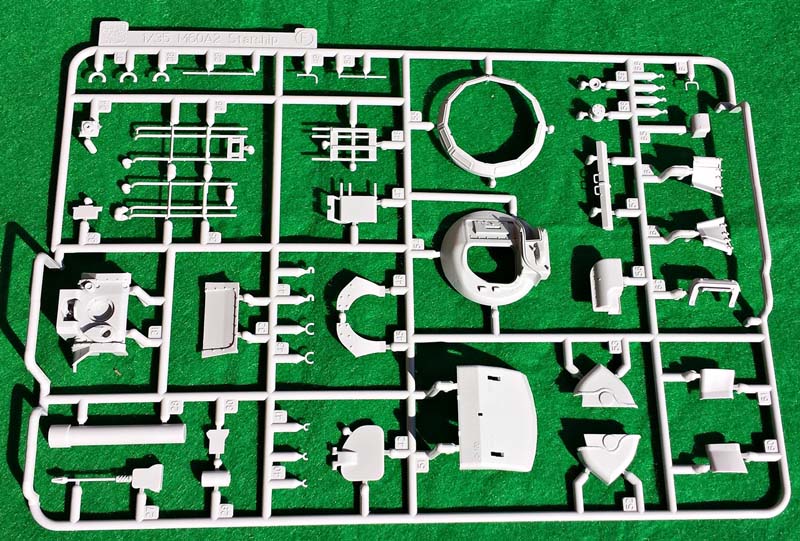
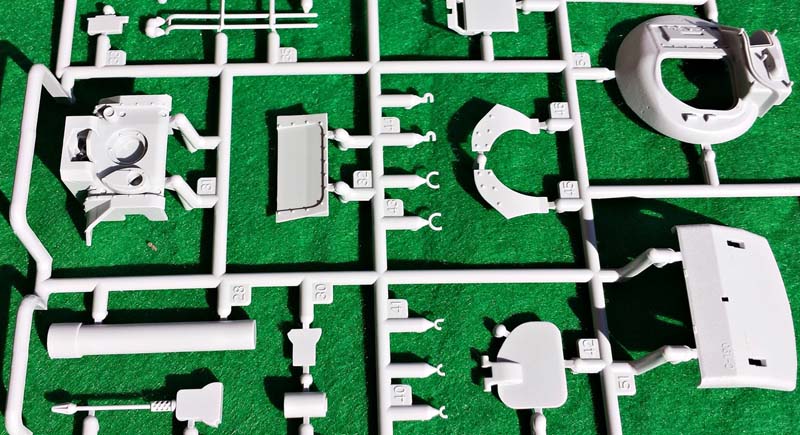
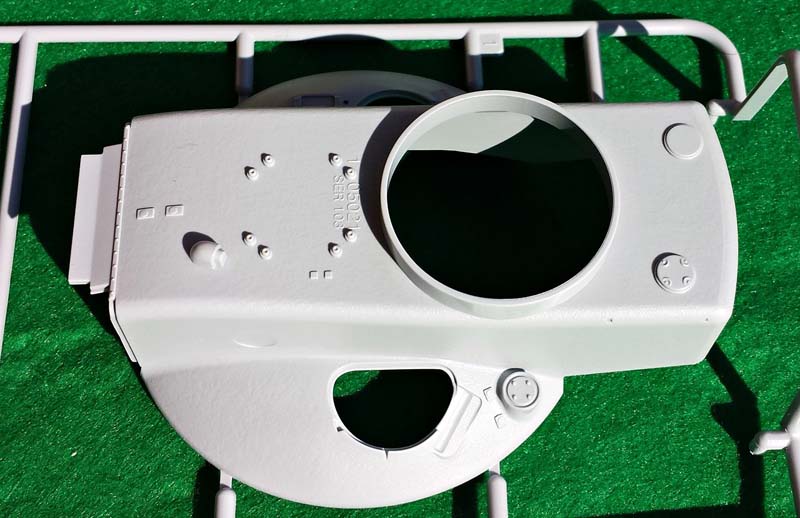
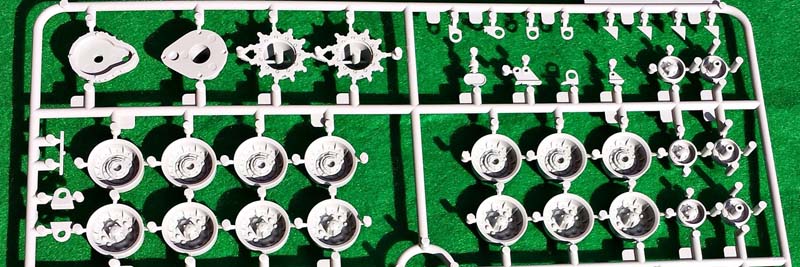
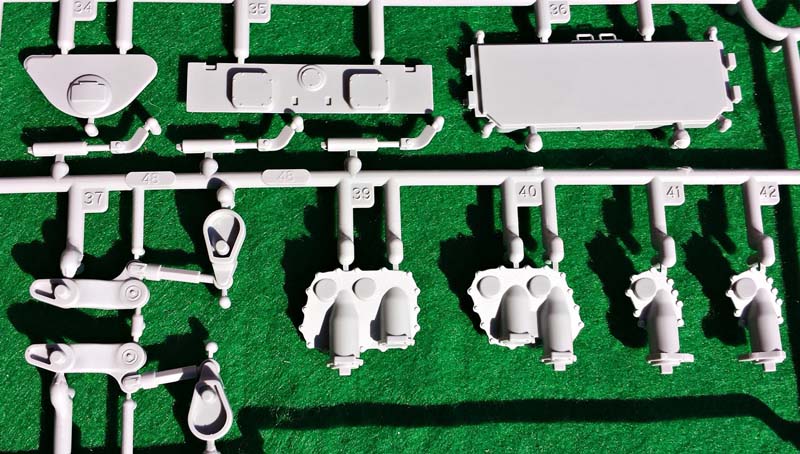
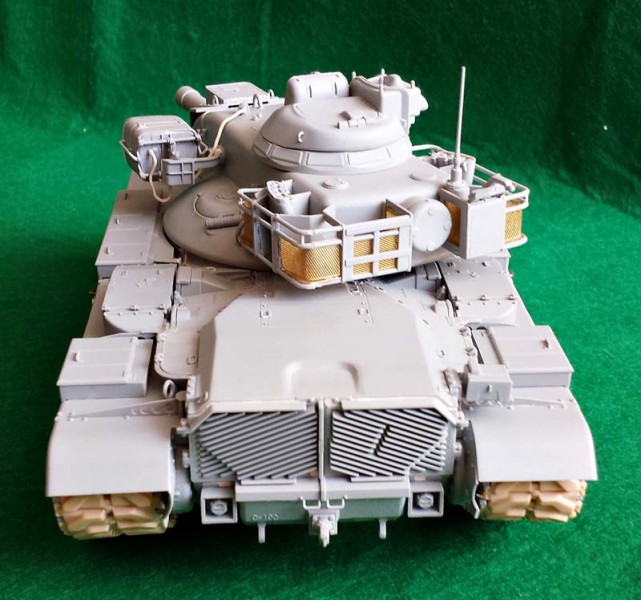
Sprue F
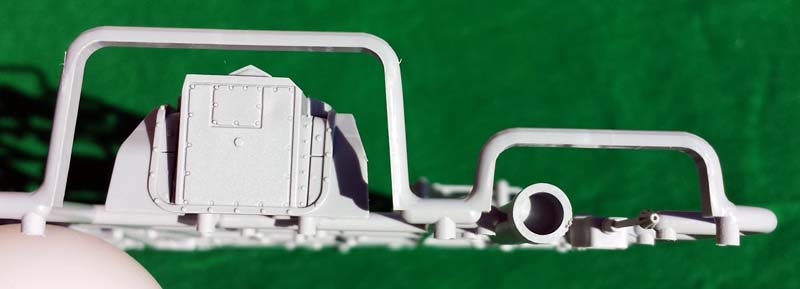
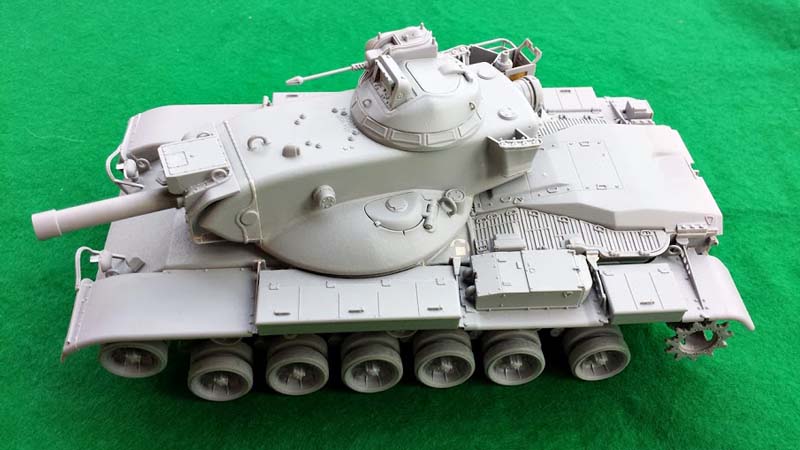
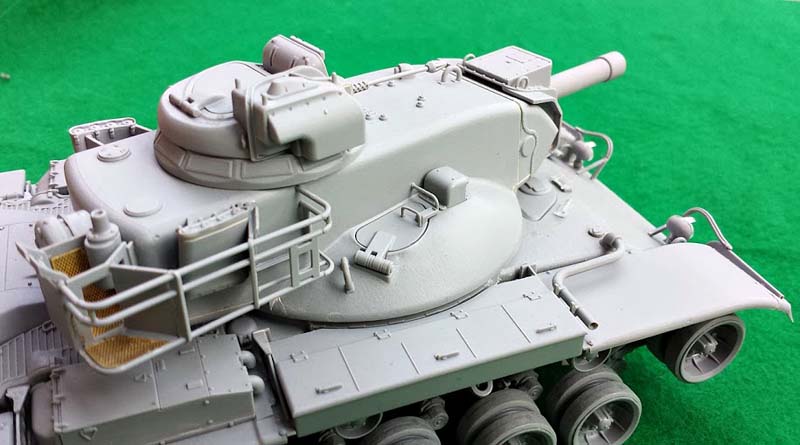
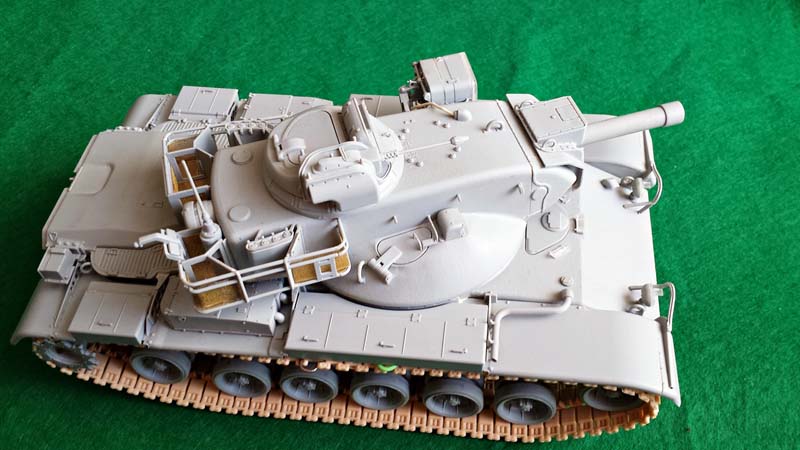
This sprue is made specifically for the M60A2 Starship, and contains almost all of the parts needed to build the turret. All parts on this sprue are made in superb quality, just look at the gun mantlet and commanders cupola to see what I mean. Turret haves are made using slide mold technology, they have a lot of crisp moulding and sharp details like casting numbers. The only small negative I noticed is the lack of gun rifling inside the main gun.
Sprue J
Like sprue D this comes from the M48 kit, and from this we need only a few parts to build the model, a search light and a couple of other parts. Other parts for example fenders, head lights guards and others go into the spares box. The parts on the J sprue, just like the others are well made, Dragon replicate details such as the heads of the bolts.
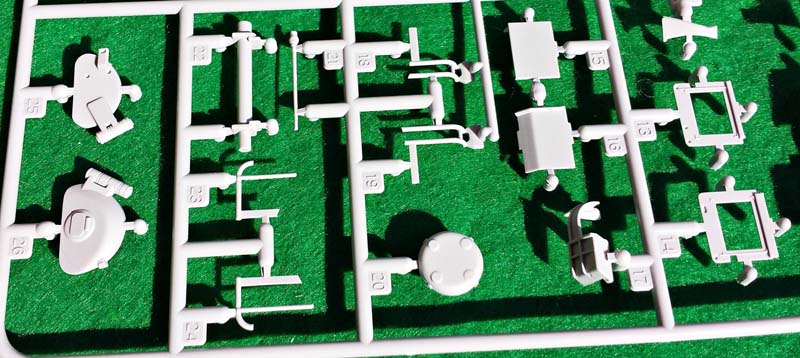
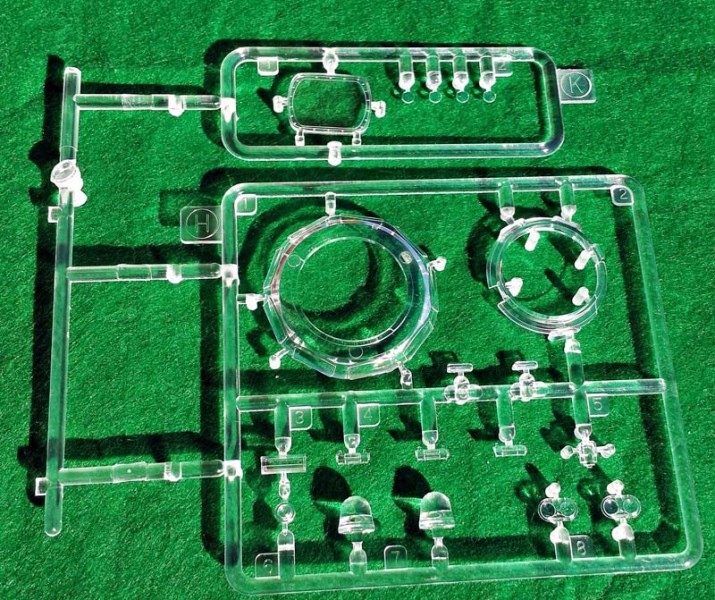
Clear Parts
Inside the box you will find two small clear sprues, K and H. From these sprues we use the head lights, driver's periscopes and part for search light, other parts are unnecessary. It's a pity that Dragon Models has not included transparent visors in the commander cupola and other periscopes, one clear visor block is on the sprue, but it doesn't fit the M60A2 Starship.
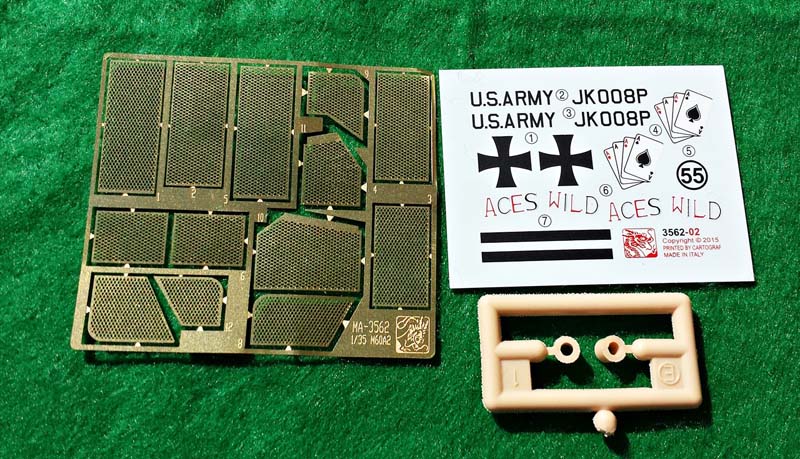
Photo Etched Parts
The photo etched content consists of one small photo-etched sheet, these are the elements needed to build the turret basket. They are made from a thin and easy to bend material, so working with them is not a problem even for the inexperienced modeller.
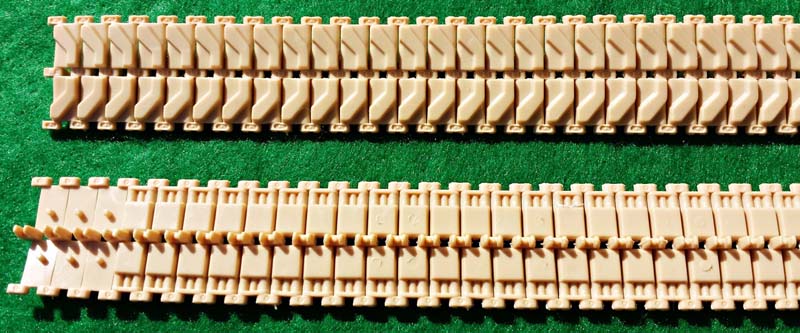
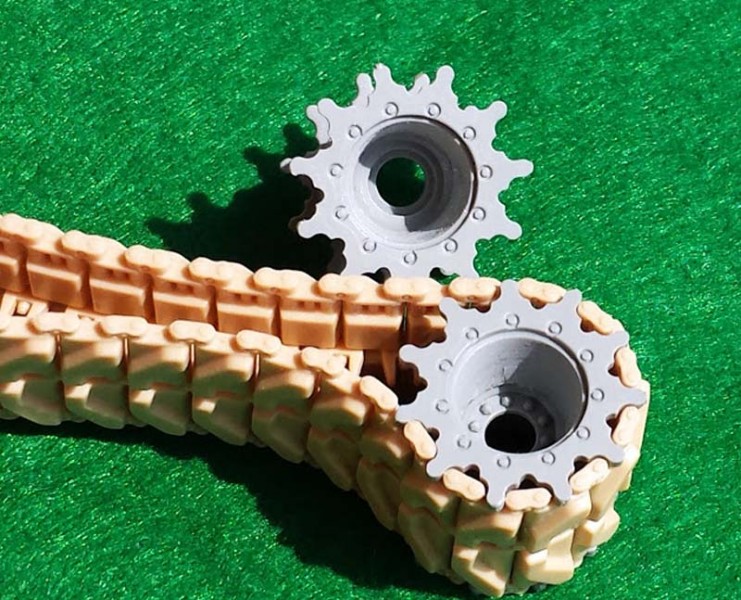
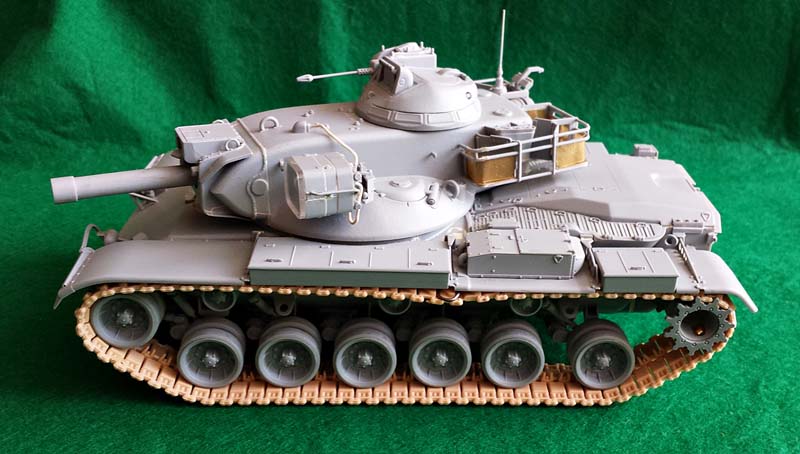
Tracks
Dragon gives us full length early tracks made from DS material. Vinyl tracks have as many supporters as opponents but for me they are one of the best vinyl tracks on the market, soft and easy to assemble. One small issue is ejection pin mark on every few link but they are on the inner side so road wheels mask them very well, and after the final assembly they are almost invisible.
Decals
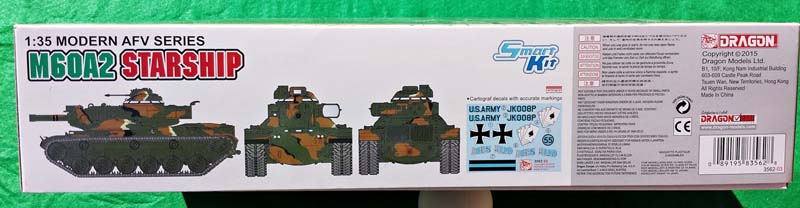
The decal sheet is small and provides markings for only two vehicles. The decals are crisp, thin and have good colours. Its hard to write something more, before using them but I do not expect any difficulties judging from previous Dragon's decals.
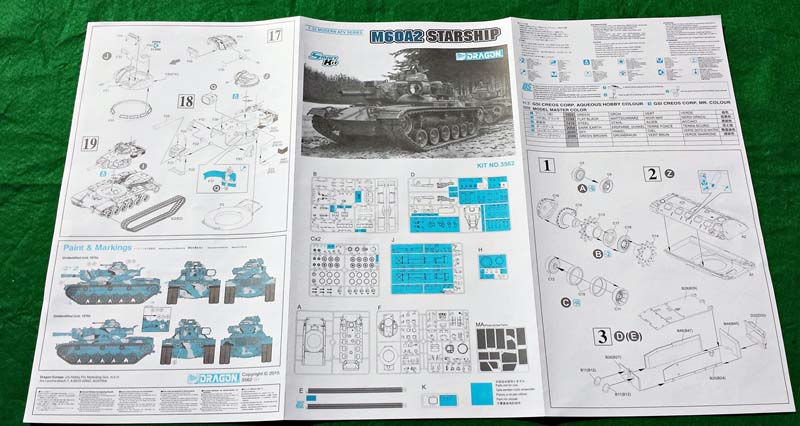
Instruction Booklet
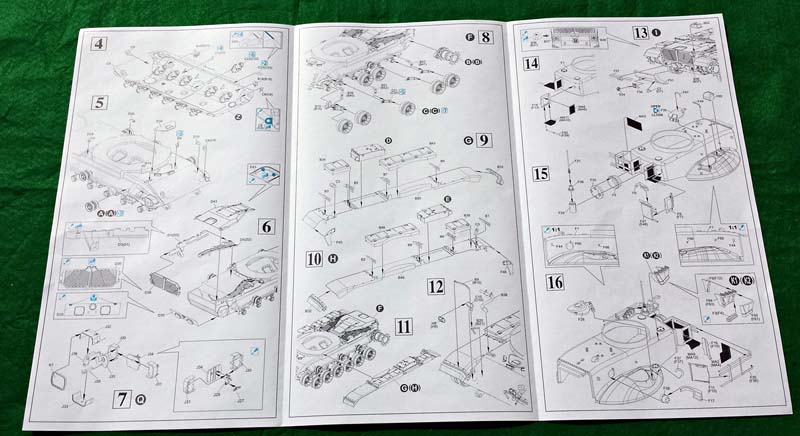
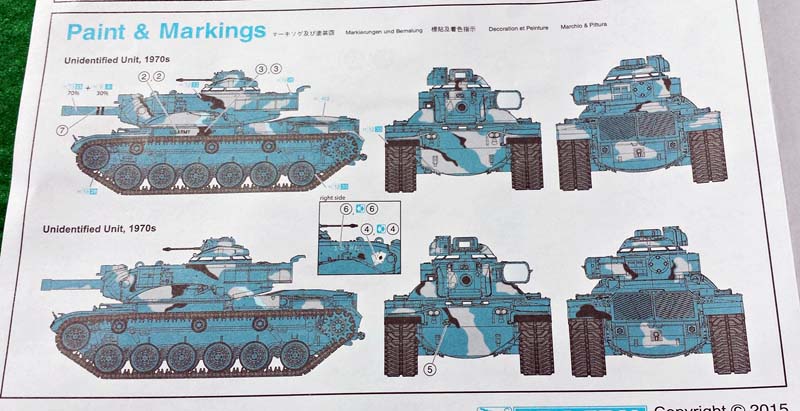
The instruction booklet is printed in black and white manual contains 19 steps. On the first page you will find a sprue map which shows all the frames and parts distribution. The instruction are clear, but sometimes require using the ref photo to determine the exact position of the part. Steps 1-12 are focused on hull and suspension assembly, the remaining 6 show how to make the turret, the last one illustrates the final assembly. On the last page Dragon models provides two paint schemes. Both are marked as vehicles from unidentified units, 1970s paint in winter verdant MERDC camouflage. It's a bit of a shame that there are no other paint schemes to allow the option to cover more of the many units that were equipped with this vehicle. Dragon Models, more research work would be very appreciated.
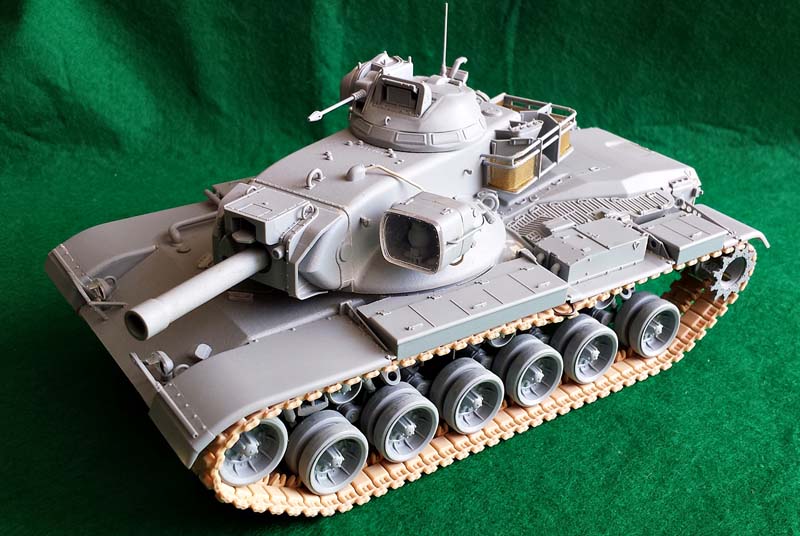
The Build
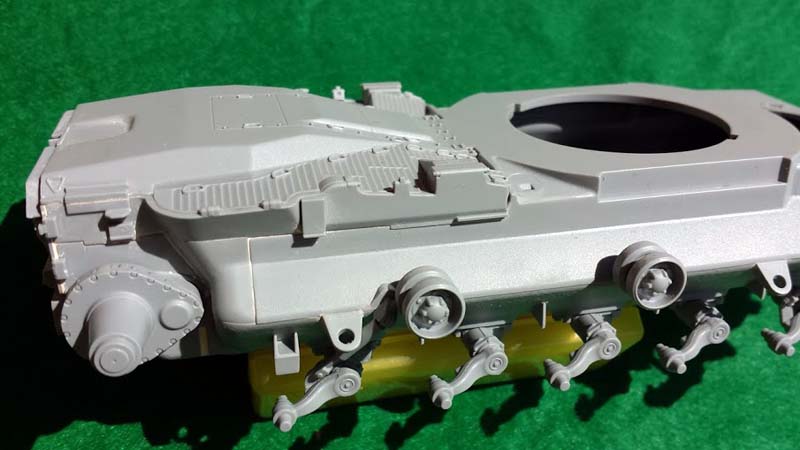
The constructed the model according to the instructions. I started with the wheels. The drive sprockets are made up of four parts, The road wheels need four parts to build each wheel; inner hub, rear hub, and 2 x road wheel outers. It requires a lot of work to create the full complement of road wheels and the two idler wheels but the final effect is worth the time spent with them. I realize that to facilitate painting you could glue the tyres on later, but before the painting I always try to glue as much as is possible. I also checked the track and sprockets fitting, all fits very well.
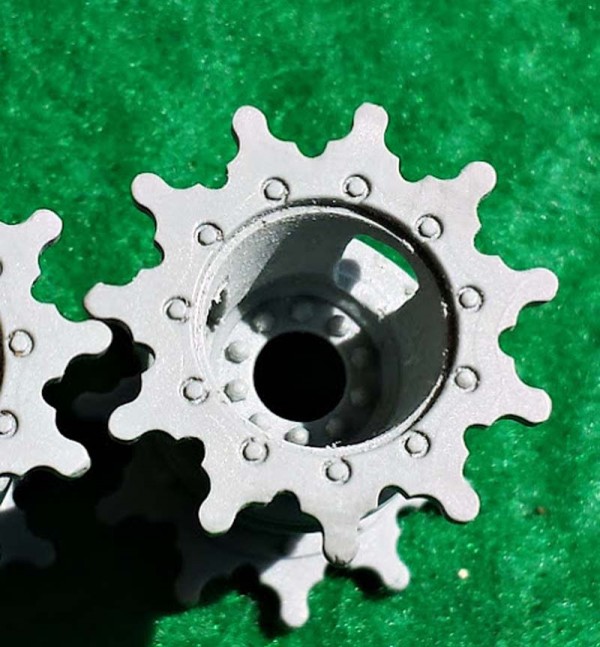
When I looked at reference photos I noted that almost all drive sprockets have three mud holes. Then I started modifying the Dragon sprockets, and cut out these holes, I drilled pilot holes and used a combination of hobby knife and sanding to form the holes and achieve the slightly oblong shape. This took some work, but the drive sprockets now look more of a match to the original.
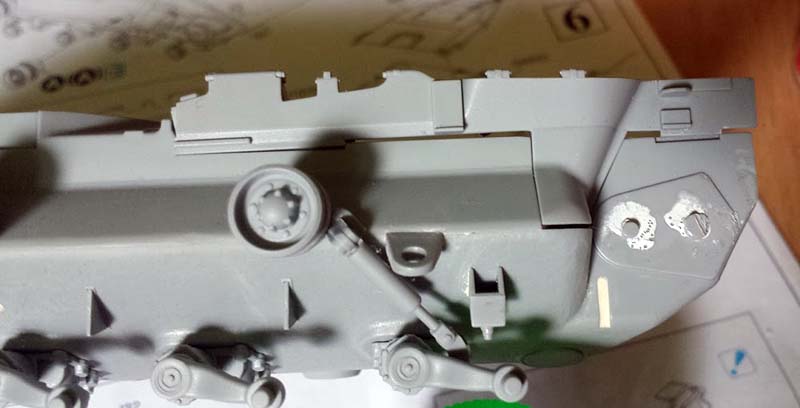
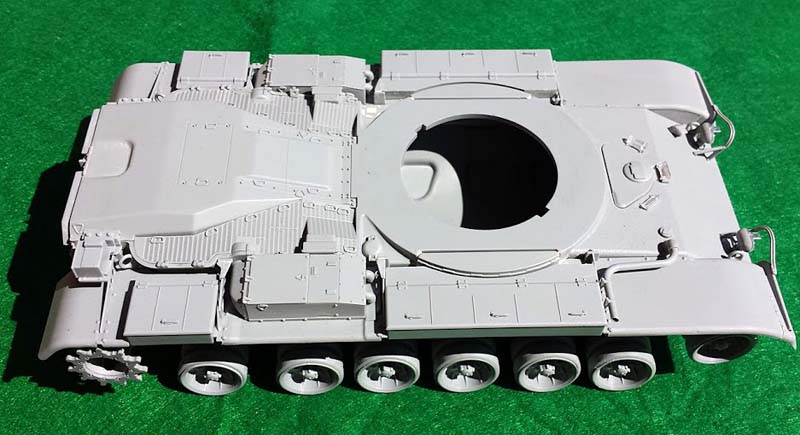
Next, I tackled the suspension assembly. First, I glued the lower and upper hull together, they fit each other really well. Next I removed some details that is for a different M60 version and used some putty for cover unnecessary holes. Then I could begin to add suspension details like bump stops, swing arms and return rollers. All parts fit very well. When I glued each swing arm in place, it could still move up and down so you have to be careful to make everything equal to each other. One note: after gluing torsion bars in the place as designated in the instructions, the gap between the 5th and 6th road wheel is too big and that is incorrect for this vehicle. Fixing this issue is very easy, you need to remove the mount on the last torsion bar and then it's possible to move is closer to the correct position.
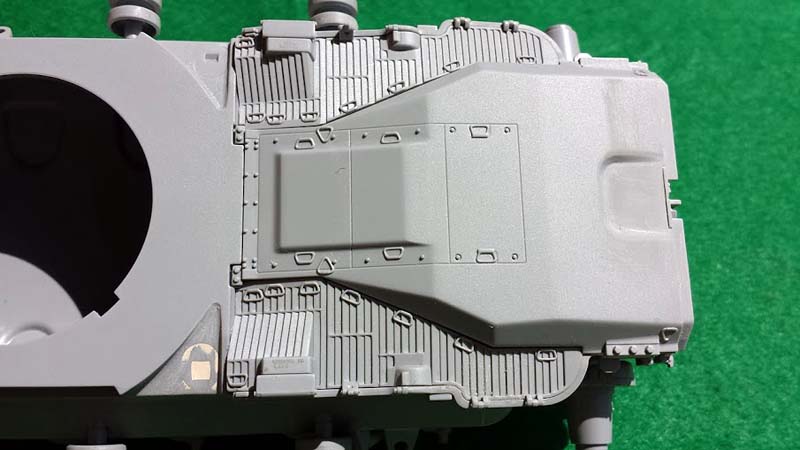
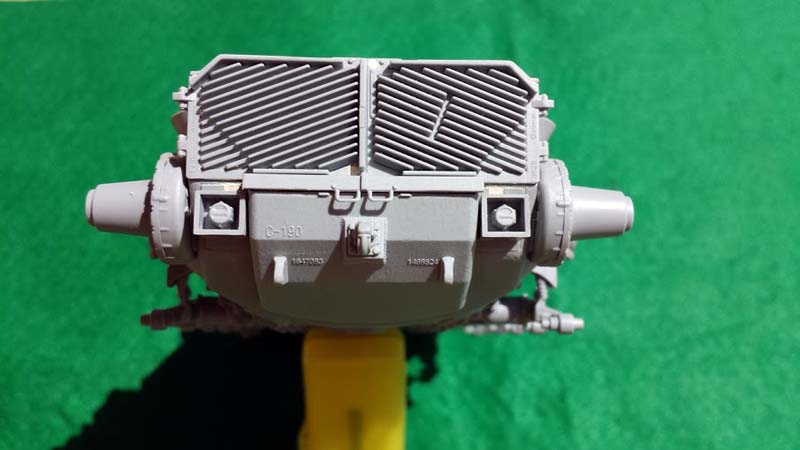
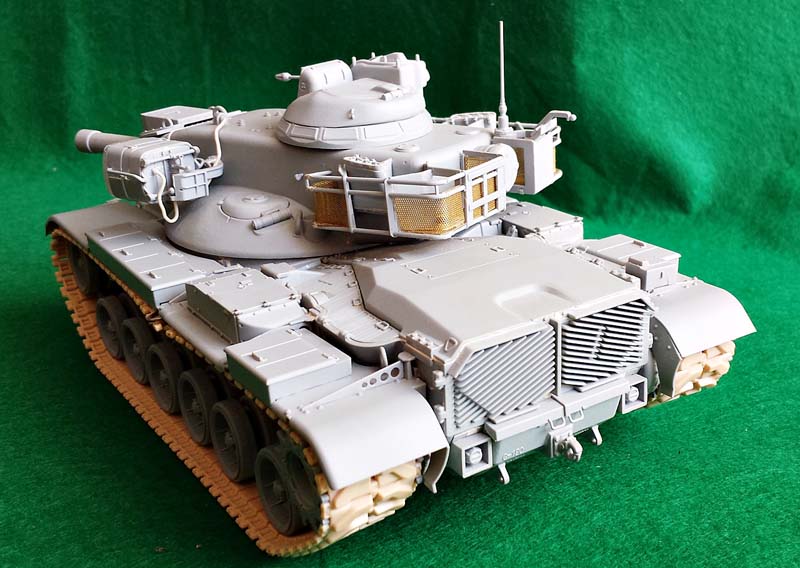
When I finished the suspension I started work with engine deck. Unfortunately I had some problems, some parts don't fit too well. To glue these parts together I used cyanoacrylate glue and next I filled the cracks with acryl putty. Despite minor fit issued engine deck looks really nice, it has a really good detail and these handle grabs looks cool.
I then corrected another of Dragon Models errors. The kit comes with two fuelling ports which is incorrect, so the left one should be removed. I just placed putty in the mount for the fuel cap.
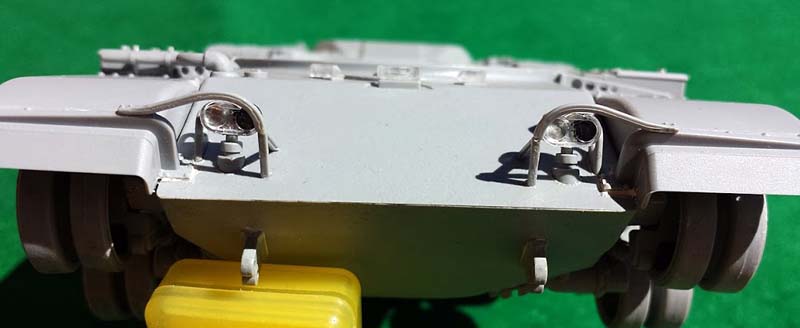
Later I made the rear part of the hull. I only I had to remove one pin mark, which was located in visible place, beside this everything fits perfect and assembly went very quickly and to good effect. The hull body was finished so I could start work on the fenders and other details, details such as the drivers periscopes, heater etc. I must mention that the plastic fenders look very nice, they are thin and work with these parts does not require a lot of time. Equipment on them also didn't bring me any problems as did the rest hull parts. Only one thing that I improved on a little bit were the headlights. To make them more realistic I glued a piece of silver foil between the plastic and clear parts, it has imitated the mirror inside the reflector.
When the hull was finished I started work on the turret. Most of the parts fit together very well so building this element was fast. The turret rack assembly was a little bit hard to do but other parts fit very well. On the turret example you can see how well Dragon mapped all the details, all bolts and rivets are sharp and crisp. As with the hull the build was straight form the box except the wire between turret and search light, that I made of thin electric wire. During this stage of work I noticed two more kit errors. Firstly there is no tow cables in the box despite the fact that you have to glue their attachments on the turret sides. Secondly on the box art Dragon Models shows an M60A2 with the dust cover on the mantlet, reference photos shows, that most of tese vehicles had them, but if you want your model with a dust cover you have to make it from scratch because Dragon Models didn't provide it inside the box.
The last thing to do was track mounting. Earlier I glued all of the wheels using Humbrol Clear Fix and fitting the tracks. It turned out that they are a little bit too long so I cut off one link of each side. Then I connected them together and put on the chassis. The assembly was finished, now time to painting and weathering, can't wait.
Conclusion
Overall, this is a really good kit, allowing you to build an interesting model with a high degree of detail straight from the box. Quality is no different from any other new Dragon product, all parts quality is of a good level, also fit is very good, but the kit has some simplification mainly some of the dimensions and a few details are wrong. For me a few millimetres difference is not so important, but I know that some people pay attention to this aspect. The lack of tow cables and dust cover inside the box is the biggest issue, there are others that are easy to fix. Despite these drawbacks the kit is really interesting and allows you to spend a lot of time with the hobby and this is most important aspect for me.
SUMMARY
Highs: - high quality and level of details
- interesting subject
- DS tracks
- not very large fragmentation of partsLows: - lack of tow cables and dust cover
- drive sprockets without mud holes
- no clear parts for commander periscopes
- fit issues with the turret basket
- only two marking optionsVerdict: This is not as easy kit as you might expect seeing the Dragon label. However it allows you to build M60A2 Starship model with good level of detail straight from the box.
Our Thanks to Dragon USA! This item was provided by them for the purpose of having it reviewed on this KitMaker Network site. If you would like your kit, book, or product reviewed, please contact us.
I have to agree slightly with people on both sides. Matt's efforts in building this are fair and informative, yes he never got all of the issues, but he did provide information on some aspects and provided modellers with a look at how the model may look when assembled. What this does highlight to me is just how far Dragon Models have fallen in regards to the quality of their products.
I apologize for the harsh tone of my comments - I was having a bad day. But my point stands - the kit is not worth the effort, considering that better and cheaper options are available. I understand that modelers can have various approach to their hobby and not everyone pays attention to accuracy and I have no problem with that.
But still, there is a difference between a decent kit that only rivet counters can find flaws in (there are no perfect kits, but I'm a modeler and I like fixing good not-perfect kits), and a kit so bad that basically no part is really correct...
Yes. Actually so is the Academy turret. Both are most likely a result of misinterpretation of the drawings in Hunnicutt "Patton" book. Only the AFV Club turret shape is correct.
Isn't that kinda critical in a "/review"?[/quote]
Yes, but so is ease of assembly, and not having to make corrections of said inaccuracies that shouldn't need to be corrected, especially in these days of "super-accuracy", multitudinous reference material, slide-mold technology, CAD-design, and above all, ACCESS to the real thing. SOME of the errors in the DRAGON -A2 kit are just plain STUPID, and THAT, Gentlemen, is not Matt's fault, but DRAGON's Engineering and R&D departments...
Yes. Actually so is the Academy turret. Both are most likely a result of misinterpretation of the drawings in Hunnicutt "Patton" book. Only the AFV Club turret shape is correct.[/quote]
Thank You, Pawel!
Isn't that kinda critical in a "/review"?[/quote]
Yes, but so is ease of assembly, and not having to make corrections of said inaccuracies that shouldn't need to be corrected, especially in these days of "super-accuracy", multitudinous reference material, slide-mold technology, CAD-design, and above all, ACCESS to the real thing. SOME of the errors in the DRAGON -A2 kit are just plain STUPID, and THAT, Gentlemen, is not Matt's fault, but DRAGON's Engineering and R&D departments... [/quote]
Agreed 100% but in that case, just call it a build log. A review typically passes judgement on the accuracy of the kit. I for one am very interested in how easily a kit goes together but am just as interested in whether the kit is accurate or not.
Too many "/reviews" out there (not pointing fingers directly at this one) simply consist of pics of the sprues and some babbling on about what's in the box.
If you want to see how a real review is done (IMO) go over to PMMS and read some of Terry's stuff.
[/quote]
I for one, have visited PMMS innumerable times! Sadly, Terry Ashley hasn't been able to do much on PMMS since May of this year, due to illness. I also like to visit the "CYBERMODELER", "MODELING MADNESS", "HYPERSCALE" and "MISSING LYNX" hobby sites- A lot of info can be gleaned from these sites, as well...
I DO miss PMMS, and Terry was very good at picking up the latest info of new kit releases, publishing initial "in-box reviews", and build articles by various authors and modellers...
I wish Terry luck in getting his health-issues resolved...
Please don't take this the wrong way-
The "/reviews" of kits with just photos of sprues that you mentioned, are generally referred to as "in-box reviews" in their by-lines; these generally entail a "what's in the box"-type of description, and not much more. They are only meant for us all to become initially acquainted with the kit in question. Sometimes, mistakes and omissions occur in these types of reviews, basically because they are meant to be simple, and not as involved as "in-depth reviews", or "build logs"...
There IS a difference between "in-box reviews", and "in-depth reviews", which take it a step(s) further, where the reviewer ACTUALLY removes parts from their sprues and dry-fits them, and then possibly even goes so far as starting to put said parts together.
Conversely, a "build log" generally entails a modeller assembling, detailing, painting, and weathering a model to completion, and this can run any number of pages full of text and photography, along with other modellers' commentary and/or advice. This is a much more involved process than an "in-box review", which sometimes even serves as an initial announcement of the kit itself, on hobby sites such as ARMORAMA and others, as well...


Comments