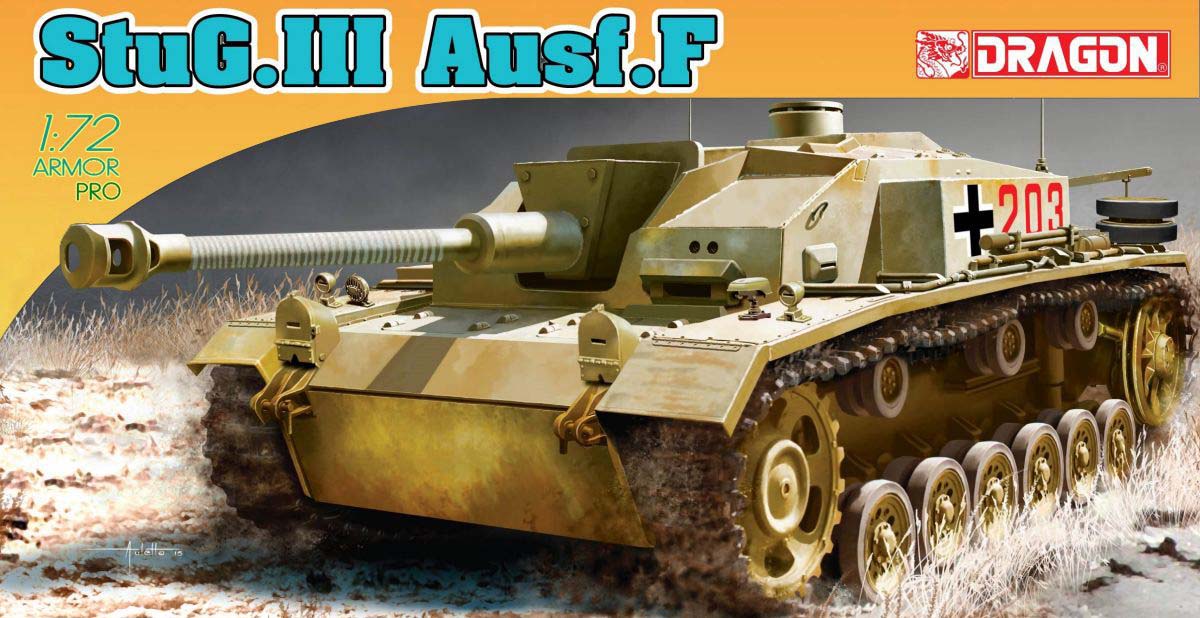
Something of an icon among German armour fans, the Sturmgeschütz III was produced in large numbers, particularly after the 75mm L/48 gun was fitted, and PzKpfw III tank production was terminated in favour of the cheaper, more heavily armoured and better armed StuG, with over 8500 units. The Ausf.F was the first to mount that long gun in a chassis little changed from earlier versions, though only 359 were produced in mid-1942 before being replaced by Ausf.F2 and then the much more numerous G.
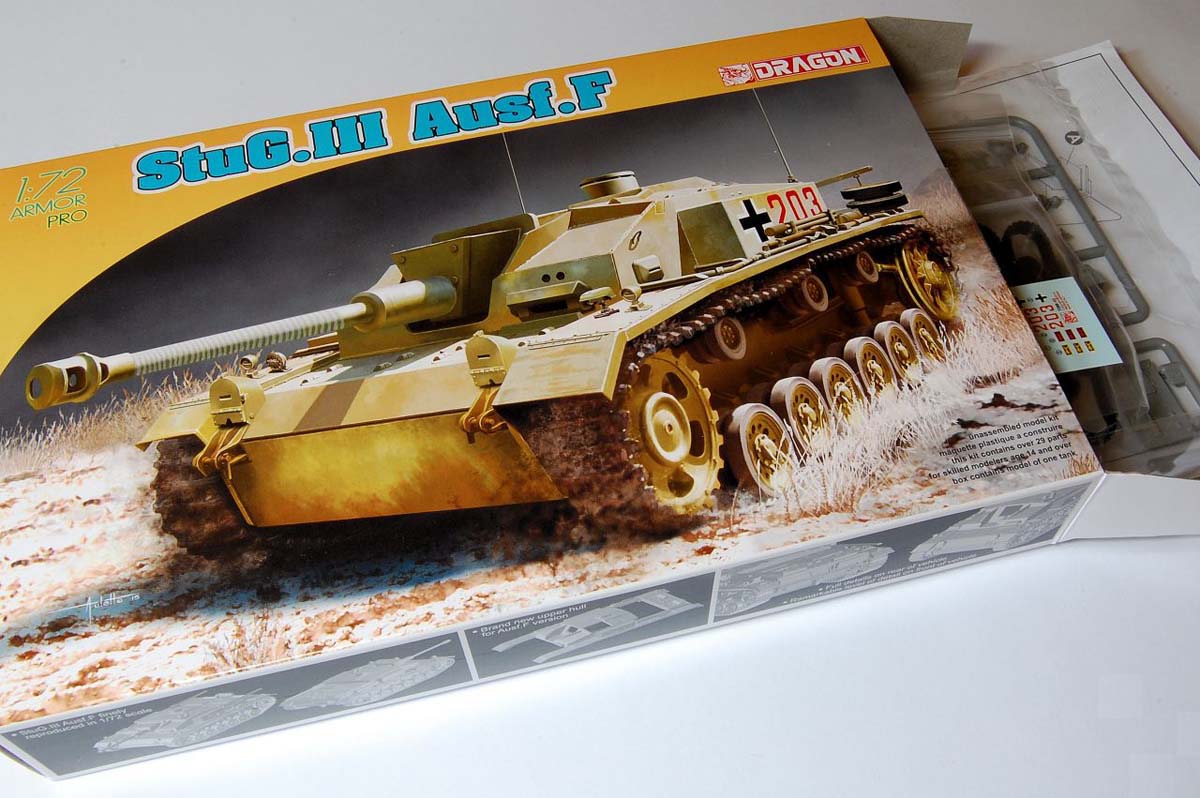
Dragon released a 1/72 kit of the Ausf.G in 2007, adding schurzen in 2010, with both of these kits having DS tracks, small etched sheets, spare wheels, opening hatches and tow cables, totalling around 135 parts. What we have here is something quite different however, with only 31 parts in the box telling us something has drastically changed.
Contents
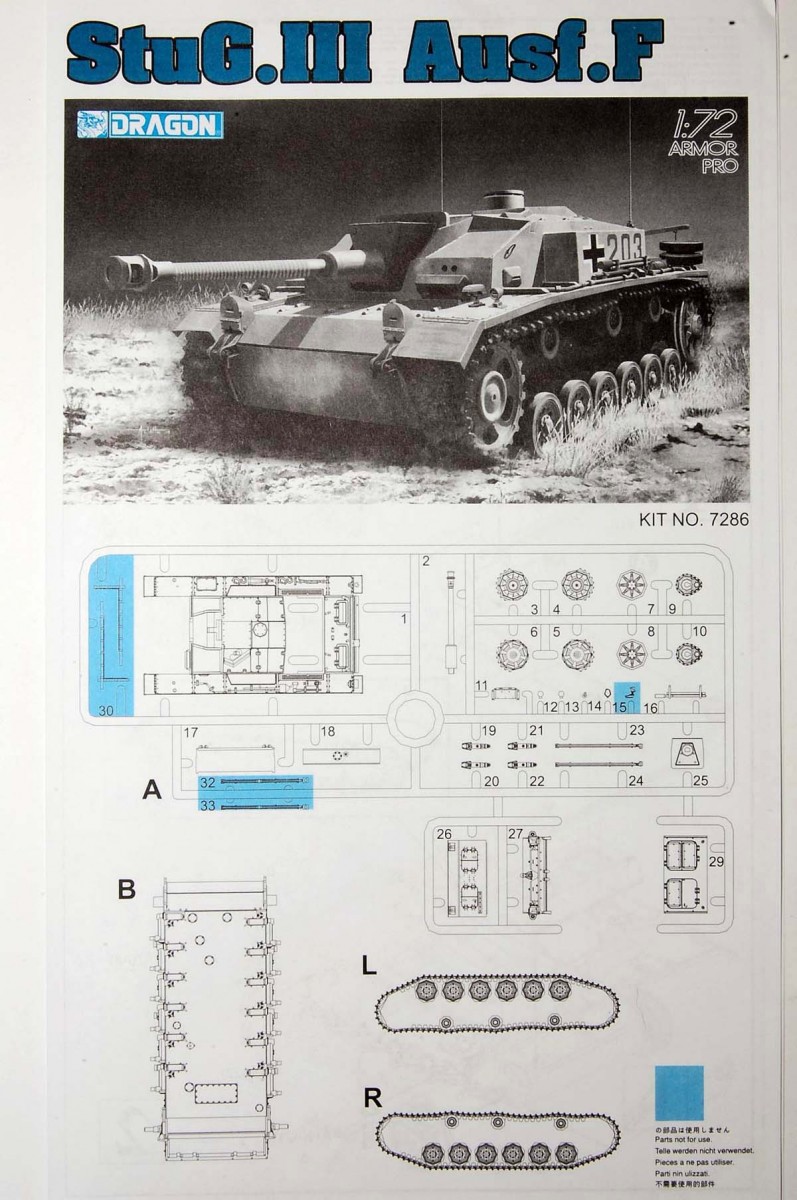
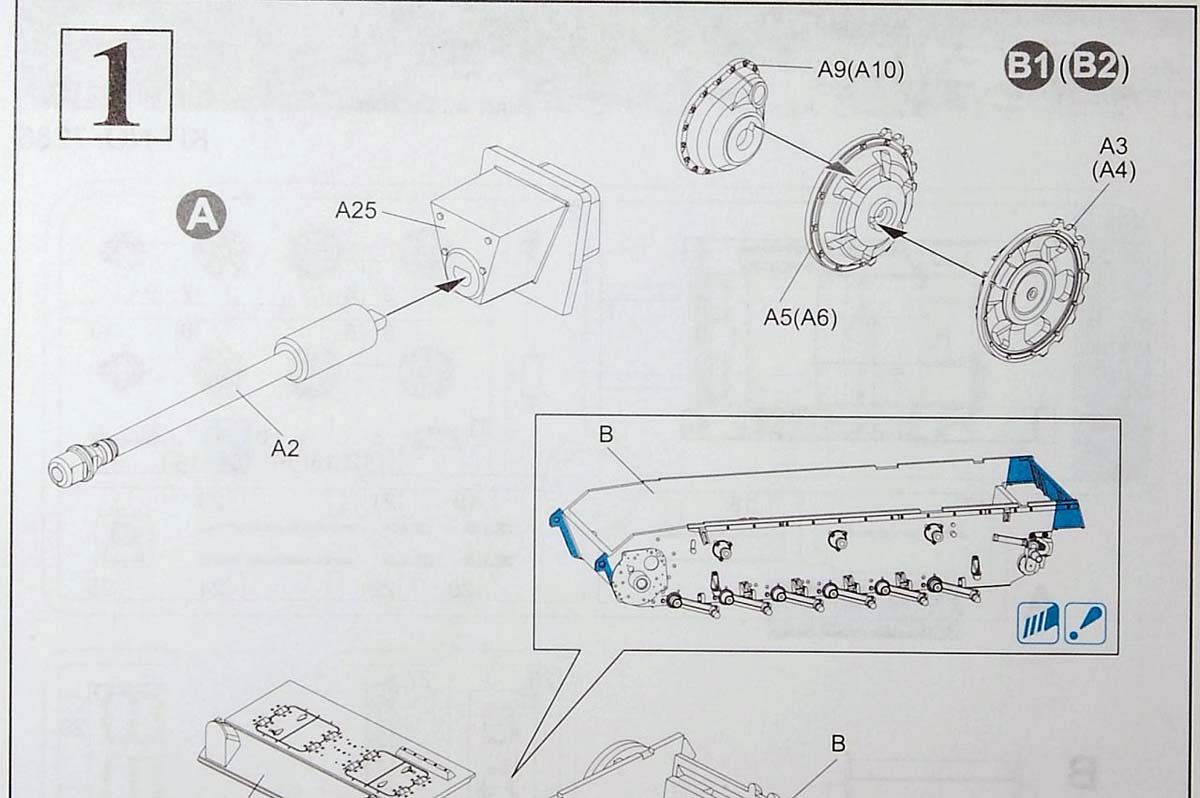
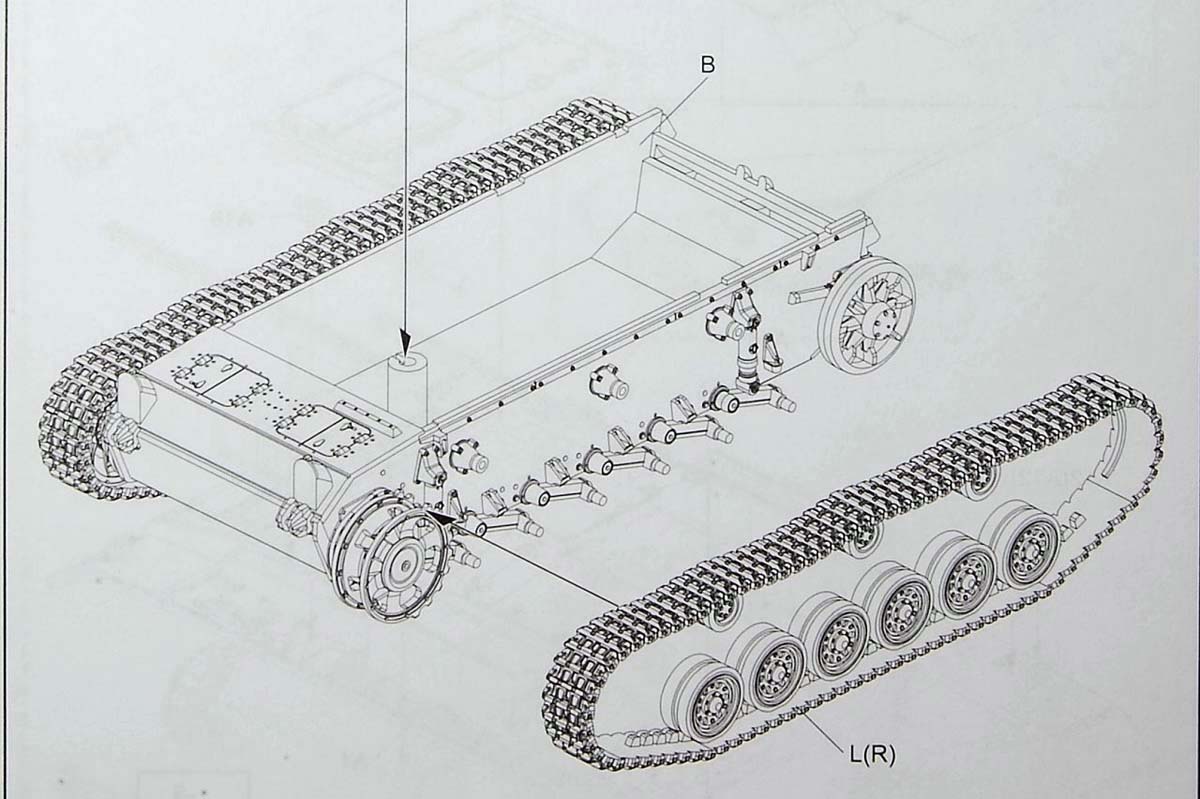
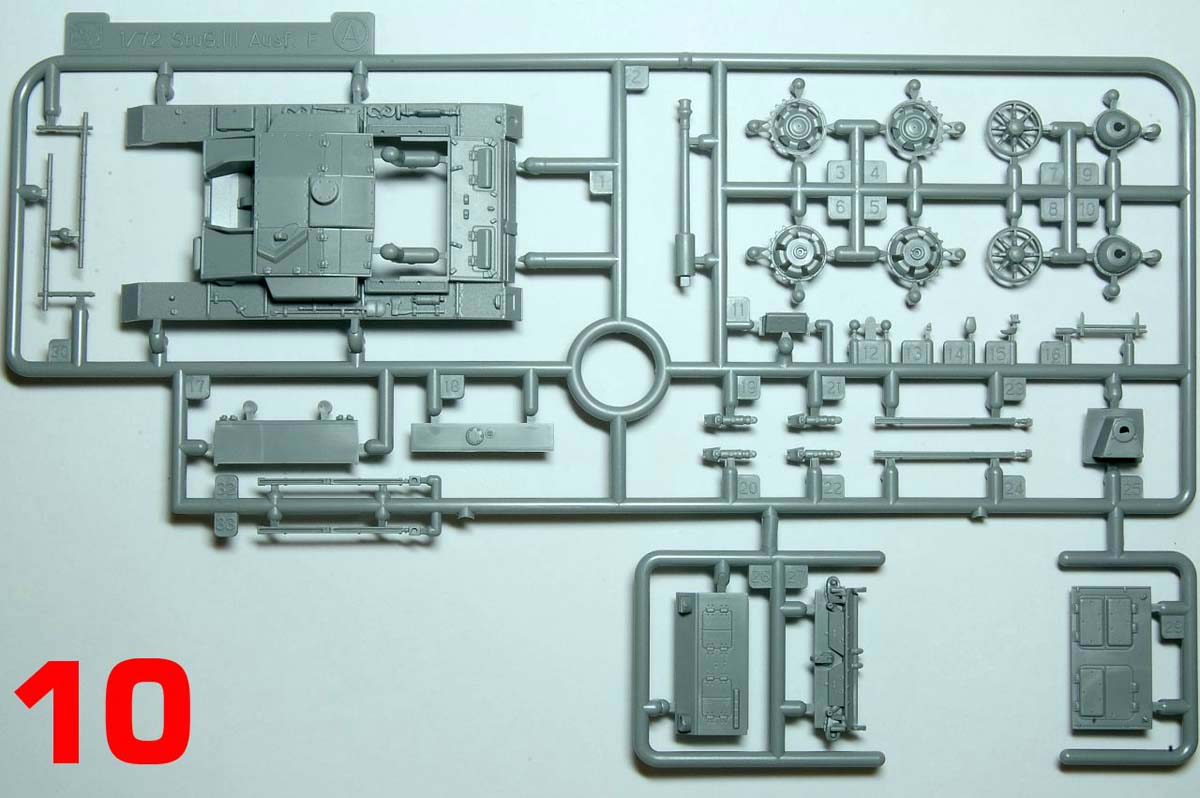
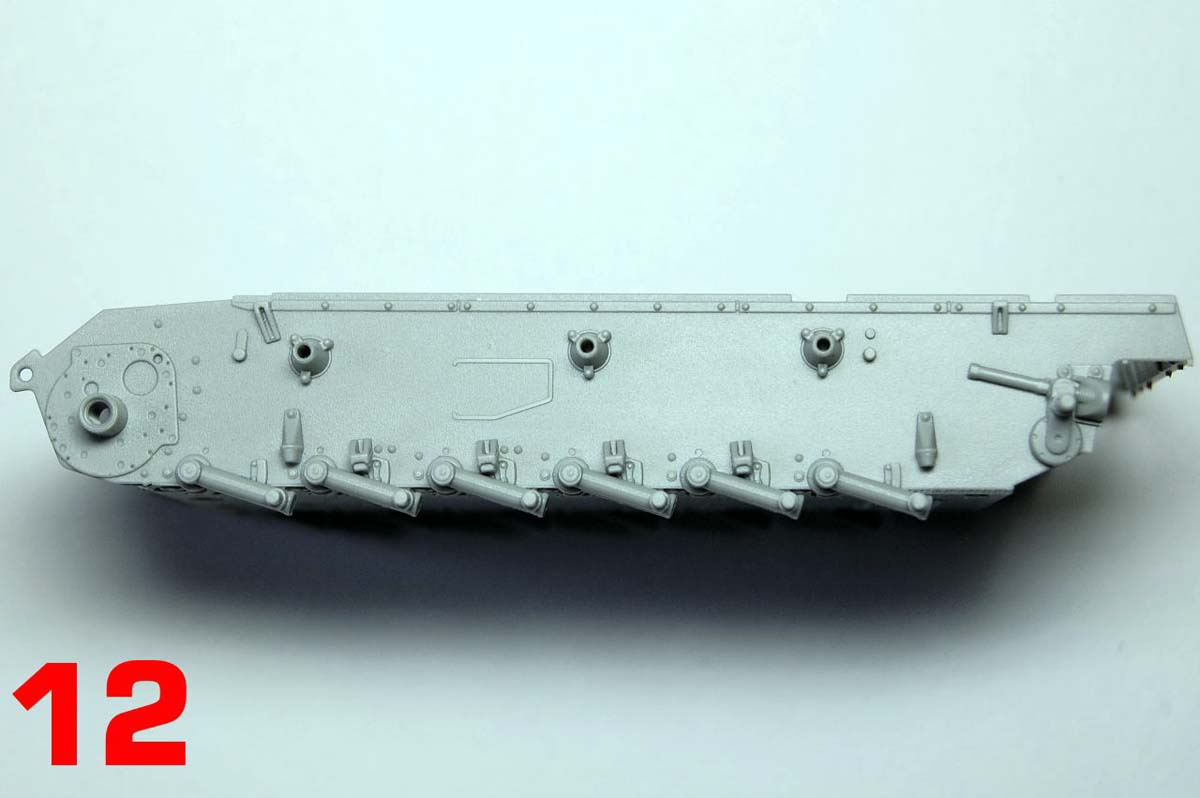
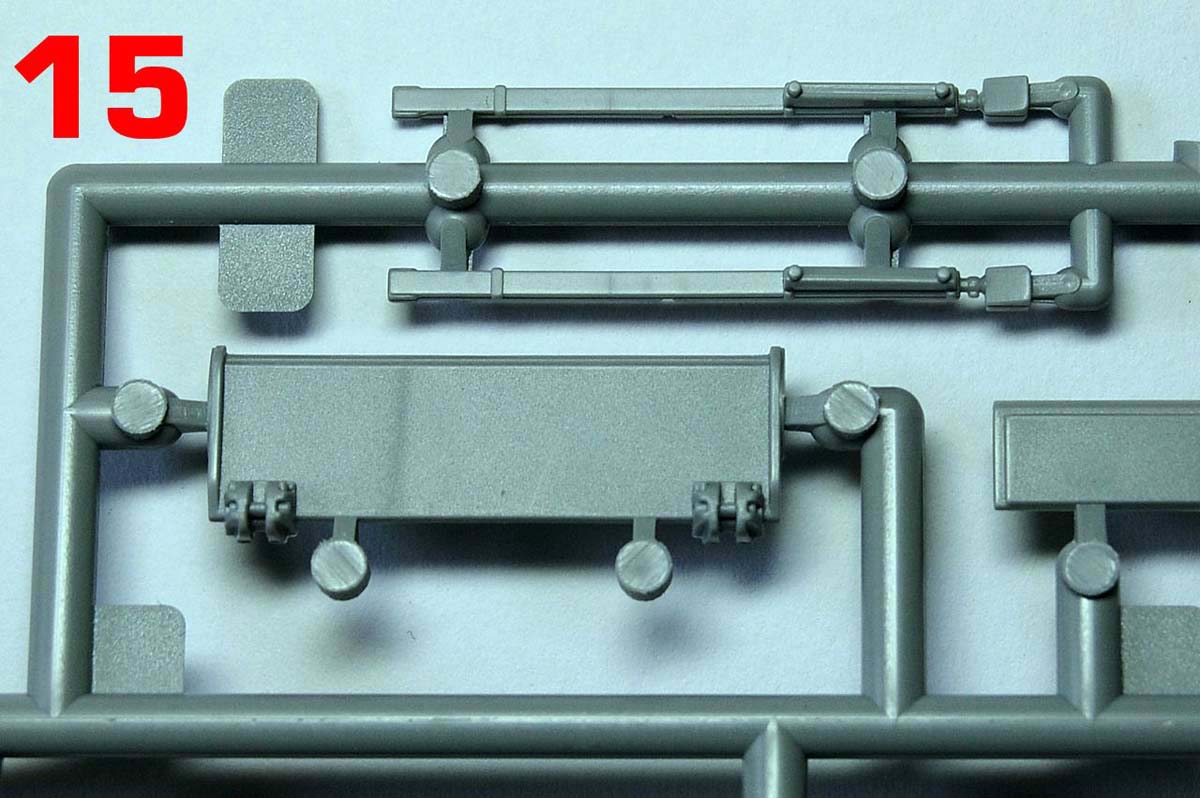
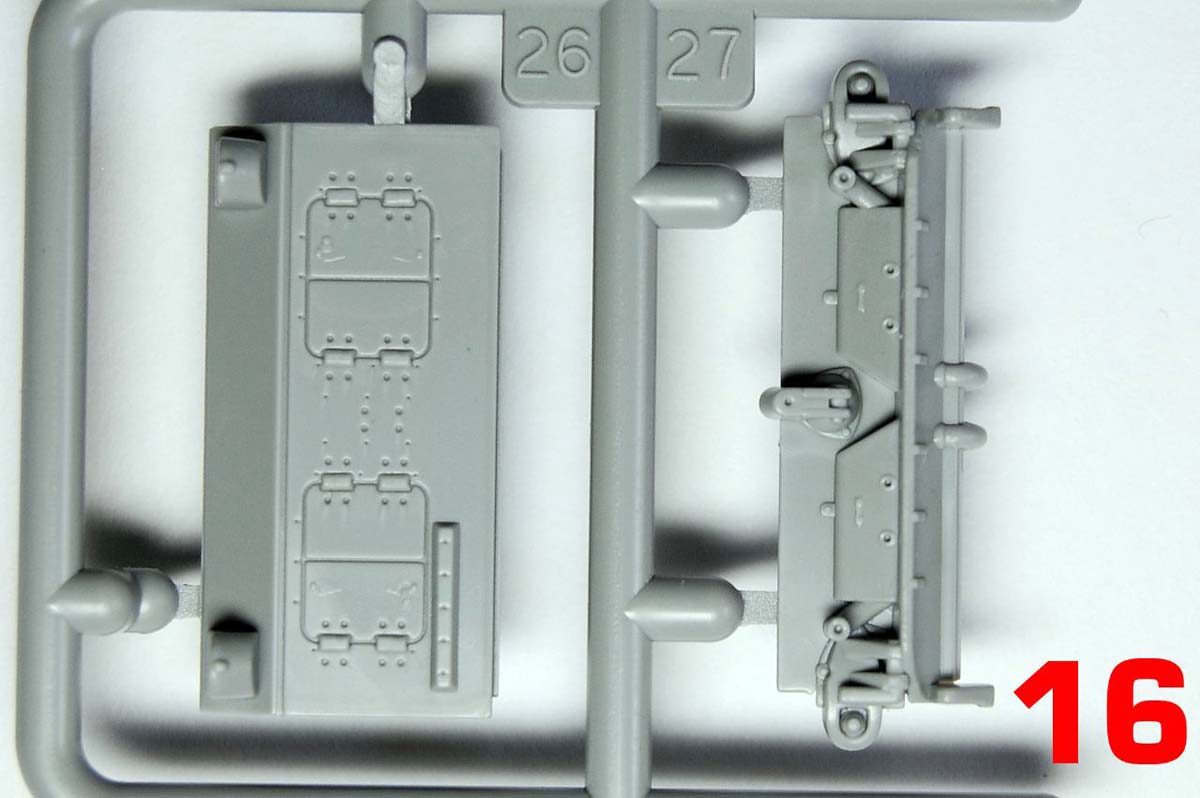
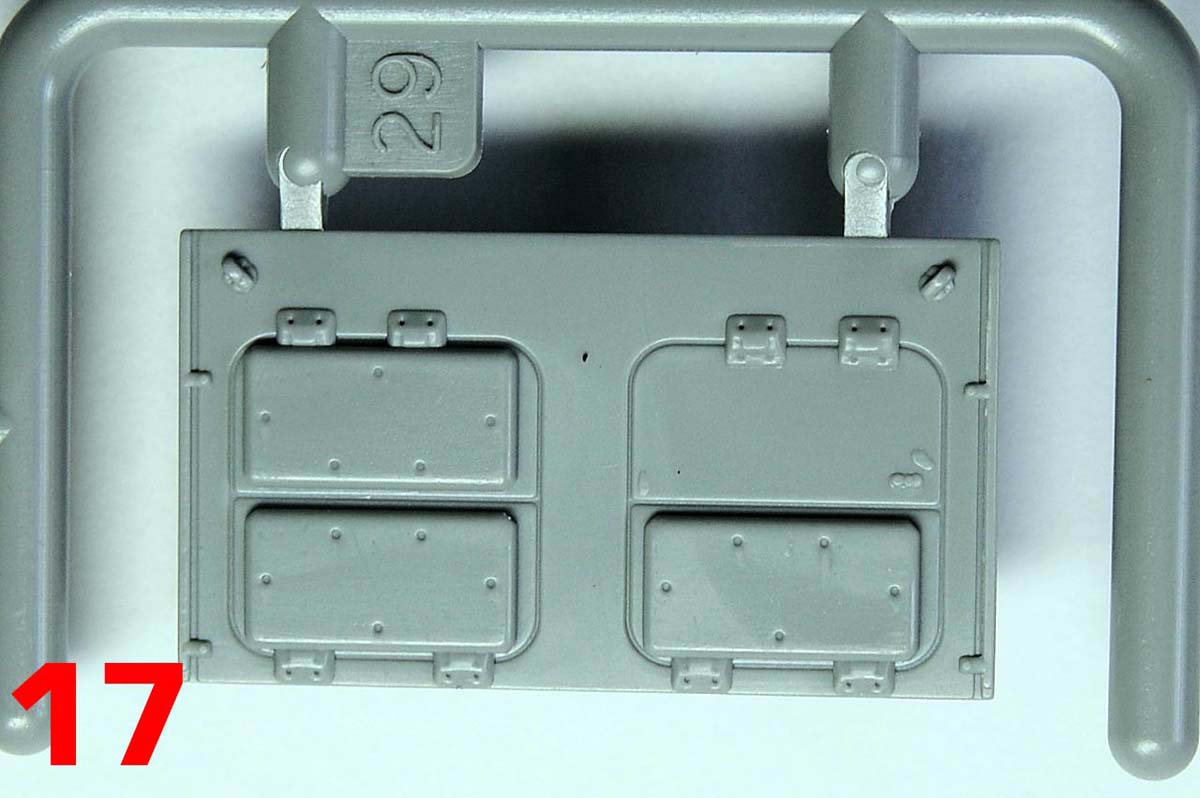
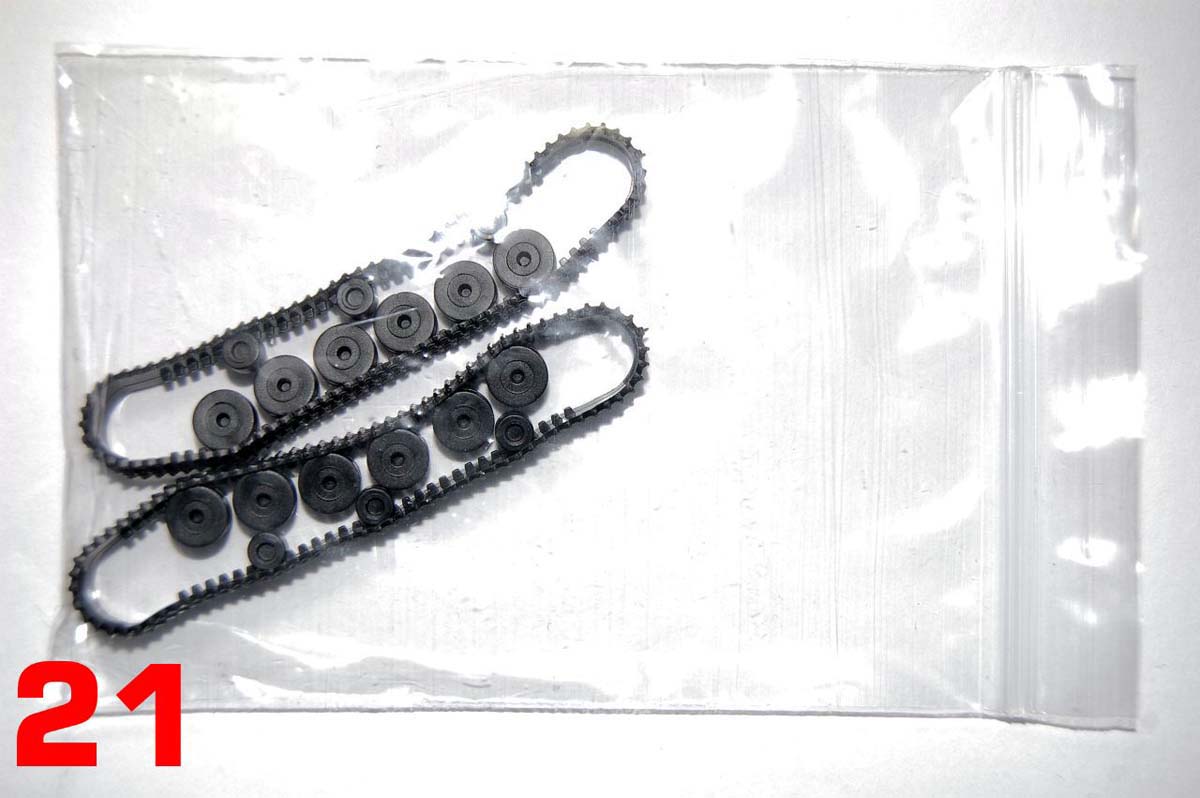
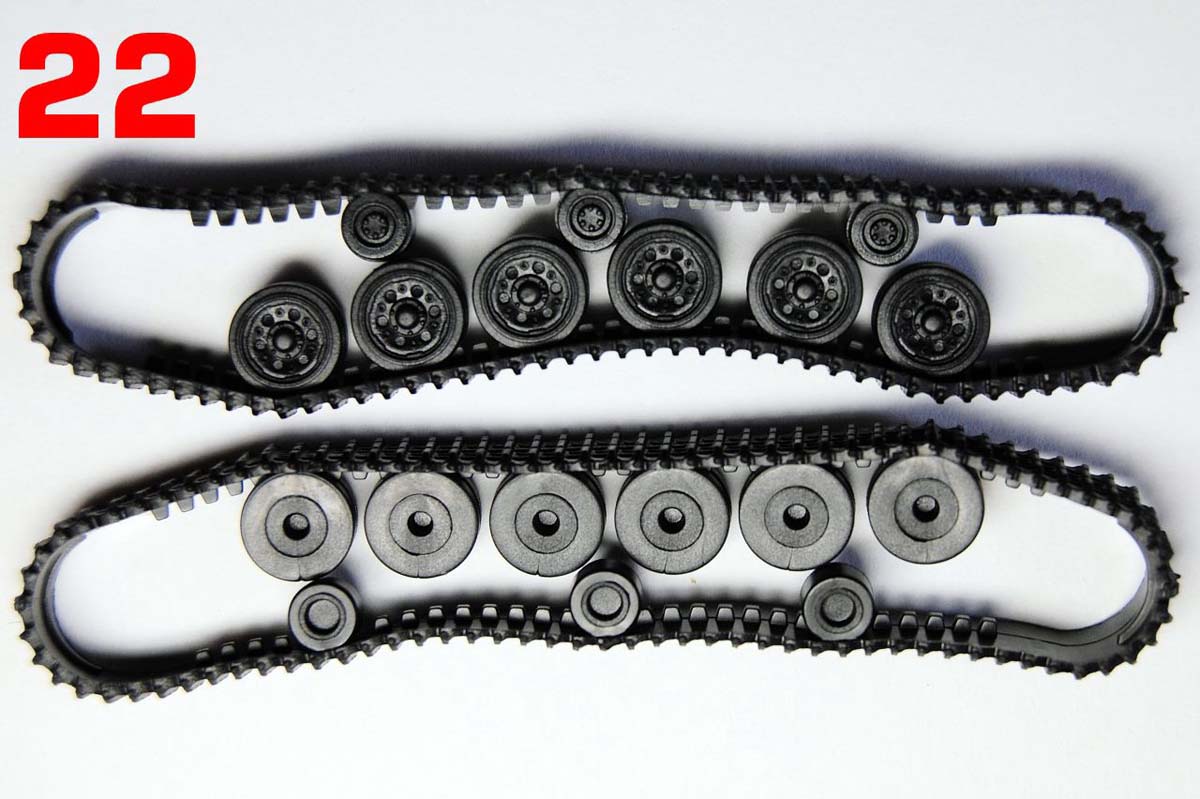
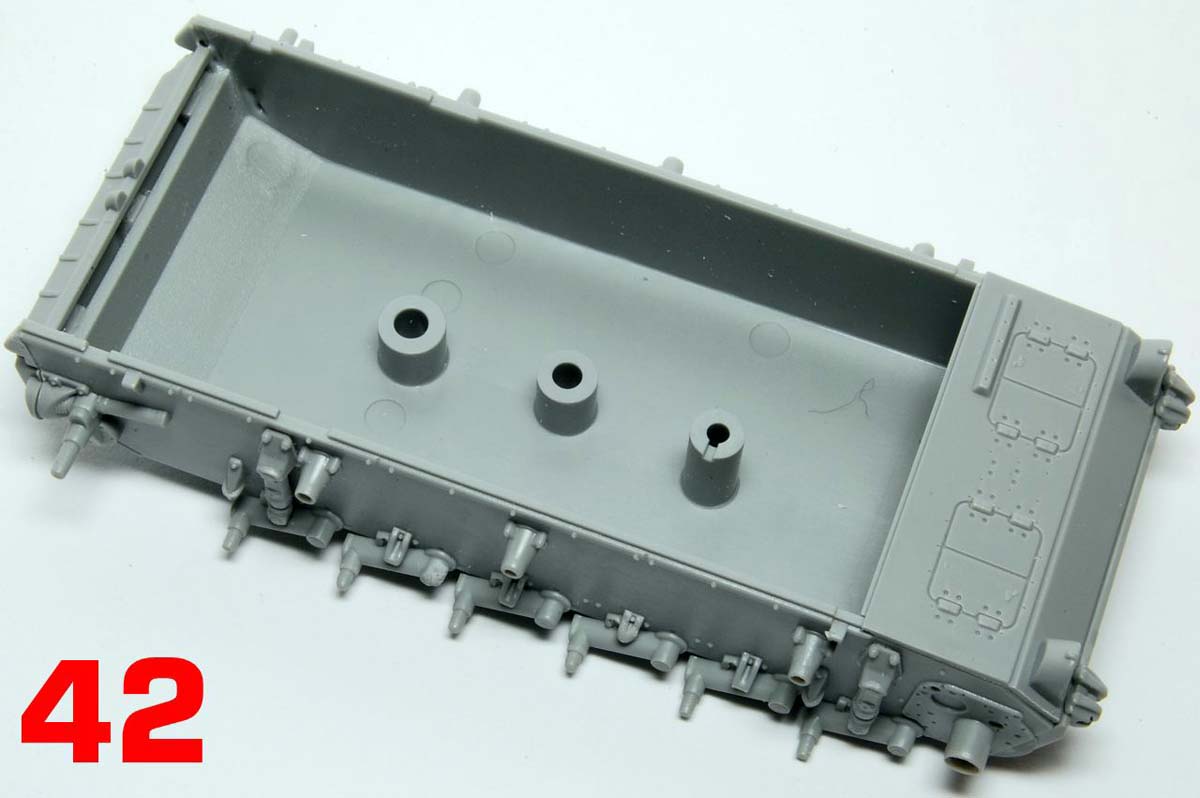
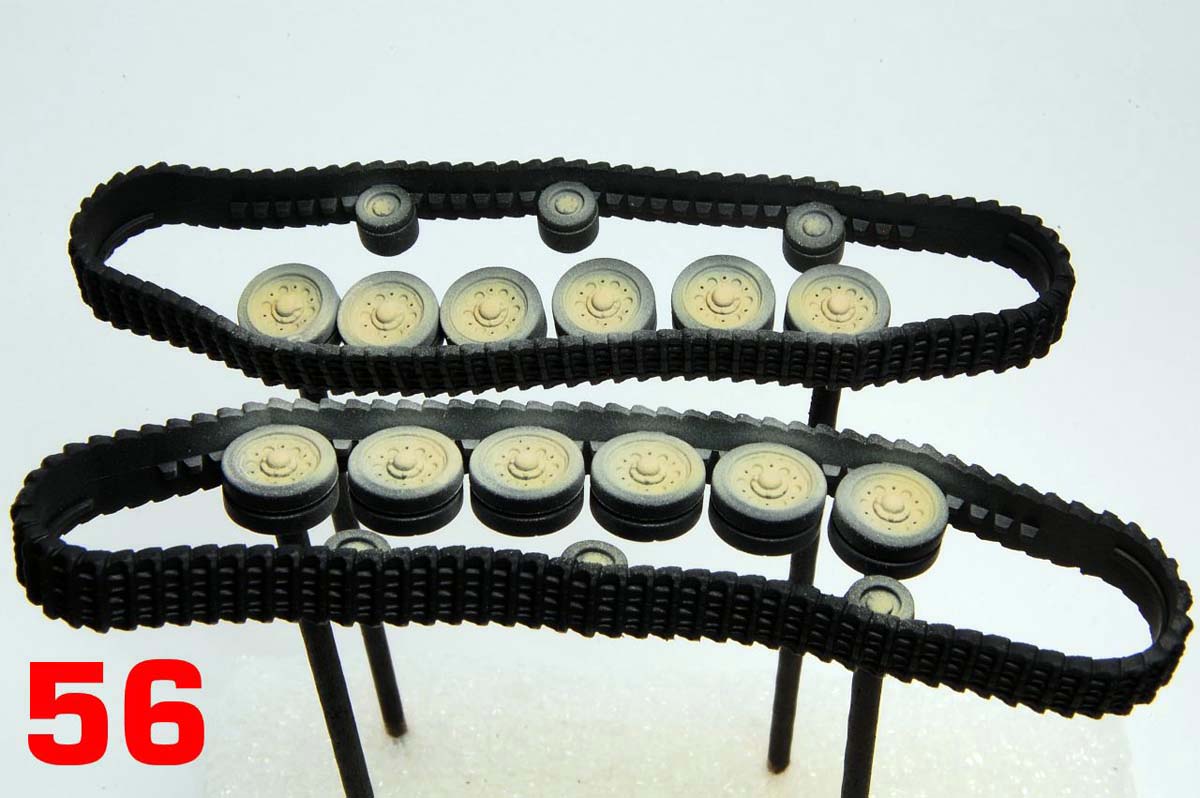
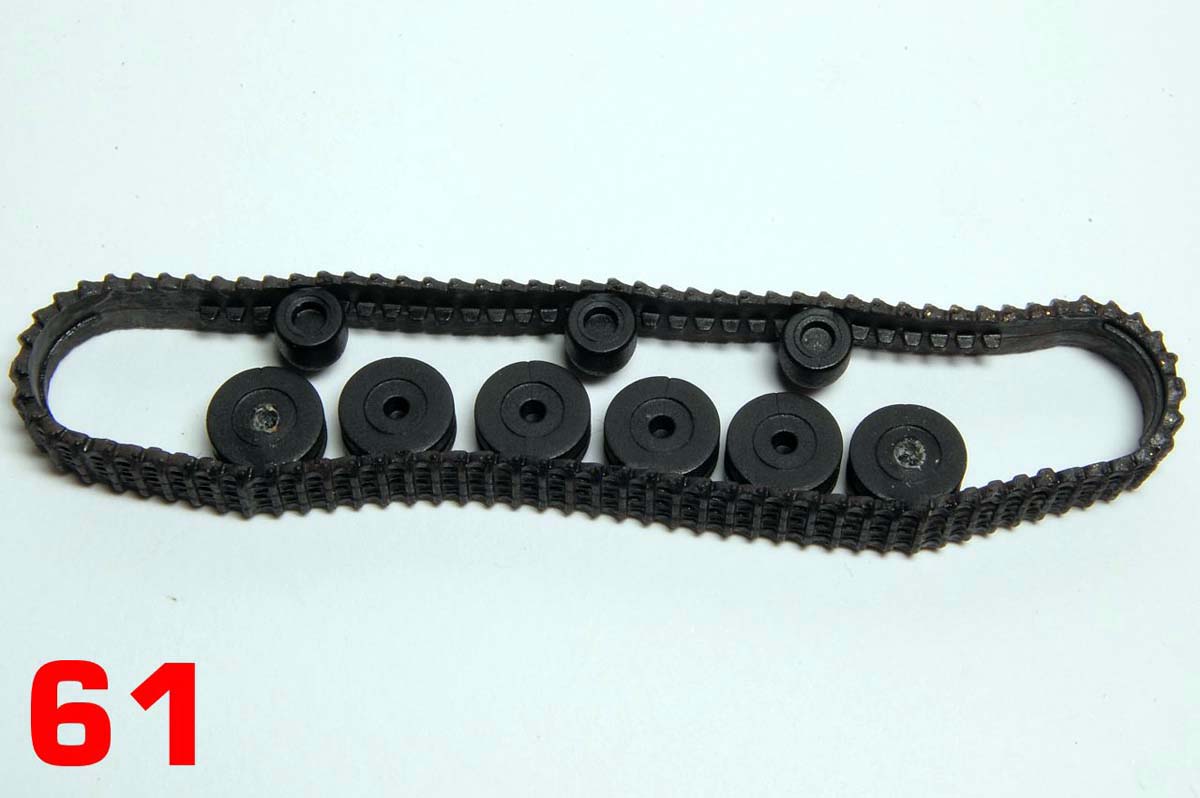
31 parts: the single sprue holds 28 of them (photo 10), then there is the hull (11, 12), with the final two parts being bagged separately (photo 21): this the left and right wheel and track units in a softish black plastic (22, 23). Each is a full track run with complete road wheels and return rollers moulded in place, but minus the sprocket and idler. Guide horns are represented as solid, being omitted from the locations into which the sprockets and idlers will fit.
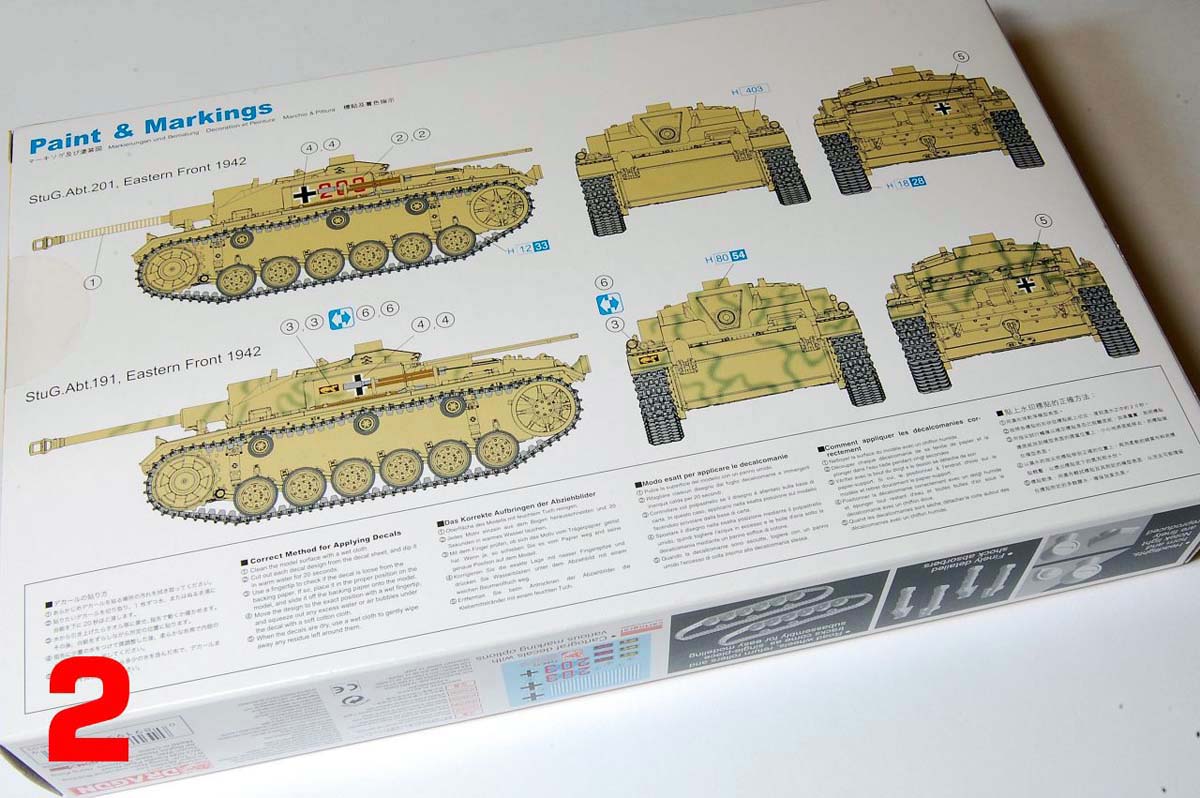
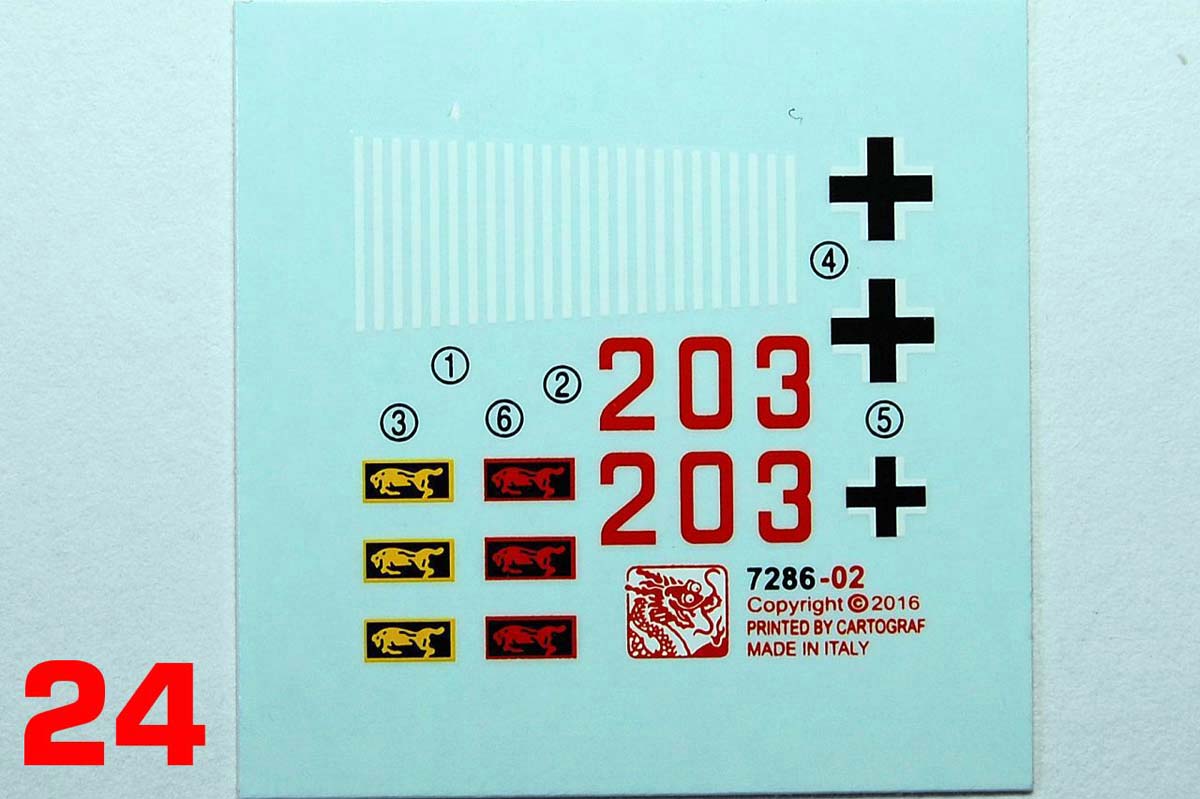
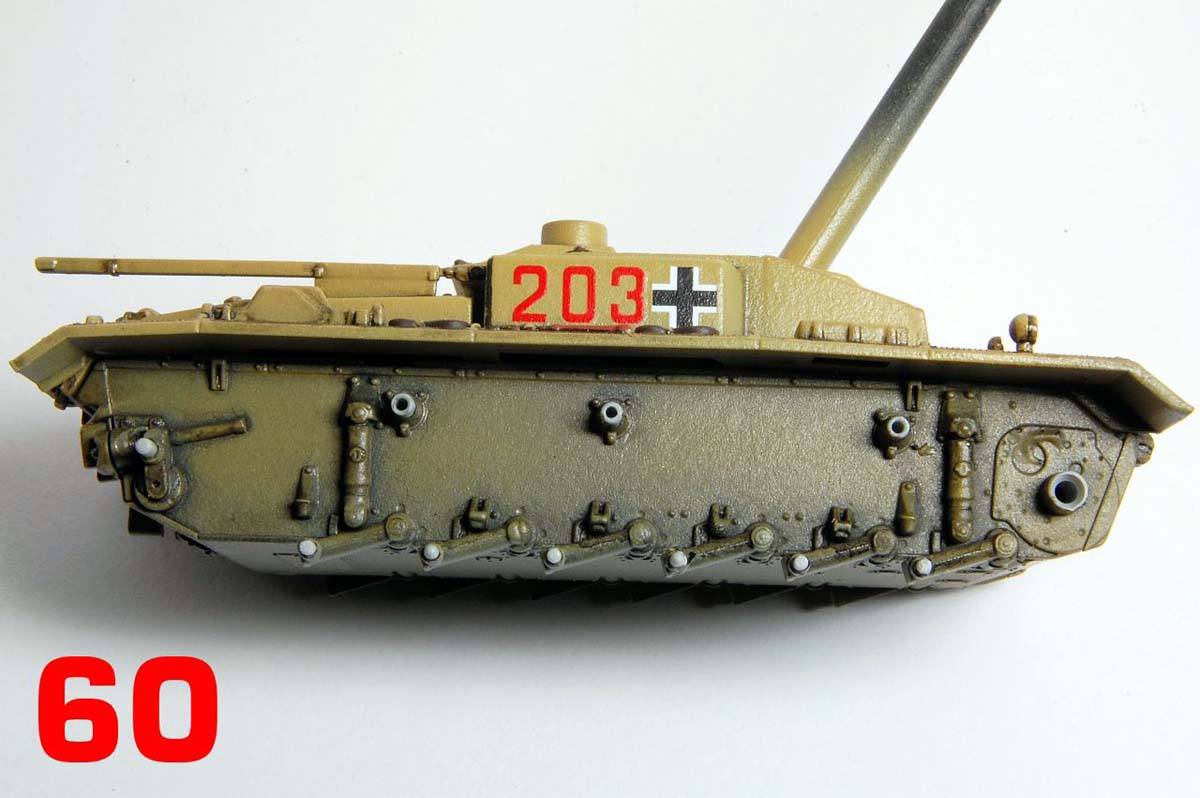
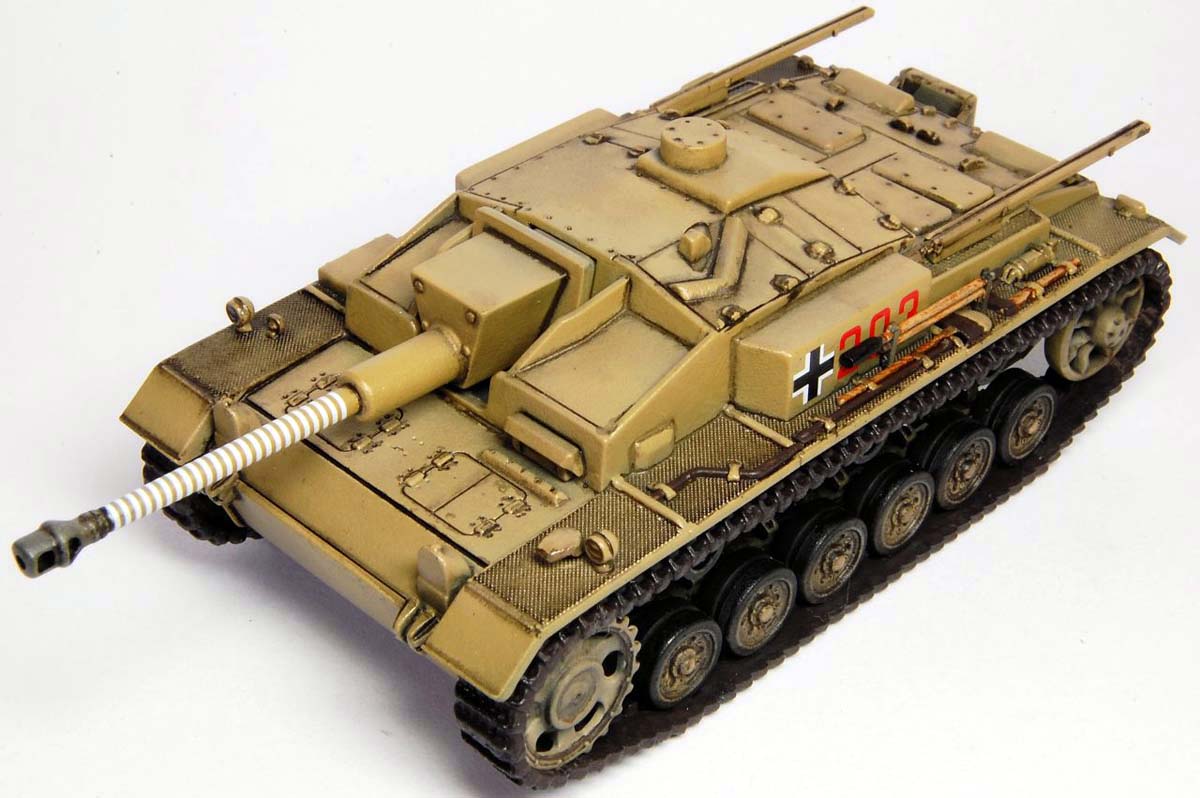
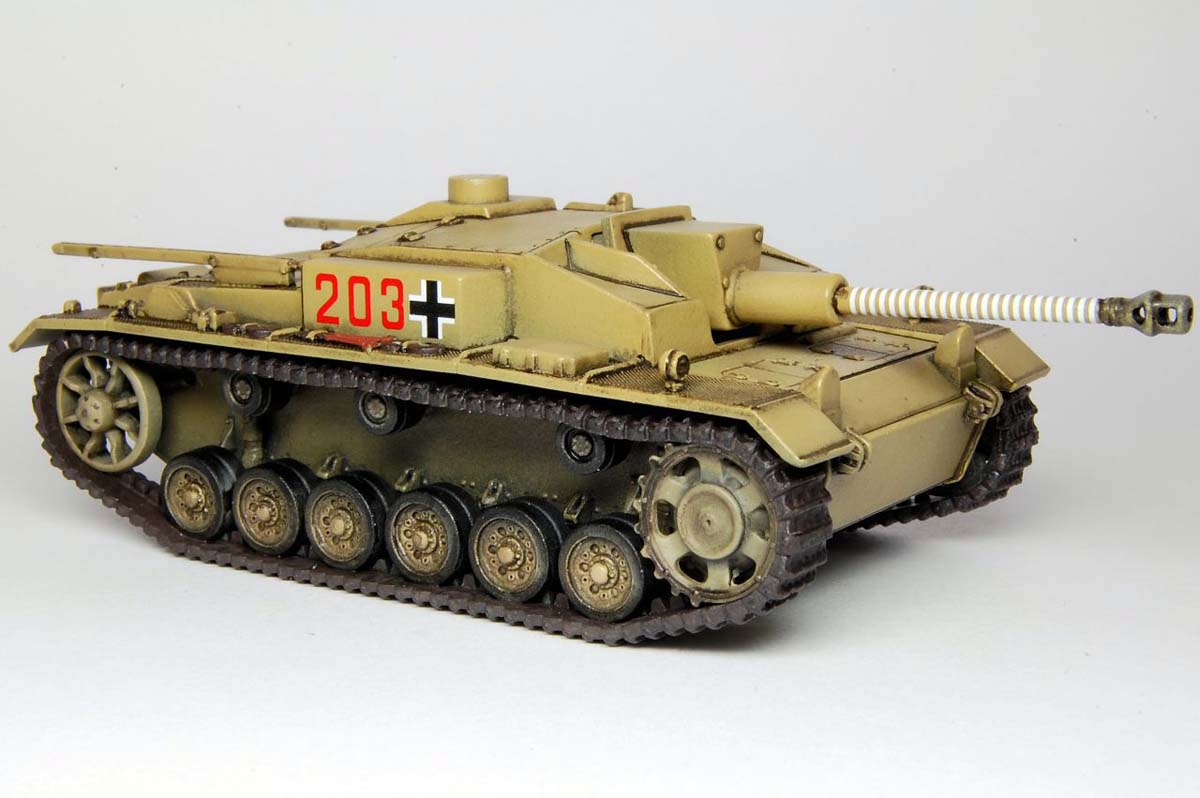
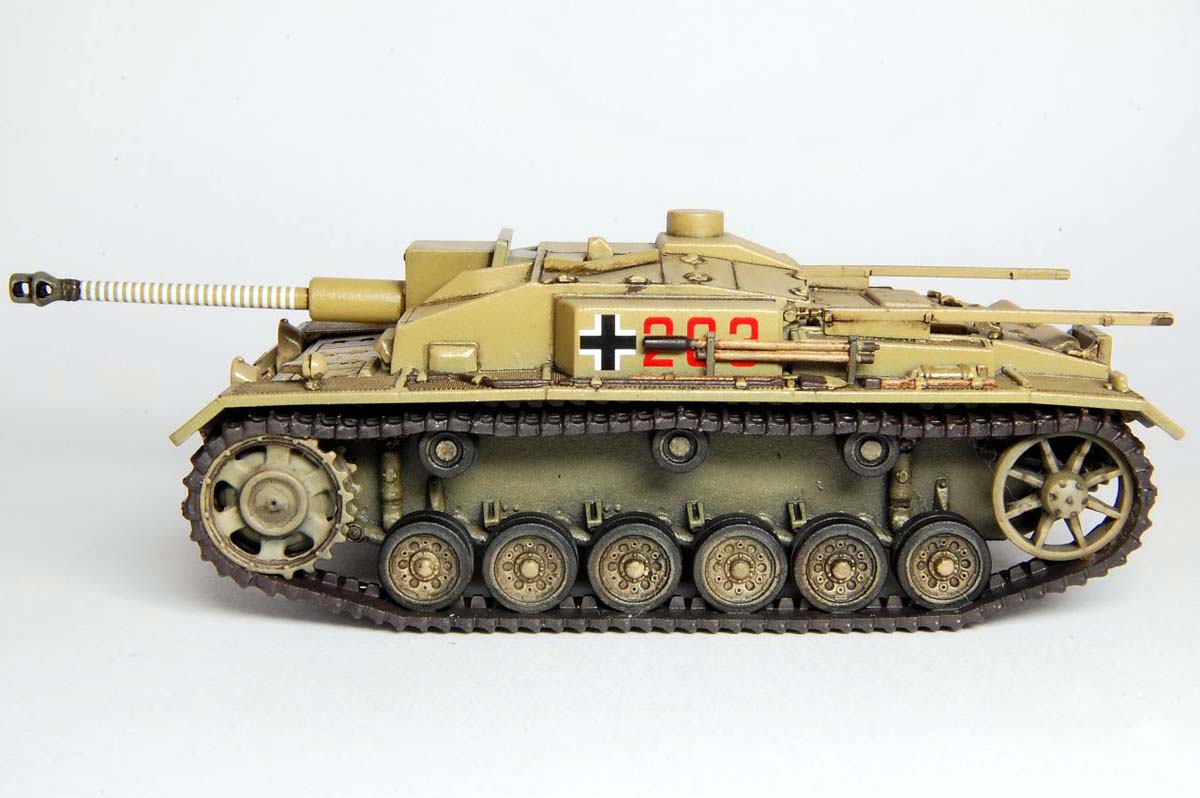
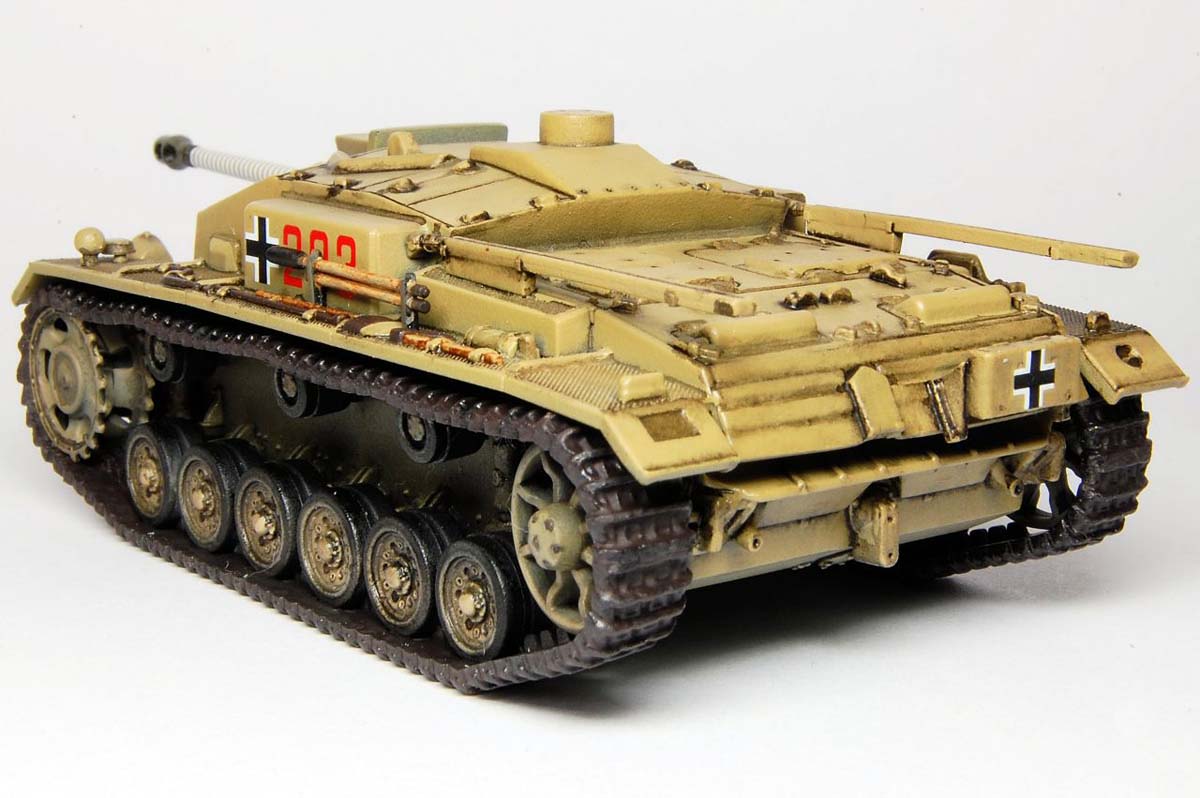
The decal sheet (24) provides for an all dark yellow example from StuG-Abteilung 201, Eastern Front 1942, number 203, with a remarkable 24 or so kill rings decorating the gun barrel, or dark yellow with green sprayed lines from Abt.191 ("Büffelbrigade"), unnumbered but with alternative red or yellow buffalo insignia.
The instruction sheet is brief and sparse, with the colour painting guide printed on the back of the end opening box (2).
Review
So this is a completely new kit, with no parts sourced from previous StuG or PzKpfw III kits. What we have is another step on Dragons journey of what might be called product rationalisation, in that there is also a new die cast and plastic model of the same StuG now available, so Im guessing that the one piece wheel/track unit is shared between the die cast ready-made and this kit version.
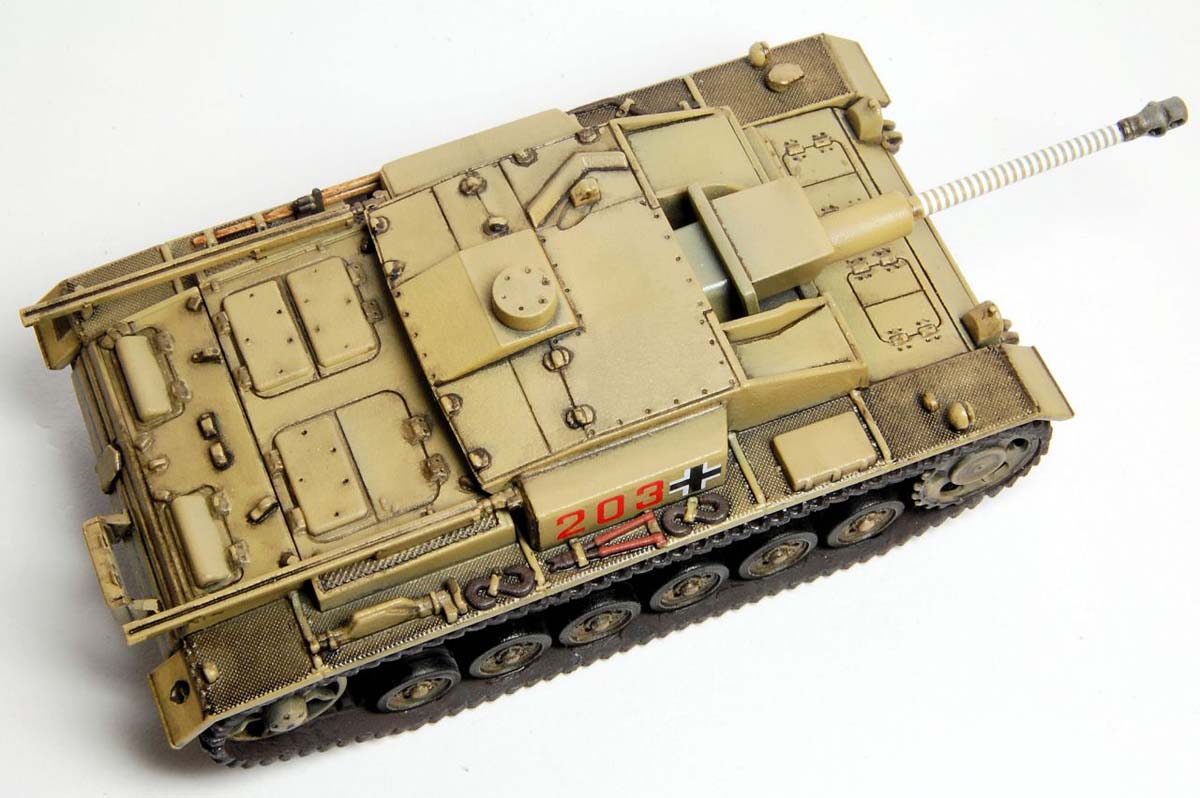
Being new, the moulding quality is excellent. The hull (11, 12) for example is very sharply defined with virtually no visible mould lines, and at this scale, there isnt much lost in terms of detail by moulding the suspension arms in place. Likewise the main superstructure (13) is an impressive moulding, even if all the tools are moulded in place, including the jack.
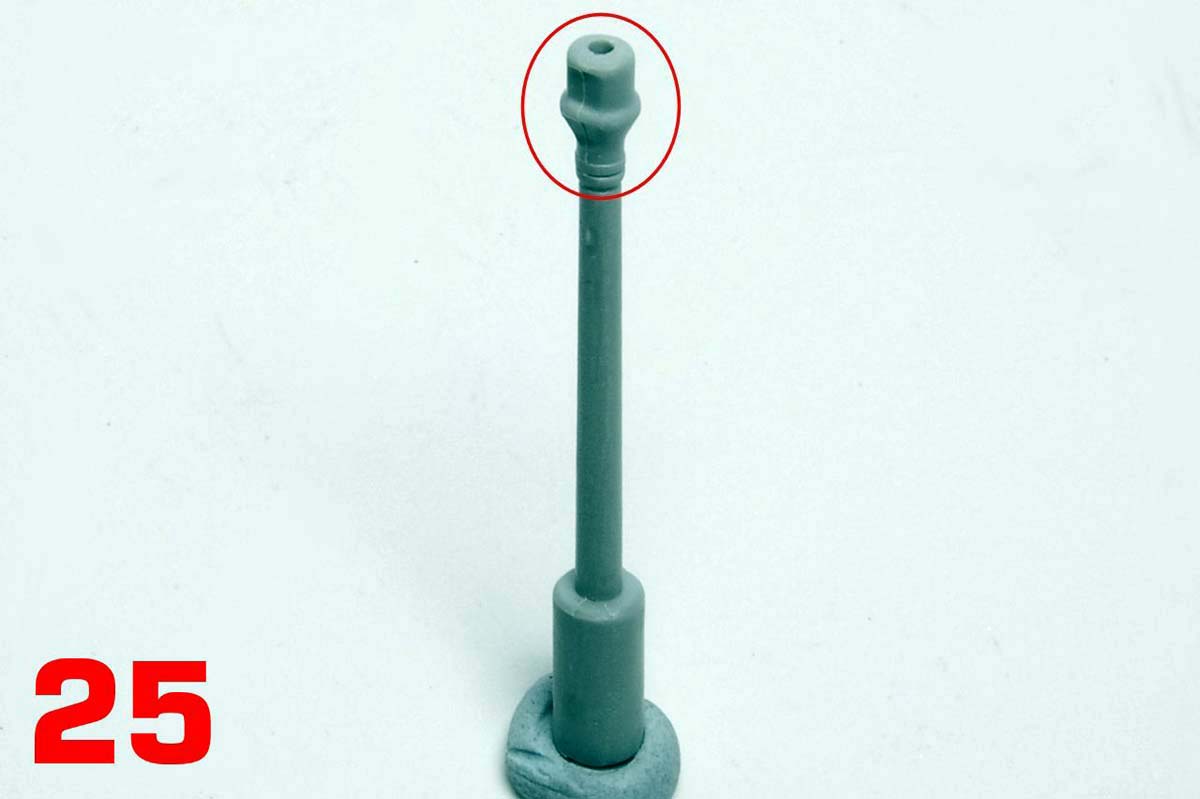
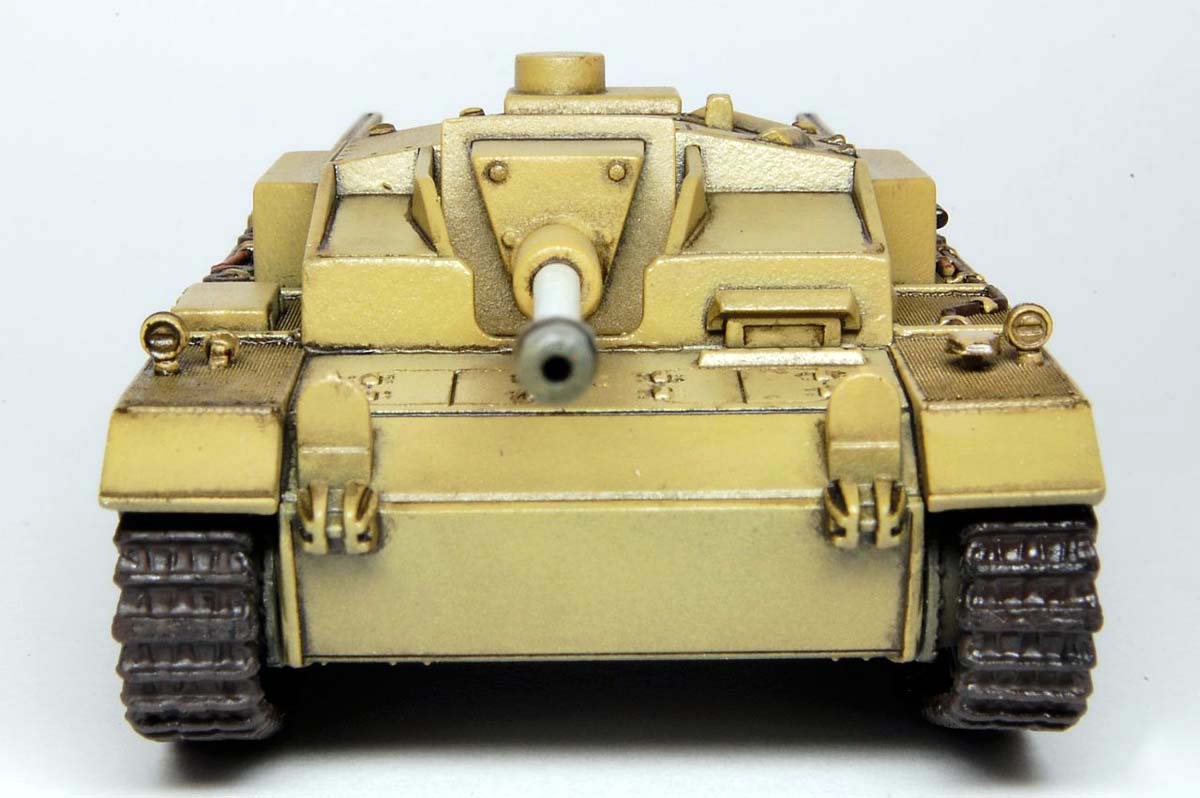
Notwithstanding that impressive moulding technology, there are disappointing simplifications. Obviously all hatches are moulded shut. The muzzle brake is solid (25), although there is a hole in the end. The sides of the roof ventilator are a featureless cylinder, the roof port that the gun site pokes through is solid, and there are no slits in the headlamp covers. The drivers side vision port has no slit, theres no binocular vision ports above the drivers visor, and no welded on tie downs on the front superstructure.
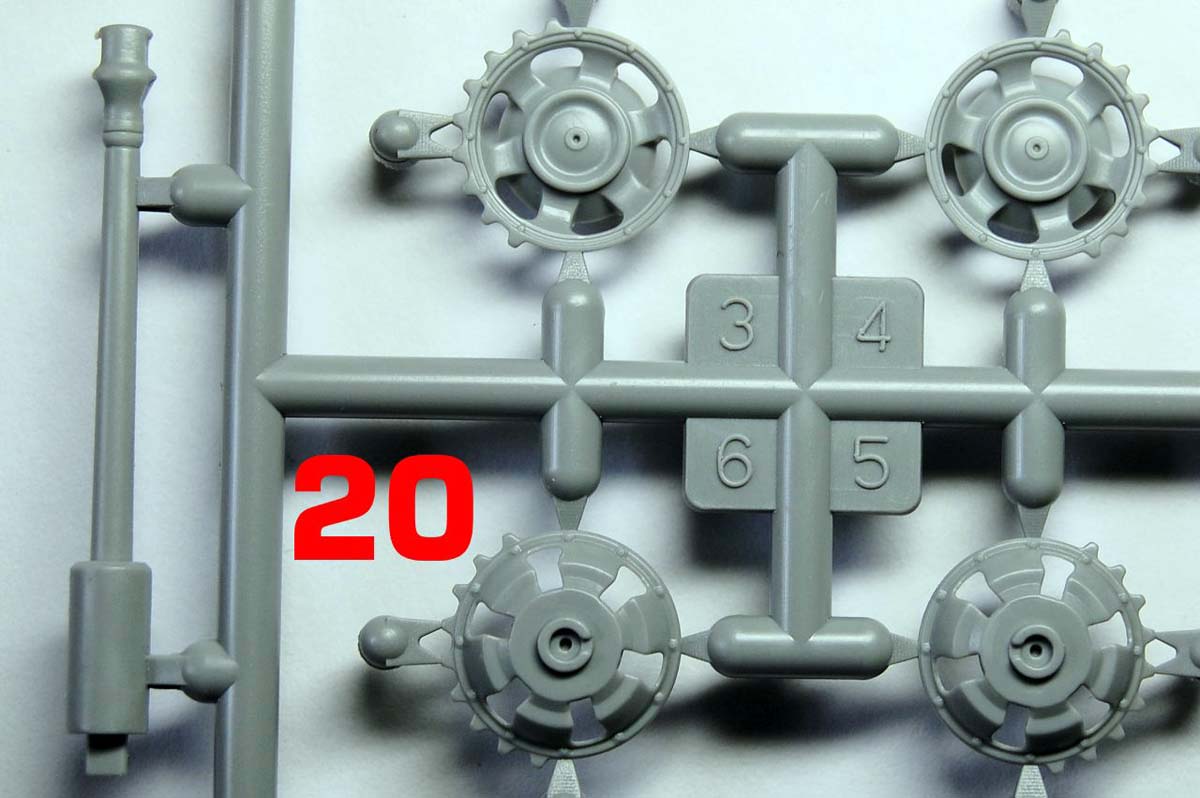
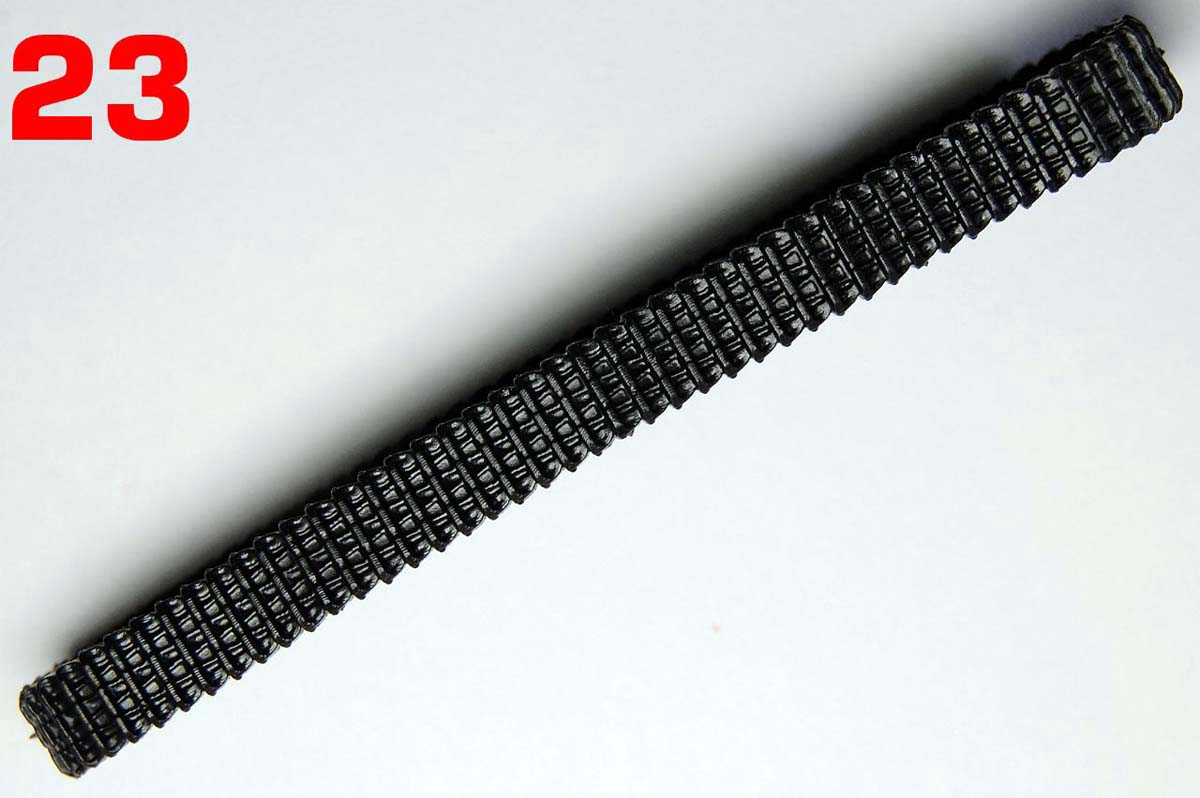
On the wheel-track units, the track itself is simplified in comparison to the DS tracks used in earlier PzKpfw.III kits, being detailed on the outside, yet solid with no drive holes (23), but without any detail on the inside other than the guide horns. The road wheels have perfectly acceptable detail on the outside faces, but again, none on the inside (22). They do have a reasonable groove between the two tyres, though not as deep as it would be if they were moulded in two halves. The return rollers are more compromised, in that while the outer half is acceptable, the inner half is enormously thick.
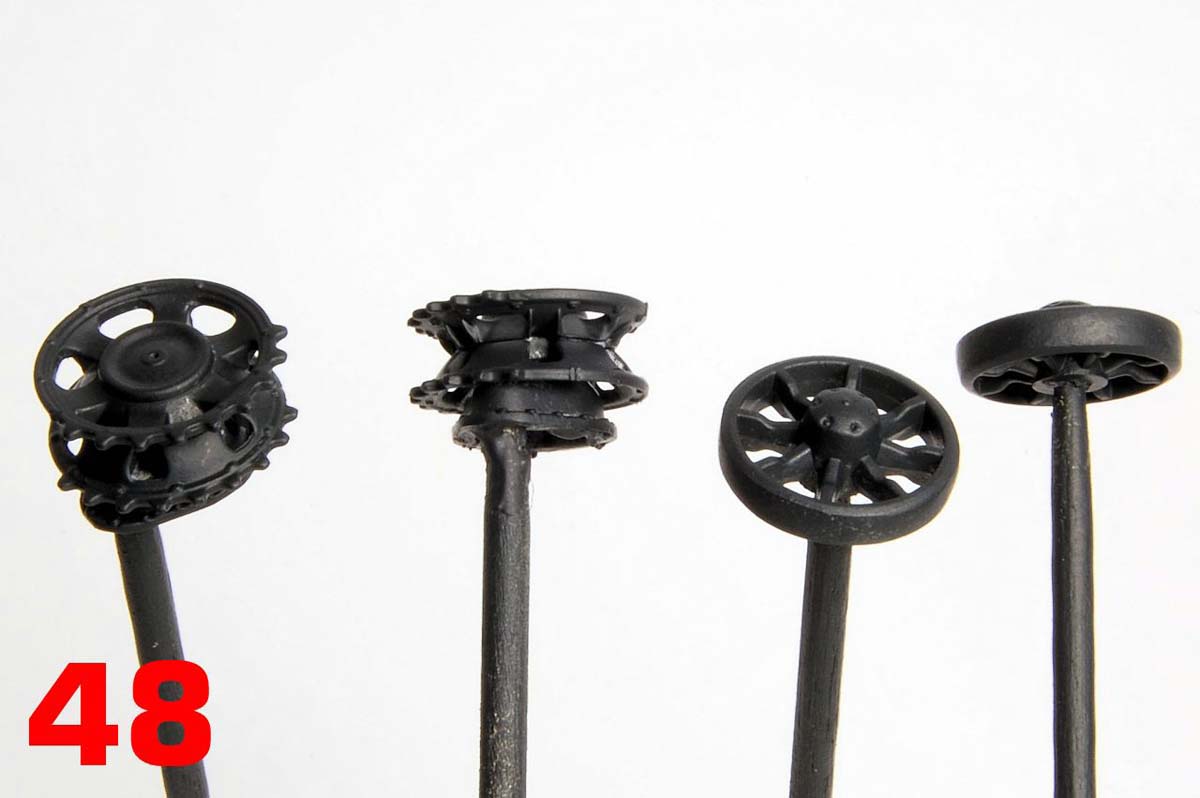
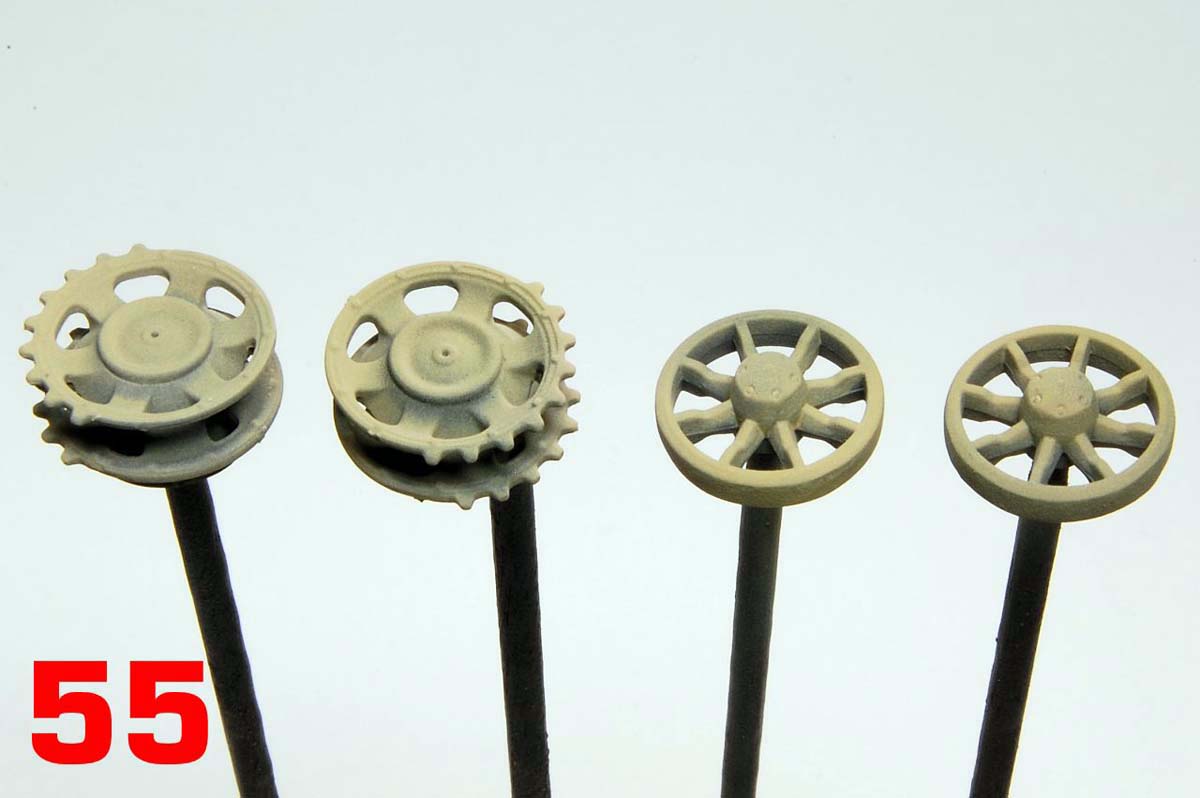
The sprockets are quite nicely done (19, 20), in three parts including the final drive cover, with the teeth omitted at the points of contact with the track. The idlers are more simplified (19), being a one piece moulding, so there is no gap into which the guide horns would be channelled, instead the rim is just solid.
The Build
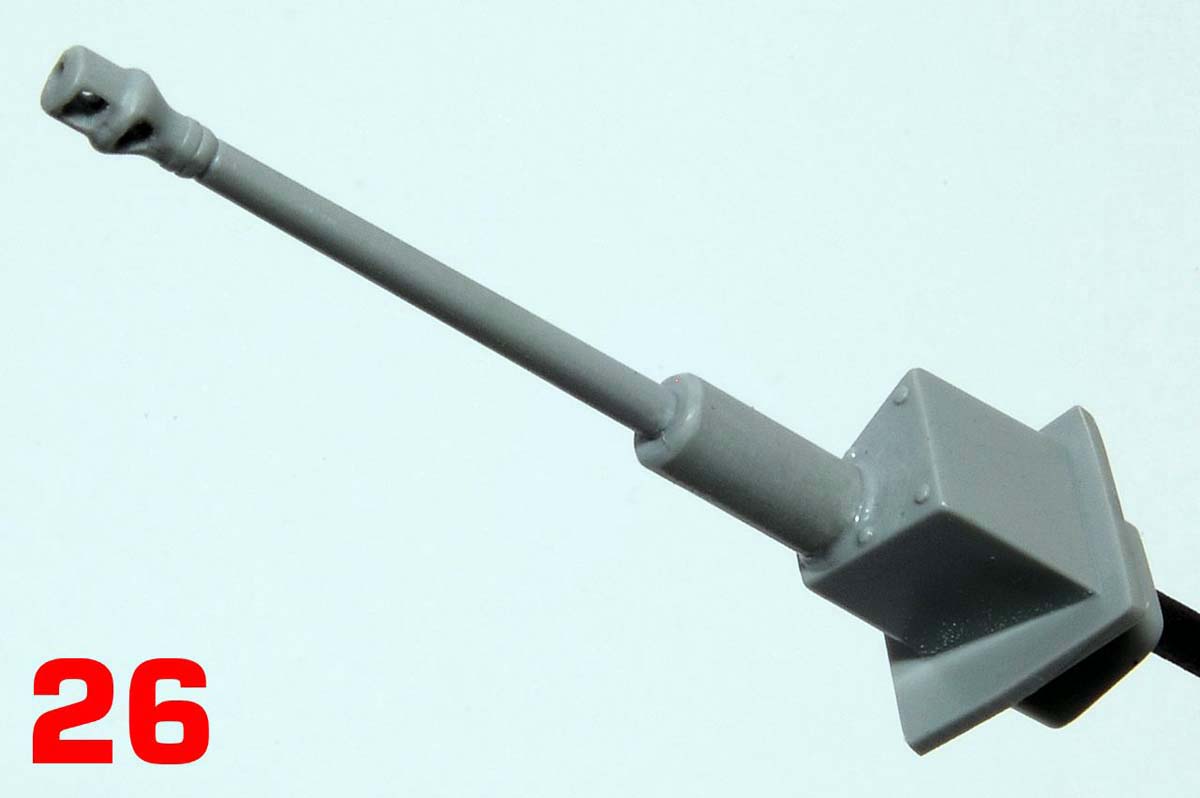
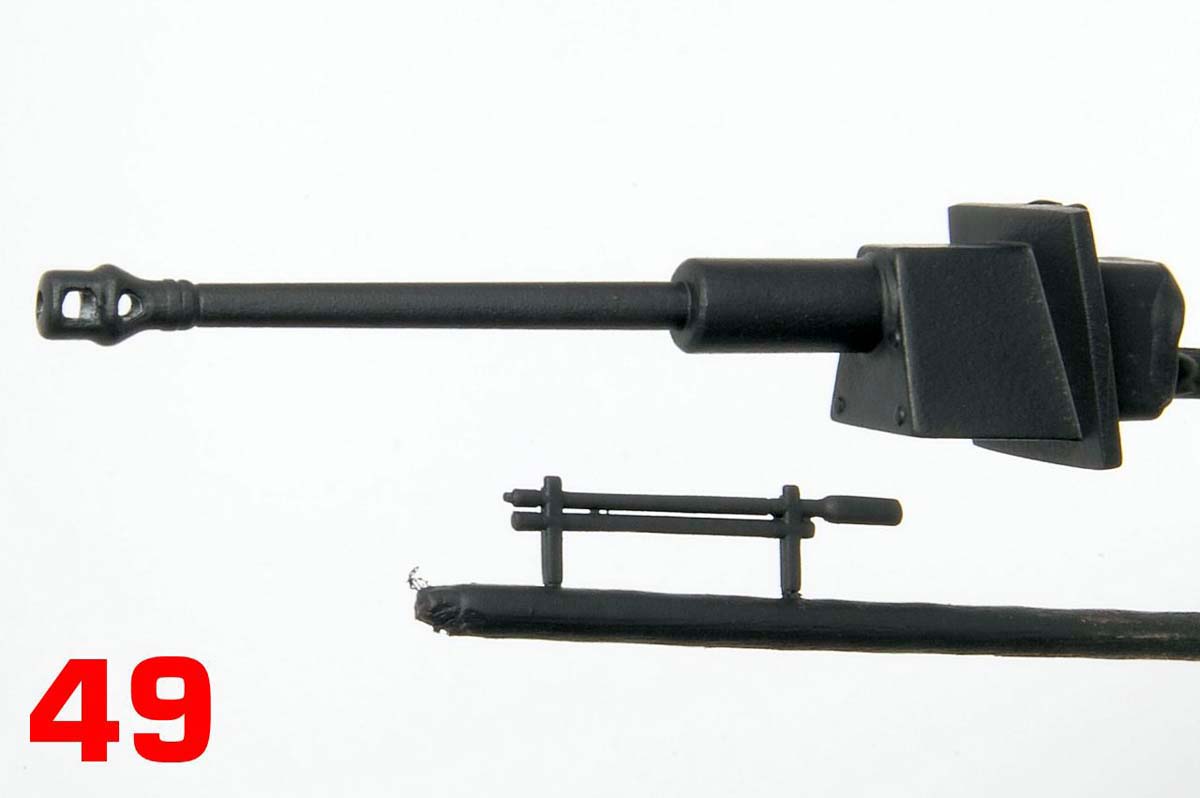
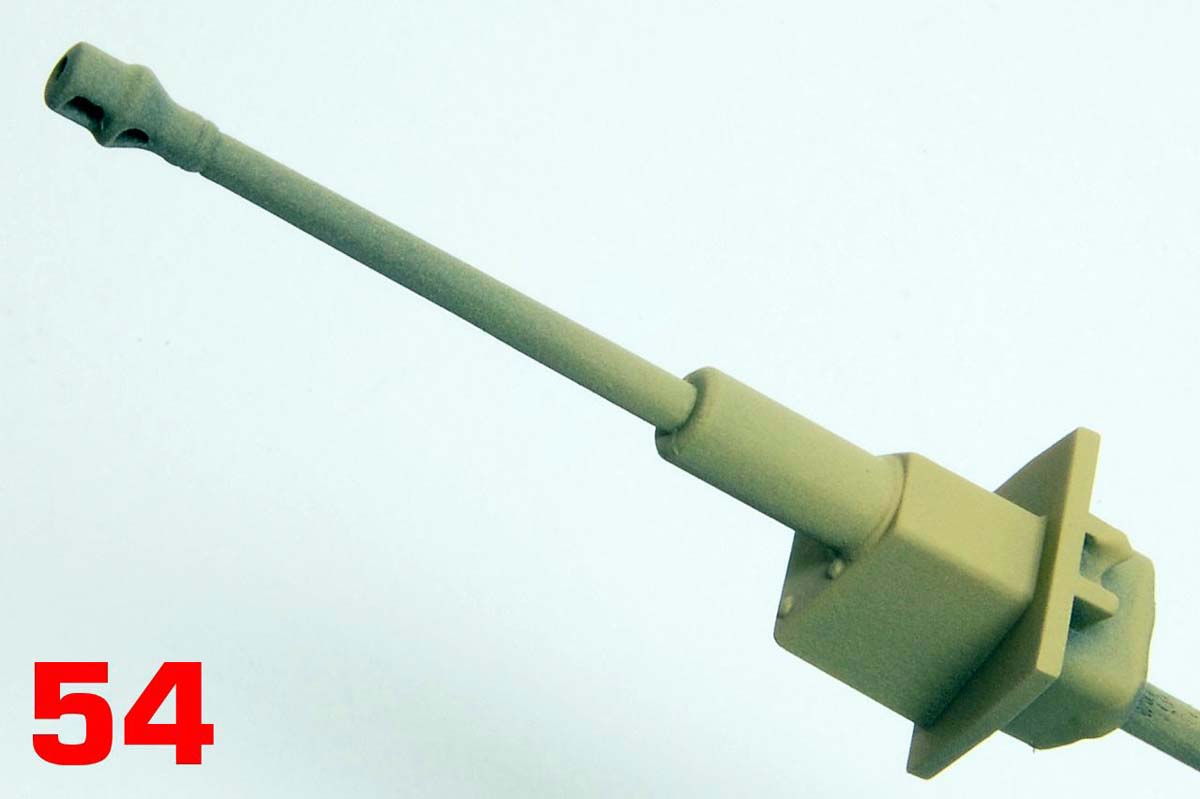
To give the new black wheel-track units a proper review I thought Id build and paint it to check how they take glue and solvents. I started with the one and only modification I carried out, which was to drill out the solid muzzle brake (photo 25) and the gun is then mounted to the mantlet (26).
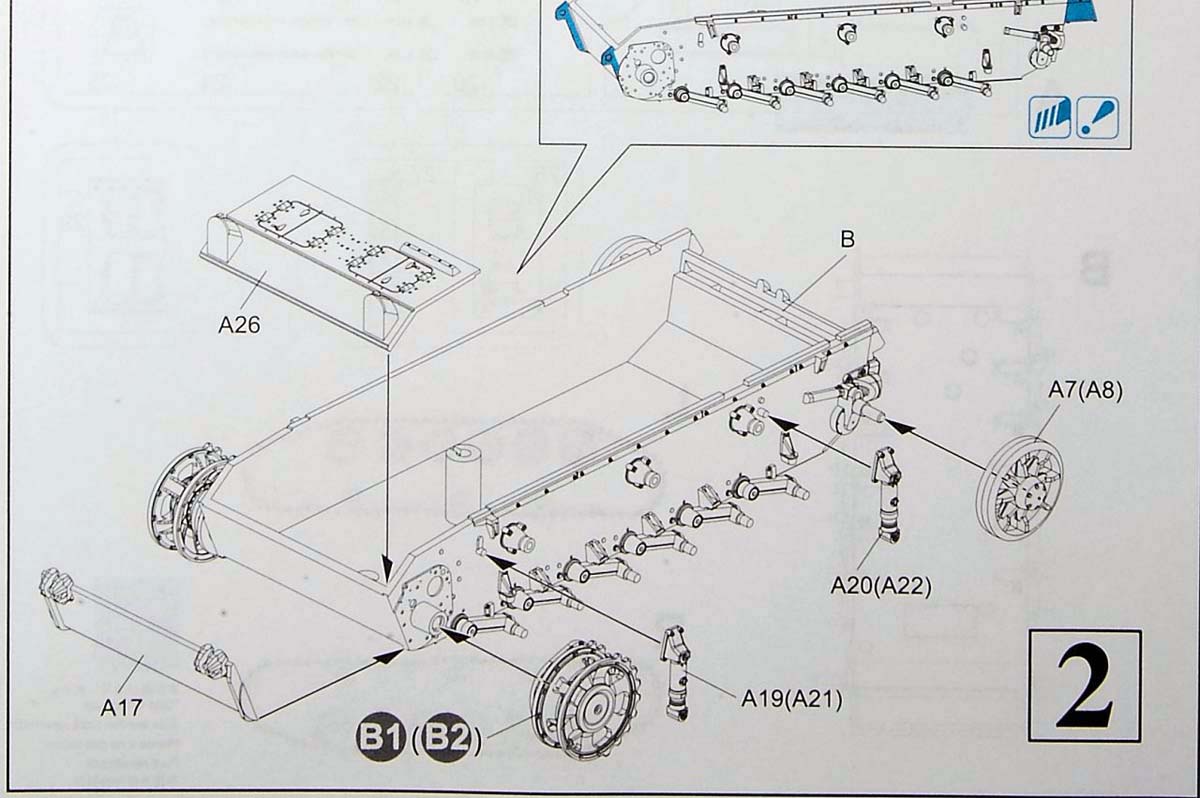
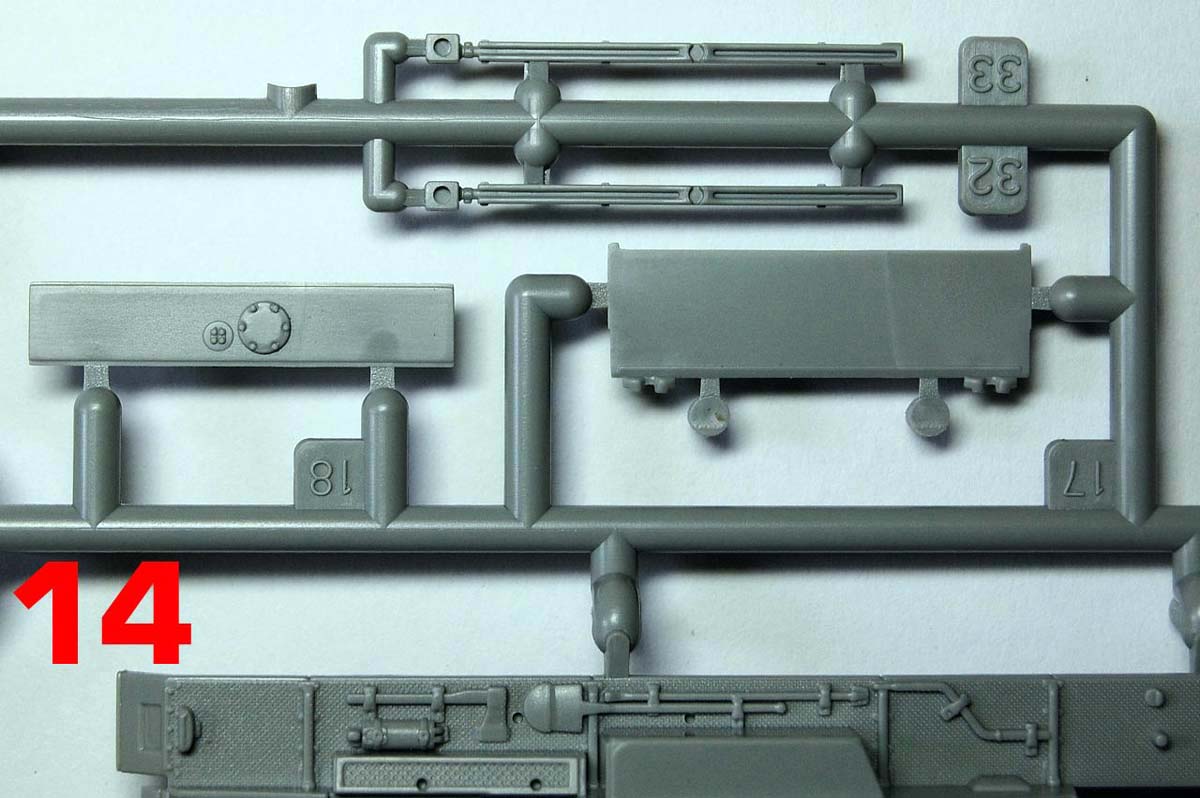
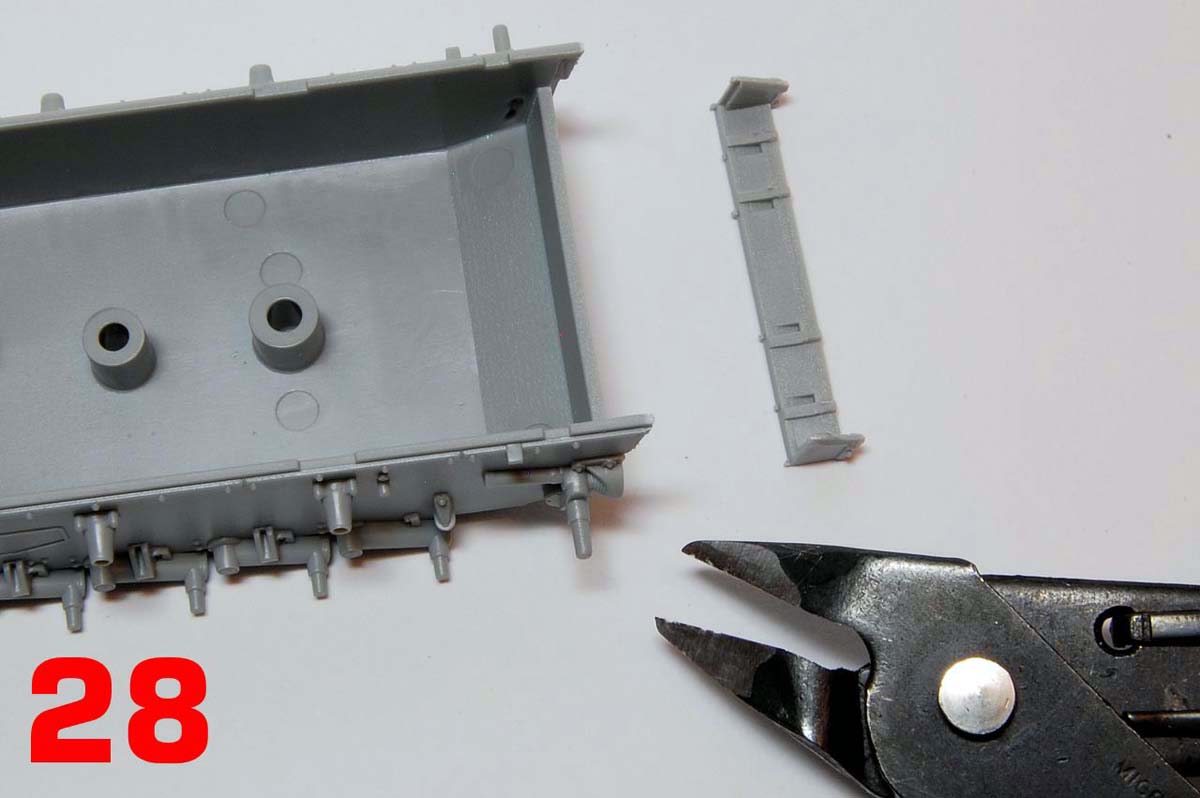
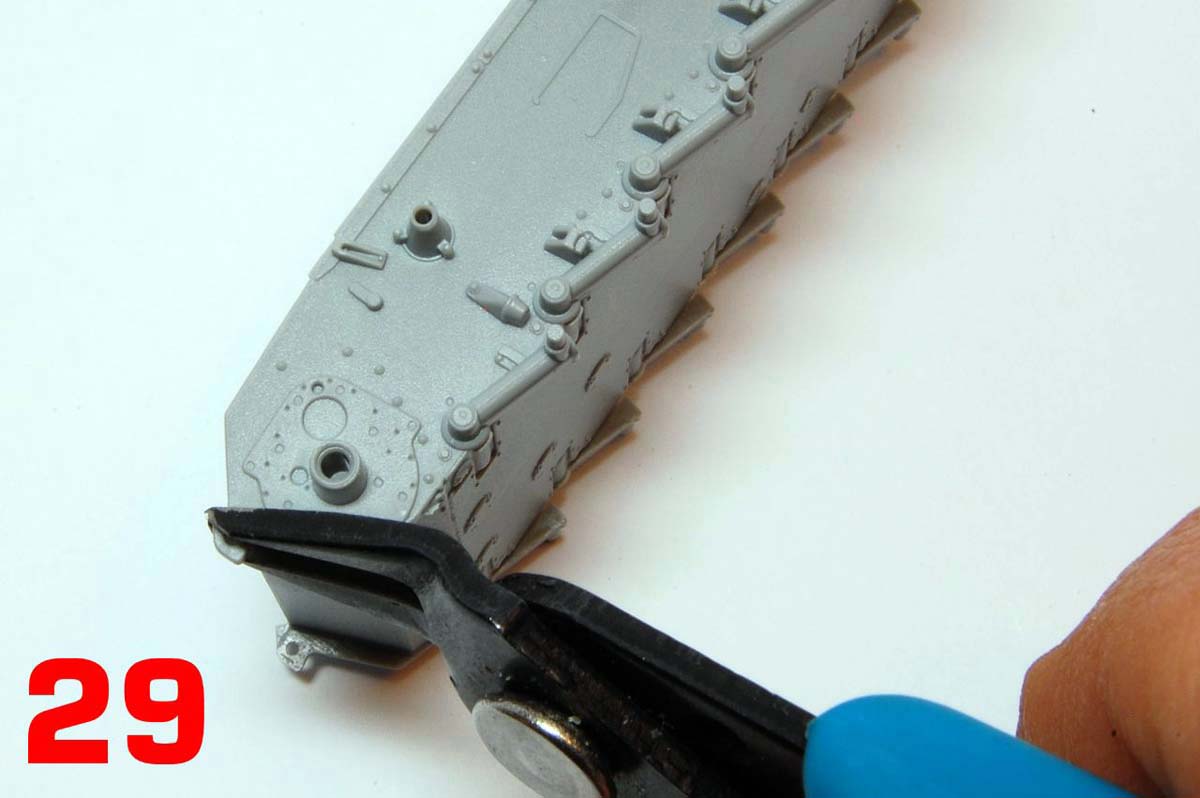
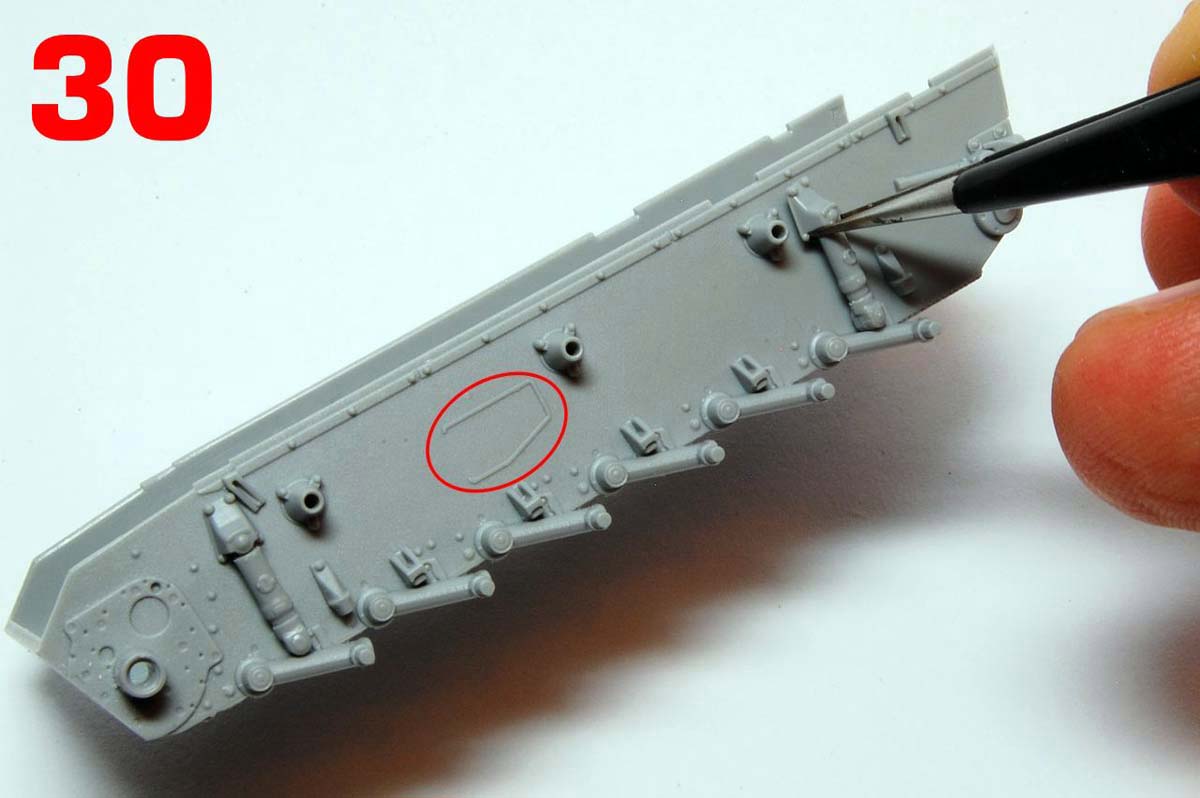
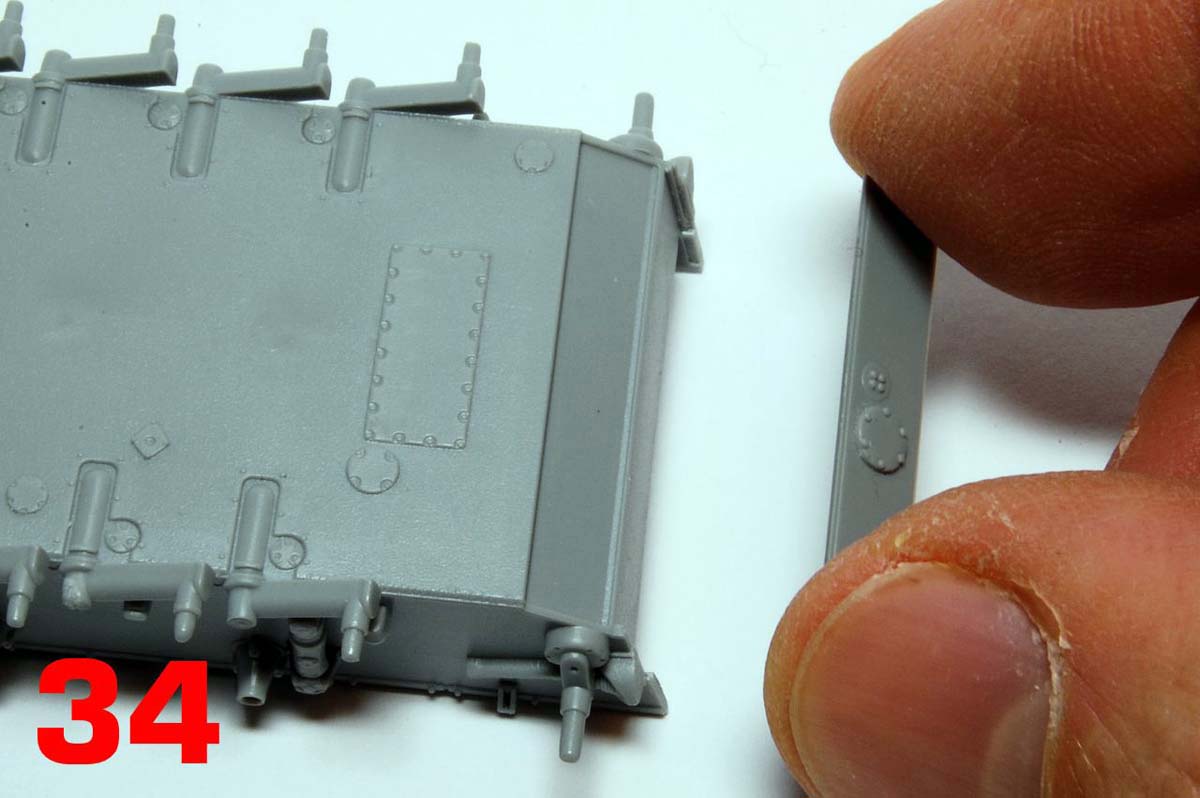
The sprockets are assembled (27) and unlike most tank kits, thats it for the wheels, were straight into the hull. The first thing here is to start snipping bits off, which are included so that kits of PzKpfw.IIIs and later StuGs can be based on the same hull. First goes the rear part of the hull (28) and then the front extensions of the side plates (29), obviously followed by a bit of tidying up and re-shaping. Also needing removal are the location marks for hull escape hatches (30, 31); the same photos show the fitting of the shock absorbers.
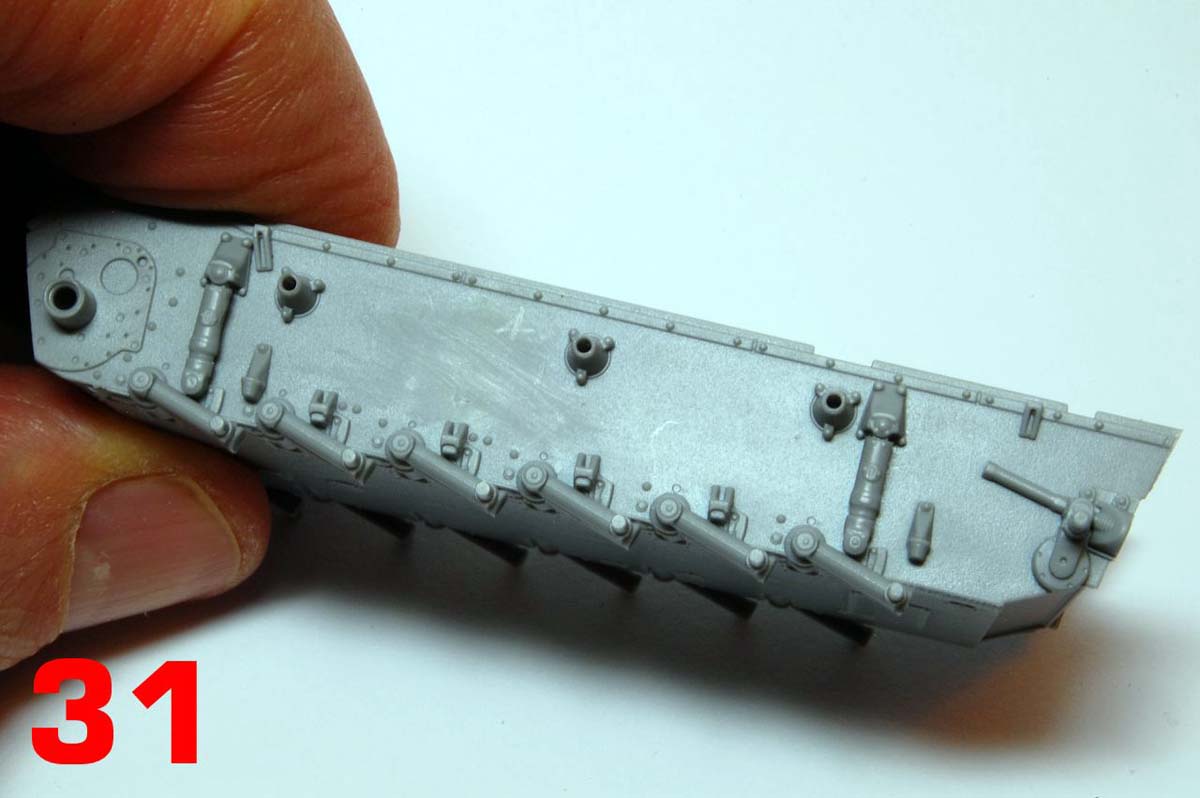
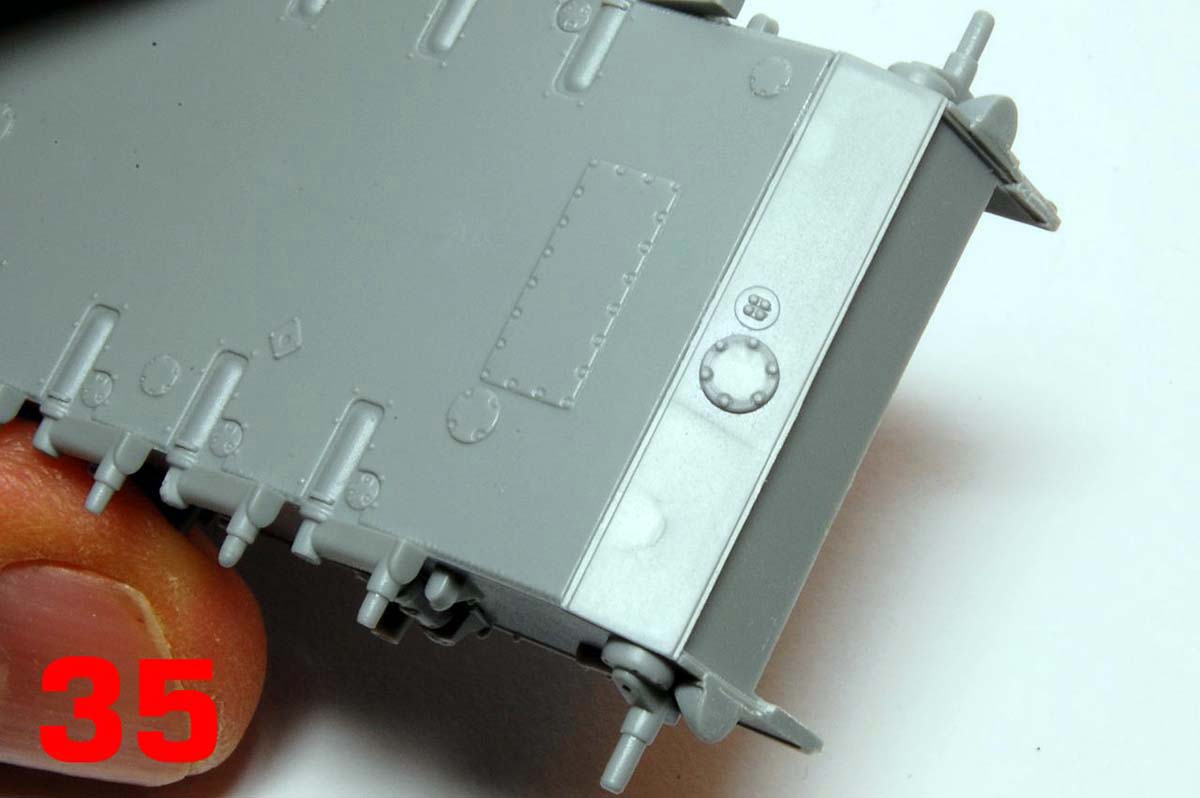
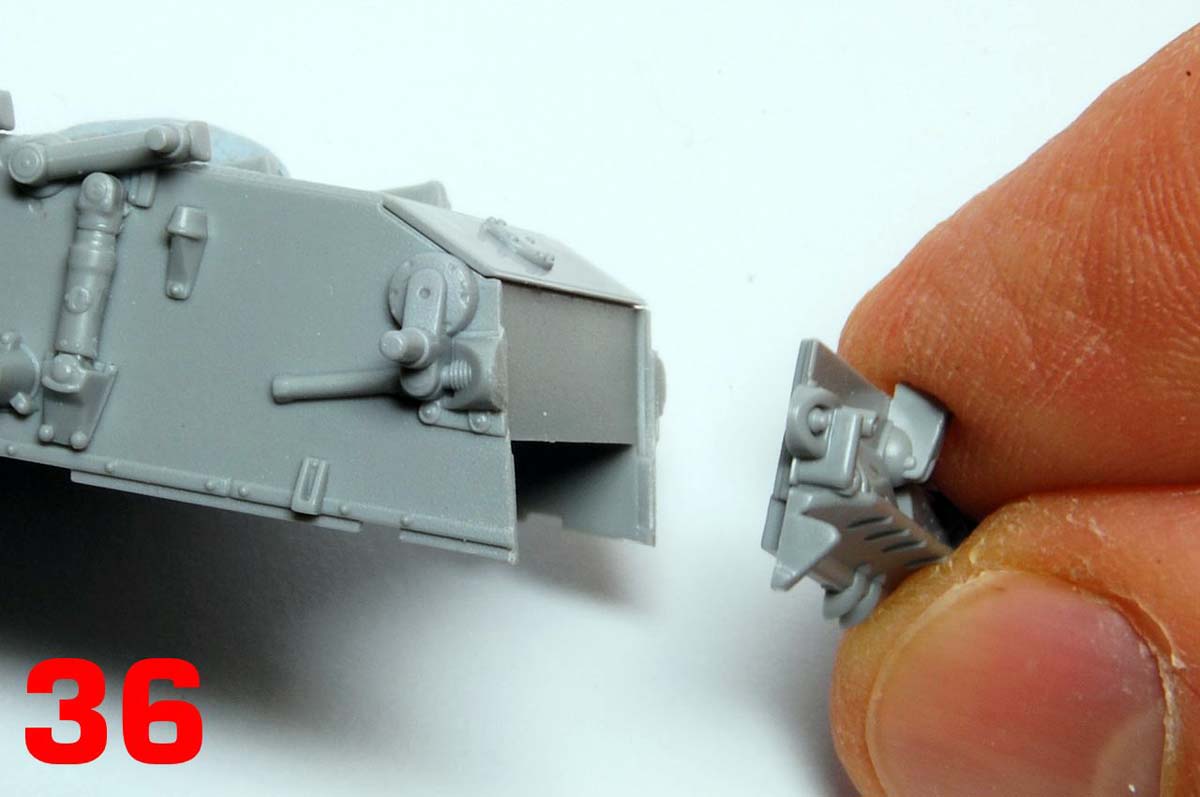
The front top plate, including the moulded in place headlamps, is next, followed by the nose plate with the towing shackles (32, 33). Then its round to the back for the lower rear plate (34, 35) and the upper rear plate (36) which fits flush over the snipped off rear part of the moulding, so now you must shape that cut profile to fit exactly. Photo 37 shows the completed lower hull; the instructions show the idler and sprockets added at this stage, but I kept them separate for painting, possibly a not too serious mistake.
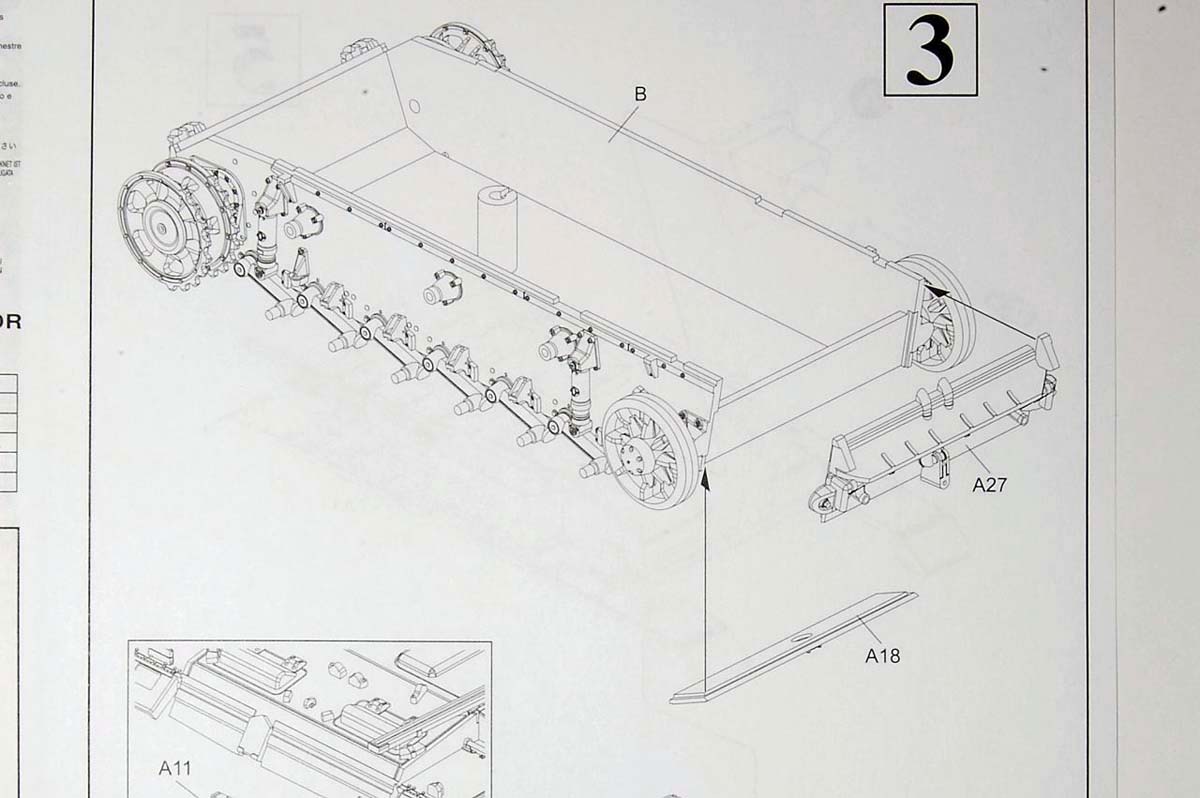
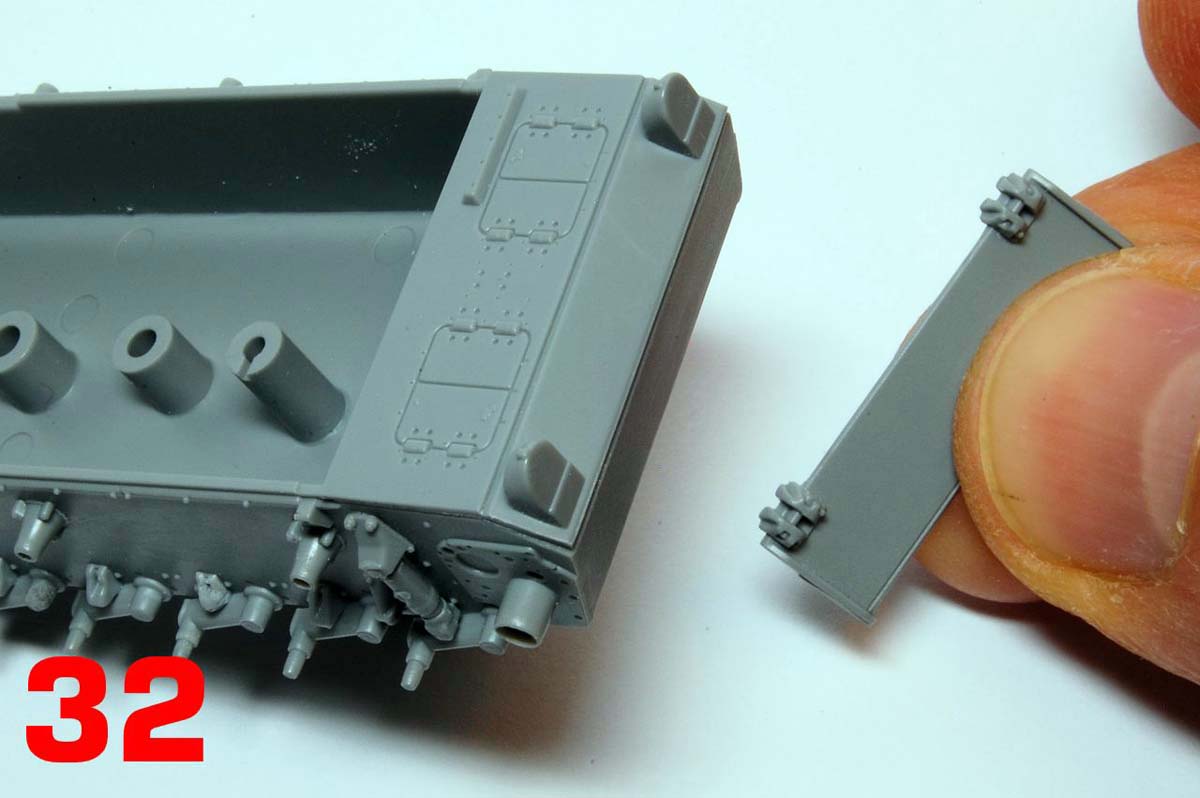
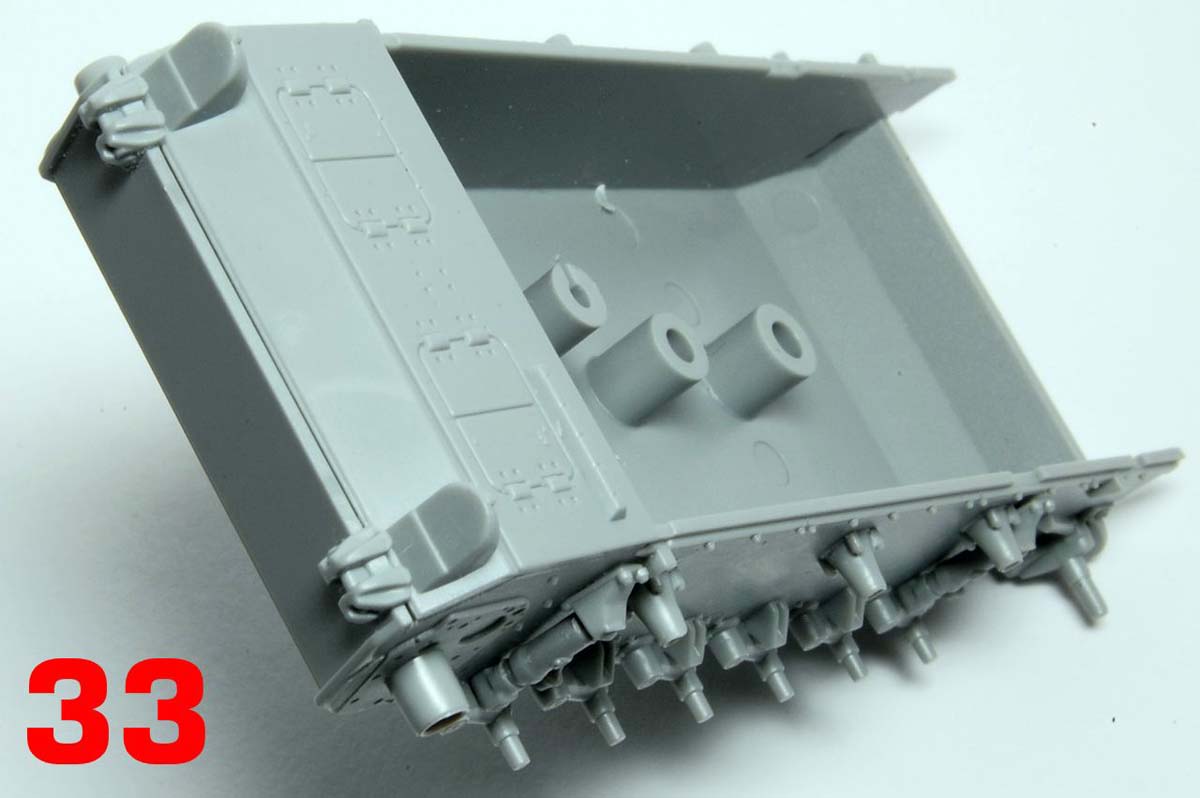
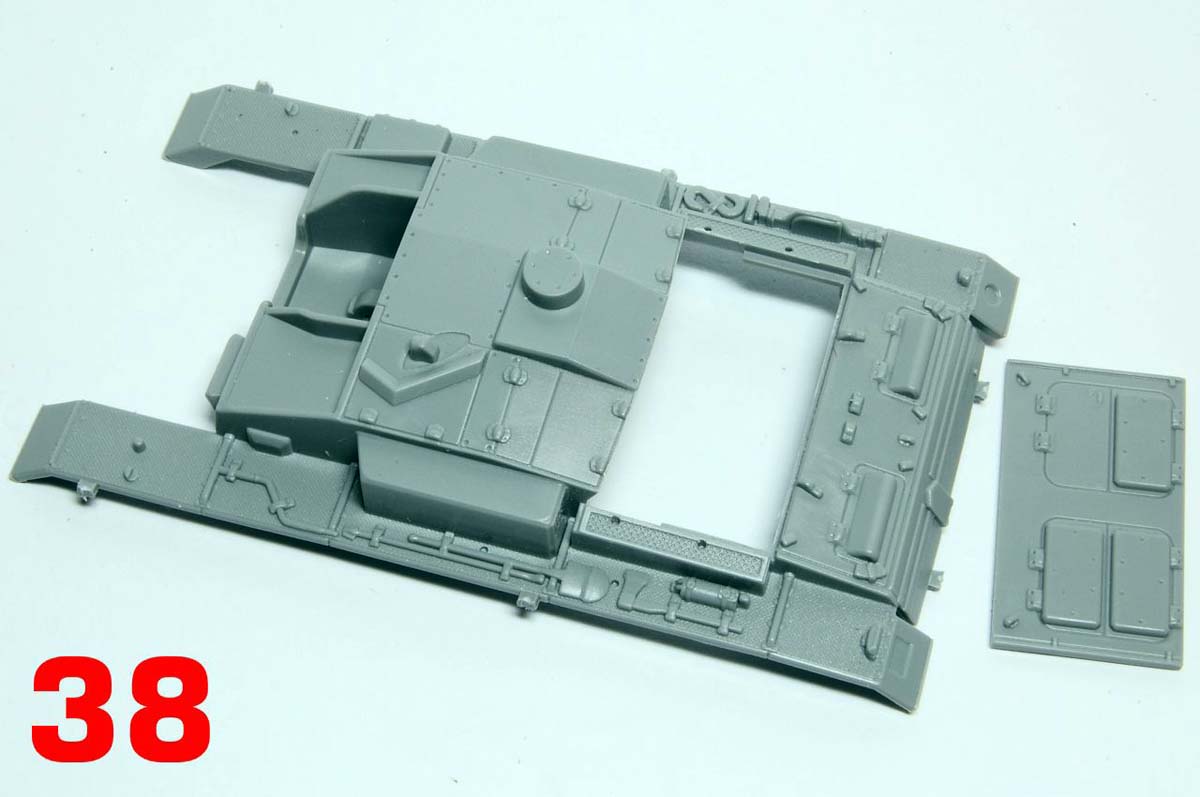
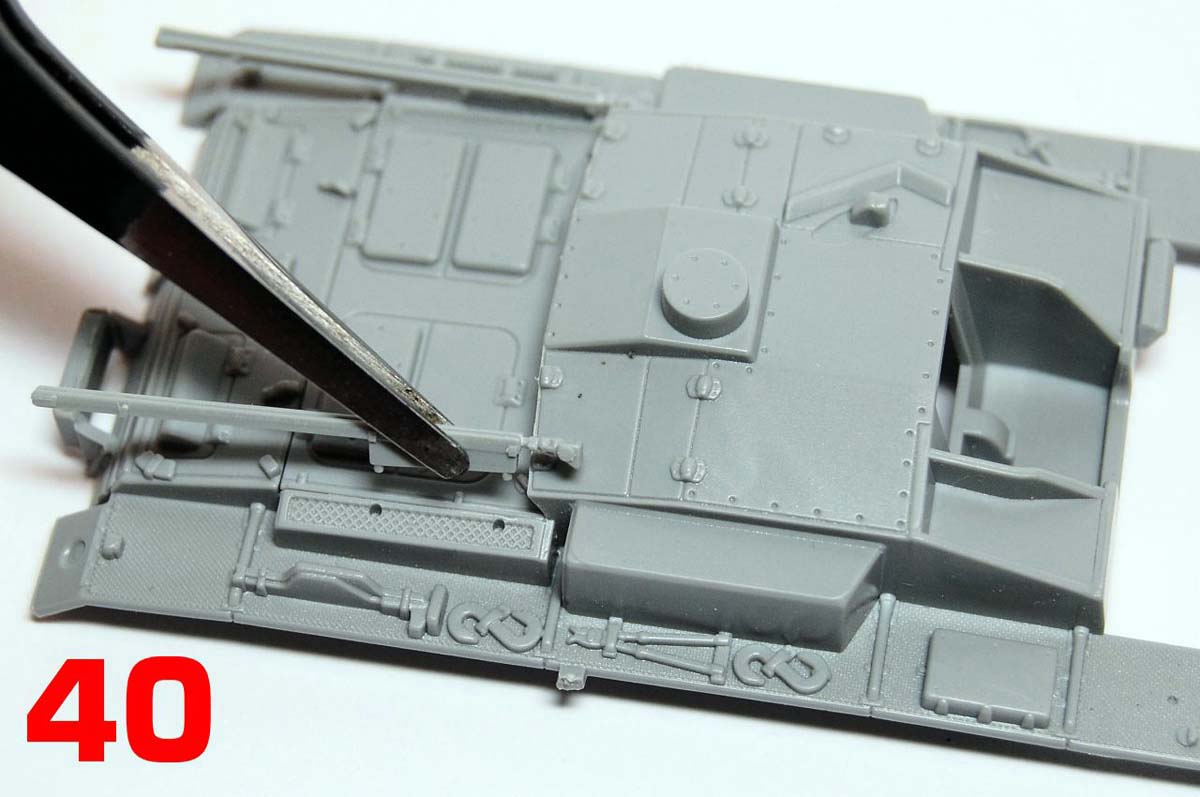
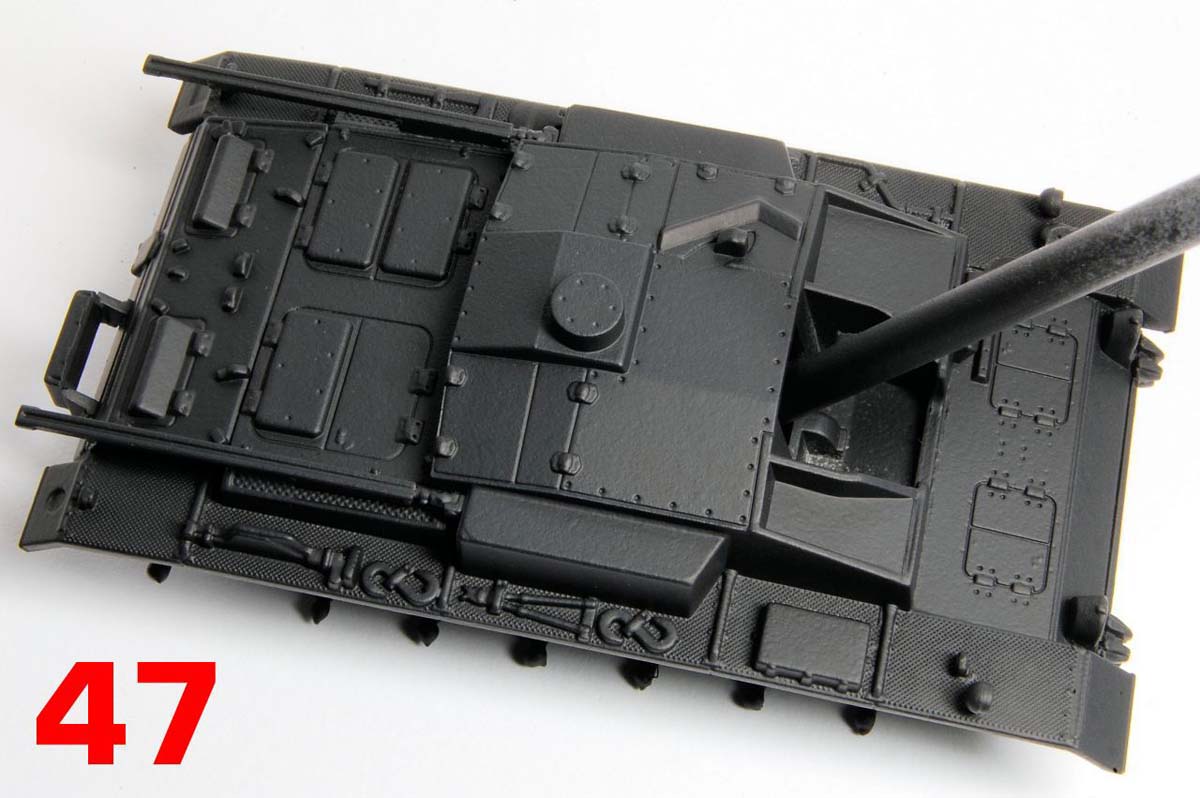
Moving to the superstructure, the front portion of the engine deck slots into the aperture on the main component (38, 39) there being a minute gap along the front edge which was filled by running in some liquid cement. The stowed aerials are next, along with the box for the smoke projectors on the rear (40) and followed by the horn, headlamps and notek light on the track guards (41).
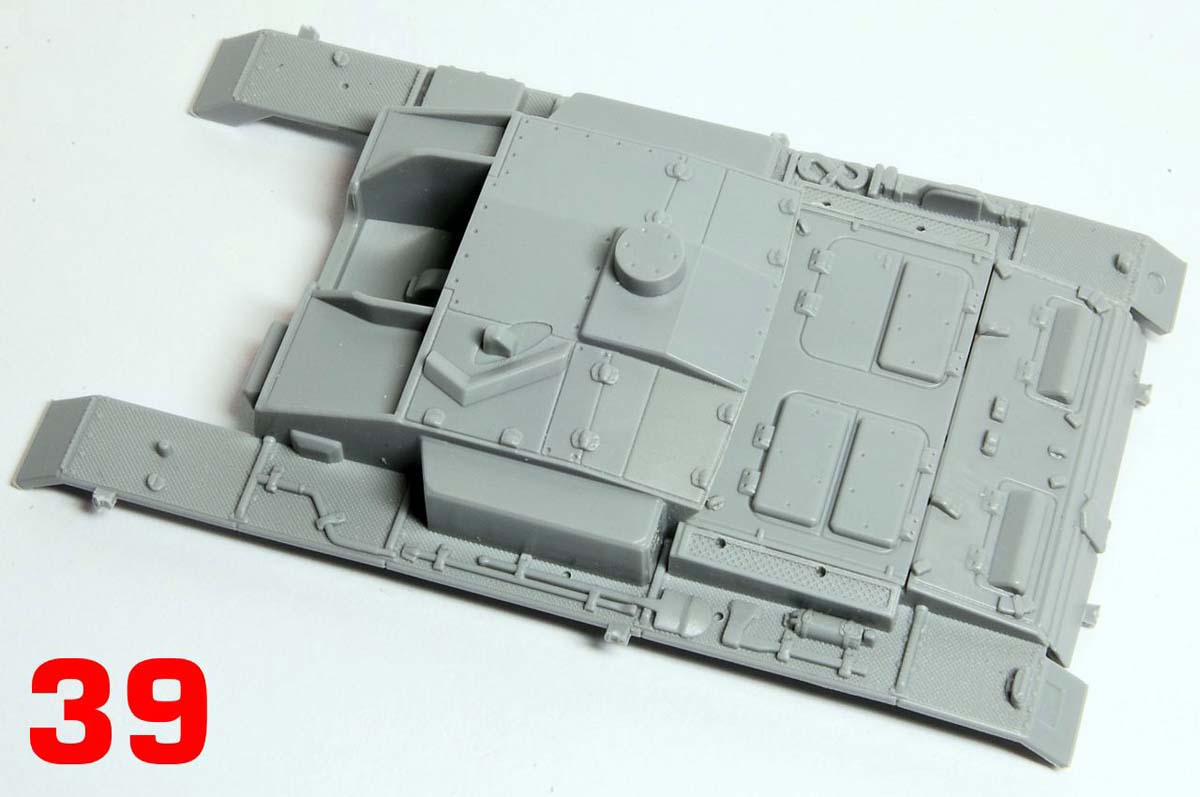
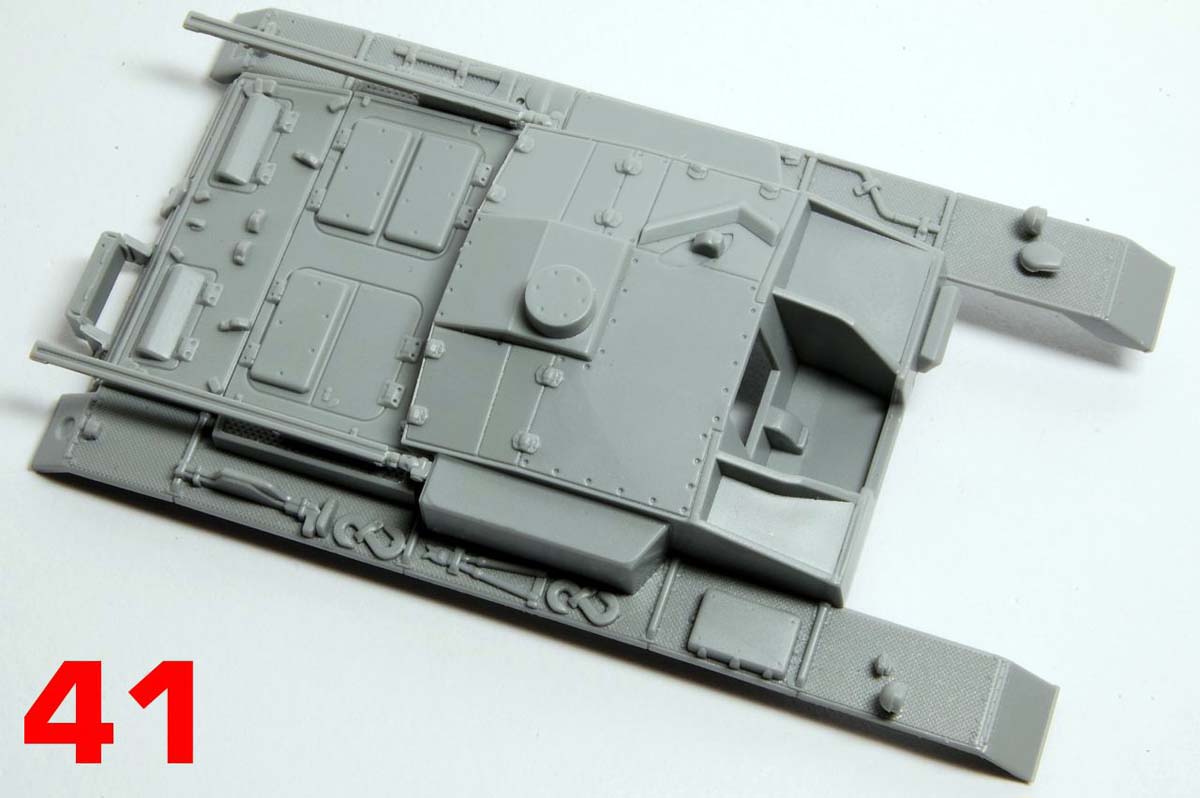
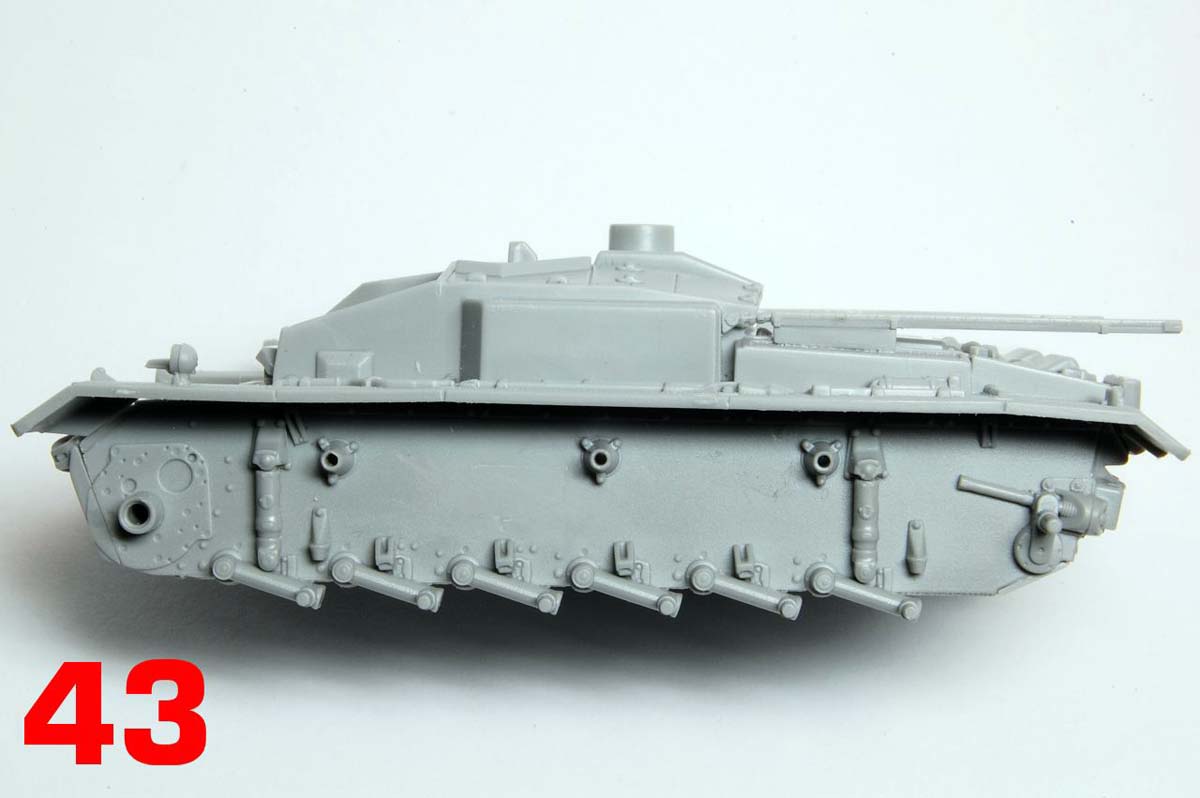
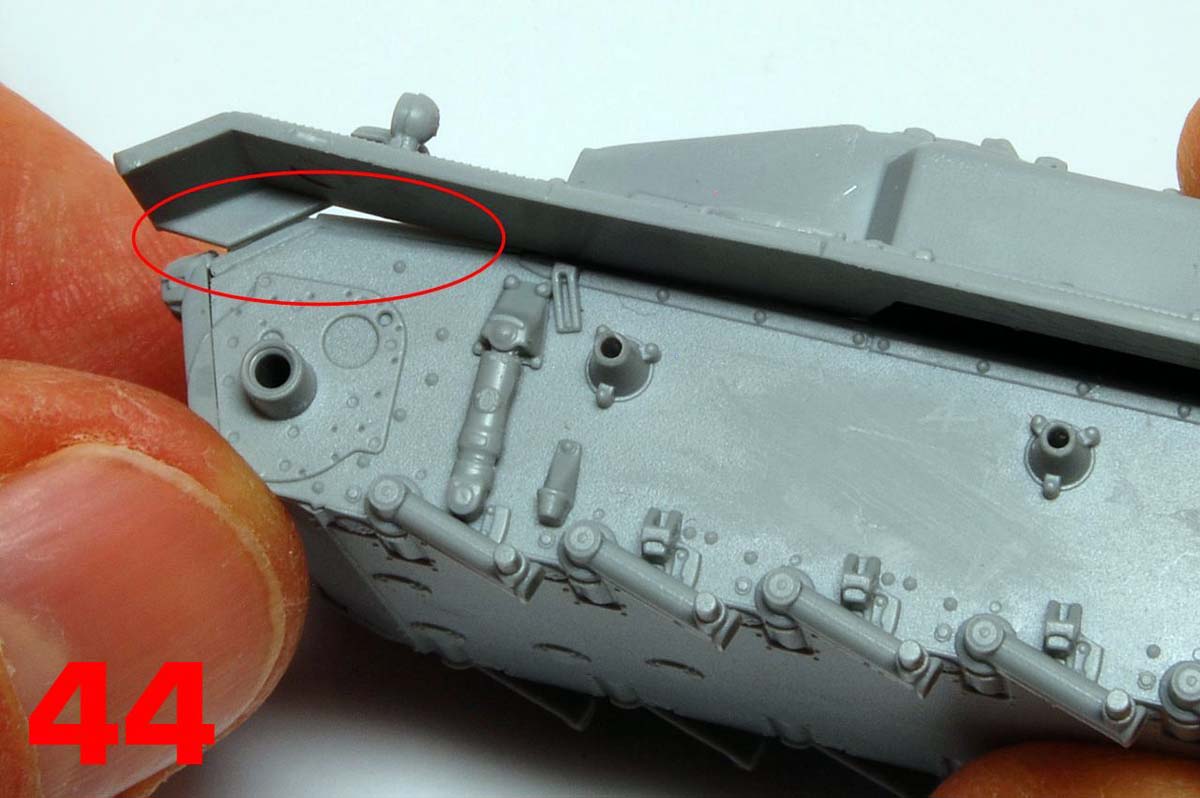
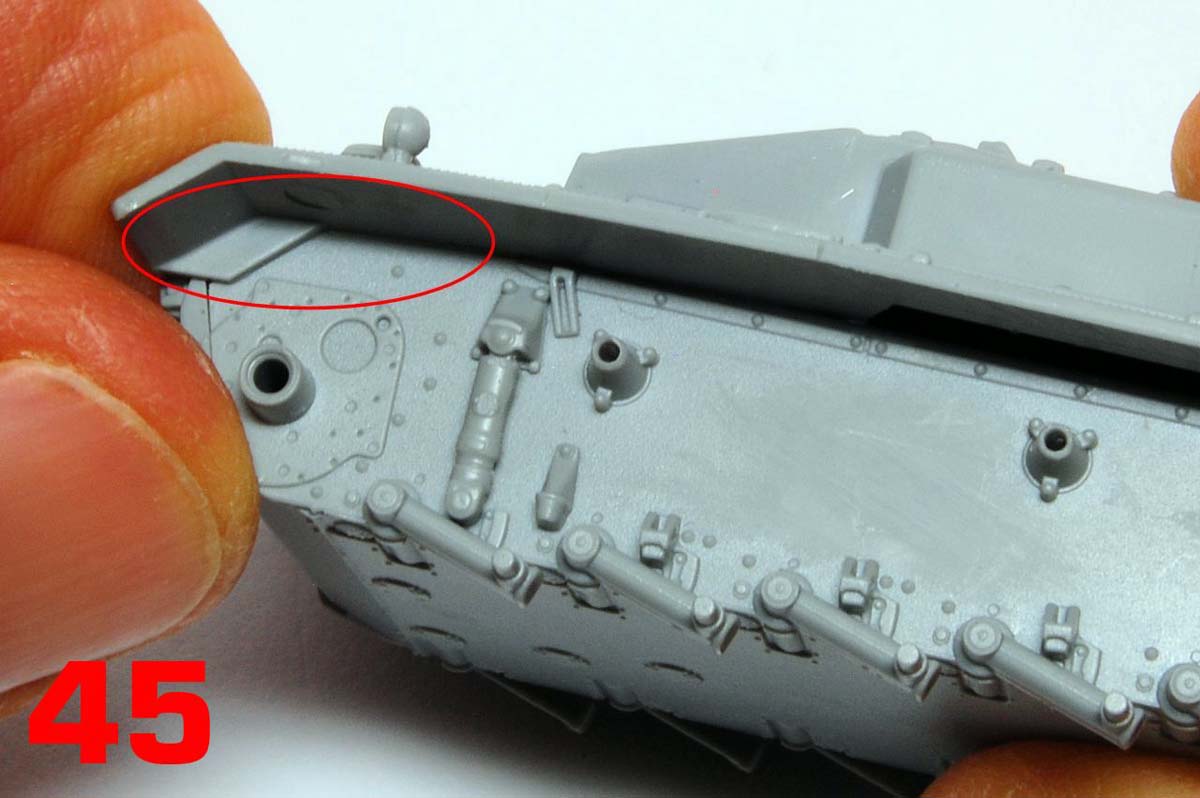
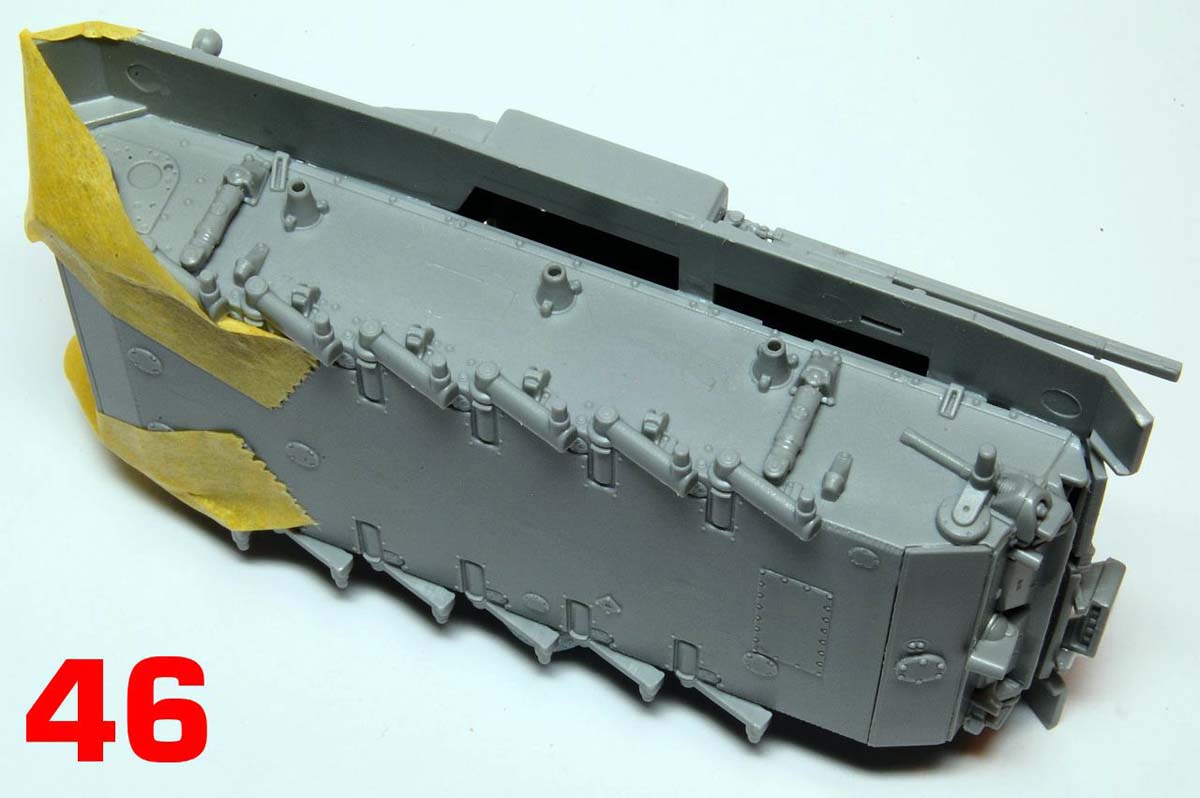
Photo 42 shows the top view of the completed lower hull on to which the superstructure is fitted (43). Note that the track guards are moulded perfectly straight and need to be bent down slightly to meet the front of the side plate and make the correct angle (44, 45). Photo 46 shows them secured with Tamiya tape while the cement sets to counter the tendency to spring back.
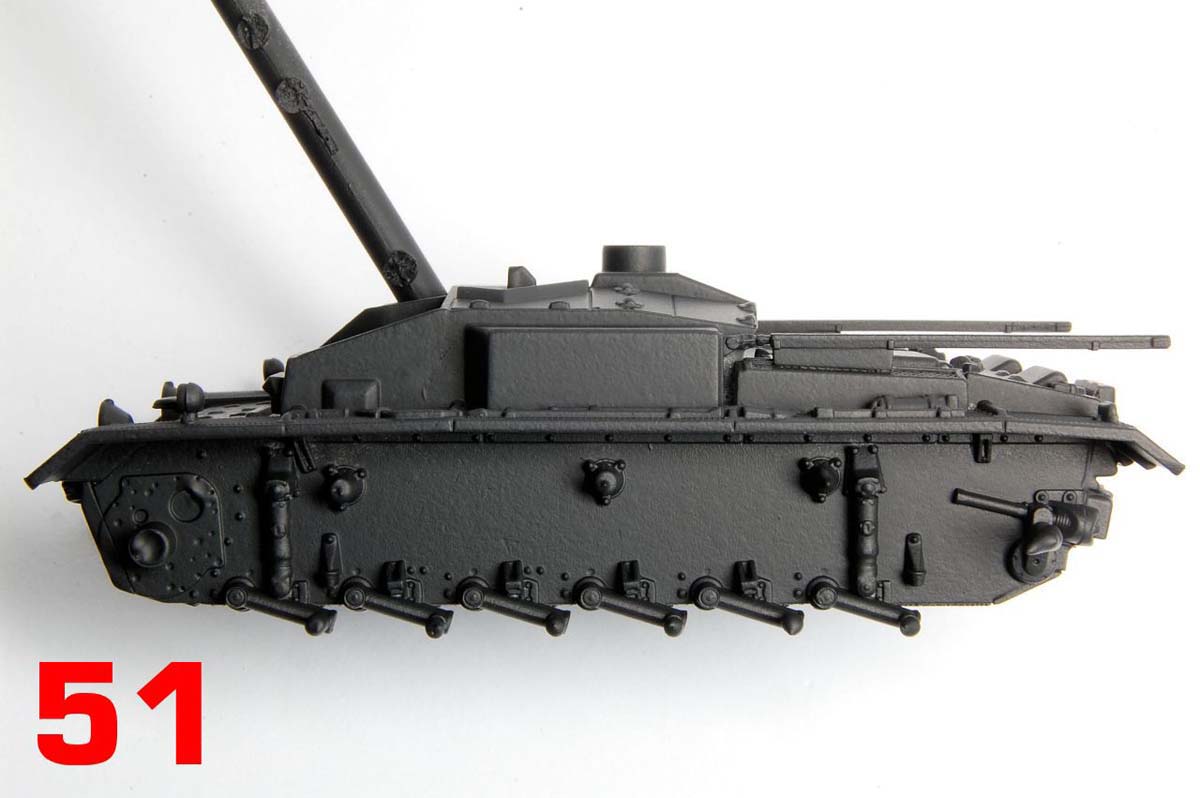
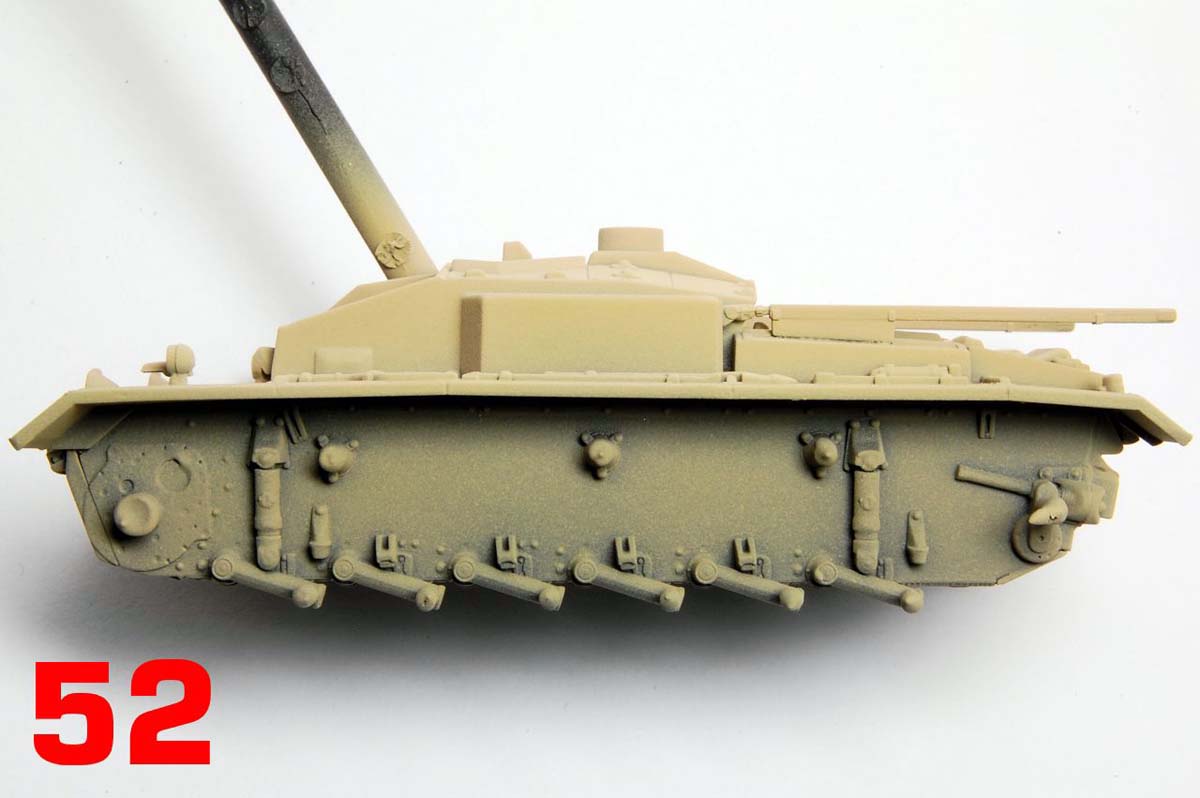
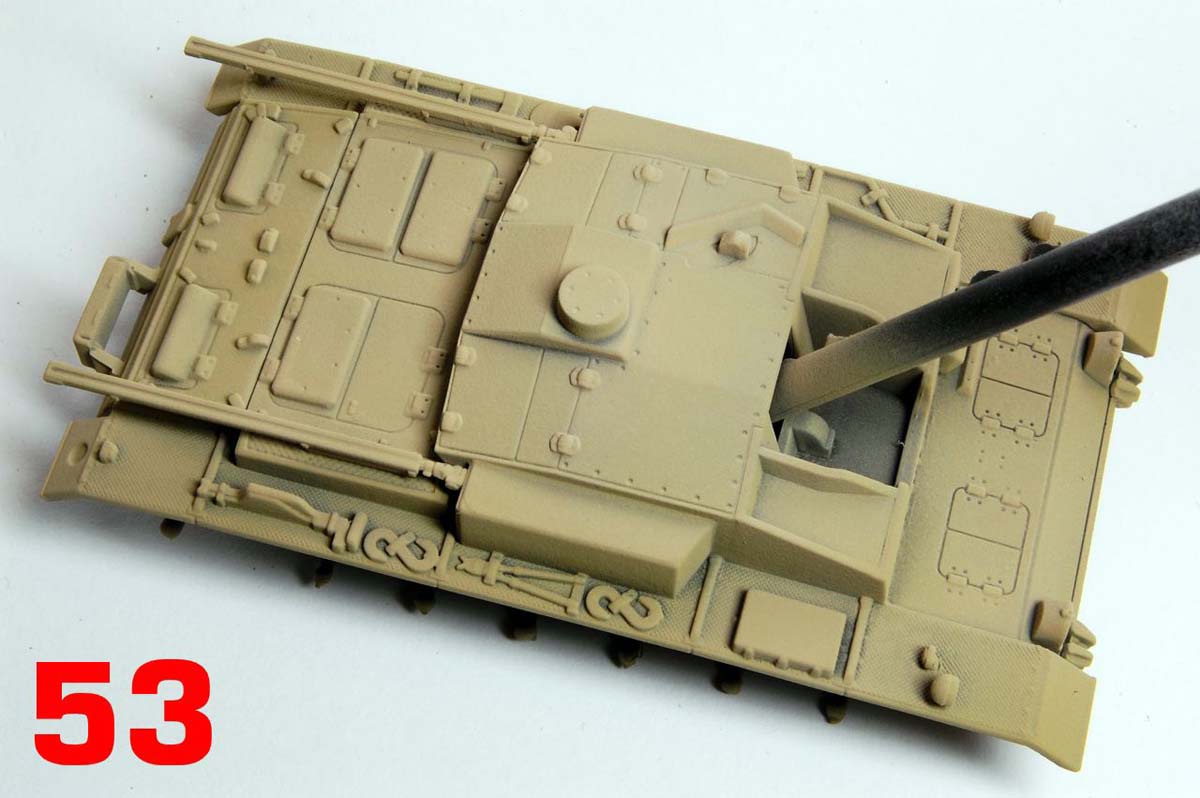
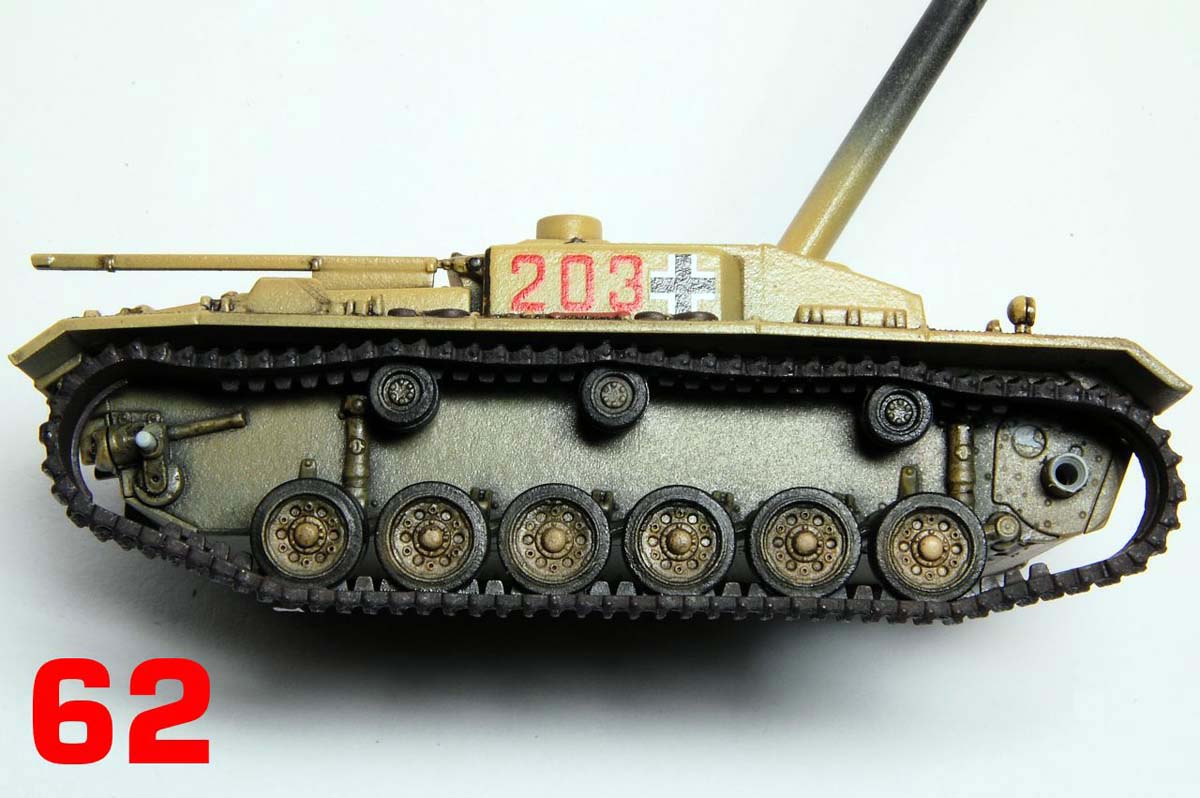
Now were already painting, with everything primed in Holts automotive black primer in photos 47 to 51, noting that the track units took the same paint perfectly well, and there was also no problem with gluing them to cocktail sticks using CA glue (50). Dark yellow was sprayed over the black with varying degrees of cover, with lower sections left darker (52), and some variations of hue were also used, mostly on the superstructure (53). The centres of the road wheels were airbrushed freehand as closely as I could manage (56).
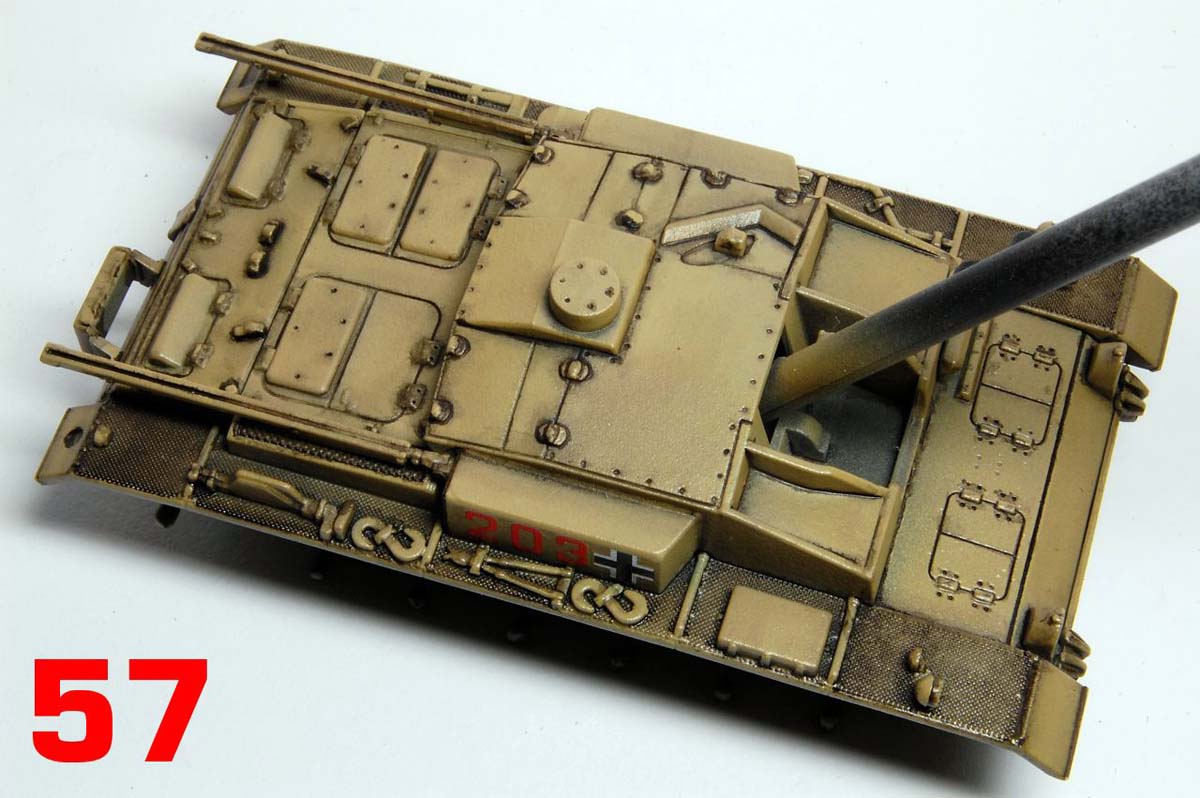
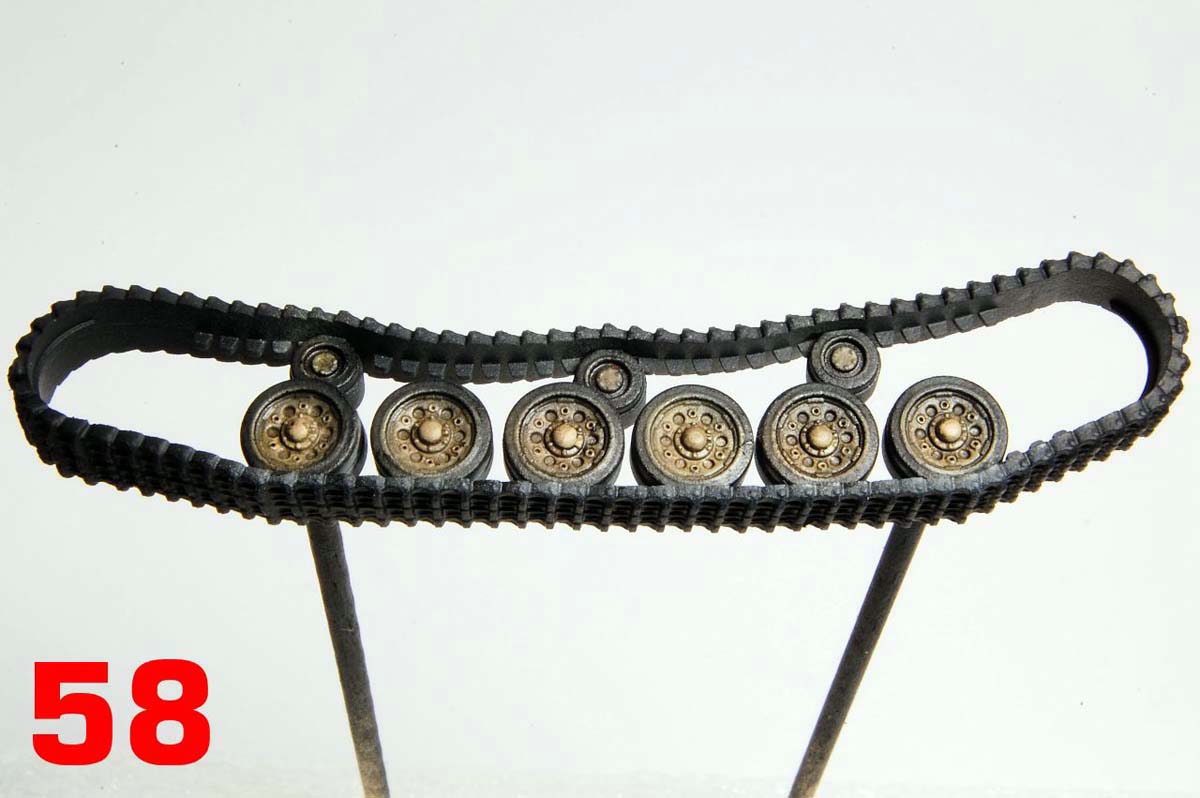
The standard gloss varnish, decal application, satin varnish routine was followed by a pin wash with Humbrol satin black enamel (photo 57) and at the same time the overspray on the tyres was touched up with the same black enamel paint, and the tracks painted with Humbrol track colour 173, so a fair amount of white spirit was used on the track units with no apparent ill effect (58).
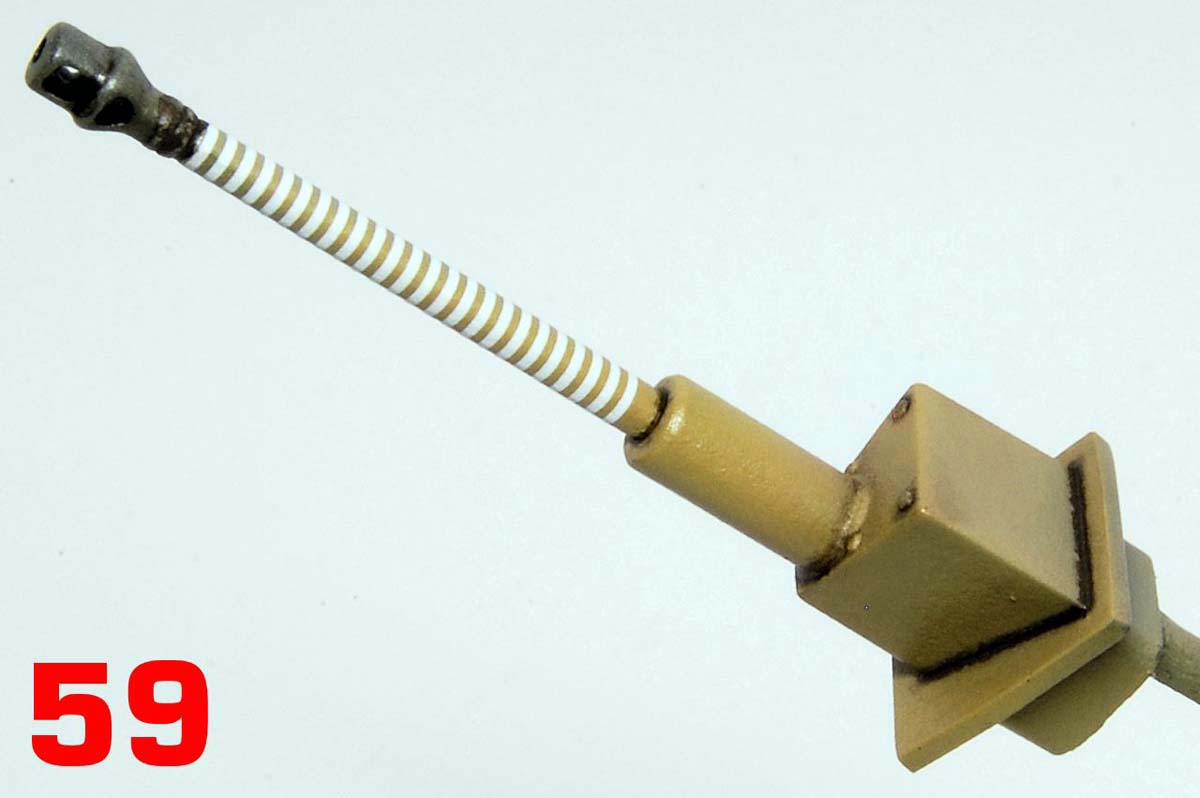
Placing the 24 ring decal on the gun barrel was a slight challenge; the decal is tapered to fit the barrel but there is some overlap, so to ensure no crossing over rings were visible I trimmed one edge with very sharp scissors while the decal was in place, still wet, on the gun barrel (59).
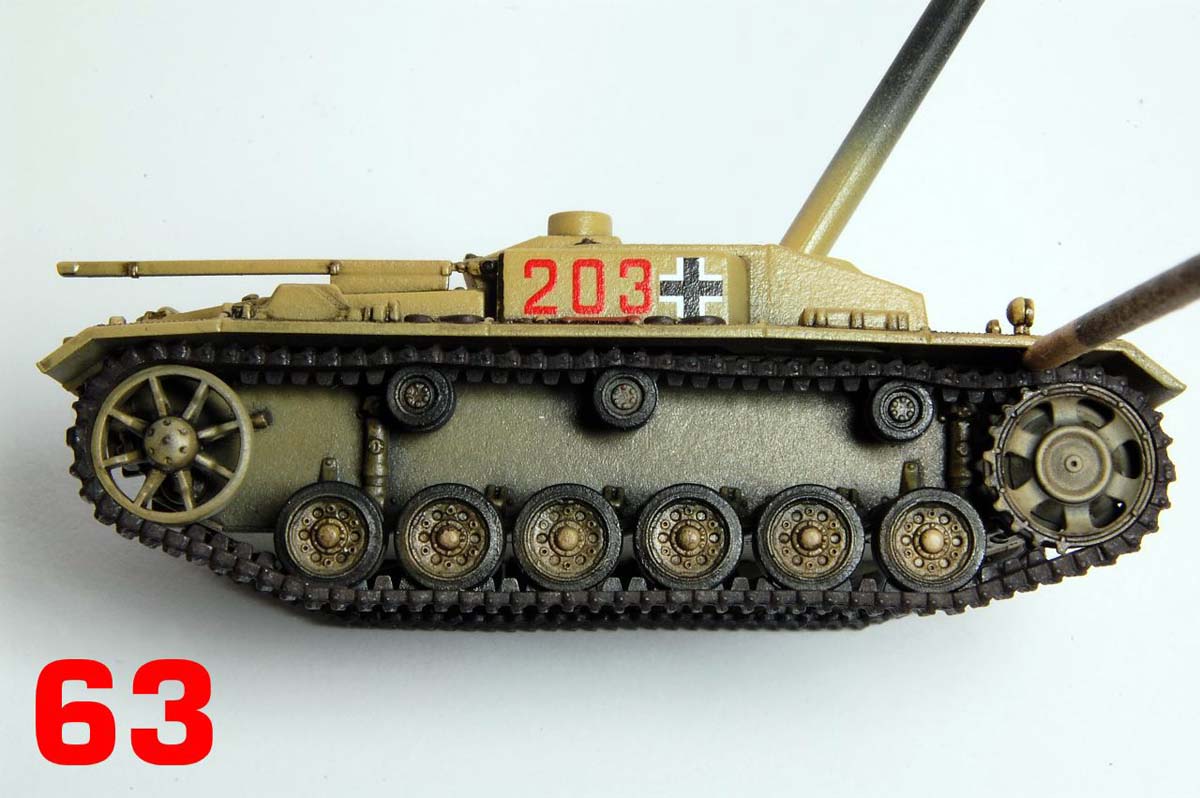
Wanting to prepare good plastic to plastic contact points for attaching the track units to the axles I had taken the precaution of covering them over with rubber masking solution before painting, and in photos 60, 61 the masking has been removed ready for cementing them together (62). The instructions give no special directions for this stage, and I used normal Humbrol liquid cement, which is normally quite slow drying, but it seemed to take considerably longer than usual to set with this soft black plastic. With nine contact points some fiddling around was necessary to make sure they were all in place, and due to the flexibility of the component there was a tendency for the return rollers especially to be pulled down by the track and so not sit at quite the right angle. Note that I havent attached the sprocket and idler at this stage, and it might have been easier had I done so. Whichever way round it is done, its advisable to leave one stage to set completely before doing the next stage, which in my case was adding the big wheels (63). The fit is good, with some attention given to the idler to make sure it was straight, and the sprocket teeth needed to be rotated to the correct angle. Note that the cocktail stick is inserted just to sag the track down on to the sprocket top, then fixed in place with a dab of CA glue.
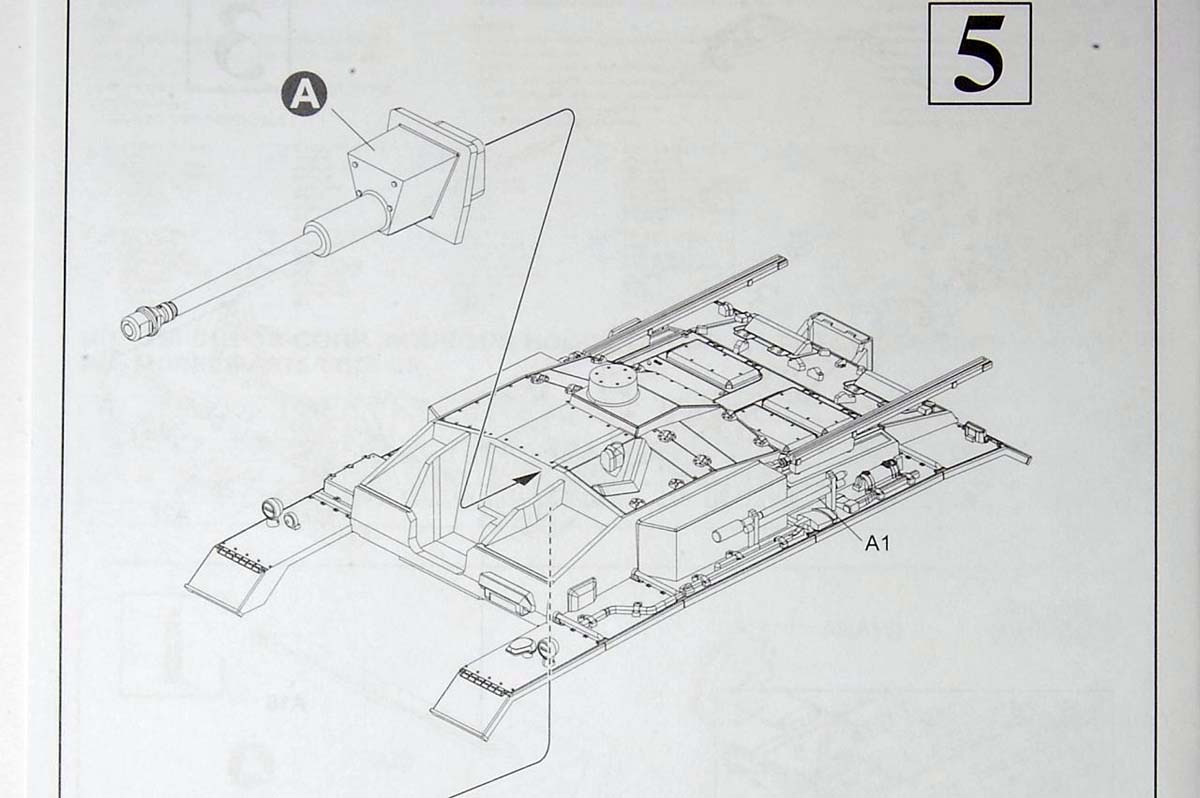
The last step is to add the gun cleaning rods and the gun, which it is worth drying fitting a few times to work out exactly where to put the cement and decide what angle you want it at as there is no elevating mechanism.
Conclusion
I think we could say that this kit, and its successors, confirms Dragons total abandonment of even the pretence that they are a producer of small scale armour models at anything like the sophisticated end of the market. Although we have been watching this deliberate lowering of the bar for some time, it seems a shame that it has come so far, although there are of course other manufacturers who have been driving things forward in terms of using technical advances to create small scale models of increasing sophistication.
This is a quick build kit, and in comparison with other brands of quick build, wargames-oriented models, it seems quite good. The moulding is excellent, and the fit of parts is mostly perfect. Having to snip bits off and reshape parts of the hull is perhaps a bit much, although given the small size it wasnt that hard with a pair of micro shears and a nail file. If you want ten of these then having only 30 parts instead of 130 is certainly going to save a lot of build time, and if dropped off a table top you at least know that the wheels arent all going to fly off. On the other hand, if youre hoping for a model to super detail, then this isnt for you, with the tracks and idler in particular being a challenge to do much with.
Despite the serious simplification compared to some of their past 1/72nd kits, Dragon have persisted with the Armor Pro label on the box, although there is a significant price differential: last years Panther A kits currently sell at over £22, while this new StuG is under £15, even cheaper in the Euro zone and in the USA; unlike some brands of wargames models at this price point however, there is only one in the box.
References
Bruce Culver Sturmgeschütz III In Action (Squadron, 1976)
SUMMARY
Highs: Excellent moulding quality. Very, very quick build.Lows: Solid muzzle brake, single layer idler, very low track detail; many other compromises on detail.Verdict: Decent quality quick build wargames type kit; not for those seeking high levels of detail and accuracy.
Our Thanks to Dragon USA! This item was provided by them for the purpose of having it reviewed on this KitMaker Network site. If you would like your kit, book, or product reviewed, please contact us.
About Matthew Lenton (firstcircle) FROM: ENGLAND - SOUTH EAST, UNITED KINGDOM
Earliest model memory is a Super Sabre my grandmother bought for me around 1972. Have always dabbled in painting and making things, and rediscovered doing that with plastic in 2008. Vowed then to complete the 30 year old stash, and have made some progress. Hobby goes hand in hand with BBC Radio 3...
Been anticipating this release for a couple of months; now I'm disappointed (but getting used to it!). Hope Flyhawk releases a "real" kit of an early StuG.


Comments