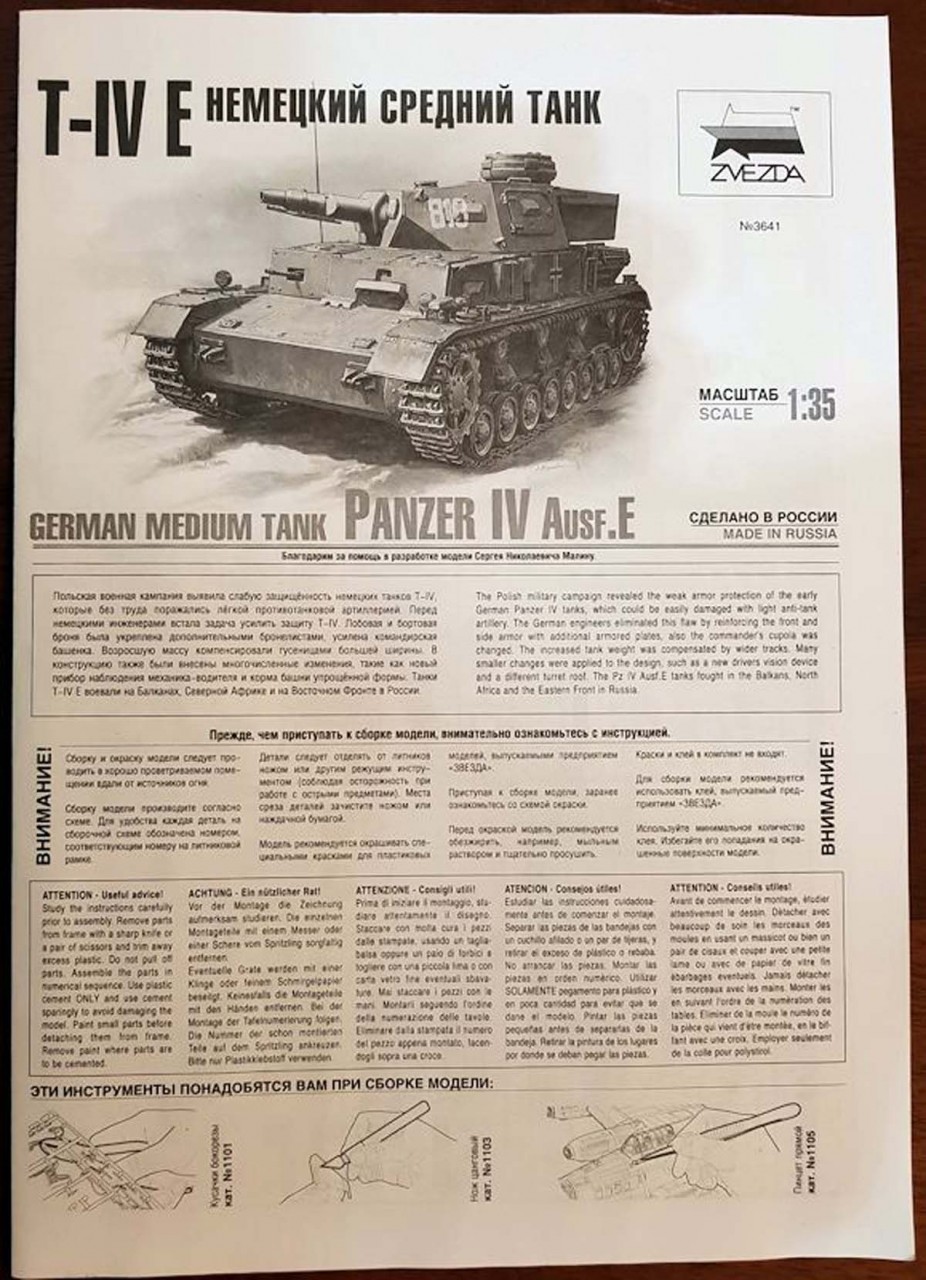
In July 1939 a contract was issued for 223 6.Serie/B.W. tanks (Panzer IV). This series was designated as the Ausf. E. However, in March 1941, this number was reduced to 206. By the end of the contract, 200 had been delivered as tanks. Four had been converted to Brueckenleger IVc bridging vehicles. The last 2 were converted to the interleaved suspension system for R&D testing.
The major difference with the Ausf E, over the Ausf D, was the additional armor protection that was added. The front armor plate was increased from 30mm to 50mm. Initial production units still had the 30mm front armor with a supplemental 30mm plate added in the field until supplies of hulls with the 50mm plate were available. Spaced armor was also added to the front upper hull. Armor plates were also added to the sides of the lower hull.
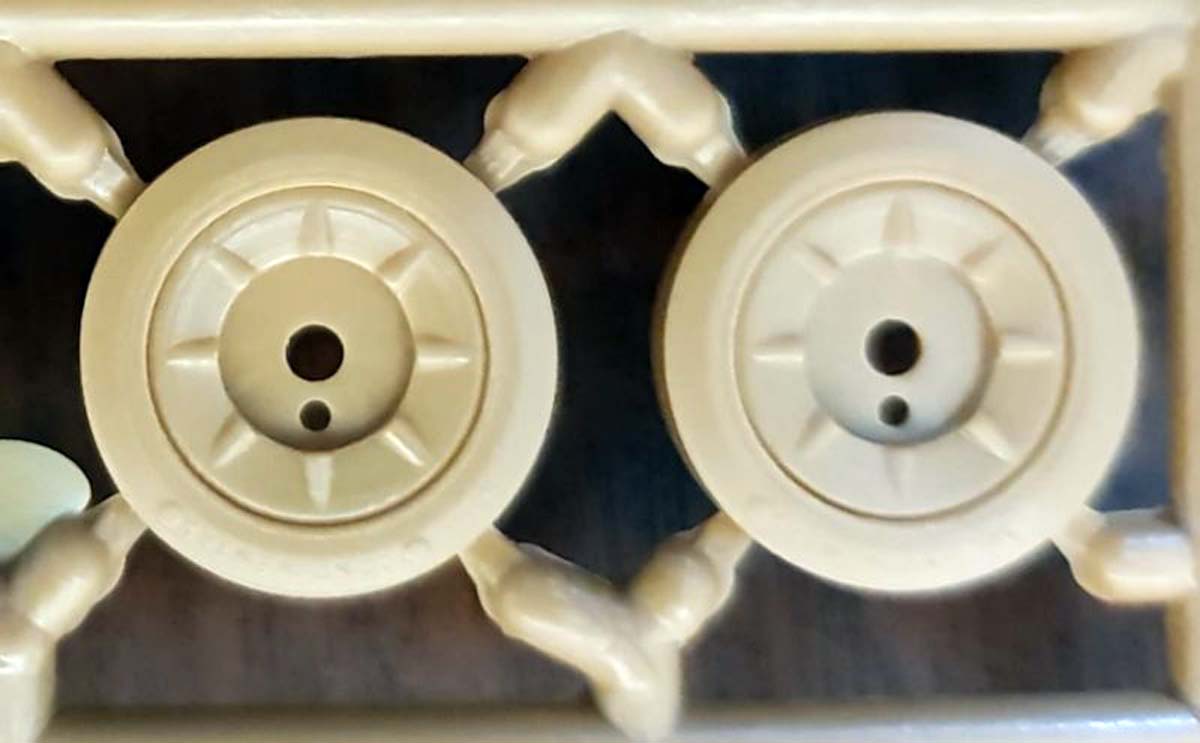
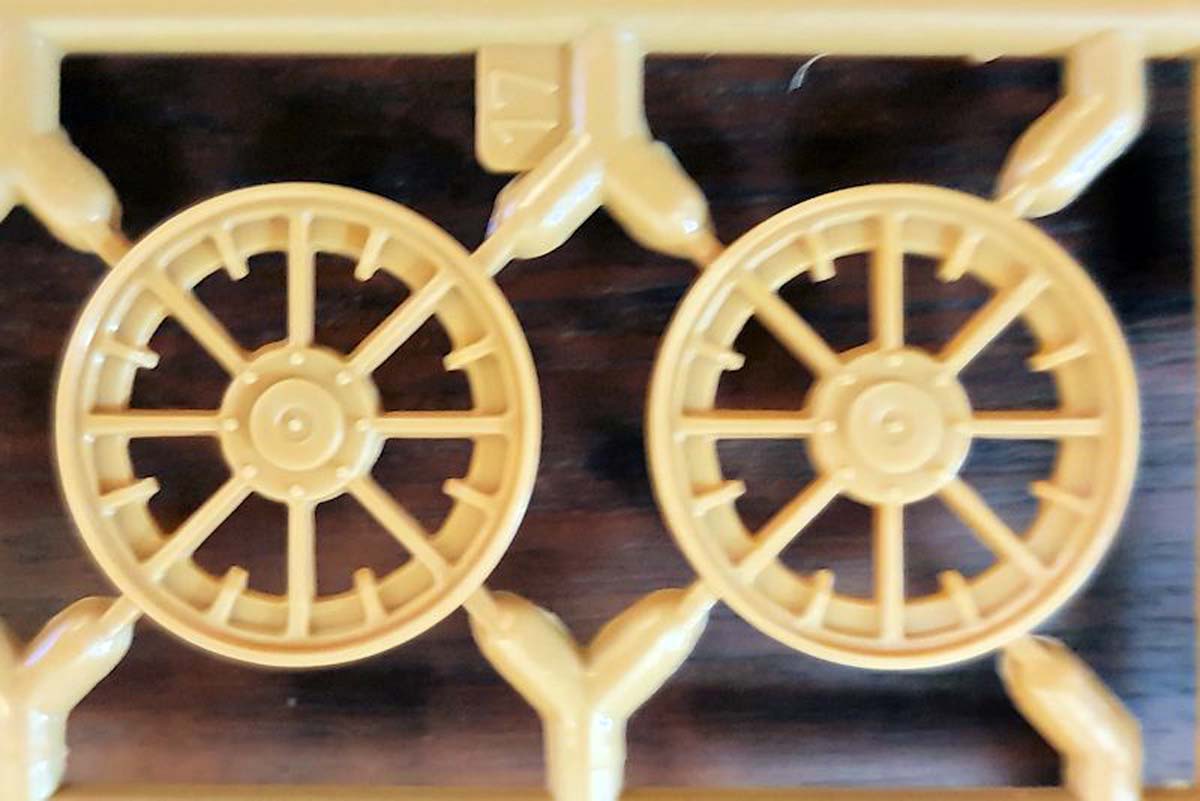
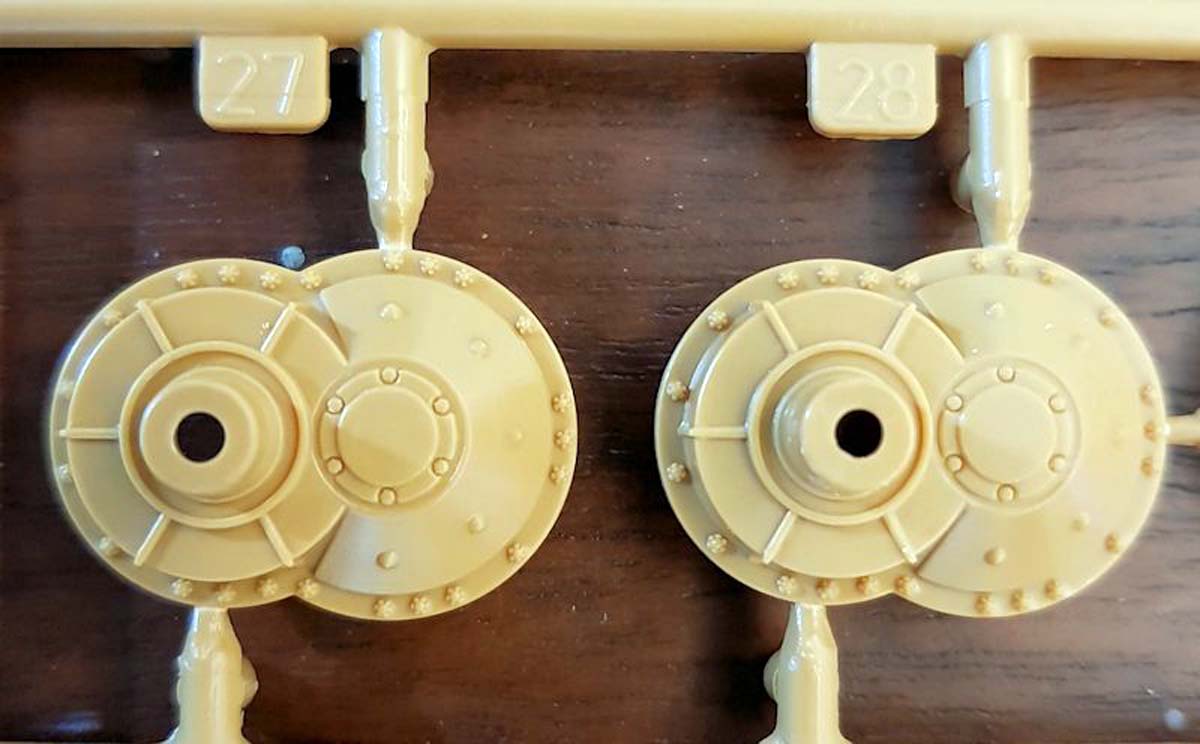
Other minor changes were made to the drive sprockets and road wheel hubcaps. The drivers visor was changed to the pivoting style. An armor guard was installed over the rear smoke candle rack. An extractor fan was added to the turret roof. Starting in March 1941 the turret storage box was added in production.
A number of tanks were converted to the Tropen configuration for Afirca.
The Ausf E used the same 7.5cm KwK L/24 low velocity main gun with one MG34 mounted coaxially in the turret and one MG34 ball mounted in the hull and operated by the radio operator.
Whats in the Box
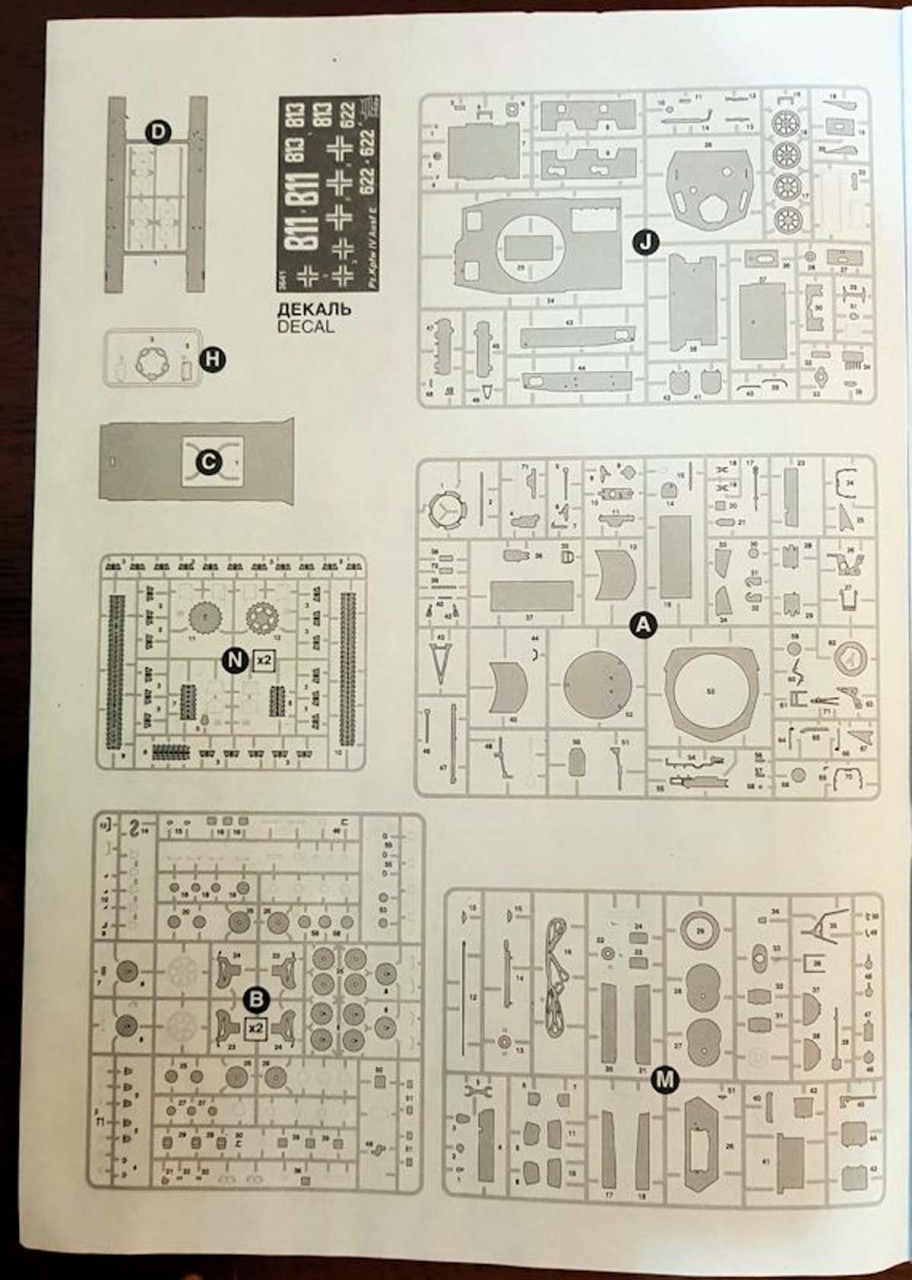
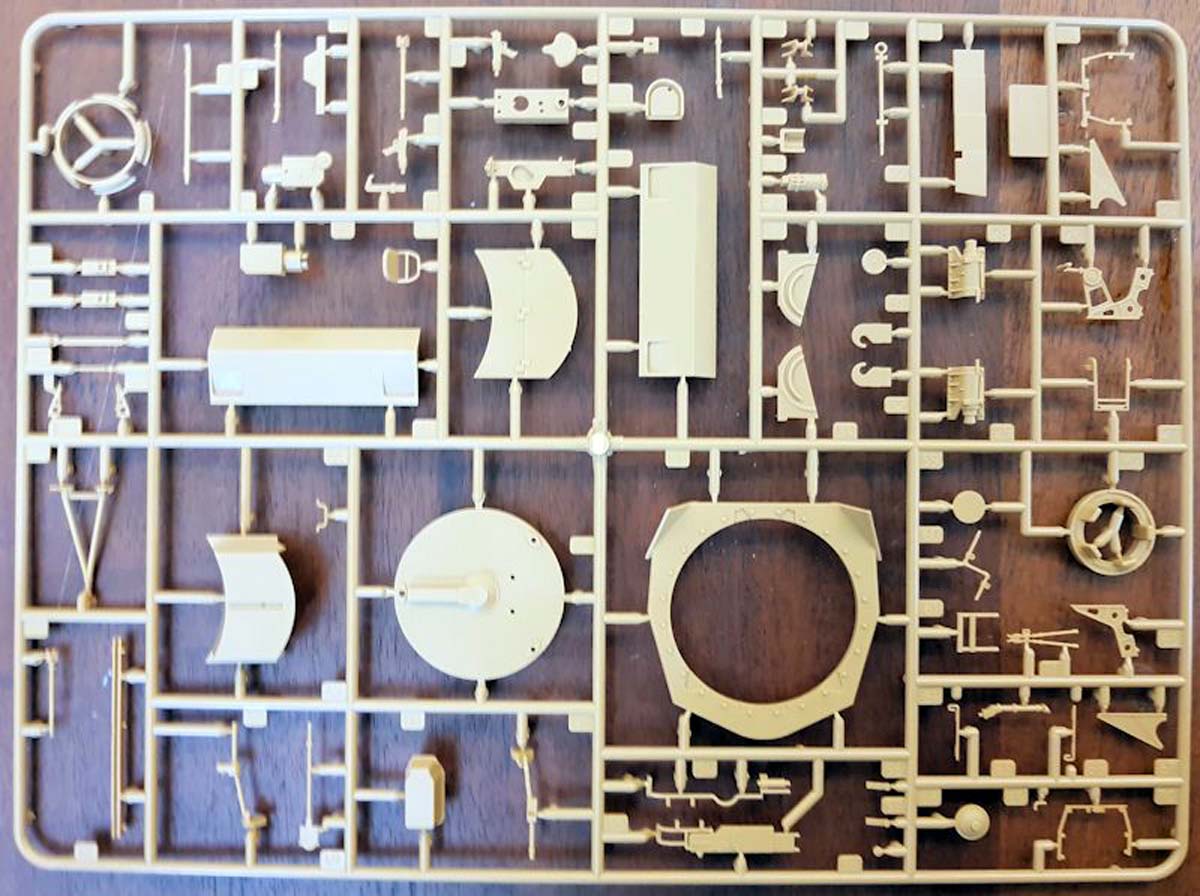
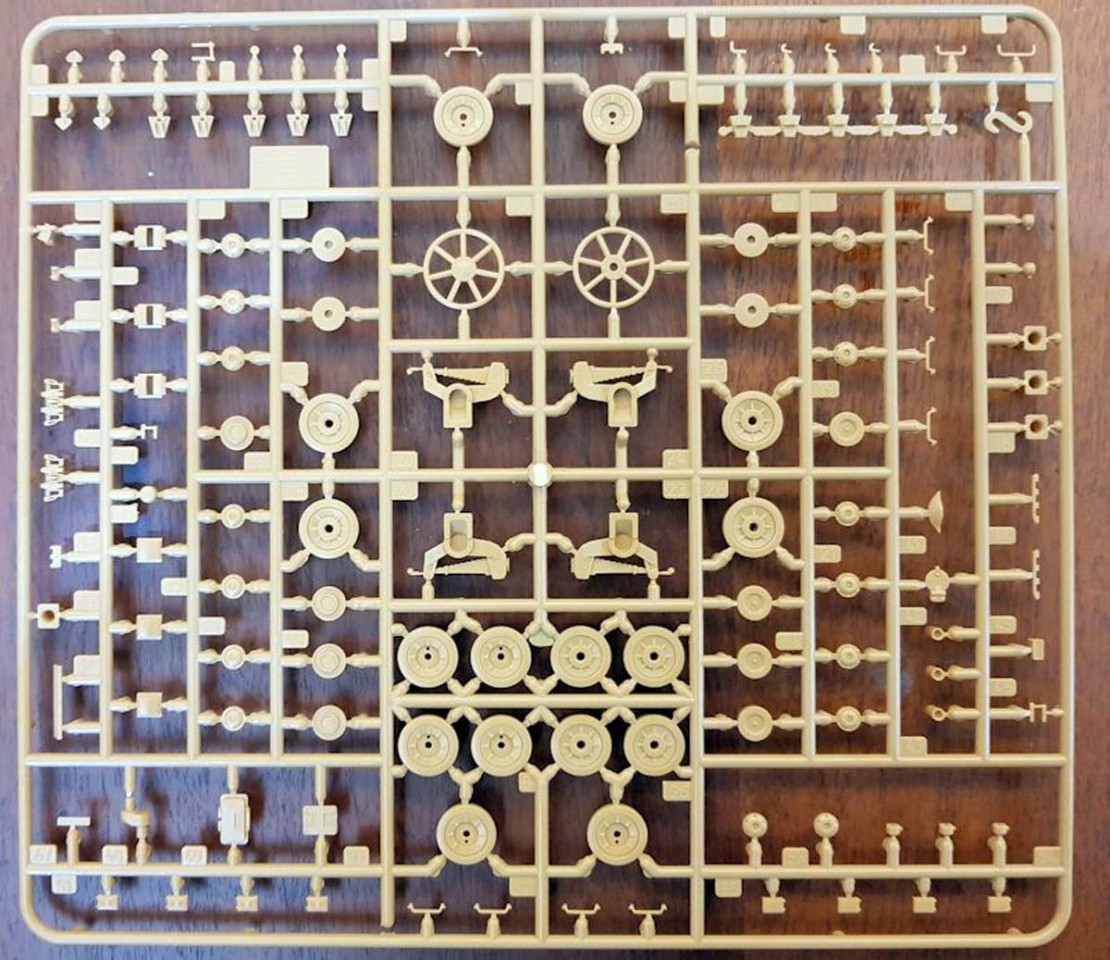
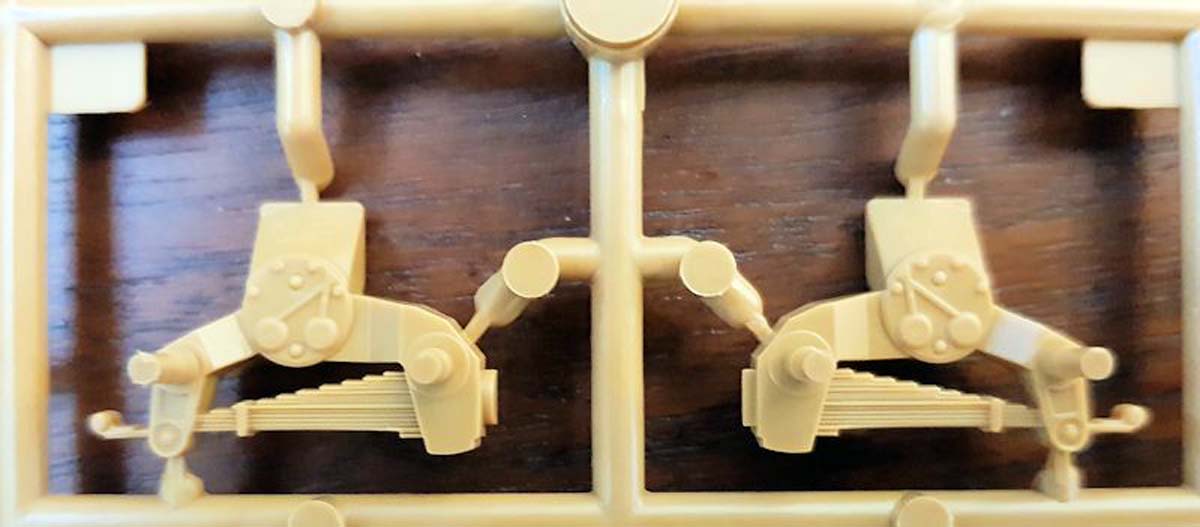
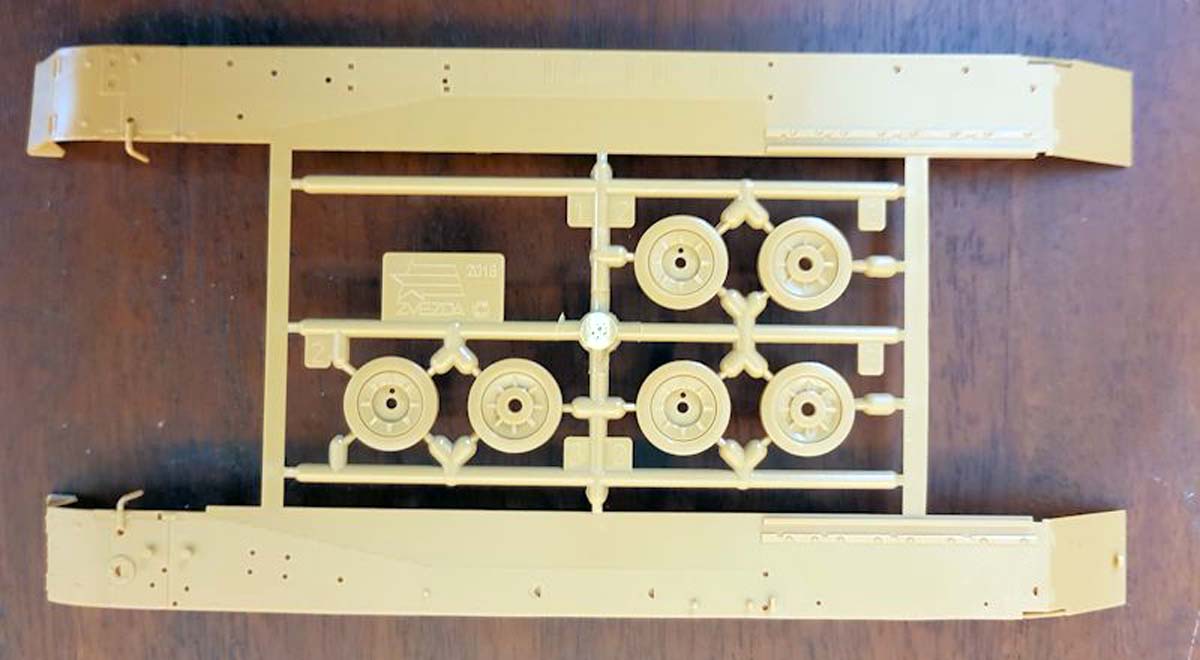
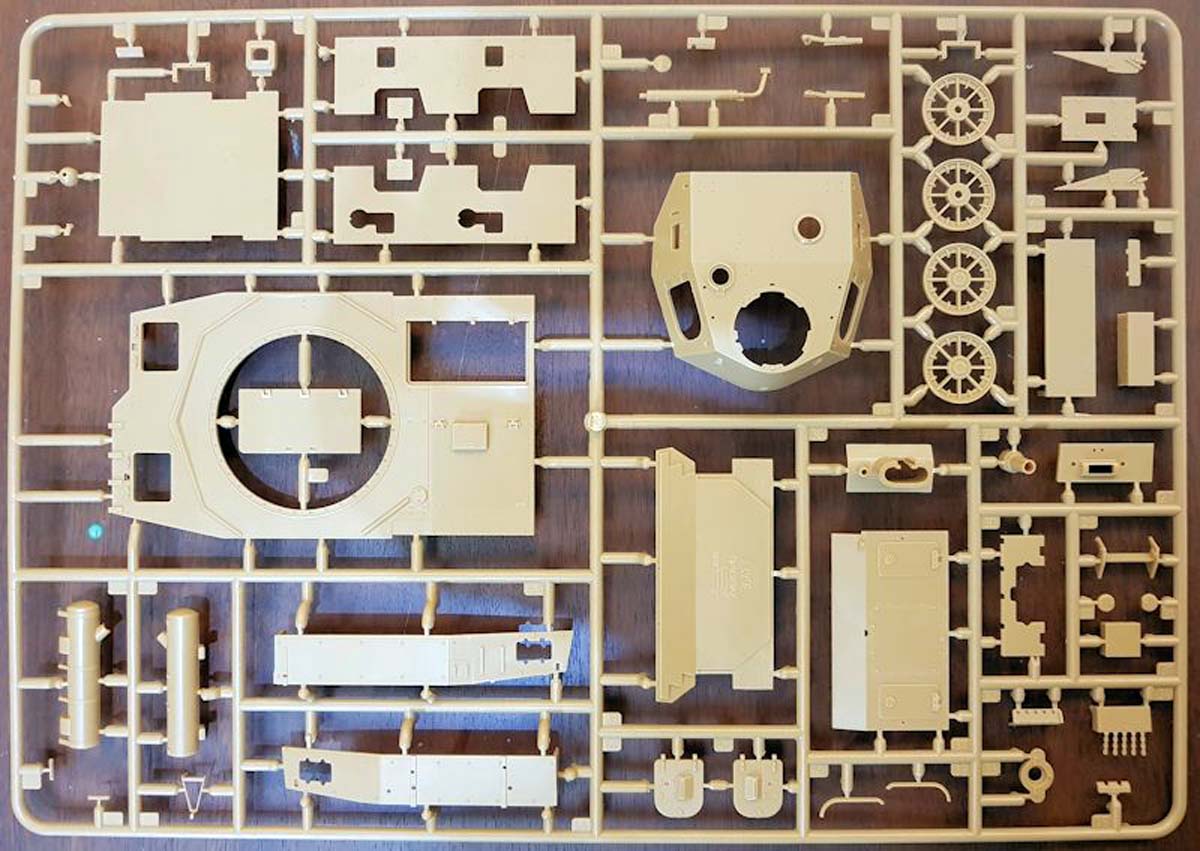
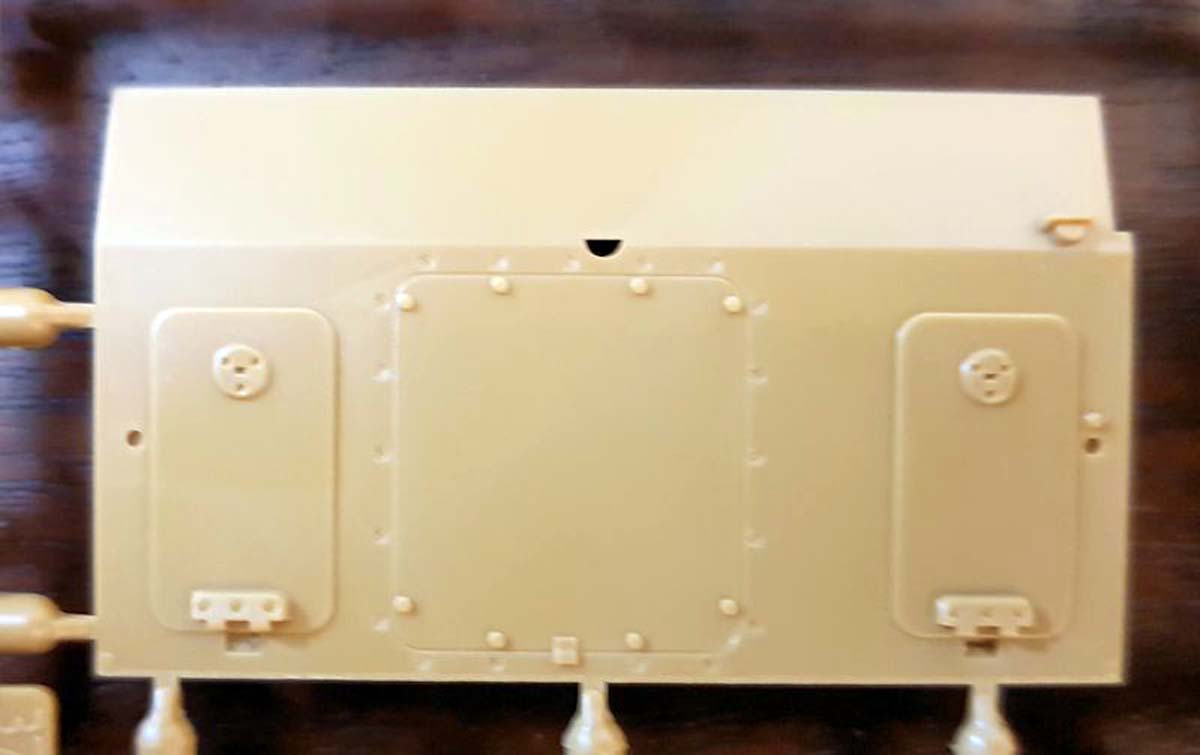
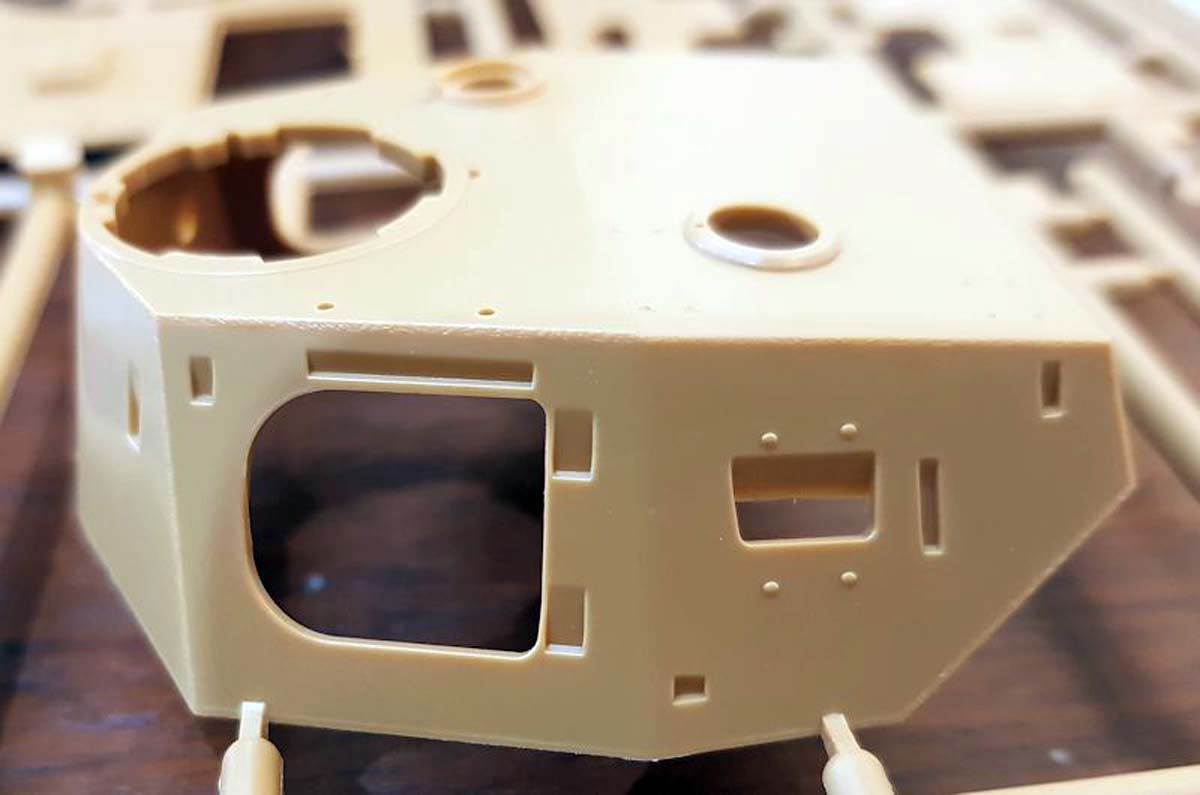
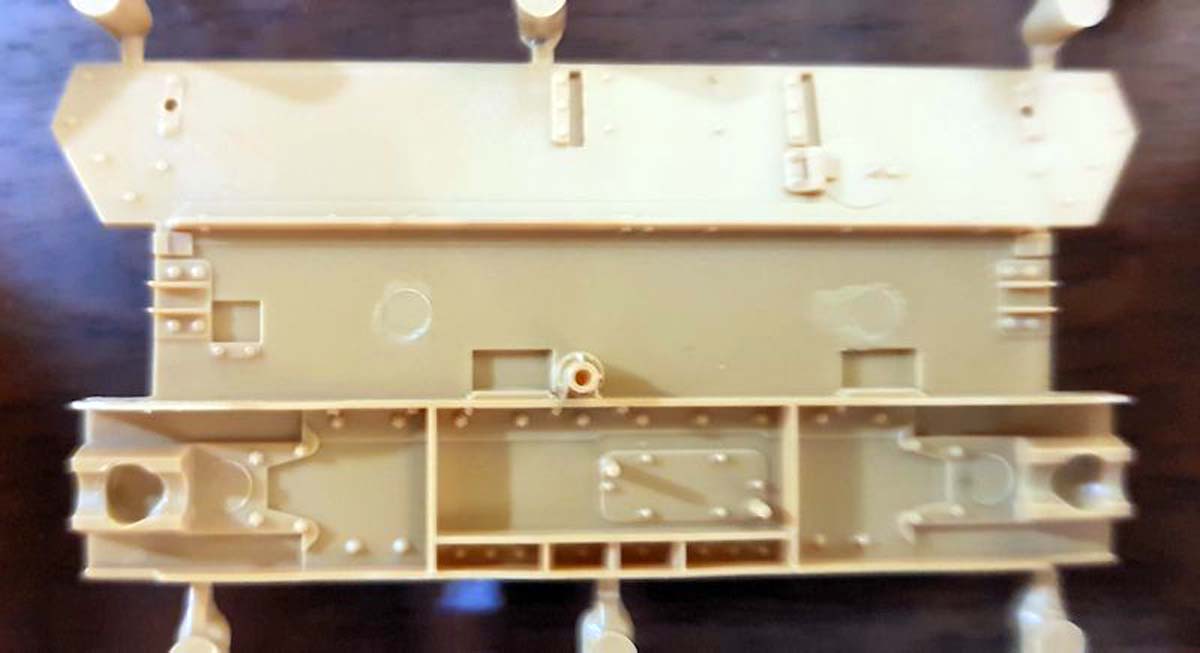
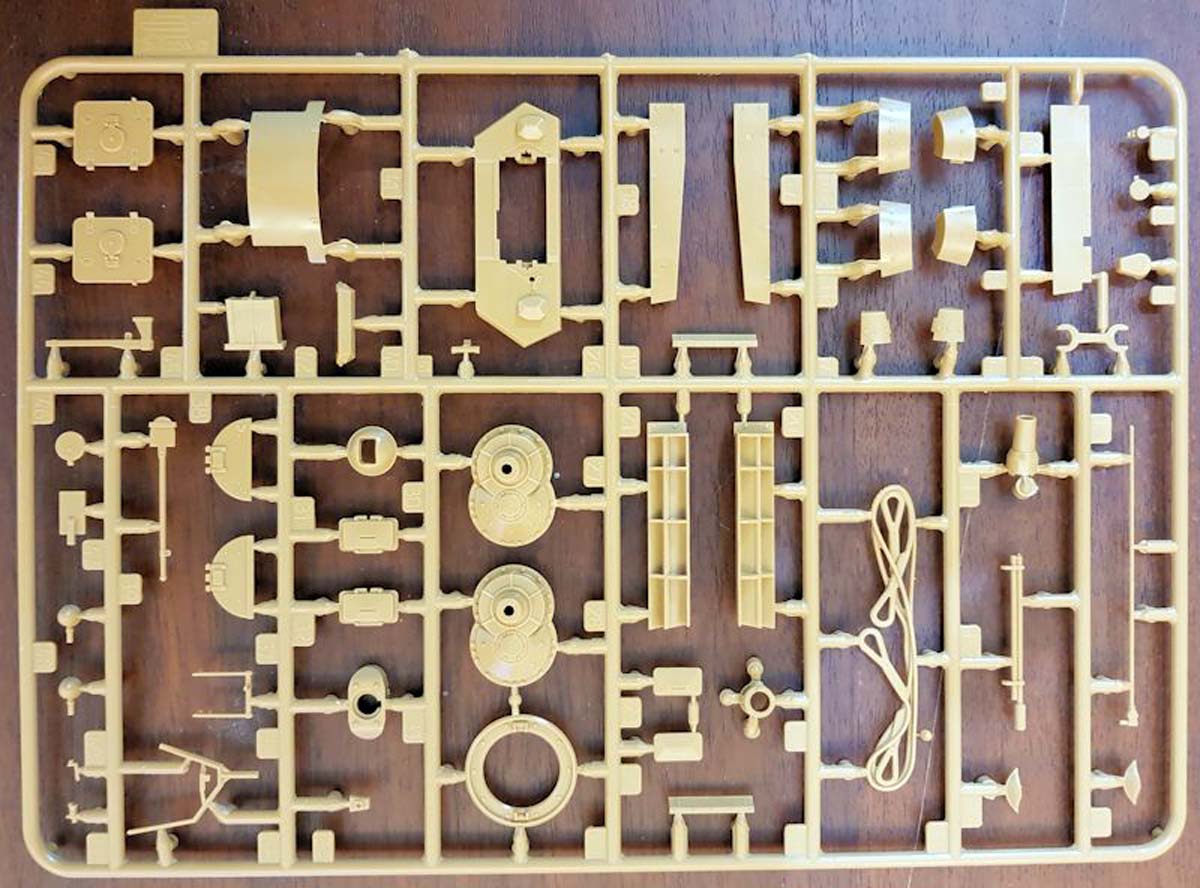
This kit is from Zvezda and released in 2018. The sprues are well protected in a solid cardboard box with an outer sleeve. The kit has a little over 500 parts. What is in the box:
8 sprues molded in tan
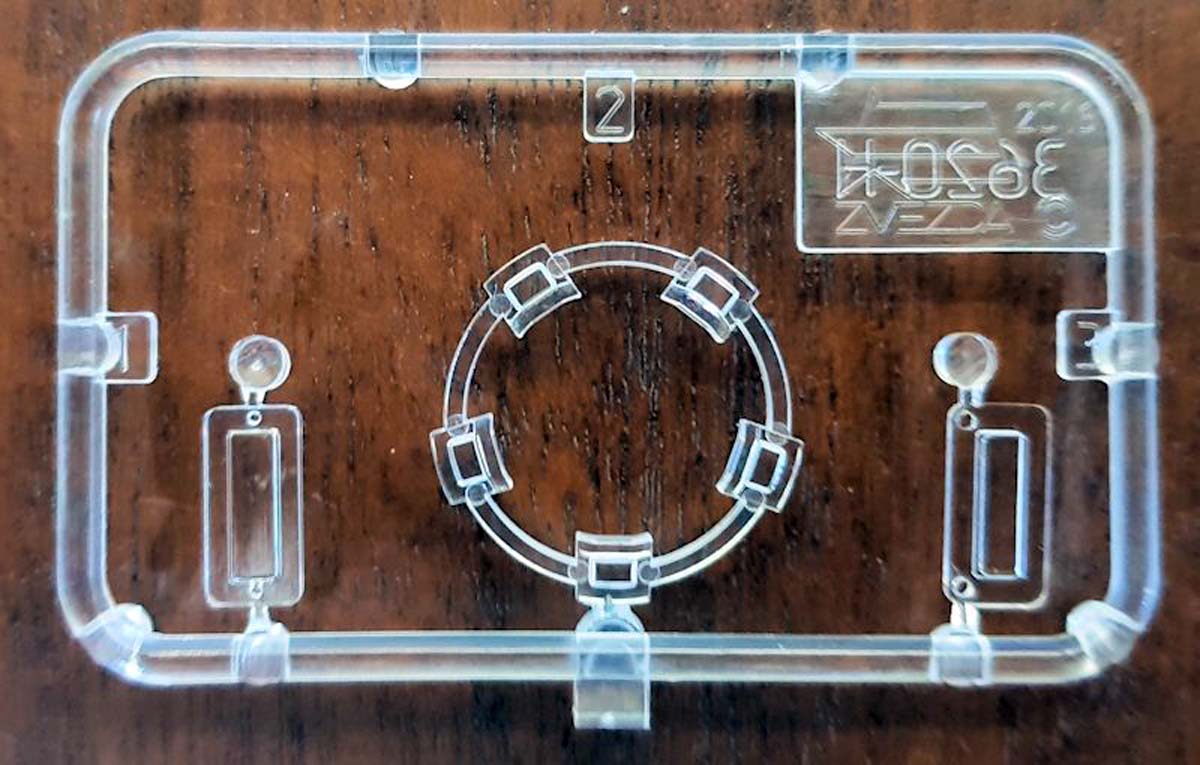
1 sprue molded in clear
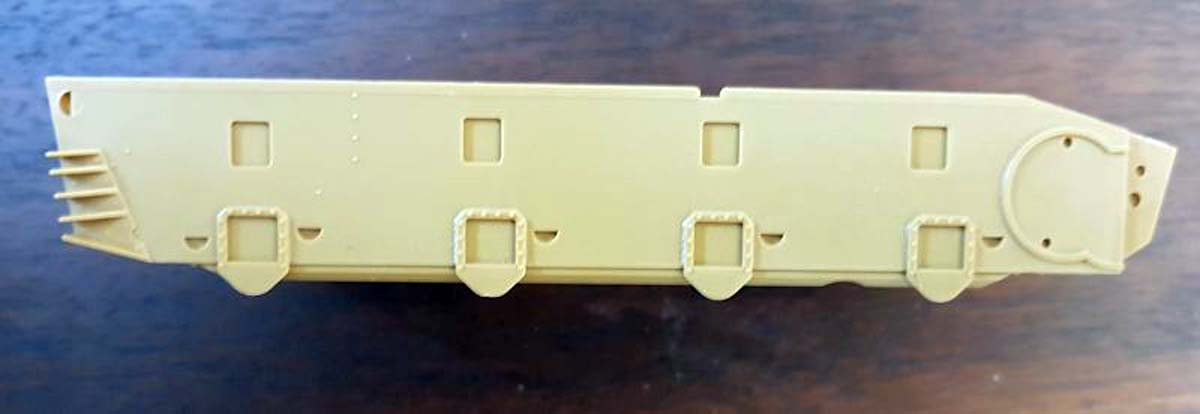
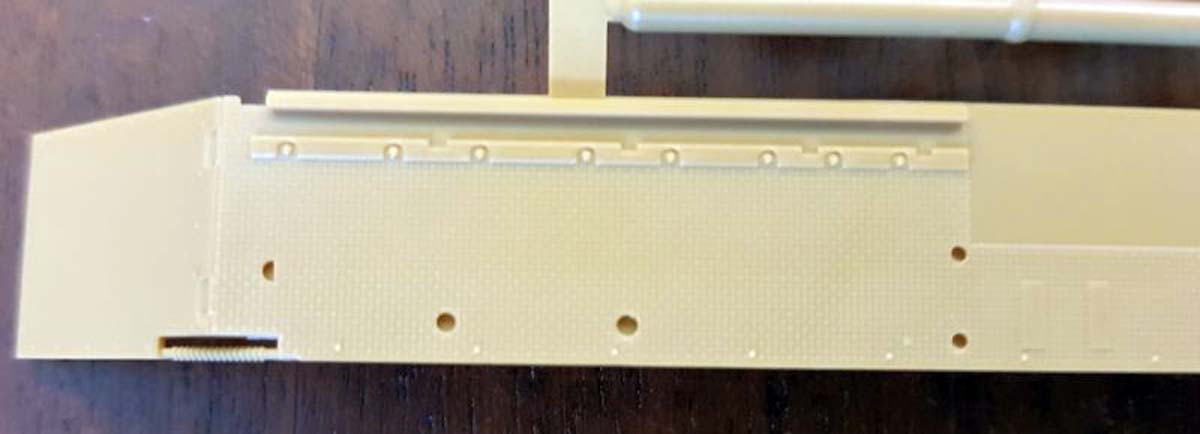
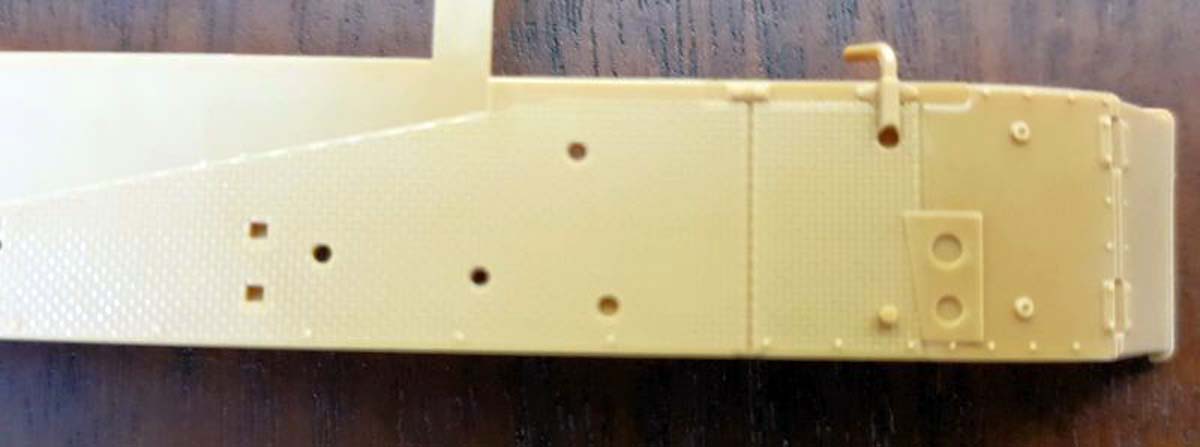
1 lower hull
1 Decal sheet
1 8 page instruction manual
1 2 page painting guide
Looking at the Kit
The quality of the styrene is very good. There is little or no flash on any of the parts. The ejector pin marks are located such that they shouldnt be an issue once built.
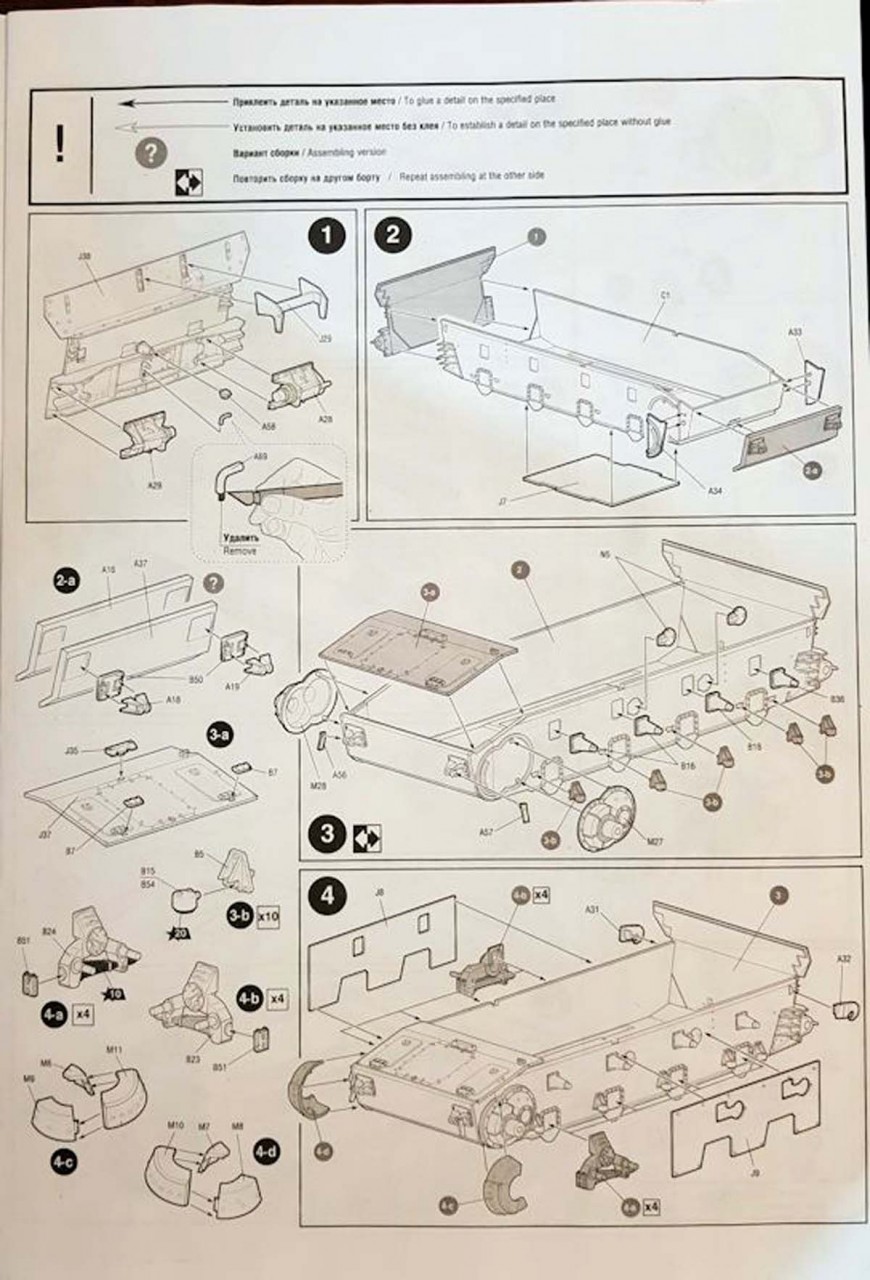
Instructions Standard Zvezda format, consisting of 8 pages of line drawings. Assembly is broken down into 25 steps. However, there are numerous sub-assembly steps within a labeled step. There are really around 58 steps when you include all of them.
Step 1 begins with the rear hull armor plate. Most kits have this in two separate halves. Zvezeda molds this as one piece. You start by adding the idler wheel adjusters along with the smoke candle rack mount. You finish with the oil filler cap and the lower hull tow hook pin. Dont forget to remove the small tab on the bottom of the tow hook pin
Step 2 continues with the lower hull. Install the rear plate from step 1. Add the bottom plate insert. Not sure why this was not molded as part of the lower hull to begin with. Sub-step 2a has you choose the front hull plate. Part A37 is the initial 30mm plate and part A16 is the 50mm plate. Select which version you want and then add the forward tow hooks. Lastly, add the forward hull extensions for the final drive covers.
Step 3 begins with two separate sub-assembly requirements. The first deals with the forward hull piece with the transmission/clutch hatches. You are just adding the hinges and part of the spaced armor support. The second is assembling the ten suspension bumpers. These are two parts, the mounting bracket and a separate bumper. The instructions call-out the bumper to be painted 20. Unfortunately, the paint list doesnt identify what 20 is supposed to be. This should be rubber or tire rubber. You should be able to install the bumpers after painting the hull.
The main part of the step is to add the parts from the sub-assemblies along with the final drive covers, return roller mounts, and fuel filler covers. These are installed on both sides (except the fuel filler covers).
Step 4 (4a/4b/4c/4d) starts with the suspension boogies and the final drive armored covers. You then install these onto the lower hull along with the rear tow hooks and the side armor plates.
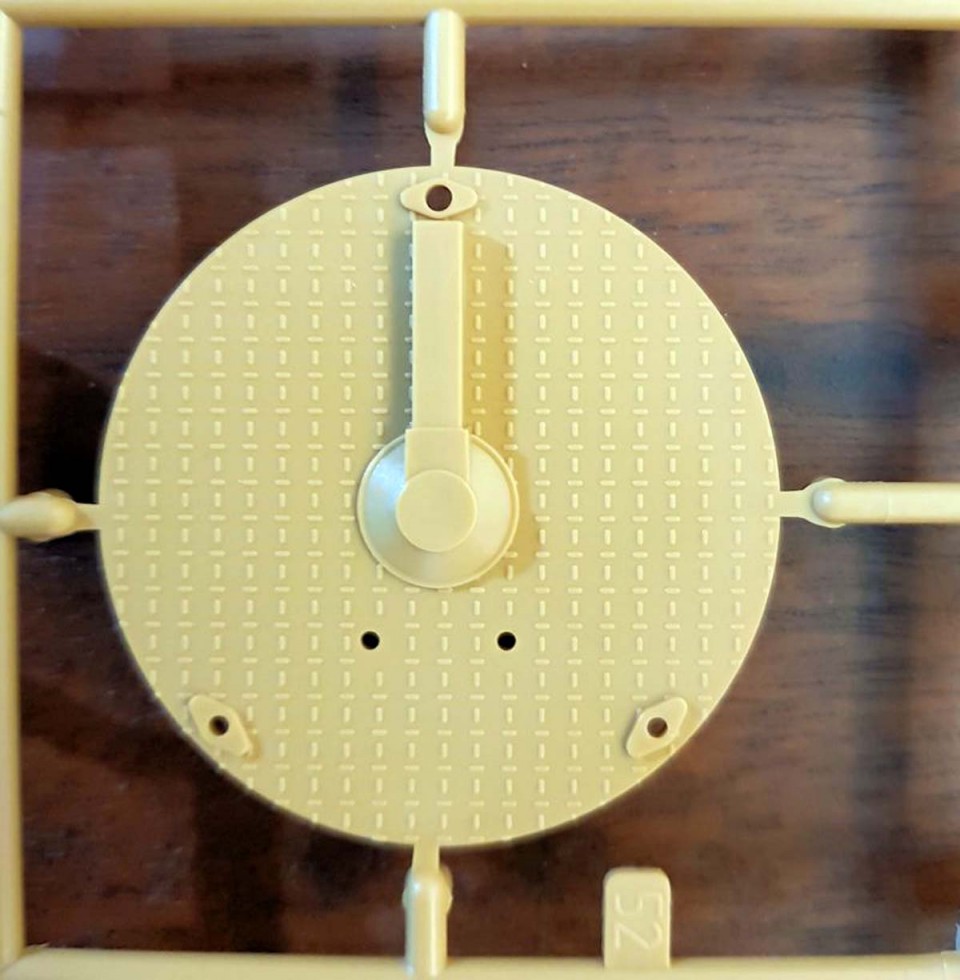
Step 5 (5a/5b) you assemble the main roadwheels and the return rollers. These are all one piece and the painting of the tire will need to be done separately from the hub. Again, the paint call-out is for 20, which is not on the list. This should be rubber or tire rubber. You complete the step by installing all of the wheels and rollers on the hull. There are no poly caps, so everything is glued in position.
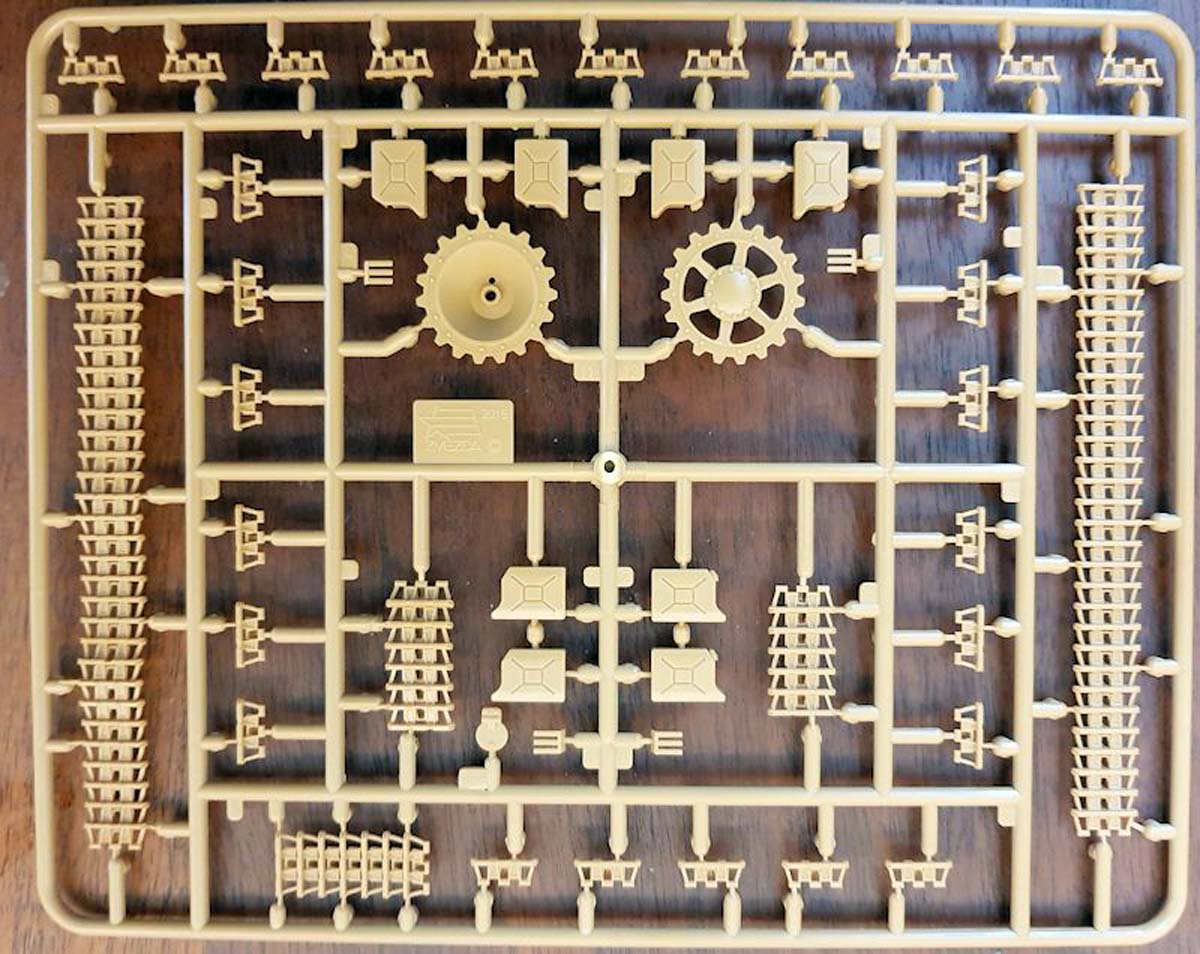
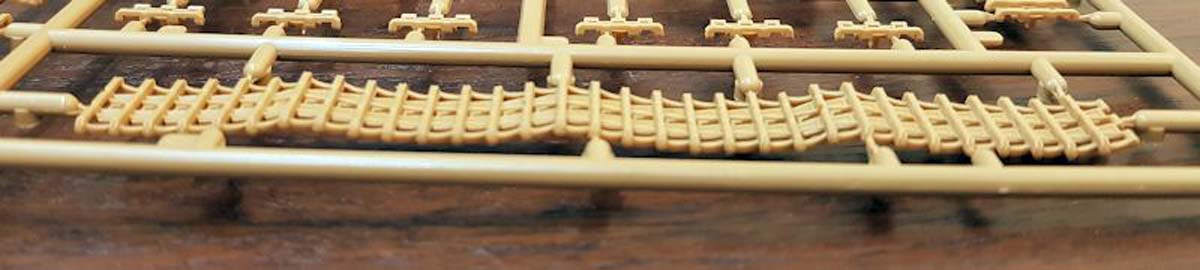
Step 6 (6a/6b/6c) assembles the drive sprockets and idler wheels. Again, there are no poly caps with these. The track is the link and length variety. The upper run has a built in sag to replicate real world conditions. This also makes it easy to position on the return rollers. There are seven links around the sprocket, and eight links around the idler. The rest is made from length pieces. Just make sure you have the correct orientation of the links.
Step 7 adds the fenders. Zvezda has made this a one piece assembly. No issues with getting them installed at the correct angle. You add a few parts to the fenders to complete this step.
Step 8 simply installs the fender assy to the lower hull.
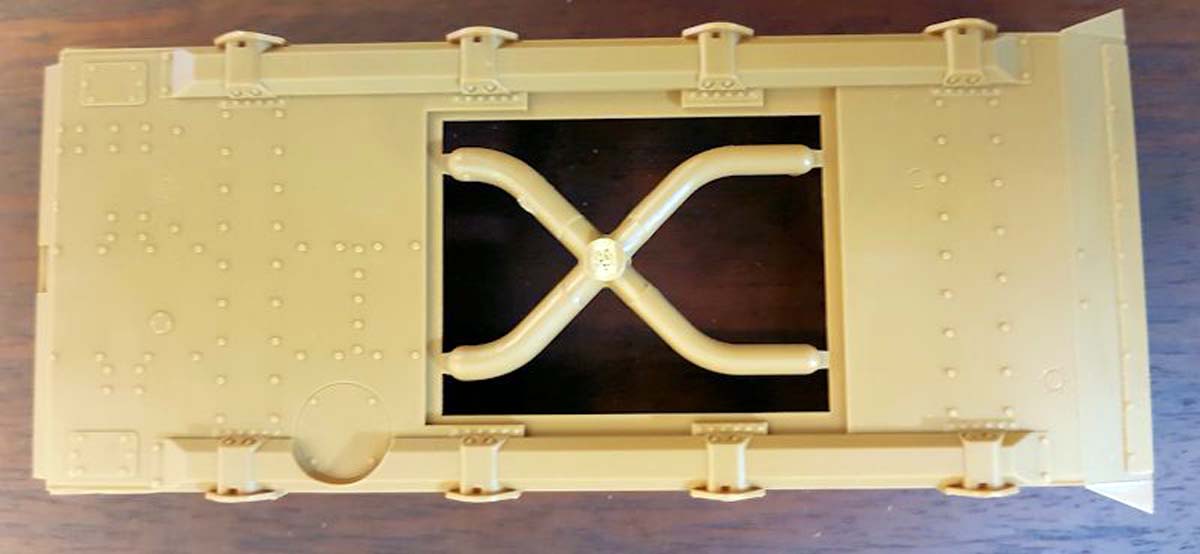
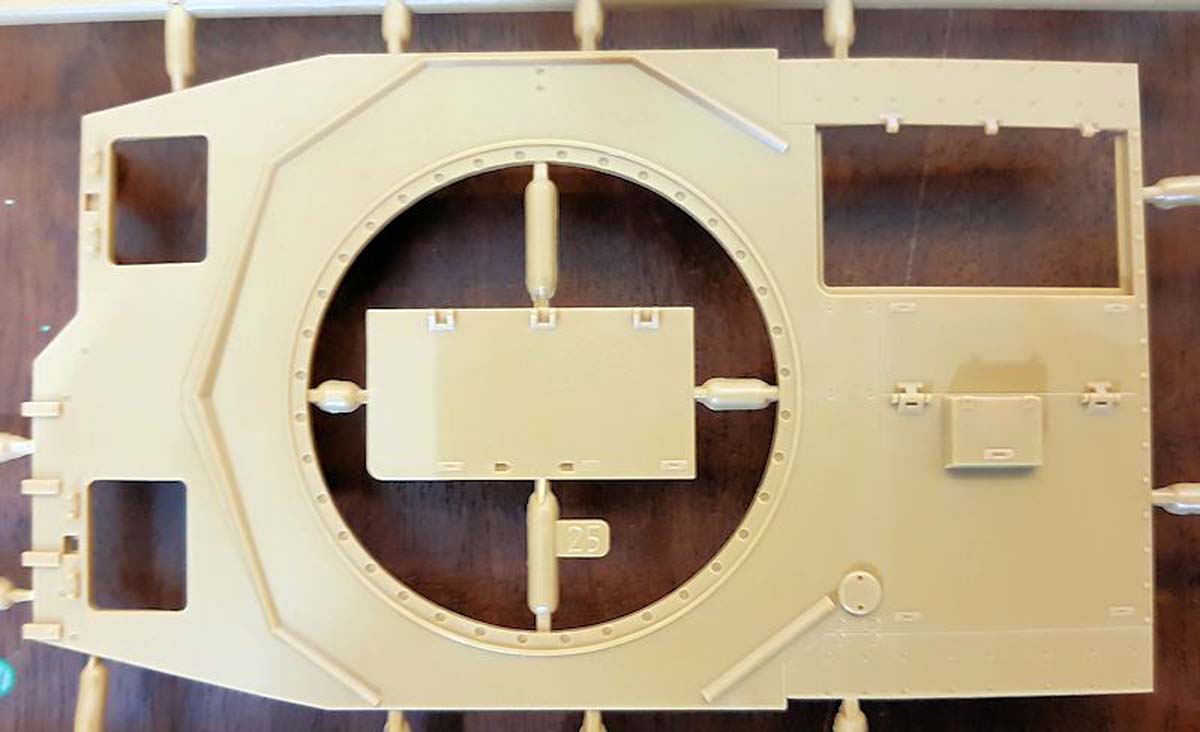
Step 9 (9a) begins assembly of the upper hull. The sides are molded with the extra armor plate, instead of being separate parts.
Step 10 (10a.10b) you start with the MG34. It is not completely accurate, but at least its more than just a barrel piece. Then install this in the ball mount and add the side visors. Add the drivers spaced armor plate, hatch rain guards and rear deck hatch.
Step 11 Attach the completed upper hull to the lower hull, along with the radiator exhaust louvres.
Step 12 (12a/12b) completes the upper hull with the rear side panels and the forward hatches. Add the spaced armor for the radio operator along with the jack and the S-hooks. You need to choose between part J2 or J11. There is no indication on which to use for what reason. You will have to either choose one, or base it on any pics you can find showing the area.
Step 13 (13a) Start by assembling the exhaust muffler. Since it is made from two pieces, the seam line should be removed. The rest of the step adds some of the tooling to the left fender.
Step 14 simply adds more parts to the fenders.
Step 15 (15a) Start with the smoke candle rack. Add the generator exhaust muffler. The towing cables are molded as one piece. Finish with a few more parts for the fenders.
Step 16 begins the turret assembly. You start with adding a number of parts to the turret shell. Most of the parts are small, so take care not to lose any.
Step 17 (17a/17b) starts with sub-assemblies for the turret front plate and main gun breech. Be careful when gluing parts M15 to M26. You want part A10 to be moveable. The step finishes with the main gun rail and shell basket.
Step 18 (18a) continues with the inner turret. Add the gun sight, coax MG34, and some additional structural supports.
Step 19 (19a/19b/19c/19d) the sub-assemblies build the crew seats on the turret supports and floor. Attach these parts to the lower turret half.
Step 20 assembles the sections from Steps 16, 18, and 19.
Step 21 (21a/21b) assemble the turret basket and attach it to the turret. Finish by attaching additional external parts.
Step 22 assembles the first part of the main gun
Step 23 finishes the main gun. You are provided two options for the barrel. You can select either one. Both styles are seen in pictures.
Step 24 (24a/24b/24c/24d/24e) starts with putting together the cupola. You can choose to have the periscope ports open or closed. Then assemble the two turret hatches. Next add these parts, along with the main gun, to complete the turret assembly.
Step 25 completes assembly of the model. Install the turret along with the antenna, headlights, and spare track links.
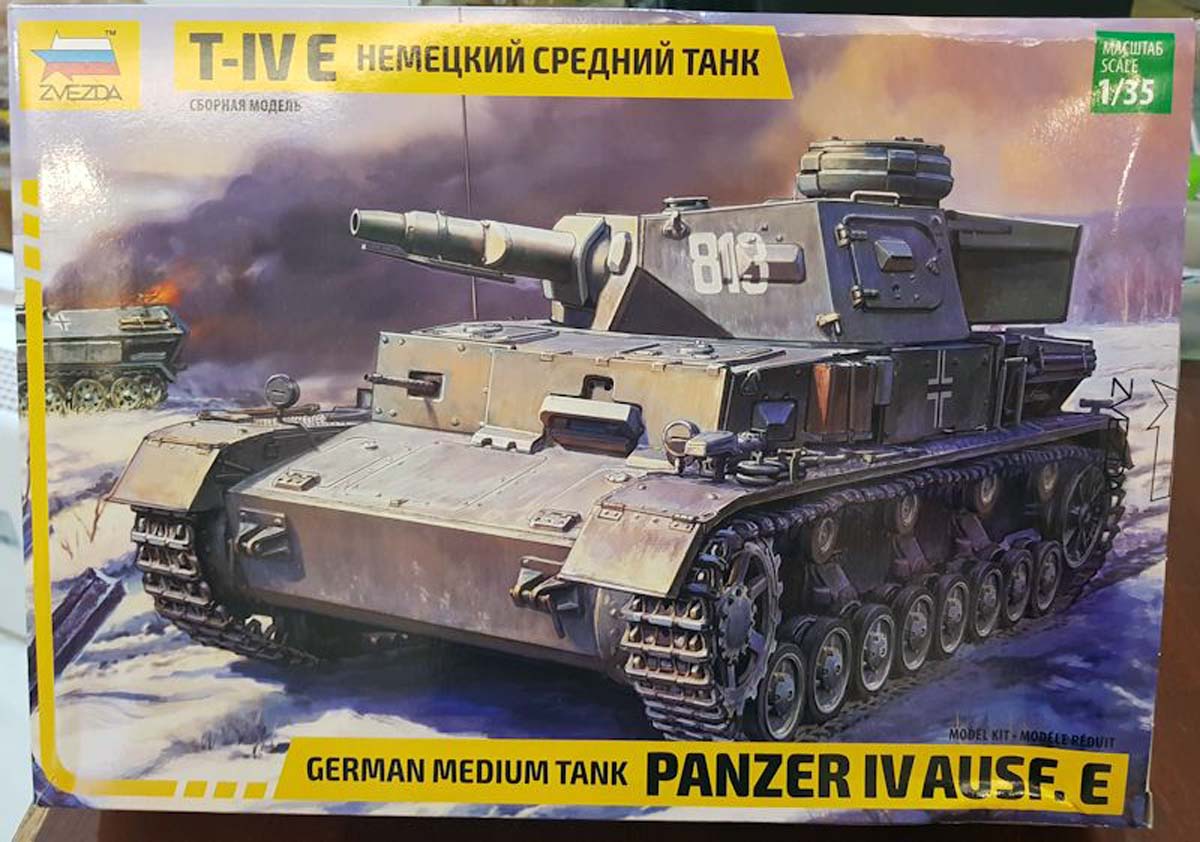
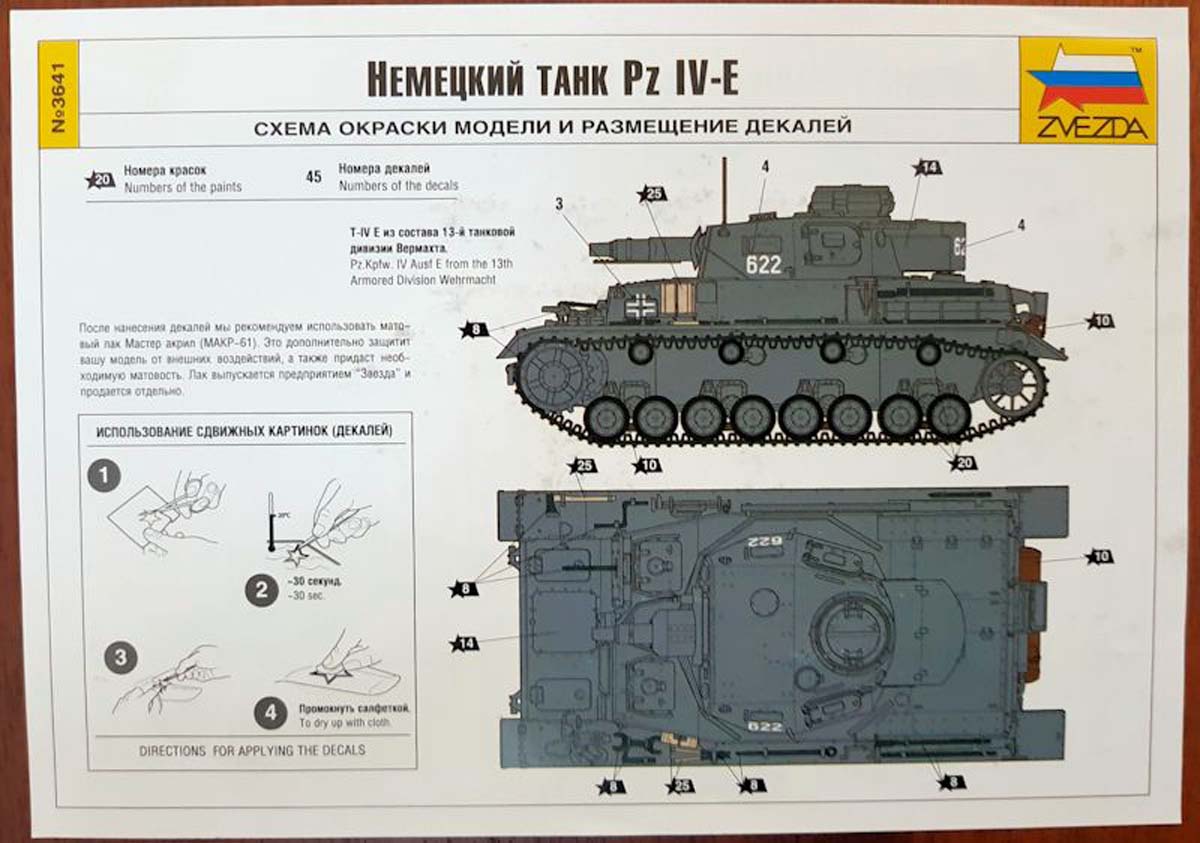
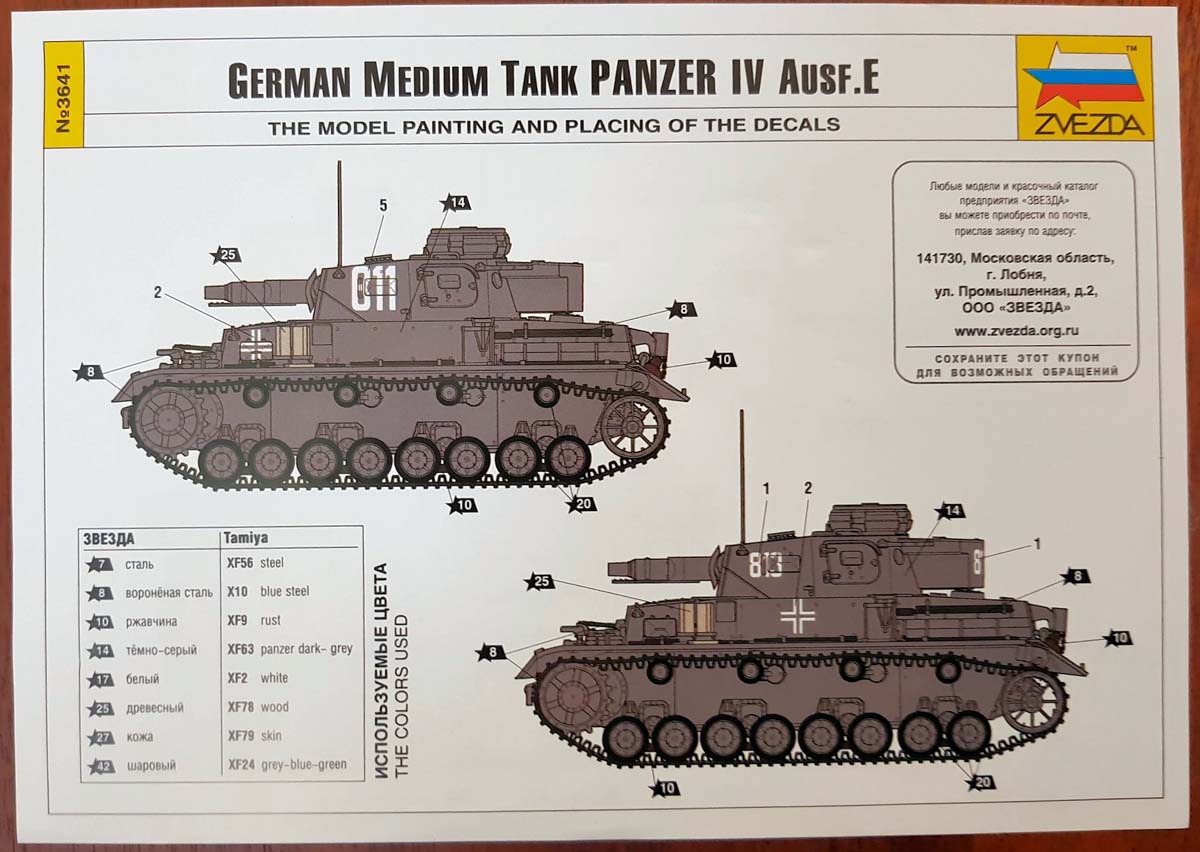
Painting Color call-outs reference Zvezdas own paint line as well as Tamiya products. Color callouts are included during assembly. All versions should be RAL7021Dunklegrau, as this was the standard scheme at the time of production.
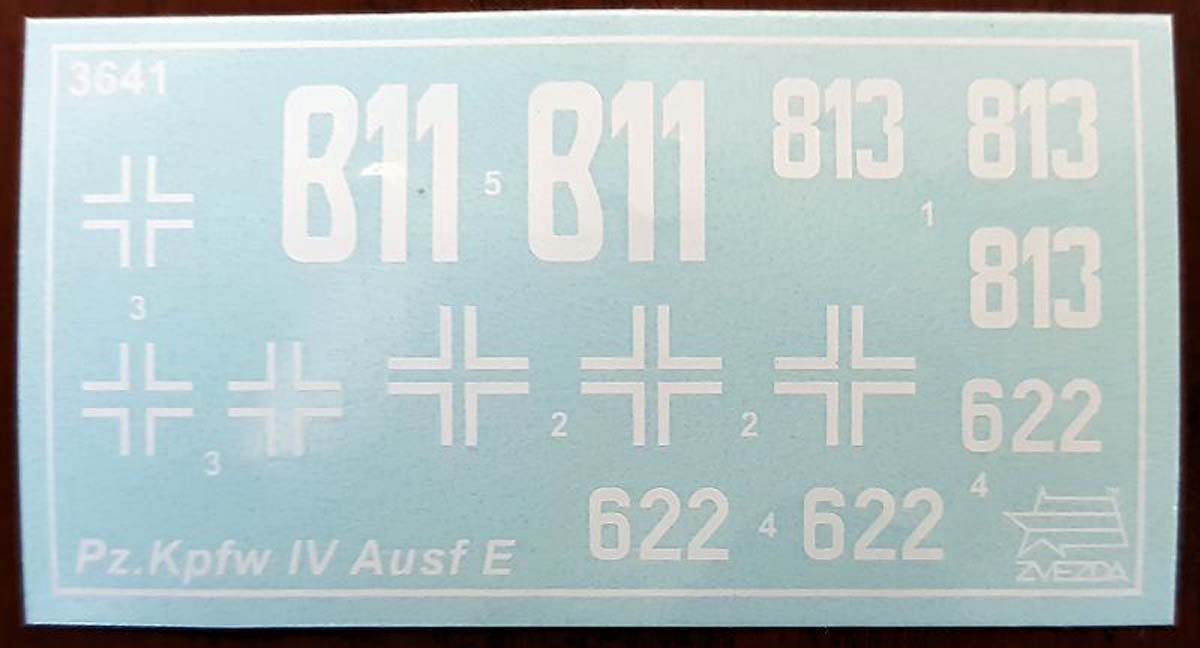
Decals The sheet includes Balkenkreuz and turret numbers only. The numbers represent three different tanks. Two are for unidentified units, and one for the 13th Panzer Division.
SUMMARY
Highs: A nicely detailed kit that is not expensive. A very good kit for the less experienced builders.Lows: No real dislikes with this kit.Verdict: The Dragon Ausf. E kits offer more parts, and complexity, for the same money. But this is a great option for a simpler, and quicker, build.
About Mark (d111298pw) FROM: OKLAHOMA, UNITED STATES
I'm from the US, but have lived most of my adult life around the world due to my work.
I started building models when I was 6. Took a 30 break as other priorities took hold (work,family, etc..). Got back into it a number of years back building F1 kits (Ferrari only). When I got to India, the modell...
Looks like a nice easy enjoyable build and not overly labor intensive. I'll probably get it after I sell off my Tristar Pzkpfw IV D.
Definitely a fitting replacement for the old Tamiya Pzkpfw IV D as opposed to an alternative to Dragon or Tristar early Pzkpfw IV.
Actually to be totally pedantic the "E," was the replacement production type for the "D" since it is the succeeding letter on this case indicating the next variant in a series.
So logically it is the literal replacement for the preceding type. So in real life it was the replacement and in my case fulfills my requirement for a 1941 era Pzkpfw IV.
I already have two "D" because I wanted to do the various differences of one from France, Russia versus Africa. Instead I'll do an "E" for Russia and the markings in the kit are very similar to the ones in the movie Panfilov's 28 Men.
And after my eye surgeries I just can't see putting together all the bits in the Tristar kit.
Hi Mark
You say in your review comments that you can get the more complex Dragon kit for the same money. This surprises me but maybe its different where you are. Here in the UK Dragon kits are much more expensive than Zvezda's.
The two Dragon kits, 6264/6301, are in the $40-50 range at some on-line shops, same as the Zevzda kit. Pricing around the world is so different, that I never put specific numbers in my reviews.
I would buy this just to check out how they are coming along as a company. As for comparing Dragon to them...is that comedy relief?
This company were in the same boat as Ark Models, Eastern Express ,Alan...etc....but they have created some new molds I hear. So...I would be curious. I have built kits from all these companies....what I like to buy from them are trucks mostly...


Comments