Newly released from Eduard for the Academy OIF Bradley, this set should enhance your vehicle, with a plethora of add-ons to impart a more scale-like appearance. This look is not intended as a review, knowing so little as I do about modern armour, more of a look at what you get in the package, and a description of it!
the contents
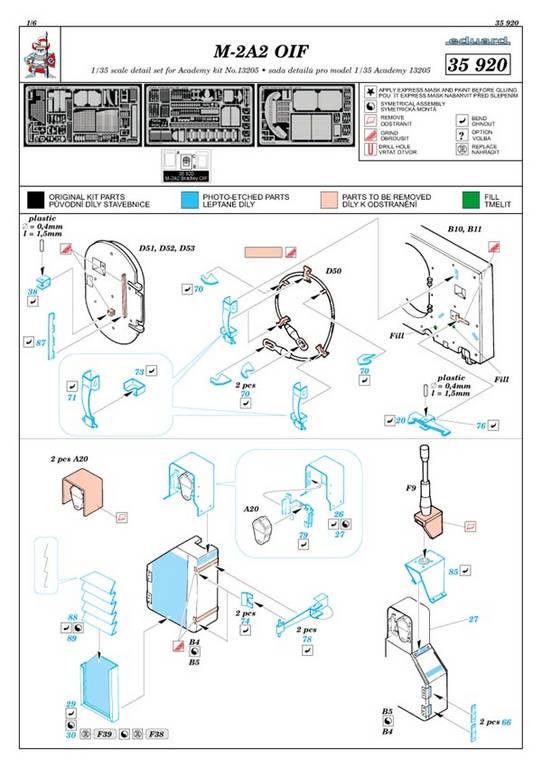
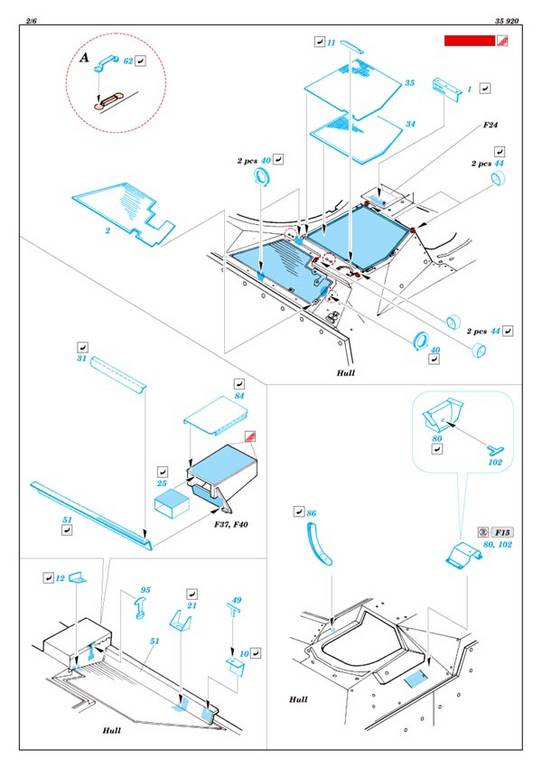
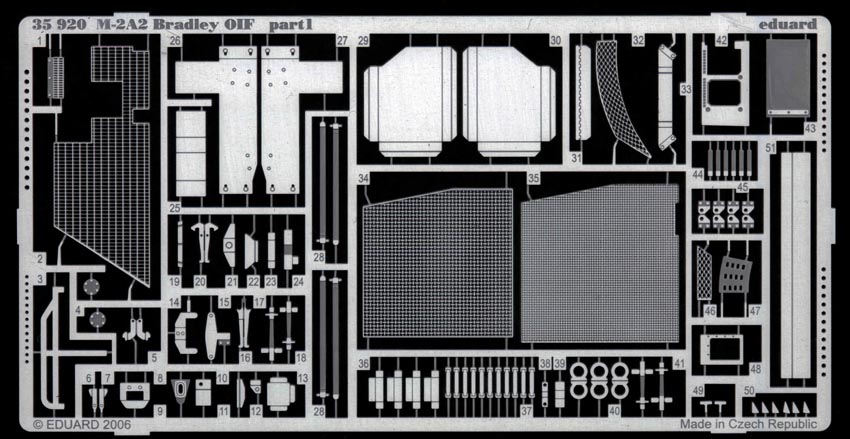
Included in this set are three fair-sized frets of photo etch, and instructions in Eduard's new mini style running to six sides. As with all Eduard sets, the instructions are fairly clear, showing exactly what parts need to be replaced, cut, or otherwise altered in order to install the Eduard photo etched parts successfully.
The first thing Eduard offer us in this set is lot's of furniture for the rear door! Not only do we get new brackets for it, but we also get new brackets for holding the tow rope we always see held on the door. There are, of course, new replacement brackets for the light clusters, and also a new bracket for the antennae, along with a myriad of smaller parts the purpose of which I have no idea of! No doubt if you model Bradley's, you'll know all these parts off by heart, so take a close look at the instructions and you'll see what I mean.
As a general rule of thumb regarding Eduard sets, if you follow the link above, you can download the instruction sheets for any set they produce, which mean you can study exactly what you get before you go out and purchase it. Great idea!
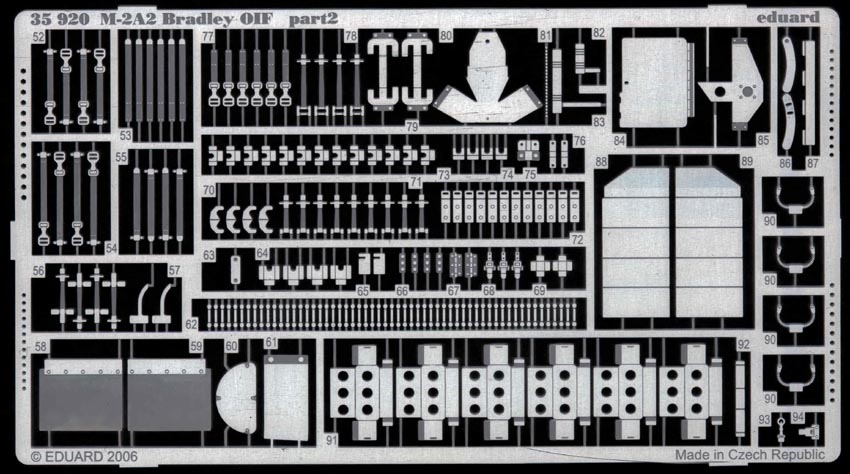
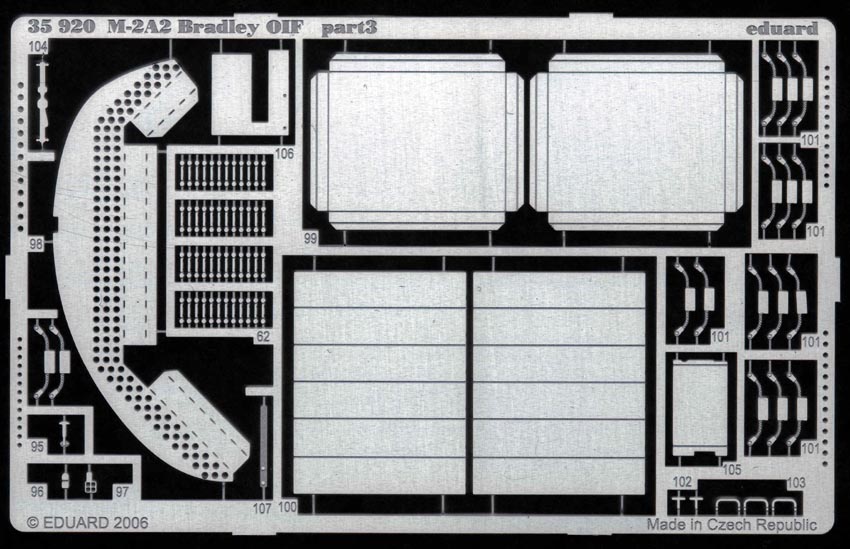
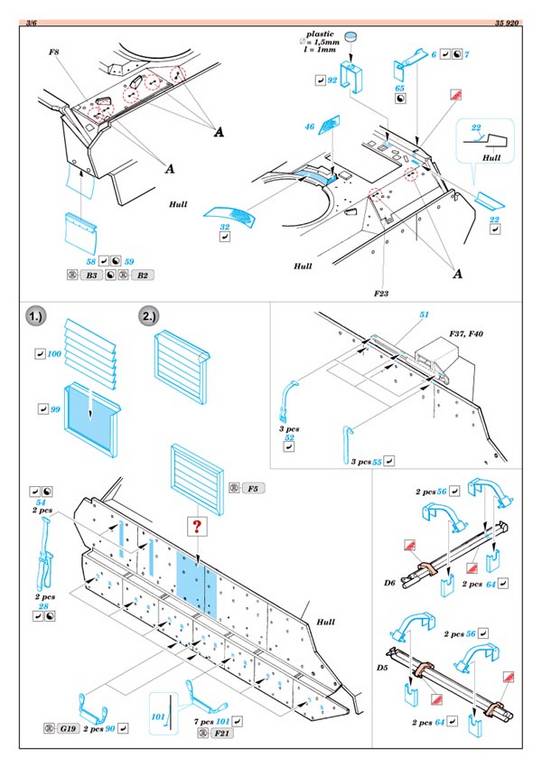
There are grills supplied in the set for the engine deck, and one of these has to have the finest mesh pattern I've ever seen done in photo etch. The CIP panels for the sides of the vehicle are produced in flat panels, which are then folded to achieve the correct serrated look,a clever idea, these are then inserted into square frames also constructed from photo etch. All the armoured panels over the running gear get new handles, which on the real vehicle are constructed of rope I think, and these I'm less convinced of. There's always a problem with photo etch when you try and replicate an obviously 3 dimensional object such as rope or chain............it just looks too 'flat'.
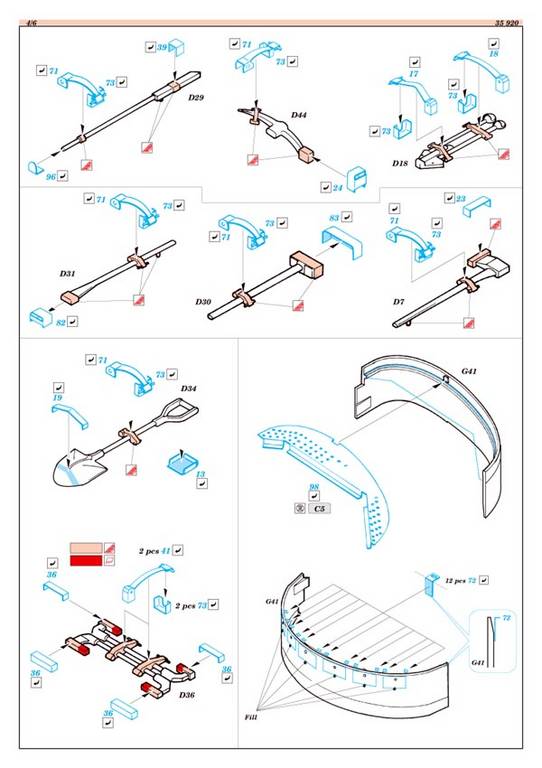
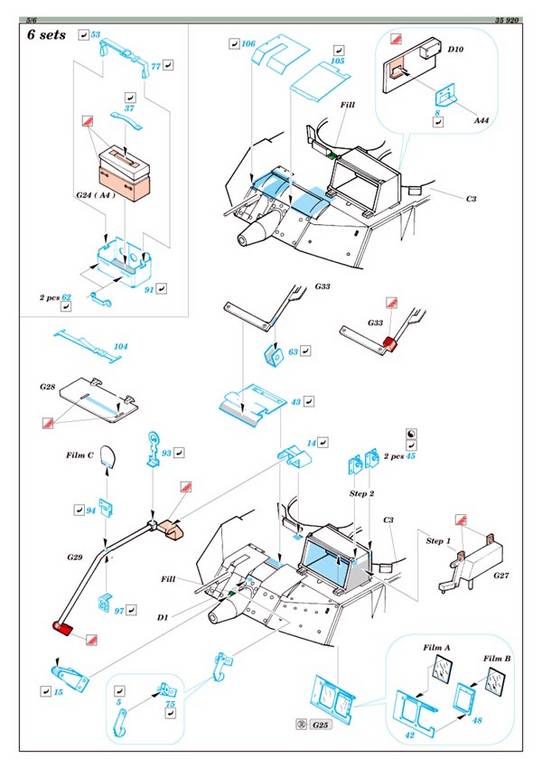
All the on vehicle tools get new clamps as you would expect, and here you're going to have to carefully remove the moulded on ones supplied by Academy. The large semi-circular stowage bin on the rear of the turret gets a new perforated bottom, and also for the turret there is a ton of small fixtures and fittings including replacement panels, hinges for things, a muzzle brake, straps, details for inside the hatches, etc., most of which can be installed without the need to perform surgery and remove moulded on plastic parts...............and nearly all of which are totally unfamiliar to me!
conclusion
If Bradley's are your thing then this set is for you! As you can see if you study the photographs it looks very extensive, and if fully installed it must make a stunning model................as for it's accuracy, I just hope Eduard have done their homework, so with that caveat I would recommend it!
SUMMARY
A look at a new set from Eduard for the Academy Bradley OIF. Three frets of photo etch provide a plethora of detailed upgrades which should keep any modeller happy for hours!
Our Thanks to Eduard! This item was provided by them for the purpose of having it reviewed on this KitMaker Network site. If you would like your kit, book, or product reviewed, please contact us.
Hi Vinnie,
I got this eduard set a couple of weeks ago.
The instructions are excellent and it's packed with a lot of etch.
Something to get stuck into
The next project ,thats if I don't sidetracked and get the
Italeri PT Boat
Cheers
Michael
Especially when you get to this part
I can't remember how many of those little pieces on the back of the turret I lost to the carpet monster :-) :-)
PS. I wonder... I got this set (at least it seems to be the same set) one year ago. Is this a new release?
Yes it is.
I looked closer at the instructions and there are parts on the gun mount, sight and top of the turret that I had to do from scratch.
Geez I just missed it by 1 year :-) :-)
Hi Antonio,
Was there any problems using the PE on the Bradley .
Any problem areas?
Also did you use the kit track or aftermarket products??
All help appreciated .
Thanks
Michael
Hi.
I used Friul tracks and the PE set from Eduard. Building the kit is very straight forward. The Tamiya kits seem to be very well engineered and there are no gaps to fill nor anything like that.
The only problem was the PE itself for two main reasons: It was my first armor kit. (I used to build 1/72 planes more than 15 years ago) and there are a lot of very small pieces on the set, namely all the fixation points for stowage on the back of the turret.
Trying to make 4 bends on a piece that's no longer than 2 mm was a real pain. And there were plenty of those.
Now, with some AFV built or being built I would say that the complexity of the task was around 6 on a scale of 10. Compared to a Legends conversion for a Merkava (2nd kit) the Bradley was a walk in the park.
If you click on the link to my site (if you can't see my signature, the link is on my profile) you can have a better idea of the result, although the kit still has some more detail work to finish it completely.
Antonio,
That is inspiring work .I am impressed.
Great work on the progress build
on the hetzer.
I see the work you put in on the Bradley.
I have just ordered the Blast wheels and tracks so I am eager to get stuck in .
I want to use the Vodnick references as well as what I can pick up from models from what you and other people have completed .Thank you
I will try and send progress photos.
Thanks for your web page link .
I will update further info in the next few weeks .
Cheers
Michael


Comments