introduction
The Leopard MBT traces its origins back to the 1950's, when the USA and Germany collaborated in the design of a replacement for the M-60 family of tanks, to serve in the European Theatre of the Cold War. The USA decided that it wanted to proceed with its own project however, and developed the M1 Abrams, whilst the Germans stuck with the MBT-70 project, renaming it the Leopard. The Leopard has been considerably upgraded during its lifespan, and the Leopard 2A5/A6 is a potent MBT, combining devastating firepower with outstanding mobility to create what many regard as the best MBT in the world.
Modellers who wish to build a model of the Leopard series tank are pretty limited in their choice of kit. Despite the Leopard being one of the main designs of modern main battle tanks, and both the Leopard 1 and 2 being used by a rather large number of different Countries (Germany, The Netherlands, Sweden, Denmark, Canada, Belgium to name a few of the principal users), only a few model kits of the Leopard 1 and 2 are available in plastic, especially in 1/35 scale.
Although there are a number of plastic injection models available of the Leopard 2 tank, none of these include all the parts to build an accurate version as used by the Royal Netherlands Army. The closest one was the Revell kit, which included the correct smoke launchers, FN MAG machine gun, and decals for the Netherlands Army. The biggest omission was, however, the lack of the Netherlands Army type side skirts, which would have to be sourced separately.
There is however good news for the fans of the Leopard 2, because HobbyBoss have a number of releases planned of various versions of the Leopard 2. The subject of this review is the very welcome recent release of the complete kit of the Leopard 2A5/A6 as used by the Royal Netherlands Army, including the correct side skirts.
what's in the box?
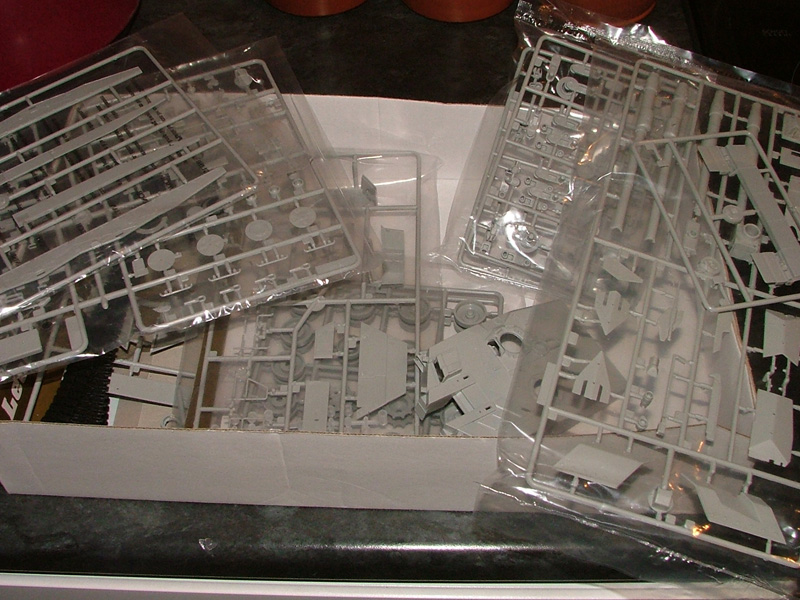
The kit is packed in a large cardboard box, and shows a painting of a Leopard 2A5 with a Windmill in the background; presumably to emphasize it's Dutch Heritage. As is so often the case with box art, the image shows a crew figure (the loader) which is however not included. In the box we find:
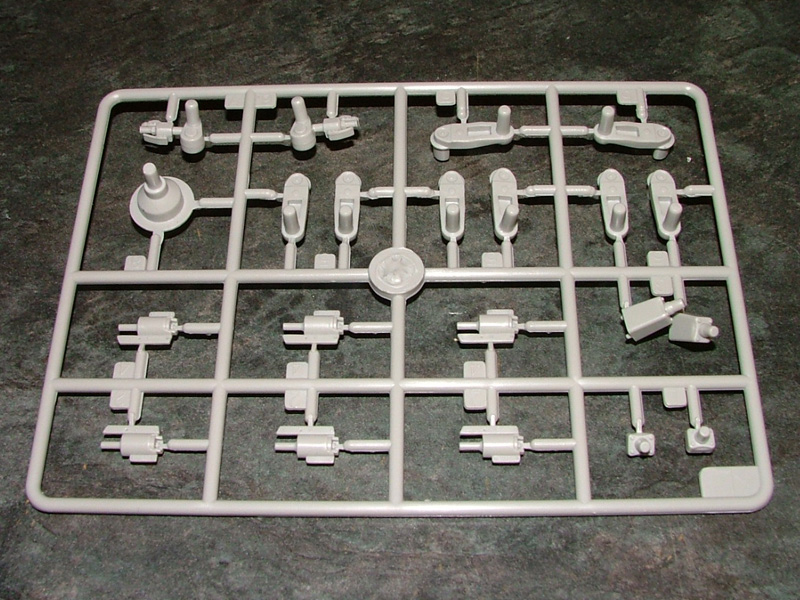
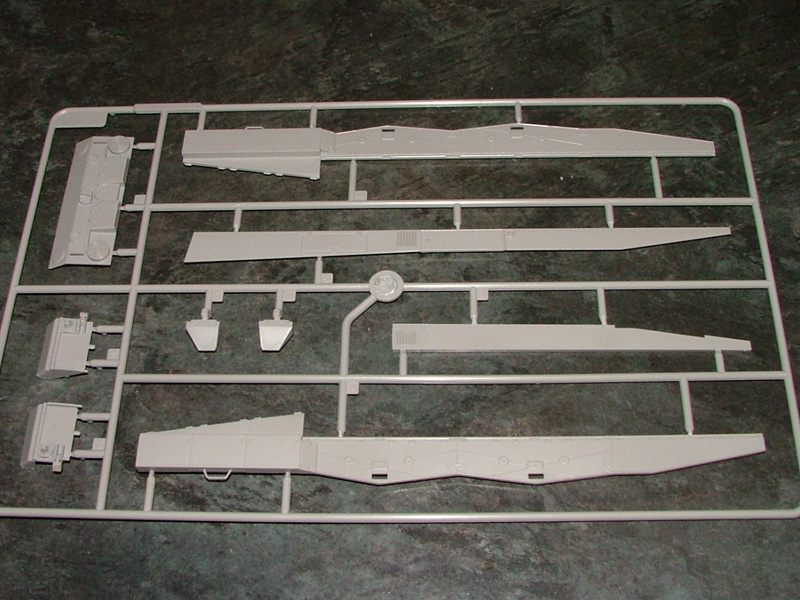
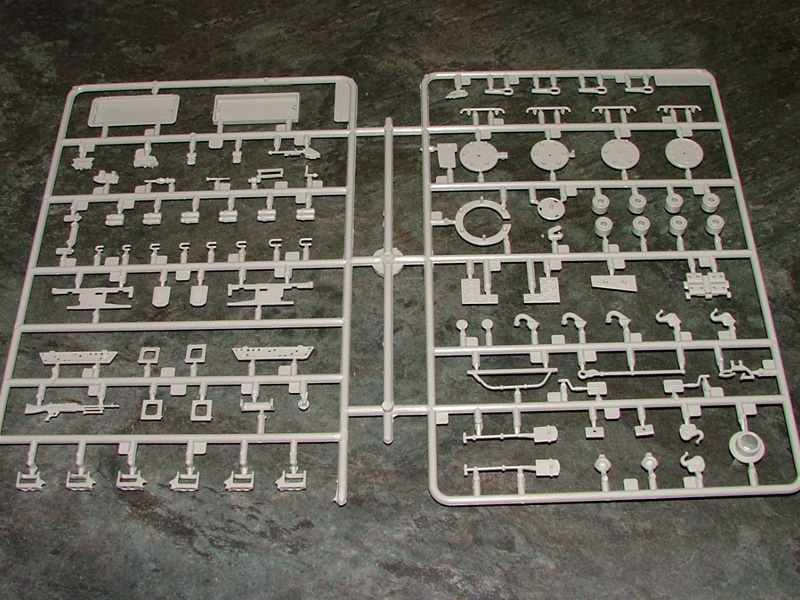
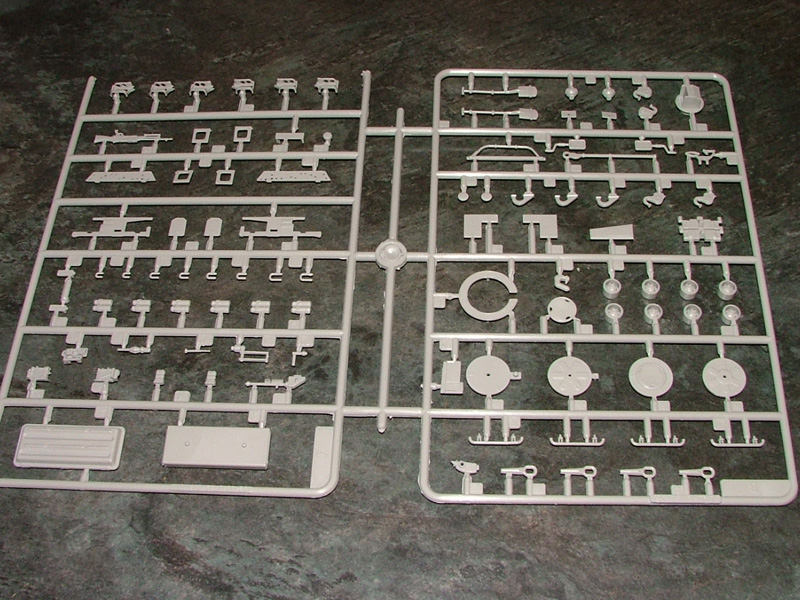
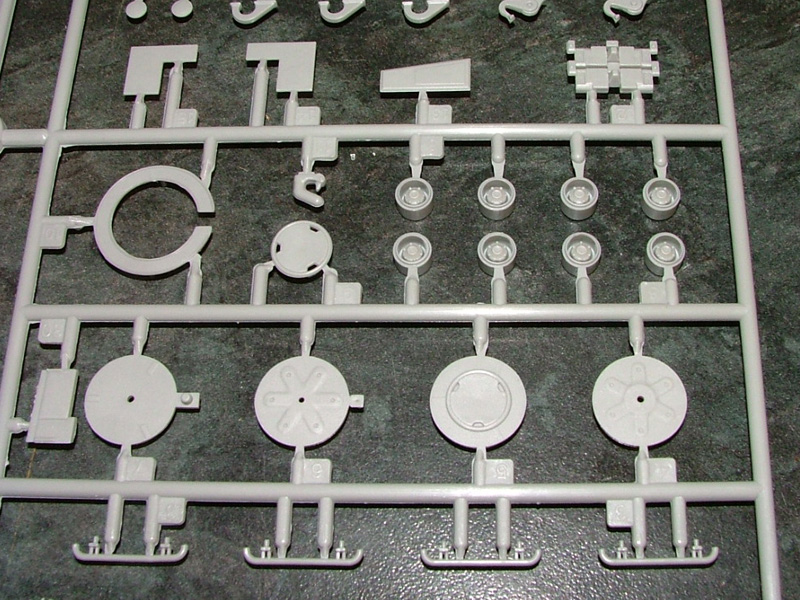
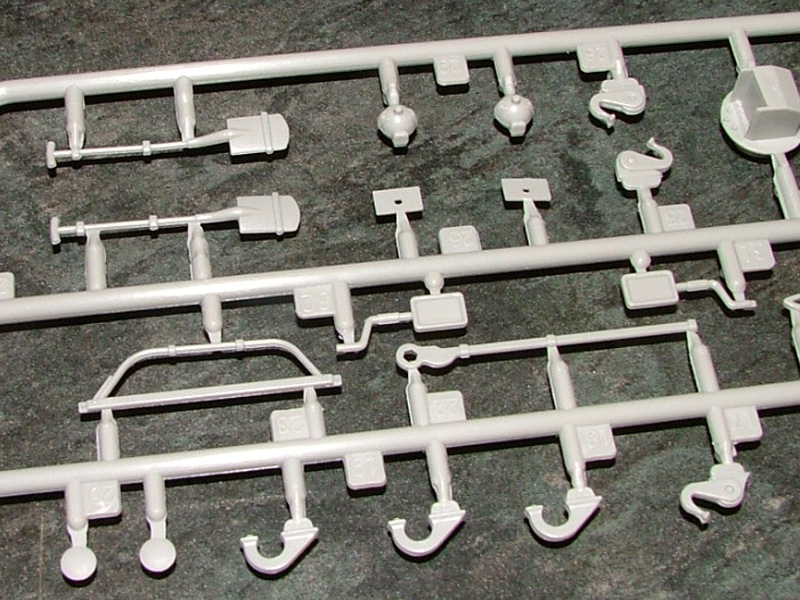
- 10 sprues in light grey styrene
- A single moulded bottom hull in grey styrene
- A single moulded turret shell in grey styrene
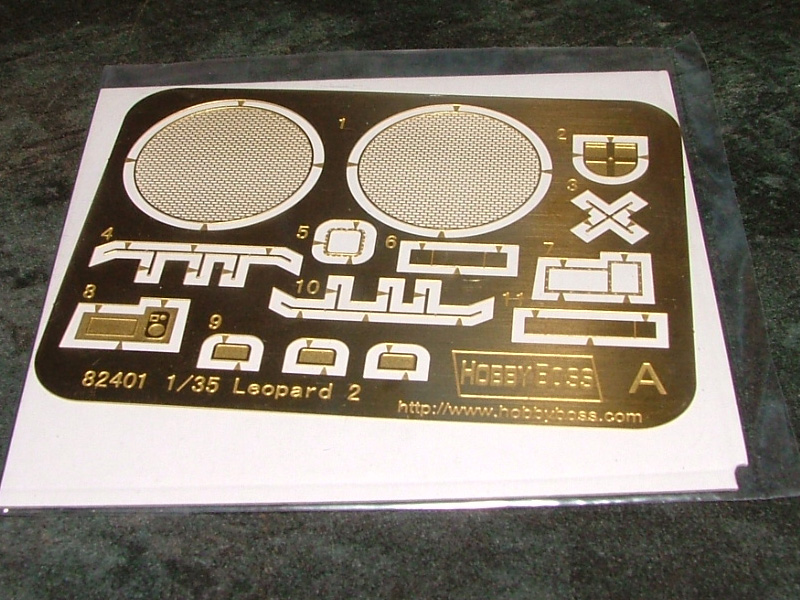
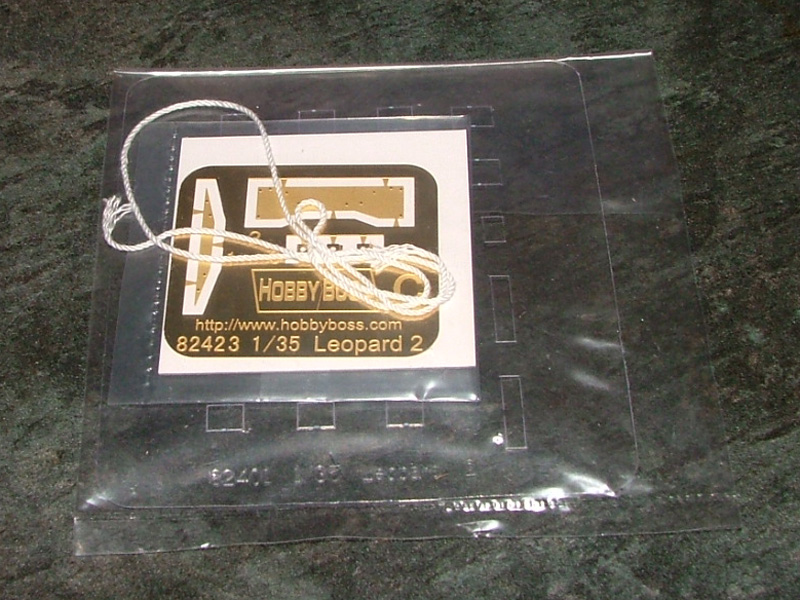
- Three frets with Photo-etch parts
- Clear acetate for the periscope lenses
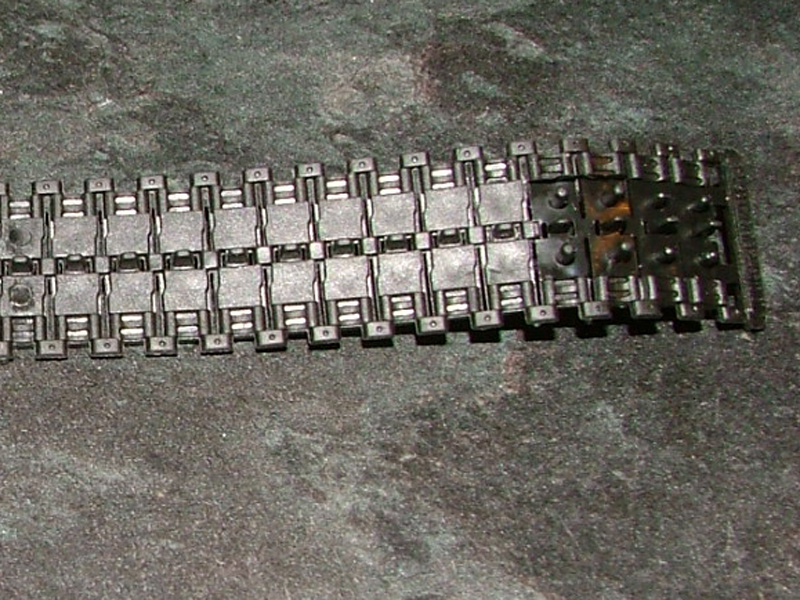
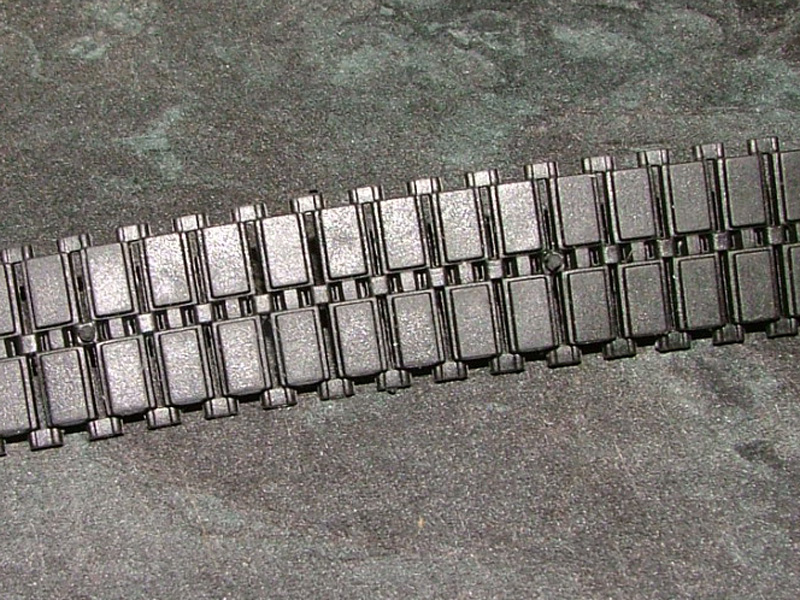
- Two rubber band tracks
- A length of thread for the tow cables
- Poly caps to attach the wheels
- A small sheet of water slide decals, containing a single option of markings
- Instructions
- A single sheet (A4) in colour with painting instructions
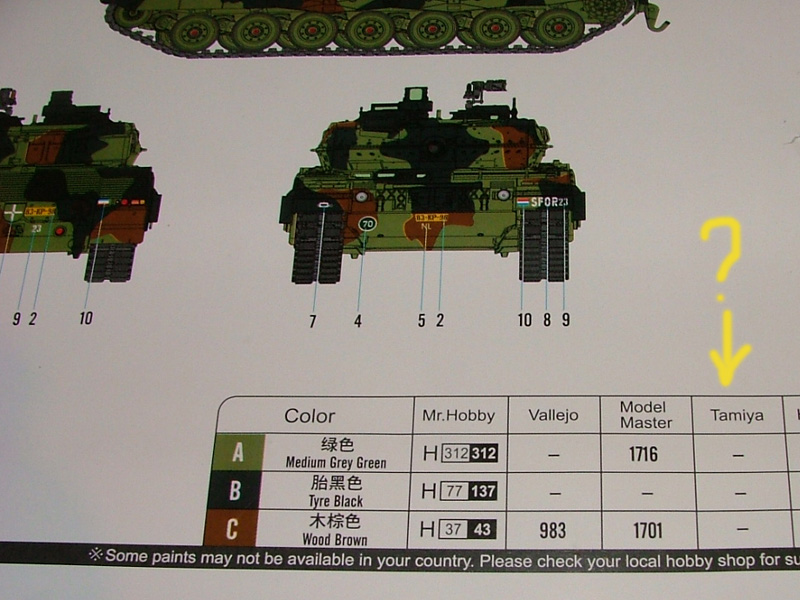
All the parts are well moulded, with just a minimum of flash and a few mould seams to be cleaned up. Detail is fine, and accuracy is quite good. The instructions are clear and easy to follow. The full colour painting instructions show a full NATO three tone camouflage. The Netherlands Army follow a standard pattern for their camouflage and use the standard NATO camouflage colours, and whilst the instructions have the pattern right, they curiously fail to call out the numbers of the Tamiya NATO paints in the listing of required paints.
building the Leopard
Overall the kit gives no problems, and apart from a few issues, the parts fit well, and dimensions are accurate when compared to photographic references. I will briefly summarize the individual steps as per the instructions, and call out any issues as they arise. Please note that for illustrative purposes I will build the kit here 'as it comes'. Some minor fit problems are not beyond the average modeller's skills to correct, and some major ones need more effort. Eventually I will finish this kit with its distinctive Dutch Camouflage netting, which will cover some of the fit problems. I also plan to build at least one more, in parade order, where I will address the issues such as the anti slip panels and spaced armour fit.
Steps 1-4
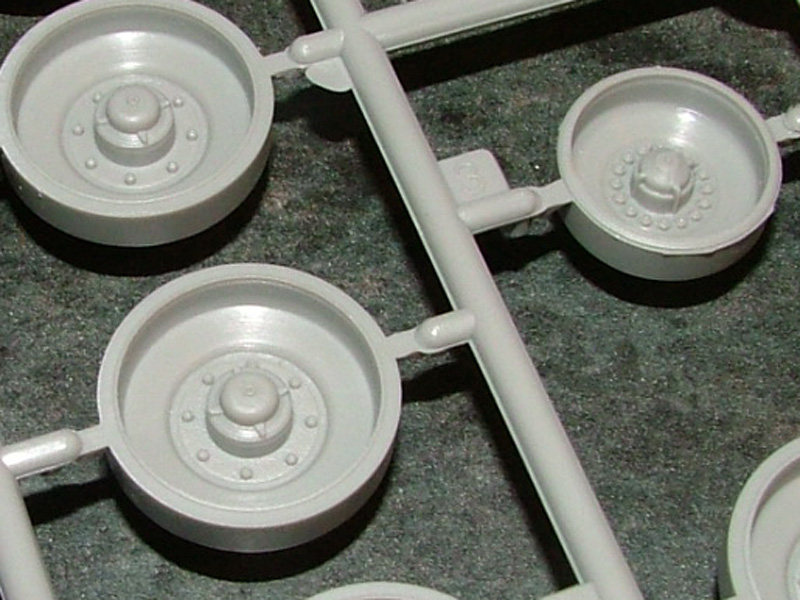
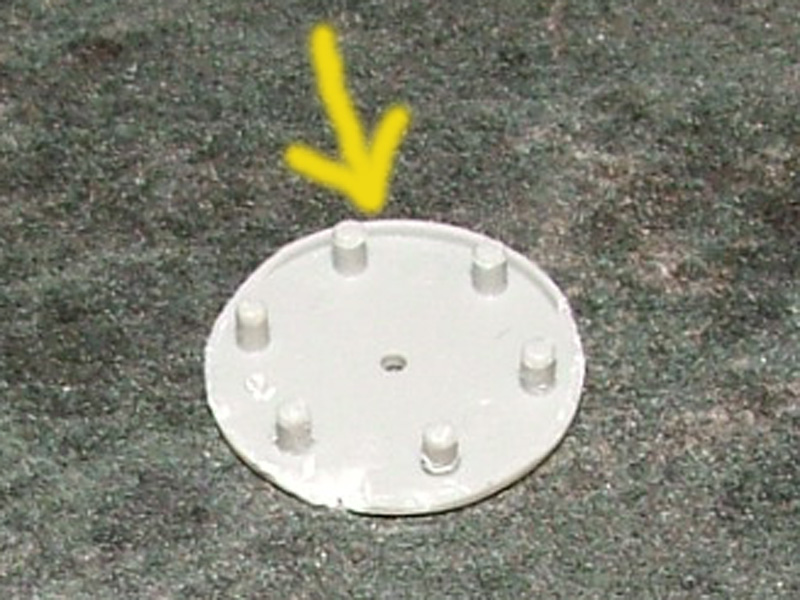
The first steps deal, conventionally, with the suspension and running gear. No groundbreaking new things here, simply sandwich a poly cap between two wheel halves, and push onto the suspension arms. The suspension arms fit into the hull on short, keyed, pins, and give a reasonably positive fit. The wheels are less positive, but line up o.k. when the tracks are fitted. The idler wheels are fixed in position, but the tracks are just the right length to be tight enough without pulling the idlers or sprockets out of alignment.
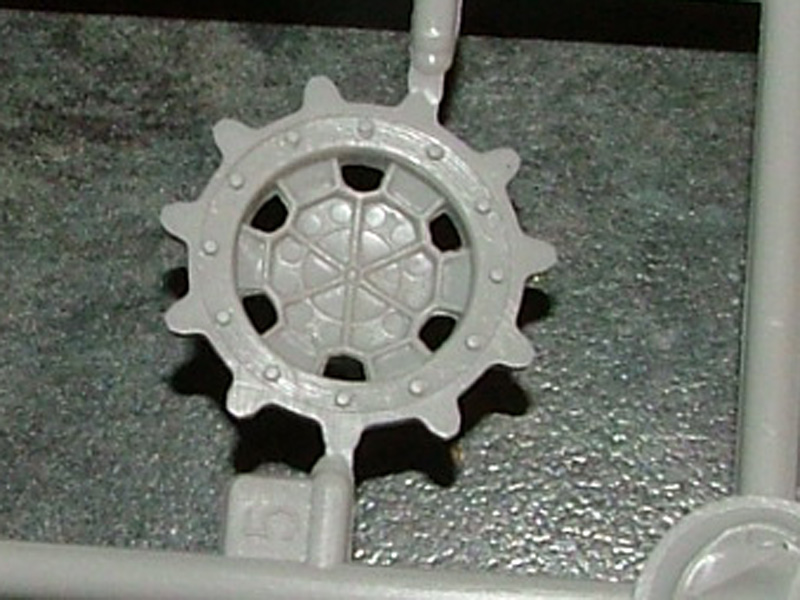
Detail on the road wheels and idlers is excellent, with correct bolt and hub detail, including the grease bolt in the centre of the hub. Don't forget to paint those red. The Sprockets are also very good, although the inner ring of bolts could have been defined a little sharper.
Step 5
The tracks are the single length, rubber band type, and are perfectly adequate for the purpose. They can be fitted at this step, or you can wait until after you have painted the lower hull and running gear, if you prefer. Connecting the ends is by means of four 'pins', which should be melted down after inserting them through four holes in the other end. You can strengthen this join with PVA Glue.
Step 6
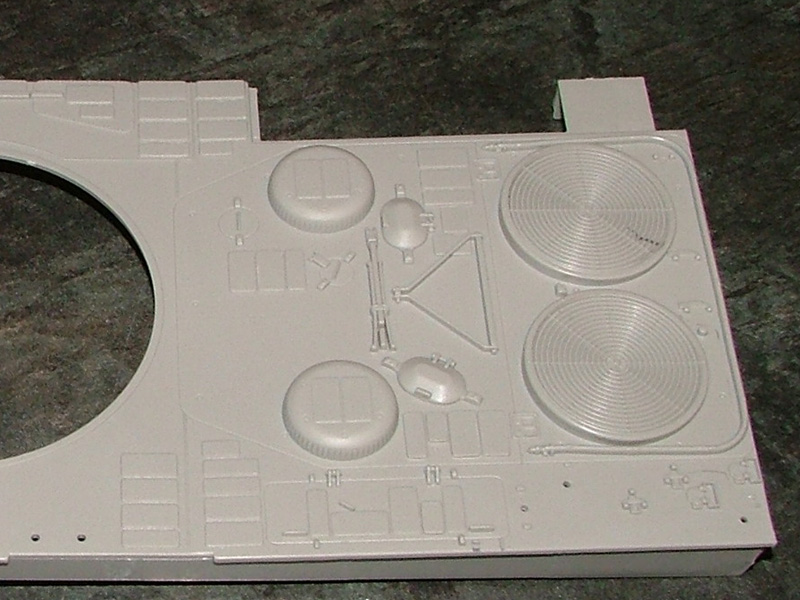
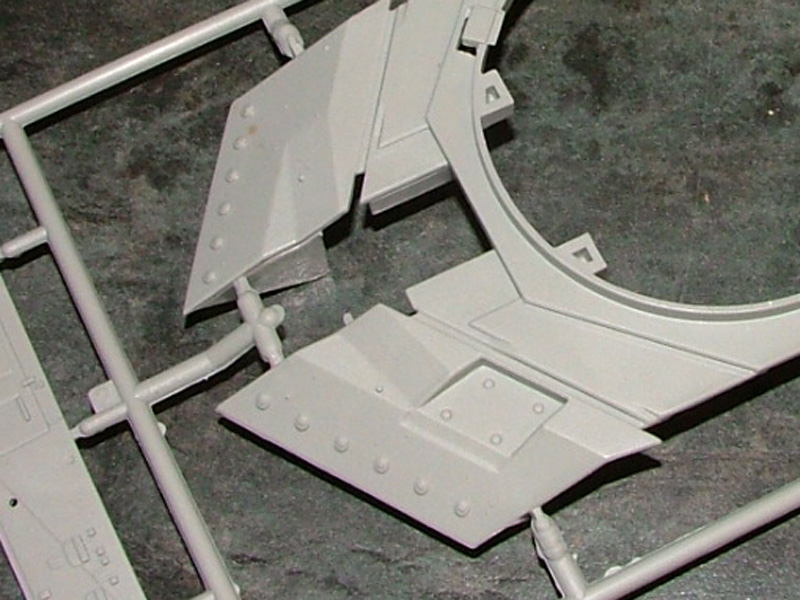
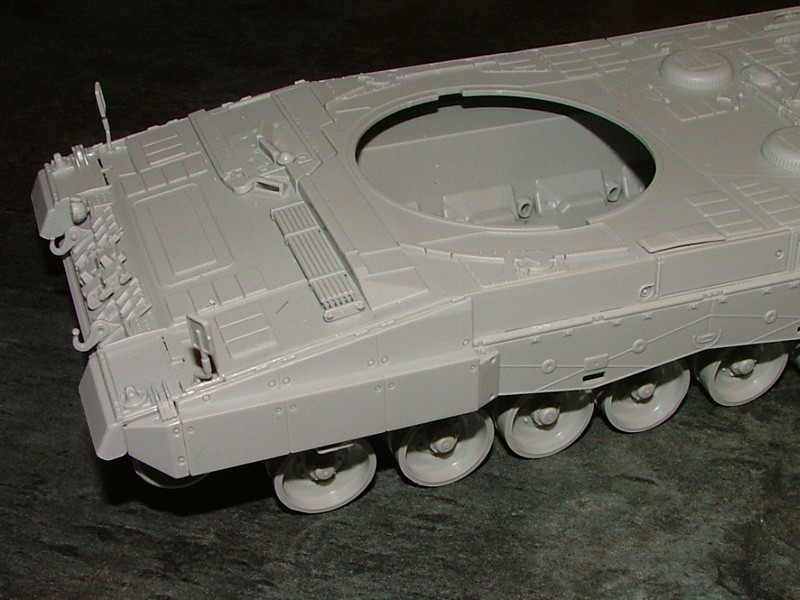
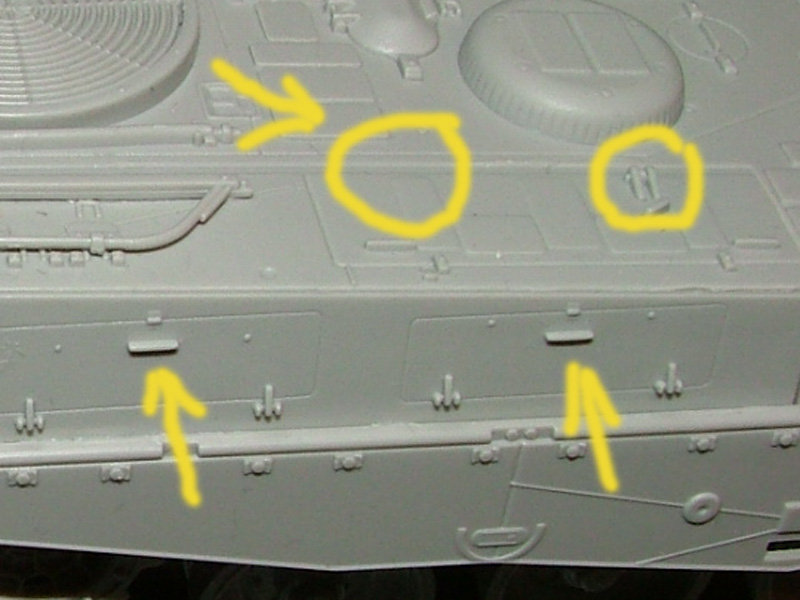
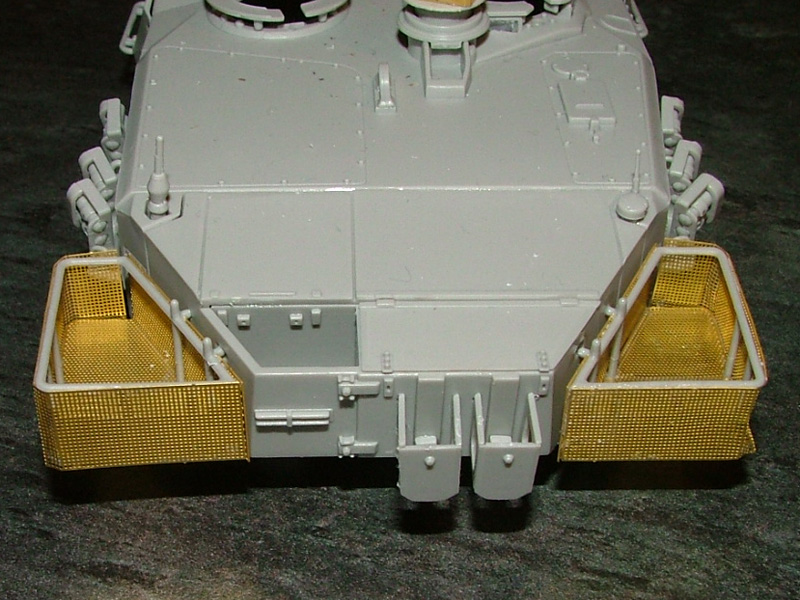
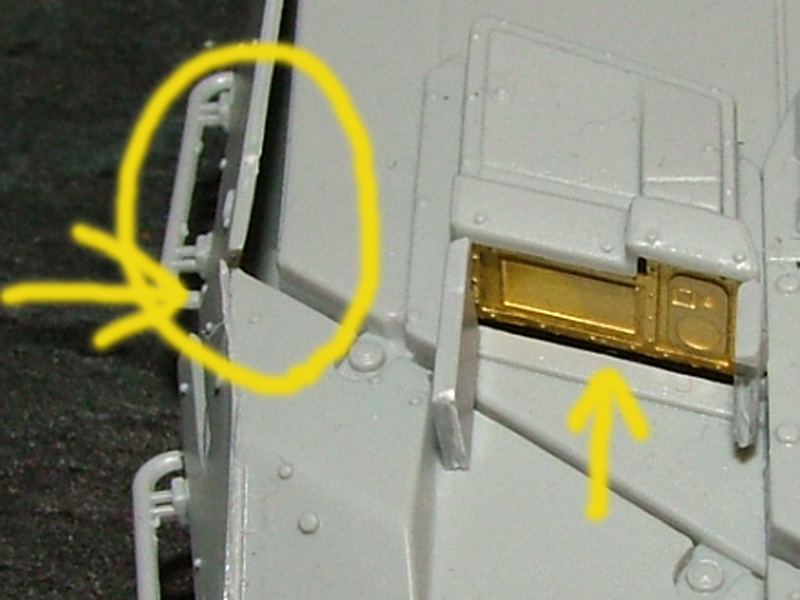
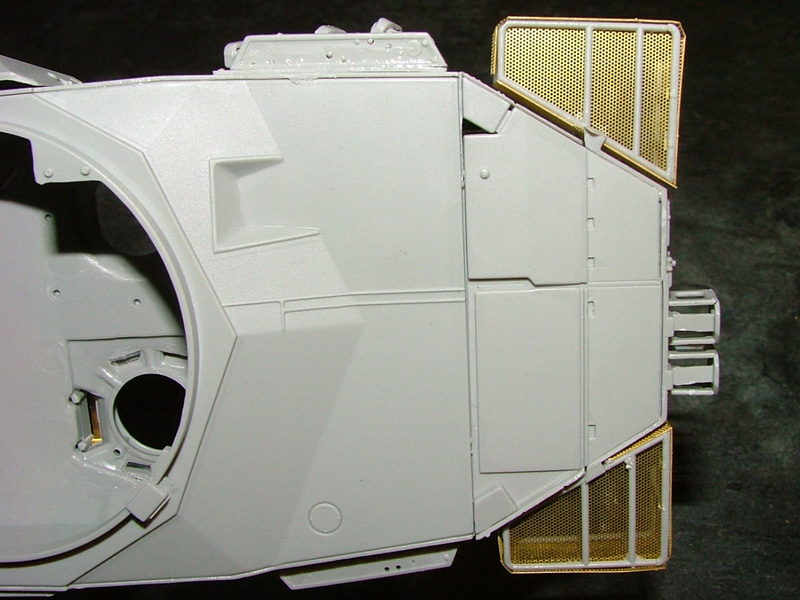
This stage is where the construction of the upper hull starts. No drama, although parts E2 (the right front mudguard) has a small gap. Part H2 is missing a hinge on a hatch, a curious omission (the missing hinge is not moulded at all), especially as this is a known fault, which has been pointed out previously. The various filler caps and covers are moulded onto the hull and well detailed, but no casting marks are present. The two big circular fans on the rear deck are well done, and are finished with Photo-etch screens. Unfortunately, the screens are wrong, as they depict a punched metal sheet, whilst they should be a woven mesh. Another disappointment are the anti-slip panels, which are far too thick. If you wish to depict these accurately, you will have to sand them down, and re-apply them with something like Mr. Surfacer.
Step 7
Adding the side panels and rear upper wall to the hull. The left side (E5) has no fit issues, and needs just a small amount of filler to completely eliminate the gap along the top. The right side has two separate panels (E8 & H3), and there is a gap between the two, which needs to be filled. The right rear corner also does not line up completely, and a small amount of trimming is necessary.
In this step the instructions call to fix the upper hull to the lower hull, but you may want to wait with that until you have painted the wheels and tracks.
Step 8
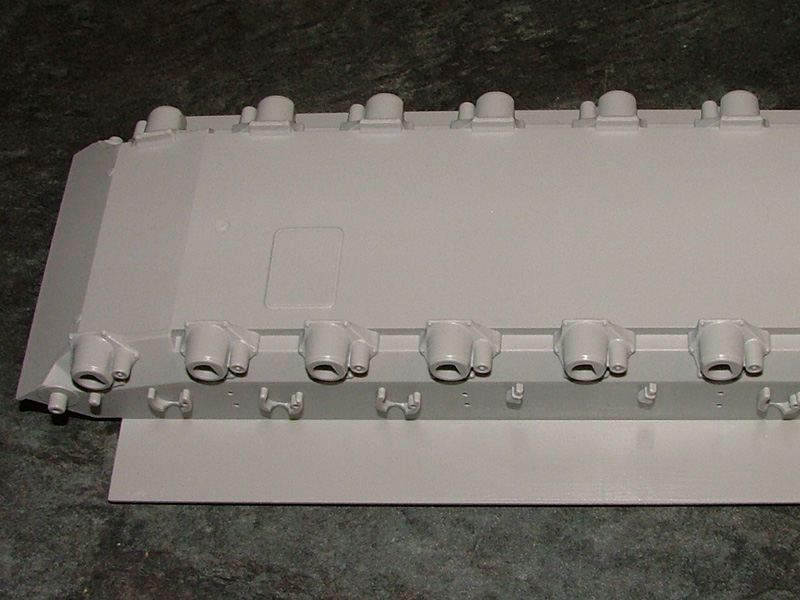
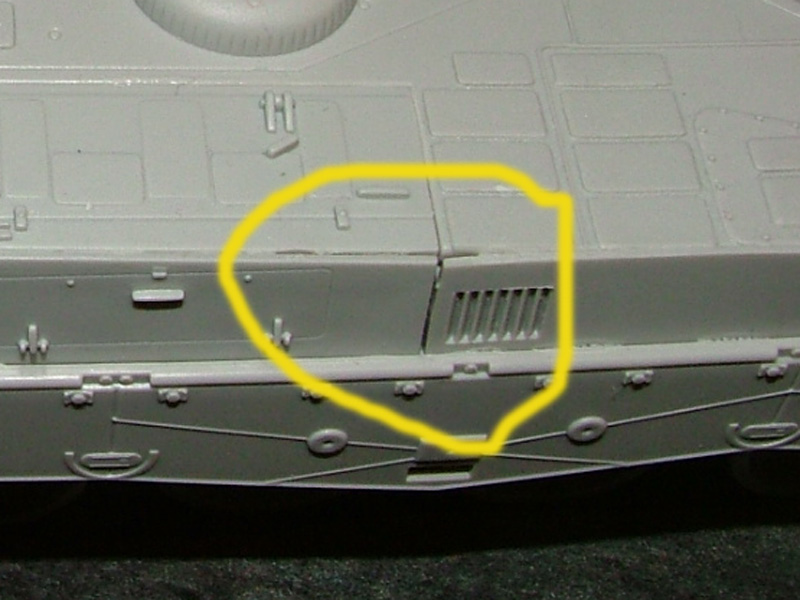
This step adds the side skirts, tools, headlights, mirrors, tow cables and air intake screens. The skirts are a single piece from front to rear, and if you want to depict the rear most section hinged up (as is regular practice to avoid the excessive build up of mud) you will need to carefully scribe and cut this section to separate it along the hinge. The tow cables are classic plastic tow eyes, with a small groove in which the supplied string is glued.
Step 9
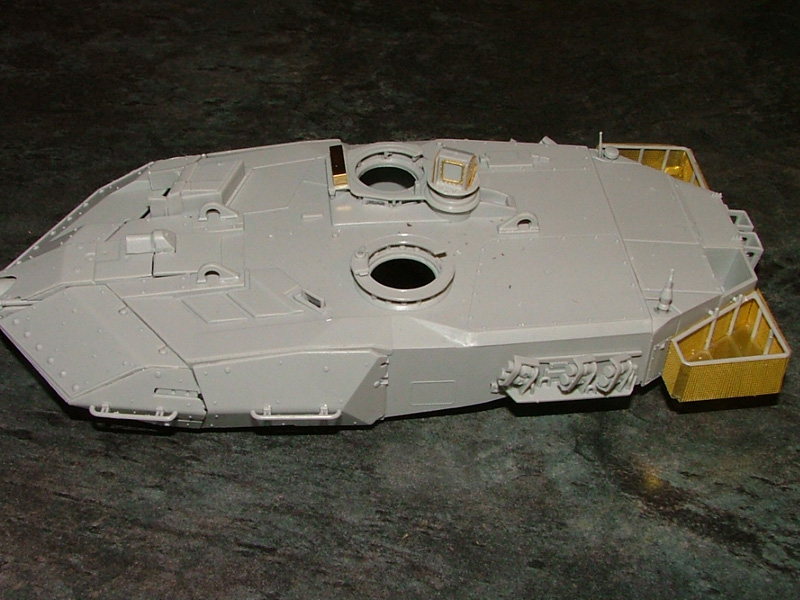
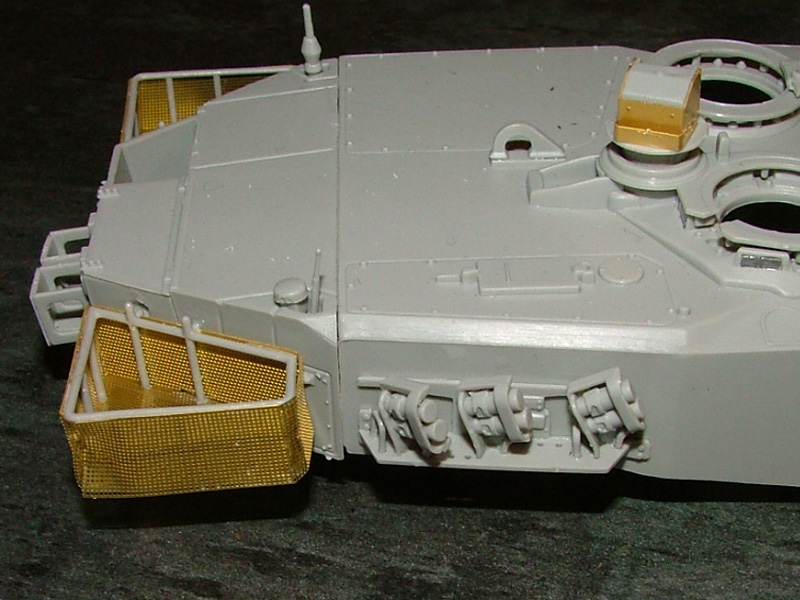
After finishing the hull, it is now time to start on the turret. HobbyBoss have captured the distinctive angular shape of the turret well, but unfortunately have slipped up with the loaders hatch and the fit of the forward spaced armour. On the plus side, the smoke dischargers are well detailed, as are the two turret baskets.
Construction starts with the barrel. The instructions show the shorter A5 barrel (the decals are for 83-KP-98, which is a 2A5), but if you wish you can also build the longer A6 barrel. As not all the Dutch Leopards are upgraded to A6 standard, you may need to check references if you are going to build a specific vehicle. The barrel is build up conventionally from two halves, which fit fine, and a separate muzzle. Detail on the barrel and bore evacuator is good, and the small seam is easy to remove.
Step 10
This step just fixes the barrel to the lower turret half, with poly caps to allow elevation of the barrel.
Step 11
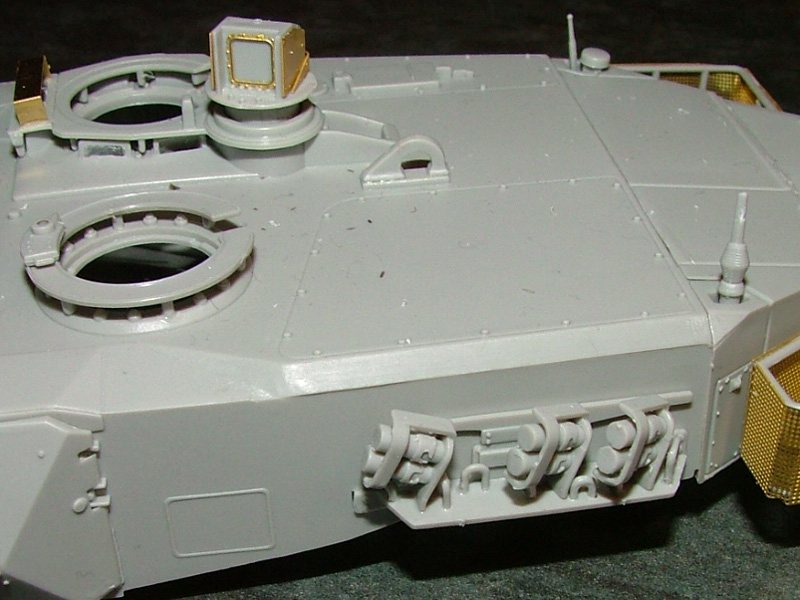
HobbyBoss include a thick sheet of 'pre-cut' clear acetate for the various vision periscopes. Some trimming is needed to fit them in the respective periscope housings in the roof and around the commander's hatch. There are two options for the gunner's sight, a very basic plastic insert which lacks detail, or a two piece Photo-etch insert, that adds some fine detail if you choose to show the armoured covers of the gunners sight opened. The rear stowage compartment of the turret is here constructed as a sub assembly, and goes together without problems. Only the rear right compartment has a separate lid.
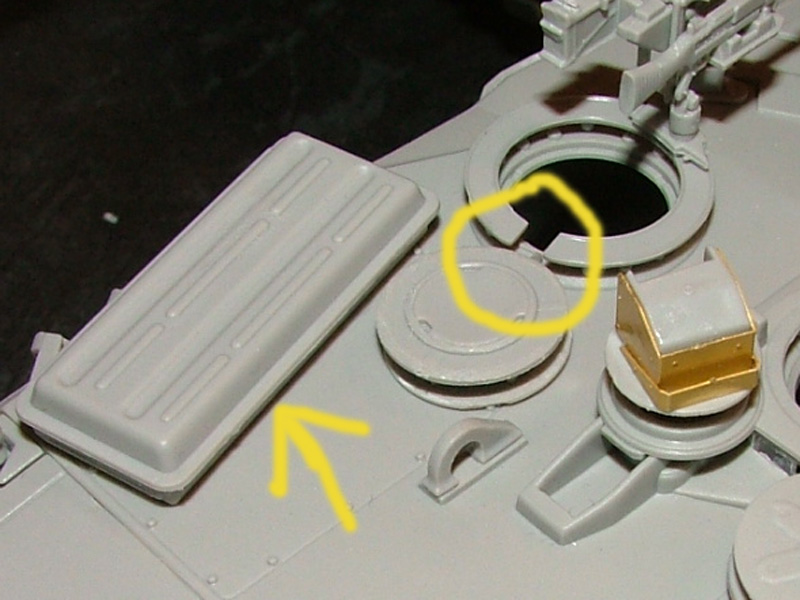
The instructions call out to make two holes in the turret roof. These are mounting holes for a stowage box, but the holes are in the wrong place. Refer to step 13 for the correct procedure.
Step 12
A simple step, the two turret halves are joined, and the turret rear stowage bustle is attached. Again the parts fit well, but care needs to be taken that the parts line up when attaching the rear bustle, as there are no positive attachment points, just a raised edge as a 'guide'. The two brackets/holders for the chocks which attach to the turret rear are built up from four pieces each, but oddly enough the chocks are not included. The hinged brackets for the (telephone) wire reel on the turret rear are moulded on in the 'stowed' position, and the wire reel is not included.
Steps 13, 14, 15
These are busy steps, adding various details to the turret, and includes the two major issues that need to be addressed.
The first problem is the loader's hatch, which is depicted with the same hinge system (up and spin horizontally) as the commander's hatch. The loader's hatch however opens with a classic hinge (up and over), and has two distinctive springs at the rear. This hinge will need to be scratched, unless you are happy to cover this area with a camouflage net or such. Both hatches are also too thick, but that is easily fixed by removing the raised edge with an Exacto knife.
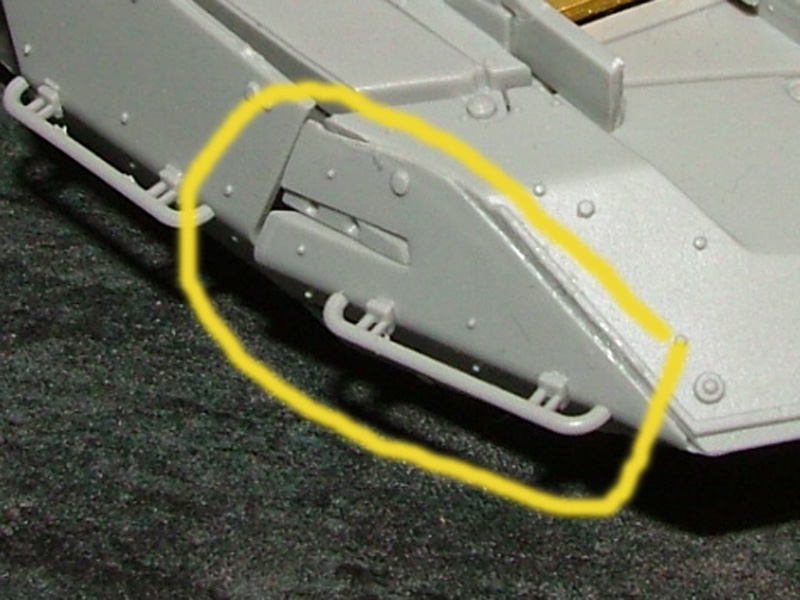
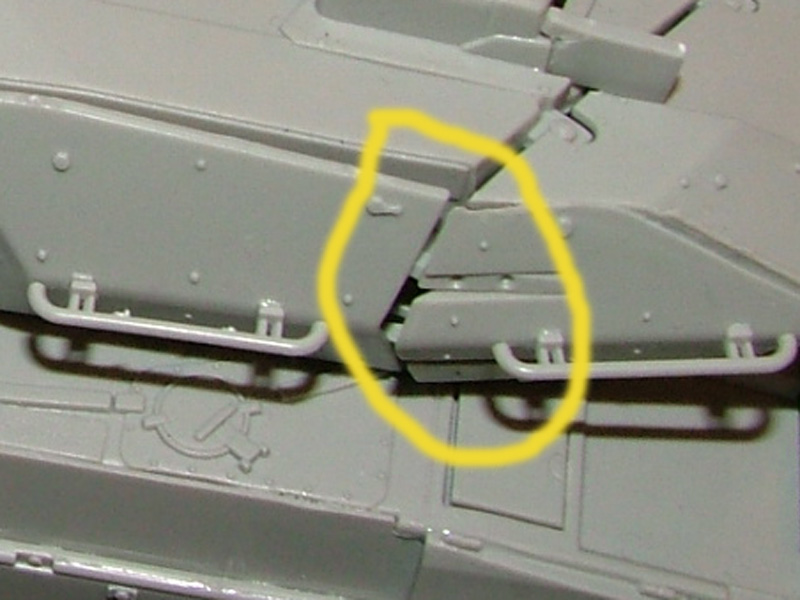
The other problem is the fit of the right front spaced armour. The lower part of the spaced armour is moulded to the lower turret half, and the upper part of the spaced armour is attached to it. On the right side this leaves a gap which is too large, and the side does not line up correct with the two hinges of the spaced side armour or the side armour itself (it should be flush).
The other parts give no problems, the Dutch type smoke dischargers are well detailed, the two stowage baskets are very nice ( with Photo-etch metal screens, rather than plastic mesh) and a good FN MAG mg for the loader. Also included is a large, rectangular stowage box which is mounted on the turret roof, behind the loader's hatch. You may need to check your references, as this box is not always mounted, but if you add it, do not follow the instructions which show you to position the box straight along the edge of the turret, as this would cause the loader's hatch to foul the box. Instead the box needs to be positioned at an angle, with the front corner sticking slightly over the edge of the turret roof.
All that is left then is step 16, which shows how the turret is connected to the hull, and the Leopard 2A5/A6 NL is ready. In all an enjoyable kit, not complicated and an ideal week-end build.
conclusion
HobbyBoss are about to fill a big gap in the market, and their various Leopard variants that are to be released should prove very popular. The HobbyBoss kit fits firmly between the two other main (1/35 scale) plastic model kits on the market, and if it was not for a few annoying, and avoidable, issues (the 'missing' hinge, the anti slip panels, the loader's hatch), this kit would certainly give Tamiya a run for the money. The recommended price (£15.99) from the distributor makes it outstanding value for money, and a must have for fans of Dutch armour, and fans of modern tanks alike.


Comments