Introduction
When entry into WWII became inevitable the US decided it needed fully-tracked mobile artillery support, so the Board of Ordnance fitted the M2 105mm field howitzer to the existing M3 medium tank chassis to create the M7 Howitzer Motor Carriage. Acceptance of the M7 occurred in February 1942, and production continued until replaced with the M7B1 built on the M4A3 chassis. Visible improvements during production were added incrementally in the typical US fashion, so while the bulk of M7 production can be loosely grouped into four main phases the actual details could be mixed between them, and of course because all the main parts were interchangeable in the field the Army just referred to them all as M7 HMC.
At first the hull had all the spotting features of the M3 three-part transmission cover with notched right side, early VVSS suspension bogies as well as low-cut sides and a machine-gun pulpit that was simply stuck on top. Ammo stowage was limited, with most of it below the floor plates, while the sponsons held crew seats. These were quickly superseded by a second batch that used the un-notched three-part transmission from the newly designed M4 tank, and introduced a bulge in the hull side below the pulpit to allow more room for the crew. In the third variation the crew seats were replaced by expanded ammo racks in the crew compartment. The fourth version replaced the running gear with the latest parts from the M4 Sherman the one-piece sharpened beak transmission housing and the heavy-duty suspension bogies with horizontal return-roller arms. These last models also did away with two vent panels on the engine deck that previously had to be protected (mostly from excessive crew stowage!) by raised cover plates. And somewhere between the third and fourth phases hinged side extension plates were developed to increase crew protection.
This kit from
Dragon Models Limited represents a third phase machine. By comparison, the recent Academy M7 was a second phase vehicle (but with a few flaws around the engine deck) while the venerable Italeri kit was a decent rendition of a fourth phase late M7. Since these vehicles generally worked at a distance from the battle front the attrition rate was much lower than that of a tank, and many early vehicles were still in service at the end of the war. Indeed, many went on to see service in Korea and as MAP-supplied vehicles to other countries after WWII.
Contents
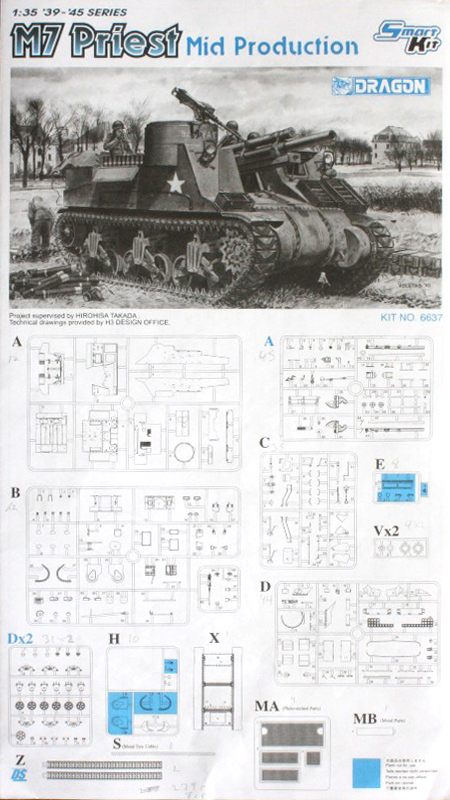
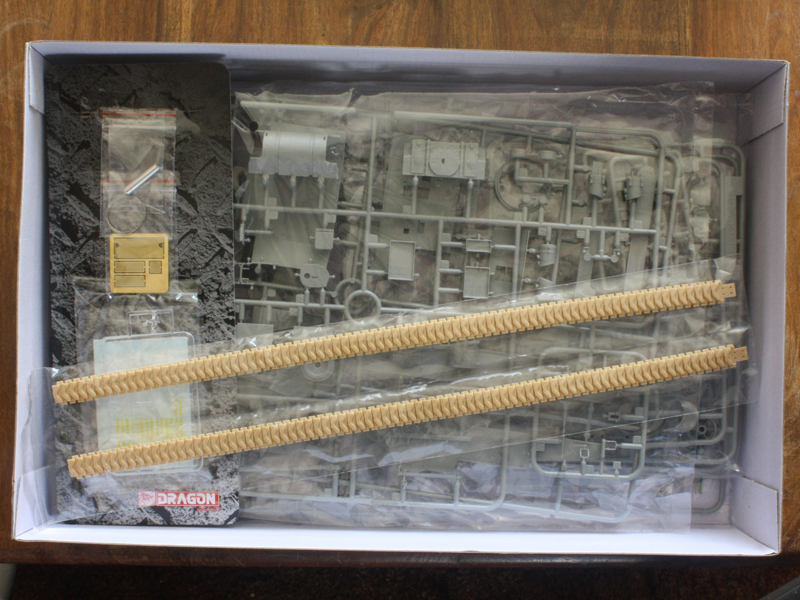
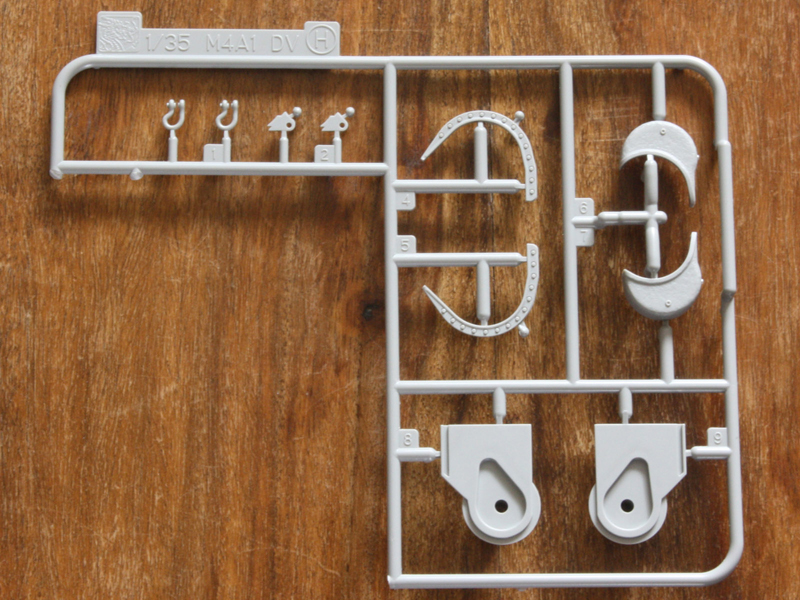
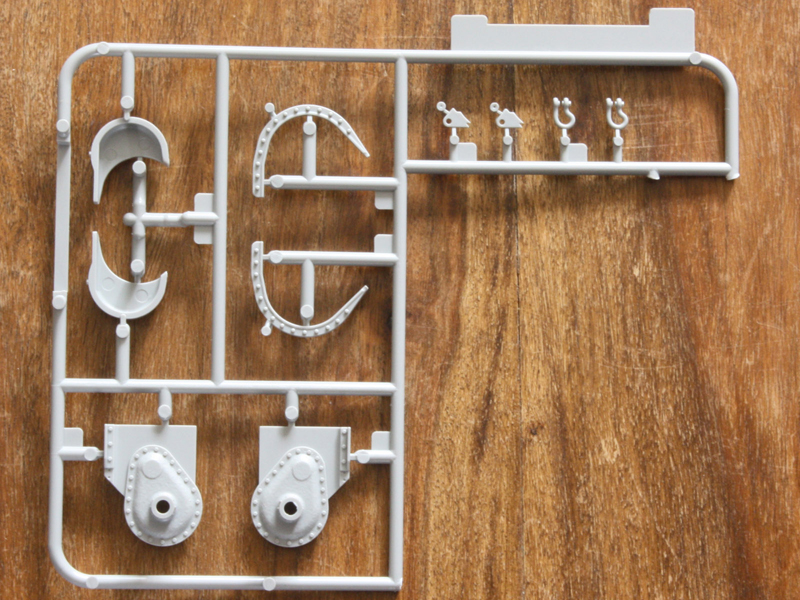
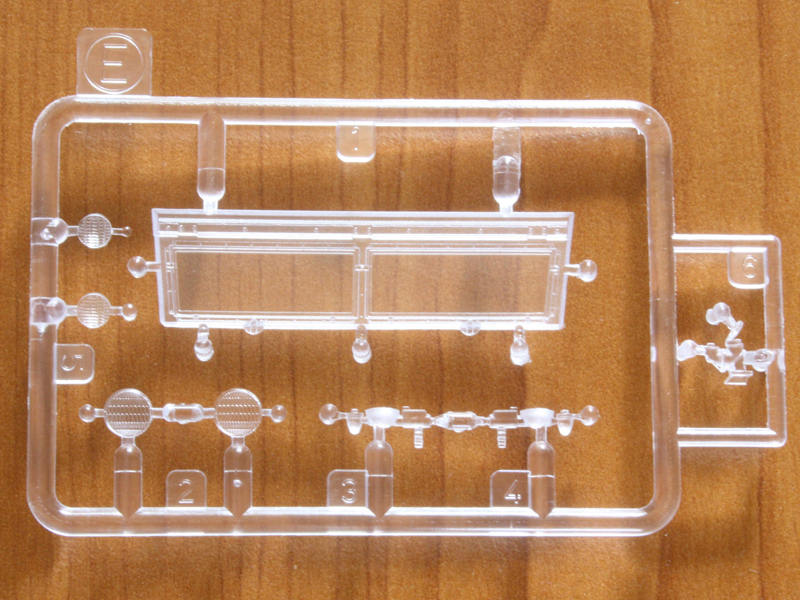
On opening the box my first impression was shock this is the first Sherman-based Dragon kit Ive seen that doesnt completely fill the box! Many of the sprues are small, and while some are recycled from the M4A1 DV and M2A1 howitzer others appear to be new to this kit. This is one model that wont swell the contents of the spares box in fact, there are only 12 parts marked as surplus and most of those are clear parts from the M2 Half-track sprue.
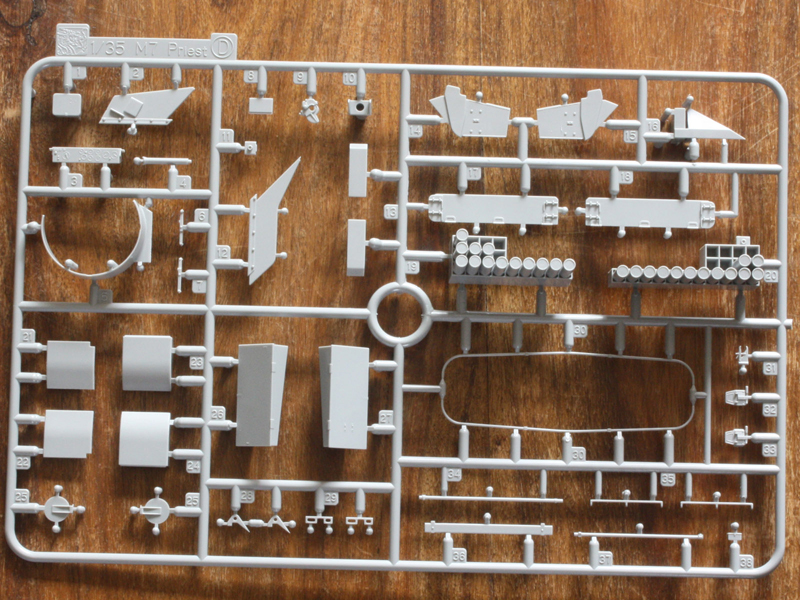
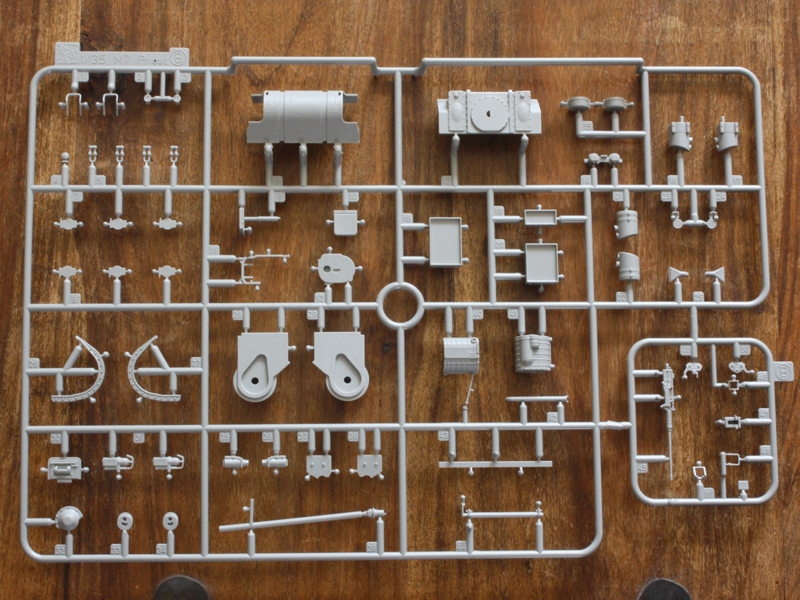
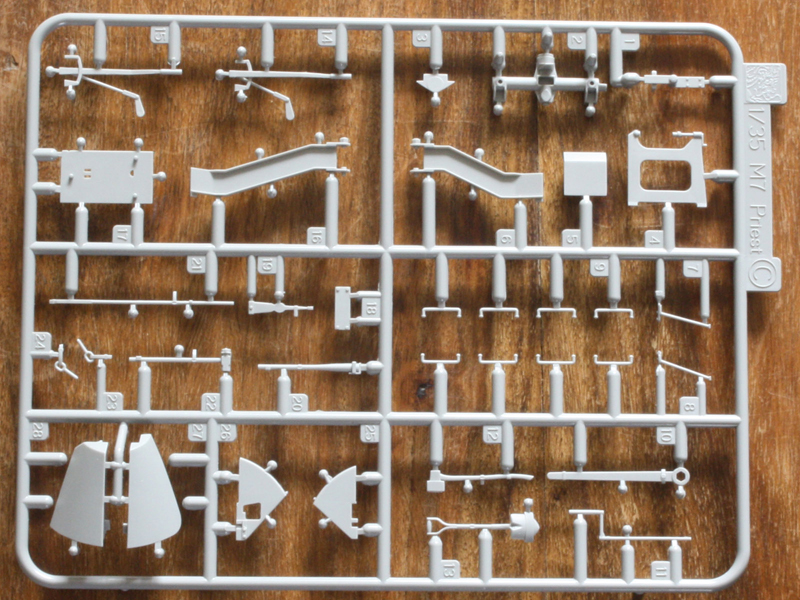
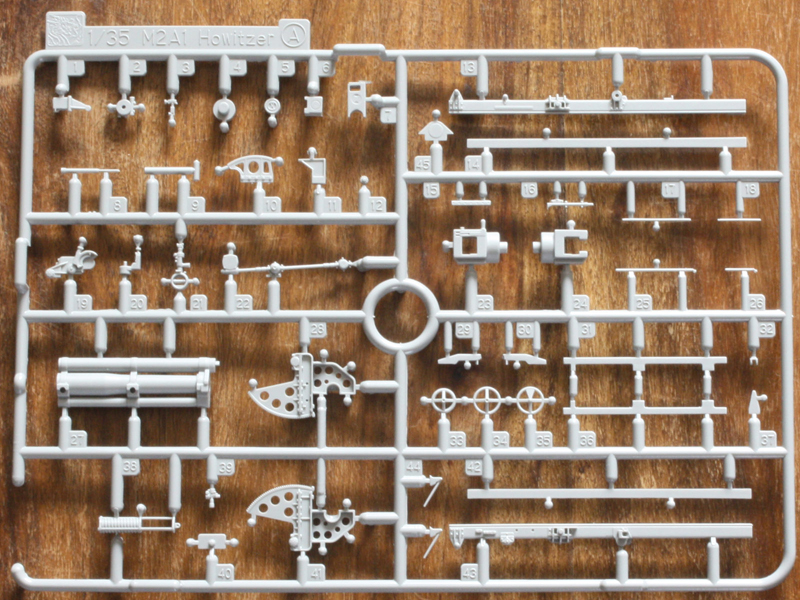
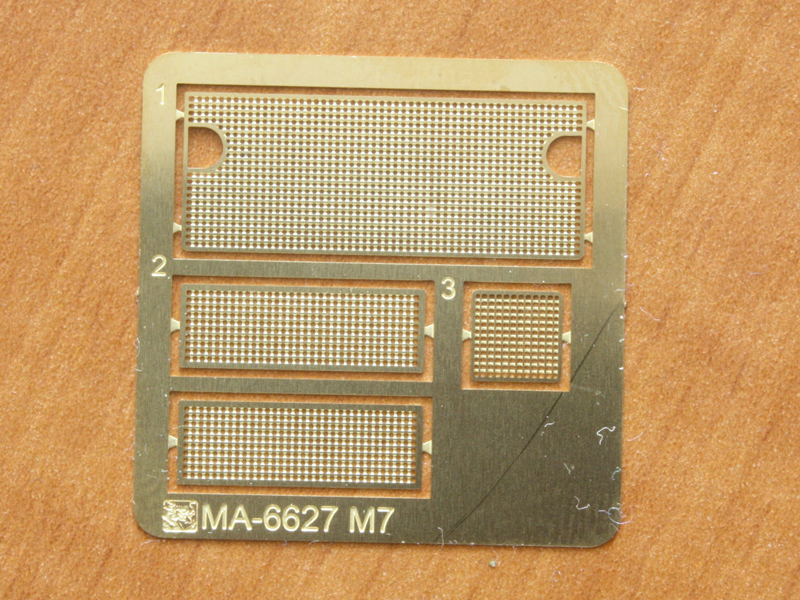
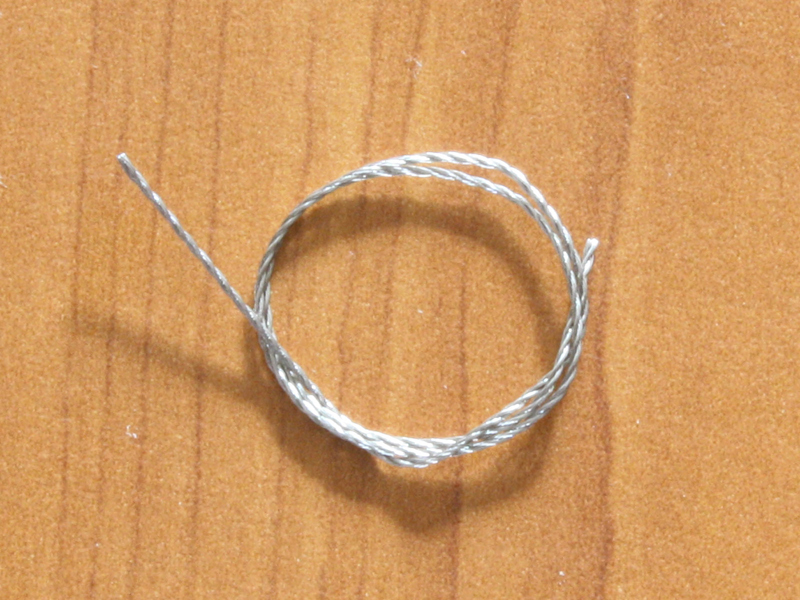
There are 10 grey sprues holding 279 parts, one sprue holding 8 clear parts, two DS tracks, a sheet of four photo-etched parts, a metal cable, and a turned metal barrel complete with rifling grooves. To make things complicated there are two different A sprues and three D sprues because of the way they are picked from other kits. Moulding is very crisp, and the deep tooling on some parts like the ammo racks is impressive. The lower hull tub is a multi-part moulding to get detail on almost every surface.
Coupled with the very targeted sprues, the instructions cover only six pages. As two of these are taken up with sprue layout and painting guides that leaves a meagre four pages to cover what is actually a complicated construction sequence. This is a source of some difficulties as discussed below.
Review
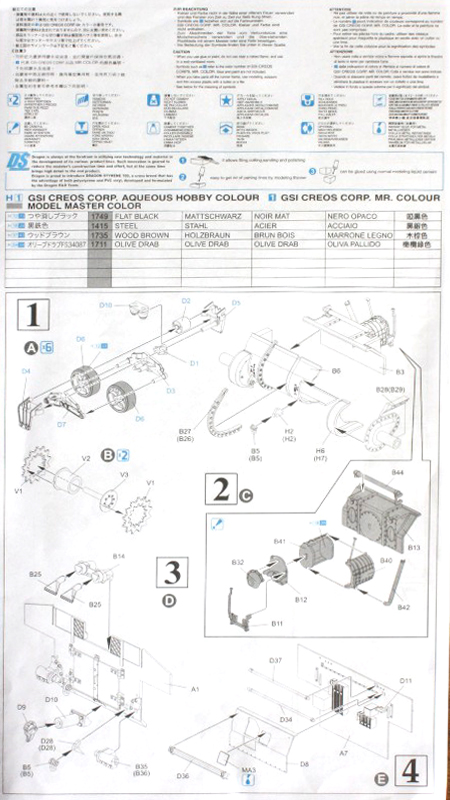
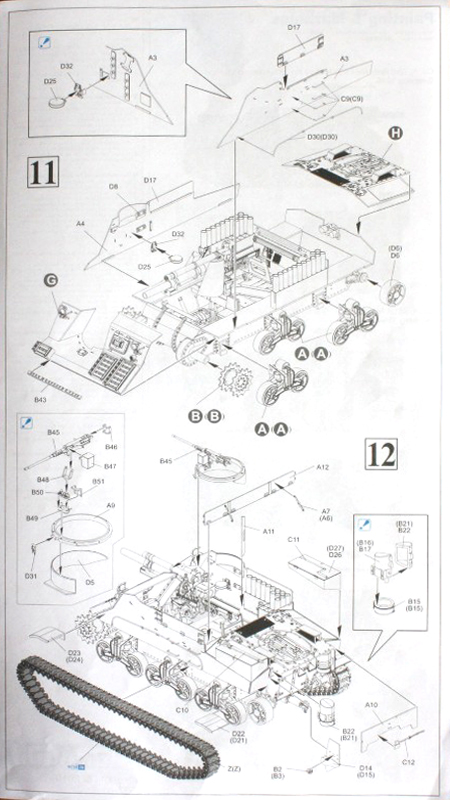
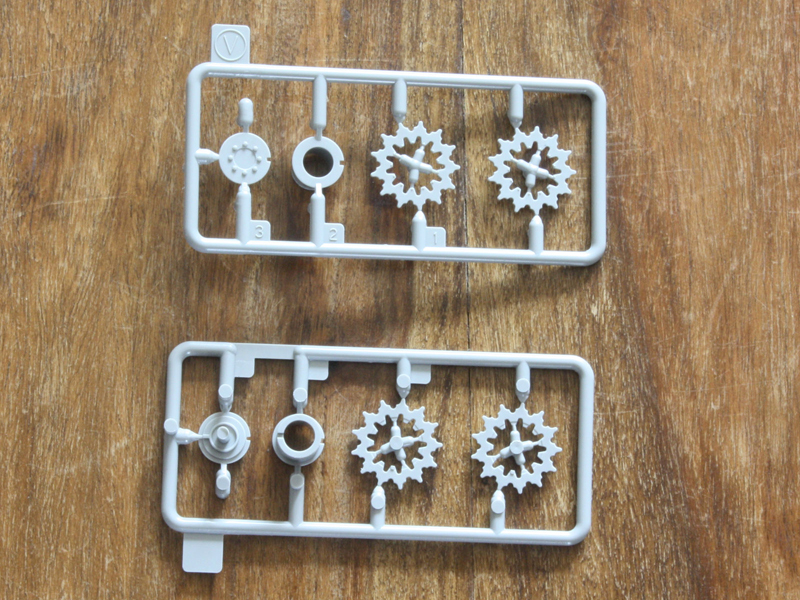
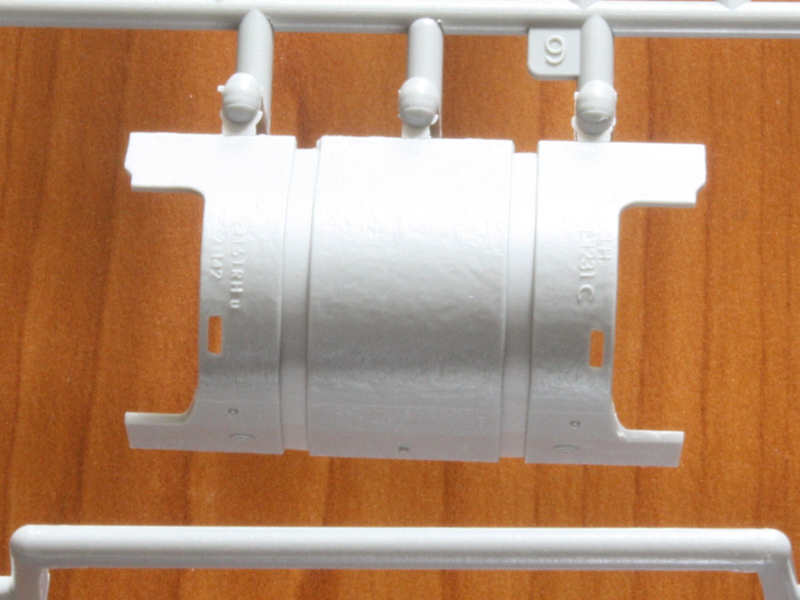
Starting at the bottom, the suspension components come from the earlier M4A1 DV kit, and comprise early M3/M4 bogies with the return roller mounted on top. The pivoting arm assembly stems directly from the old Italeri design. The road wheels and idler are of the open spoke design, with small lumps replicating grease nipples. The most common variation seen on these vehicles is the use of solid pressed-steel idlers and road wheels. U-shaped lifting brackets as found on very early M4s are provided for the bogies, but I havent seen these on any M7s. The return rollers are particularly well done with fine end details. Unfortunately none of the cast parts have any foundry markings on them despite these being common on the real thing. The drive sprockets are made of four pieces in Italeri style, and only the early fancy type are given. This is fine for the mid-production vehicle as issued, but of course these were consumable parts subject to field replacement. To replicate a field-repaired vehicle with plain sprockets or solid pressed road wheels will require access to the spares box or aftermarket parts. The good news is that Dragon has provided a set of their lovely T48 rubber-chevron tracks made in DS plastic that responds to styrene cement. Many M7s also appeared with plain rubber block T51 tracks or steel chevron T54 tracks.
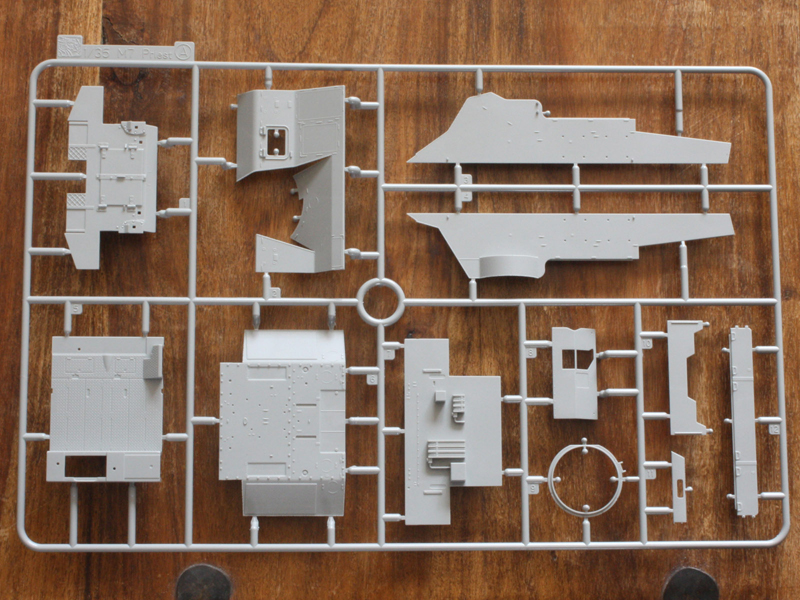
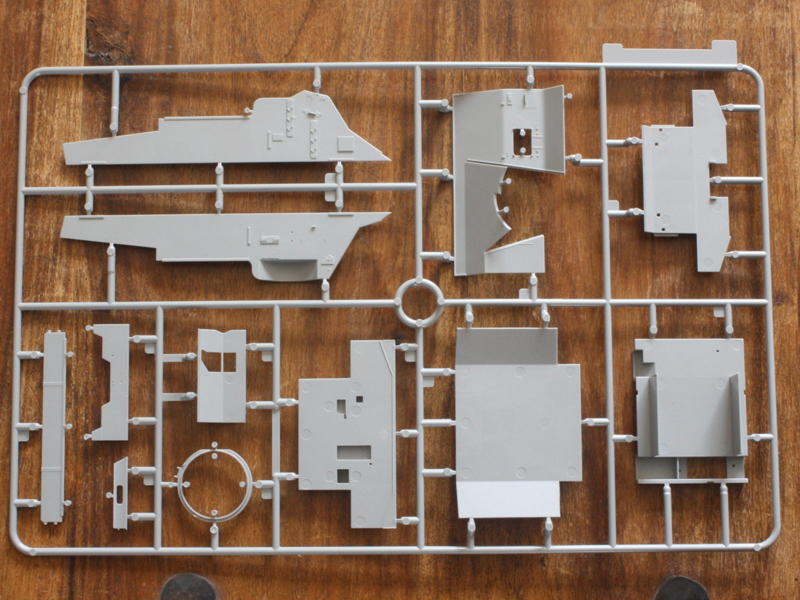
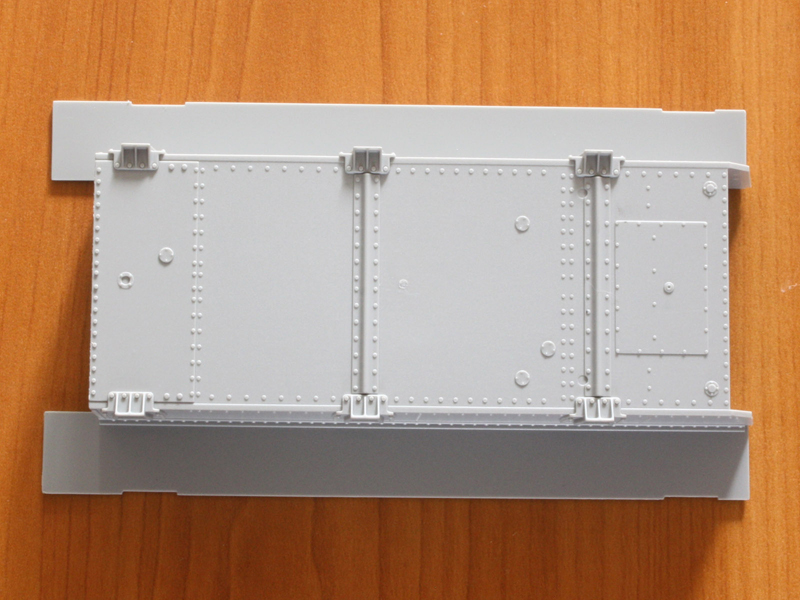
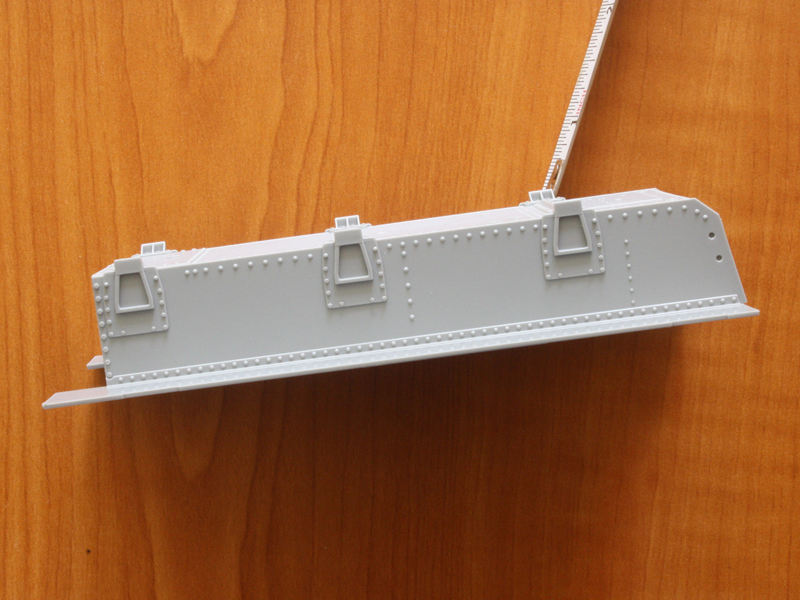
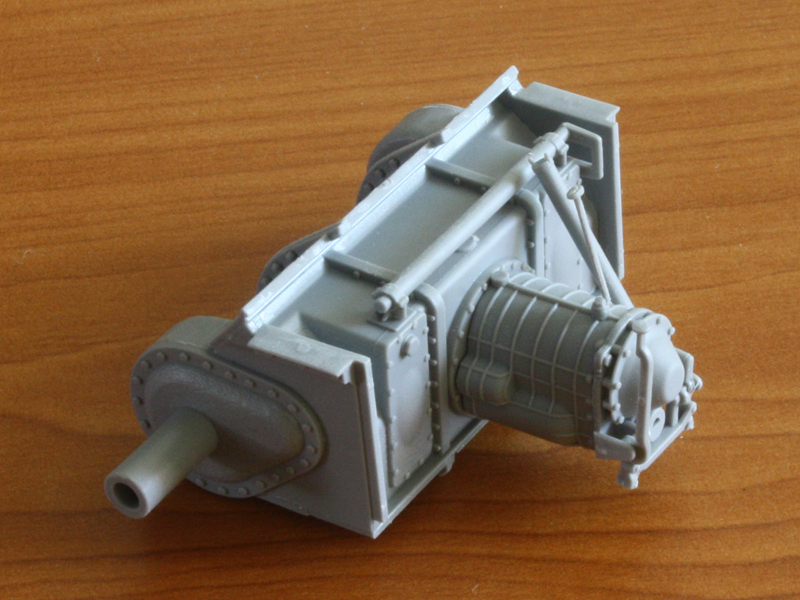
The lower hull is a new casting with lots of detail on every surface. The real thing was based on the riveted hull of the M3, so the model has more rivets than the mind can comfortably imagine. The three-piece transmission housing is made up from a central curved part (with subtle foundry marks) onto which the curved final-drive housings and flanges are added. This allows lots of detail, including all the lubrication points and drain plugs, but requires care to ensure the parts mate so closely they look to be part of the same casting as on the real thing. The final drive covers are moulded integral to the sides of the transmission, and unlike in some Dragon kits these are the right size. And since the whole of this assembly (including the interior face and gearbox) is separate to the hull it wouldnt take too much effort to create a field-repair diorama with the whole thing being removed!
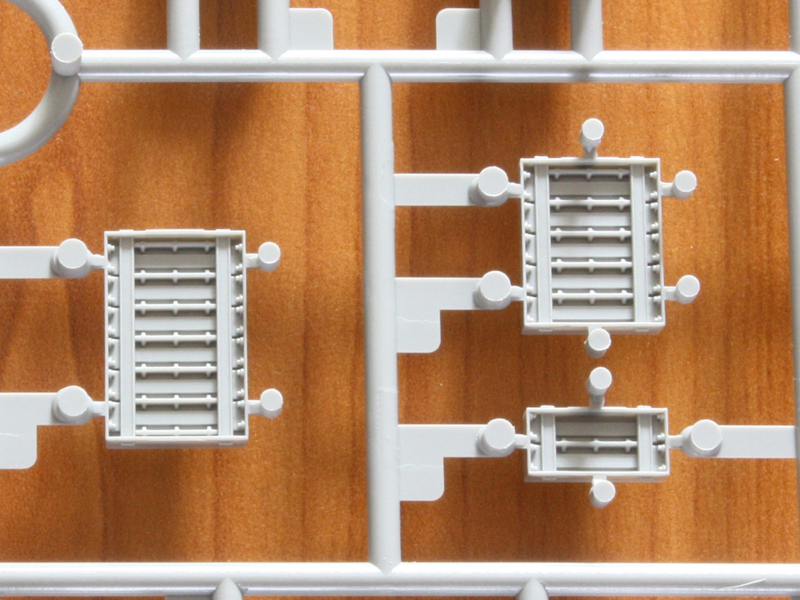
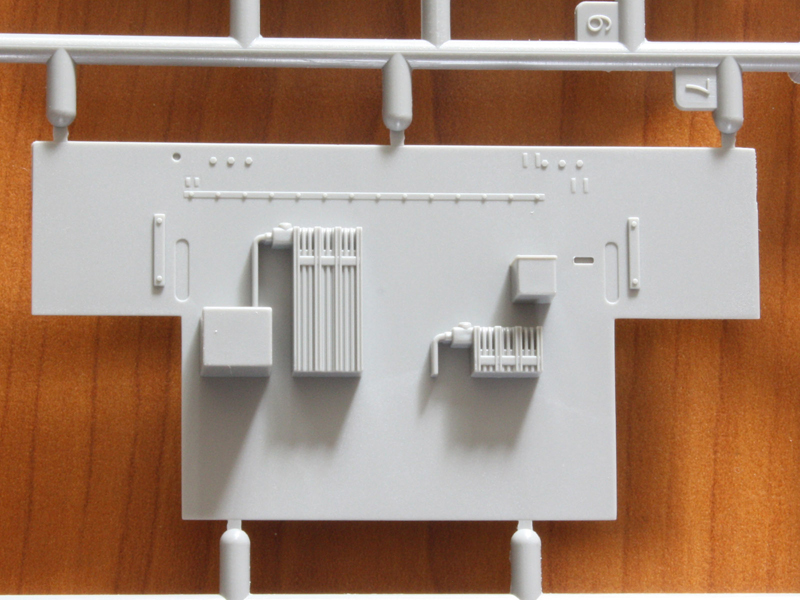
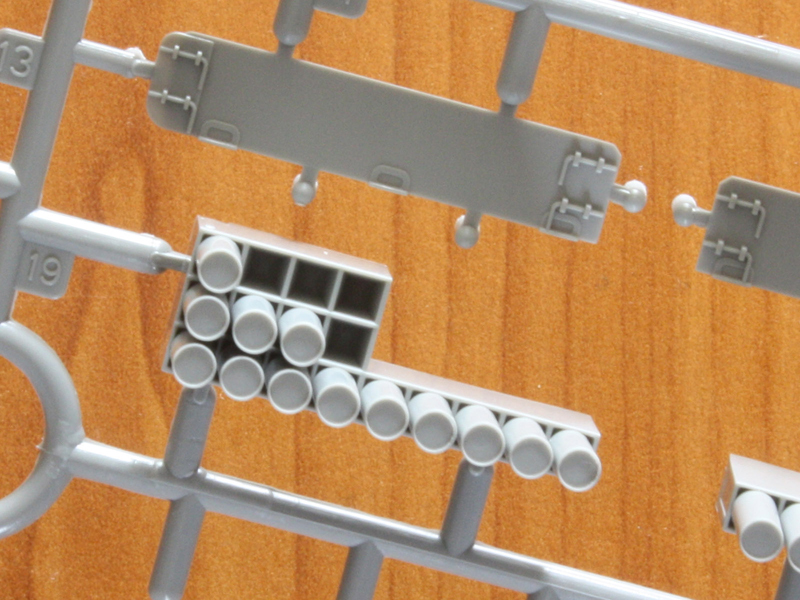
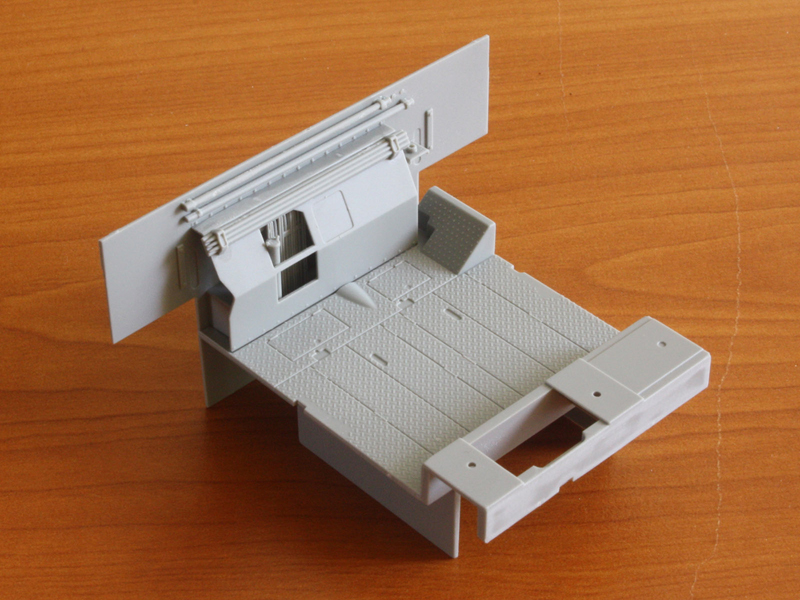
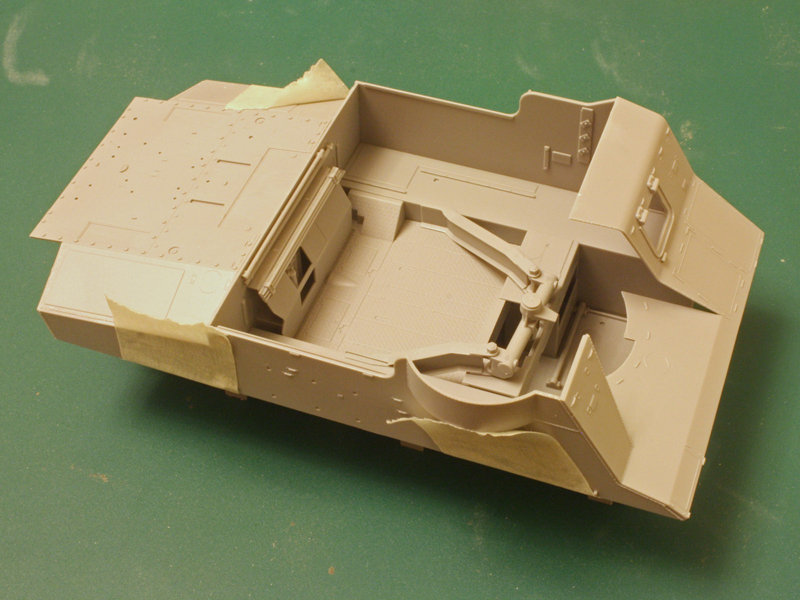
Because its open-topped, there is a fairly complete interior that includes the drivers controls, instrument panel, and transmission as well as ammo stowage. On the rear wall there are oil cooler details as well as the stowed gun cleaning rods and ranging poles. The floor includes hatches leading to under-floor ammo stowage, which are moulded closed. The large visible ammo racks on the sponsons come with moulded-in stowage tubes for all except a handful of rounds. These are very nicely moulded (almost unbelievably deep without any draft angle distortion on the tubes, actually a triumph of tooling), but leave little scope for varied ammo loads for the diorama builder. The stowage rack for the .50cal MG is empty, but ought to hold two ammo boxes. There is also a lot of empty space on the sponson next to the driver that I am sure should hold small-arms ammo and other stuff in boxes. There are clips in the pulpit area where two carbine scabbards should be mounted, but no such small-arms are provided. Likewise there are empty mounting points for three weapon scabbards on the left wall by the driver I wonder which incomplete museum exhibit they measured for the kit? It should be noted that official stowed small-arms for American armour changed from the M1 carbine to the M3 SMG during the active life of these vehicles, so presumably a well-used vehicle would have been updated accordingly.
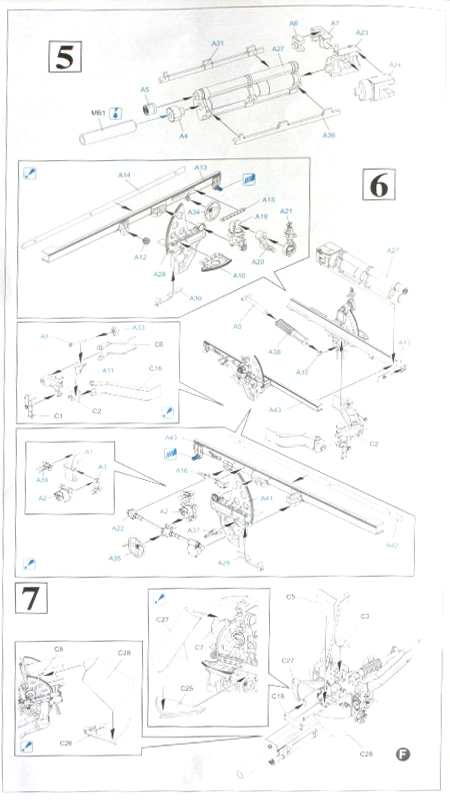
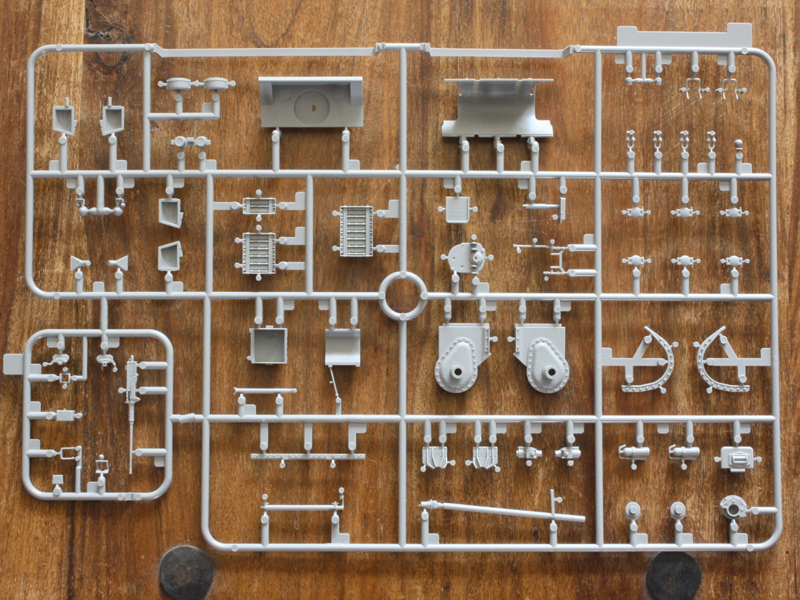
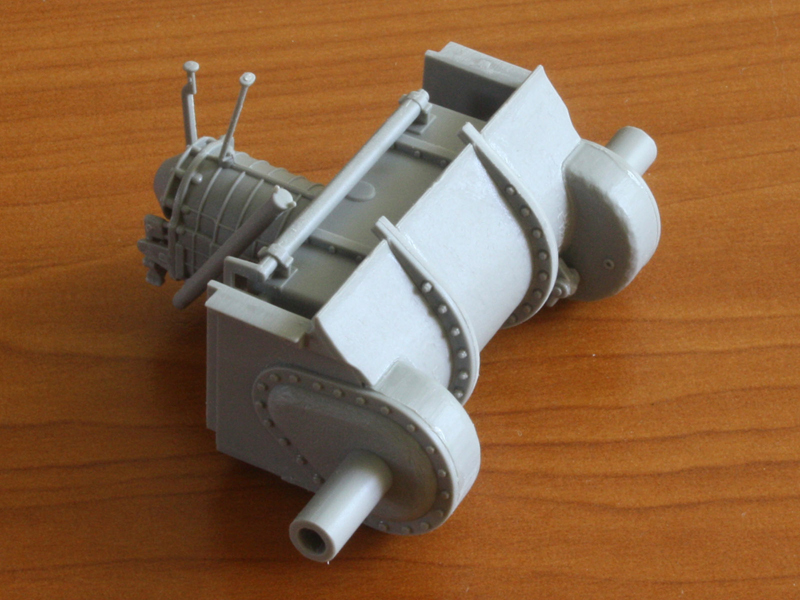
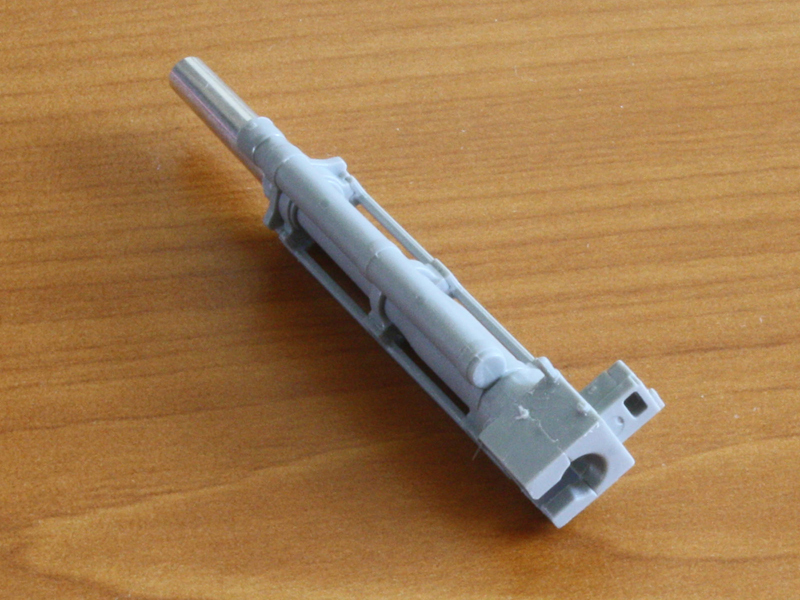
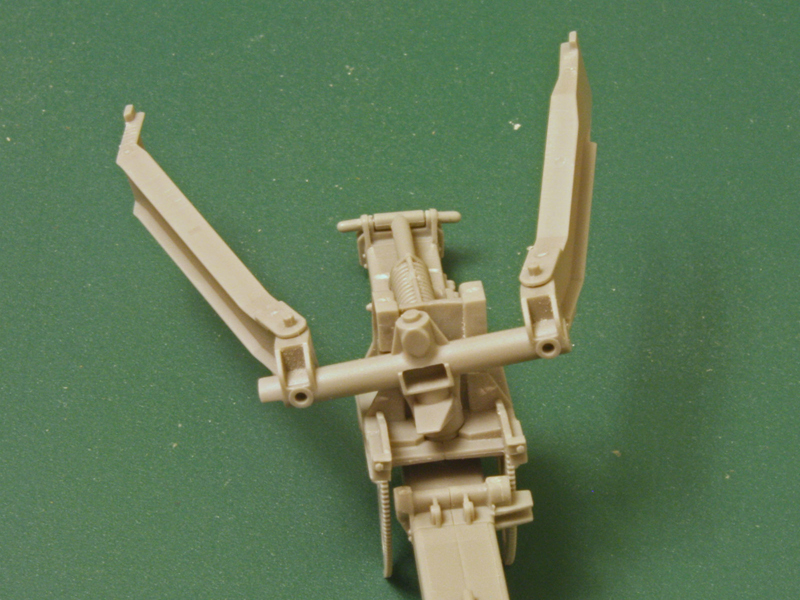
The gun is from Dragons earlier M2A1 Howitzer release (kit #6499) reviewed
here on Armorama by Mike Del Vecchio. The rear barrel section is a large one-piece mould without any blemishes, and the muzzle section is a turned metal piece complete with rifling grooves. It knocks spots off the old Italeri gun! Since the sliding breech block is a separate piece it can be positioned open (for loading) or closed, but note that the breech operating handle is moulded to the block in the closed position. I was bothered by the big seam along the top of the breech this will take some filling and careful filing to remove, especially as there are several raised details to preserve. The other weapon in the kit is the .50cal machine gun with slide-moulded open muzzle. The moulded-on charging handle is a tad short for my liking, so I may replace it with plastic rod. The gun comes with the D40733 cradle (part of which is moulded to the gun) and early D40731 50-round fixed ammo can, but this lacks the characteristic folded tabs along the edge seams. The MG comes with a very detailed skate-ring mounting.
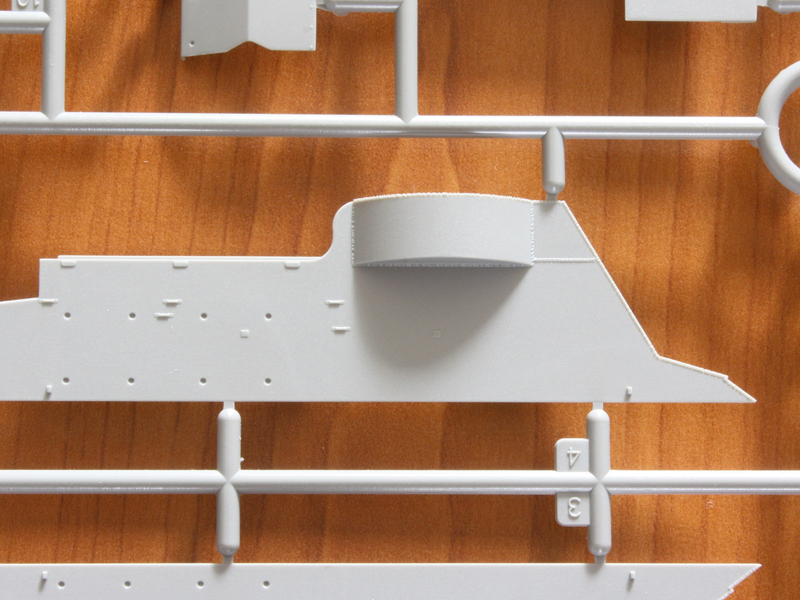
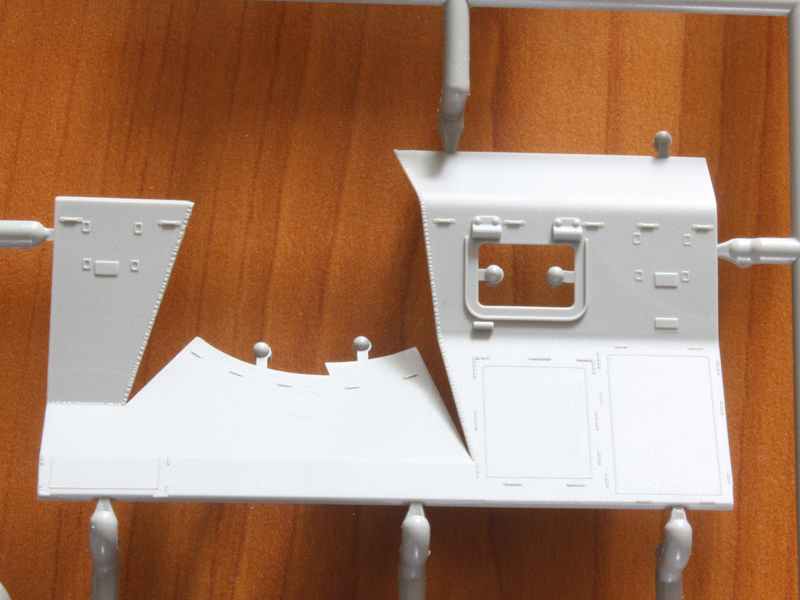
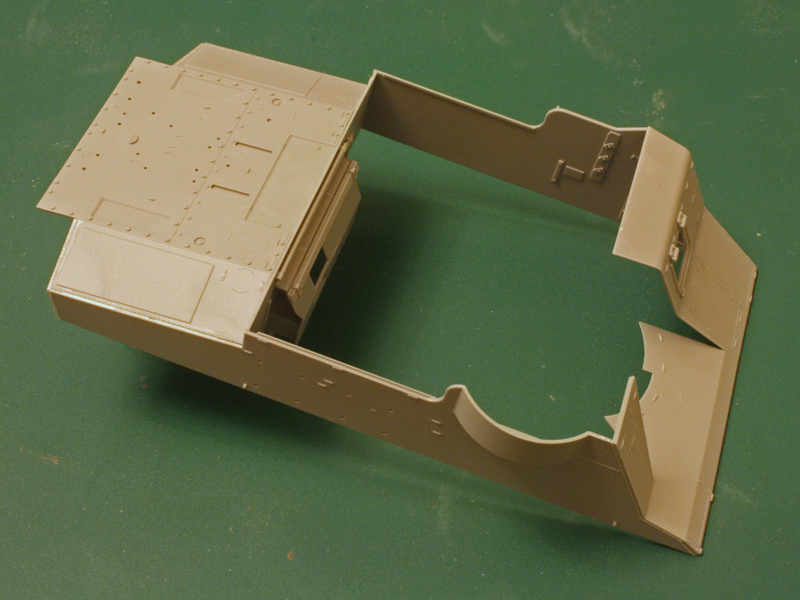
Dragon did well on the exterior, providing lots of weld seams. Build-up of the upper hull from flat panels is similar to the old Italeri kit, and is the only way to get the subtle details on both outside and inside faces of the fighting compartment. The separate hinged side extension panels are a nice touch since they can be positioned up or folded down, and the rear plate likewise could be folded down. Oddly it seems Dragon forgot the locking lugs on the pulpit side, even though they added them to the other. The extensions appear mostly on late vehicles so using them on this kit is optional just remember to shave off the locking lug details if deleting them. Of course, there are photos of very creative field-made side extensions too!
A nice touch is the way the bows for the canvas roof are separate parts that can be left off or even applied in place on top of the fighting compartment Italeri moulded theirs to the hull sides while Academy didnt provide them at all. Just remember to do something about the attachment clips if you dont mount them, as these are moulded on the bows rather than the hull. The grouser stowage boxes come with a full load of textbook-stowed grousers moulded in. Id have preferred them separate, as vehicles in active use often lost the grousers and had other things in the boxes instead. Also, not all the available track types accepted the grousers, including the T48s in this kit. While on the subject, Dragon chose to go old-school with the mounting points for these boxes moulding on faint placement outlines that would require sanding if the boxes are left off.
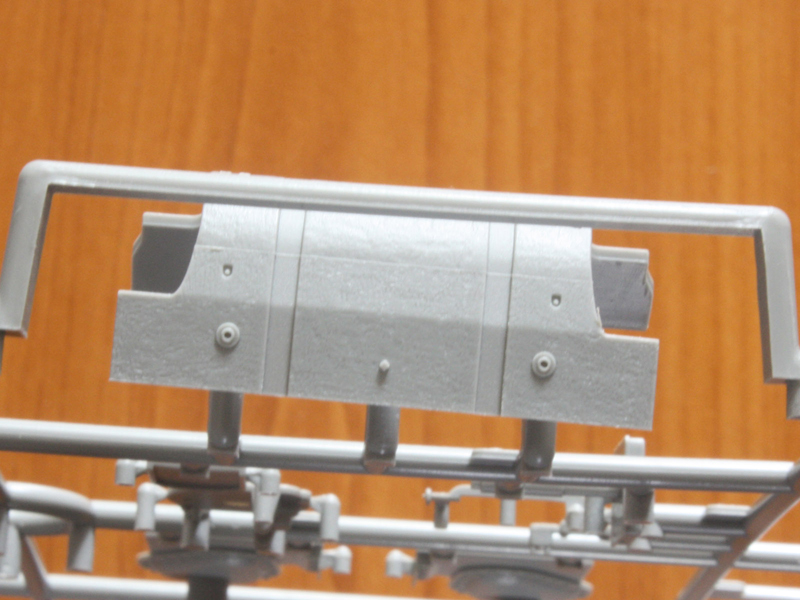
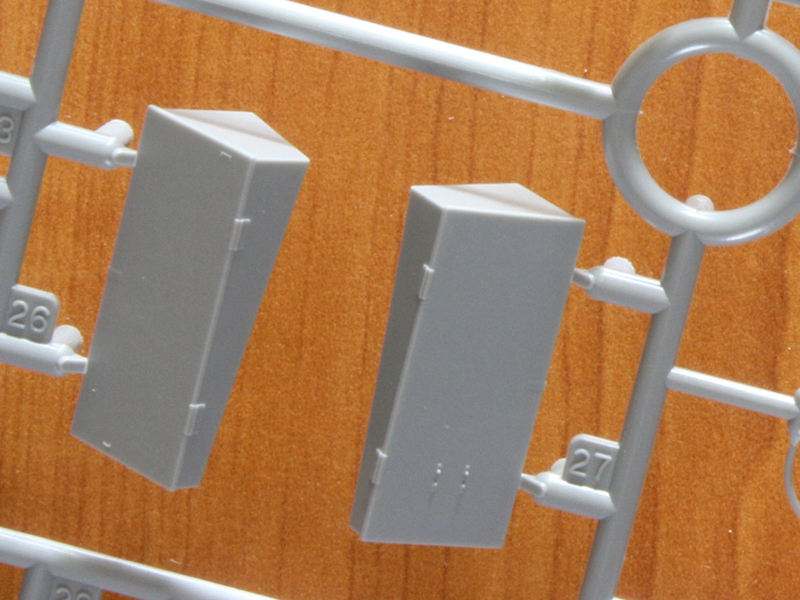
Tool boxes on the rear deck are of the top-opening variety, but are cast as single blocks with no option to pose them open. Earlier phases of the M7 had side-opening boxes with fuel-can stowage above, while later ones had wire baskets on the top lids for soft stowage. The tools are reasonable, but are provided complete with moulded-on clamps and/or straps of varying believability. Perhaps it would be best to cover the whole deck with excess stowage just as seen in wartime photos?
Decals:
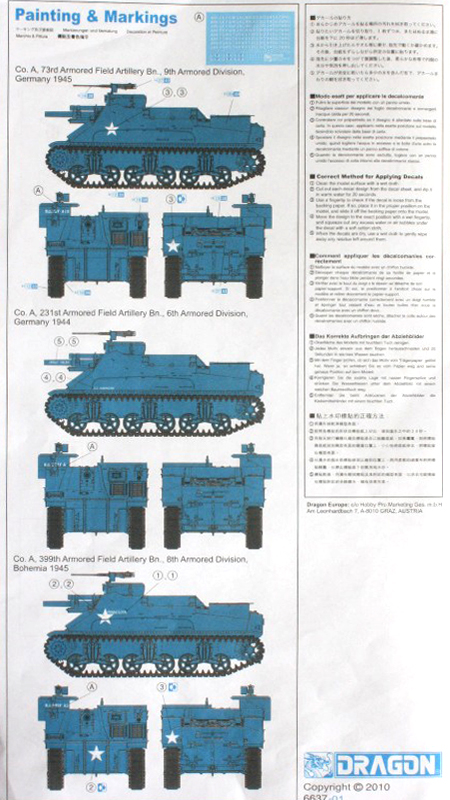
Dragon provides three marking options, all based on WWII examples. These are: A Company, 73rd Field Artillery Battalion, 9AD (Germany, 1945); Crazy Helen, A Company, 231st Field Artillery Battalion, 6AD (Germany 1944); and Minnesota, A Company, 399th Field Artillery Battalion, 8AD (Bohemia 1945). The interesting part is the way the bumper codes and registration numbers are provided on a separate alphabet/number jungle sheet that should serve for quite a few additional US vehicles once youve taken enough for the M7. And for all those moulded-in shells there are yellow band decals to save on painting.
Construction notes
Being open-topped this will be a challenge to paint. Id be tempted to build the body sides & engine deck panels into a sort of upper hull unit that can be added to the lower hull after painting so each can be painted easily the joint can be touched up or hidden by weathering later. Because the rear hull plate forms an important part of the upper hull structure I believe it is better to attach it to the upper hull rather than the lower as instructed. Either way, the secret is lots of dry fittings to make sure there are no gaps! Fortunately the whole lot inside and out is good old OD green
In order to test several issues I jumped around the instructions rather than following the sequence. The more I thought about it, the more I realised the instructions leave a lot to be desired, and are best used only to indicate part numbers while common sense calls the shots.
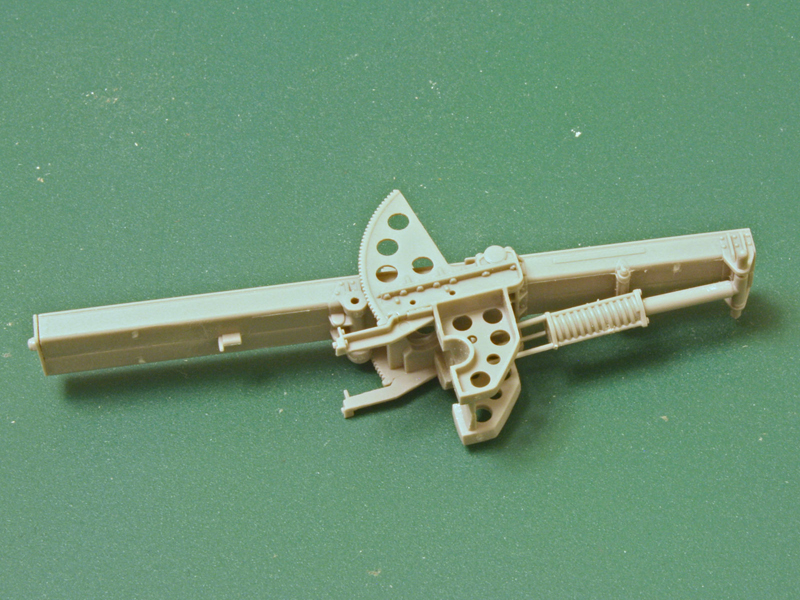
I built up the gun first to check on how it was mounted, since the directions dont indicate any free play for elevation or traverse. In fact, Dragons instructions indicate that I should glue up all the parts and lock the gun into the travel lock. If you want it to elevate then do not glue the pivot-pins on the cradle to the quadrants or the piston (A9) into the spring (A38) as indicated in step 6 just dry-fit them. Also, you will want to preserve the two lugs at the rear of the cradle that the instructions would have you remove. And the travel lock (rectangular part C4 standing on the deck, attached to the rear of the cradle) should be laid down in the stowed position to avoid fouling the gun.
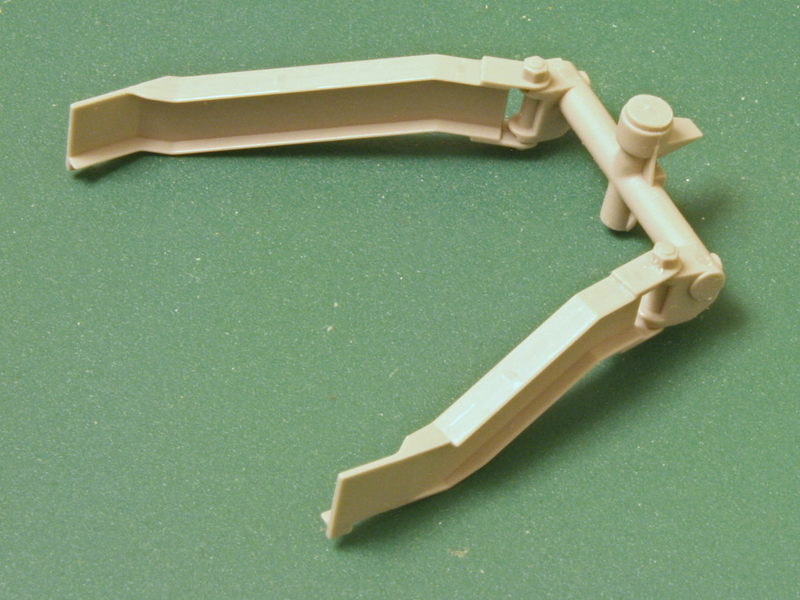
Traverse is more problematic, as the gun assembly sits on a pedestal (part C2) and the instructions suggest it should be glued. Dont! Careful study shows that the pedestal (which is essentially the front yoke of the M2A1 105mm field howitzers towed carriage without wheels) gets trapped between the quadrant halves (A28 & A41) at the top and a lower plate (C3) at the bottom, so it can indeed pivot if no glue is applied. To paint the gun as a separate assembly the cradle, pivot, and I-beam trails will need to be attached to the floor after the whole lot is painted, but the trails can be set at the wrong angle so make sure you dry-fit everything first and mask off any mating surfaces that will need to be glued later. I assembled the yoke and trails, then set them temporarily in place on the deck to harden before trapping the yoke in the gun cradle. This is definitely a fiddly assembly if you are new to the hobby.
The transmission went together well enough, but care is needed to get the two sides level. I dry-fitted mine to the hull front while it was still soft so I could adjust all the angles. Also, the armour lobe sections covering the final drives do leave a slight seam to fill, but a light dabbing of Mr Surfacer should do the trick.
I assembled the main upper hull panels into a single unit while carefully making sure they fit snugly on the lower hull. I found I could incorporate the fighting-compartment bulkhead and the rear panel into this assembly, but fitting it to the lower hull takes some careful wiggling mainly because of the idler axles. Only after the main panels had cured overnight would I even think of adding any details. Watch out here, since the sides do not have any flanges to provide positive fitting to the edges of the lower hull in the fighting compartment youll need to line them up so the lower edge of the sides is level with the underside of the sponsons. On the bright side, once assembled into a box the upper hull sits quite solidly on the lower hull tub. To ensure a snug fit I taped the sides to the lower hull while the glue dried on the various panels. I will need to mask the mating surfaces between upper and lower hulls before painting
I started a separate build log on this kit, which can be found here:
DML M7 Priest Build
More details of assembly hints and issues will be added over the coming weeks.
Conclusion
This is a very welcome kit of a mid-production M7 that is different from the two existing models. If you want a kit that builds up nicely into a crisply-detailed accurate model straight from the box, or a kit with all the mid-production features the others dont have, then this kit is definitely for you! What you get is very well done except for the instructions but my grumble is that the lack of optional wheels, the moulded-in ammo, and moulded-in grousers simplify construction at the expense of flexibility.


Comments