

Hosted by Richard S.
Canadian Forces Campaign
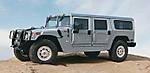
2002hummer

#257

Joined: October 11, 2011
KitMaker: 812 posts
Armorama: 110 posts

Posted: Tuesday, July 16, 2013 - 12:33 PM UTC
I'm in, I hope. Looking at a Canadair CC-109 Cosmopolitan by Welshmodels.

LeoCmdr
Joined: January 19, 2005
KitMaker: 4,085 posts
Armorama: 3,917 posts

Posted: Tuesday, July 16, 2013 - 03:38 PM UTC
Quoted Text
Can someone recommend some Tankers that have clothing and gear similar to those used by Canadian tankers in the picture above/mid too late 90's prior to the shift to CADPAT. Same for some infantry figures that could be used.
You have some options and some limited options.
For the basic old Canadian Combats you should look at using U.S. Vietnam era figures and/or Israeli figures and convert them into Canadian figures....Your research is the key.
The officer in the Tilley hat is actually wearing a crew suit...the closest figure to that is the old Verlinden Israeli Tank Commander but it would also need re-working...I have started modifying one in my stash.

Mcleod
Joined: April 07, 2010
KitMaker: 1,028 posts
Armorama: 45 posts
Posted: Wednesday, July 17, 2013 - 12:46 PM UTC
I'm hoping this campaign entry will pass as an example of equipment as used by the Canadian Forces.

I would like to model a subject that was flown by 440 Sqn. RCAF, during their tenure with the 2nd Tactical AF in WWII Europe.
Using XtraDecals most excellent 1/72 Typhoon offering, I'm hoping to do this example:

Just in case this kit is within the Campaigns criteria, heres the date stamp:

Youngun, please let me know if this works. I know its a tank buster, and not liked much around here. Still a nice model, though.
recceboy
Joined: July 20, 2006
KitMaker: 706 posts
Armorama: 665 posts

Posted: Wednesday, July 17, 2013 - 02:41 PM UTC
Been press ganged into the campaign, I 'am in with something wheeled / tracked. Will have to pick one........
Anthony
Anthony
jet
Joined: December 30, 2002
KitMaker: 306 posts
Armorama: 295 posts
Posted: Wednesday, July 17, 2013 - 08:52 PM UTC
Quoted Text
Been press ganged into the campaign, I 'am in with something wheeled / tracked. Will have to pick one........
Anthony
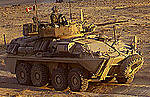
How about a Lav III

Maybe I'll start an early Leopard project!

ltb073

Joined: March 08, 2010
KitMaker: 3,662 posts
Armorama: 3,078 posts
Posted: Friday, July 19, 2013 - 12:27 PM UTC
Hey guy my kit that I will use for this campaigned arrived yesterday and I plan to take it with me on my road trip to Maine starting tomorrow so here is my start up picture

Yes I know an oldie but goodie, but the 2 pack of PE that came with it should spruce it up a bit

Yes I know an oldie but goodie, but the 2 pack of PE that came with it should spruce it up a bit


Youngun
Joined: November 10, 2010
KitMaker: 587 posts
Armorama: 550 posts

Posted: Monday, July 22, 2013 - 10:22 AM UTC
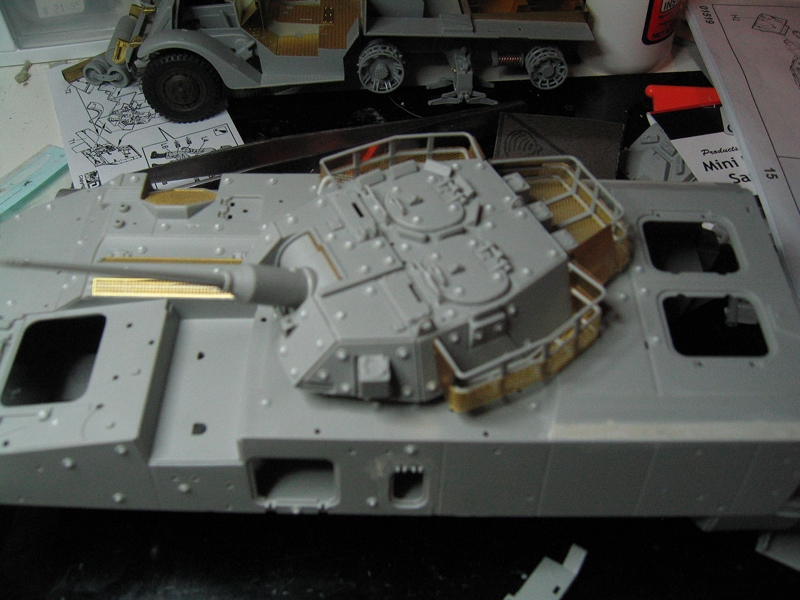
Here's my contribution to the campaign, the AVGP series. Ive had the Girzzly stalled on my bench for a while because I've lost a wheel..If anyone has a spare XML tire+rim they could part with it would be much appreciated. My two primary builds for the Campaign will be the Husky and the Cougar, trying to incorporate the two into a diorama with the Husky towing the cougar or servicing it in some way. 
Got some work done on the Cougar, added the 40mm grenade boxes and a spare jerry can rack.


Got some work done on the Cougar, added the 40mm grenade boxes and a spare jerry can rack.


Grauwolf

#084
Joined: September 14, 2005
KitMaker: 2,485 posts
Armorama: 743 posts

Posted: Monday, July 22, 2013 - 03:59 PM UTC
Hi all,
This will be my entry for the Canadian Forces Campaign.

Cheers,
Joe
This will be my entry for the Canadian Forces Campaign.
Cheers,
Joe

bison126

Joined: June 10, 2004
KitMaker: 5,329 posts
Armorama: 5,204 posts
Posted: Tuesday, July 23, 2013 - 05:12 AM UTC
Hi all,
my entry for the campaing is the LAV III which I intend to build OOTB. I know there are some accuracy issues but I want to keep it simple.
Here is the box and its content.

Olivier
my entry for the campaing is the LAV III which I intend to build OOTB. I know there are some accuracy issues but I want to keep it simple.
Here is the box and its content.
Olivier

Mcleod
Joined: April 07, 2010
KitMaker: 1,028 posts
Armorama: 45 posts
Posted: Friday, July 26, 2013 - 04:41 AM UTC
Here, I'm attempting to build a 440sqn, RCAF Hawker Typhoon, which was stationed at B.78 Eindhoven in the autumn of 1944.
These are just some progress shots.
I always lay down a first coat of Humbrol enamel silver. After sufficient drying time, this is followed by Tamiya color coats. My logic behind this, is that I can use an alcohol or Tamiya thinner dipped Q-Tip to rub lightly on the parts. This assists weathering.

All the small parts have been completed, other than the addition of seat harness. I'm also still considering how I might realisticly weather the prop. The photo shows the parts with Tamiya color, alcohol rubbed, wash applied, and a final Testors Dullcote coating.

Now its time to start putting this show together.
Critical input is welcomed.

Lazzarus78

Joined: January 27, 2013
KitMaker: 75 posts
Armorama: 75 posts
Posted: Saturday, July 27, 2013 - 05:12 AM UTC
Hey guys, made some progress on my early Grizzly.
Thanks to Olivier Carneau and Jason Bobrowich who helped me and showed me a very nice build review on Network54. There i saw a lot of corrections on the Trumpeter kit, but for mine it was too late to do some of them. That means in my case my Grizzly will be only something like 75% correct. And i have some problems to build the AA gunsight correct, so i will not attach it on the turret. Perhaps i correct that later. My skills arent good enough to do some of the corrections. I hope this is ok for you guys.


Cheers Christoph
Thanks to Olivier Carneau and Jason Bobrowich who helped me and showed me a very nice build review on Network54. There i saw a lot of corrections on the Trumpeter kit, but for mine it was too late to do some of them. That means in my case my Grizzly will be only something like 75% correct. And i have some problems to build the AA gunsight correct, so i will not attach it on the turret. Perhaps i correct that later. My skills arent good enough to do some of the corrections. I hope this is ok for you guys.
Cheers Christoph
Dragon164
#226
Joined: February 20, 2012
KitMaker: 1,909 posts
Armorama: 1,066 posts

Posted: Saturday, July 27, 2013 - 09:55 AM UTC
Hi Christoph,
Looking good, don't worry about what we think it's what you think that matters.
Cheers Rob.
Looking good,
don't worry about what we think it's what you think that matters. Cheers Rob.

LeoCmdr
Joined: January 19, 2005
KitMaker: 4,085 posts
Armorama: 3,917 posts
Posted: Saturday, July 27, 2013 - 11:48 AM UTC
Christoph,
Nice work on the turret backdating.
The other parts to not use on your early Grizzly build are parts A5...the dual set of shocks on the front suspension.
The shocks weren't mounted until the late 1980s. You'll have to fill in the mounting holes on the front hull if you remove them.
Nice work on the turret backdating.
The other parts to not use on your early Grizzly build are parts A5...the dual set of shocks on the front suspension.
The shocks weren't mounted until the late 1980s. You'll have to fill in the mounting holes on the front hull if you remove them.

SgtRam
#197
Joined: March 06, 2011
KitMaker: 3,971 posts
Armorama: 2,859 posts

Posted: Saturday, July 27, 2013 - 12:18 PM UTC
Christoph
Looking good, looking forward to the build. I guess I better chose something soon. Thinking of going with something with wings for this one.
Kevin
Looking good, looking forward to the build. I guess I better chose something soon. Thinking of going with something with wings for this one.
Kevin
ltb073
Joined: March 08, 2010
KitMaker: 3,662 posts
Armorama: 3,078 posts
Posted: Sunday, July 28, 2013 - 04:33 AM UTC
Hey guys 
While on Vacation I got my Quad Tractor to the primer stage here is the progress
Engine was dry fit to enable later painting

the PE livened up the interior

as well as the exterior

It was primed this morning
While on Vacation I got my Quad Tractor to the primer stage here is the progress
Engine was dry fit to enable later painting

the PE livened up the interior

as well as the exterior

It was primed this morning
Mcleod
Joined: April 07, 2010
KitMaker: 1,028 posts
Armorama: 45 posts
Posted: Wednesday, July 31, 2013 - 05:39 AM UTC
In order to achieve some idea of seat harness, I took Tamiya tape and bits of metal. After coloring the tape, I fashioned the harness and placed them in the seat. In 1/72 scale and the tight confines of a Typhoon cockpit, I just wanted something to be there:


Here's where I'm at now, the fill and sand stage:


Here's where I'm at now, the fill and sand stage:


Youngun
Joined: November 10, 2010
KitMaker: 587 posts
Armorama: 550 posts
Posted: Wednesday, July 31, 2013 - 07:17 AM UTC
^Nice work ben. After some research over at netowrk54, I think I've got the final composition for what I want to do. The idea being that on a exercise the Cougar broke down and the vehicle tech's had to bring out the husky to tow it to the hangar. 
I don't know if the tankers are 100% accurate but I did find some images of similar looking Canadian crew man.

Here are the vehicle techs, the kneeling one is checking the tow bar connection, while the more senior one observes him.

And just to finish off here's my whole Canadian Forces contingent posed all together.

Cheers
I don't know if the tankers are 100% accurate but I did find some images of similar looking Canadian crew man.
Here are the vehicle techs, the kneeling one is checking the tow bar connection, while the more senior one observes him.
And just to finish off here's my whole Canadian Forces contingent posed all together.
Cheers
Lazzarus78
Joined: January 27, 2013
KitMaker: 75 posts
Armorama: 75 posts
Posted: Wednesday, July 31, 2013 - 07:58 AM UTC
Hi guys, a lot cool models and ideas here. Nice idea to tow the Cougar, looks excellent in my eyes. Cool collection you have there Alex. I made some progress too.
The roof hatches were corrected and i added some smaller details. First time for me that i do so much scratch stuff and corrections. I am really surprised that it looks so acceptable.


It is not perfect, but i am pretty happy for the moment.
Cheers
The roof hatches were corrected and i added some smaller details. First time for me that i do so much scratch stuff and corrections. I am really surprised that it looks so acceptable.
It is not perfect, but i am pretty happy for the moment.
Cheers
Mcleod
Joined: April 07, 2010
KitMaker: 1,028 posts
Armorama: 45 posts
Posted: Thursday, August 01, 2013 - 12:50 AM UTC
Alex, I really like your towjob diorama idea. It reminds me of a similiar scene I witnessed on the streets of Calgary when I lived there in the 80's. Well done!
Stuber, your right. Your work is highly acceptable; very pleasing.
Stuber, your right. Your work is highly acceptable; very pleasing.
bison126
Joined: June 10, 2004
KitMaker: 5,329 posts
Armorama: 5,204 posts
Posted: Thursday, August 01, 2013 - 03:07 AM UTC
Hi all,
has anybody already built a LAV III or a ASLAV? I'm quite stuck with the building of the turret baskets. The bars just can't be aligned with their positioning holes in the PE parts. The uper one seems to be too long so I have a kind of bow shaped bar instead of a straight one.
Trumpeter does not give any template to bend the PE mesh parts and this too is a real pain
I'll post pictures later on.
I also found that Trumpeter goofed the turret sights. They won't just fit on their molded basis and the flipping shutter must be worked to be installed on the sights.
Olivier
Dragon164
#226
Joined: February 20, 2012
KitMaker: 1,909 posts
Armorama: 1,066 posts
Posted: Thursday, August 01, 2013 - 11:16 AM UTC
Olivier,
I built one for the Operation Afghanistan Campaign, here is the only pic I can find from the build but I can take some of the completed model if you like.
Cheers Rob.
I built one for the Operation Afghanistan Campaign, here is the only pic I can find from the build but I can take some of the completed model if you like.
Cheers Rob.
bison126
Joined: June 10, 2004
KitMaker: 5,329 posts
Armorama: 5,204 posts
Posted: Thursday, August 01, 2013 - 08:12 PM UTC
Thanks for the pic Rob. Do you remember how you managed to bend the mesh parts?
I'll try to do this today if the temperature is not too hot. Yesterday the CA glue cured before I could put the parts in contact
Olivier
I'll try to do this today if the temperature is not too hot. Yesterday the CA glue cured before I could put the parts in contact
Olivier
bison126
Joined: June 10, 2004
KitMaker: 5,329 posts
Armorama: 5,204 posts
Posted: Friday, August 02, 2013 - 12:23 AM UTC
Here are the WIP pictures of my LAV III. It is an OOTB build, I just fixed the wrong front tiedown points which were for a Stryker not a LAV.
The hull is nearly complete. I'll add the tools after the painting. The mirrors will be folded onto the hull sides.
The turret still misses the baskets.


Olivier
The hull is nearly complete. I'll add the tools after the painting. The mirrors will be folded onto the hull sides.
The turret still misses the baskets.
Olivier
Youngun
Joined: November 10, 2010
KitMaker: 587 posts
Armorama: 550 posts
Posted: Friday, August 02, 2013 - 02:39 AM UTC
Camo's on, did the three tone Nato Black, Nato Green and Tan/Green Yellow. It was done free handed with my airbrush.


And now for the diorama, decided to go for the a frame connected to the top tow points.


And now for the diorama, decided to go for the a frame connected to the top tow points.
Mcleod
Joined: April 07, 2010
KitMaker: 1,028 posts
Armorama: 45 posts
Posted: Friday, August 02, 2013 - 05:54 AM UTC
I am really liking your work here, Alex. Although your toes in photo 5 are in shadow, they indicate that your figures have very realistic skin tone.
Just wondering about your excellent freehand camo job. What pressure would you be at to avoid the over splatter that I so often experience with freehand work?
Ben
Just wondering about your excellent freehand camo job. What pressure would you be at to avoid the over splatter that I so often experience with freehand work?
Ben
 |

WEB HOSTING BY


Copyright ©2021 Armorama and Kitmaker Network, a subsidiary of Silver Star Enterprises
All Rights Reserved. Please read our Conditions of Use and Privacy Policy.
All Rights Reserved. Please read our Conditions of Use and Privacy Policy.