Campaigns
Where Armorama group builds can be discussed, organized, and updates posted.
Bronco Only Campaign
PvtMutt
Visit this Community
Missouri, United States
Joined: July 01, 2006
KitMaker: 614 posts
Armorama: 601 posts
Posted: Friday, May 16, 2014 - 02:47 PM UTC
Man when you camo you camo "J", even the jack blocks will be hard to find.

Nice hard edge scheme
Tony lee
Tiger1944
Visit this Community
Victoria, Australia
Joined: October 11, 2013
KitMaker: 160 posts
Armorama: 152 posts
Posted: Friday, May 16, 2014 - 03:01 PM UTC

Quoted Text

Man when you camo you camo "J", even the jack blocks will be hard to find.

Nice hard edge scheme
Tony lee


Thanks Tony
Still have a load of detail painting to go, don't worry the jack blocks will be painted as timber. Also have to do some light chipping and that old technique "dry-brushing"!
Tiger1944
Visit this Community
Victoria, Australia
Joined: October 11, 2013
KitMaker: 160 posts
Armorama: 152 posts
Posted: Sunday, May 25, 2014 - 03:31 PM UTC
Some weathering, washes, filters and dry-brushing:


Still some details to pick out, headlights to fix (be warned they are very easy to break ) and stowage to add.
PvtMutt
Visit this Community
Missouri, United States
Joined: July 01, 2006
KitMaker: 614 posts
Armorama: 601 posts
Posted: Monday, May 26, 2014 - 03:17 AM UTC
Very Nice Jason, you've done well.

Tony lee
robw_uk
Visit this Community
England - North East, United Kingdom
Joined: June 22, 2010
KitMaker: 1,224 posts
Armorama: 1,207 posts
Posted: Tuesday, May 27, 2014 - 08:14 PM UTC
very nice work all... my A-13 is pending, need to crack on with my 251 campaign first... hope to be ready to start this sometime next month
Nito74
Visit this Community
Lisboa, Portugal
Joined: March 04, 2008
KitMaker: 5,386 posts
Armorama: 4,727 posts
Posted: Wednesday, May 28, 2014 - 12:42 AM UTC
Seeing Jason's build...well I need to start this one soon...
FJHueso
#156
Visit this Community
Madrid, Spain / España
Joined: February 29, 2004
KitMaker: 119 posts
Armorama: 53 posts
Posted: Thursday, May 29, 2014 - 09:59 AM UTC
Hello all!

Just received my input to this campaign: Civilian Topolino with lady, girl and dog. Nice little kit, but quite a challenge...

Regards
Javier


Nito74
Visit this Community
Lisboa, Portugal
Joined: March 04, 2008
KitMaker: 5,386 posts
Armorama: 4,727 posts
Posted: Sunday, June 01, 2014 - 12:00 PM UTC
Here goes:


Small question...why have all the hatches open if there's no interior parts..


Bronco's detailed instructions :


Painting & decal sheet


Tiger1944
Visit this Community
Victoria, Australia
Joined: October 11, 2013
KitMaker: 160 posts
Armorama: 152 posts
Posted: Thursday, June 05, 2014 - 10:40 AM UTC
@John, The panzer II is looking good so far. I have built the standard Ausf.D PzII by Bronco and its a nice little kit.

Well I'm calling this one done
I have another Bronco kit in the stash which I will also build for this campaing, a Gaz-69 cold war anti-tank missile truck.

pics:


alewar
Visit this Community
Canelones, Uruguay
Joined: December 27, 2006
KitMaker: 773 posts
Armorama: 765 posts
Posted: Thursday, June 05, 2014 - 01:18 PM UTC
Great work Jason!

I still fighting with the wheels.....

Felicitaciones from the south!

Alvaro

Cam
#275
Visit this Community
Alberta, Canada
Joined: March 01, 2006
KitMaker: 174 posts
Armorama: 141 posts
Posted: Thursday, June 05, 2014 - 03:05 PM UTC
I'm going to jump in with the 6Pdr AT (airborne)gun. planing to do the Jeep and trailer for the Arnhem campaign and this will help dress up the diorama.

max_meeki
Visit this Community
Tasmania, Australia
Joined: December 19, 2011
KitMaker: 92 posts
Armorama: 88 posts
Posted: Friday, June 13, 2014 - 03:02 PM UTC
Start pic.

Tiger1944
Visit this Community
Victoria, Australia
Joined: October 11, 2013
KitMaker: 160 posts
Armorama: 152 posts
Posted: Friday, June 13, 2014 - 03:28 PM UTC
@Max & Cam, looking forward to seeing how both your builds progress. I will start my second Bronco kit for this campaign very shortly.
casualmodeler
Visit this Community
Hame, Finland
Joined: February 04, 2009
KitMaker: 702 posts
Armorama: 665 posts
Posted: Sunday, June 15, 2014 - 06:38 AM UTC
Ok fellow modelers. At this moment I'm thinking to build this kit: http://www.perthmilitarymodelling.com/reviews/vehicles/bronco/cb35079.html
I haven't started yet, just found this kit from basement storage. I know I'll have my hands full with this kit during september..
TMoon
#152
Visit this Community
Texas, United States
Joined: December 07, 2002
KitMaker: 487 posts
Armorama: 441 posts
Posted: Monday, June 16, 2014 - 12:49 PM UTC
Here is my start up photo for the Campaign.
It is a German 2.8cm s.Pz.B.41 Anti-Tank gun


Tom
max_meeki
Visit this Community
Tasmania, Australia
Joined: December 19, 2011
KitMaker: 92 posts
Armorama: 88 posts
Posted: Tuesday, June 17, 2014 - 02:03 PM UTC
As I'm on a roll....


I started this as well.
Tiger1944
Visit this Community
Victoria, Australia
Joined: October 11, 2013
KitMaker: 160 posts
Armorama: 152 posts
Posted: Monday, June 30, 2014 - 04:44 PM UTC
This is my second Bronco kit for this campaign


Yep it's a typical Bronco kit with thousands of tiny parts!
Tiger1944
Visit this Community
Victoria, Australia
Joined: October 11, 2013
KitMaker: 160 posts
Armorama: 152 posts
Posted: Friday, July 18, 2014 - 09:32 AM UTC
I have started work on the Gaz-69, and for it's small size the kit is packed full of detail. And a score of tiny parts, including wing nuts!

Progress so far:


[/url][url=https:
panzerbob01
Visit this Community
Louisiana, United States
Joined: March 06, 2010
KitMaker: 3,128 posts
Armorama: 2,959 posts
Posted: Monday, July 21, 2014 - 03:24 AM UTC
I'm IN, with yet another of those oh-so-popular (and way tiny and full of itty-bitty pieces) Bronco Topolino DAK kits!

The box fell off my pile, landed on the bench, popped open, and started screaming "build me NOW" with what I figure was some sort of Italian-Chinese-sounding accent. I resisted - for about 5 seconds - but, seeing just how cute and different this thing is from my usual tankish fare... succumbed to the call!

That was mid-afternoon yesterday. The building started right away. Here's the start pic:


There's a lot of nice detail in the kit, but, as always, room for improvements and OCD / AMS-isms. There is a wealth of photo stuff all over the web on these little cars - many older pics, even FIAT add-blurb pics from the 30's+. And several good restored examples, too. I think Jay Leno actually has (maybe had?) one of these! For the builders, lots of good guidance. Don't forget that these came out before the war, and continued production in this body form until, I think, 1953 or maybe 1957. And I would bet that the majority in German service were "seconded" from civilian stock and not actually built expressly for the Wehrmacht.

What paint-scheme to go with? I'm sort of thinking not DAK but rather either Italy ca 1944 or maybe over in the western front Normandy+.

Go, Topolino!

Bob
panzerbob01
Visit this Community
Louisiana, United States
Joined: March 06, 2010
KitMaker: 3,128 posts
Armorama: 2,959 posts
Posted: Tuesday, July 22, 2014 - 08:35 AM UTC
Bronco Topolino DAK WIP post 1...

OK. I jumped right into things... saw that yes, it DOES have a fairly nicely detailed little engine. The operative is "little". Really TINY. Like in US dime-sized. But pretty cool!


From there, I moved to that frame. Hmmmm. Bronco did NOT do justice to this part. Yes, it's delicate and yes, the arms and stuff all appear present and reasonably scaled. But (look up Topolino pics on the web...) the main frame rails were "perforated U-channel" pieces. I know. NOBODY will likely see this, but I did carve them out and drill them - what the heck, I'll KNOW this stuff is there! 
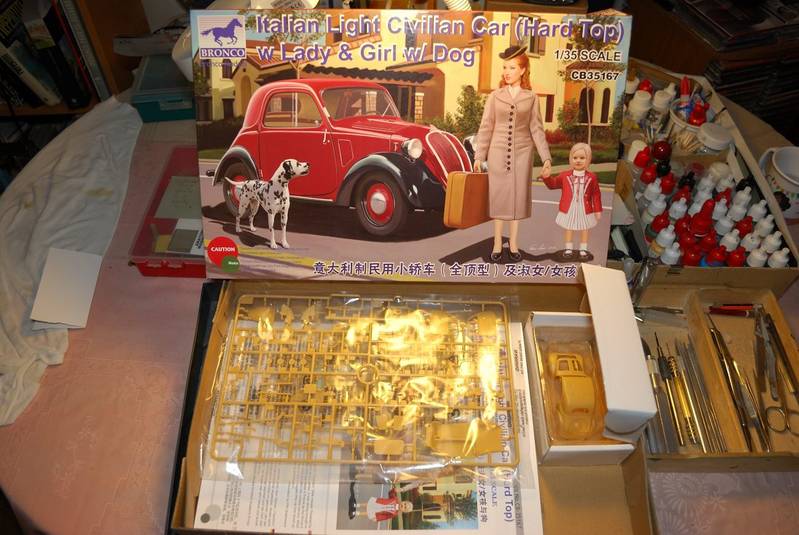
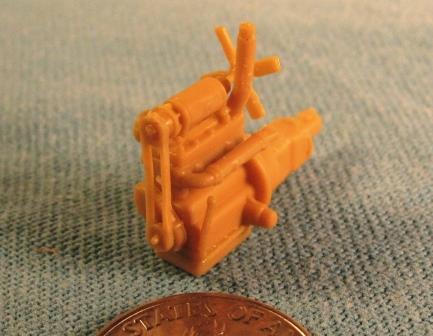
And then I mounted that tiny engine and some suspension bits (also tiny).


Next evening saw me shift over to the interior. Bronco supplies OK seats and a couple VERY TINY pedals (there is NOTHING in this kit larger than basically SMALL. ). Pics show that these seats did not sit on the floor, but on rails to slide back and forth on. And like about every other car with such seating, there were these little handles which the sittee could use for to move his seat... So in went some styrene rails and sprue handles. And then there is (and I am surprised that Bronco missed this simple detail! ) missing hand-brake beside the tranny tunnel. So I added that bit, too. And a couple little plugs for those pivot pins on the sides of the seat-backs to fold same forward.


And lastly... OCD-ism crept in and... "hmmmm. I wonder what this little (I mean TINY) mill would look like if I "wired" it up a bit?" And so I stretched some sprue and made a distributor and "wired" the little booger up. The kit does come with a spark coil to be mounted right side of the engine compartment, so I left a couple leads out for that stage. I also added the generator out-lead to left of engine, and figure that I'll pop some sort of little beeper horn in there when it goes together. Apparently Bronco did not supply that horn, but pics show one rather clearly down in there, so...


I think I'll also add in some little lines for the carb operating cable (throttle) and for a fuel-line to the pump, which may have been down below that distributor somewheres 
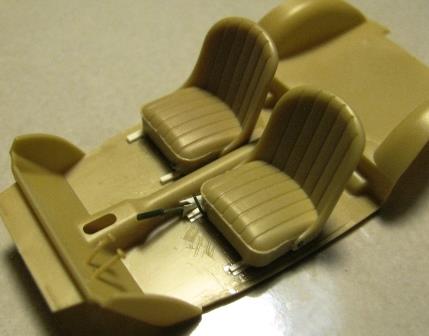
And perhaps that fuel line bent on around the front of the mill and went on back under that radiator somewhere to the left side... ??? I'm not sure, but it could look cool and probably no show judge will know any better!

I need to go back to my frame and maybe add a brake cable or line somewhere...

All in all, it's a nice kit and, while dinky and very very delicate, goes together well.

More sometime soon!

Bob

PS: Does anyone have any good idea what the gas-pedal looked like on this thing, and where actually it mounted? Bronco has given us a 2-pedal car without any gas-pedal. So... it's shift and STOP, but no GO!
Tiger1944
Visit this Community
Victoria, Australia
Joined: October 11, 2013
KitMaker: 160 posts
Armorama: 152 posts
Posted: Saturday, July 26, 2014 - 10:48 PM UTC
@Bob, that little Fiat looks like a great little project. I bet it has as many tiny parts as my Gaz-69 truck I am doing at the moment..even individual wingnuts that are bound to feed the carpet monster
I reckon if I did that Fiat it would end up looking like this one:


This shot shows the accelerator pedal, it's from a 1936 model
Hope it is of some help for you.


And my progress on my Gaz-69 missile truck:

panzerbob01
Visit this Community
Louisiana, United States
Joined: March 06, 2010
KitMaker: 3,128 posts
Armorama: 2,959 posts
Posted: Sunday, July 27, 2014 - 05:08 AM UTC
Jason;

The Topol is somewhat smaller than is that GAZ and actually comes with only about 150+ parts... albeit some are certainly just as tiny as any you'll find in the GAZ! If you are doing the "Baby Carriage" kit, well... Now I know what I'll be in for when I pull that one out for cement!

Your progress looks great - lots of stuff we'll know is under there but really unlikely to be seen by hardly anyone else! I, too, I too! It's nice stuff.

Whatever that pic you indicated as being of a "1936" something is of, it certainly looks mondo different from any Topol! But the suspect gas - pedal looks about what I think it would have been based on glimpses in other known Topol photos, so I'll go along that route.

Thanks for posting it!

Hmmmm. I wonder whether WWII "militarized" Topols might have had those wooden duck-boards... THAT would look "the bomb!" Hey, why not!

Bob
casualmodeler
Visit this Community
Hame, Finland
Joined: February 04, 2009
KitMaker: 702 posts
Armorama: 665 posts
Posted: Sunday, July 27, 2014 - 08:46 AM UTC
Hello gents!
Here's the starting pic from monday. Some progress has happened but that's another story. I'm heading for one week holidaytrip, so there's no progress on next week. Catch you later folks..

casualmodeler
Visit this Community
Hame, Finland
Joined: February 04, 2009
KitMaker: 702 posts
Armorama: 665 posts
Posted: Thursday, August 14, 2014 - 11:05 PM UTC
Hello gents. Here's where we stand today:

On the front is that friiggin PE part or actually two flat, straight PE parts, which should be bent both idenifically and the thinner one glued over the other half... 
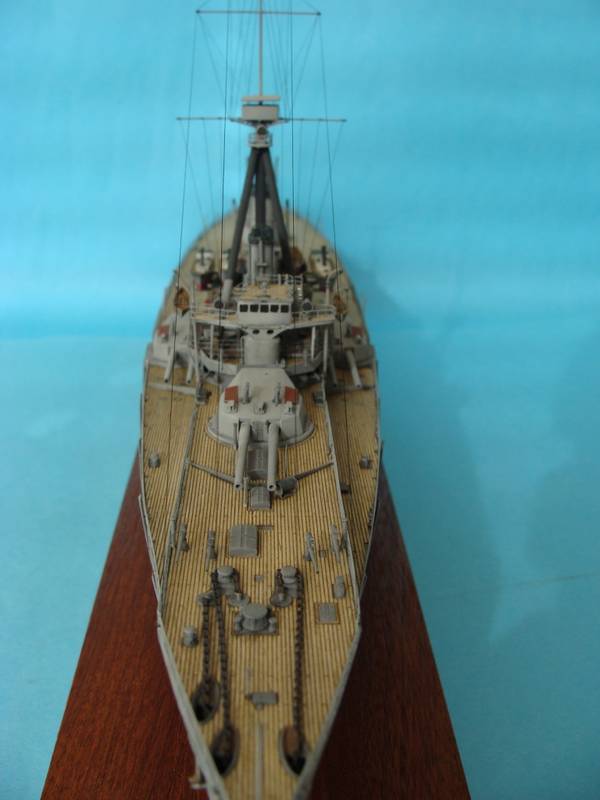
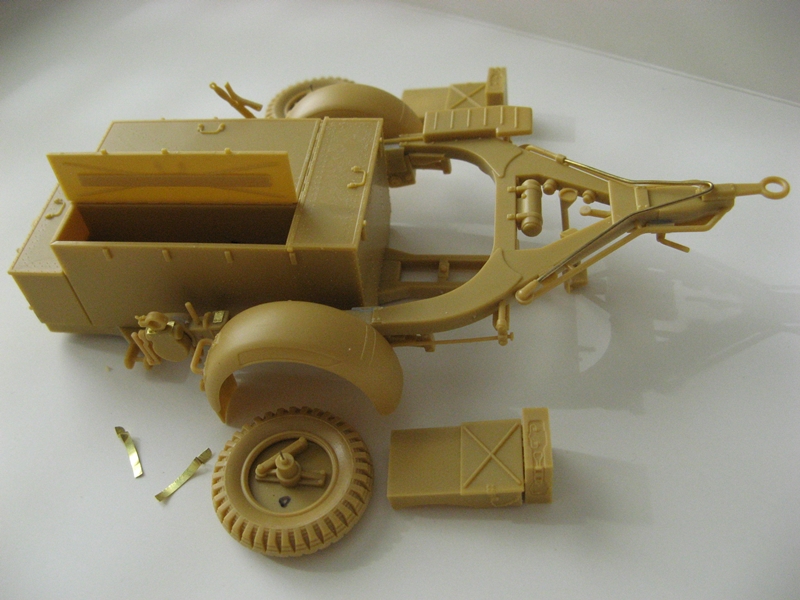
I spent hours trying to get it on it's place but no success, so I put this kit aside for couple days. It's supposed to be fender support but man it's one PITA.

Only parts missing beside that is jerrycans from top of the rear hatch. I'm planning to leave that one hatch open but I should figure out, what kind of support there has been keeping it open?
Nito74
Visit this Community
Lisboa, Portugal
Joined: March 04, 2008
KitMaker: 5,386 posts
Armorama: 4,727 posts
Posted: Sunday, August 31, 2014 - 05:04 AM UTC
Very small update,


So many tiny almost invisible parts... I won't finish this one in time... but I'll try !!!!