Update on the WW1 trench diorama.
I started on the trench firing steps. I debated on using wooden platforms on wooden legs. I ended up going with wood sided steps, back-filled with dirt. For the wood planks I used Popsicle sticks. I filled the step with styrofoam and covered the top with Celluclay.

I had placed a firing step where the tank fell through so I damaged it up. I also began added the damaged trench walls where the tank had crushed them and knocked them loose.

With the FT17 added.

View of the other side.

It's time for the figures. First up are the Stormtroops from the original diorama. "A" was left as is, just touched up a bit. "B" is a bit of a problem for me. My plan was to have this guy join the normal infantry on the firing steps while e waited for his turn to hit the ladder. I'm probably going to change that. "C" is the NCO and will get a few changes. He'll be modified to be on a ladder and will be armed with a MP18. "D" I actually disliked and planned on modifying. I decided to keep it and might change the angle f the hand holding the rifle.

Some of the modifications to the NCO figure. The donor leg actually came from an old Italeri Soviet Infantry set.

And now the ICM Infantry set. The figures appear a little larger in scale than the stormtroopers. The heads are a bit large. The figures come with spiked helms but I'm going to use the standard steel helment. There's three riflemen and an officer blowing a whistle. The idea is that the normal infantry are manning the trench while the stormtroopers are starting an attack.

The normal infantry are posed walking. That didn't work well with the idea of them manning the trench defenses. I swapped the legs of two of them and it gives them a stance like they are standing. The third figure was made in to a machinegunner for the MG08/15. The idea with him was that he was rushing to take his position. I don't really like the way it looks so I am going to modify him again to stand at the firing step. The fourth figure is the officer and I'll probably build him without any changes.

I'm bad about adding too much and this project isn't any different. I scratched a couple of additional stormtroopers using Italeri Soviet Infatry legs and German torsos from the spares. The other figure and the set of legs might become another stormtrooper headed up the other ladder. The Italeri legs are to donate the puttee lower legs. I decided to stop and might pick up another set of stormtrooper figures for the backpacks.

Idle hands....more changes. I decided to modify the far end of the trench. I wanted to add a bend. In practice this kept a shell that landed in the trench from wiping out an entire section. For this project it was to add some character to that end. The yellow diagonal lines represent a section of the back wall that would be cut out. A wall section will be added at the vertical post...outlined by the popscicle stick.

Section cut and section added. I also moved the far end firing step closer to the tank and placed the ladder in the corner.

Celluclay added and base coat painted.

The stormtroopers added. I'm probably going to modify the firing stormtrooper to be "going-over-the-top".

I'm pretty pleased how this one is coming along. I've decided to take a brief break from working on it to catch up on some other projects and to decide on a few things.


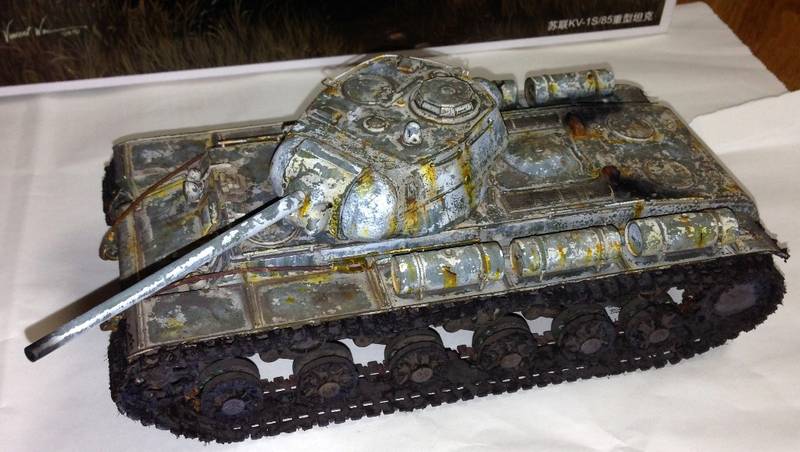
 (must of been the cheap hairspray is my guess). I picked up some of AK's heavy chipping fluid for my next attempt.