

You went really crazy on this one!
LOL
Keep going!!!
Armor/AFV: What If?
For those who like to build hypothetical or alternate history versions of armor/AFVs.
For those who like to build hypothetical or alternate history versions of armor/AFVs.
Hosted by Darren Baker
Kpz.70 MBT Modernized

hugohuertas

Joined: January 26, 2007
KitMaker: 1,024 posts
Armorama: 1,013 posts
Posted: Monday, April 24, 2017 - 02:31 AM UTC

ColinEdm


Joined: October 15, 2013
KitMaker: 1,355 posts
Armorama: 1,229 posts
Posted: Sunday, April 30, 2017 - 09:26 AM UTC
After checking reference pics again I made some adjustments to the slat armour position:

I am rejigging the front of the ERA bricks as well. Added some mud flaps to the rear of the hull (credit to Tom Cromwell on how to make these!):

Received the paints this week:

And started on the tracks, still quite a few to go...

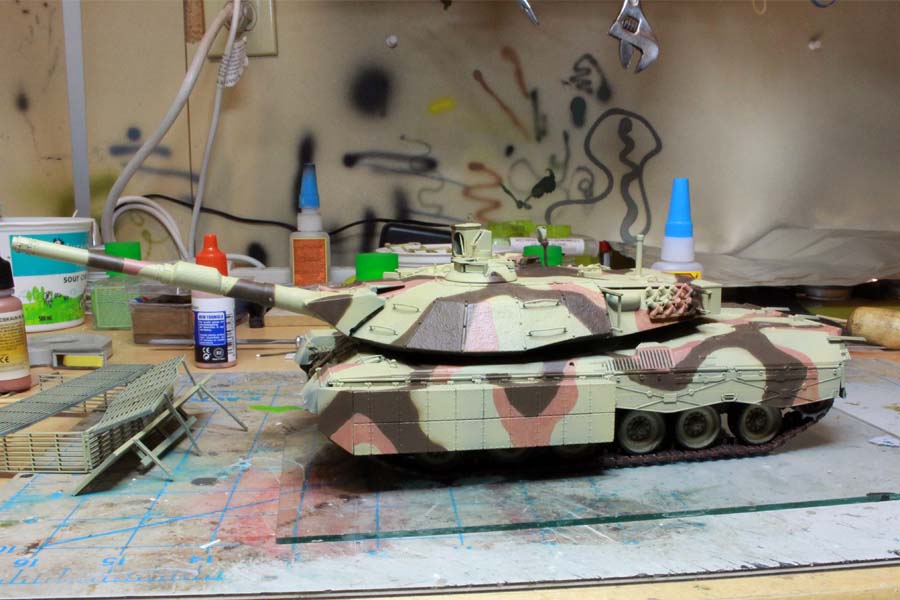
I have to get these done and installed so I can fix the skirts in place and finish off the rear slat armour. Started painting the wheels are undercarriage. Started off with Tamiya Xf-59 Olive Green with a bit of black added to darken it up. this will act as a base for my chipping as the paint scheme is a desert pattern applied over the base green. Followed this up with some hairspray and then the base German Sand Beige.


Probably no update next weekend as I will be out of town.
I am rejigging the front of the ERA bricks as well. Added some mud flaps to the rear of the hull (credit to Tom Cromwell on how to make these!):
Received the paints this week:
And started on the tracks, still quite a few to go...
I have to get these done and installed so I can fix the skirts in place and finish off the rear slat armour. Started painting the wheels are undercarriage. Started off with Tamiya Xf-59 Olive Green with a bit of black added to darken it up. this will act as a base for my chipping as the paint scheme is a desert pattern applied over the base green. Followed this up with some hairspray and then the base German Sand Beige.
Probably no update next weekend as I will be out of town.

crossracer

Joined: April 26, 2005
KitMaker: 117 posts
Armorama: 116 posts

Posted: Tuesday, May 02, 2017 - 05:21 PM UTC
All I can say is with most what if subjects, if it looks right it probably would be right. Excellent work and your level of perfection in trying to get the slat armor right proof that your what if probably would have looked a lot like this.
Great job 👇👍
Great job 👇👍
ColinEdm
Joined: October 15, 2013
KitMaker: 1,355 posts
Armorama: 1,229 posts
Posted: Sunday, May 14, 2017 - 09:11 AM UTC
Thanks for the kind words guys. Things have slowed down a bit as we are taking care of my 3 year old nephew for a while, he is pretty high energy and the wife and I aren't used to used to keeping up with him lol, most days he doesn't even take a nap but we sure need one!  Anyway, I managed to finish cleaning up the track links and assembled the tracks. Tried out a new painting process with them, starting out airbrushing a base coat of Tamiya Red Brown with a bit of black mixed in. Then I proceeded to spatter on various rust coloured layers, dark to light to get a varied finish.


Then painted in the worn areas with oily steel and the pads (roughened up with 40 grit sandpaper to show wear) with black grey.


A bit of touchup yet to do. Also worked on the suspension and running gear. I used a combination of hairspray and sponge chipping to get a nice level of wear indicative of a rather hastily sprayed desert camo on a vehicle that has spent a lot of time in the sandbox.


some overall and pin washes, grease stains and I can assmble the running gear and mount the skirts.
Anyway, I managed to finish cleaning up the track links and assembled the tracks. Tried out a new painting process with them, starting out airbrushing a base coat of Tamiya Red Brown with a bit of black mixed in. Then I proceeded to spatter on various rust coloured layers, dark to light to get a varied finish. Then painted in the worn areas with oily steel and the pads (roughened up with 40 grit sandpaper to show wear) with black grey.
A bit of touchup yet to do. Also worked on the suspension and running gear. I used a combination of hairspray and sponge chipping to get a nice level of wear indicative of a rather hastily sprayed desert camo on a vehicle that has spent a lot of time in the sandbox.
some overall and pin washes, grease stains and I can assmble the running gear and mount the skirts.
ColinEdm
Joined: October 15, 2013
KitMaker: 1,355 posts
Armorama: 1,229 posts
Posted: Monday, May 22, 2017 - 09:02 AM UTC
Got the tracks mounted, I shortened them up by a couple of links but looks like I could have lost one or two more, oh well, will be covered by the skirts anyway.


Rear view:

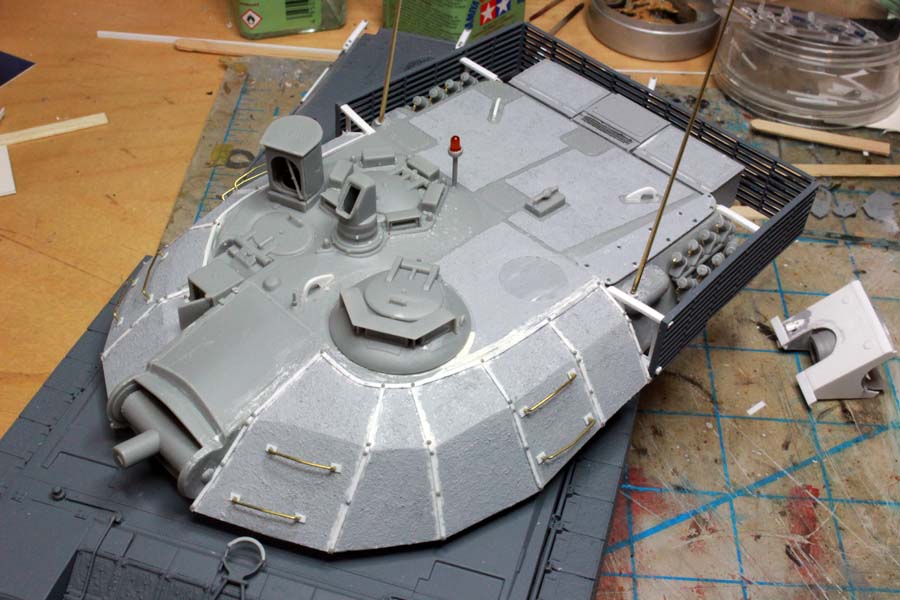
Added headlights, modified a bit and with new conduit from brass rod.

Hatches on turret and slowly adding the details. The drivers capsule looks like it is not oriented properly, but I added some clips so that it can rotate, this way the turret can by rotated to a desired display position other than pointing straight ahead and the drivers capsule can be oriented accordingly.


Cheers
Rear view:
Added headlights, modified a bit and with new conduit from brass rod.
Hatches on turret and slowly adding the details. The drivers capsule looks like it is not oriented properly, but I added some clips so that it can rotate, this way the turret can by rotated to a desired display position other than pointing straight ahead and the drivers capsule can be oriented accordingly.
Cheers
ColinEdm
Joined: October 15, 2013
KitMaker: 1,355 posts
Armorama: 1,229 posts
Posted: Sunday, June 04, 2017 - 07:35 AM UTC
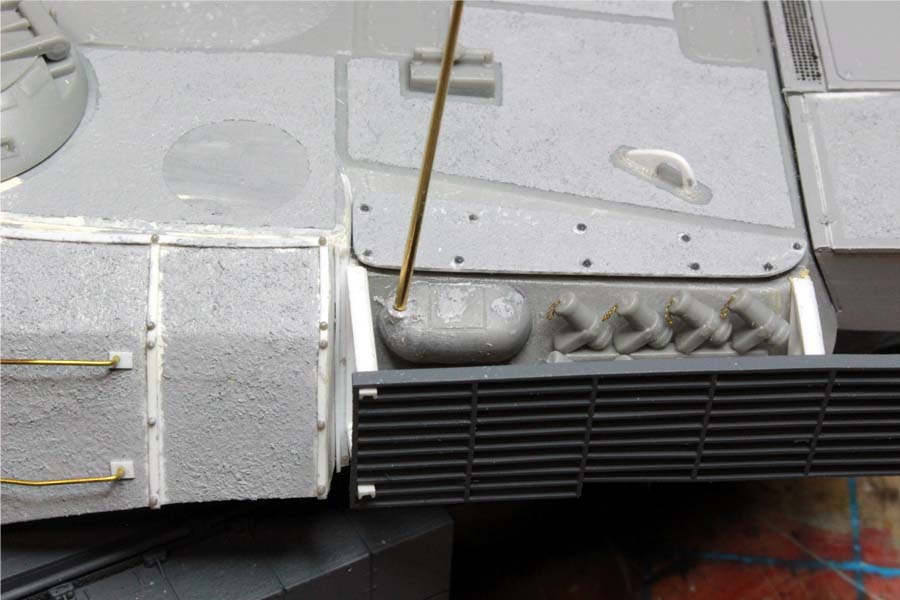
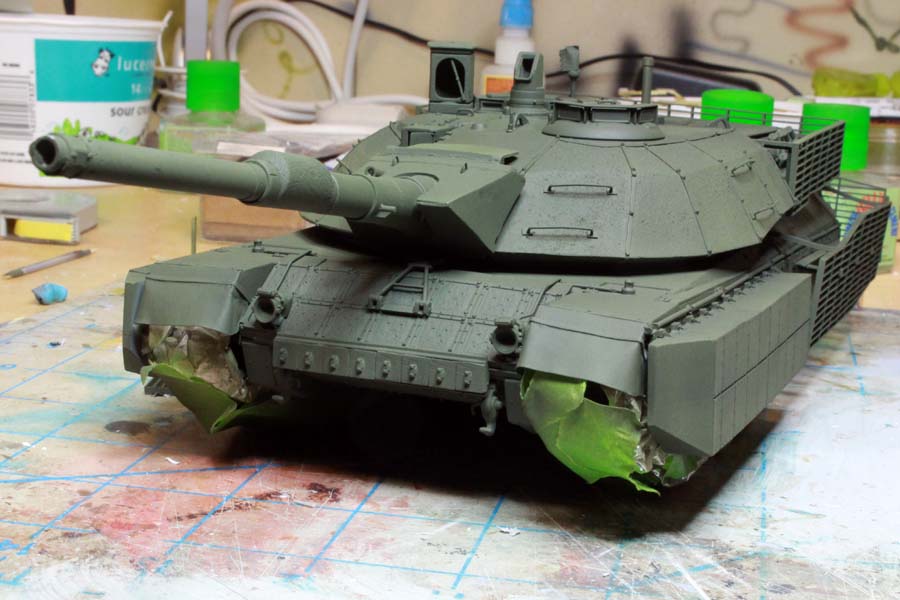
Pretty much have the lower hull done with skirts and ERA. Added some 'rubber' mudguards on the front fenders made with the foil from the top of a wine bottle (I've told my wife again and again wine has multiple benefits!).


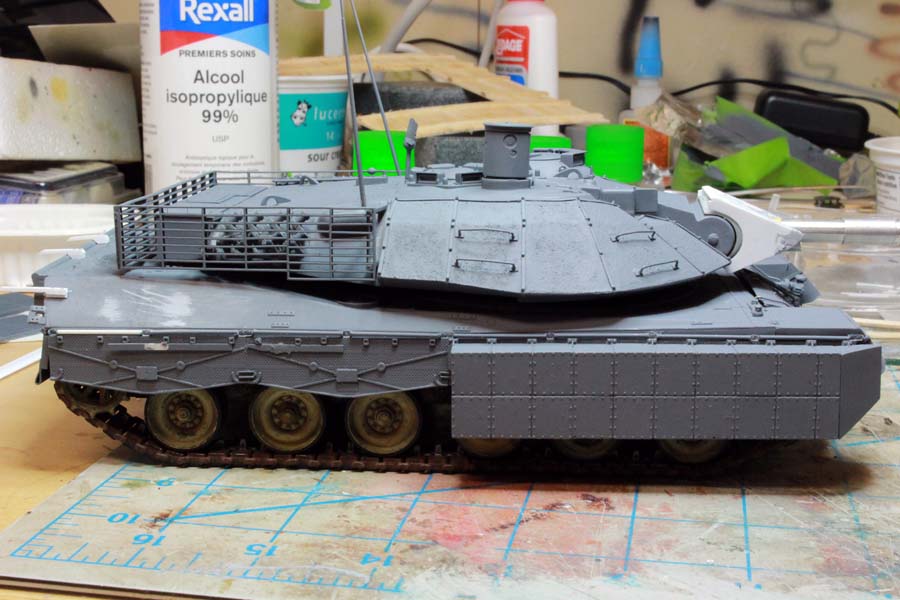
With slat armour taped on, working on the rear section now.

And put a coat of primer on to check for little fixes needed:


I salvaged the mounts for the travel rest and remounted it slightly lower down on the front glacis to account for the ERA thickness.
A little longer between updates right now as we are taking care of my 3 year old nephew, it's been a long time since we've had to deal with such a bundle of energy!
With slat armour taped on, working on the rear section now.
And put a coat of primer on to check for little fixes needed:
I salvaged the mounts for the travel rest and remounted it slightly lower down on the front glacis to account for the ERA thickness.
A little longer between updates right now as we are taking care of my 3 year old nephew, it's been a long time since we've had to deal with such a bundle of energy!
BootsDMS

Joined: February 08, 2012
KitMaker: 978 posts
Armorama: 965 posts
Posted: Sunday, June 04, 2017 - 04:35 PM UTC
'Love all this - but will the Driver still need some sort of camera (presumably on the glacis?) in order for him to drive the beast?
You may recall that the original concept was to have just such a method.
Keep up the good work.
Brian
You may recall that the original concept was to have just such a method.
Keep up the good work.
Brian
ColinEdm
Joined: October 15, 2013
KitMaker: 1,355 posts
Armorama: 1,229 posts
Posted: Monday, June 05, 2017 - 05:55 PM UTC
Tbh, I had forgotten about the cameras, I don't think they were ever installed on the kPz, but I could be wrong, I may still add one or two though.

Armorsmith
Joined: April 09, 2015
KitMaker: 1,063 posts
Armorama: 1,000 posts
Posted: Monday, June 05, 2017 - 06:23 PM UTC
Impressive. More patience than I have with slat armor.
ColinEdm
Joined: October 15, 2013
KitMaker: 1,355 posts
Armorama: 1,229 posts
Posted: Saturday, June 24, 2017 - 09:47 PM UTC
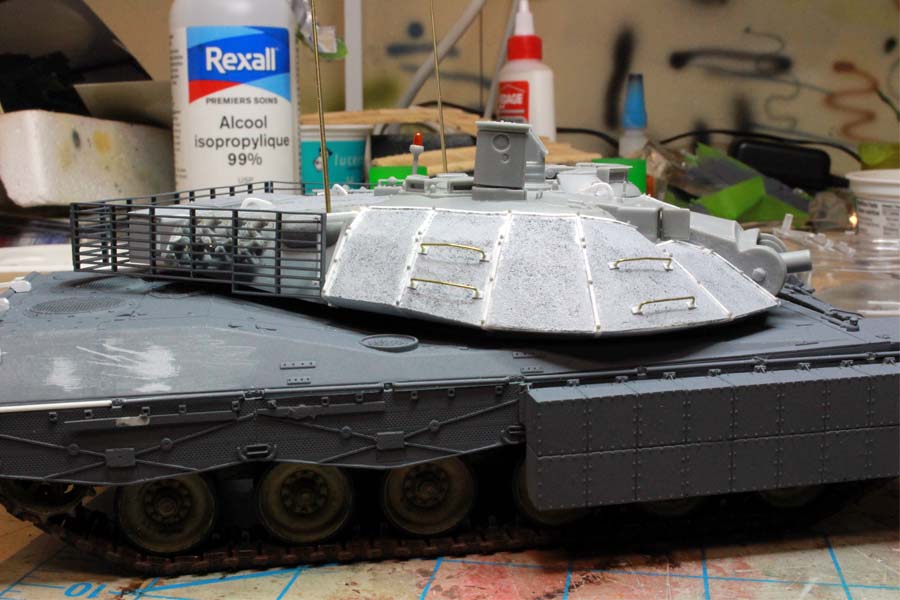
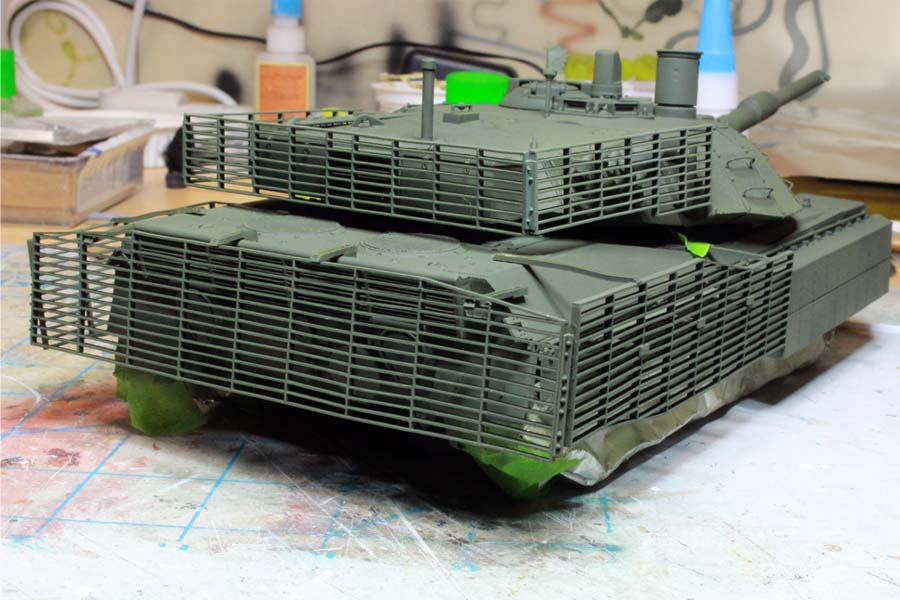
Getting my mojo back after some tough times and finally some new progress, finished off the slat armour and added some mounting brackets. Still have to add bolt heads, maybe one more bracket per side, but it is getting there! Slat is just temporarily in place, will be removed for painting and weathering.


hugohuertas
Joined: January 26, 2007
KitMaker: 1,024 posts
Armorama: 1,013 posts
Posted: Saturday, June 24, 2017 - 10:13 PM UTC
ColinEdm
Joined: October 15, 2013
KitMaker: 1,355 posts
Armorama: 1,229 posts
Posted: Monday, July 03, 2017 - 05:04 AM UTC
[img]https://gallery.kitmaker.net/data/30934/thumbs/13913.j[img]

errains

#045
Joined: September 23, 2005
KitMaker: 362 posts
Armorama: 350 posts
Posted: Monday, July 03, 2017 - 09:45 AM UTC
Hello Colin
I'm tweaking you photo code to see if I can get I to work
[img]https://gallery.kitmaker.net/data/30934/13913.jpg[img]
....shoot that didn't work....sorry
I'm tweaking you photo code to see if I can get I to work
[img]https://gallery.kitmaker.net/data/30934/13913.jpg[img]
....shoot that didn't work....sorry

bots1141
Joined: October 14, 2013
KitMaker: 318 posts
Armorama: 313 posts
Posted: Monday, July 03, 2017 - 03:17 PM UTC

I never figured out how to make it full size!
bots1141
Joined: October 14, 2013
KitMaker: 318 posts
Armorama: 313 posts
Posted: Monday, July 03, 2017 - 03:34 PM UTC
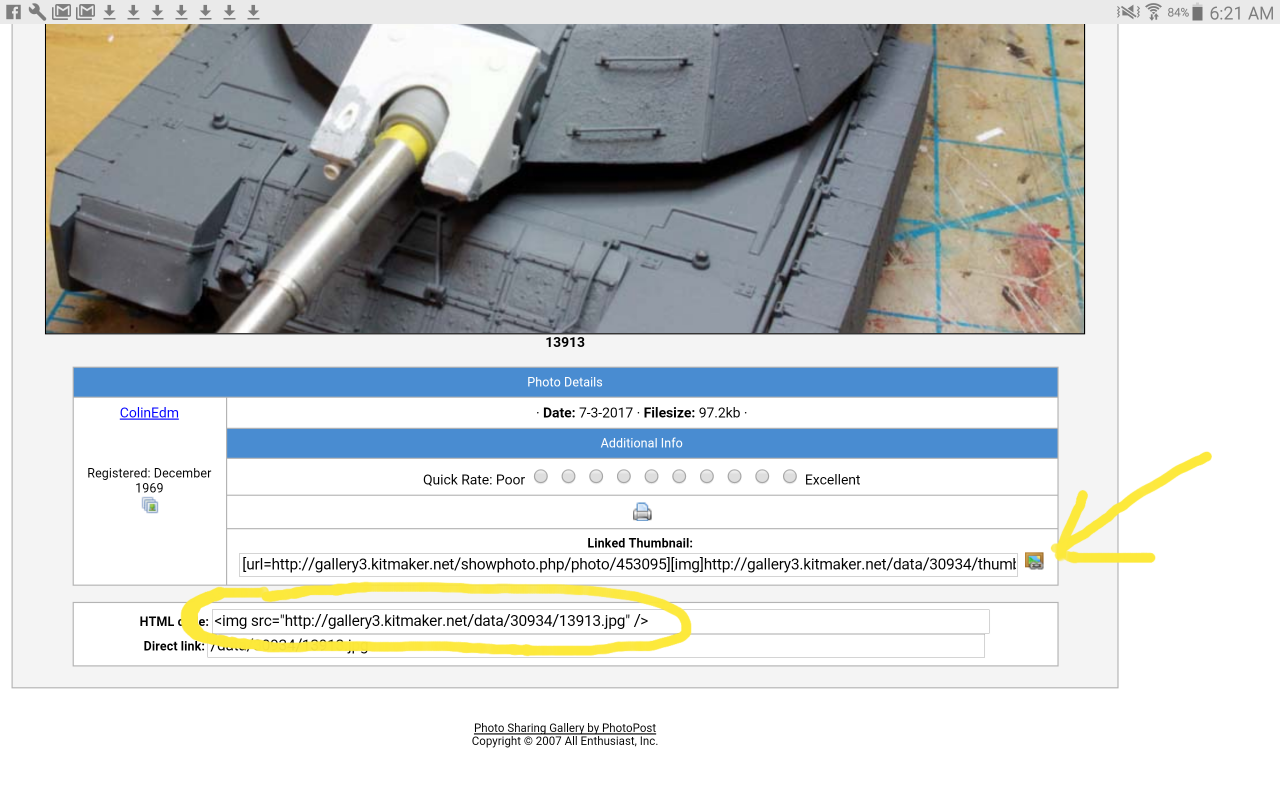
Got it! Just hit the little box that the arrow is pointing at and copy the HTML code!
ColinEdm
Joined: October 15, 2013
KitMaker: 1,355 posts
Armorama: 1,229 posts
Posted: Monday, July 03, 2017 - 05:59 PM UTC
Aha! Thanks, I will work on uploading some more pics tonite!
ColinEdm
Joined: October 15, 2013
KitMaker: 1,355 posts
Armorama: 1,229 posts
Posted: Tuesday, July 04, 2017 - 06:21 PM UTC
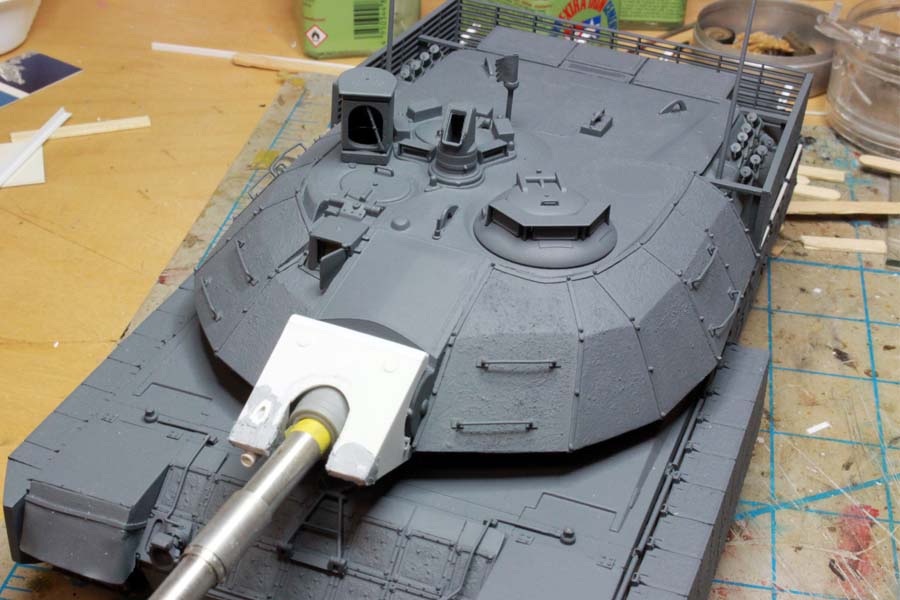
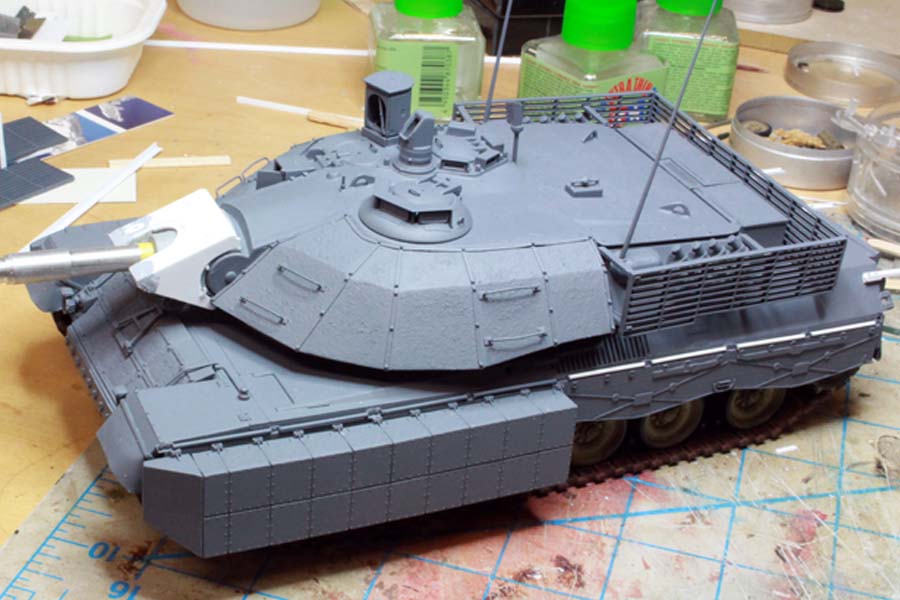
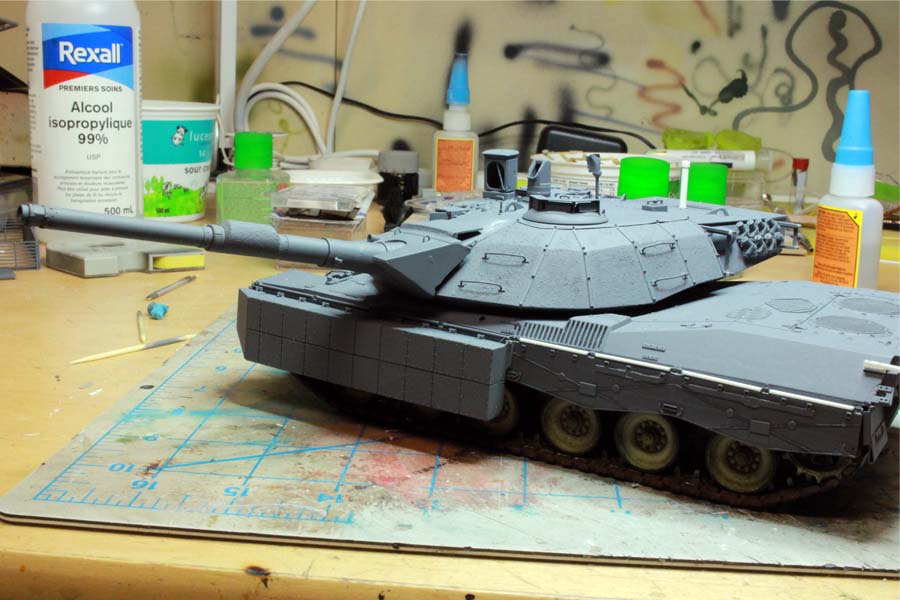
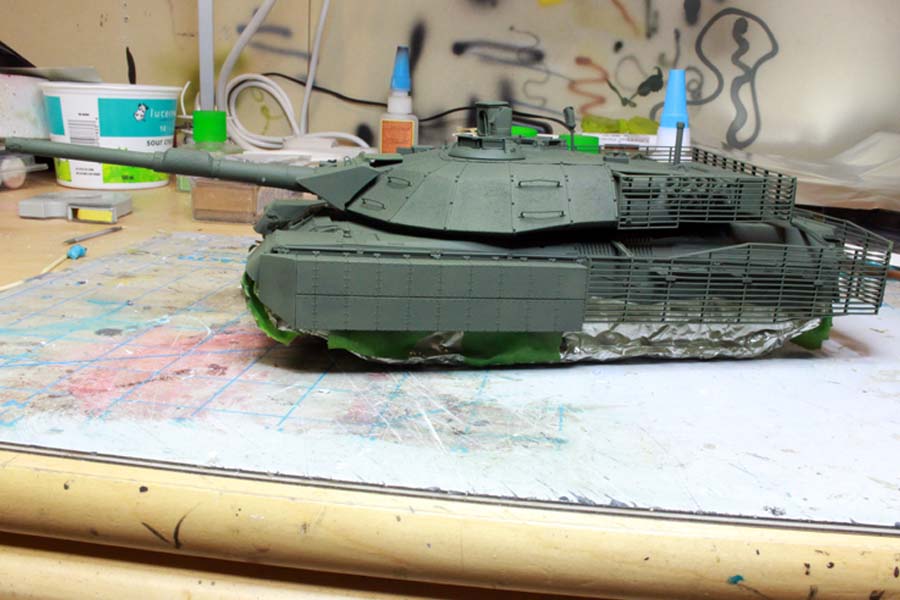
OK, trying again. Turret is pretty much finished off, just some more work on the gun mantlet & barrel and assembling the RWS. Did have to do some surgery on the antennae "pods". Shortened them up by about 5mm and had to reverse the location of the antennae connection on one so it was towards the front. Antennae are not fixed in place as they will removed for shipping.
And some primer on:
Cheers,
And some primer on:
Cheers,
Armorsmith
Joined: April 09, 2015
KitMaker: 1,063 posts
Armorama: 1,000 posts
Posted: Tuesday, July 04, 2017 - 07:30 PM UTC
Really like the look of this one. Great scratch work. Anxious to see some paint on this.
ColinEdm
Joined: October 15, 2013
KitMaker: 1,355 posts
Armorama: 1,229 posts
Posted: Saturday, July 29, 2017 - 09:00 AM UTC
Finally got some time to work on this one again. Assembled and primed the RWS, another LiveResin work of art.
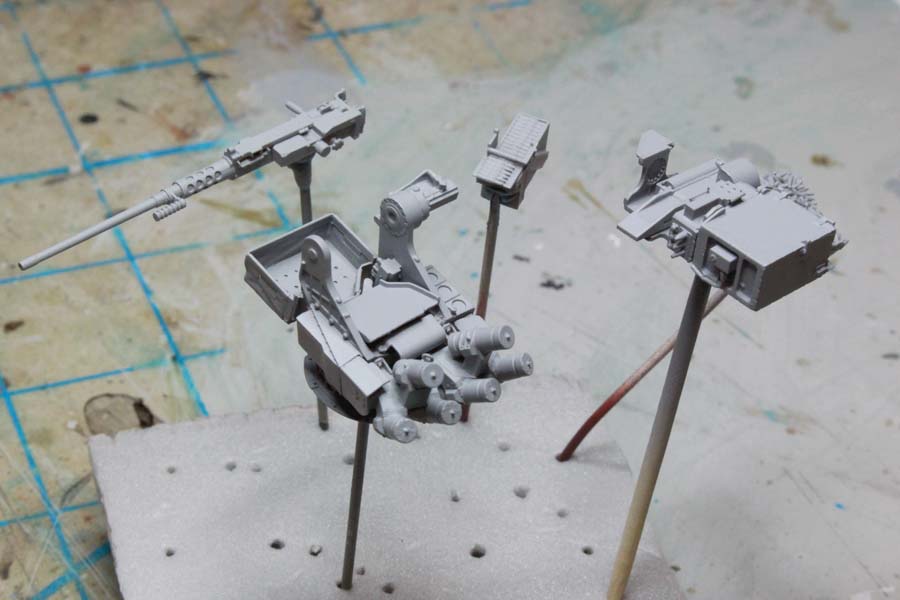
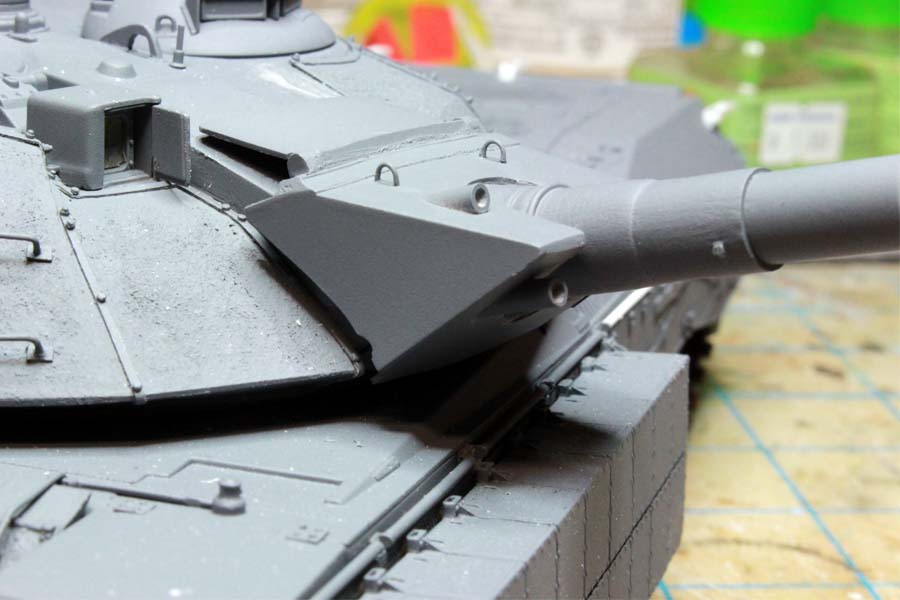
I wasn't happy with the mantlet add-on armour I did originally so I cut it all off and started over. Much happier with this,just a few touchups needed:
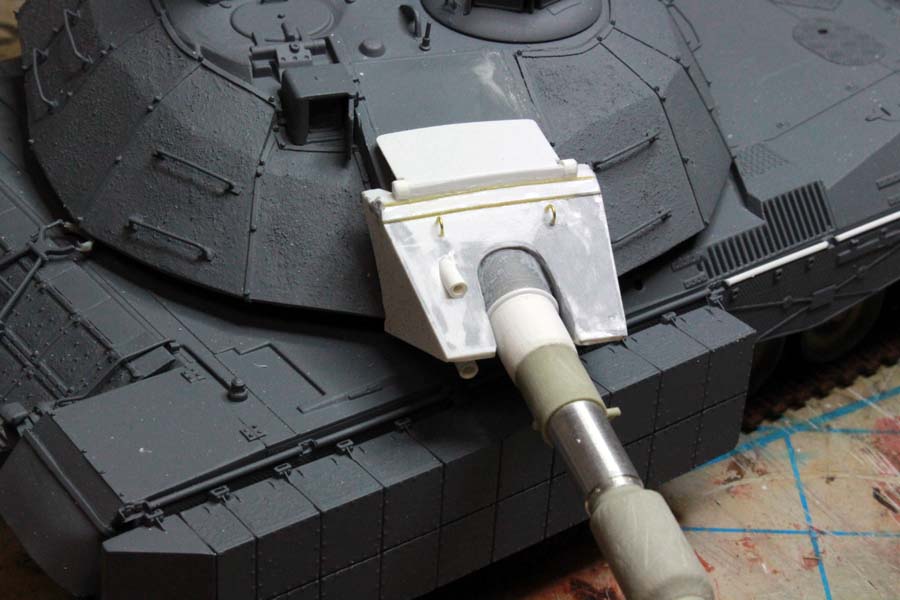
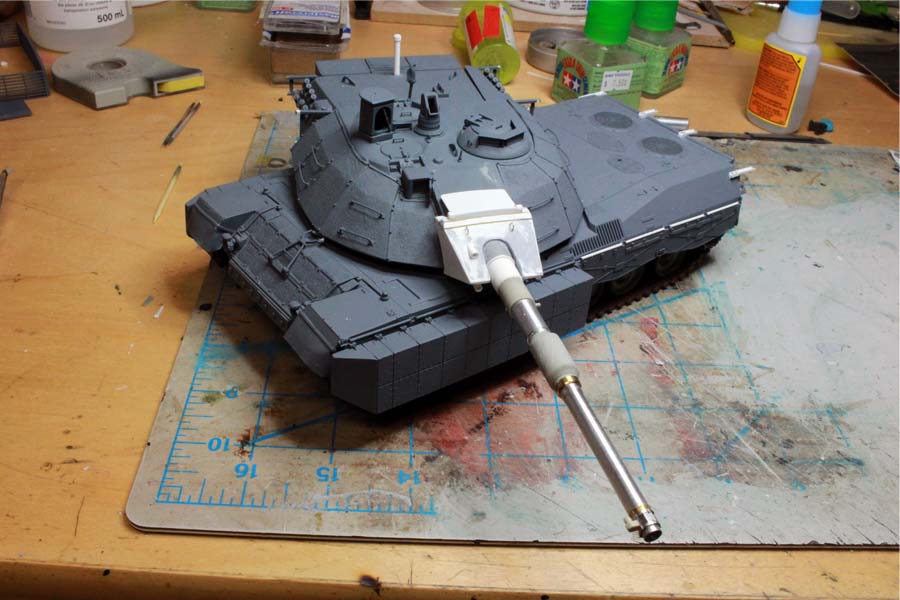
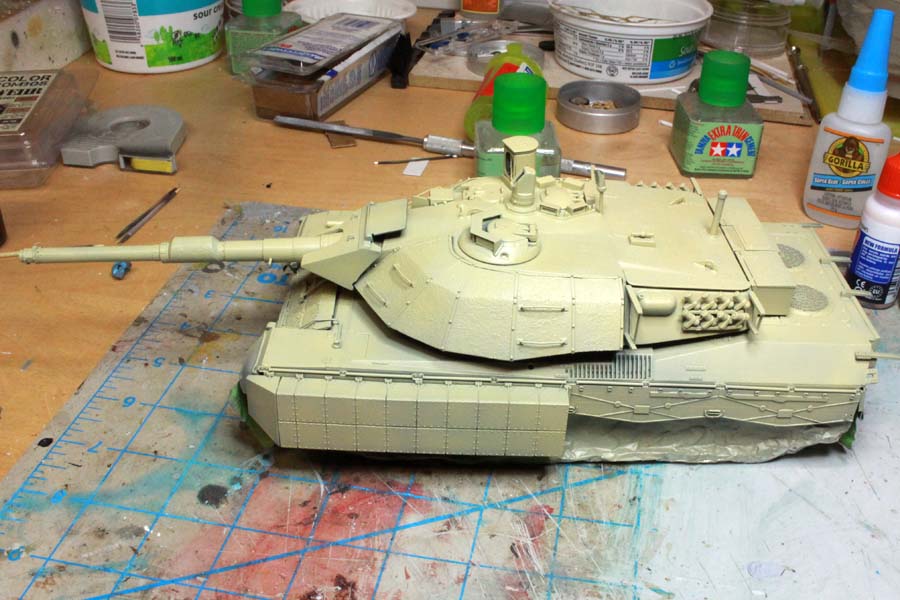
As you can see I also got the 120mm L/44 put together, needed a bit of modification to get it to fit properly. A bit more primer:
and check that my hinged armour works:
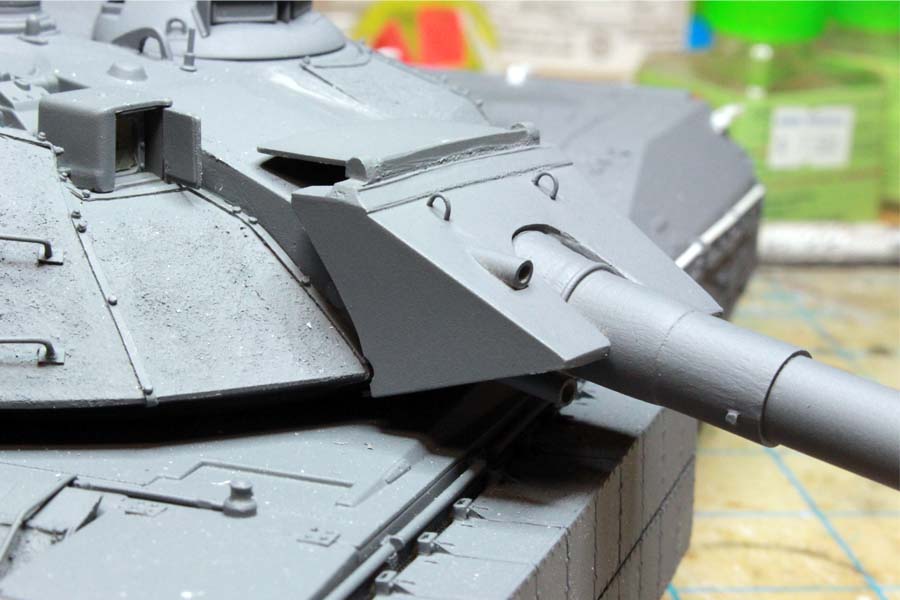
Then base coat of green. A few touchups then it will be hairspray and top camo coat time!
Cheers
I wasn't happy with the mantlet add-on armour I did originally so I cut it all off and started over. Much happier with this,just a few touchups needed:
As you can see I also got the 120mm L/44 put together, needed a bit of modification to get it to fit properly. A bit more primer:
and check that my hinged armour works:
Then base coat of green. A few touchups then it will be hairspray and top camo coat time!
Cheers
urumomo
Joined: August 22, 2013
KitMaker: 675 posts
Armorama: 667 posts
Posted: Saturday, July 29, 2017 - 05:12 PM UTC
Been watching this from the start .
Really fantastic job !
Sux about the Ph*** Bucket disaster
Really fantastic job !
Sux about the Ph*** Bucket disaster
ColinEdm
Joined: October 15, 2013
KitMaker: 1,355 posts
Armorama: 1,229 posts
Posted: Thursday, August 03, 2017 - 07:17 PM UTC
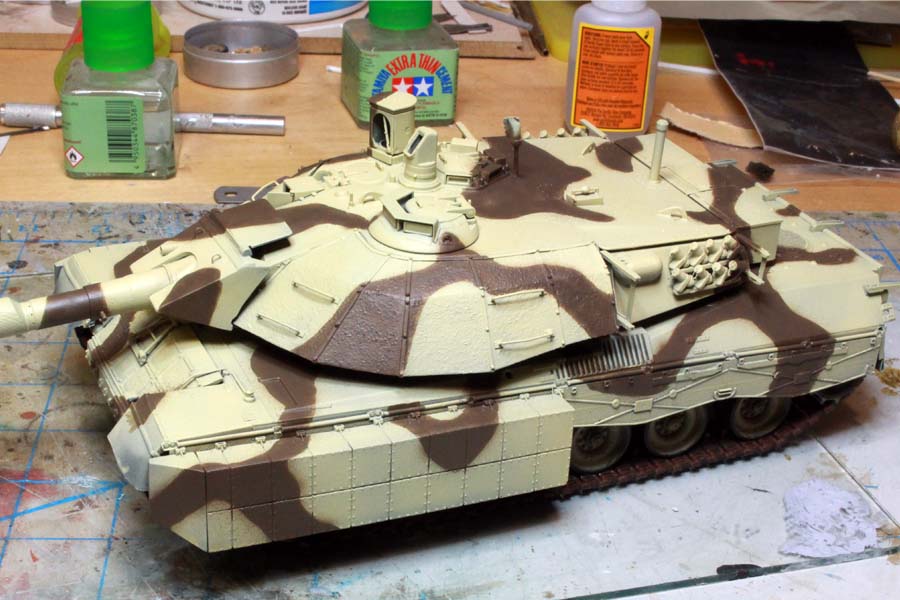
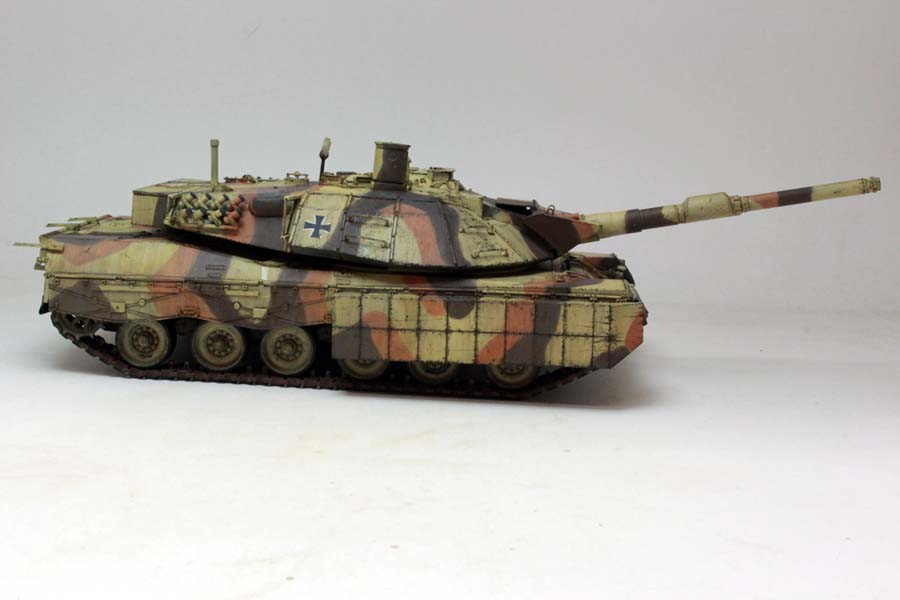
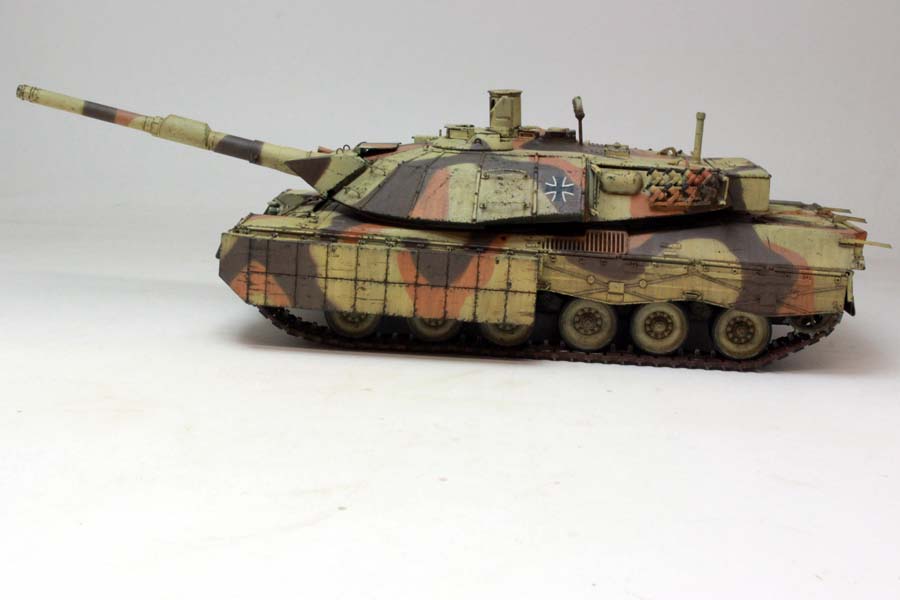
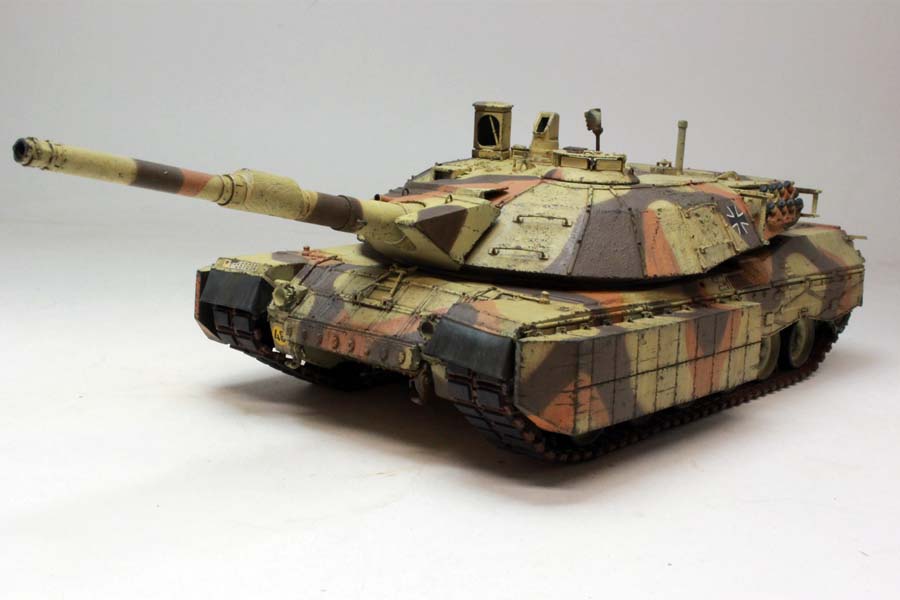
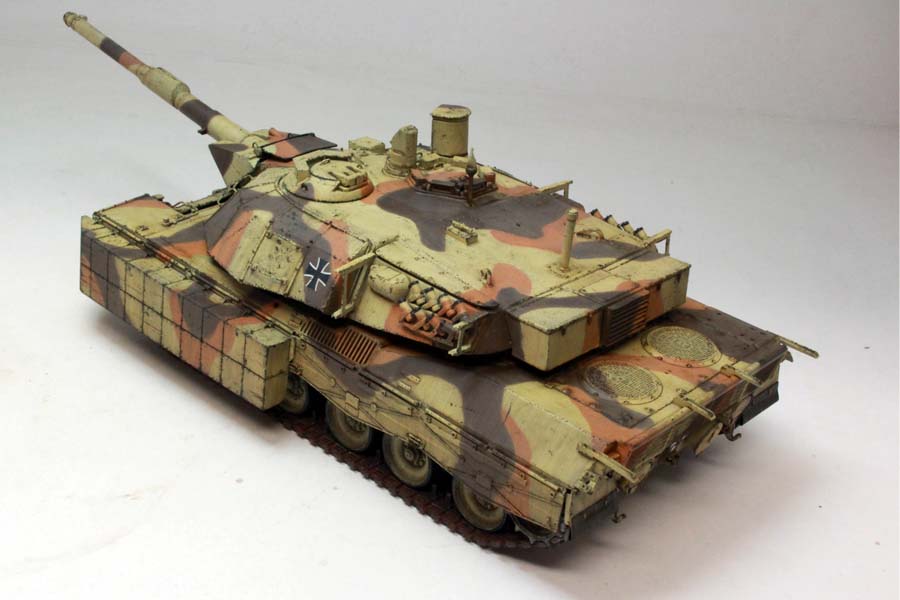
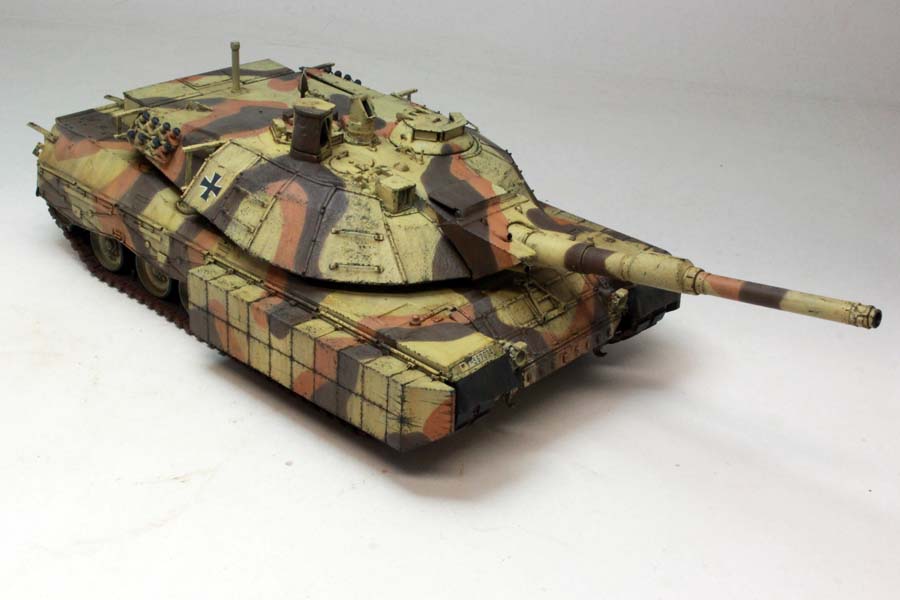
Thanks Keith! Progressing with paint, Bundeswehr 3-tone desert camo. Colours didn't turn out quite as I expected, but weathering should help bring it together.
ColinEdm
Joined: October 15, 2013
KitMaker: 1,355 posts
Armorama: 1,229 posts
Posted: Sunday, August 20, 2017 - 08:32 AM UTC
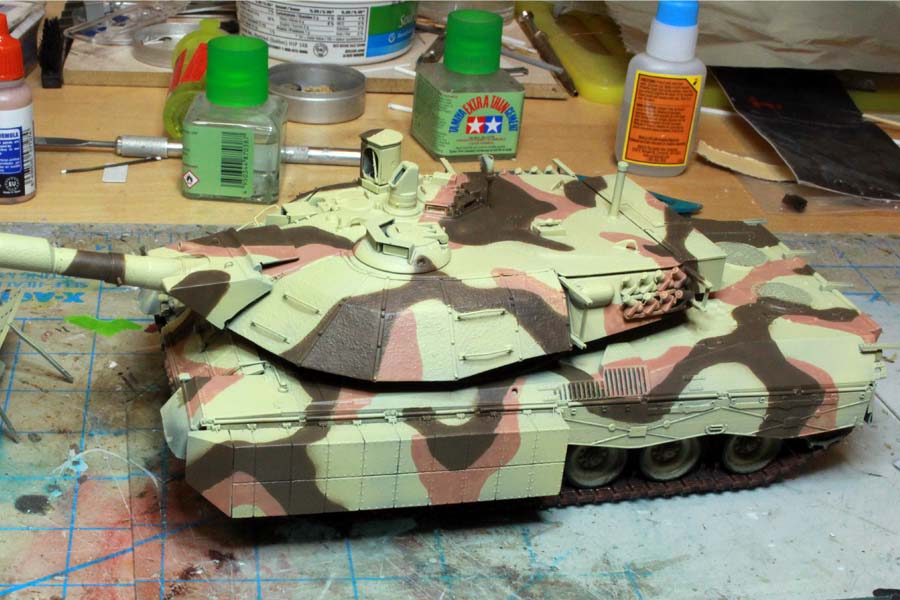
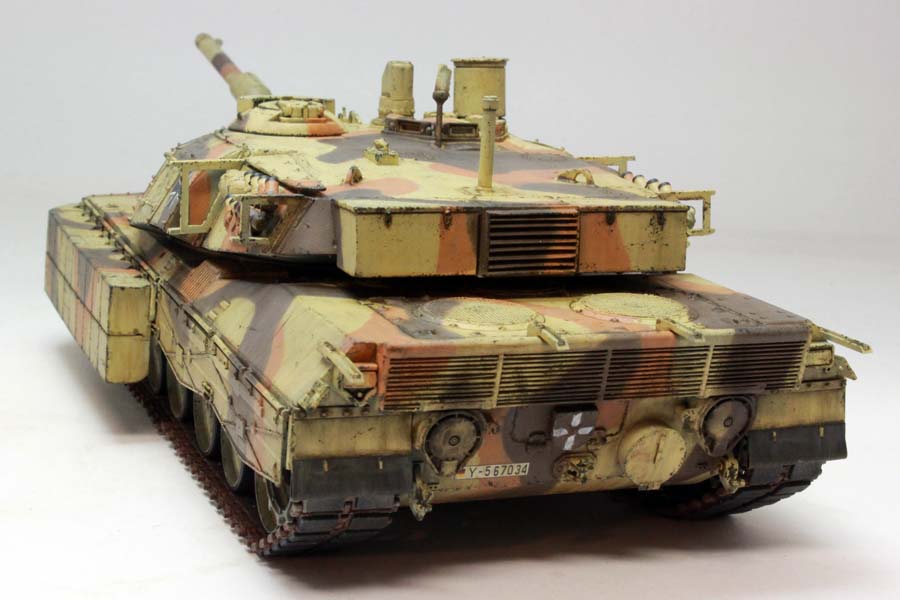
Time for an overdue update! I have been plugging away with the weathering on this, my aim was to portray a tired, well worn veteran of a long campaign in the 'sandbox'. Still a bit to do, optics, RWS, final attachment of the slat armour and some desert dust over everything.
barkingdigger
#013

Joined: June 20, 2008
KitMaker: 3,981 posts
Armorama: 3,403 posts
Posted: Sunday, August 20, 2017 - 11:16 PM UTC
Wow - that's a really cool paint job!

pod3105

Joined: August 08, 2010
KitMaker: 466 posts
Armorama: 444 posts
Posted: Monday, August 21, 2017 - 12:11 AM UTC
Yowza- one seriously stonkin' build and finish.
Amazing and inspiring.
Amazing and inspiring.

Thirian24
Joined: September 30, 2015
KitMaker: 2,493 posts
Armorama: 2,344 posts
Posted: Monday, August 21, 2017 - 12:21 AM UTC
Looks killer! Great job.
 |

WEB HOSTING BY


Copyright ©2021 Armorama and Kitmaker Network, a subsidiary of Silver Star Enterprises
All Rights Reserved. Please read our Conditions of Use and Privacy Policy.
All Rights Reserved. Please read our Conditions of Use and Privacy Policy.