The Great War, A Last Hurrah
barkingdigger
 Associate Editor
#013
England - East Anglia, United Kingdom
Joined: June 20, 2008
KitMaker: 3,981 posts
Armorama: 3,403 posts
Posted: Friday, April 19, 2019 - 12:38 AM UTC
Hi all
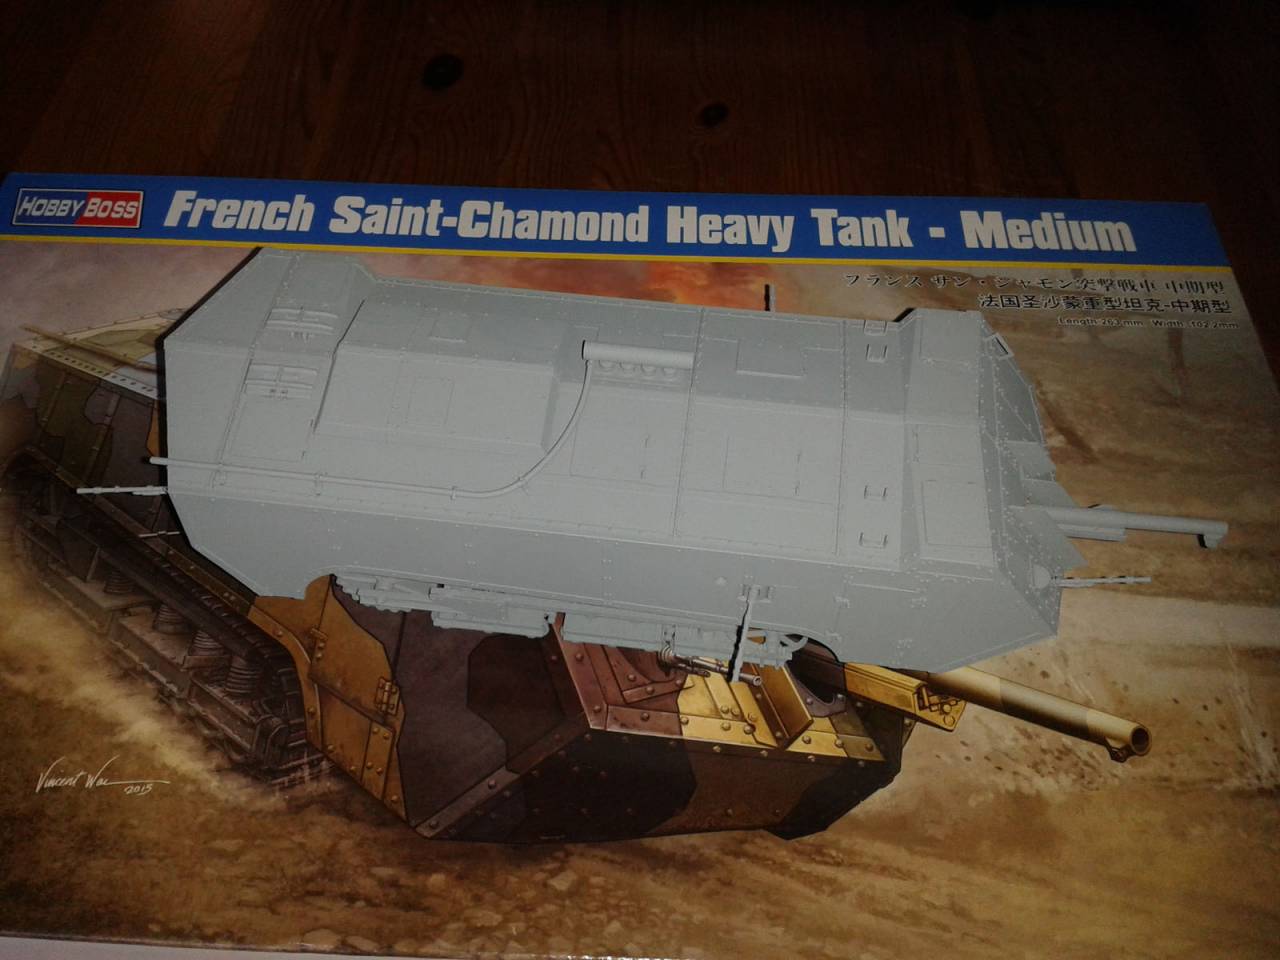
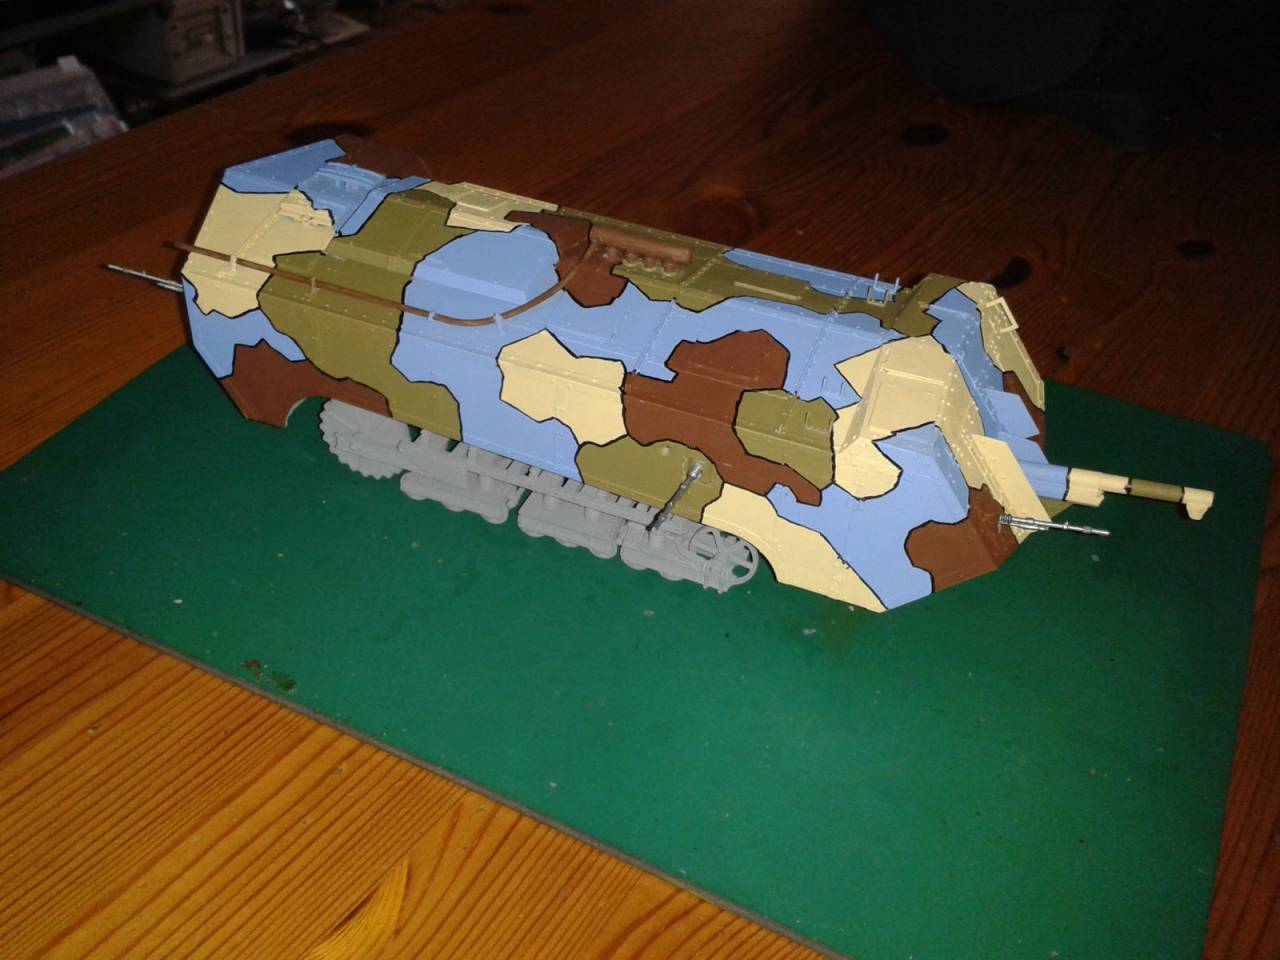
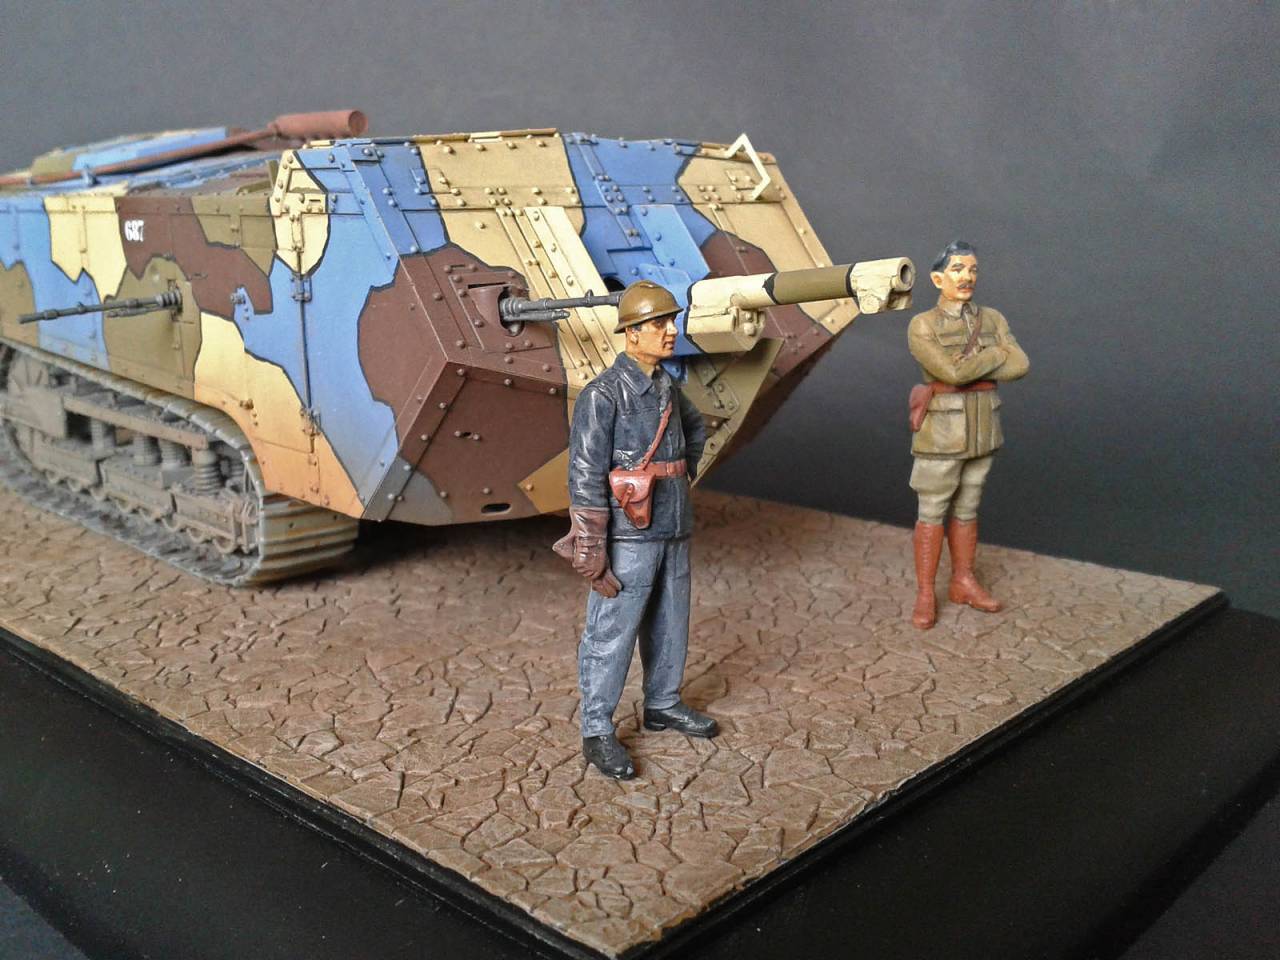
About time I got an entry posted here! I picked up the HB Saint-Chamond medium kit last month in one of Creative Models' sales and threw it together as per instructions as "plastic therapy" relief from my usual complex conversions. Sadly I didn't think of entering it here at the time, so my first pic is already in Halford's Grey rattle-can primer. I used the hairy stick method to add camo from Vallejo and AK acrylics, but unlike James my green is more olive and my blue is blue-er. I need to tone it all down with filters etc, but the flash on my camera has made the colours look far more vibrant than they really are.
The only deviations from the instructions were that I glued the little road wheels in place, and the MGs, and I left off the tracks to paint later. HB calls for 36 links per track, but I found that 35 is the correct number. Oh, and I picked up the Master Box WWI Tank Men set for a Frenchman to stand next to it when done! (Saved a long Ferero Rocher box from Xmas that is perfect for a base. Modelling is fuelled by chocolate...)
If I finish in time, I do have a Tamiya Mk IV that I built a while ago but still needs paint. I was going to use German markings for it, and even modified the gun shields for the Nordenfeldt guns the Germans used in stead of 6pdrs. But only if I have time...
"Glue, or Glue Not - there is no Dry-Fit" - Yoda (original script from Return of the Jedi...)
#460
California, United States
Joined: September 16, 2014
KitMaker: 1,156 posts
Armorama: 1,024 posts
Posted: Friday, April 19, 2019 - 04:59 AM UTC
Welcome Tom, I look forward to seeing how you tame those colors. What is the hairy stick method? How did you make the black separation lines between the colors?
Looking good so far!
Vintage Paul
I'd happily live in the past but for air conditioning, the internet, mobile phones, modern medicine & dentistry and, and, and . . .
Washington, United States
Joined: March 15, 2009
KitMaker: 3,670 posts
Armorama: 2,052 posts
Posted: Friday, April 19, 2019 - 05:07 AM UTC
Quoted Text
Welcome Tom, I look forward to seeing how you tame those colors. What is the hairy stick method? How did you make the black separation lines between the colors?
Looking good so far!
"Hairy Stick" = paint brush. And Tom has done an exceptional job going "old school" here.
VR, Russ
barkingdigger
Associate Editor #013
England - East Anglia, United Kingdom
Joined: June 20, 2008
KitMaker: 3,981 posts
Armorama: 3,403 posts
Posted: Friday, April 19, 2019 - 10:51 AM UTC
Thanks Russ! And indeed it was good old brush-painting - even for the black separation lines - with the aid of 2x magnifying glasses and a ton of patience. But there's a long way to go yet...

"Glue, or Glue Not - there is no Dry-Fit" - Yoda (original script from Return of the Jedi...)
Washington, United States
Joined: March 15, 2009
KitMaker: 3,670 posts
Armorama: 2,052 posts
Posted: Friday, April 19, 2019 - 11:20 AM UTC
Quoted Text
Thanks Russ! And indeed it was good old brush-painting - even for the black separation lines - with the aid of 2x magnifying glasses and a ton of patience. But there's a long way to go yet...
Tom,
I suspect most WWI vehicle camouflage schemes were painted in the single "base color" with an "ancient" spray gun at the factory, with the camouflage done by the troops with a "hairy stick" by hand in real life. I think the exception might have been the French, who may have added the camo with a "hairy stick" at the factory. I've seen way to many WWI vehicle models painted entirely by airbrush, with the soft edges resulting from that treatment. It's nice to see some "old school" treatments too. I just finished Roden's 8" Howitzer in the American scheme, and although I used an airbrush for the base color and hard edged brown camouflage (primarily for speed in the paining process), I hand painted in my thin black lines (hairy stick style). I also tried to do the camouflage unevenly, so it would appear hand painted (that's my story, and I'm sticking to it!

). Again, nice work with the "hairy stick".
VR, Russ
#460
California, United States
Joined: September 16, 2014
KitMaker: 1,156 posts
Armorama: 1,024 posts
Posted: Monday, April 22, 2019 - 10:08 AM UTC
Quoted Text
Quoted Text
Welcome Tom, I look forward to seeing how you tame those colors. What is the hairy stick method? How did you make the black separation lines between the colors?
Looking good so far!
"Hairy Stick" = paint brush. And Tom has done an exceptional job going "old school" here.
VR, Russ
Ah, just what I have been doing until recently. I only just started airbrushing on my last project. it would be interesting to find out just how far back spraying paint was introduced. In the early part of the last century the carriage trade which included automobile bodies was still using brushes and then hand sanding & rubbing out of the paint. It was very labor intensive.
Vintage Paul
I'd happily live in the past but for air conditioning, the internet, mobile phones, modern medicine & dentistry and, and, and . . .
Washington, United States
Joined: March 15, 2009
KitMaker: 3,670 posts
Armorama: 2,052 posts
Posted: Monday, April 22, 2019 - 01:24 PM UTC
Quoted Text
...it would be interesting to find out just how far back spraying paint was introduced. In the early part of the last century the carriage trade which included automobile bodies was still using brushes and then hand sanding & rubbing out of the paint. It was very labor intensive.
I cannot give you an exact date for when "airbrushing" began, but I do know that "airbrush" finishes were found as early as the late 1890s, and seem to correspond to the with the development of electric powered compressors. Before electric compressors, steam compressors were found, but they were apparently too large for widespread painting purposes, but "hairy sticks" seem to be favored most. For smaller purposes, "airspraying" systems seem to go back even farther-- at one time, I had a modest collection of tools, among which was a very old "L" shaped device similar to a metal whistle with a "fan" shaped opening on the opposite end and a vertical tube attached that screwed onto a metal paint bottle-- you blew on the end of the whistle, which drew the paint up and out of the bottle, spraying the object you wanted to paint--it had an 1870 manufacture date as I recall. Here is an interesting article on the History of airbrushes, which go back to the 1890s:
http://www.airbrushmuseum.com/airbrush_history_insidestory.htm VR, Russ
barkingdigger
Associate Editor #013
England - East Anglia, United Kingdom
Joined: June 20, 2008
KitMaker: 3,981 posts
Armorama: 3,403 posts
Posted: Tuesday, April 23, 2019 - 10:42 AM UTC
Well, if you want to get technical "spray painting" goes back tens of thousands of years. Cave art of hands was done by blowing a mix of minerals and water over a hand pressed to the wall, so it left a shadow of clean space. Exactly when they invented the compressor is, however, still unknown to archaeologists...
"Glue, or Glue Not - there is no Dry-Fit" - Yoda (original script from Return of the Jedi...)
barkingdigger
Associate Editor #013
England - East Anglia, United Kingdom
Joined: June 20, 2008
KitMaker: 3,981 posts
Armorama: 3,403 posts
Posted: Sunday, April 28, 2019 - 04:36 AM UTC
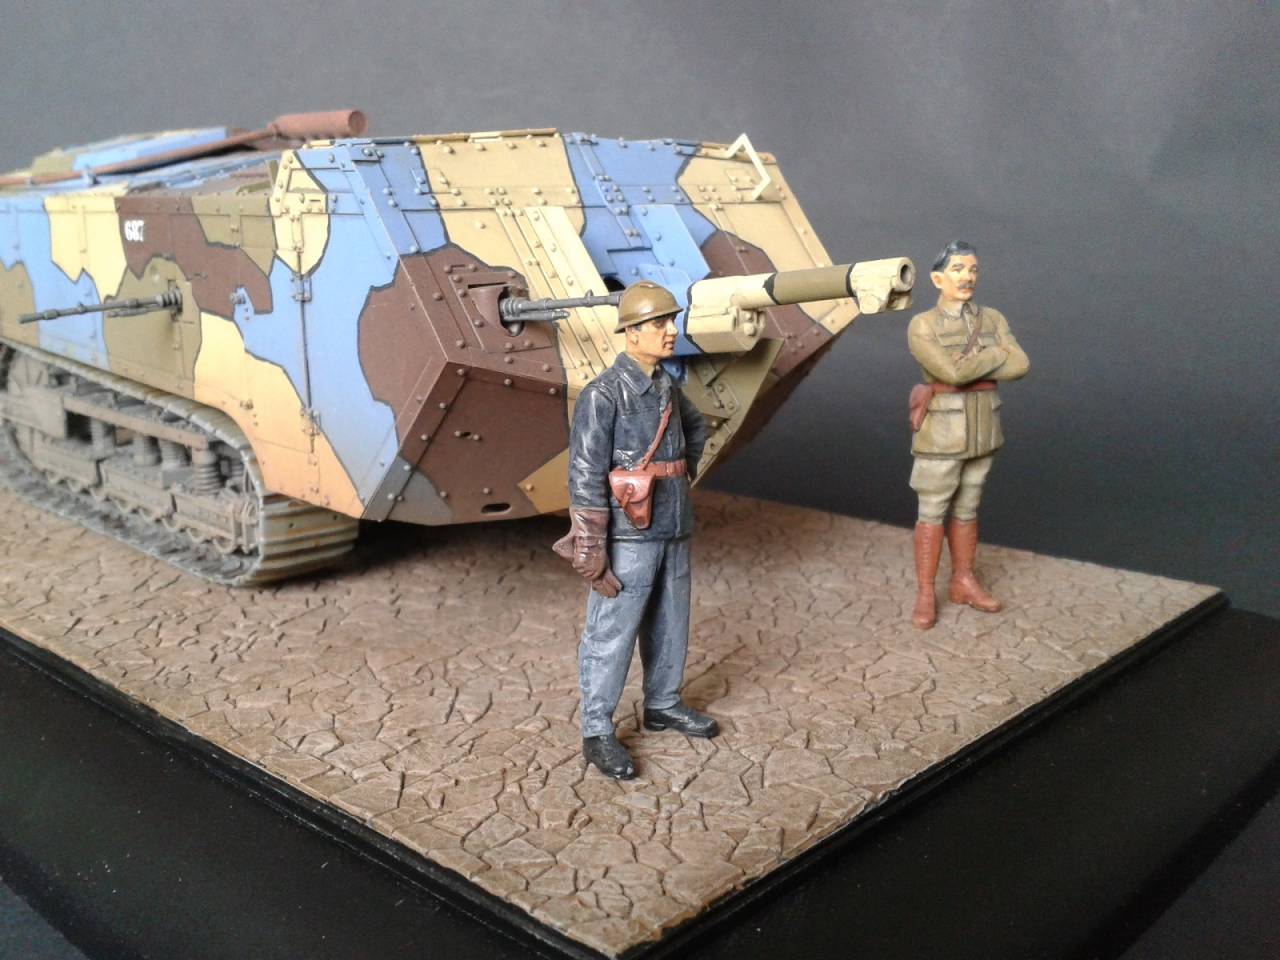
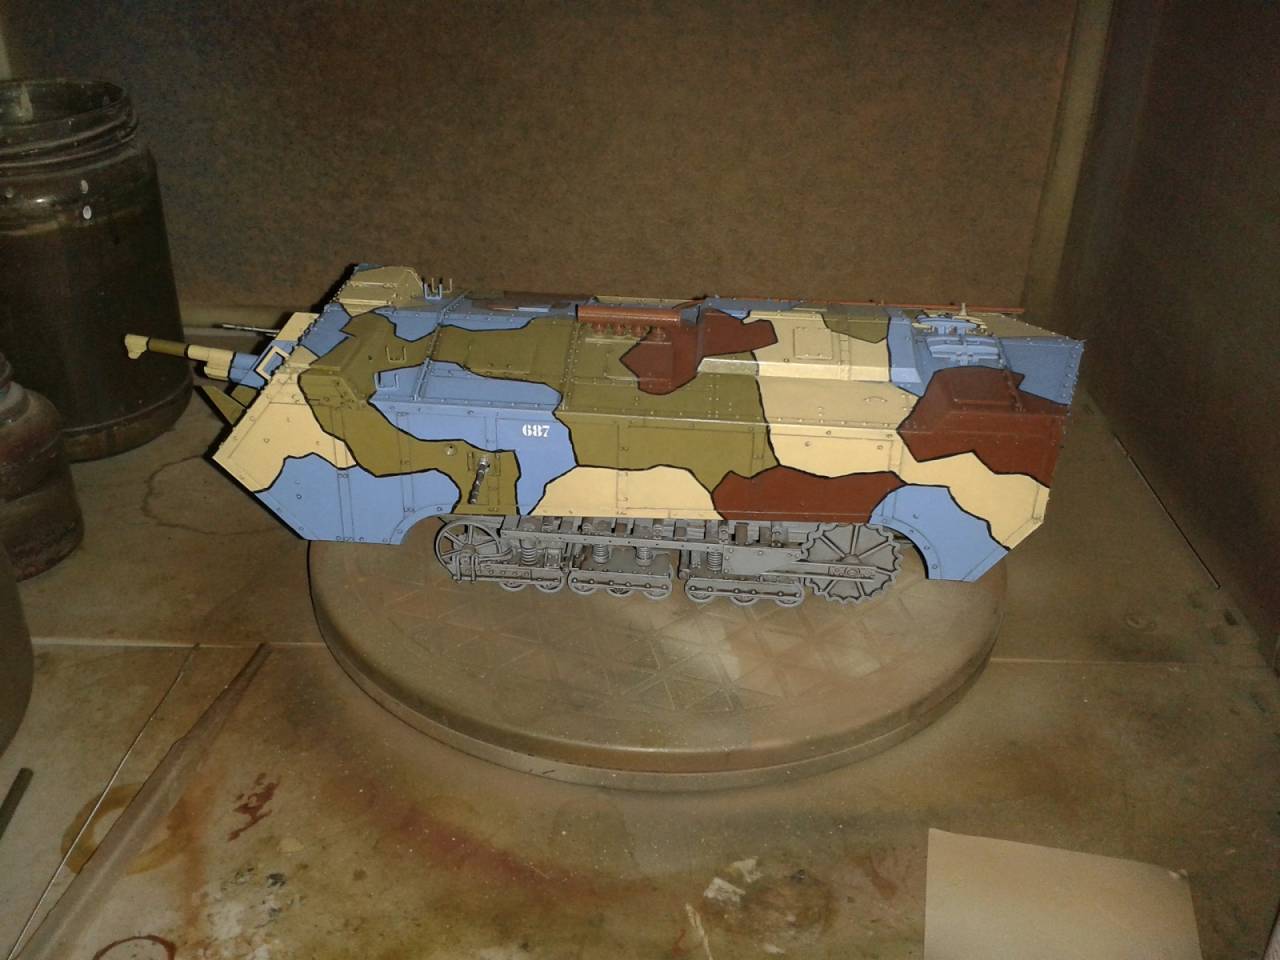
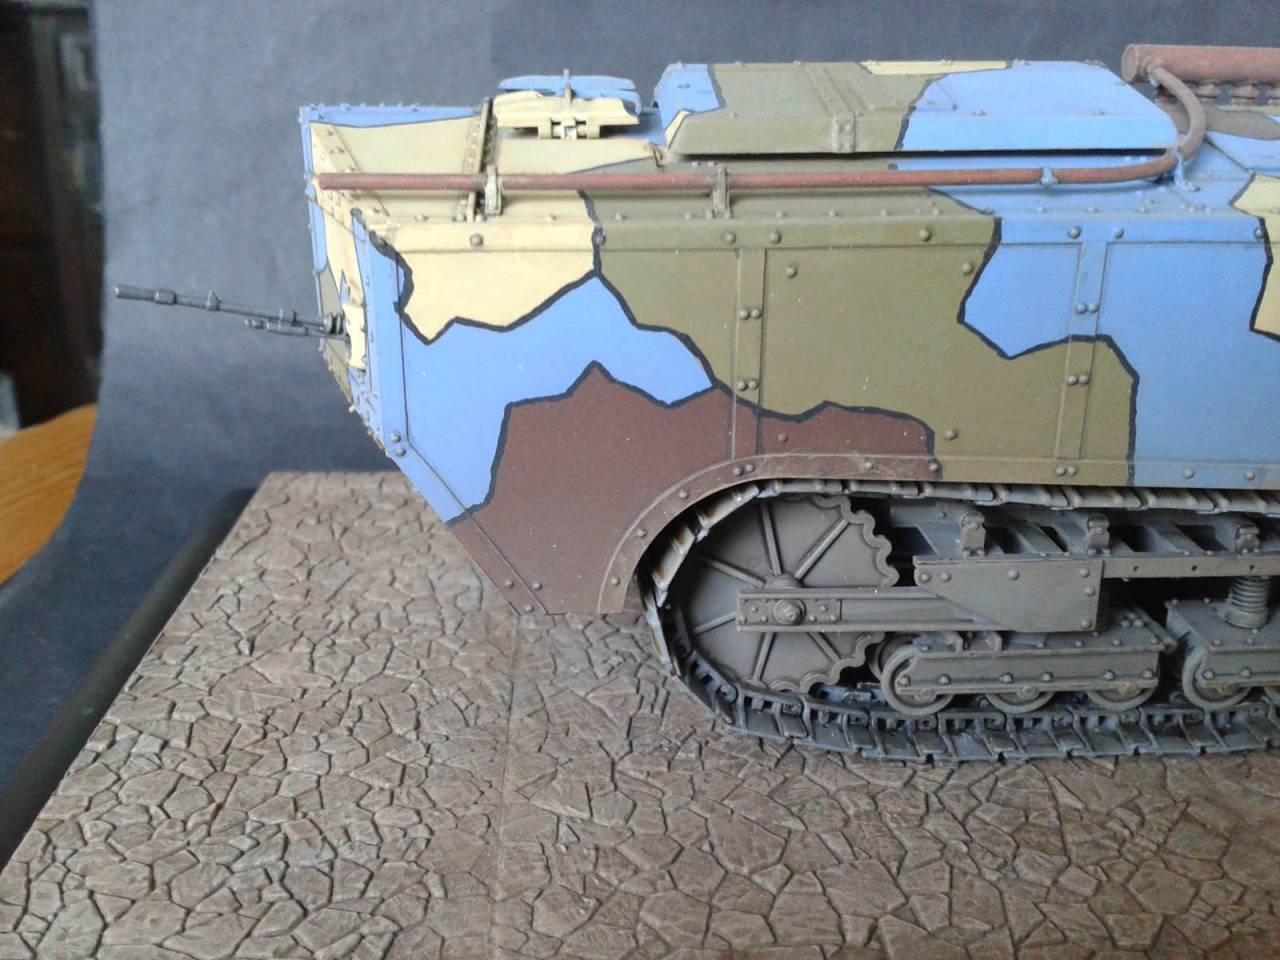
The colours of my Saint-Chamond may still be a bit bright, but it has now had a very thin grimy grey filter, glosscoat, and pin wash to "pop" the rivets and panel lines. It wants a little thinned earth dusting around the lower quarters, and some more dirt in the suspension, followed by some dry-brushed dirt up top. (I used GW's "Nuln Oil" and "Agrax Earthshade" for the washes, and the filter was based on Polyscale Grimy Black, a great dark geyish colour with some hints of red in it suitable for all manner of washes but sadly long since killed off by Testors Corp after a strategic buy-out, but I still have a few bottles left.) I thought about making it grubby, but I kind of like it clean and bright! The real ones didn't go fast enough or far enough to get much road dust on them, and I didn't want to add lots of mud since the SC's best days came in the open fields as the Germans started retreating in 1918. And maybe I'm just too much of a coward to ruin such a nice build with mud?...
I have the French figs from the Master Box Tankmen set all primed and ready to paint next! I figure I'll put them and the tank on a "town street" base of some sort, probably before getting committed to its first action.
One minor gripe - I painted the tracks and then test-fitted them only to discover there isn't enough back-to-back room between roadwheel flanges. I'll need to gently file the inner faces and maybe the lip of the track to get it to fit, but if I was starting over I'd add shims to the roadwheel halves from 0.020" plastic before assembling them. There should be enough room between the sideframes for the slightly wider wheelsets.
"Glue, or Glue Not - there is no Dry-Fit" - Yoda (original script from Return of the Jedi...)
#460
California, United States
Joined: September 16, 2014
KitMaker: 1,156 posts
Armorama: 1,024 posts
Posted: Wednesday, May 01, 2019 - 10:03 AM UTC
Tom - Your Saint-Chamond is really looking sharp with its brighter colors. You calmed them enough to make them believable. Some of the Great War colors were more vivid than anything used since then.
Had you done a trial fit with the tracks and something changed? I just finished a Trumpeter Sukhoi Su-9 and ran into that exact problem. Despite numerous test fittings, the seat hit the canopy when the day came to glue it on. I think the CA glue kicked before the seat was fully home in the cockpit. I shod used sumthin slower . . .
Vintage Paul
I'd happily live in the past but for air conditioning, the internet, mobile phones, modern medicine & dentistry and, and, and . . .
#460
California, United States
Joined: September 16, 2014
KitMaker: 1,156 posts
Armorama: 1,024 posts
Posted: Wednesday, May 01, 2019 - 10:08 AM UTC
This one is getting close to being ready for paint:

Tamiya calls for a 50/50 mix of two of their acrylics. I imagine these will need to be thinned to airbrush? Any suggestions?
Vintage Paul
I'd happily live in the past but for air conditioning, the internet, mobile phones, modern medicine & dentistry and, and, and . . .
Washington, United States
Joined: March 15, 2009
KitMaker: 3,670 posts
Armorama: 2,052 posts
Posted: Wednesday, May 01, 2019 - 04:14 PM UTC
Paul, yes I have a few suggestions:
1) Mix the two colors (not sure what colors they are, but I'm going to assume Khaki Green and Khaki?) in a separate container before thinning
2) Thin at least 1:1 with Tamiya proprietary thinner. Depending on your airbrush, you may want to go 60:40 Thinner/paint.
3) Spray in a light coat to begin with, followed by a couple of heavier coats.
4) You may want to use a dark primer, but frankly, I like to use Tamiya paints without a primer-- they are not "true acrylics" as the carrier is lacquer based, so they can be used as their own primer, depending on what you are painting.
Hope this helps.
VR, Russ
barkingdigger
Associate Editor #013
England - East Anglia, United Kingdom
Joined: June 20, 2008
KitMaker: 3,981 posts
Armorama: 3,403 posts
Posted: Wednesday, May 01, 2019 - 08:54 PM UTC
Hi Paul,
I did dry-fit them briefly to see about the length - that's when I noticed 36 links was too long - but don't think I tried to "seat" them at that time. (My bad!) As the old saying goes:
"I cut it twice already, but it's still too short..."

As for your tank, Russ is spot-on about mixing and thinning Tamiya.
"Glue, or Glue Not - there is no Dry-Fit" - Yoda (original script from Return of the Jedi...)
#460
California, United States
Joined: September 16, 2014
KitMaker: 1,156 posts
Armorama: 1,024 posts
Posted: Thursday, May 02, 2019 - 06:13 AM UTC
Thanks guys for the suggestions about using Tamiya paint. I have long used it with my "hairy stick" but this will be a first time through the airbrush. I'm looking forward to seeing how it comes out.
Vintage Paul
I'd happily live in the past but for air conditioning, the internet, mobile phones, modern medicine & dentistry and, and, and . . .
Washington, United States
Joined: March 15, 2009
KitMaker: 3,670 posts
Armorama: 2,052 posts
Posted: Thursday, May 02, 2019 - 08:42 AM UTC
Quoted Text
Thanks guys for the suggestions about using Tamiya paint. I have long used it with my "hairy stick" but this will be a first time through the airbrush. I'm looking forward to seeing how it comes out.
If you can paint Tamiya with a "hairy stick" you can airbrush it s well. The secret to Tamiya (and the beauty too)is being able to thin it properly. I've seen some on-line tutorials for both AB and hairy stick painting, which tell you to mix the thinner right in the bottle--Don't, youll mess up the balance between the lacquer carrier and the acrylic pigment. Sadly when it comes to mixing thinner with it, most of these tutorials fall short in correct mixing. Always mix Tamiya in a separate container. When I hand paint-- I drop straight Tamiya paint into a dish pallet, and add their Yellow cap thinner as needed with a pipette. Since Tamiya paint dries so quickly, I can refresh it with Thinner as needed. If you use non-Tamiya thinners, you won't be able to "rejuvenate" it properly. Tamiya is concentrated, and a little paint goes a long way. You can even let the palette dry up, come back the next day and add thinner, and it will work. Don't try brushing it directly from the bottle for large jobs though--it dries too quickly. Airbrushing totally depends on the viscosity of the paint-- the thinner the better. You can accomplish some very nice soft edges buy laying your base coat, and then "cleaning up" by spraying very thin Tamiya along the edges. Tamiya and Gunze Mr. Color are my two favorite paints, followed by Model Master-- they are all different formulations, but I usually can get them to behave with the proper thinning techniques.
VR, Russ
#460
California, United States
Joined: September 16, 2014
KitMaker: 1,156 posts
Armorama: 1,024 posts
Posted: Tuesday, May 07, 2019 - 09:51 AM UTC
Thanks Russ, I will take your lead on using these paints. I have been thinning them for brush use using rubbing alcohol. It did not occur to me that Tamiya might be different from standard acrylics that I thought used this stuff.
The Tamiya thinner I just bought is called X-20A. It does not have a yellow top. Is this the wrong stuff?
Vintage Paul
I'd happily live in the past but for air conditioning, the internet, mobile phones, modern medicine & dentistry and, and, and . . .
Washington, United States
Joined: March 15, 2009
KitMaker: 3,670 posts
Armorama: 2,052 posts
Posted: Tuesday, May 07, 2019 - 05:04 PM UTC
Quoted Text
Thanks Russ, I will take your lead on using these paints. I have been thinning them for brush use using rubbing alcohol. It did not occur to me that Tamiya might be different from standard acrylics that I thought used this stuff.
The Tamiya thinner I just bought is called X-20A. It does not have a yellow top. Is this the wrong stuff?
Paul, I think X20 will probably work, but I buy the plastic 1 pint bottles with a cream-yellow cap. That seems to be the best Thinner for Tamiya.
VR, Russ
Washington, United States
Joined: January 31, 2019
KitMaker: 50 posts
Armorama: 49 posts
Posted: Saturday, May 18, 2019 - 10:03 AM UTC
All,
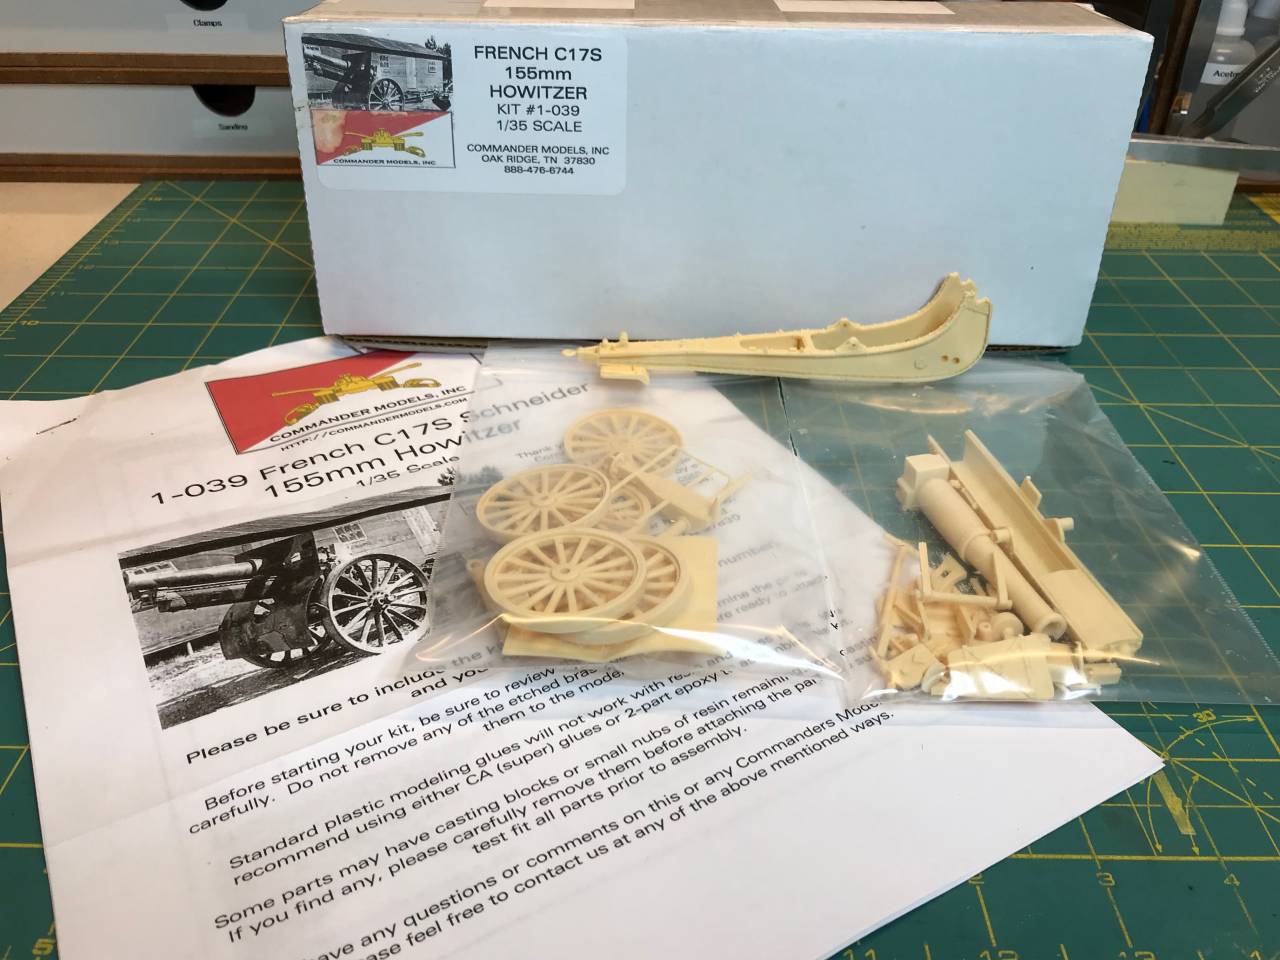
I'm going to jump into the Last Hurrah with artillery used by the American Expeditionary Forces in the Great War. See the review that Russ Bucy and I did on Roden's BL 8-Inch Howitzer Mk VI on Armorama. Now I'm working on the 155mm Howitzer Model of 1917 (Schneider). These were purchased from France and issued to the American units when they arrived in France. The build is based upon the Commander Models kit 1-039 in 1:35 scale.
barkingdigger
Associate Editor #013
England - East Anglia, United Kingdom
Joined: June 20, 2008
KitMaker: 3,981 posts
Armorama: 3,403 posts
Posted: Sunday, May 19, 2019 - 02:59 AM UTC
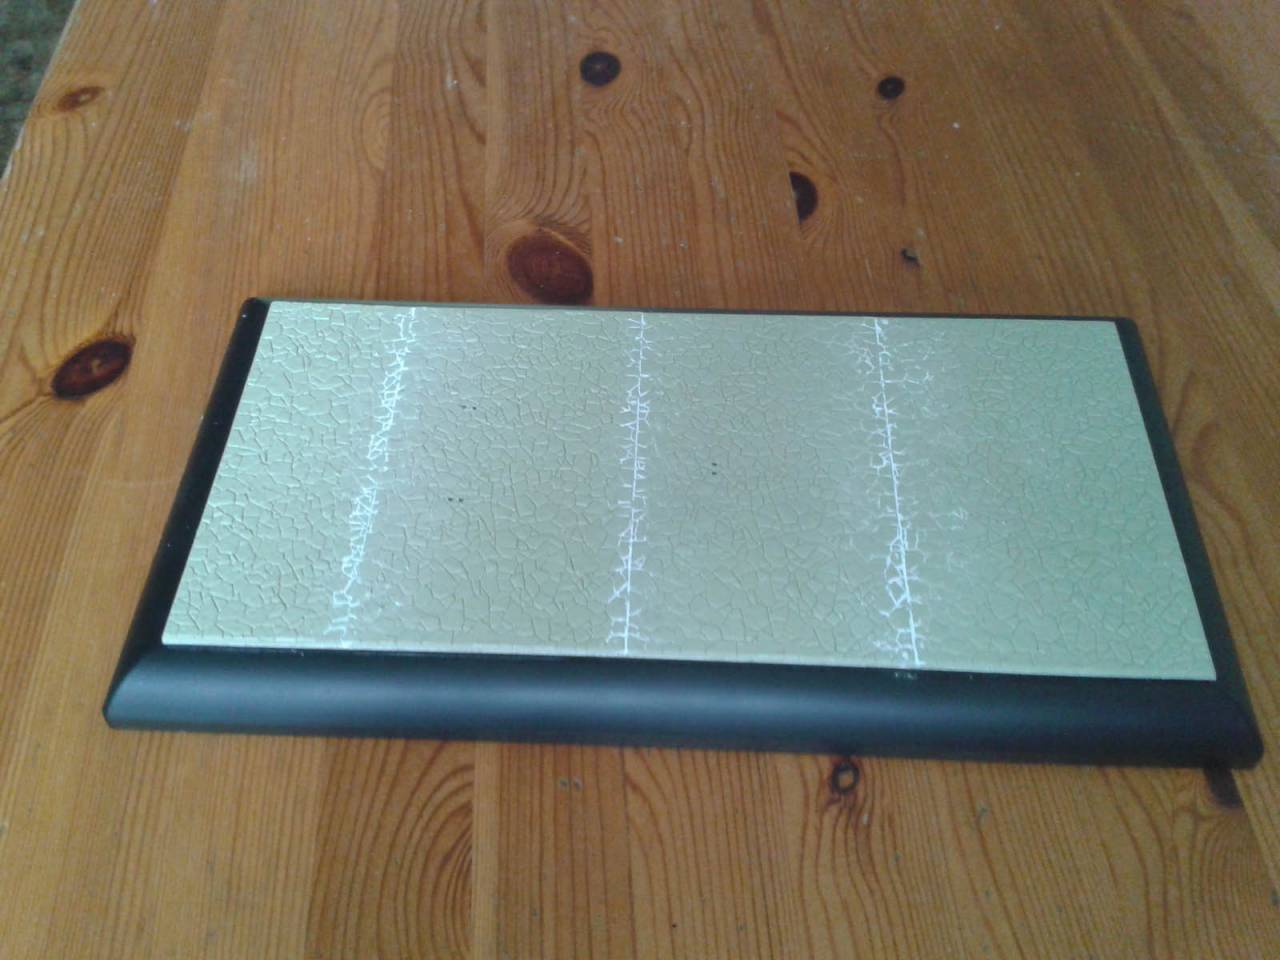
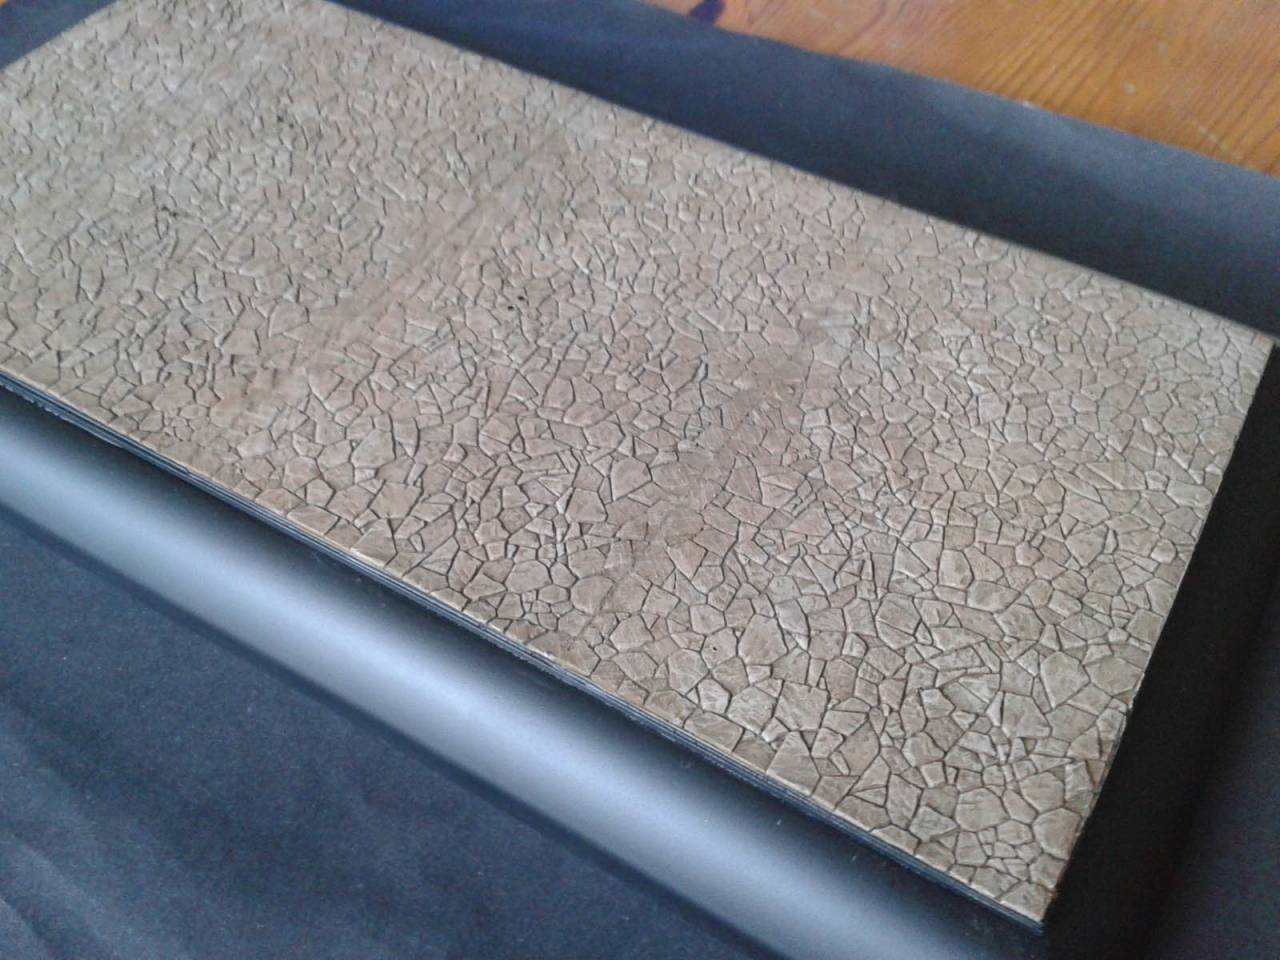
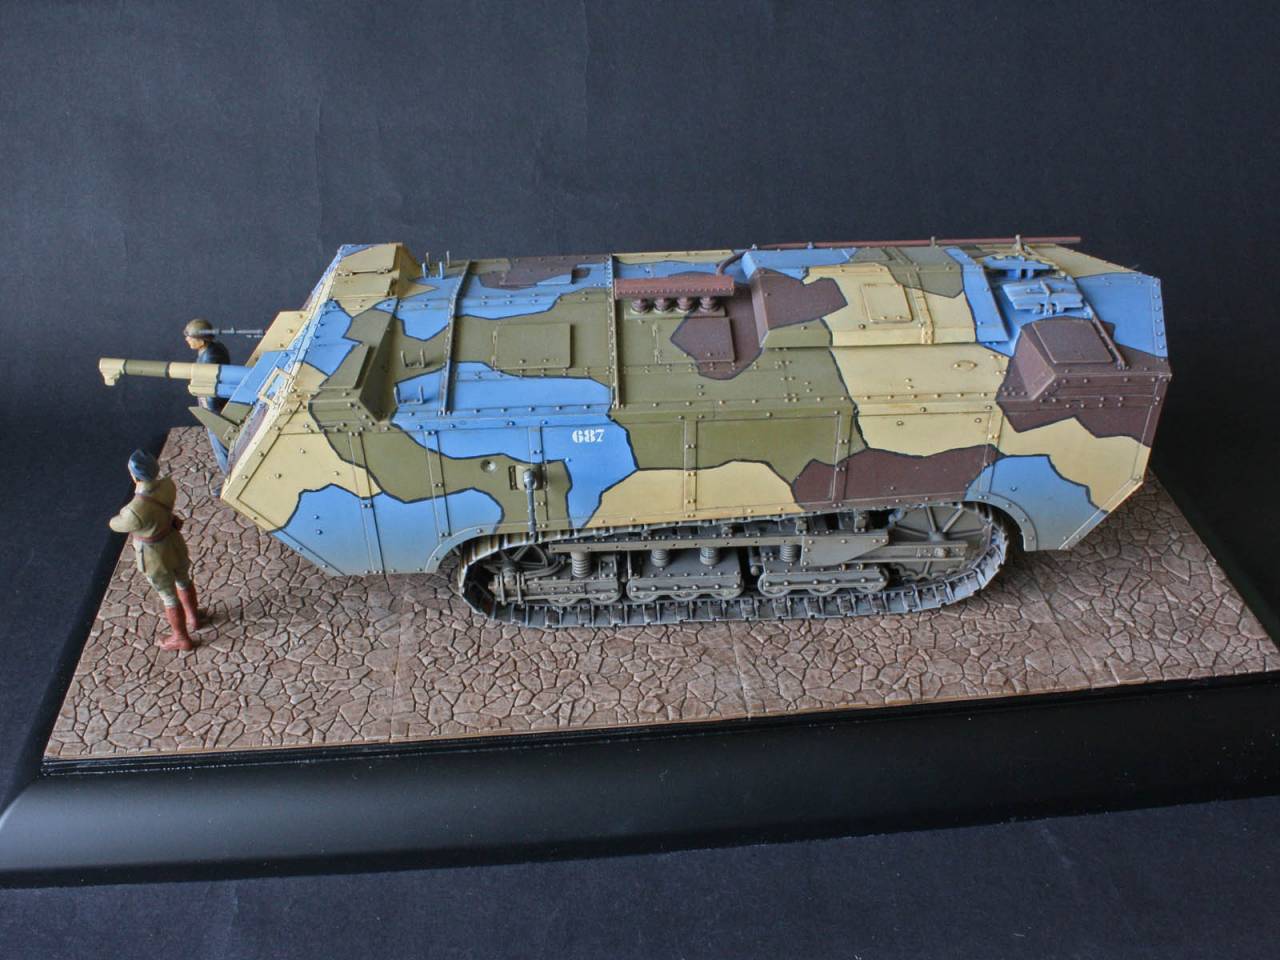
Brief update on my Saint Chamond - I've been messing with a base. I laminated some 2mm plastic to the top of the Ferrero Rocher box, primed it, and then discovered the ideal basing material in a random visit to my local train shop! It's a "crazy paving" set of sheets from Wills Kit, a UK train scenery maker, and is the perfect minimalist ground treatment. Trouble was, to laminate it on top I needed to remove all that primer! So out came the sander, on went the sheets, and it is currently de-gassing in the shed after yet another coat of paint. (The clamps were a simple but brutal way to get it to adhere in the middle without bowing upwards...)

The beast itself has been weathered quite a bit to tone the colours down, but I need good light for a pic that captures it. And I've hand-painted the French figures from the Master box WWI Tankmen set, but they need a matte coat. My plan is to have it on display at the MAFVA Nationals in a few weeks' time.
"Glue, or Glue Not - there is no Dry-Fit" - Yoda (original script from Return of the Jedi...)
barkingdigger
Associate Editor #013
England - East Anglia, United Kingdom
Joined: June 20, 2008
KitMaker: 3,981 posts
Armorama: 3,403 posts
Posted: Tuesday, May 21, 2019 - 08:32 AM UTC
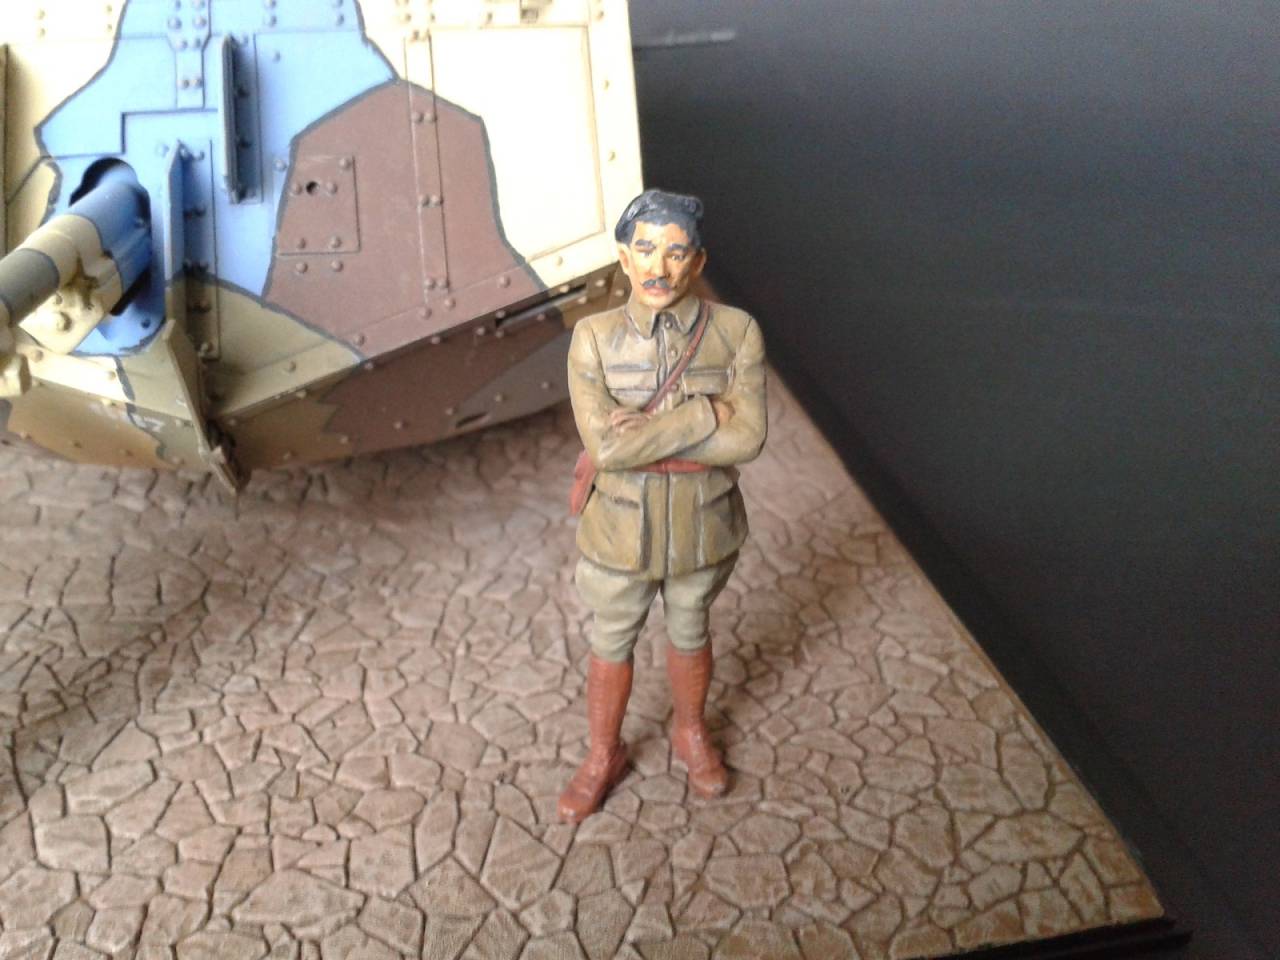
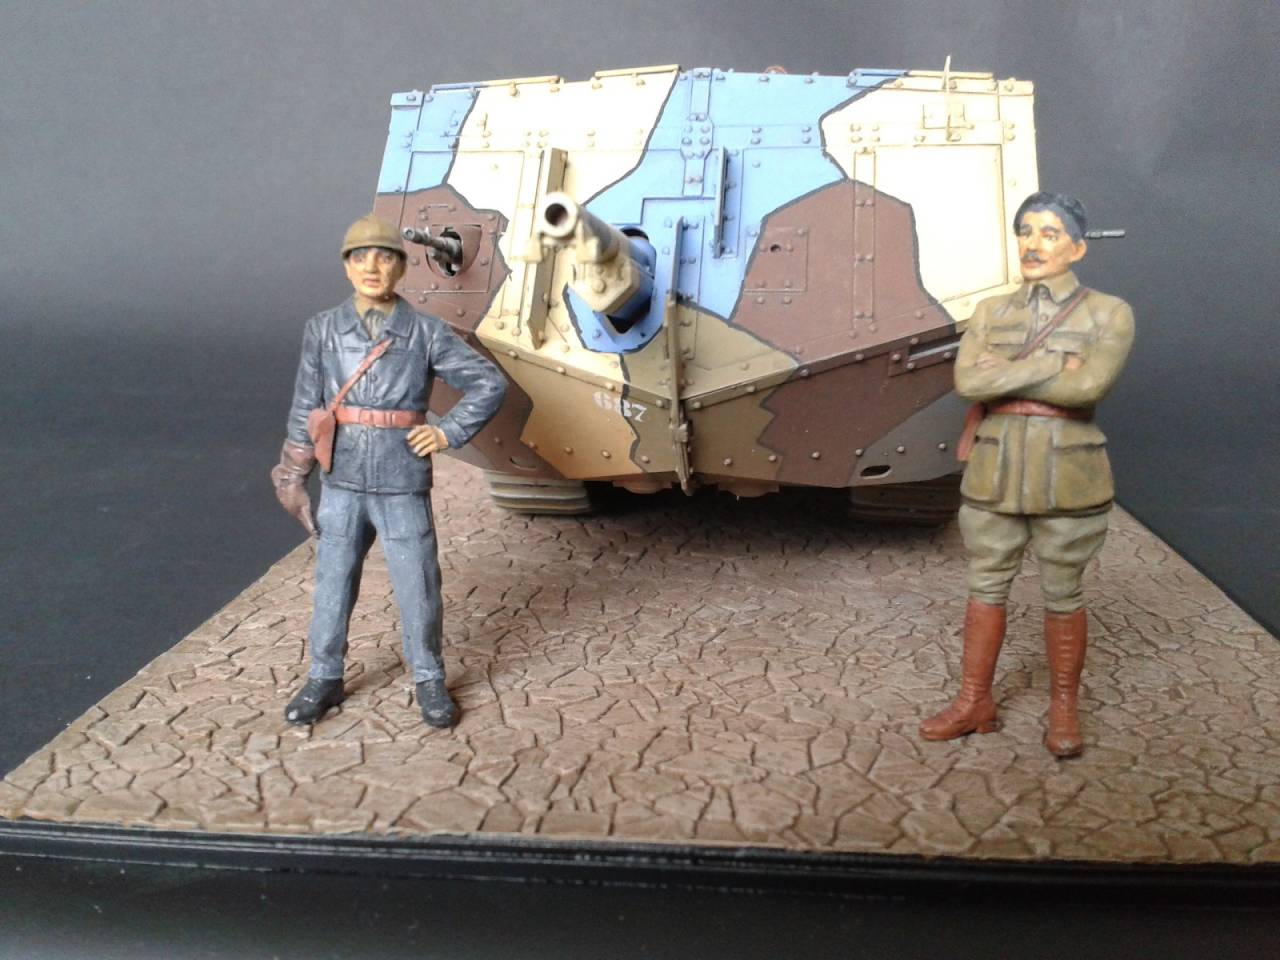
...and with a lick of paint!
The tank itself looks like this:

Forgot to mention I plan to work on it this weekend and grab a decent set of pics, in time for the MAFVA Nationals on Father's Day!
"Glue, or Glue Not - there is no Dry-Fit" - Yoda (original script from Return of the Jedi...)
barkingdigger
Associate Editor #013
England - East Anglia, United Kingdom
Joined: June 20, 2008
KitMaker: 3,981 posts
Armorama: 3,403 posts
Posted: Monday, May 27, 2019 - 06:04 AM UTC
"Glue, or Glue Not - there is no Dry-Fit" - Yoda (original script from Return of the Jedi...)
barkingdigger
Associate Editor #013
England - East Anglia, United Kingdom
Joined: June 20, 2008
KitMaker: 3,981 posts
Armorama: 3,403 posts
Posted: Thursday, June 06, 2019 - 07:30 AM UTC
Finally grabbed some better pics of my French tank, and put them in the Campaign gallery.

Been a lot of good ol' fun!
(Still have a Mk IV to paint up as a Beutepanzer, but not in time for the final push...)
"Glue, or Glue Not - there is no Dry-Fit" - Yoda (original script from Return of the Jedi...)
#460
California, United States
Joined: September 16, 2014
KitMaker: 1,156 posts
Armorama: 1,024 posts
Posted: Tuesday, June 11, 2019 - 11:19 AM UTC
Russ - Your resin artillery piece looks great, I'm looking forward to seeing how it comes out.
Vintage Paul
I'd happily live in the past but for air conditioning, the internet, mobile phones, modern medicine & dentistry and, and, and . . .
#460
California, United States
Joined: September 16, 2014
KitMaker: 1,156 posts
Armorama: 1,024 posts
Posted: Tuesday, June 11, 2019 - 11:25 AM UTC
Tom - What a stunning Saint-Chamond! The base adds a lot to it, I'll keep that trick in mind for a future build. In the end, your colors came out well. I have seen some aircraft with colors we would consider odd in the modern day. Here they look very believable. Great job and thanks for you salute to the end of the Great war.
Vintage Paul
I'd happily live in the past but for air conditioning, the internet, mobile phones, modern medicine & dentistry and, and, and . . .
Washington, United States
Joined: January 31, 2019
KitMaker: 50 posts
Armorama: 49 posts
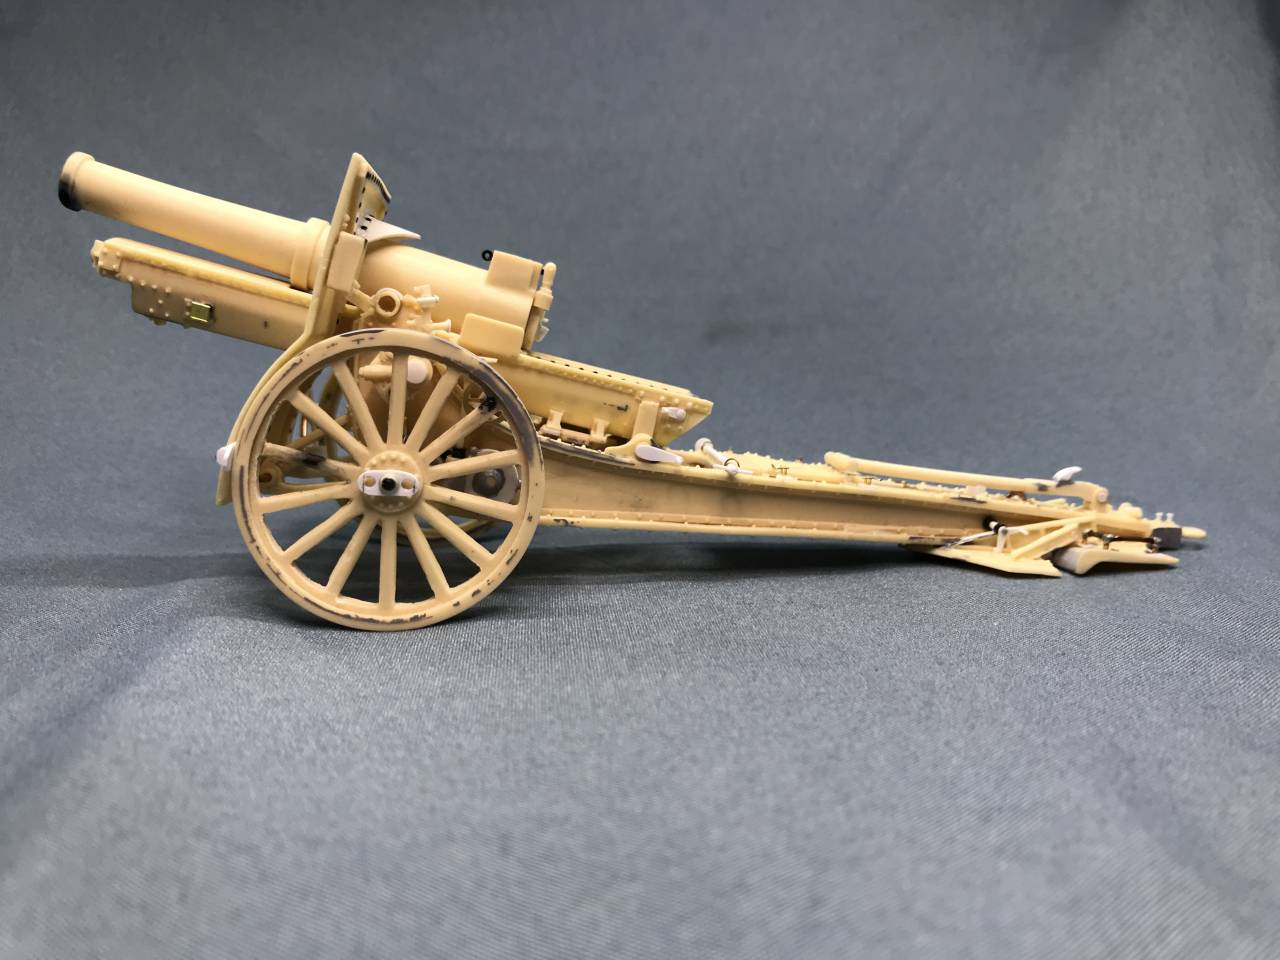
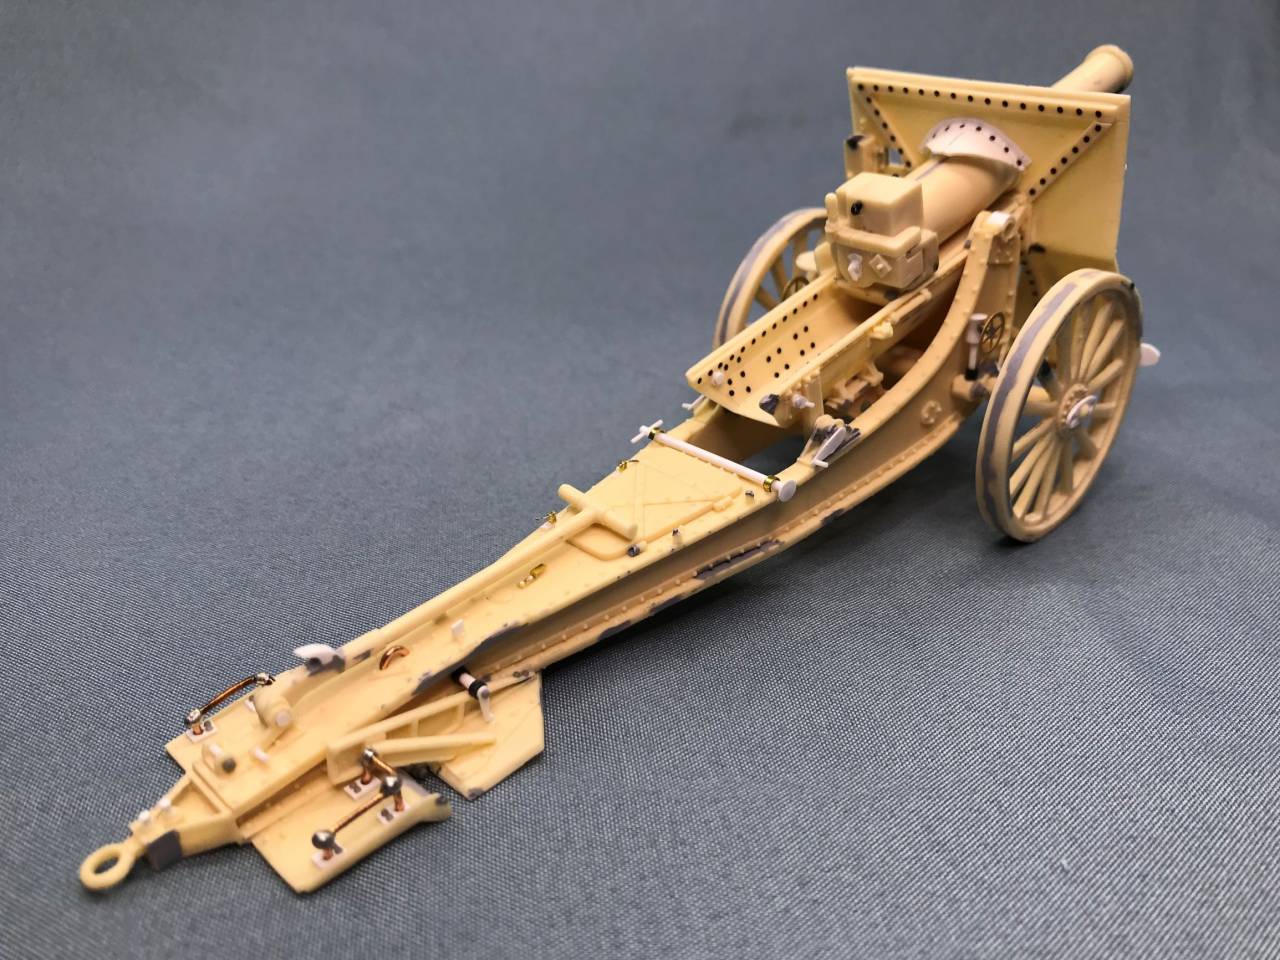
Posted: Tuesday, June 11, 2019 - 03:40 PM UTC
Here are a couple of shots of the built 155mm Howitzer Model of 1917 (Schneider). This is based upon the Commander Models kit 1-039 in 1/35th scale. I added a number of details: brakes, latches, site door cover, spade hinge and latches, travel lock, wheel hubs, spade handles, etc. After struggling to get various putties to stick firmly to the resin, I tried something new for filling the many voids and pin holes. I mixed a bit of gunmetal pigment into a few drops of medium CA, applied it with a toothpick and then hit it with accelerator. It worked better than anything else on the voids. It filed and sanded nicely. I primed the model today.
Rick