

Rick,
Really great work! Looking forward to seeing it finished with a coat of paint. I use Bondo on resin, but then again it depends on how "slippery" the resin is-- some are so smooth even thin CA can puddle up.
VR, Russ
Campaigns
Where Armorama group builds can be discussed, organized, and updates posted.
Where Armorama group builds can be discussed, organized, and updates posted.
Hosted by Darren Baker, Richard S.
The Great War, A Last Hurrah

Kevlar06


Joined: March 15, 2009
KitMaker: 3,670 posts
Armorama: 2,052 posts
Posted: Tuesday, June 11, 2019 - 04:08 PM UTC
ebergerud
Joined: July 15, 2010
KitMaker: 297 posts
Armorama: 164 posts
Posted: Sunday, June 16, 2019 - 01:33 PM UTC
Quoted Text
Quoted TextThanks Russ, I will take your lead on using these paints. I have been thinning them for brush use using rubbing alcohol. It did not occur to me that Tamiya might be different from standard acrylics that I thought used this stuff.
The Tamiya thinner I just bought is called X-20A. It does not have a yellow top. Is this the wrong stuff?
Paul, I think X20 will probably work, but I buy the plastic 1 pint bottles with a cream-yellow cap. That seems to be the best Thinner for Tamiya.
VR, Russ
The Tamiya thinner debate started about ten years back when armor gurus Adam Wilder and Mig Jimenez claimed Tamiya did not made acrylic paints, but lacquers. Hence, they said use lacquer thinner. (Many prefer Gunze Mr. Leveling Thinner - which is very good too, but Tamiya yellow cap Lacquer Thinner is just fine.) Some people still use A20 - I've used lacquer for some time and consider it superior. I'd guess A20 users are simply very good with the airbrush.
As good as the lacquer/acrylic paints (Tamiya, Gunze, MRP)are for airbrushing, I am very underwhelmed by their hand painting qualities. This is where water based acrylics really shine. I think if you check modeling videos or books coming from Mig or Wilder you'll see Vallejo Model Color - or Panzer Aces which is the same thing) very commonly used for chipping or other hand painted stuff. (Other water based acrylics include more thinned versions for airbrushes: Vallejo Model Air, LifeColor, Mission Models and most AK paints. All hand paint very well.) If you want a superior paint and a cheaper one try Golden Fluid Acrylics - you'll have to devise your own colors but that's easy. Now I only use water based acrylics, but that's because I don't have a spray booth - I certainly agree that the acrylic/lacquers are the easier to airbrush. You can get very good results airbrushing water acrylics, but there's a longer learning curve.
Eric
ebergerud
Joined: July 15, 2010
KitMaker: 297 posts
Armorama: 164 posts
Posted: Sunday, June 16, 2019 - 02:09 PM UTC
Glenn
I've got the Meng Renault and think it would be neat to get it ready for Lt Patton. Did you do you M1917 for a board - I'd like to see what is entailed for conversion?
Eric
I've got the Meng Renault and think it would be neat to get it ready for Lt Patton. Did you do you M1917 for a board - I'd like to see what is entailed for conversion?
Eric

Hudson29

#460
Joined: September 16, 2014
KitMaker: 1,156 posts
Armorama: 1,024 posts
Posted: Friday, June 21, 2019 - 06:25 AM UTC
Rick - That is one great looking gun! Your recipe for filler is one I might like to try myself. I have used CA glue as filler on plastic and it certainly speeds up the job.
hetzer44
Joined: December 21, 2005
KitMaker: 241 posts
Armorama: 124 posts
Posted: Saturday, June 22, 2019 - 08:17 AM UTC
Here's my latest work on the Takom Whippet. Very good kit, but there were a few areas where there were gaps that I had to fix. Perhaps it was my fault and not Takom. Either way, the kit is progressing very well and I really enjoyed the build so far, except for cleaning up all the road wheels.

Not much to attach to the upper hull except the mufflers and grousers.

Hope to get this completed before the August deadline.
Cheers!
chuck
Not much to attach to the upper hull except the mufflers and grousers.
Hope to get this completed before the August deadline.
Cheers!
chuck
hetzer44
Joined: December 21, 2005
KitMaker: 241 posts
Armorama: 124 posts
Posted: Saturday, June 22, 2019 - 08:24 AM UTC
Another quick update since I have the extra bench time this Saturday.

You can see a very little white putty on the upper hull right where there wasn't a perfect fit. I'll need to work in the putty a bit more to make it look good.

This rear box was giving me fits early on in this build, but I was able to muster enough patience to get it lined up and ready to attach.

Well on to the roof and tracks, then painting.
Cheers!
chuck
You can see a very little white putty on the upper hull right where there wasn't a perfect fit. I'll need to work in the putty a bit more to make it look good.
This rear box was giving me fits early on in this build, but I was able to muster enough patience to get it lined up and ready to attach.
Well on to the roof and tracks, then painting.
Cheers!
chuck
henrikpalmberg

Joined: September 03, 2018
KitMaker: 31 posts
Armorama: 29 posts
Posted: Tuesday, June 25, 2019 - 11:47 PM UTC
So, I wasnt completly content with how my my Mk. 1 turned out, so I decided to strip off the paint and start over.
This is where I am with it now. The tank has been painted with Ammo by Mig acrylics. I hand painted the camouflage and then filled the blotches with some lightened color to give it some life. The camouflage scheme and number is somewhat made up (call it artistic license), but heavily based on period photos. I saw in a video made by the Bovington tank museum that only the C company had the mesh roof.
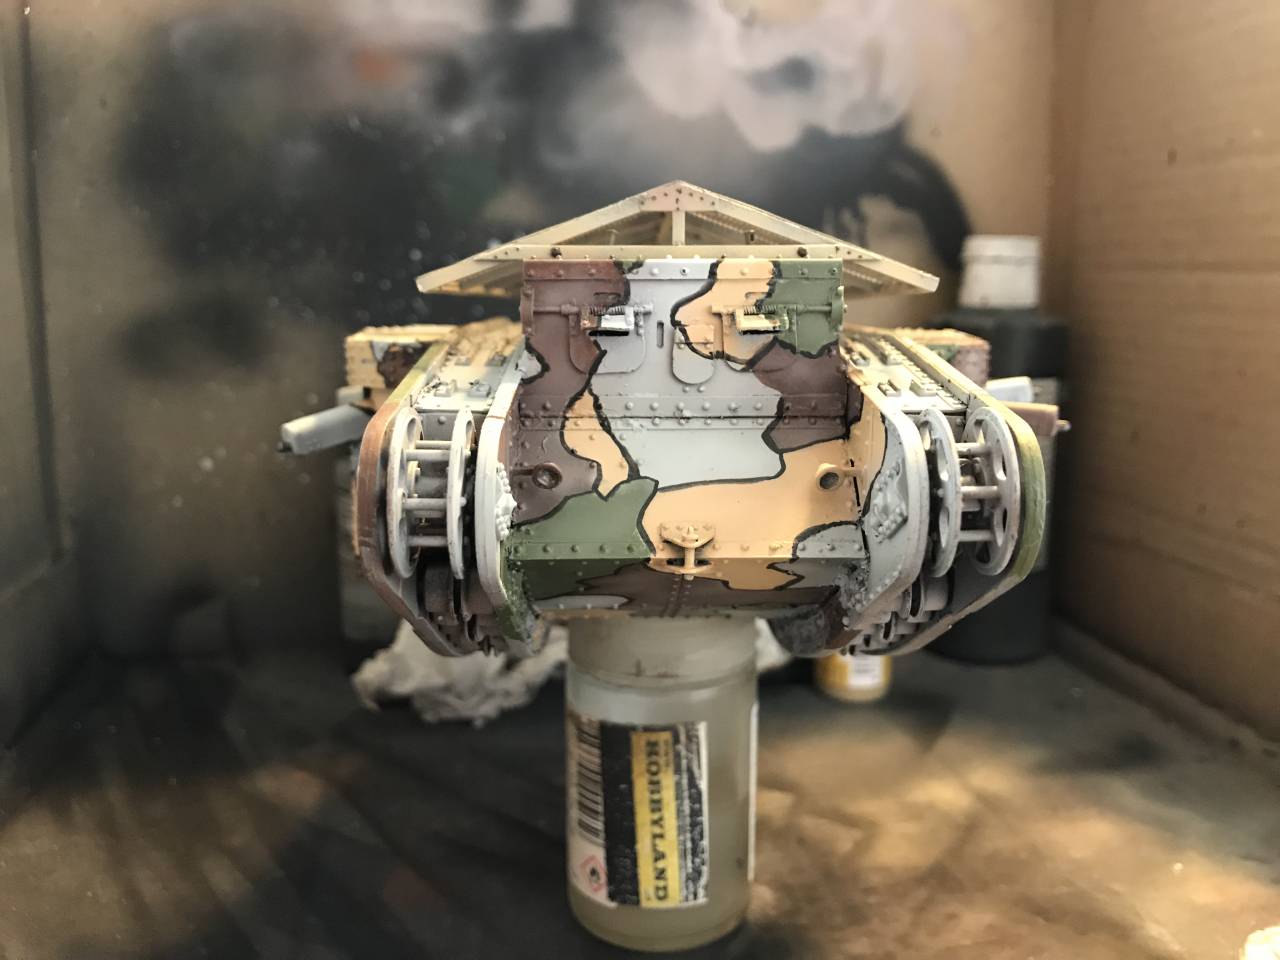
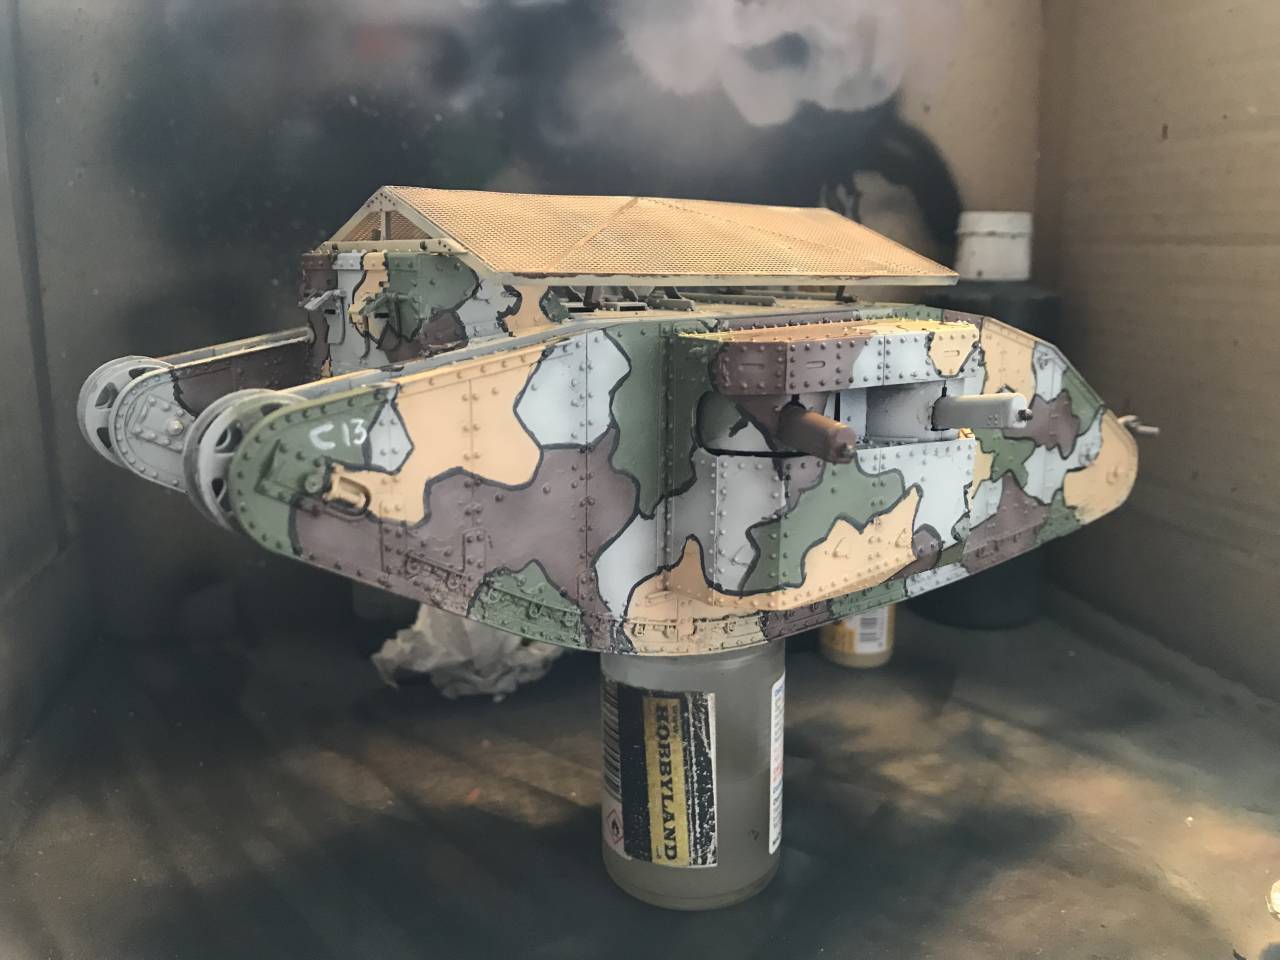
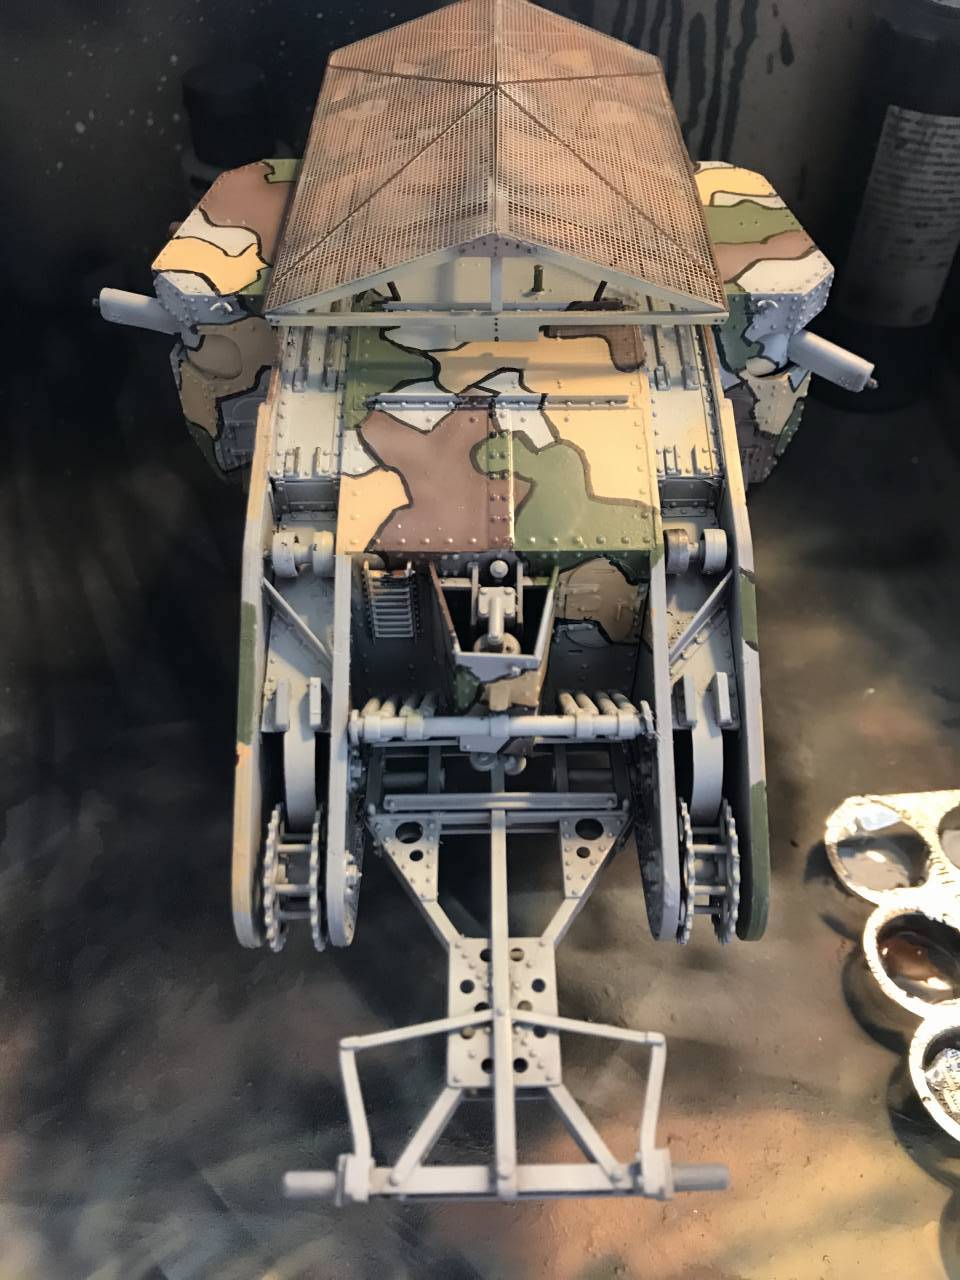
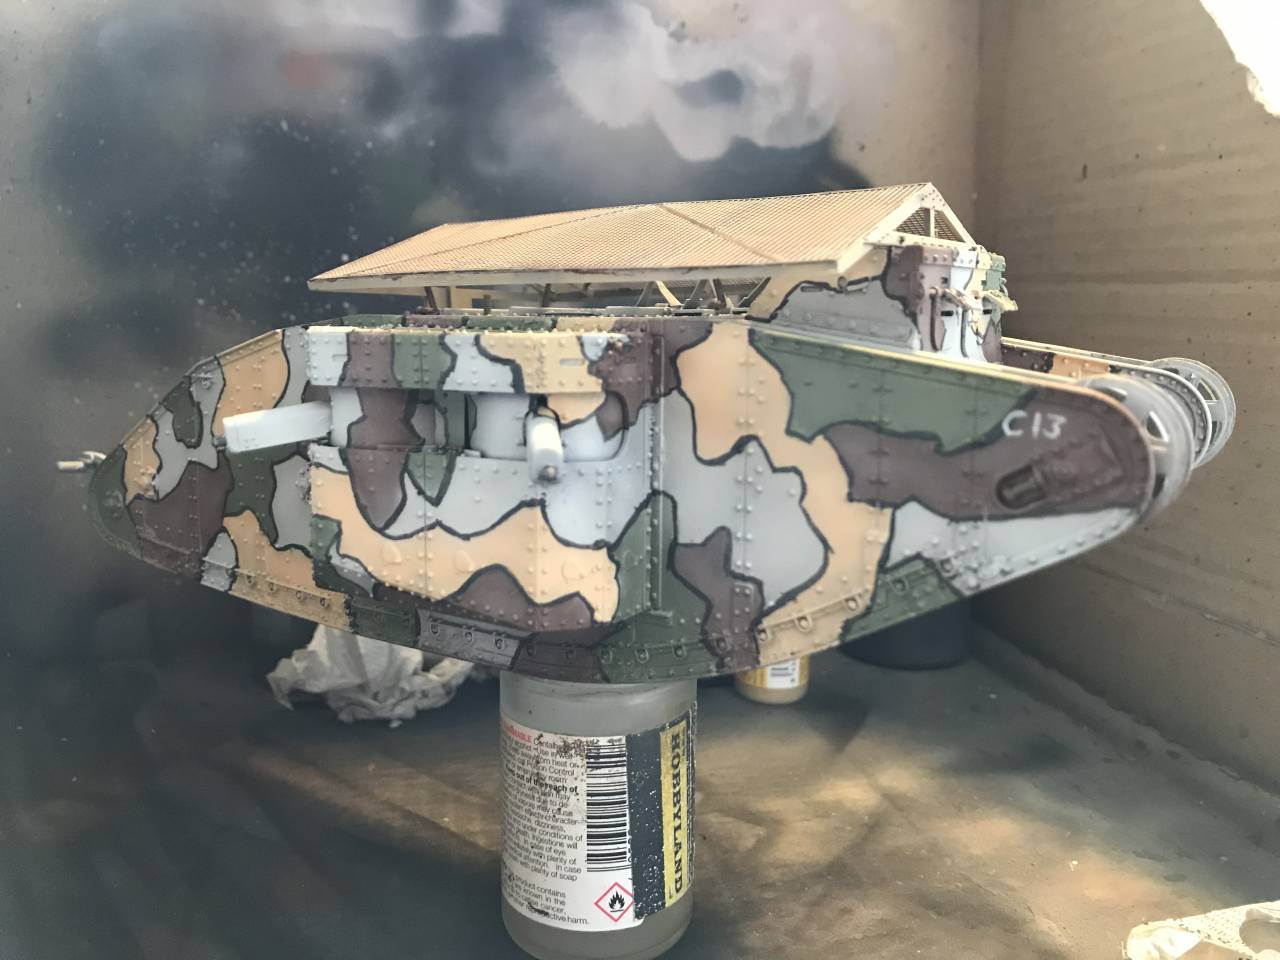
And now to the fun part, weathering!
Hope you will like it
// Henrik
This is where I am with it now. The tank has been painted with Ammo by Mig acrylics. I hand painted the camouflage and then filled the blotches with some lightened color to give it some life. The camouflage scheme and number is somewhat made up (call it artistic license), but heavily based on period photos. I saw in a video made by the Bovington tank museum that only the C company had the mesh roof.
And now to the fun part, weathering!
Hope you will like it
// Henrik
hetzer44
Joined: December 21, 2005
KitMaker: 241 posts
Armorama: 124 posts
Posted: Wednesday, July 10, 2019 - 11:19 AM UTC
Vey nice work Henrik. I was following your progress. Fantastic.
Cheers!
chuck
Cheers!
chuck
hetzer44
Joined: December 21, 2005
KitMaker: 241 posts
Armorama: 124 posts
Posted: Wednesday, July 10, 2019 - 11:23 AM UTC
Finally finished,,,even all the photo-etched hooks are in place. Now it's ready for the paint shop.


Striker
Joined: August 21, 2003
KitMaker: 94 posts
Armorama: 40 posts

Posted: Friday, July 12, 2019 - 01:29 AM UTC
I got caught up in some other modelling projects and of course the wargames figures ooze into my paint queue but progress is continuing. I'm not happy with the faces so I'll try and touch them up.
Hudson29
#460
Joined: September 16, 2014
KitMaker: 1,156 posts
Armorama: 1,024 posts
Posted: Friday, July 12, 2019 - 08:27 AM UTC
Chuck - Your Takom Whippet is impressive. I had the old Emhar kit which was not nearly as nice. Seeing yours in paint will be great.
Hudson29
#460
Joined: September 16, 2014
KitMaker: 1,156 posts
Armorama: 1,024 posts
Posted: Friday, July 12, 2019 - 08:29 AM UTC
John - Your figures are coming out well. That is a very special skill!
Hudson29
#460
Joined: September 16, 2014
KitMaker: 1,156 posts
Armorama: 1,024 posts
Posted: Friday, July 12, 2019 - 08:31 AM UTC
Henrik - Your Mk. 1 is stunning with that paint and mesh roof. This will be a grand salute to the Great War.

PasiAhopelto

Joined: October 01, 2016
KitMaker: 514 posts
Armorama: 171 posts
Posted: Sunday, July 28, 2019 - 02:15 AM UTC
I think I should get started if I want to finish my build:

It's simple kit with good level of detail.
It's simple kit with good level of detail.
Hudson29
#460
Joined: September 16, 2014
KitMaker: 1,156 posts
Armorama: 1,024 posts
Posted: Thursday, August 08, 2019 - 11:43 AM UTC
Pasi - Yes, it is good to make a start. I have not worked on my own Mk IV for a couple of months as other projects took priority.
We can ask for an extension if needed.
We can ask for an extension if needed.
PasiAhopelto
Joined: October 01, 2016
KitMaker: 514 posts
Armorama: 171 posts
Posted: Thursday, August 15, 2019 - 07:14 AM UTC
I think I'm able to finish this in schedule, so extension not needed for me.
Finished assembly couple of days ago:

I had also PE parts for the kit, and used about half of them. I think most of the plastic is good enough as it is, for example fenders are thin plastic.
Finished assembly couple of days ago:
I had also PE parts for the kit, and used about half of them. I think most of the plastic is good enough as it is, for example fenders are thin plastic.
Owengate
Joined: June 03, 2019
KitMaker: 73 posts
Armorama: 39 posts
Posted: Thursday, August 15, 2019 - 08:03 AM UTC
Not even finished yet and I must say, it already looks promising.
hetzer44
Joined: December 21, 2005
KitMaker: 241 posts
Armorama: 124 posts
Posted: Saturday, August 24, 2019 - 03:15 AM UTC
Well, this build is a wrap. Great campaign. While there were a few areas where I had encountered some fit issues during construction, all in all it was a very good experience and a well-detailed kit. My only major disappointment were the decals. I used my tried and true decal application method, but still the decals didn't lay down as well as I would have liked. Track construction was amazing.


Hope everyone enjoyed this campaign.
Cheers and all the best to Great War campaigners.
chuck
Hope everyone enjoyed this campaign.
Cheers and all the best to Great War campaigners.
chuck

Mrclark7
Joined: June 04, 2017
KitMaker: 503 posts
Armorama: 477 posts
Posted: Sunday, August 25, 2019 - 03:17 PM UTC
A couple pics of my progression so far on the build. I have started the priming and hope to start the scheme later this week.


I thought I would also talk about how I might have cured my airbrush woes of lately.
For a long time I have been having airbrush spraying issues in both my airbrushes. I was going nuts trying to figure why my brush kept getting clogged so easy. So i went to walmart and bought a tea strainer and last night I strained a bottle of half used 17ml yellow. It was amazing how much gunk was in the bottom of the strainer. I then strained a small amount of my primer black bought just recently from the hobby store. Again an amazing amount gunk in the bottom.
So bottom line, I am seeing this in a large amount of my vallejo paints. I would highly recommend straining them before using in the airbrush. So far everyone that I have strained has had issues in the vallejo line.
Striker
Joined: August 21, 2003
KitMaker: 94 posts
Armorama: 40 posts
Posted: Sunday, August 25, 2019 - 10:28 PM UTC
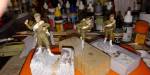
Uploaded pics of my finished figures. I'll have to work on more figures to get better but I gave a try at some new techniques, just need to hone those skills.

deerstalker36

Joined: May 16, 2010
KitMaker: 232 posts
Armorama: 218 posts
Posted: Sunday, August 25, 2019 - 11:44 PM UTC
Quoted Text
For a long time I have been having airbrush spraying issues in both my airbrushes. I was going nuts trying to figure why my brush kept getting clogged so easy. So i went to walmart and bought a tea strainer and last night I strained a bottle of half used 17ml yellow. It was amazing how much gunk was in the bottom of the strainer. I then strained a small amount of my primer black bought just recently from the hobby store. Again an amazing amount gunk in the bottom.
So bottom line, I am seeing this in a large amount of my vallejo paints. I would highly recommend straining them before using in the airbrush. So far everyone that I have strained has had issues in the vallejo line.
i use vallejo, but i use a jigsaw adapted to vibrate the bottles way more than i could shake them normally. acrylics do have a tendency to settle out the pigments from the carrier. is this the gunk you are seeing?

hetzer44
Joined: December 21, 2005
KitMaker: 241 posts
Armorama: 124 posts
Posted: Monday, August 26, 2019 - 09:31 AM UTC
Quoted Text
Sorry for the late reply...lots of family stuff this summer. Thank you for the kind words of encouragement. I had the old Emhar kit, but sadly never finished it. I'm happily encouraged you are still modeling after building the Emhar offering.Chuck - Your Takom Whippet is impressive. I had the old Emhar kit which was not nearly as nice. Seeing yours in paint will be great.
Cheers!
chuck
Striker
Joined: August 21, 2003
KitMaker: 94 posts
Armorama: 40 posts
Posted: Monday, August 26, 2019 - 09:34 AM UTC
Quoted Text
i use vallejo, but i use a jigsaw . . .
I use vallejo, Andrea, and Scale 75 mostly and mixing can be a pain. I've purchased a vortex mixer as well as a finger nail polish shaker. Vortex was around 150, nail polish shaker 100, both through Amazon. Not nearly as cheap a solution but they fit on the desk nicely and are easy to use. It has cut down on my glossiness.
Striker
Joined: August 21, 2003
KitMaker: 94 posts
Armorama: 40 posts
Posted: Monday, August 26, 2019 - 09:39 AM UTC
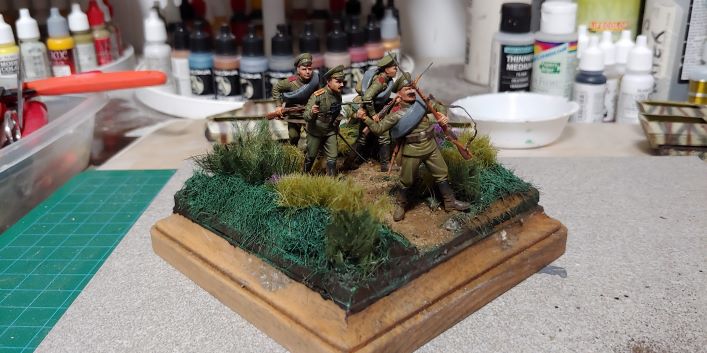
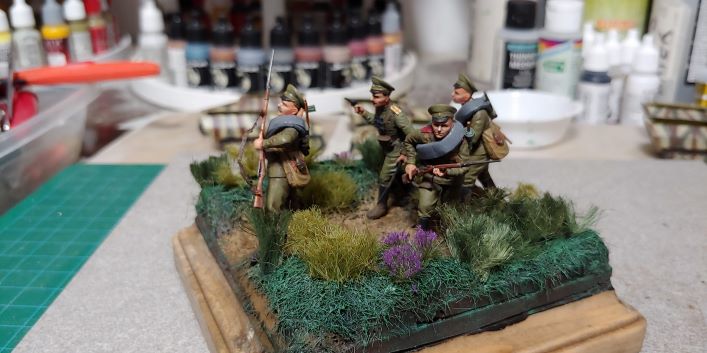
I have pics in the gallery but figured I'd throw a couple here of the completed set of figures. I kind of got behind the 8-ball with some other projects but they turned out ok. I spent more time watching painting videos and picked up a few tricks and I was able to work on some more skills. I'm normally a guy that won't paint figures because they won't turn out good, but without painting I won't get my skills up to be good enough, and round and round it goes. So this was a good "just paint them!" exercise and confidence builder. My base grass turned out a bit "greener" than I like but I'll hit up the oil paint aisle and pick up some more and practice, practice, practice.
Mrclark7
Joined: June 04, 2017
KitMaker: 503 posts
Armorama: 477 posts
Posted: Monday, August 26, 2019 - 09:59 AM UTC
i use vallejo, but i use a jigsaw adapted to vibrate the bottles way more than i could shake them normally. acrylics do have a tendency to settle out the pigments from the carrier. is this the gunk you are seeing?[/quote]
I use a saws all for all 17ml bottles. hand shake the 200ml ones. The gunk is more described as being like dried rubber or latex. Some pieces in the 200ml were like small worms. So clearly coming from my top after being used. I have over 100 17ml bottles from the local hobby store and hobby lobby. The worse bottles are those that I used ball bearing in to help mix up. Obviously how I handle my paints needs to be changed, but I am finding this even on new unused stock I have.
I use a saws all for all 17ml bottles. hand shake the 200ml ones. The gunk is more described as being like dried rubber or latex. Some pieces in the 200ml were like small worms. So clearly coming from my top after being used. I have over 100 17ml bottles from the local hobby store and hobby lobby. The worse bottles are those that I used ball bearing in to help mix up. Obviously how I handle my paints needs to be changed, but I am finding this even on new unused stock I have.
 |

WEB HOSTING BY


Copyright ©2021 Armorama and Kitmaker Network, a subsidiary of Silver Star Enterprises
All Rights Reserved. Please read our Conditions of Use and Privacy Policy.
All Rights Reserved. Please read our Conditions of Use and Privacy Policy.