

1⁄35King Tiger in Poland 1944
15
Comments

Inspiration
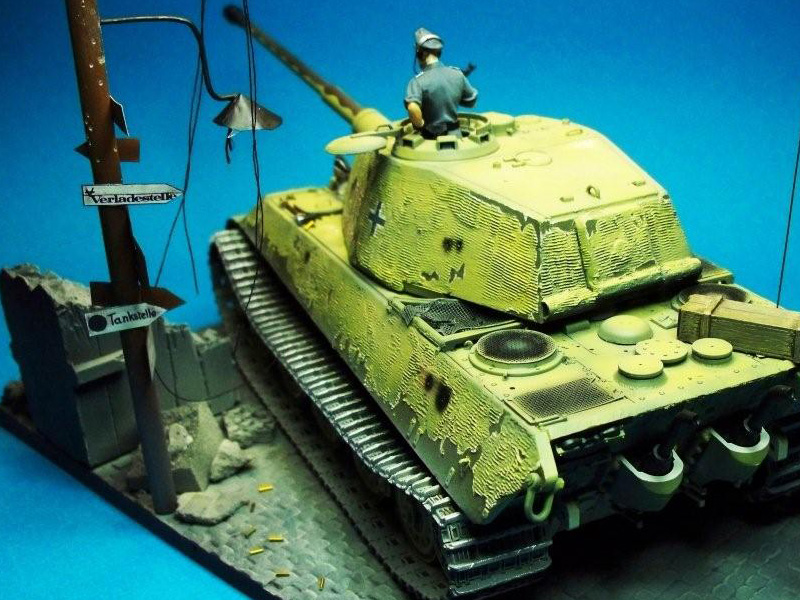
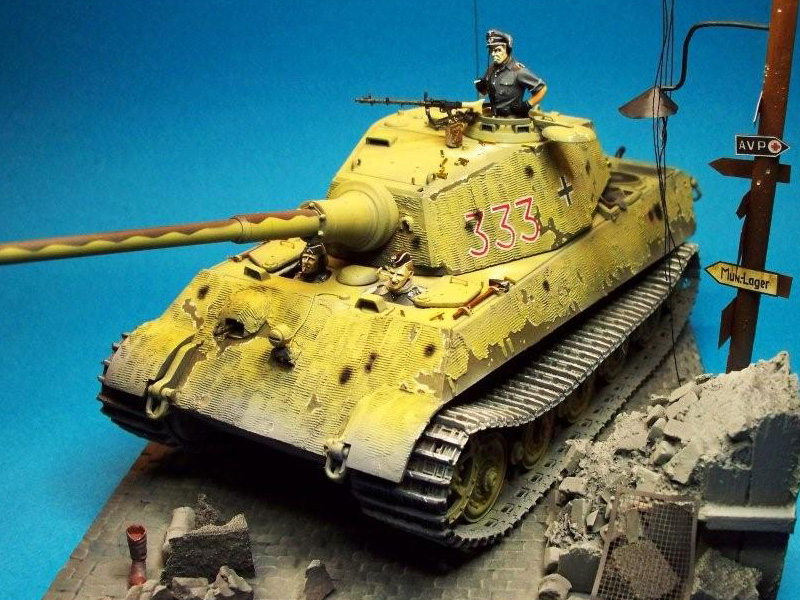
Before I started this build I was looking, for the 1023rd time at Mr. Pat Stansells fantastic Tiger Tank book, and I had the idea for this build.It emerged from the lasting impression I had of a Tiger II photographed in the city of Kummersdorf 1944. I first saw these photos of his rendition of this King Tiger about five years ago. The simplicity of the dark yellow scheme made this particular tank stand out. Having a simple numeral stencil on the front hull and lacking a complex camo scheme, the models sleek lines stand out.
The Model
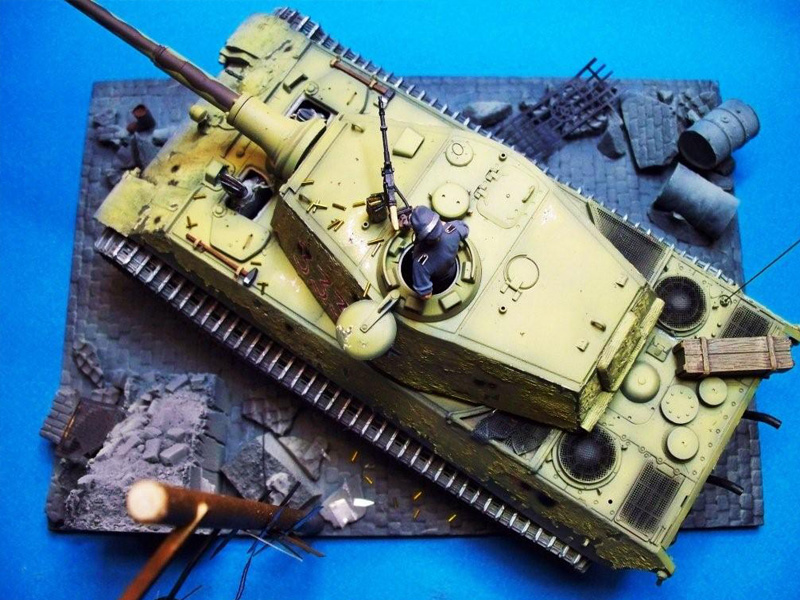
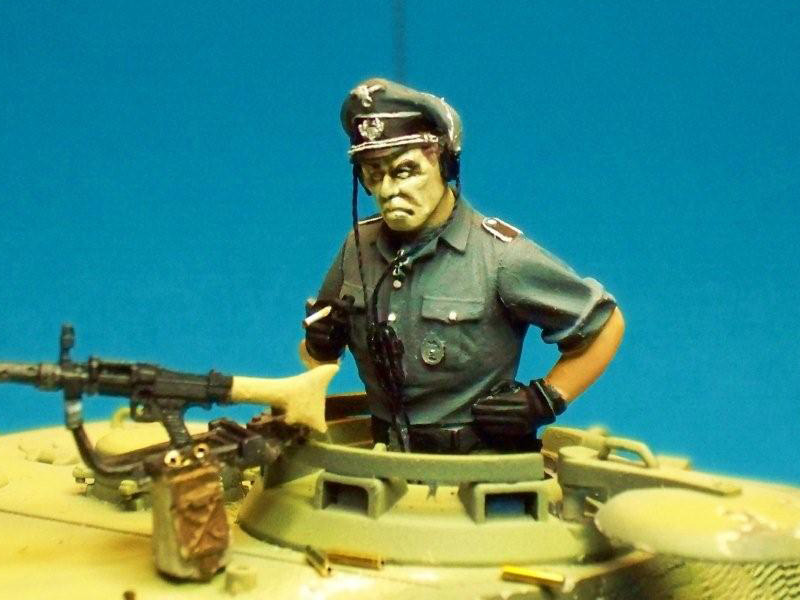
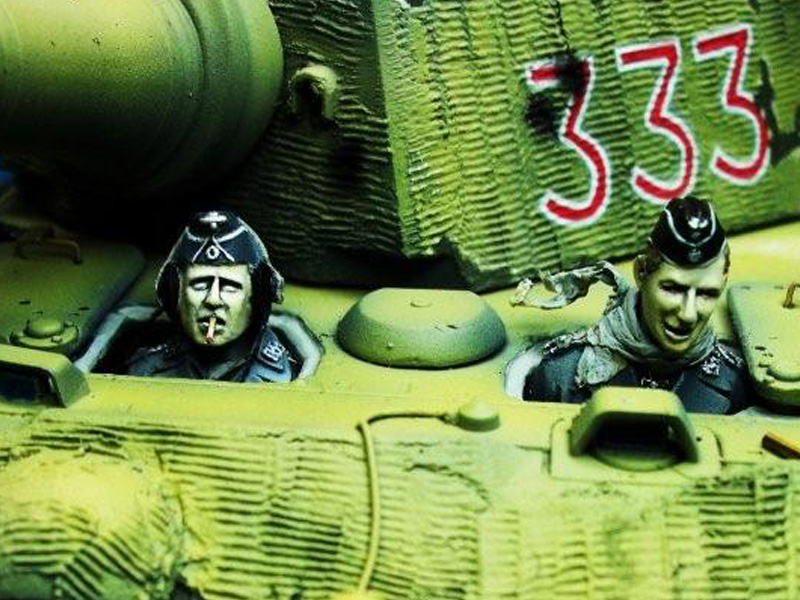
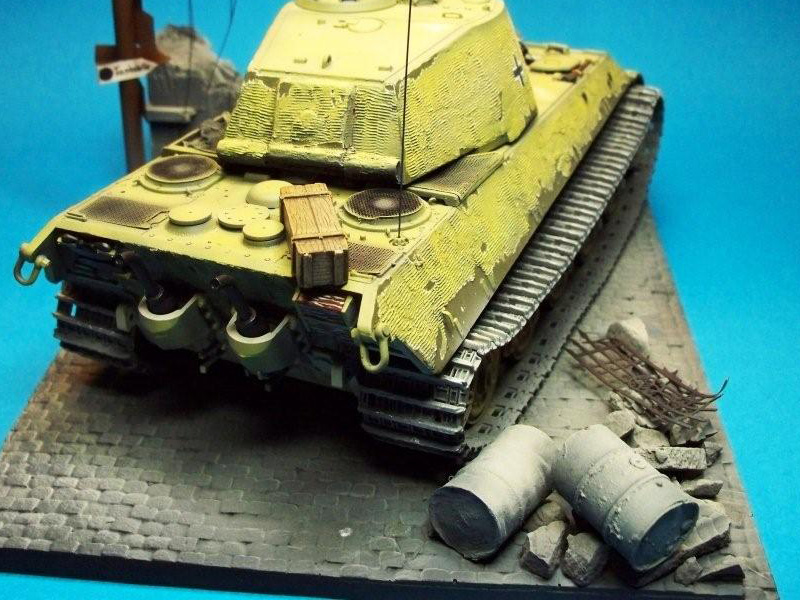
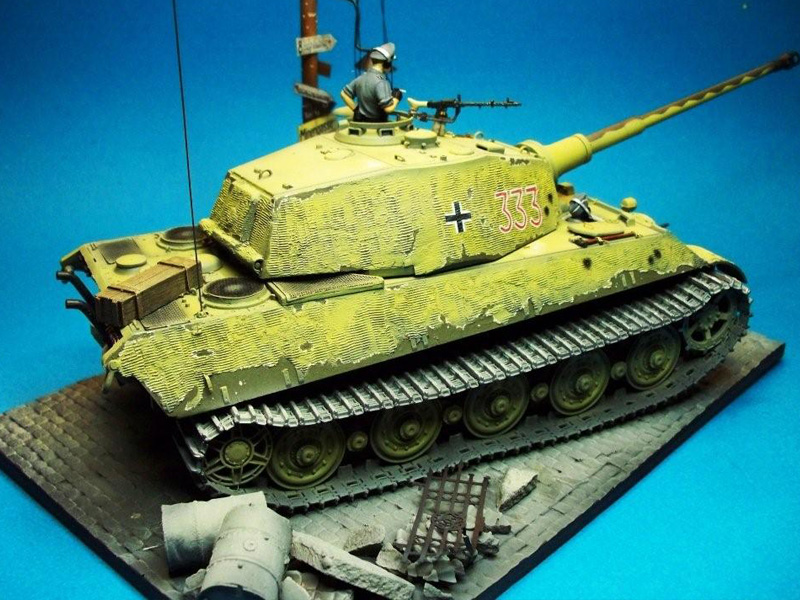
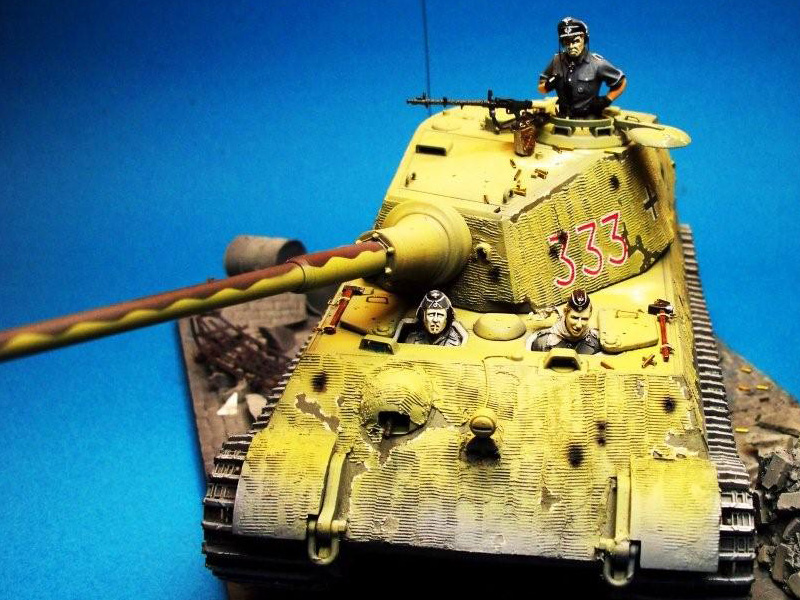
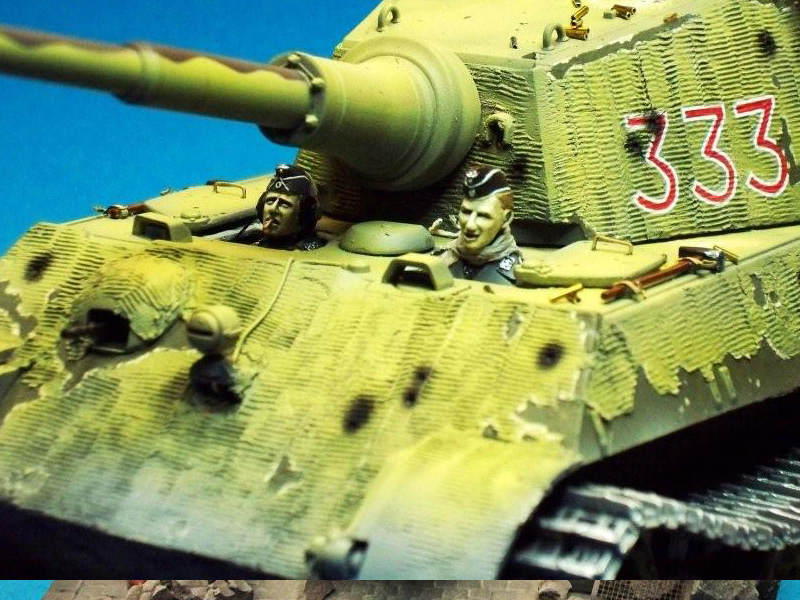
For my build, I chose the vehicle on an earlier page of the same book, King tiger #313. The King Tigers of the schwere Abt. 501 were distinctive in that they had the larger Balkenkruez with numerals that were flat on top, and not rounded. The tigers of 501 were shuttled about, in both the East and West theatres, and I wanted a crew and Panzer that were showing the signs of wear and tear but, none the less, were still game for a fight.Construction
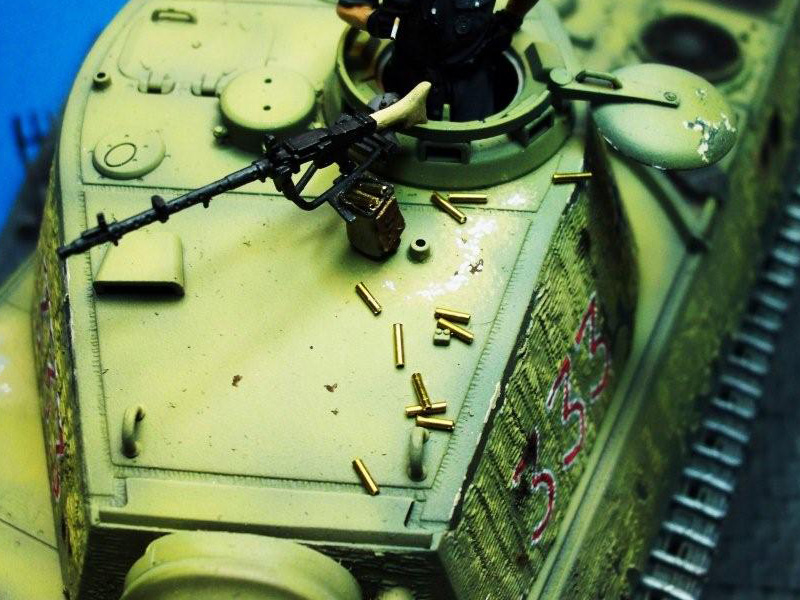
Dragons 1/35 Alfred Kurzmaul Tiger II was my choice for this build. This kit was very quickly built, as there is very little clean up, owing to Dragons advanced mold technology. The turret is a good fit as there are no gaps, or sanding to compensate for. The vision blocks are a bit primitive but offer an opportunity for scratch build alternatives, or go to your bench strength, ... Photo etch. There are no clear sprues in the kit so I would recommend the good old spares bag. I used the kit provided vision blocks and a Metallic Blue Crayon marker on the face of all the glass, it picks up any available light, and looks good (from a distance). There were many King tigers that did not sport anti-magnetic paste during this time, but I chose to apply zimmerit as this would be a good opportunity to show wear and tear on the hull, and in keeping with the images I was attempting to emulate from Mr. Stansell. I left the hull and turret sides largely free of clutter. Bondo brand filler from the tube and the Lion Roar zimmerit tools did the trick. One thing that I will pass along is that you need to heavily powder the zimmerit roller and keep a wire brush handy, use both often throughout the process. The suspension is very simple to build, as on most DML kits, it offers no travel, so unless you modify it, it will be a static suspension. The Modelkasten resin links were my choice to replace the links supplied in the kit, as this is a pre SMART kit.Painting and weathering
The Tiger was painted with Tamiya enamel in the spray can (Gunship Gray) as a primer, because it is very strong and acts like an anchor for the following layers, Gunze Sanyo acrylics used for the camouflage colours. Weathering is done with Rembrandt oils thinned with cheap white spirit ... the cheaper the better, in my opinion. I use so much of the stuff that I would go broke if I used the Art Supply store stuff, so, to the Hardware Store, lads! That brings me to another point I would like to make; about six months ago my wife yelled at me for spending $16 for a Sable 000 brush, let me say, she was forced to eat her words, that same brush is still in use...months after cheaper brushes would have literally curled up and died. The moral of this story is, as far as brushes are concerned, always buy the best you can afford .The Base
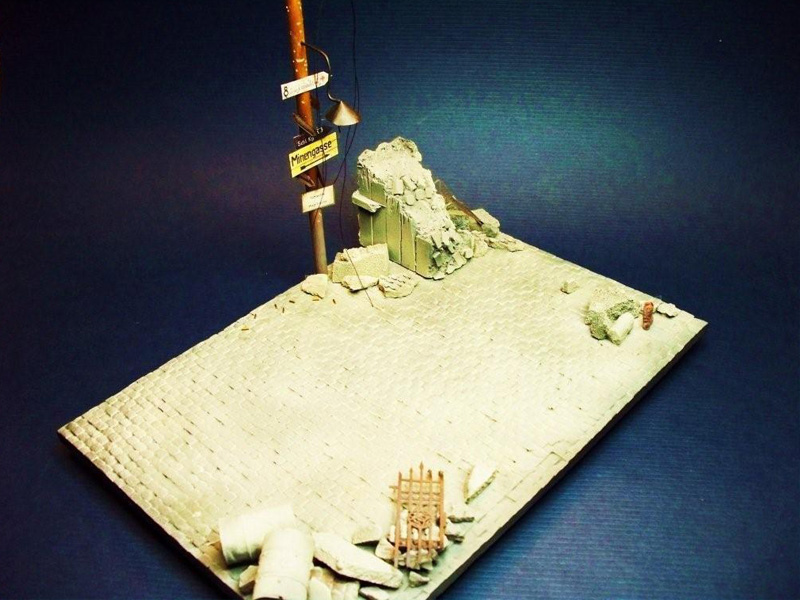
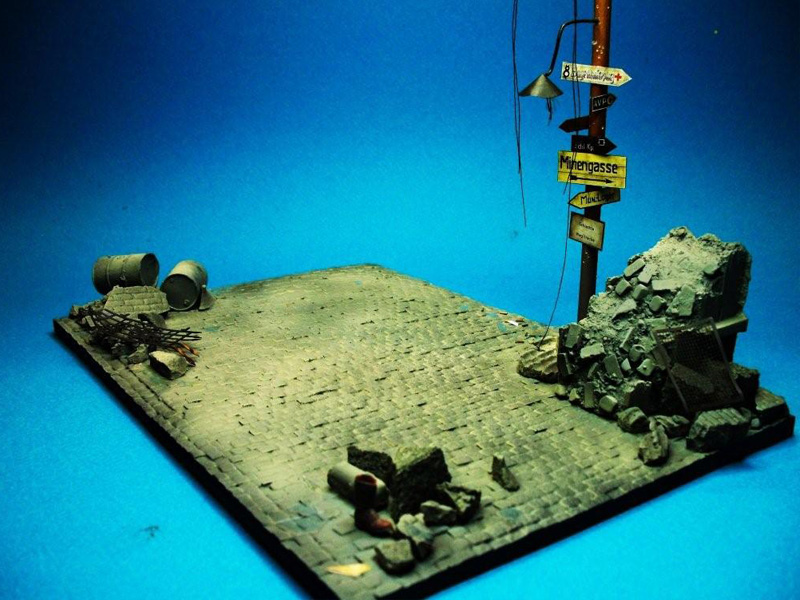
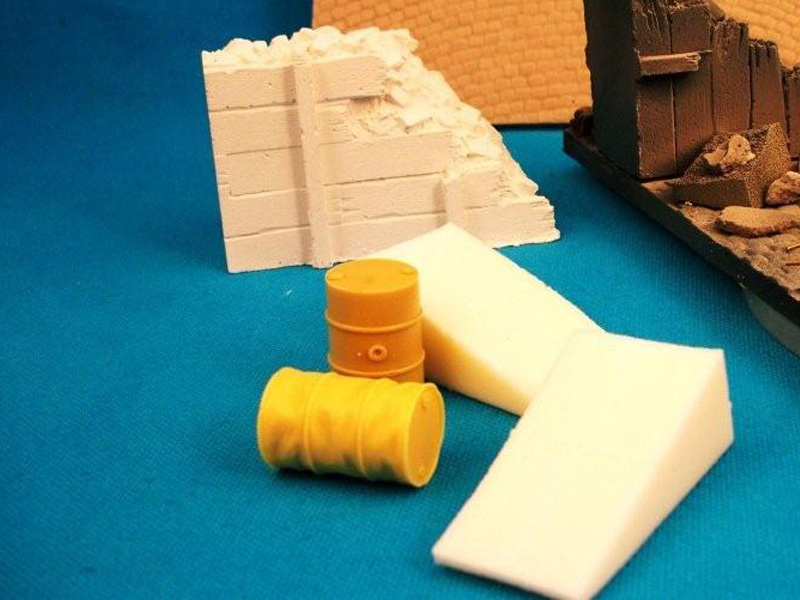
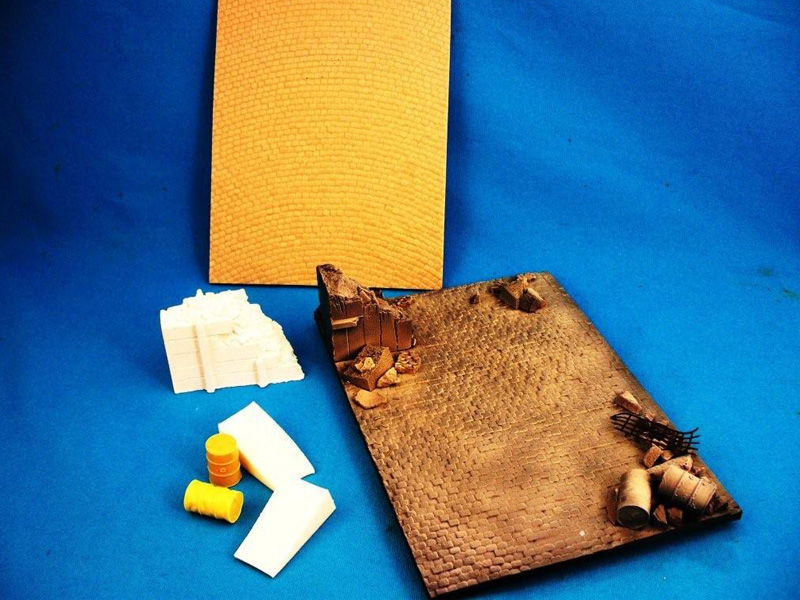
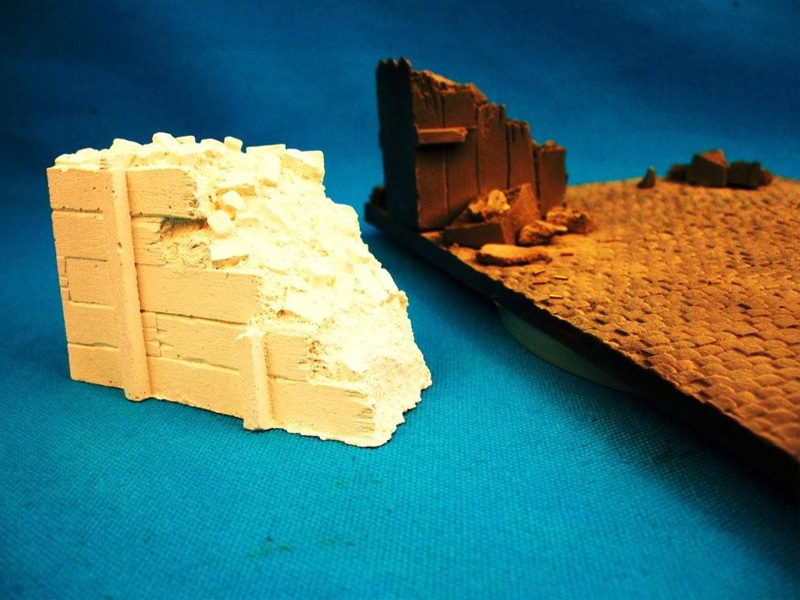
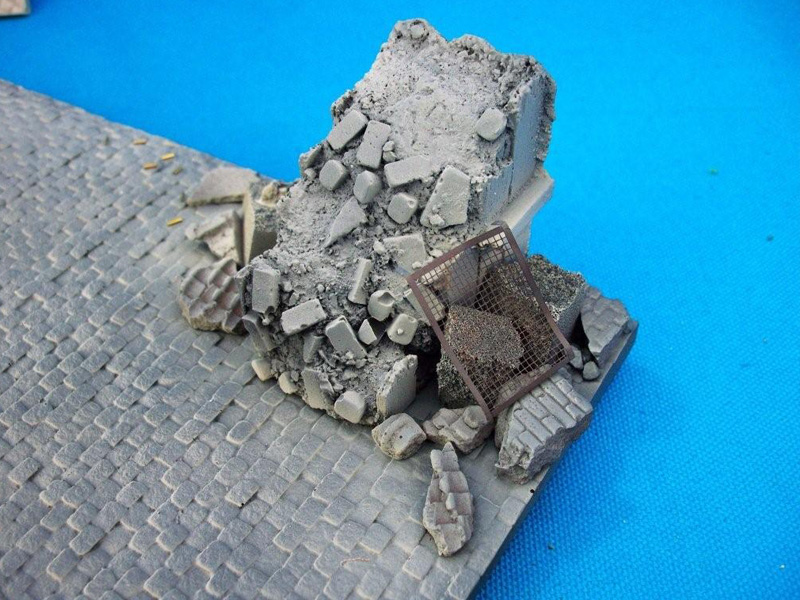
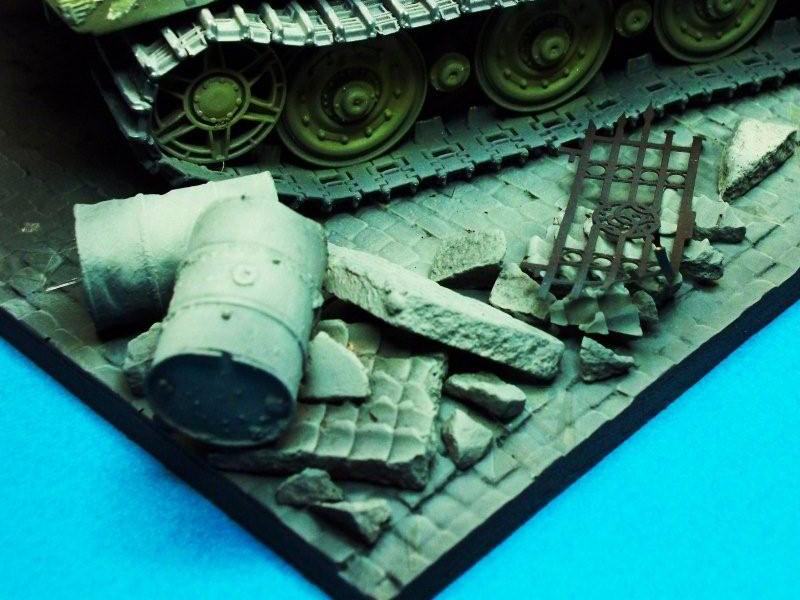
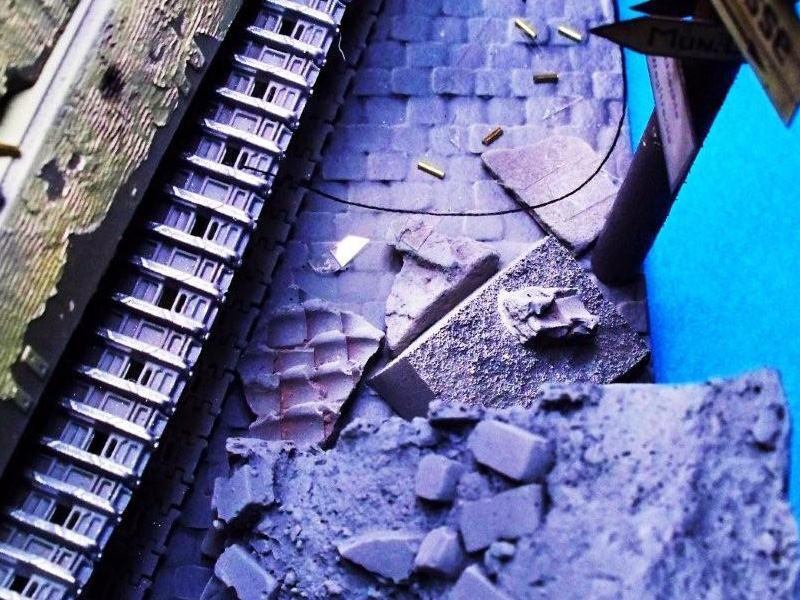
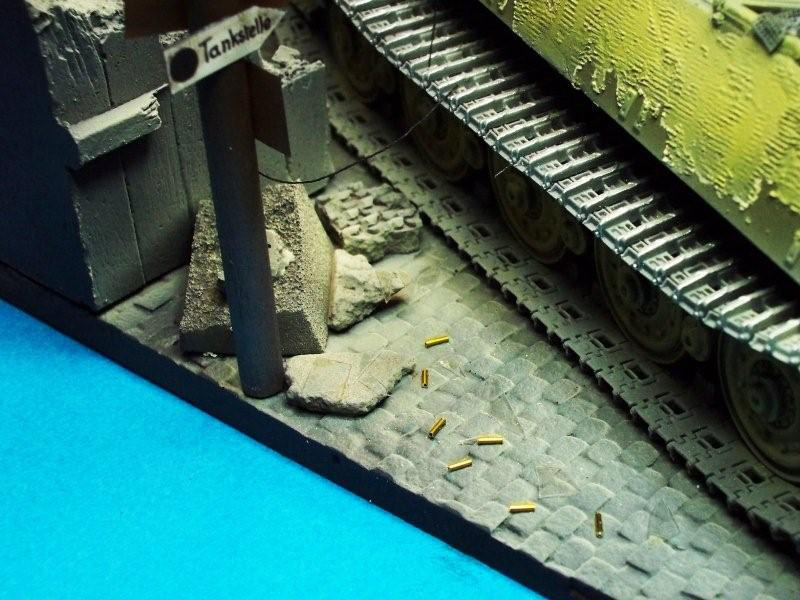
The base was constructed with a Verlinden resin cobblestone street making the process incredibly easy. I had not used this resin product before, preferring to make my own out of Styrofoam, but this turned out to be a very nice alternative and I will be using more soon. On top of this I added Verlindens tank barrier set. Also, some scenic elements that I made were incorporated. One thing that I discovered recently was that if I pinched off pieces from my wifes makeup wedges and glued them down and painted them they look just like shattered chunks of concrete. They are also very lightweight, weighing almost nothing. The rest of the bricks and so forth were made scratch from plaster molds. The gate is a Verlinden PE piece. And there is a bit of bed frame from an old T-34/85 kit. All of this was then undercoated with Tamiya Gunship Gray, coated with Model Master Flat acrylic and then airbrushed with Gunze Barley Gray mixed with 70% Alcohol. The Gunze is sprayed at a lower angle to ensure the relief of the cobblestones is more pronounced. All of the elements that comprise my groundwork are glued in place and painted at the same time to ensure uniformity. Last but not least, I add some cut up bits of clear plastic sheet, This does not show up very noticeably on film but in reality they are a nice touch to a scene of such destruction. The only element not covered yet is the signpost/lamppost/telegraph pole. A wooden dowel spray painted with Gunze Air Camo Brown. Verlinden sign kit. Street lamp made from .003 Copper sheet and Telegraph lines made of black thread through a piece of sprue and you are set!Conclusion
A very enjoyable kit for the German armor enthusiast and the accessories made it easier all the more. With every build, I learn more, and this one was not an exception. I would thank my friends down at G&G Model Shop here in Houston (since 1946) for their guidance and helpful advice in completing this project. As usual, Dragon and Verlinden made it easy to come up with an exciting idea for the hobby I enjoy so much. Keep up the good work!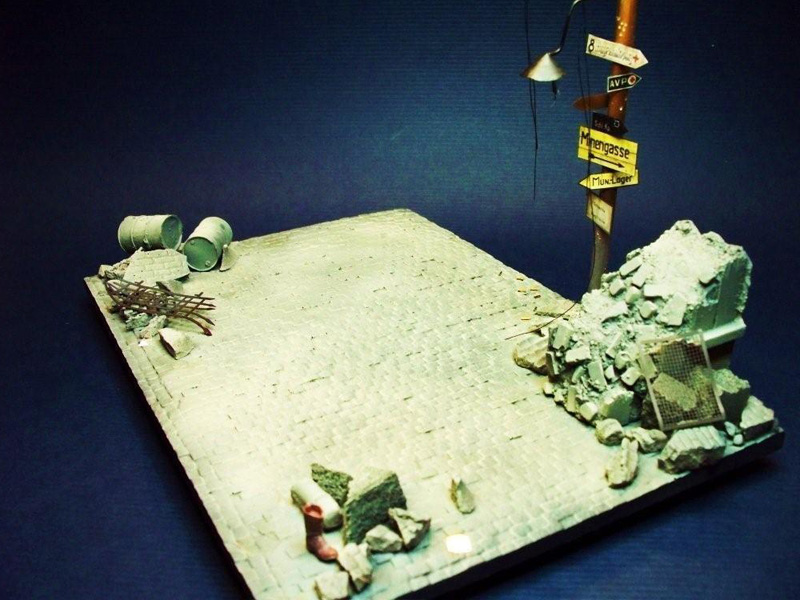


About the Author


FROM: TEXAS, UNITED STATES
Semi-Amateur modeler. Write for Scale Military Modeler International magazine free-lance. Produce commission work for a few select clients. Judged several IPMS events. Work almost exclusively in WW2 Scale Armor (preferably 1:35 scale). Dioramic subject that I enjoy the most involves tying Air/Ar...
Comments

Nice, build. Has anyone this picture of the vehicle? It would be very unusual to see a King Tiger without a 3 tone camouflage pattern.
spit
SEP 18, 2008 - 12:49 AM

Robert, Well done. A very nice diorama. But what's the story behind the boot in front of the Tiger? Inquiring minds want to know. Keep up the great work. Every model you build is a learning experience as I have found, so don't let all the critics get you down. Keep modeling and keep posting beautiful works like this one.
Chris
SEP 20, 2008 - 04:19 AM

hi darren
is the [quote] the reason why the figures look so jaundiced. im not buy any means saying i can do better but i just would like to see the model in a more natural light....
neil
SEP 20, 2008 - 05:10 AM

Thanks to all that commented.....and all are appreciated....good feedback or bad, this is what Armorama is all about.
Regarding the single boot,........it is there for just the reason that you perceptively noticed,......something to ponder. David and Goliath,.....man vs. machine.
As for the non-three color scheme, as I explained in the text, this was inspired by a photo of a King Tiger taken in Kummensdorf , late in the war which was entirely painted dark yellow. Regards, RL
SEP 21, 2008 - 04:39 AM

I have seen several figures painted by Rob and the level of detail is very good, my comment in the introduction was to highlight how different levels of light, Direction, and type effect what the viewer sees.
SEP 21, 2008 - 05:09 AM

As has been mentioned before, the effort given to detail is superb and a good example for others to follow (can't wait to start my first vingette)!!
SEP 21, 2008 - 05:31 AM

A nice job on the dio and tank, Robert, but I would strongly suggest that you develop a better, more consistent method of photographing and lighting your next project. The lighting in many of your photos is just shy of terrible, if you'll excuse my frankness, and detracts from the overall presentation.
I don't know if it's your lighting or what, but you should work on getting a warmer skin tone on your figures; the TC looks a little pale. Some shading in the faces would really add dimension as well.
The butt of the MG is a curious shade as well--it should be a wood color; darker for sure.
The rest of the dio is really well presented, but I too would like to see it in a more natural light. Either that, or check the white balance of your camera.
SEP 27, 2008 - 06:45 PM

Just want to add my 2 cents* about the paint brush: I have a Grumbacher #5 red sable that I bought in college back in the early eighties, and it's still going strong. I'm pretty sure I have 2 of those brushes, but I can't find the other one. Sixteen bucks for a triple-aught sable? Sounds a tad high, I think 12 - 14 bucks is more appropriate.
*whatever happened to the "cent" symbol on the keyboard, anyway?
OCT 08, 2008 - 08:14 AM
Does that include sales tax? If so, I am going to charge back in there and demand my $1.37 back !! I feel like a fool now!! Regarding the cent key,....it was eliminated for political purposes............or down-sizing.........anyone?
OCT 14, 2008 - 10:04 AM
Copyright ©2021 by Robert Liles. Images and/or videos also by copyright holder unless otherwise noted. The views and opinions expressed herein are solely the views and opinions of the authors and/or contributors to this Web site and do not necessarily represent the views and/or opinions of Armorama, KitMaker Network, or Silver Star Enterrpises. All rights reserved. Originally published on: 2008-09-17 00:00:00. Unique Reads: 25003

WEB HOSTING BY


Copyright ©2021 Armorama and Kitmaker Network, a subsidiary of Silver Star Enterprises
All Rights Reserved. Please read our Conditions of Use and Privacy Policy.
All Rights Reserved. Please read our Conditions of Use and Privacy Policy.