

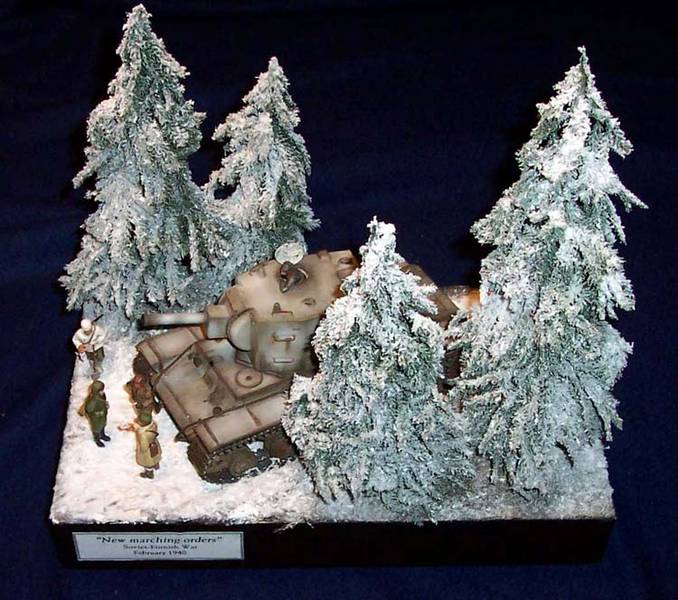
1⁄35New Marching Orders

"New Marching Orders"
The day dawned on 12th February 1940. It was still foggy but the snowstorm, which raged the previous day already blew over. On the Russian front, tanks ready for sortie were producing engine noises. Russian soldiers enveloped in a dense fog were waiting for their tanks. Soon light tanks came one after another. First the silhouette of their turret and gun came in sight and then their whole body emerged from behind the fog. There were ten tanks of a light tank company.The soldiers watched them in silence.
At the sight of huge tanks, which appeared next, however, they set up shouts of alarm at the same time. They could not believe their eyes. The tanks nearly four metres high were huge beyond all imagination. The soldiers walked up to the tanks and tapped on their armour as if they had been asking a superman to share his might with them
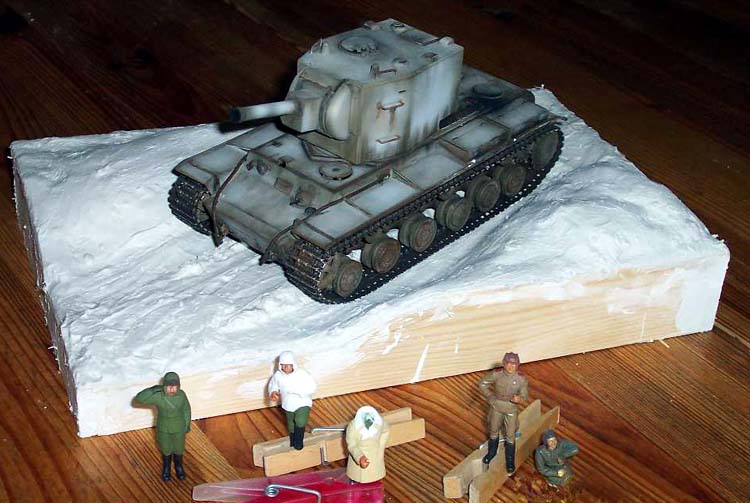
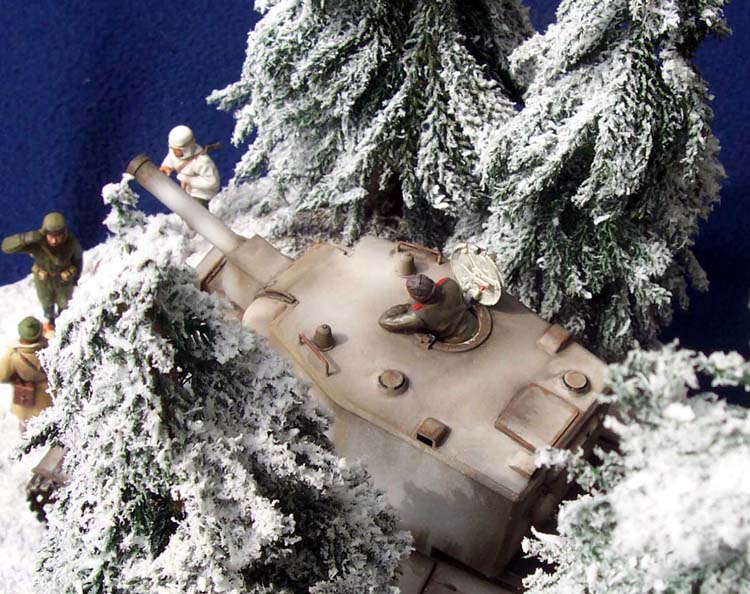
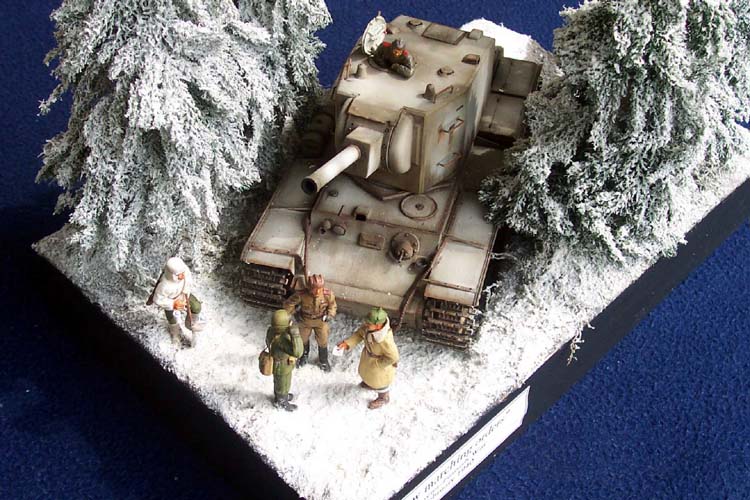
This very illustrative quote from Tamiyas KVII building instructions gave me the inspiration to build this diorama. The scene, an officer receives new marching orders for the assault of that day from an courier, is situated on the Mannerheim Line, during the Soviet-Finnish war 1940, when KV2's boosted up the Soviet soldiers moral with their appearance on the battlefield and performing their tasks as 'bunker-busters'. I build the diorama for my first completed campaign on Armorama: Seeing Red
Building the KVII
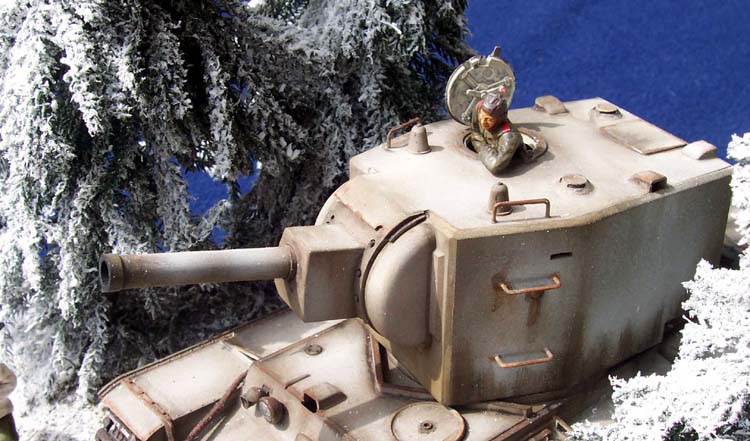
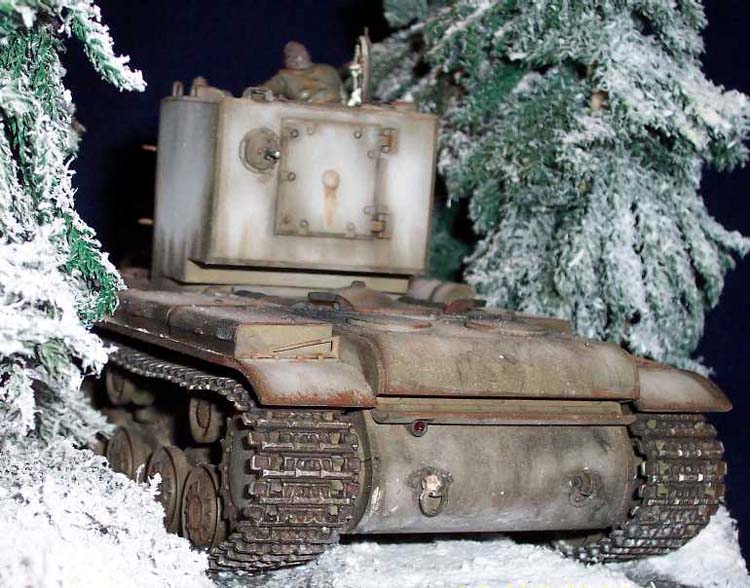
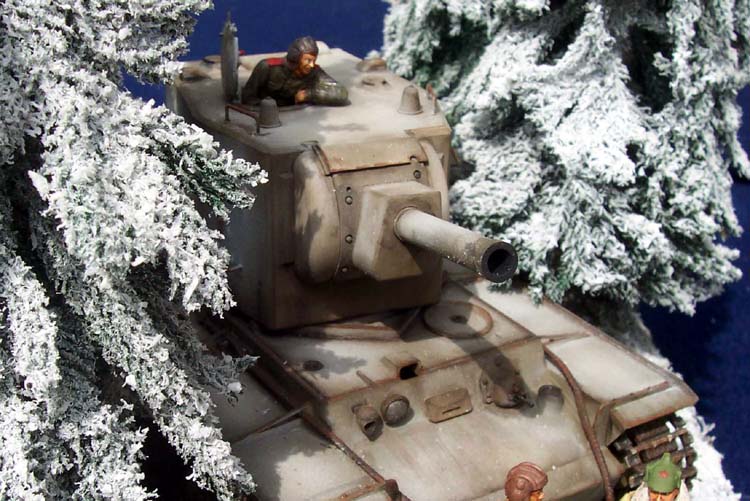
The KVII tank was easy to build. I like the non-similarity of the wheel placement between the both sides very much. It's a rare piece of design.The kit is an older Tamiya model and that shows in some details. An easy but very effective 'upgrade' of the old mold is cutting away the solid triangular supports on the fenders of the tank and place new ones, scratchbuild from styrene strip. This does not only look more realistic, it also gives the tow cables the possibility to be drawn through the supports as you see on reference pictures.
Painting the KVII
I've sprayed the tank in Tamiya Dark Green XF-61with a little drip of XF15 (yep, Flesh) to give it a little faded look. The white is just XF-2.In real life the Russian tanks came out of the factory in an overall green and were mostly over painted by the crew in white during winter conditions. Those white water based paints wore off very quickly, so the tank became some green and white colourscheme.
In my model however I just sprayed the tank in completely the opposite way. I sprayed an overall white first, followed by green on the edges and other weared-off places. I find it gives an impressive effect. The reason I use Tamiya paint on big surfaces is that I can easily use thinned oil or enamel paint to wash the model when the Tamiya paint is.
I find it difficult to do this after using Humbroll or Modelmaster paint, because the thinner sometimes effect the paint, even when it has dried several days.
I withstand the temptation to place slogans on the turret sides. On most reference pictures I have seen of Winterwar KVIIs I did not see those slogans. It was a common thing, but not every Russian tank had them.
After the Tamiya green and white colours dried a couple of days, I used thinned oil paints for shadowing and outlining (Talens, Van Gogh series, Vandyke Brown). For the rust on the muffler, steps and tracks I used a lesser-thinned oil paint (Talens, Van Gogh series, Burnt Sienna). To give a depth effect on the rosters, I used thinned Humbrol Flat Black. For the exhaust dirt, I used Talens Black Soft Pastel scraped off to powder. The rear light is 3x a drip of Tamiya X27 Clear Red.
Figures
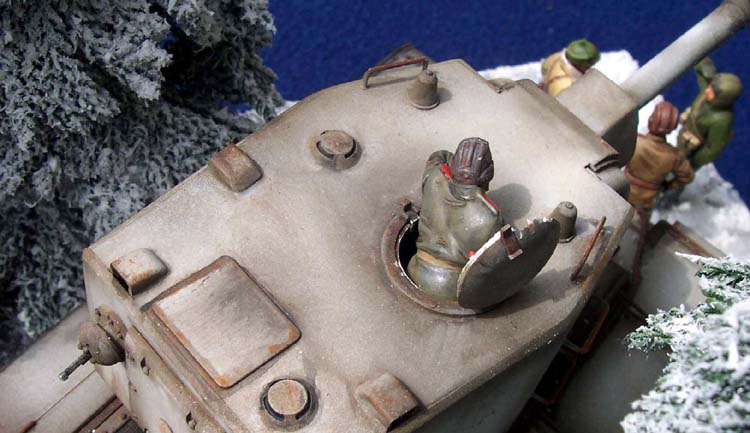
There are five figures used. The two tankers are from Tamiya. The one standing comes with the kit. The other crewmember is from Tamiyas Russian tankcrew set.The officer, the courier and the Russian soldier come together in ICMs Soviet Red Army Infantry 1939-1942 set .
The ICM figures where slightly better than the Tamiya ones but did need a little attention because of some moulding holes in a few parts. Nothing a bit of putty cant fix. There were two choices of headwear for the officer. I used the early war officers hat. Belts for the gun and the sack were made from thin alufoil strips. The painting is very basic; I used Humbrol for the base colours and oilpaint for the outlining, shading and highlighting.
The diorama
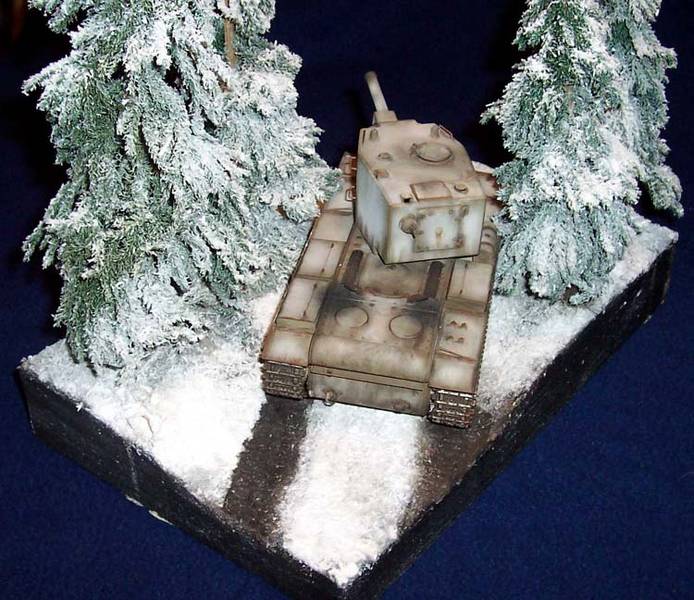
The diorama is made of a plywood base and sides. The sides where sawn with a hobbysaw to fit the planned terrain contour. Terrain was formed with lumps of old newspaper held in place with tape and covered with plastercloth.When dried, the cover received another layer of plaster in which the tracks were pressed in to simulate the track pattern in the ground.
Next the groundwork is given a base of thinned paint in a dark brownish/green colour. On this I put some sand to give it a texture. Dried roots of plants from out of my backyard where crumbled on the base and secured with thinned whiteglue. This simulates ground coverage and dead wood. The trees were made from balsa rods with Bush nr.7351 Naturmoos as foliage.
When the trees are in place and everything else is OK is sprayed the whole dio in with sprayglue (Bison Spray Glue in this case) and let it snow!
I used a mixture of ground white plastic as snow. It's a halfproduct used in plastic industries. It's good to apply with white glue, plastic glue, CA glue etc. After this it also received a layer of babypowder to give it a more smoothened surface.
The snowing procedure is both dropping snow from above as blowing snow from my hands on the diorama. After the snow, the tank and figures were placed and secured with some whiteglue.
Items used: Tamiya 35063 KVII
Tamiya 35215 Russian Tankcrew at Rest
ICM 35051 Soviet Red Army Infantry 1939-1942
Bush 7351 Naturmoos


About the Author

Copyright ©2021 by Paul Sonnemans. Images and/or videos also by copyright holder unless otherwise noted. The views and opinions expressed herein are solely the views and opinions of the authors and/or contributors to this Web site and do not necessarily represent the views and/or opinions of Armorama, KitMaker Network, or Silver Star Enterrpises. All rights reserved. Originally published on: 2005-06-08 00:00:00. Unique Reads: 23976

WEB HOSTING BY


Copyright ©2021 Armorama and Kitmaker Network, a subsidiary of Silver Star Enterprises
All Rights Reserved. Please read our Conditions of Use and Privacy Policy.
All Rights Reserved. Please read our Conditions of Use and Privacy Policy.