

1⁄35M1A1HA Abrams
10
Comments


About the Author


FROM: LUZON, PHILIPPINES
i have been making models since i was a child..on and off..on and off..and just last year i joined the IPMSPHILS-BAC..and proud to be one! meeting old friends and other modellers changed my views..particularly on details and types of weathering. you can say modelling is a never ending process.
Comments

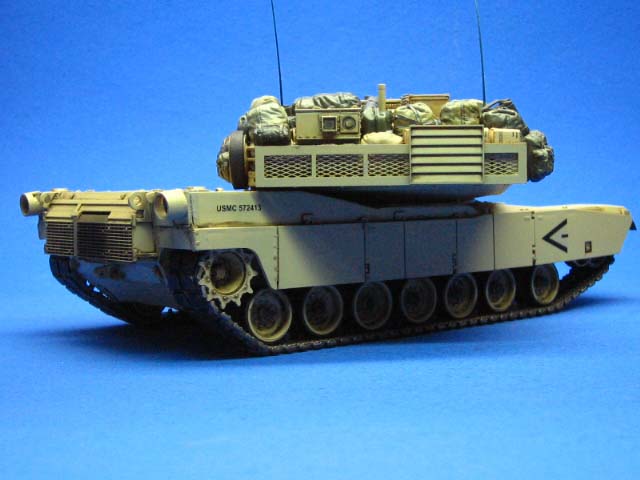
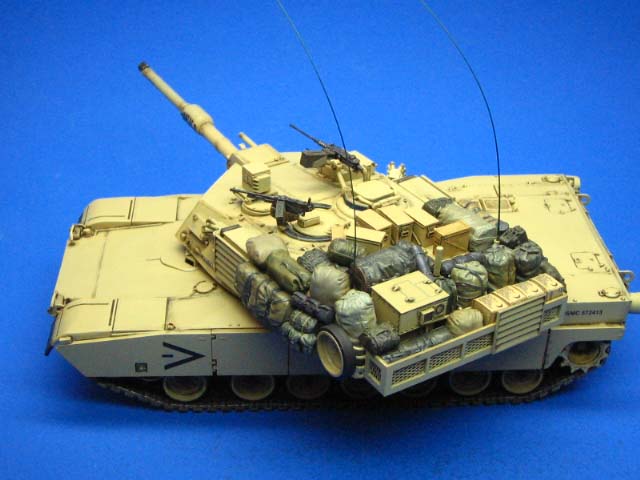
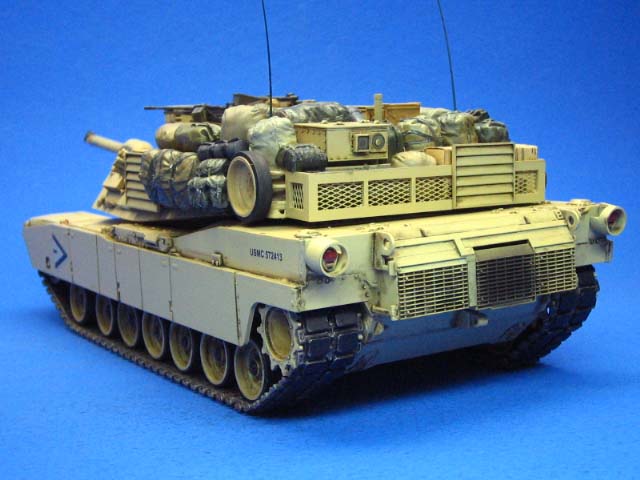
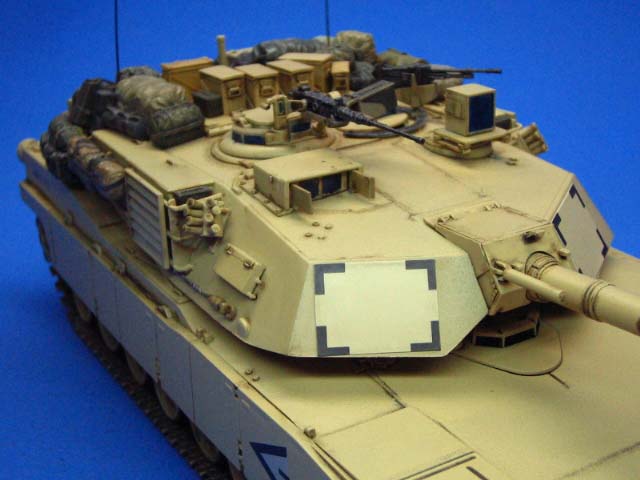
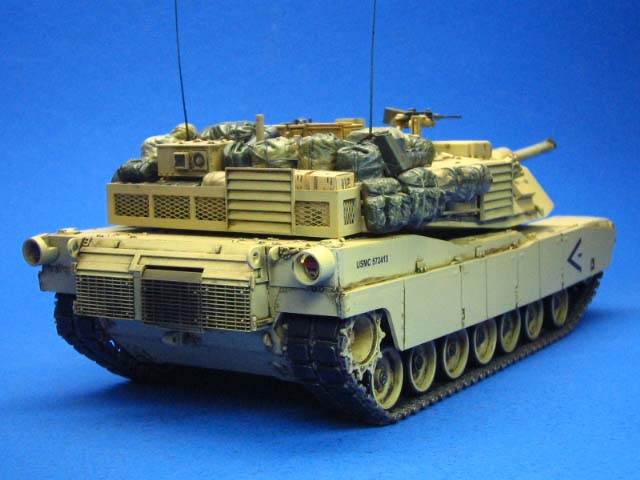
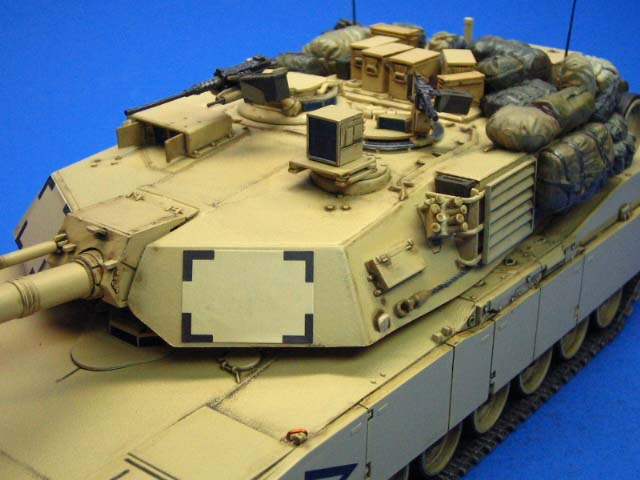
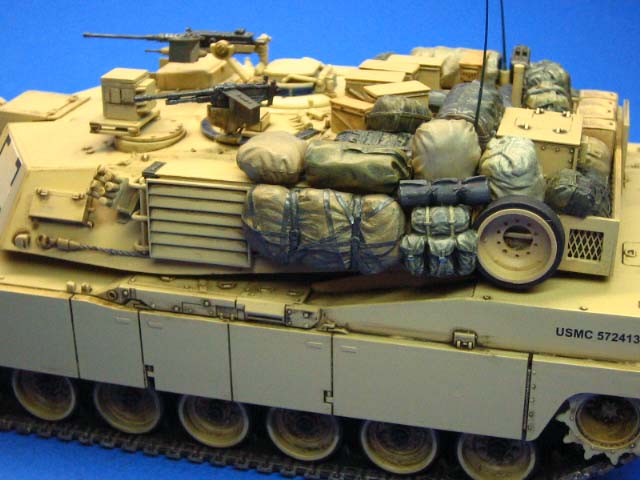
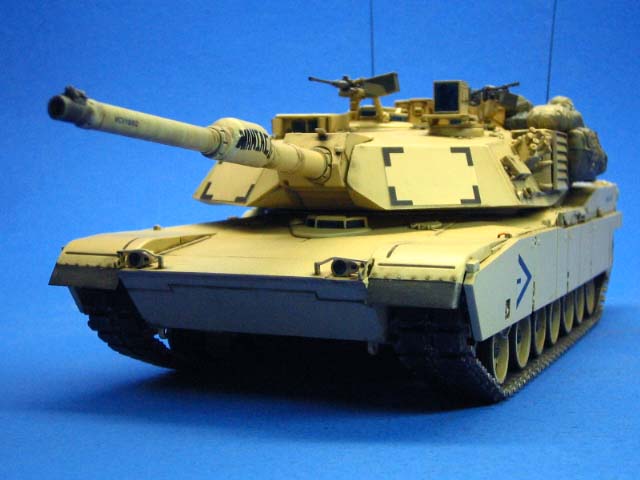
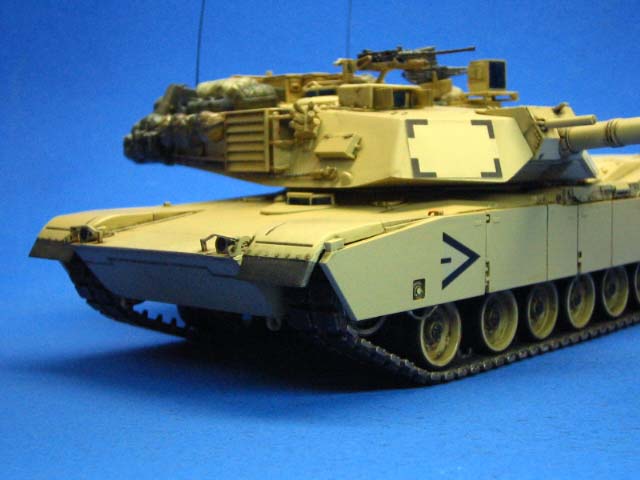
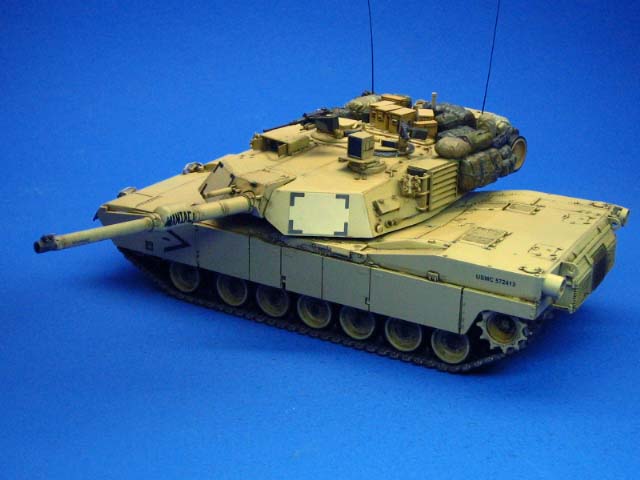
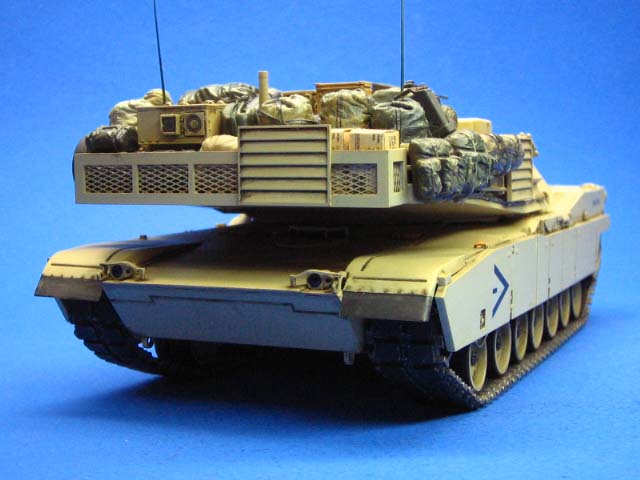
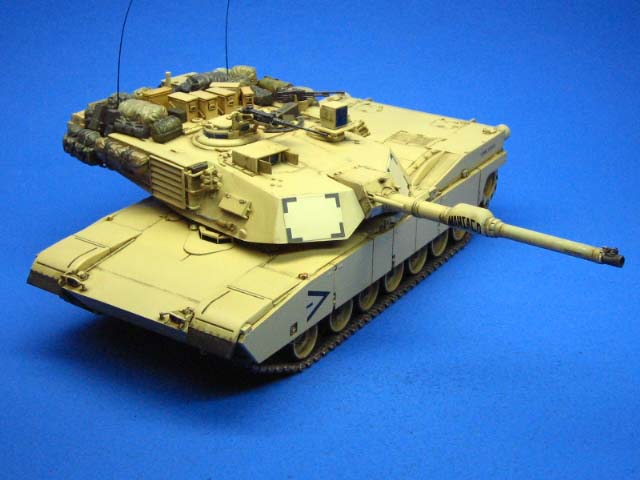
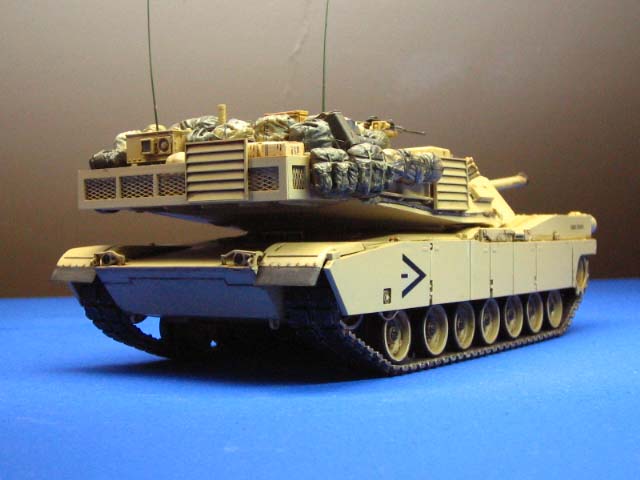
Looks pretty good. Couple things I see though. The track on the right front is loose and sagging. The fuel can that you have on the right rear, in turret bustle rack, is not really accurate. It is in a vehicle mounting bracket, strap and frame around lower portion. It would be mounted somewhere on a vehicle, but there is nowhere to mount it on an Abrams. Antennas are way too long as well. They should be about 2 3/4 inches long in 1/35 scale. Also, the mounting bracket is missing from the rear exhaust grill for mounting the snorkel. All USMC M1A1HCs have these welded to the exhaust grill. It is in the kit as well. Headlights should be silver as well, they are not IR, but regular, clear headlights. On the smoke launcher tubes, the open ends are covered with black rubber covers to keep dirt/debris out of them when not loaded with smoke grenades. The ends on yours should be painted flat black down to where the hard edge is on the tubes. Also, the face of the MCD is a high gloss golden-yellow color, not black. The last two things are not really your fault, but Dragon's. The tow pintle (trailer hitch) is a blob with a hole in the kit. It should be replaced with an accurate tow pintle from another kit. Lastly, the turret Bustle Rack Extension (BRE) in the kit is not a USMC version, but the version that 3ID used in OIF. The correct USMC version is in the new Academy M1A1 Baghdad 2003 kit, Eduard also has one available in PE. Overall a god job. A few minor corrections and it will be great. Good job on finishing and all the stowed gear.
AUG 18, 2005 - 05:30 AM

Liberator.
Really good looking job! Been working on mine, but it isn't going to look that good when finished. I'd go
Joe
AUG 18, 2005 - 10:17 AM

Howdy all. Vinnie , Marine in this use will begin with a capital "M". Like in Marine Corps,US Marines or 1st Marine Tank Bn. Marine is a proper noun in this instance. Liberator, nice job putting the Dragon kit together. To me only two items need correcting. The 3ID bustle rack extension and the tactical markings on the forward hull skirts. Since that is a Bravo company "hog" the vee should point to the right or 3 o'clock when viewed from the side. As it is marked now on one side it is from is from Delta compnay and one side is Bravo. Do not be afraid to sand it off and remark it. That is what we would do in 1:1 scale. Otherwise nice work. Out here.
AUG 19, 2005 - 09:48 AM

Sometimes IR lenses are also used on M1A1, so this actually is not an error:
 Pawel
Pawel
PawelAUG 20, 2005 - 09:07 AM

The IR lenses are part of the COEI (components of the end item) on an Abrams tank. Normally stored in the driver's compartment, they can be installed in a few minutes with just a simple screwdriver.
AUG 20, 2005 - 02:18 PM

nice job, im doing that kit now. it has the worst fit of most any kits ive seen... haha. its a living nightmare. i actually needed C-clamps for the turret but had none so just lots of blocks and rubber bands. and as for those launchers on the front there is a real pic that showed them all sand color. there is no flat black, tho the instructions said there should be. the tubes are sand and the tips are a little lighter color. as for the headlights, good info to know. i havent painted any of it yet. ive been assembling this thing for a week. haha. i dont see how a company can put so much on detail (they did a nice job with detail i think) then make the fit so horrible.
AUG 20, 2005 - 05:27 PM
The smoke launchers in the above picture are loaded with smoke grenades, which are a pale green in color. In the kit, they are not loaded and have the rubber dirt/debris covers on them. For the way they are in the kit, they should be tipped with black for the covers.
AUG 20, 2005 - 05:33 PM

thanks guys,...i'll put that on my list..so the next time i'll build (another )abrams..it'll be near accurate. well the fit was not that good(i've done alot horrible than this one)..but with little patience and trouble shooting..everything went well. quite a challenge too. thanks again.
AUG 21, 2005 - 05:09 AM

PICKY PICKY PICKY
Good looking tank Capt. Stainless...even if it is all wrong. My guess is only about 1/2 of 1% of people when asked could name all the faults in your build. The others are top notch builders that really know their stuff or driving and maintaining one while serving our country fighting for "his" daddy's honor.
Anyway, once again you continue to amaze us with your consistant efforts in the fine art of model buildin. (I still think your a team of guys from the Far-East doing this to make most of us feel bad )
Keep up the great work guys...hehe
kevin
AUG 21, 2005 - 05:41 AM

Nicely Done! If only these photos came out sooner when i was making my M1A2. It certainly isnt as well done as yours.
I didnt apply a wash to mine seeing as ive only just learnt about it but i had heaps of fun weathering it with pigment powder.
It appears that you made the same mistake i did as well which was not fitting the spare wheel with the guide tooth so it looks like its going to fall off at the next bump.
But as Kevin mentioned, in the end, minor details like this would go unnoticed to the untrained eye which would be the vast majority.
AUG 26, 2005 - 06:08 PM
Copyright ©2021 by Saraocraft. Images and/or videos also by copyright holder unless otherwise noted. The views and opinions expressed herein are solely the views and opinions of the authors and/or contributors to this Web site and do not necessarily represent the views and/or opinions of Armorama, KitMaker Network, or Silver Star Enterrpises. All rights reserved. Originally published on: 2005-08-18 00:00:00. Unique Reads: 15340

WEB HOSTING BY


Copyright ©2021 Armorama and Kitmaker Network, a subsidiary of Silver Star Enterprises
All Rights Reserved. Please read our Conditions of Use and Privacy Policy.
All Rights Reserved. Please read our Conditions of Use and Privacy Policy.