

1⁄35Dragon Fires Again - Flak 37
13
Comments

the kit
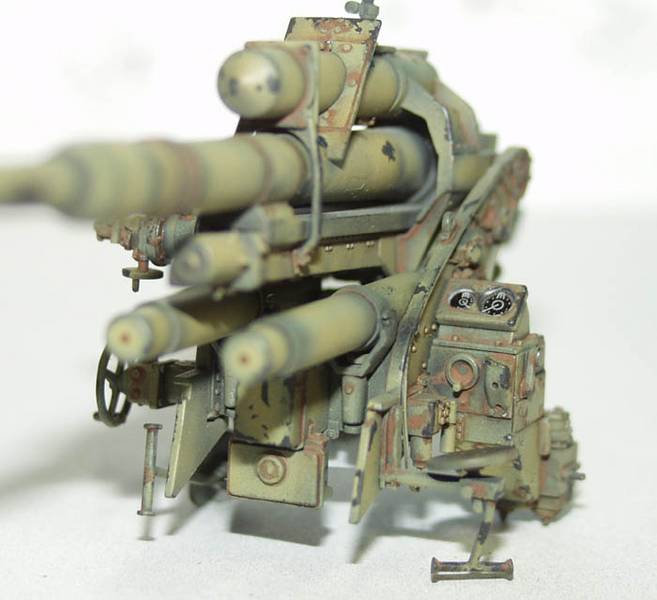
The first thing I had to do before actually beginning assembly was decide which of all the options I would choose to use. A brief look through the instructions told me I had the option of either displaying the gun on the two wheeled trailers or rigged for firing. Having recently built the Dragon Flak 36 rigged for firing, I decided to display this one in transport mode, mounted onto the two wheeled trailers. There are 3 options of barrel included in the kit, type 18, type 36 or type 37. I decided to go with the type 37 and also to use the photo-etch or metal option included in the kit wherever possible. The other major decision is the type of shield used. Three types are included in the kit, or you could also build the gun without a shield. You have to decide quite early in the build since the mounting is different for a couple of the options. There is a normal shield, extended shield, or a pressed shield. I had decided to go with the pressed shield, the same as shown on the box art by Barry Crook. Dragon have thoughtfully included a separate parts map, which means none of that flipping backward and forward trying to find the correct sprue for a part, and thats important in this kit since there are a LOT of sprues! Decisions made, sprues laid out, I was ready to begin!Assembly Stages 1 to 9
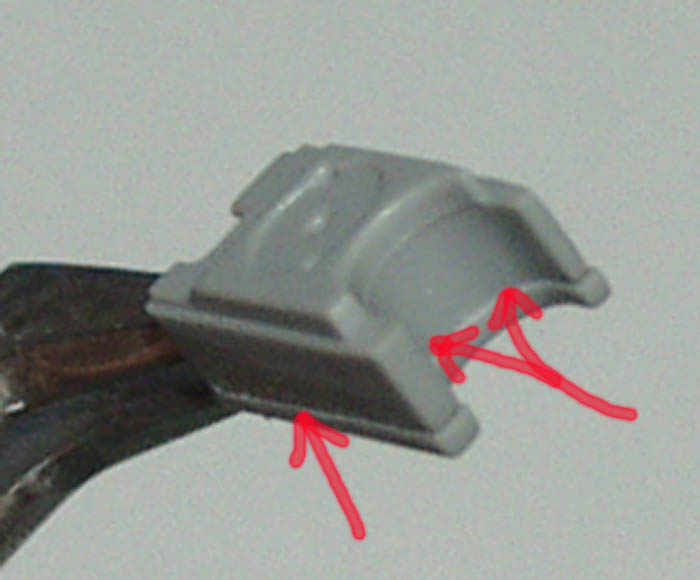
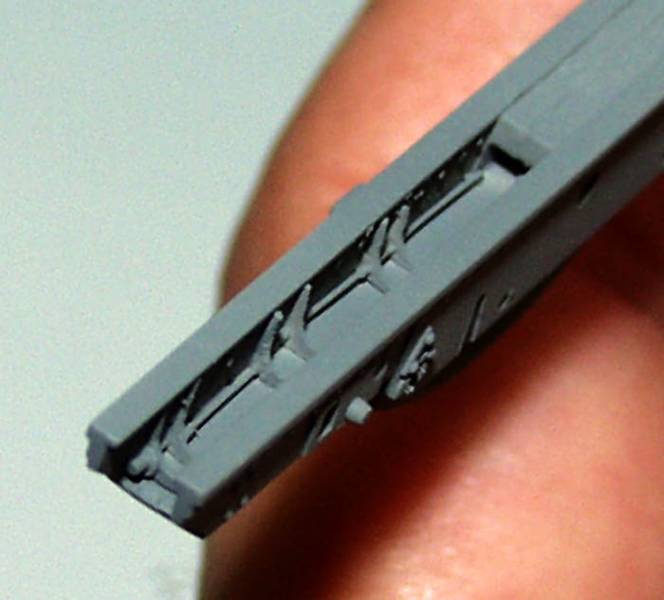
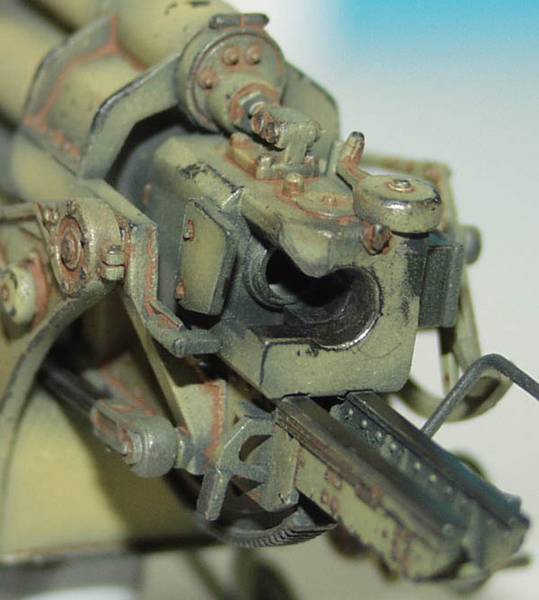
Stage 1 is the assembly of the main gun barrel and its mount. No problem here, just deciding to use which barrel as Ive already said, and also to decide on the metal or plastic option, although I have to wonder at why anybody would use the plastic option? There are different parts to use dependent on which barrel you have used, so take care! There are an awful lot of barrels accumulating in my spares box thanks to Dragon. The breech block in this stage is made from three parts, the detail is fantastic, but it does leave very noticeable joins, which can be easily hidden with a little superglue and accelerator. As you can see from the pictures, it looks much better and much more like the real thing if you cover these joins up.In stage 2 you get to build the gun slide, and its here that a major problem occurs. In nearly every gun Ive ever built, the slide comes in two halves. This always leaves a large, very visible seam running down the middle which is very difficult to hide since it cant be easily sanded. The solution I usually resort to is to place a strip of thin foil along the bottom, which hides it rather nicely. This kit presents a problem however, since there are reinforcing ribs present along the inside, which would make covering with foil difficult. After giving it some thought, and looking up some references, I decided that they would have to be replaced as they were not quite the correct shape anyway. While I was at it I would also place a thin wire through the brackets along the left-hand side as per references show, although I have no idea what this wire represents.
I very carefully removed the brackets using a fine chisel blade. Then, in one half I placed a strip of foil, making sure it wasnt too wide to prevent the two halves of the slide from joining. Then I had to make the brackets. I cut strips of styrene after measuring, and punched holes along its length to match the radius of the brackets. The strip could then be cut to match the shape of the brackets. Each bracket was carefully drilled near its left-hand corner using a 0.3mm bit, so the wire could be inserted later. When finished and primed, no trace of the seam was visible.
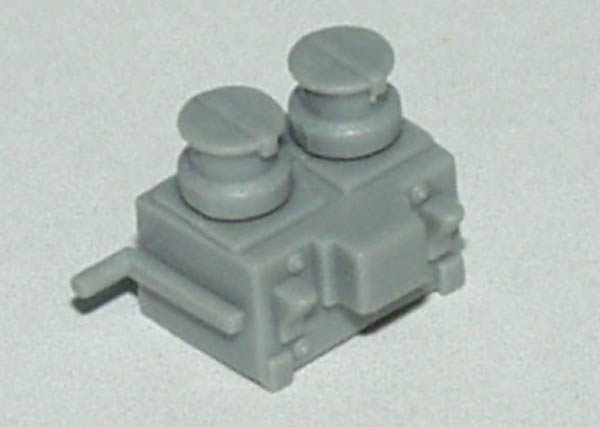
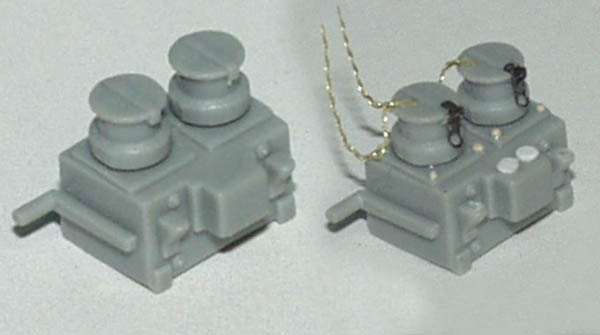
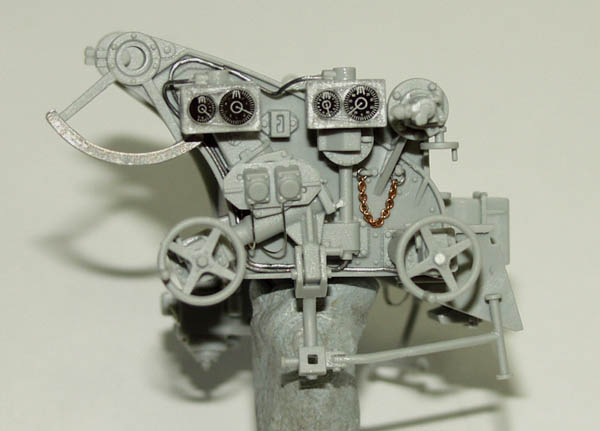
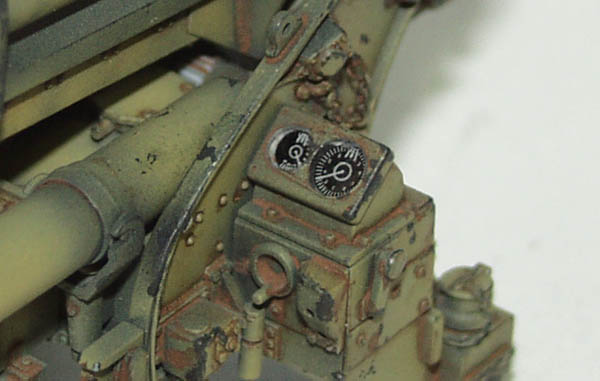
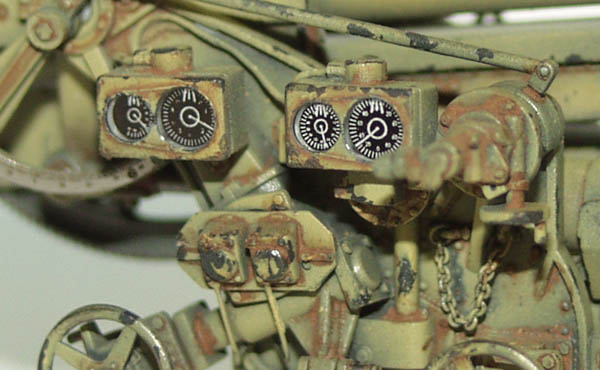
In stage 5, I decided to add some details to the Primer, consisting of catches on the covering lids, retaining chains, and some corner rivets. The chains were Aber photo-etched ones left over from a previous build, the catches were old Eduard items, which were not strictly accurate, but close, and since I have 3 reference pictures showing 3 different types of catches I decided to use some license! The corner rivets are actually beads from an old water filter (thanks Derek!). It is during this stage that you get to use the fantastic inclination dials that Dragon have manufactured for this kit. These dials come actually pre-sealed within clear plastic housings! All you have to do is mask them for painting. I think youll agree from the pictures they look great...Dragons work, not mine!
There are also two tiny chains to be attached in these stages, the purpose of which I dont know, but they are there on all the reference pictures I have, although both types of chain that Dragon supply look grossly over-scale, so I replaced these with some much finer chain from the spares box. The option you have chosen for displaying the gun, i.e. travel or firing mode, also dictates the position of one of the seats, which can be folded up for storage.
Its here that I advise you to ensure that you have cleaned all parts of moulding seams etc. thoroughly! I have learnt from experience, that the best way of painting these 36/37 kits, is to leave the main gun assembly separate from its mount, however....the fit is so tight, that when assembling after painting, extensive damage to the paintwork youve just completed can result. Thats what I found in the first Dragon 88mm! With this one I paid particular attention to ALL seams and there was no problem when assembling after painting. Obviously, before painting test-fit all assemblies and make allowances for the layer of paint....it does make a difference!
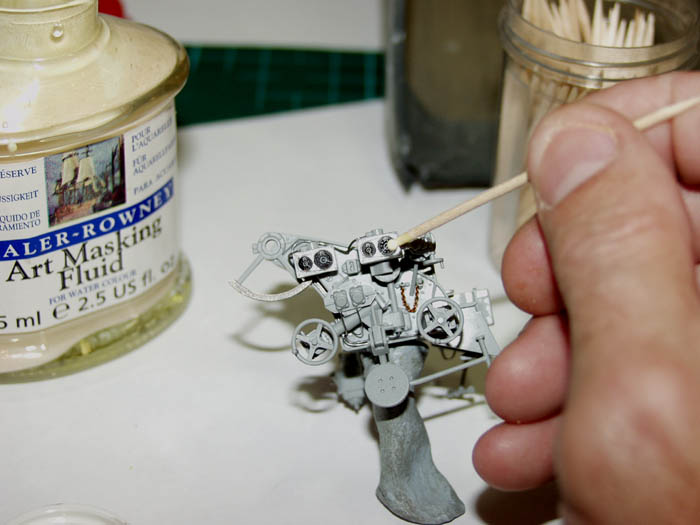
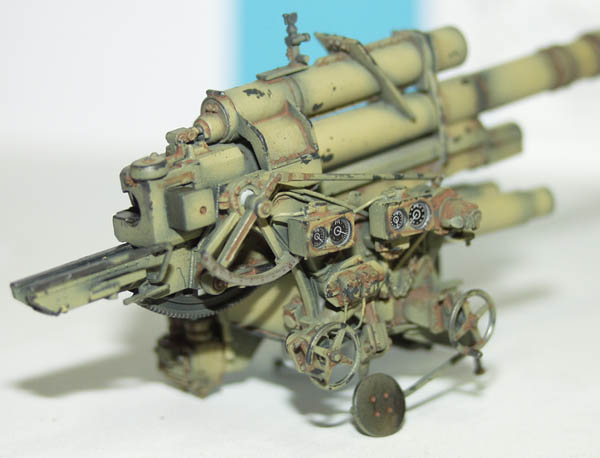
As you can see from the pictures, all of the assemblies so far were fully painted and weathered before proceeding with the build. I began by spraying everything with Tamiya XF-69 Nato Black, then dabbing art masking fluid at random, with a small piece of torn scotchbrite, paying particular attention to areas that might have received heavy wear. I then used a cocktail stick to make sure those lovely dials were well masked! I then gave the parts a light misting of Tamiya XF-60 Dark Yellow, with heavier coverage towards the central parts of panels etc. After this, a coat of Tamiya X-22 Gloss Clear, and then a very dilute solution of burnt umber in white spirit was run around all details, and into corners etc. I always have a small container of clean white spirit and a clean brush handy in case of mistakes! When I was satisfied I used a very soft pencil to enhance the metallic effect on the breech block, slide, footrests etc.


About the Author


Comments

I agree with the others intirely! What a work.
What should I say?? I love to see your work. This one should be in a dio.
A salute for you!!
NOV 30, 2005 - 01:02 AM

Hi Vinnie,
Fantastic job on the flak gun, you're a constant source of motivation.....
Frank
NOV 30, 2005 - 05:34 PM

Excellent review, Vinnie. Looks like an outstanding model of the 8.8cm Flak 37. Think I might just have to check one out myself
I have the Dragon 8.8cm Flak 36 kit, and that is amazing as well, but have yet to build it. After reading your review, and seeing all the in-progress shots of your kit, I would like to get one.
I wonder why they didnt include a crew with this kit ? Maybe Dragon has a future plan to help us with this ?
Cheers !!
Alpen
DEC 01, 2005 - 12:44 AM

Beautiful work Vinnie, thanks for sharing with us! I must say, I've not had any interest in this kit until seeing yours. I'm now more interested in getting this kit, you're as much an asset to Dragon as you are to Armorama. lol
DEC 01, 2005 - 05:29 AM

Great build/review Vinnie. Your work always is something to behold. I hope you do not give your students as much homework as you seem to enjoy with your building!
Patrick
DEC 01, 2005 - 07:23 AM

great buildup article, Vinnie..
and well presented,too
keep up the nice work..
Best,
Nick
DEC 02, 2005 - 04:41 AM

This is the only Axis kit I have ever had an eye on. I built the ancient Tamiya one many years ago. This new one from DML looks like it would fit quite nicely on the DW Trailer.
Very nice job there Vinnie. Now, either one of two things, get back to work... err never mind, carry on.
DEC 02, 2005 - 01:56 PM

Really, really great build... If only mine looked like this.
The reason I write at all is that I studied a lot of photos (archive and recent), and saw a gun in life.
The chains as I found out on the gun are for chaining the legs when in travelling position - only after building my kit did I saw that particular photo. Also: there is a seam running along in the middle of all legs on the real thing as well (at least on one I actually saw.) - so eliminating them might not be necessary.
I didn't find much photos on Africacorps guns, and the reference books are not much help either in this respect, but I think the real guns were never as worn and weathered. Only after sitting 50 years in front of a museum do they get so battered. (It's just a personal opinion, and doesn't mean I don't awe you and look for all the builds you publish...)
FEB 12, 2006 - 12:53 AM

Hi Vinnie. You really do fantastic work. You know what would set those clear dials off? A little hazyness around the very outside edge. If you ever look at dials on real eqipment that operates outdoors you'll see what I mean. A good place to look is any forklift or construction equipment that work in dirty out in the weather conditions. Just a tip. Your work is very inspiring. Thanks
BH
FEB 12, 2006 - 02:11 AM

Fantastic piece of Artillery there! (Is it possible to even fit one more detail on this thing!) Great job man! I'm at a loss for words...
(I'd love to know, what exactly is your wash made up of...The rust is just so realistic!)
MAR 04, 2006 - 10:04 AM
Copyright ©2021 by Vinnie Branigan. Images and/or videos also by copyright holder unless otherwise noted. The views and opinions expressed herein are solely the views and opinions of the authors and/or contributors to this Web site and do not necessarily represent the views and/or opinions of Armorama, KitMaker Network, or Silver Star Enterrpises. All rights reserved. Originally published on: 2005-11-30 00:00:00. Unique Reads: 24434

WEB HOSTING BY


Copyright ©2021 Armorama and Kitmaker Network, a subsidiary of Silver Star Enterprises
All Rights Reserved. Please read our Conditions of Use and Privacy Policy.
All Rights Reserved. Please read our Conditions of Use and Privacy Policy.